Clarity Matters Blog Tutorial: How To Use The Semi Square
Hello hello! Grace here.
I hope this finds you well, safe, and enjoying your Sunday morning.
Have you been following Paul and his Groovi Tuesday sessions on Facebook & YouTube? He is currently working his way through the various multi-needle tools that are showcased in the Pergamano Handbook for Multi-Needle Tools – Volume 2. This week he moved on to the next tool in the book – The Semi Square Tool.
If you missed those last sessions though, then you can catch up here:
Picot V Small Perforating Tool – HERE
Picot V Medium Perforating Tool – HERE
Picot V Large Perforating Tool – HERE
Angle Perforating Tool – HERE
Cross Perforating Tool – HERE
4-In-4 Perforating Tool – HERE
Almond Tool and Heart Tool – HERE
Moon Tool – HERE
During Groovi Tuesday this week, Paul started working with the Semi Square Tool. You can catch up on the episode, HERE.
Meanwhile, the lovely Glynis Whitehead (Clarity Craft Design Team Member) has made two more projects to go with this most recent tool tutoring. I’ll hand you over to Glynis…

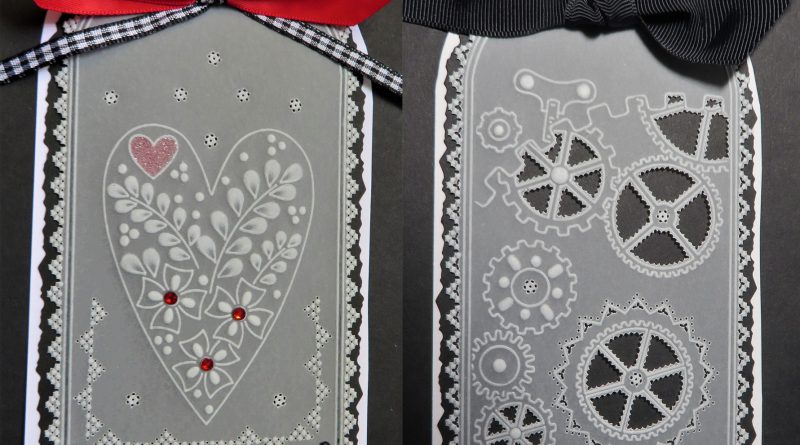
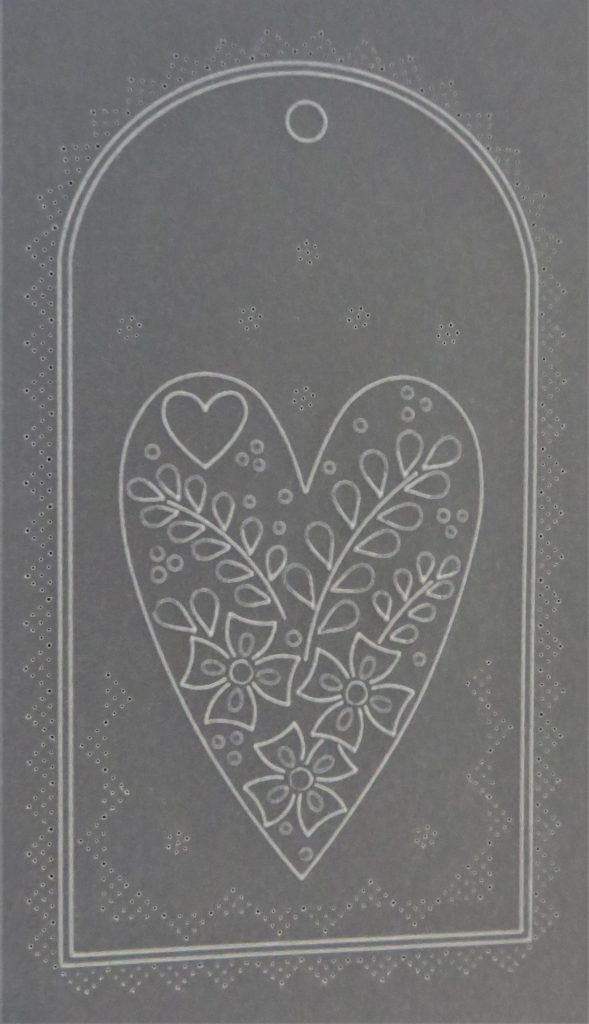
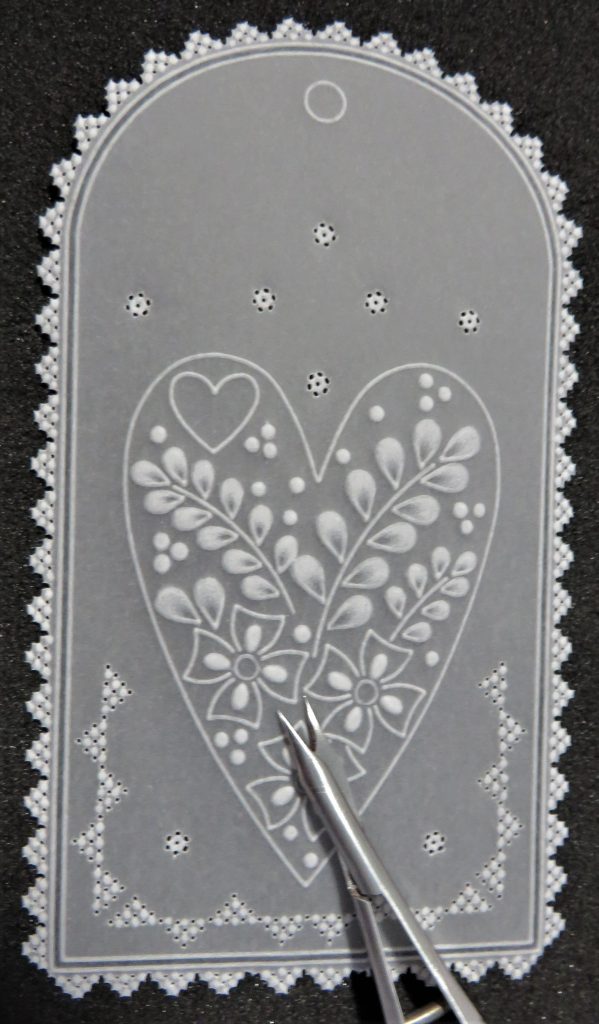
Semi Square Tool – Project 1
Ingredients
Pergamano Handbook for Multi-Needle Tools Vol 2 by Linda Williams (PER-BO-70355-XX)
Nested Arch Tags Groovi Plate A5 (GRO-PA-41465-04)
Tina’s Doodle Love Hearts A5 Sq Groovi Plate (GRO-LO-40858-03)
Semi Square Perforating Tool (PER-TO-70021-XX)
Flower Perforating Tool (PER-TO-70018-XX)
Single Needle Perforating Tool (PER-TO-70035-XX)
1mm Embossing Tool (PER-TO-70011-XX)
1.5mm Embossing Ball Tool (PER-TO-70004-XX)
3mm Embossing Ball Tool (PER-TO-70005-XX)
4.5mm Embossing Ball Tool (PER-TO-70015-XX)
6mm Embossing Ball Tool (PER-TO-70016-XX)
Groovi Embossing Tool 1&2 (GRO-AC-40026-XX)
Faber-Castell Polychromos Pencils (ACC-PE-30797-XX)
Or Perga-Liner Pencil (B) (PER-CO-70063-XX)
Blending Nibs (PER-AC-70300-XX)
Dorso Oil (PER-CO-70066-XX)
Pergamano Glitter, Mapping Pen & Sticky Ink (PER-AC-70305-XX)
Perga Glue (PER-AC-70133-XX)
Method
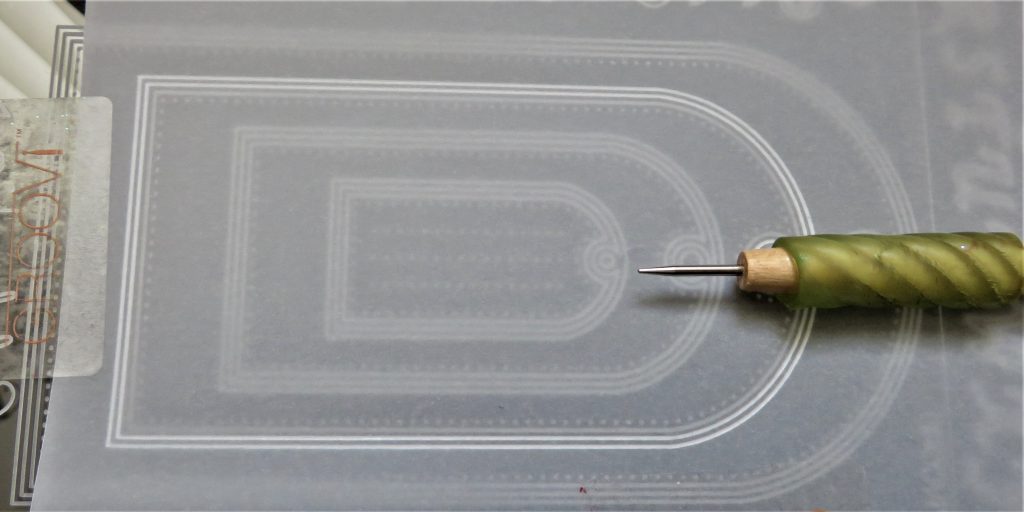
Step 1. Trace the 2nd largest tag from the Nested Arch Tag plate.
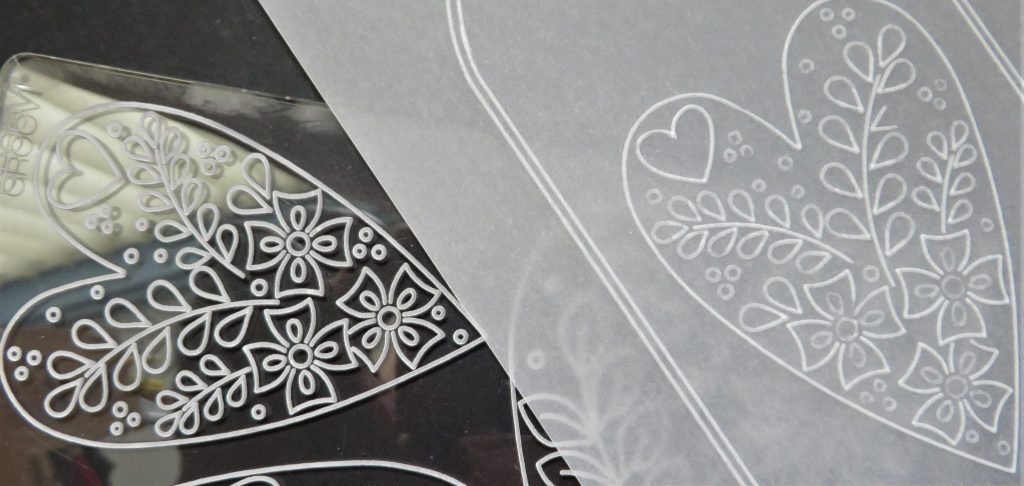
Step 2. Emboss the heart from the Doodle Love Hearts plate. Remember to do all the elements you wish to use for white work with the number 2 tool or a 1.5mm ball tool.
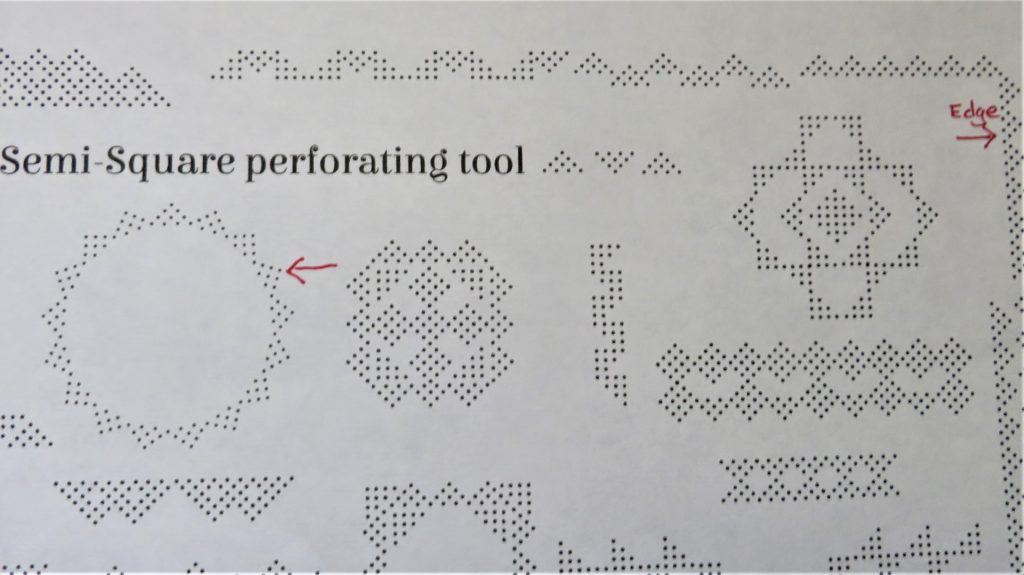
Step 3. The semi-square perforating tool has been illustrated by Linda in her Handbook on pages 46-49 and the sampler you need to photocopy is on page 49. I have marked the perforations used in this project with a red pen. Place the paper pattern onto a shallow mat with the parchment secured on top. Match the points of the needles to the dots underneath and perforate through parchment and pattern. Use the dots on the handle and the two end needles to help you keep the work straight. Do the two inside corners of the tag. Perforate up to the point of the heart first, then turn the parchment around onto the pattern and perforate from the opposite corner.
Step 4. Now go around the outside edge. Start at the corners at the bottom of the tag and work inwards to the middle so that you can fill any gaps. Then do the same up each side of the tag, spacing out the semi-squares at the top. Add some flower perforations in the corners and dotted around the top of the heart.
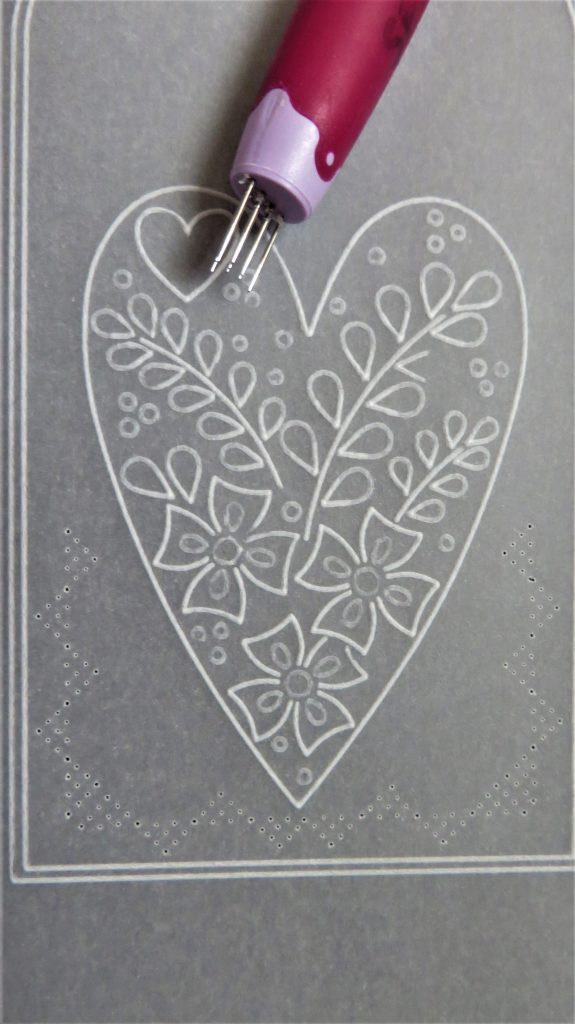
Step 5. Using the largest ball that will fit the space, emboss all the elements within the heart design. Also, emboss within the flower perforations with a 1.5mm ball tool.
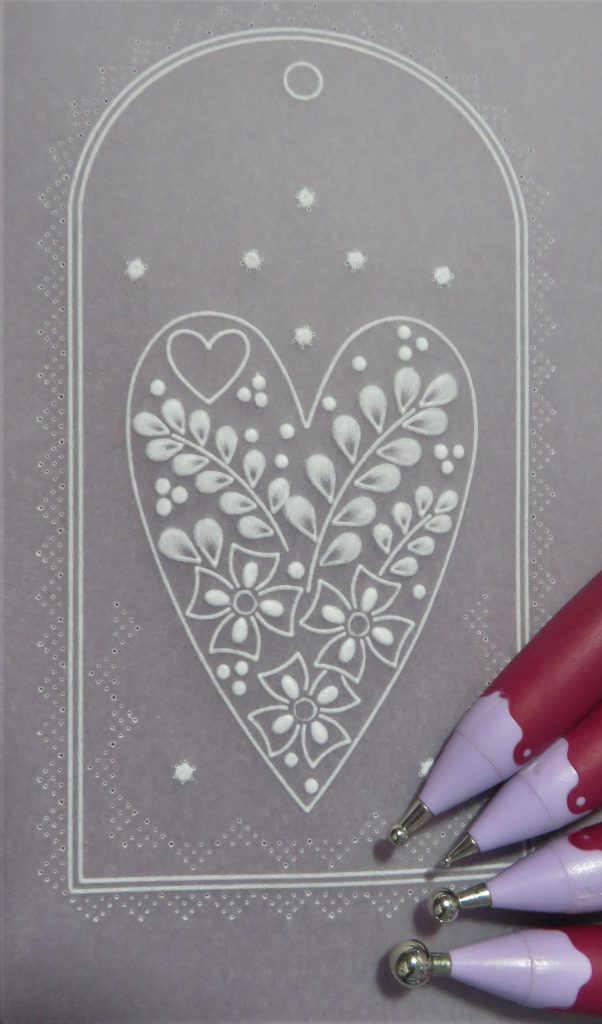
Step 6. Use a 1mm ball tool and emboss small dots within the perforations.
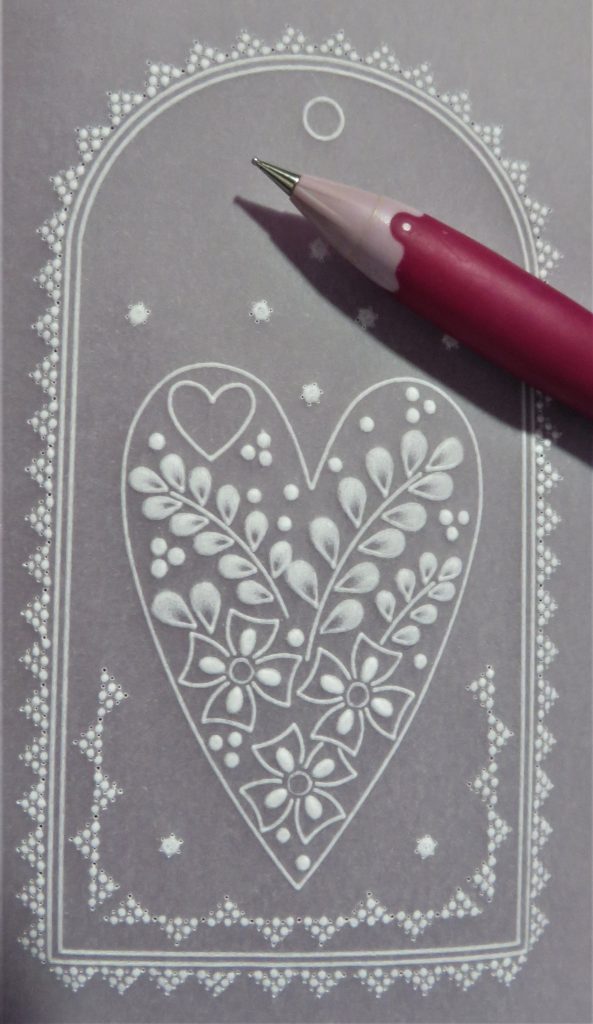
Step 7. Go around the margin of the tag with a black pencil.
Step 8. Place the tag onto a deep perforating mat and re-perforate the holes of the semi-square perforations, just use the single-needle fine tool for this. Use the flower tool to re-perforate those holes. Put the tool in just halfway and give it a gentle twist to open up the holes. Be very careful not to tear the parchment.

Step 9. Picot cut around the outside of the tag.
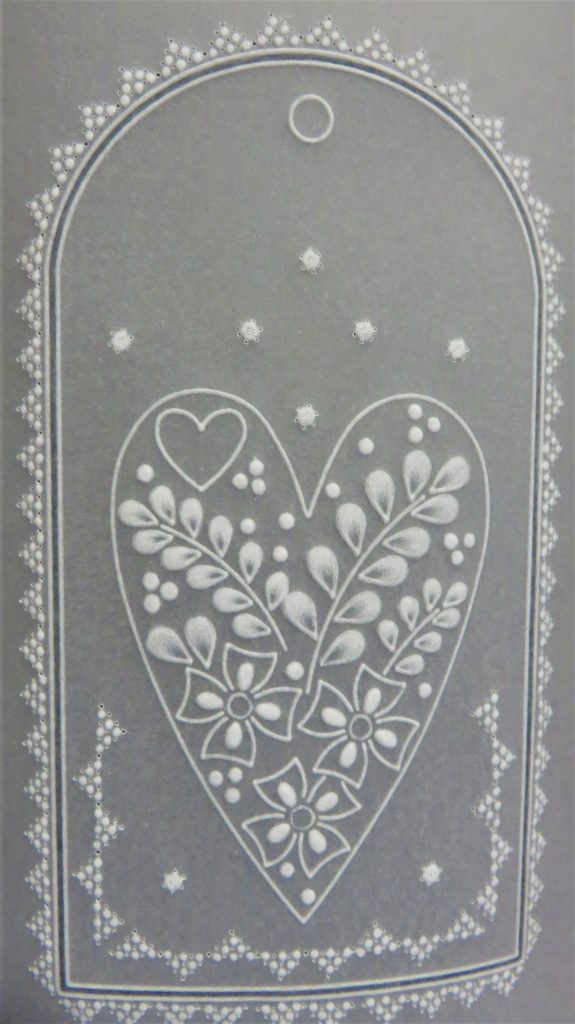
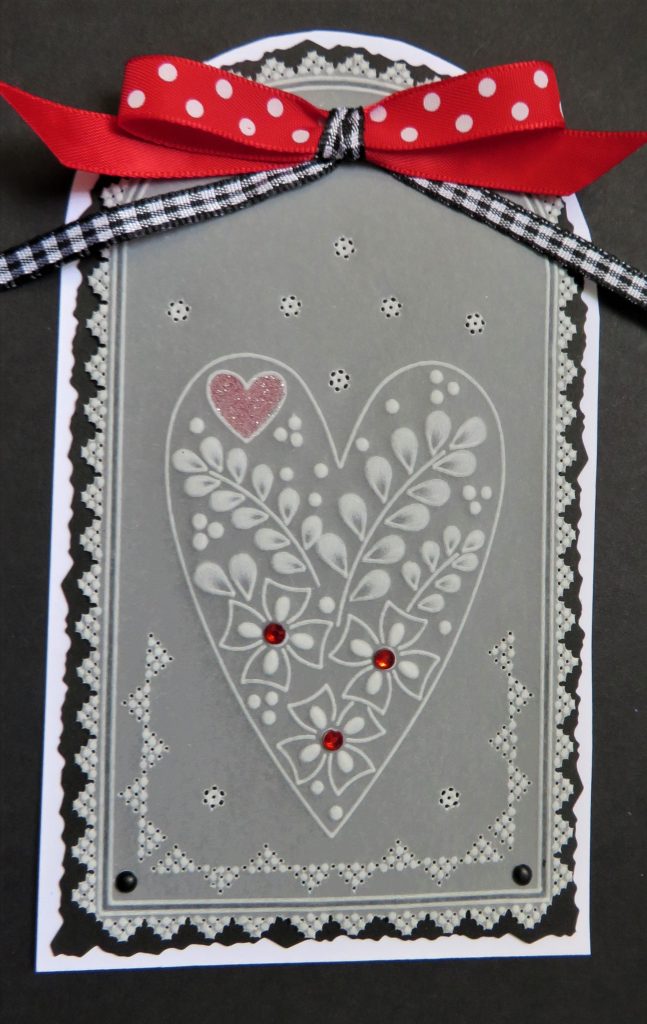
Step 10. Colour the heart in red, then mat and layer the tag onto some black card/paper and then onto white.

Step 11. Paint some sticky ink over the red heart, either using a blending nib or a small paintbrush. I have a cheap little brush for this job. Then add some Perga Glitter to the top – your choice of colour. I used a hint of silver for this. Put some gems in the centre of the three flowers and a bow at the top. Your first project is complete!
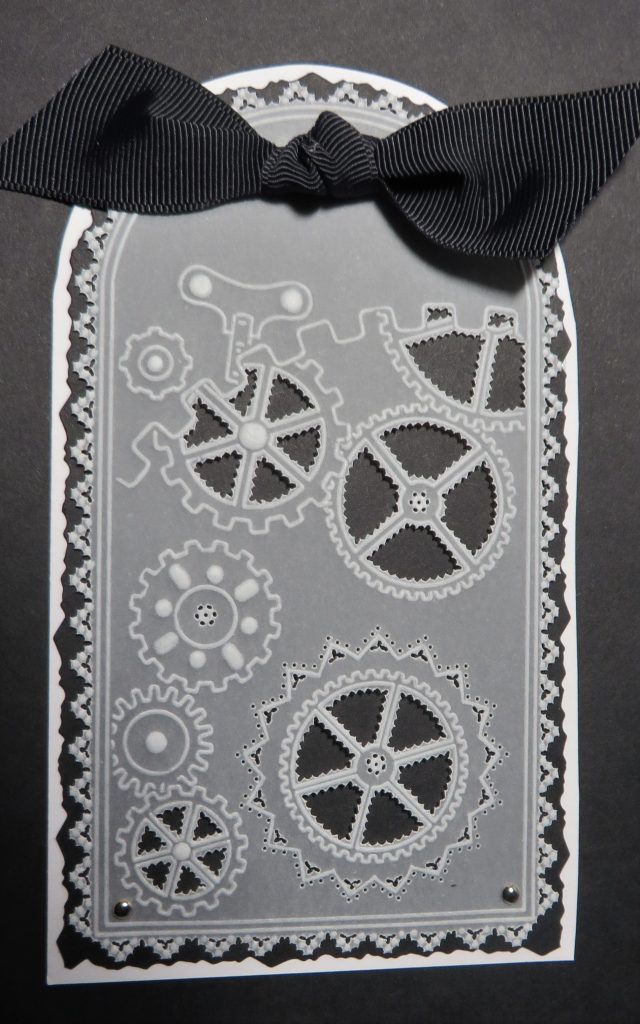
Semi Square Tool – Project 2
Ingredients
Pergamano Handbook for Multi-Needle Tools Vol 2 by Linda Williams (PER-BO-70355-XX)
Nested Arch Tags Groovi Plate A5 (GRO-PA-41465-04)
Cogs A5 Sq Groovi Plate (GRO-OB-40734-03)
Clocks A5 Sq Groovi Plate (GRO-OB-40735-03)
Semi Square Perforating Tool (PER-TO-70021-XX)
Flower Perforating Tool (PER-TO-70018-XX)
1-Needle Perforating Tool (PER-TO-70035-XX)
2-Needle Perforating Tool (PER-TO-70037-XX)
1mm Embossing Tool (PER-TO-70011-XX)
1.5mm Embossing Ball Tool (PER-TO-70004-XX)
3mm Embossing Ball Tool (PER-TO-70005-XX)
Groovi Embossing Tool 1&2 (GRO-AC-40026-XX)
Faber-Castell Polychromos Pencils (ACC-PE-30797-XX)
Or Perga-Liner Pencil (B) (PER-CO-70063-XX)
Blending Nibs (PER-AC-70300-XX)
Dorso Oil (PER-CO-70066-XX)
Perga Glue (PER-AC-70133-XX)
Method
Step 1. Trace the 2nd largest tag from the Nested Arch Tag plate.

Step 2. The semi-square perforating tool is illustrated by Linda in her handbook on pages 46-49 and the sampler you need to photocopy is on page 49. I have marked the perforations we will use with a red pen.
Step 3. Place your paper pattern onto a shallow mat with the parchment tag secured over the marked perforations. Matching each needle to the dots underneath, perforate through both parchment and paper. Use the dots on the handle and the outside needles to guide you. Perforate into the bottom right-hand side of the tag – always perforate from the front.
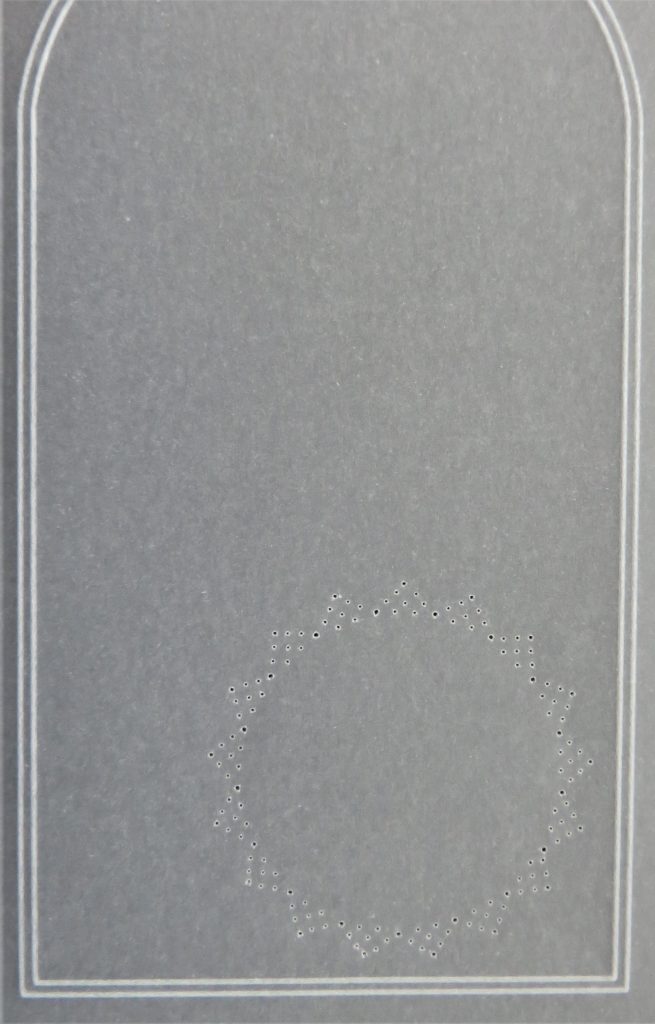
Step 4. Now go around the edge of the tag and use the pattern to help you if you need to. Start at each end of the bottom corner and work inwards towards the middle so that you can gauge how to space them out so that they will fit. Also go up both edges of the tag in the same way, meeting at the top of the tag.

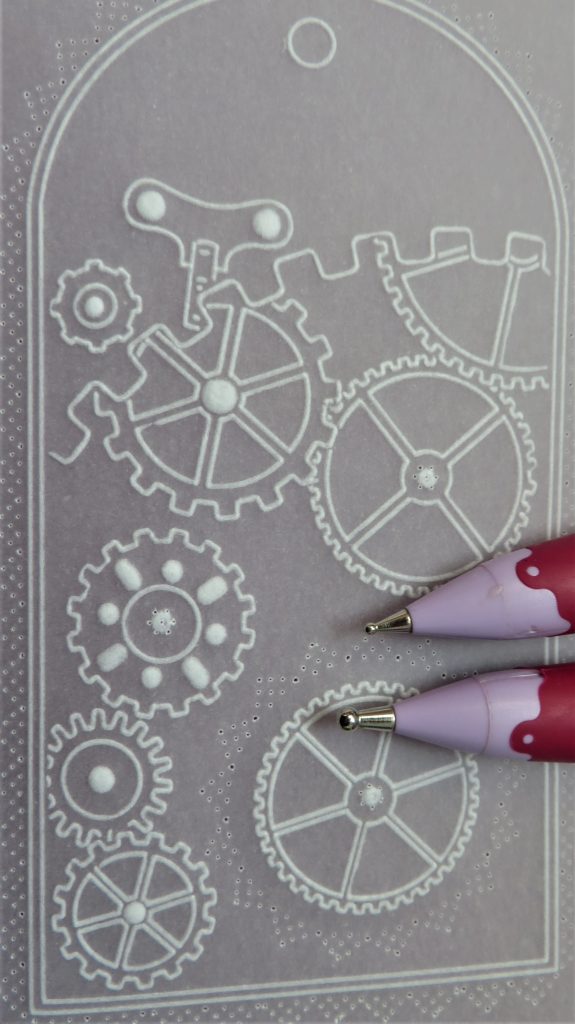
Step 5. Bring in the cogs and clocks Groovi plates and start by embossing the largest cog from the plate into the centre of the perforation combination. Leave out the centre of the cog so that a flower tool perforation will fit in. Then add more cogs at random around the tag. I have left some centres, used the number 2 tool and created some embossing opportunities.
Step 6. Add the flower tool perforations to the centres of the cogs where you have left room. Then you can emboss all the dots and perforations within the cogs. Use a 1.5mm ball tool for the flower perforations and any smaller dots, and a 3mm ball tool for larger areas.
Step 7. Now use the 1mm ball tool to emboss between the perforations of the semi-square tool. Make zig-zag lines within the circle in the tag, then do dots on the edge, leaving the centre dot empty. We are going to picot cut out the centre triangle of holes, so it’s not the end of the world if you forget to miss the centre hole in a couple of the semi-square perforations.
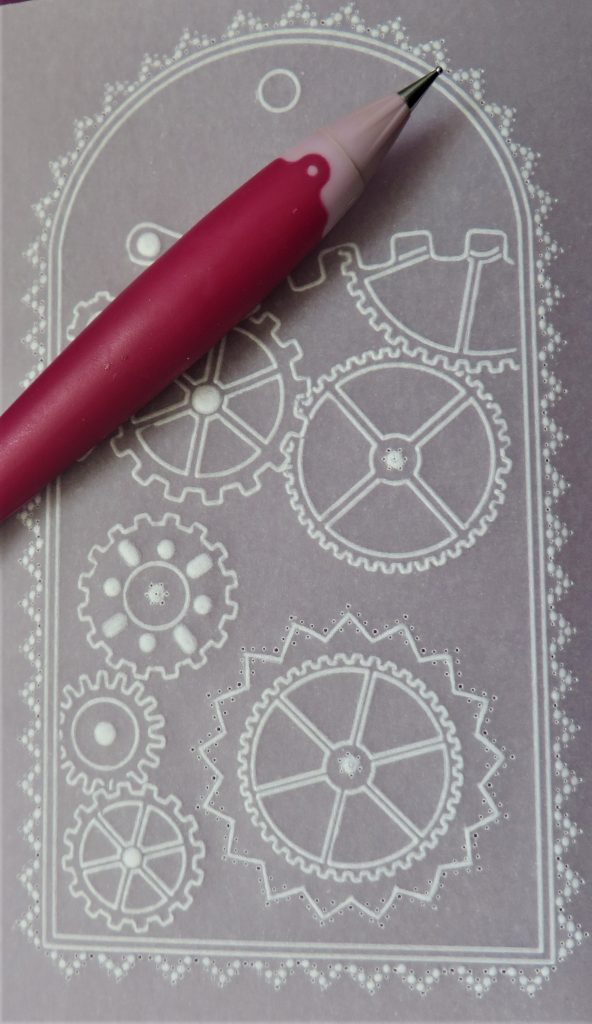
Step 8. Use the flower perforating tool to open up the perforations made in the centre of the cogs. Just go in halfway with the needles and give a very gentle little twist to open up the holes a little bit more. Re-perforate all the other holes with the single-needle fine tool. Perforate in the spokes of the cogs with a 2-needle tool if you wish to picot cut those out too.
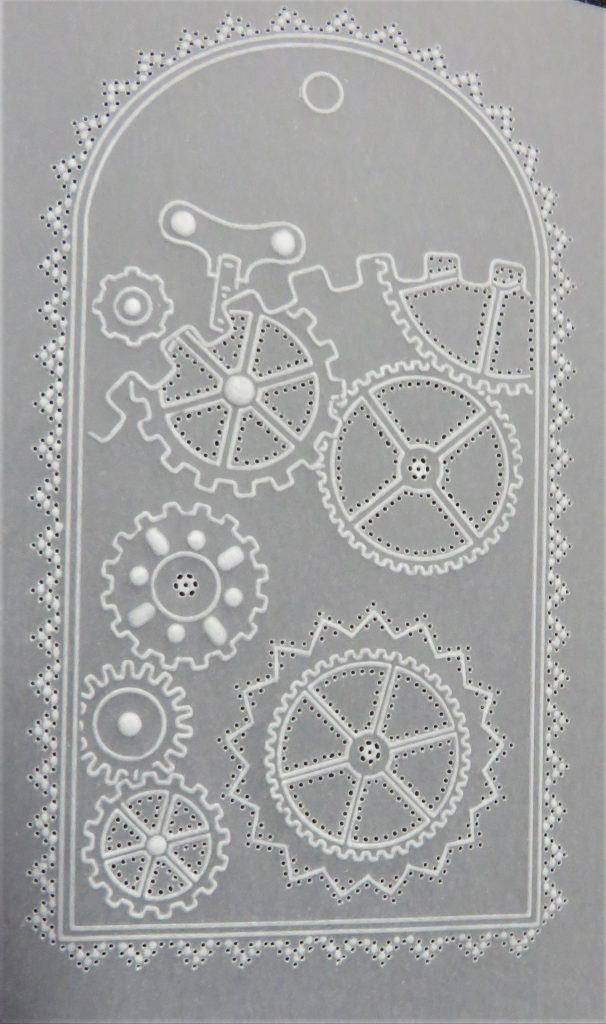
Step 9. When you picot cut the little triangles in the centre of the semi-square perforations, you will that the gap between the holes at the base is longer than the other two. You need to snip this first.
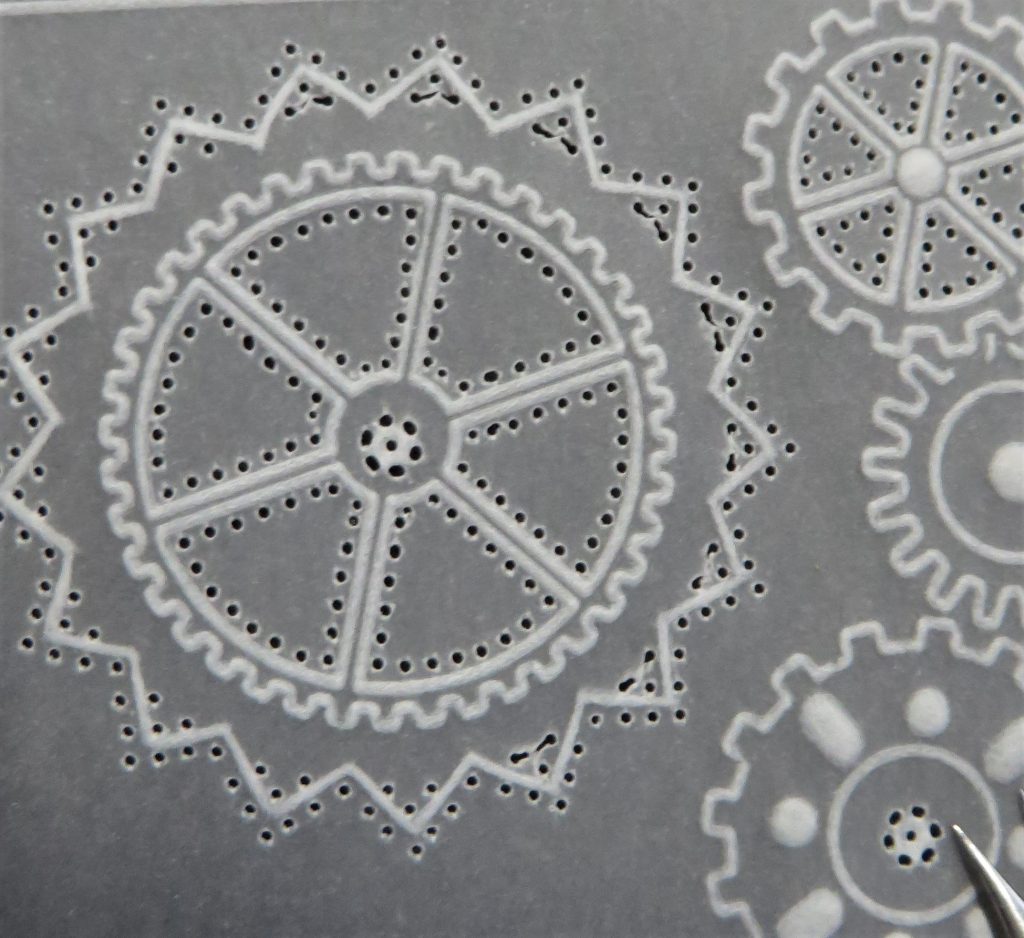
Step 10. Snip out all the centre triangles and around the edges, then do it in between the spokes of the cogs.
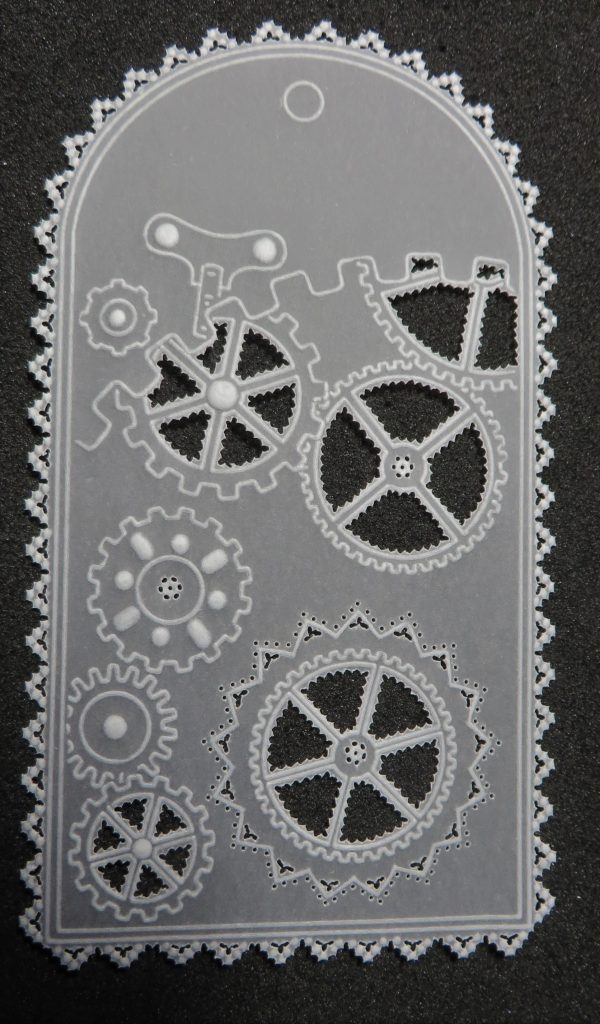
Step 11. Mat and layer the work onto your choice of backing paper/card. You can add your colour by your choice of backing paper. Add a ribbon at the top of the tag. Your second project is complete!
TWO more impressive projects! Thank you, Glynis, for sharing your tips and tricks with us. We are so very lucky to receive this tutoring from someone so gifted.
Everything that Glynis has used can be found on the Clarity website, HERE.
Looking at the week ahead, there is no SHAC or Groovi Tuesday this week as our Annual Parchment Retreat is taking place in Tunbridge Wells, but we still have plenty to keep you entertained…
Thursday 19th October:
New & Exclusive with Dawn Wheeler on Create & Craft – 4pm & 8pm
Friday 20th October:
New & Exclusive with Dawn Wheeler on Create & Craft – 8am
Friday 20th October:
Craft Along with Paul – 7pm Live on Facebook and YouTube
Saturday 21st October:
Get Groovi with Tina on Create & Craft – 1pm & 5pm
Hope to see you there!
Travel gently, friends.
Lotsa love, Grace & Glynis xoxo
Clarity – The Home of Art, Craft, and Well-Being.
Hi Grace, first this chilly morning but its dry & the sun is shining so not too bad for the time of year. Another two lovely tags this week, thank you Glynis for great step by step instructions which I will act on later or even do them in place of the SHAC & Groovi Tuesday.
Have a good week everyone, perhaps see some of you on the Craft along on Friday xx
Great projects again Glynis. I’m sure they can be adapted for any occasion x