Clarity Matters Blog Tutorial: Embroidery on Parchment
Hello hello! Grace here.
I hope this finds you well, safe and enjoying your Sunday!
We are joined by our friend (and talented Clarity Design Team member) Glynis Whitehead, for another incredible step-by-step blog tutorial. I’ll hand you over to our teacher…

Embroidered Tag
People have been enjoying the embroidery on parchment very much, so I have produced another project to show you how versatile it can be.
Ingredients
Nested Arched Tags A5 Groovi Plate (GRO-PA-41465-04)
Square Embroidery Sampler Groovi Plate (GRO-PA-41484-15)
Josie’s Triangle Lace Duet A5 square Groovi Grid (GRO-GG-41661-12)
Groovi A4 Clear Parchment Paper (GRO-AC-40024-A4)
Pergamano Perforating Tools:
Fine Single-Needle (PER-TO-70035-XX)
Bold Single-Needle (PER-TO-70028-XX)
Semi-Circle Tool (PER-TO-70017-XX)
Medeira Metallic Turquoise Embroidery Thread (ACC-MS-30996-XX)
Set of 25 Size 12 Embroidery Needles (ACC-MS-30804-XX)
Double-sided Tape (ACC-AD-30375-XX)
(for sticking the ends of the thread to the back of your card)
Coloured backing card
Method
Step 1. Cut the Parchment down to two A5 pieces. (If you have a stash of A5 parchment in the cupboard that’s brilliant). First rub both sides of the parchment with a tumble dryer sheet. This makes perforating smoother and also easier when you do the embossing. Line up the paper on the grid so that you can get 7 repeats of the grid pattern along the bottom and top edges, and 11 repeats down the sides.
Step 2. Turn the grid over (make sure it says ‘Perforate this side up’ on the grid) and line up so that the holes will fit between the dots. The grids come with an instruction leaflet written by Josie, never throw this away as it hold your hand whilst you produce a lovely lacey mat for your work. Perforate the holes using a BOLD single needle tool.
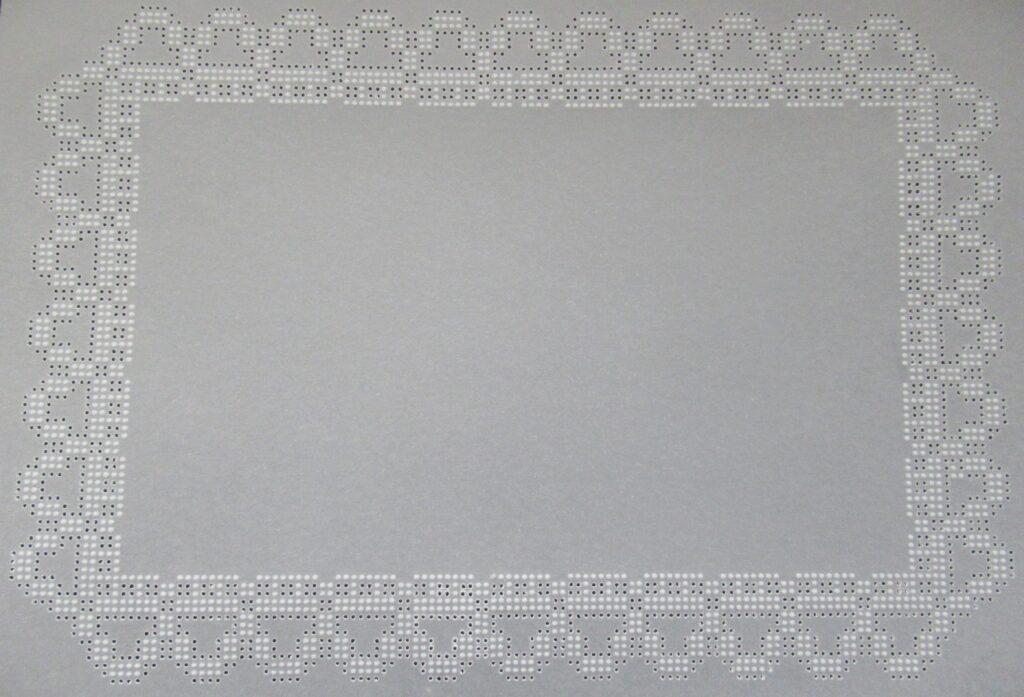
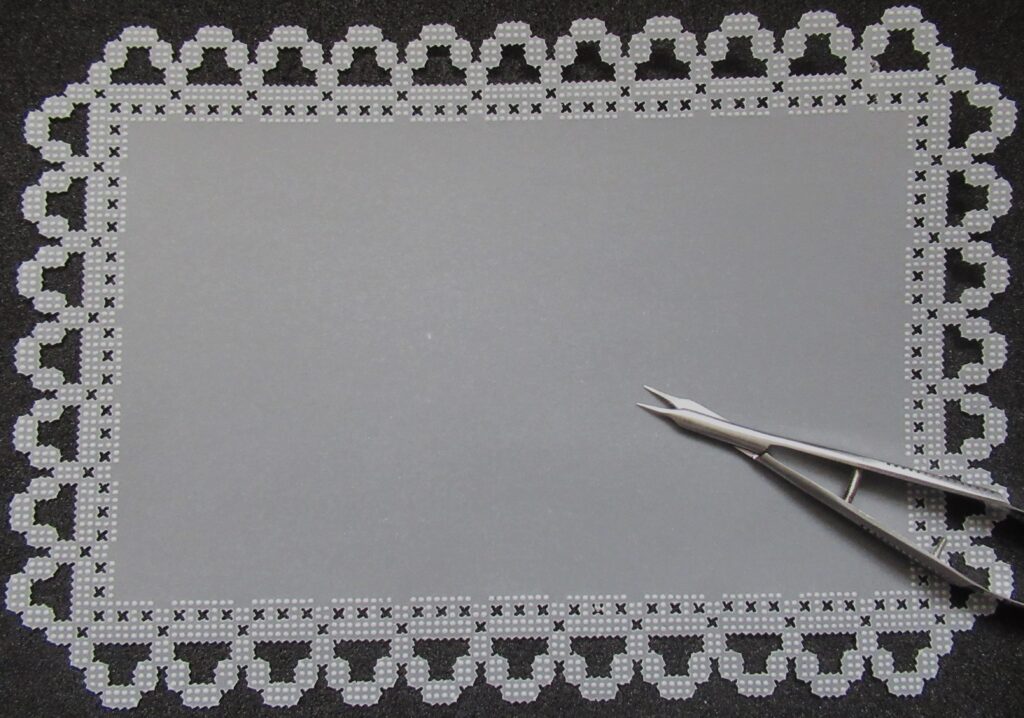
Step 3. Snip out the work, following the cutting plan provided by Josie Davidson, which came with your plate. Be sure to cut all the perforations which are on the diagonal first.
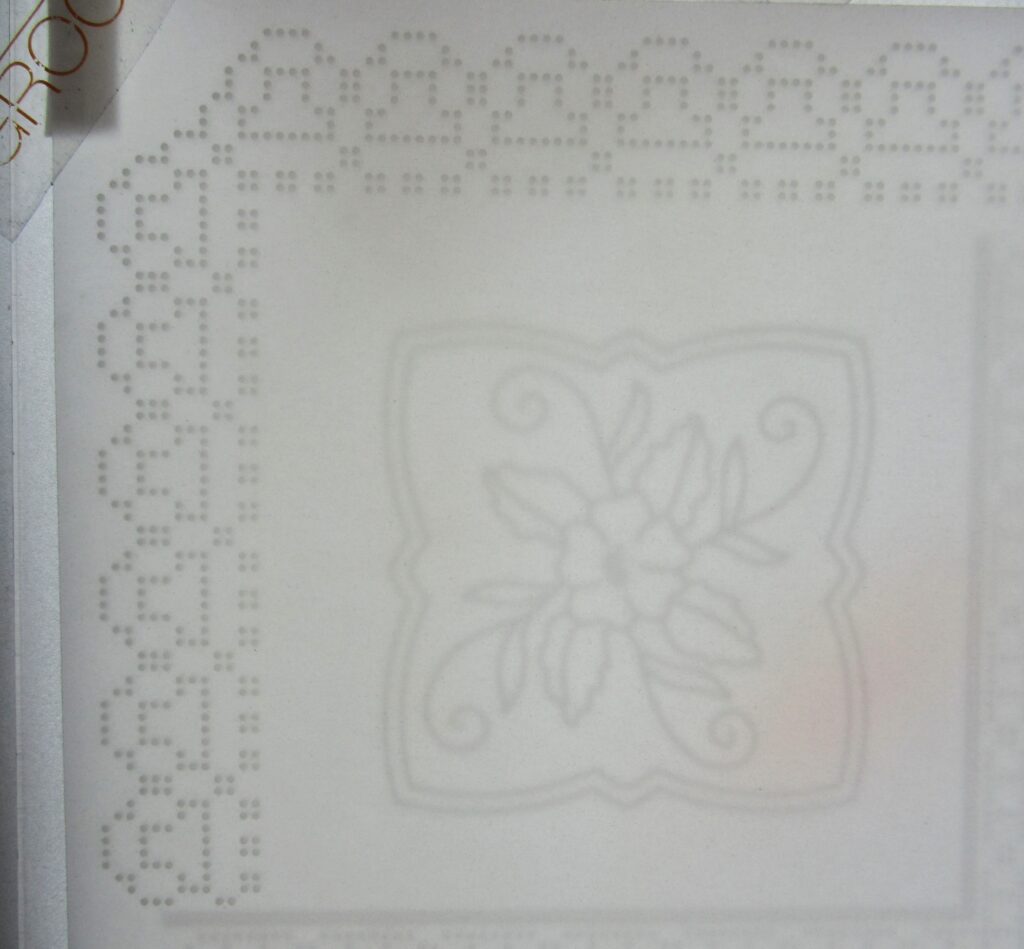
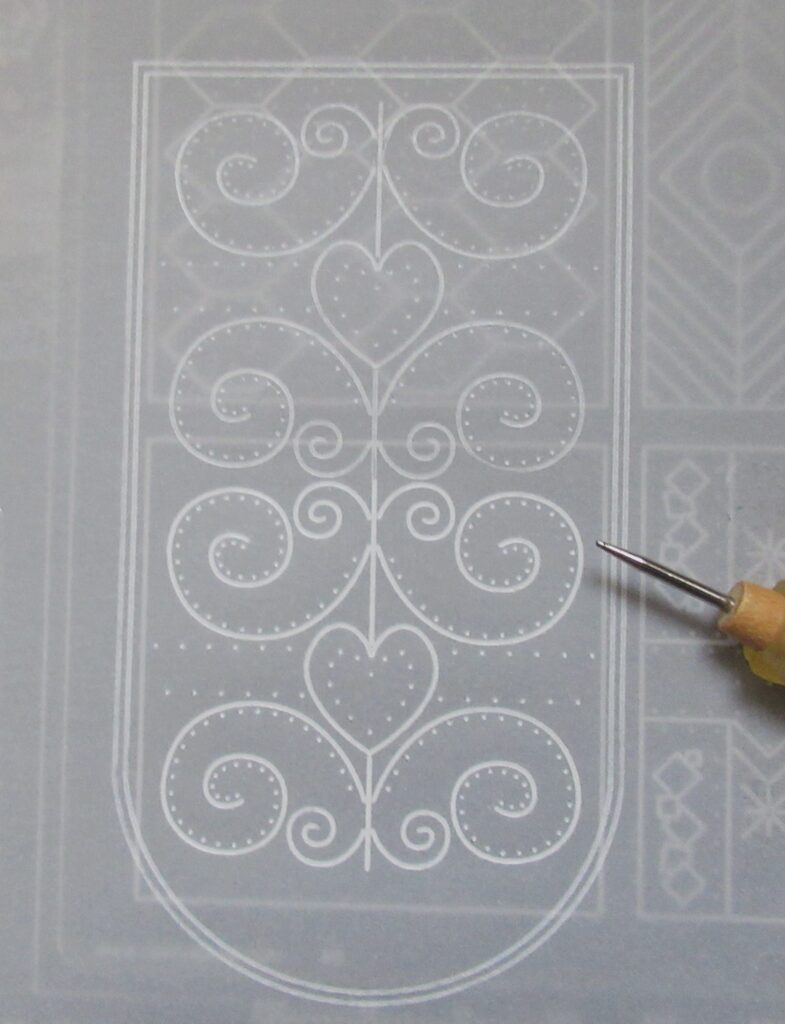
Step 4. Line up the parchment over the second largest nested arched tag and only trace out the outer two lines.
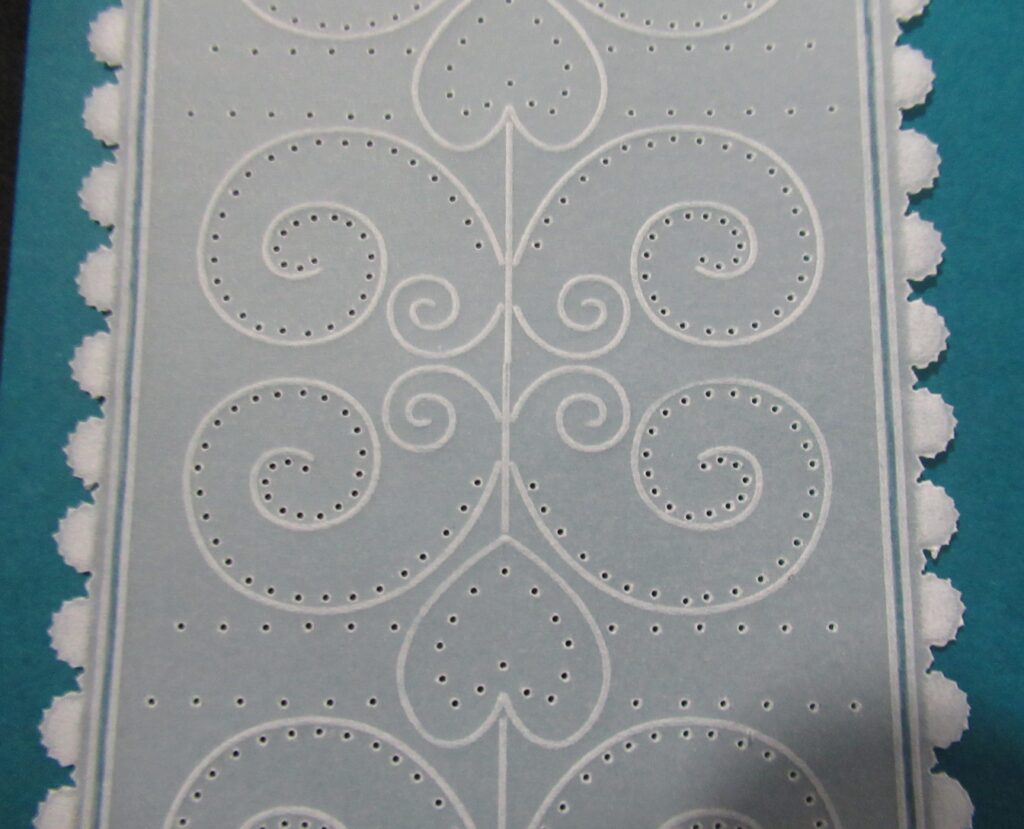
Step 5. Attach the tag to the embroidery sampler. Line up the square around the pattern with the bottom line of tag – this will help to get it straight. Emboss the whole pattern, making sure you get all the tiny dots (these will be your stitching holes). Turn the tag around and line the pattern up again. The patterns on this plate do tesselate, so you can make a whole panel of pattern.
Step 6. Shallow perforate around the tag with the Semi-Circle Perforating tool.
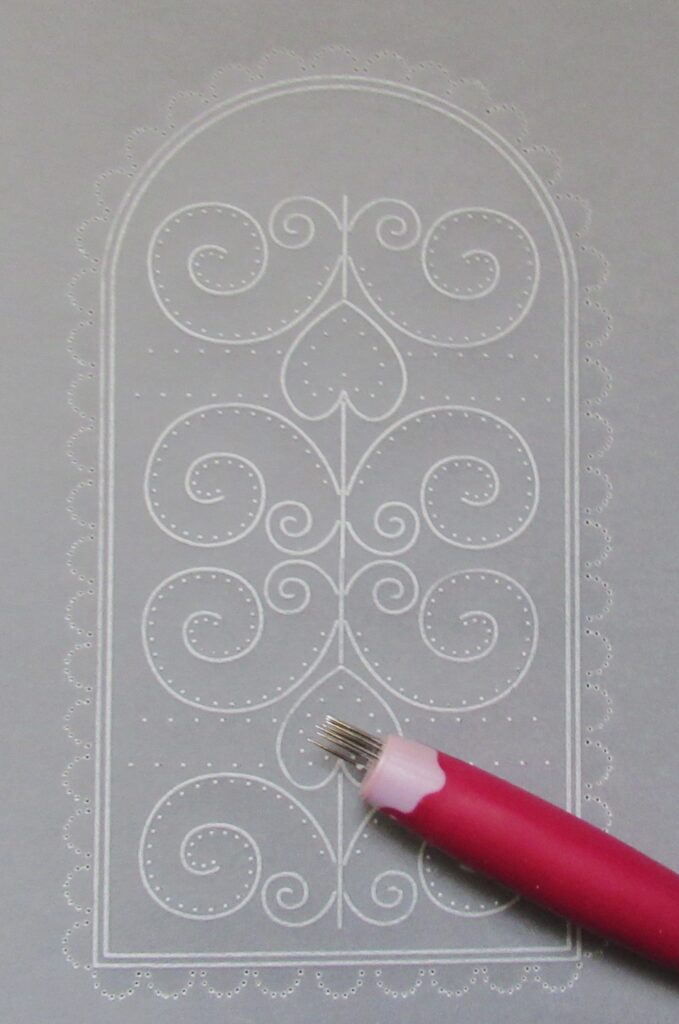
Step 7. Emboss within the semi-circle perforations. Start with a 3mm ball tool, or number 4 tool from the starter kit. Go very gently, getting the whiteness in coats of embossing. By the time you get back to the beginning, they will be rested enough to go over again as they are very small areas. Lastly go over with 1.5mm ball tool or number 3 tool from the starter kit, to sharpen up the edges of your embossing. Then turn the work over and deeply perforate from the front. Use a FINE single needle tool if you have problems with relocating all the needles of the semi-circle tool.
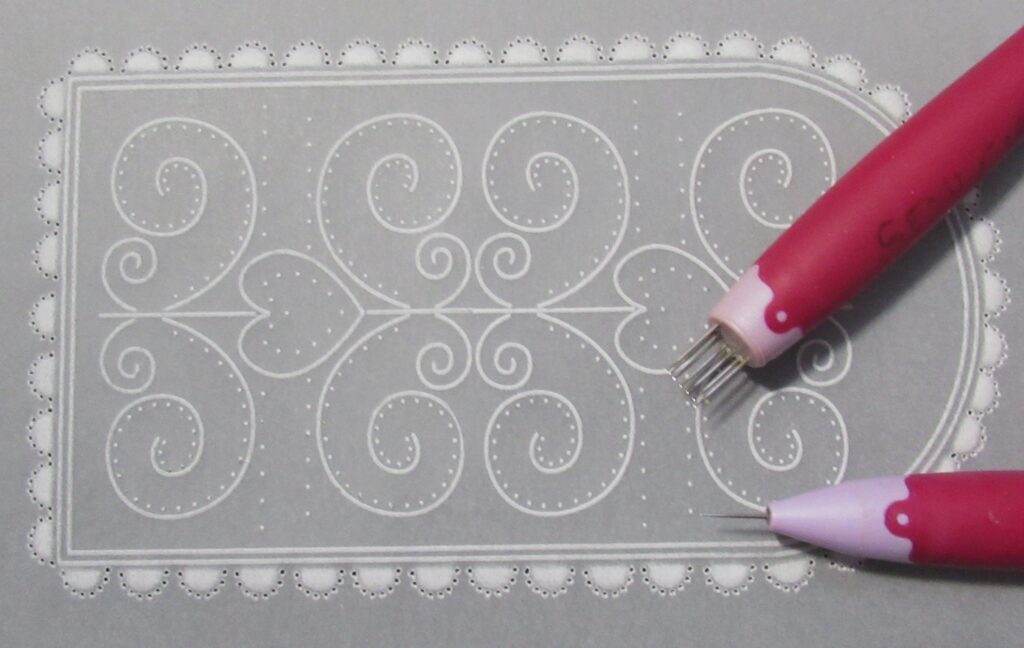
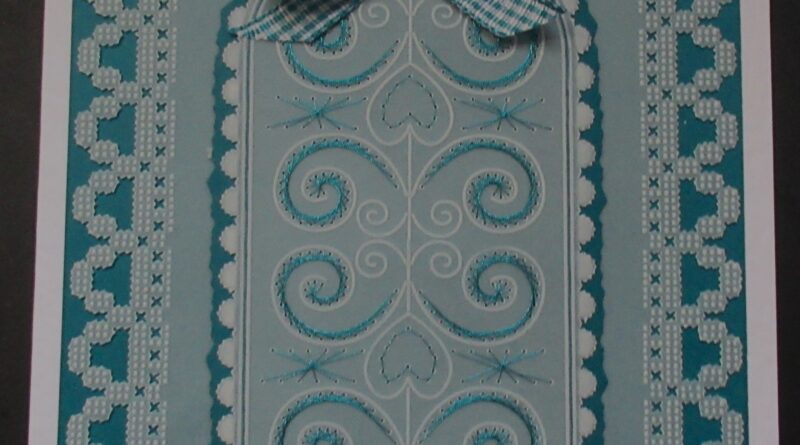
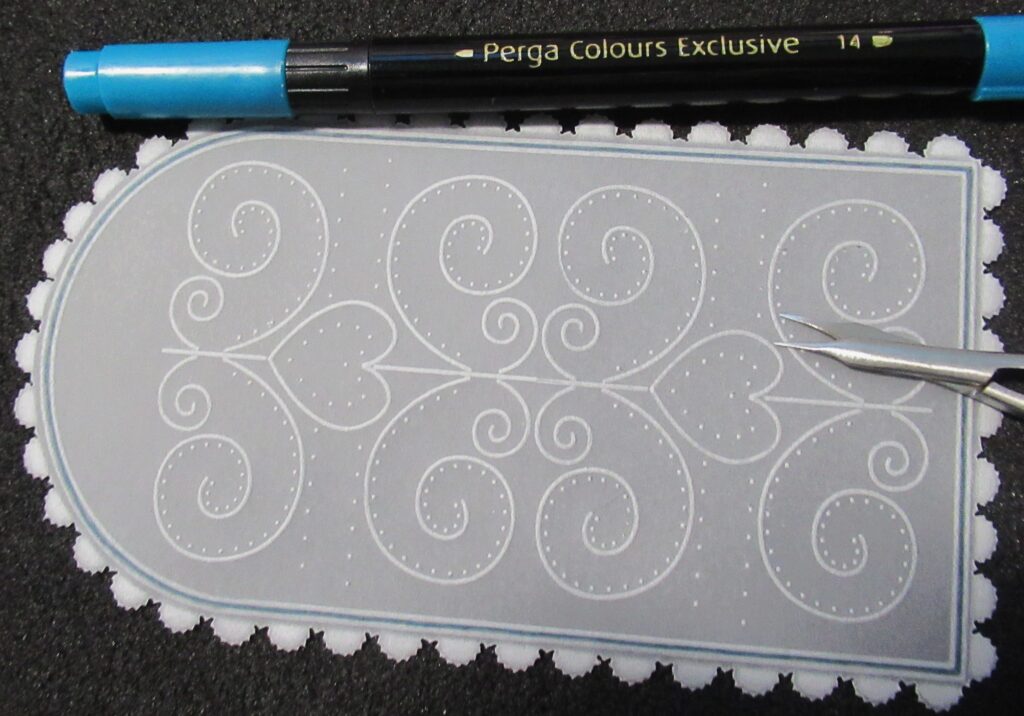
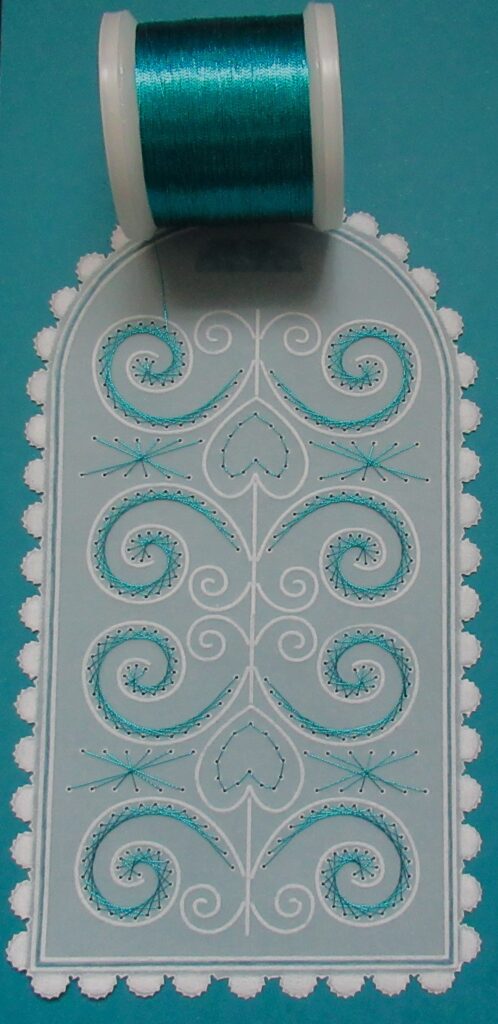
Step 8. Snip out the tag, colour in the margin – I used Perga Colours Exclusive pen number 14. The tag is now ready to be mounted onto your choice of backing card.
Step 9. Stick the tag to your backing card. You can use a bit of double- sided tape at the top as this will be covered by your ribbon. Take the FINE single needle tool and perforate through the parchment and backing card to make the stitch holes.
Step 10. When you start stitching, start from the wider end of the swirls. The stitches are 6 holes long, so come up at the first hole, pass over 4 holes and go down at the 6th. The Embroidery Sampler plate comes with a stitching guide, so it is so worth keeping this safe. I have enlarged the section of the sampler I am working on so that you can see from it how the stitches are placed.
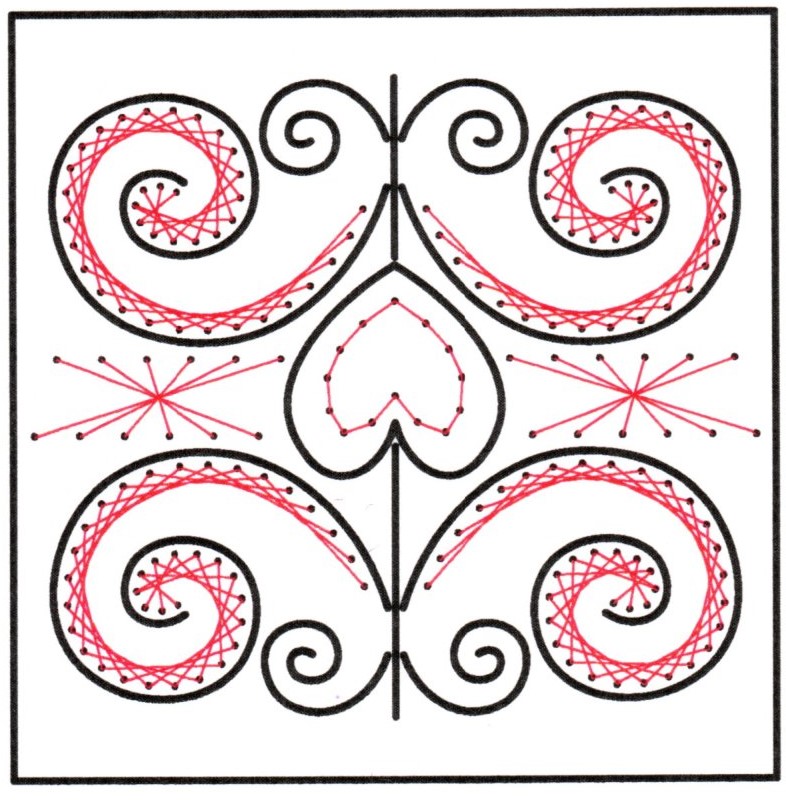
Step 11. The swirls are the trickiest part of this design, but if you make sure to start at the widest part and follow this guide, you will see how the pattern goes. Bring the needle up at 1, down at 6, up 7 down 2, up 3 down 8, up 9 down 4, up 5 down 10, up 11 down 6, up 7 down 12 and so on until you have completed all the stitching.
Step 12. Cut a mount to match the tag background. It needs to be 13.7cm x 19.7cm. Fix the lace mat with brads at each corner, attach the tag using double sided tape. Fold an A4 Piece of card in half to make an A5 card blank and add the finished topper. Make a bow to finish off the tag and cover up the double sided tape.
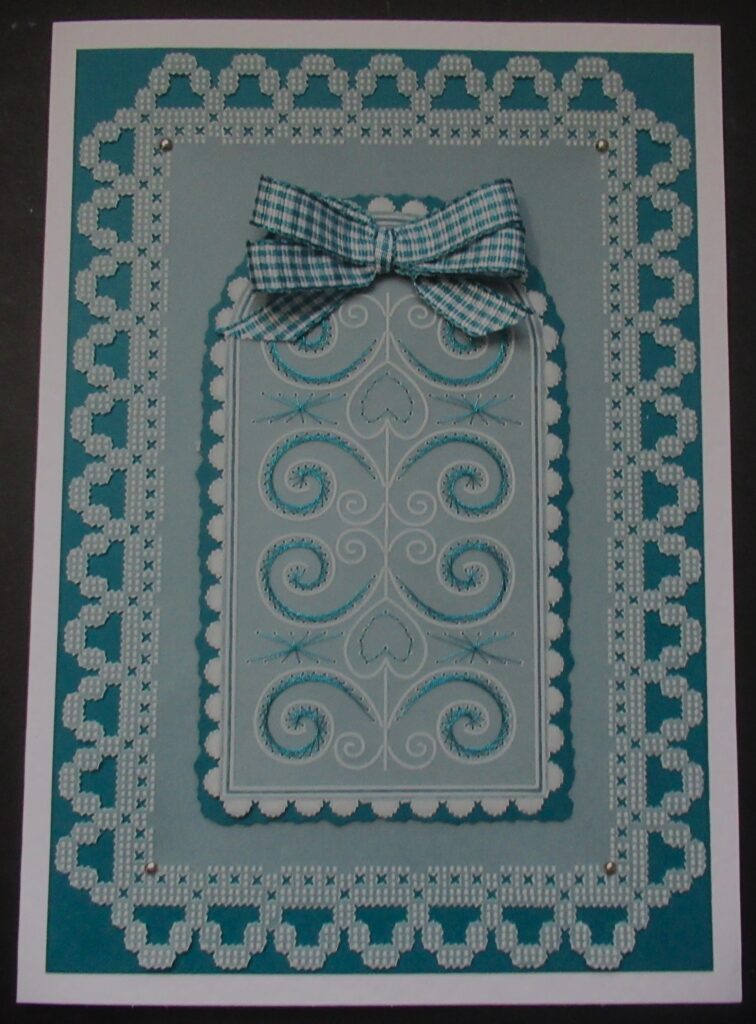
What a beautifully finished card! Fabulous.
Thank you, Glynis, for sharing this easy to follow step-by-step project with us. Another amazing project that you at home should be able to replicate in your own way!
Everything that Glynis has used in this particular project is available in a shopping list, HERE.
Now, looking at the week ahead…
Monday 29th April:
In the SHAC with Barbara – 10am Live on Facebook & YouTube
Tuesday 30th April:
Groovi Tuesday with Paul – 10am Live on Facebook & YouTube
Thursday 2nd May:
In the SHAC with Barbara – 7pm Live on Facebook & YouTube
Sunday 5th May:
TV Clarity Classics on Create & Craft – 3pm – 5pm
See you there!
Travel gently, friends.
Lotsa love, Grace & Glynis xoxo
Clarity – The Home of Art, Craft, and Well-Being.
Lovely project Glynis and love your choice of colour, Teal is one of my favourites! Xx
Step 1 do you emboss the dots and if so with which tool?
Absolutely beautiful, Glynis. Thank you for sharing the step by step.
Beautiful Glynis, thank you so much for your lovely clear instructions. Really like that colour too xxx
I love everything about this. Will definitely be giving it a go, thank you. X
Another gorgeous project , thanks Glynis
Will be having a go at this x
Glynis has come up trumps again, I especially love the colour. Thank you both for sharing.
I have only just viewed yesterday’s blog and don’t know how you manage to choose. Those pieces shown went from the simple to the sublime, all were great.
Another pretty card by Glynis, look forward to seeing some makes on the FB page. For once I haven’t got all the ingredients so I will have to see what I can come up with but the lace frame will be useful. I am going to see if the small poppet will fit on the tag vertically rather than horizontally like the previous one. Watch this space Glynis !!
Thanks Grace for another great blog – have a good week everyone xx