Clarity Matters Blog Tutorial: How To Use The Moon Tool
Hello hello! Grace here.
I hope this finds you well, safe, and enjoying your Sunday morning.
Have you been following Paul and his Groovi Tuesday sessions on Facebook & YouTube? He is currently working his way through the various multi-needle tools that are showcased in the Pergamano Handbook for Multi-Needle Tools – Volume 2. This week he moved on to the next tool in the book – The Moon Perforating Tool.
If you missed those last sessions though, then you can catch up here:
Picot V Small Perforating Tool – HERE
Picot V Medium Perforating Tool – HERE
Picot V Large Perforating Tool – HERE
Angle Perforating Tool – HERE
Cross Perforating Tool – HERE
4-In-4 Perforating Tool – HERE
Almond Tool and Heart Tool – HERE
During Groovi Tuesday this week, Paul started working with the Moon Perforating Tool. You can catch up on that episode, HERE.
Meanwhile, the lovely Glynis Whitehead (Clarity Craft Design Team Member) has made two more projects to go with this most recent tool tutoring. I’ll hand you over to Glynis…

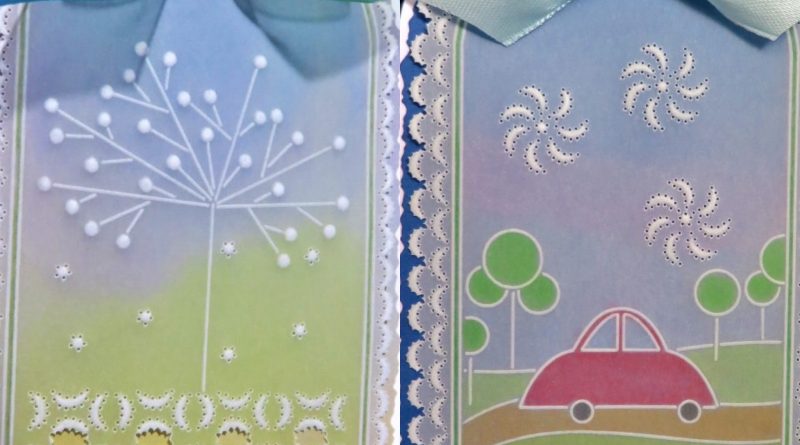
Moon Perforating Tool – Project 1
Ingredients
Pergamano Handbook for Multi-Needle Tools Vol 2 by Linda Williams (PER-BO-70355-XX)
Nested Arch Tags Groovi Plate A5 (GRO-PA-41465-04)
Tina’s Funky Bow Tie & Bubble Car Layering Shapes A5 Sq Groovi Plate (GRO-PA-41159-03)
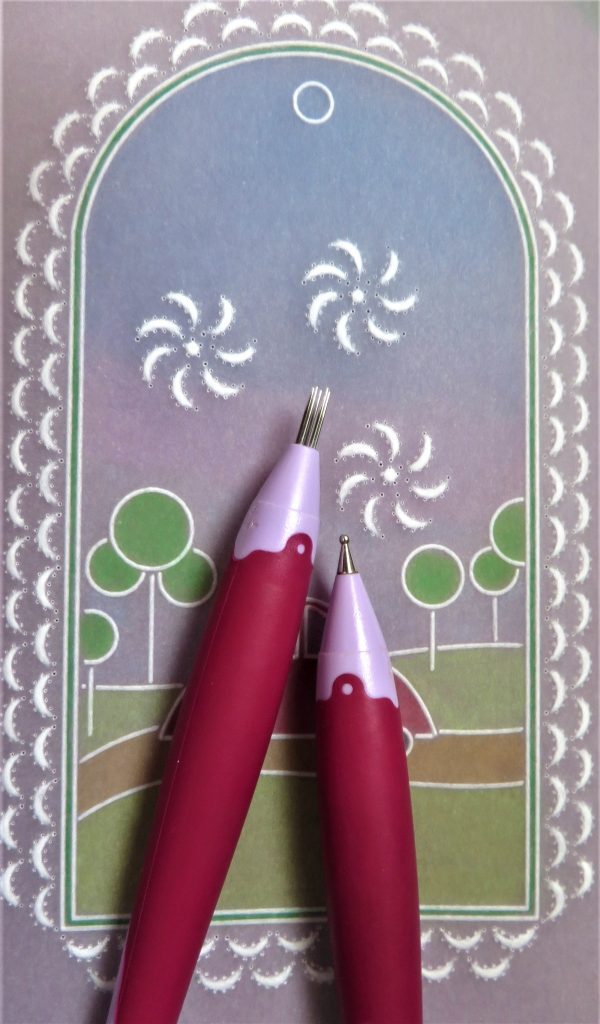
Moon Perforating Tool (PER-TO-70031-XX)
5 in a Circle Perforating Tool (PER-TO-70025-XX)
Single Needle Perforating Tool (PER-TO-70035-XX)
1.5mm Embossing Ball Tool (PER-TO-70004-XX)
3mm Embossing Ball Tool (PER-TO-70005-XX)
Groovi Embossing Tool 1&2 (GRO-AC-40026-XX)
Faber-Castell Polychromos Pencils (ACC-PE-30797-XX)
Or Perga-Liner Pencil (B) (PER-CO-70063-XX)
Blending Nibs (PER-AC-70300-XX)
Dorso Oil (PER-CO-70066-XX)
Perga Glue (PER-AC-70133-XX)
Method
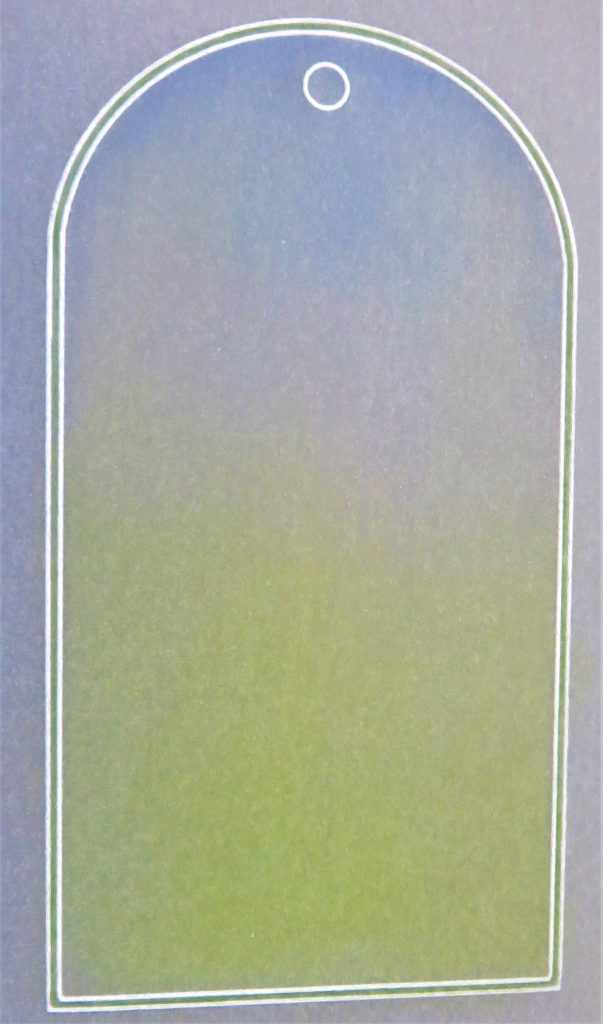
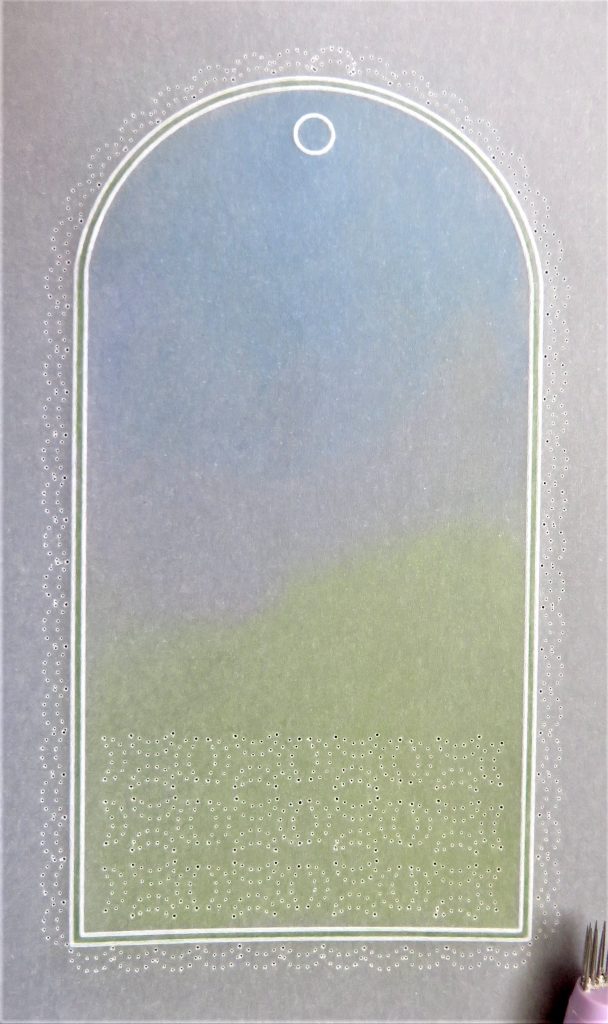
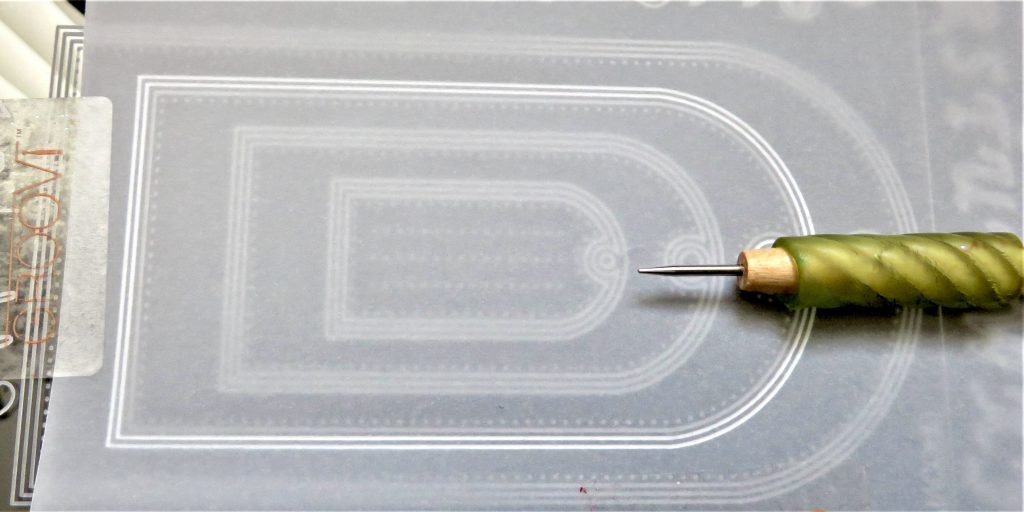
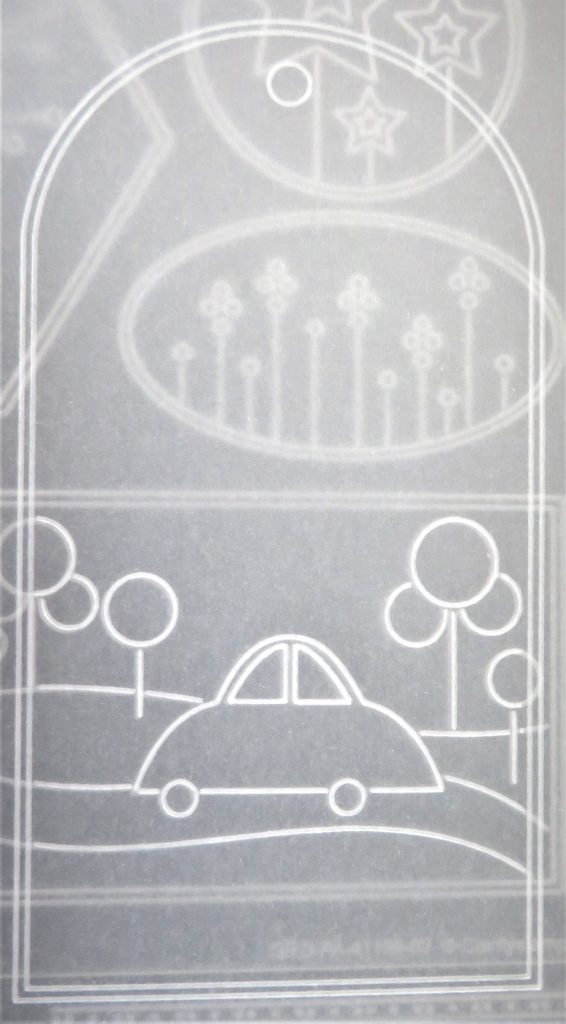
Step 1. Trace the 2nd largest tag from the Nested Arch Tag plate.

Step 2. Dorso on the back of the tag using blending pencils, some Dorso oil, a tissue and blending nibs. Starting at the top of the tag, add blue, then some violet, then some pink. For some landscape, add some green at the bottom of the tag and then yellow. Leave a little gap between all the colours, so that you can go back in and merge the colours without a solid edge to them. Also, choose one of the colours to fill in the margin of the tag.
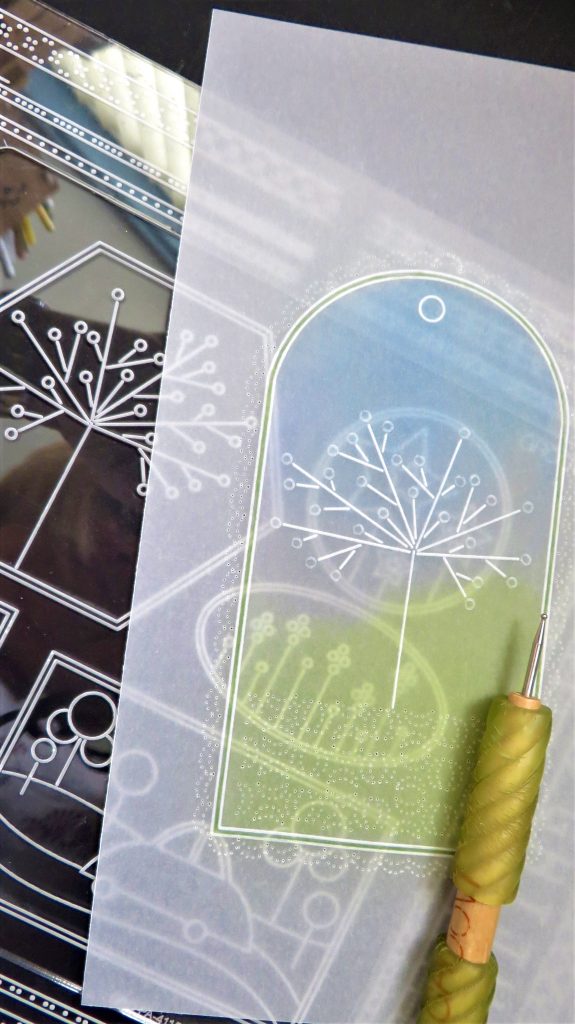
Step 3. The Moon perforating tool is illustrated by Linda in her Handbook on pages 42-45 and the sampler you need to photocopy is on page 45. The perforation patterns I shall use are marked with a red pen.
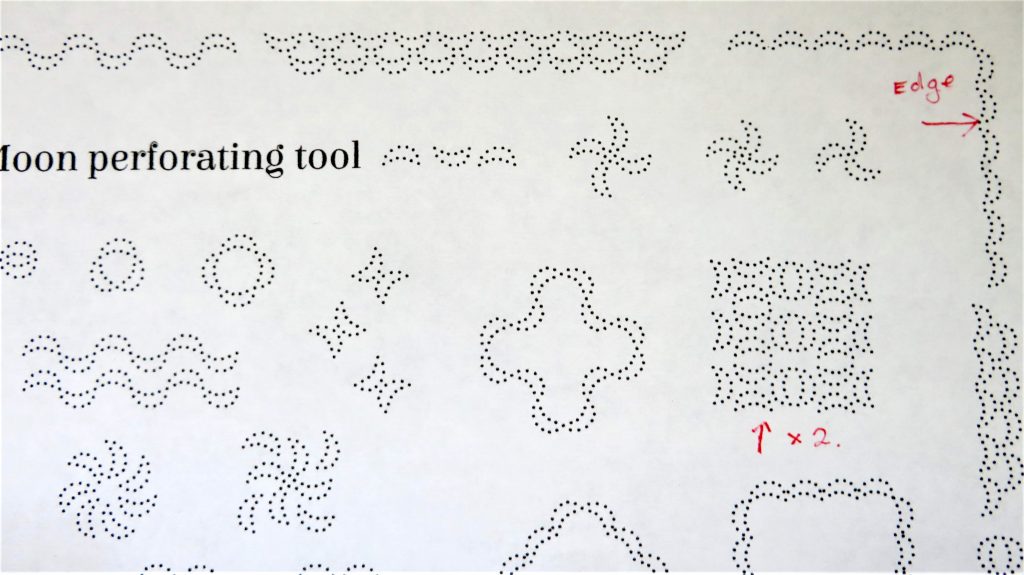
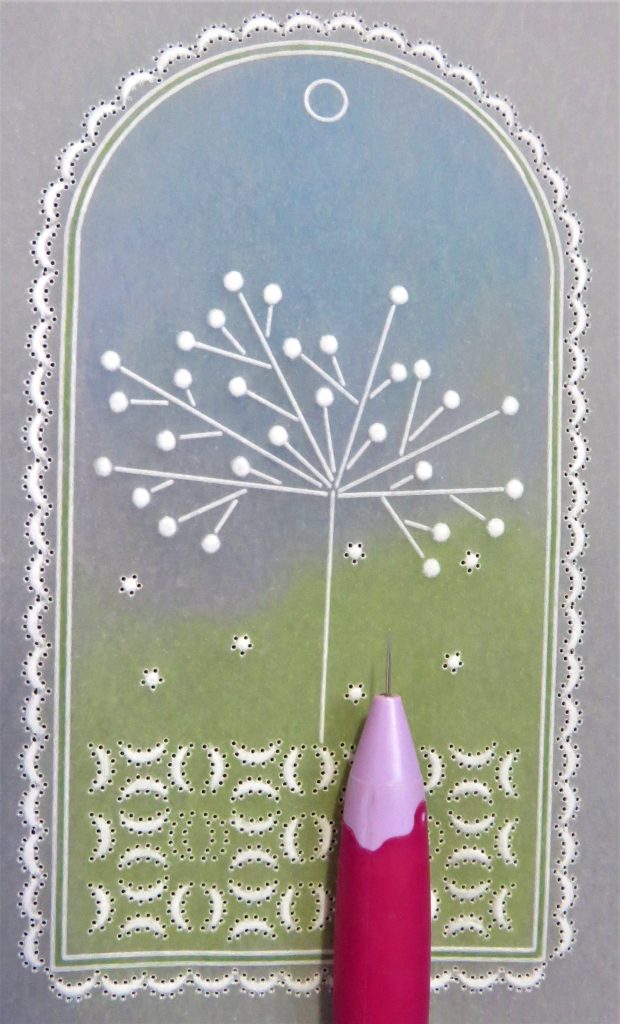
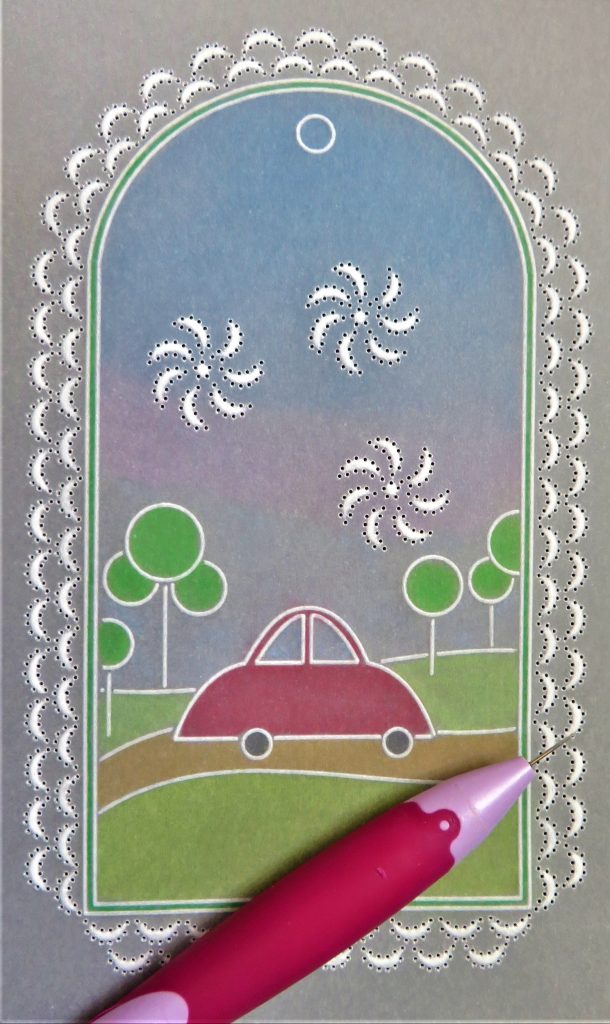
Step 4. Place the photocopied sampler onto a shallow mat with the parchment tag lined up on top. Make two of the Moon tool perforating patterns along the bottom of the tag. Match up the needles to the dots underneath and perforate through parchment and pattern at the same time. Use the dots on the handle of the tool to help you keep it straight and place the two end needles first and the others will follow.
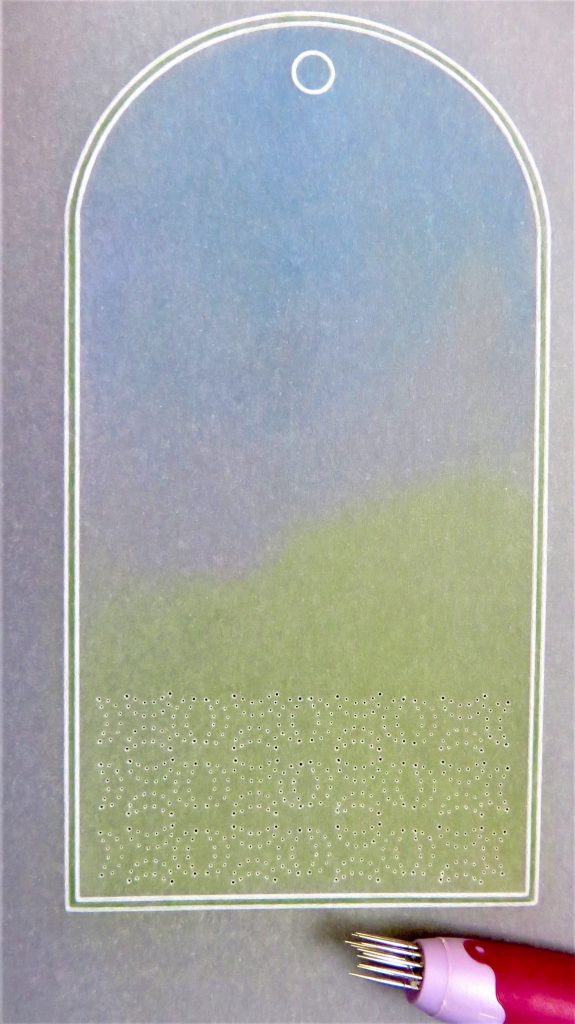
Step 5. Starting at the corners and meeting in the middle, go around the edge of the tag with the moon tool. Don’t forget you can use the paper pattern underneath your work to help you with lining up the needles. Again, just do shallow perforations so that you can emboss within them and not tear the parchment.
Step 6. Emboss the tree from Tina’s Funky Bow Tie and Bubble Car Layering Shapes Groovi Plate. Use the number 1 tool on the trunk and branches and the number 2 tool (or 1.5mm ball tool) for the circles.
Step 7. Perforating shallowly, add some 5-in-a-circle perforations under the tree to represent falling blossoms.
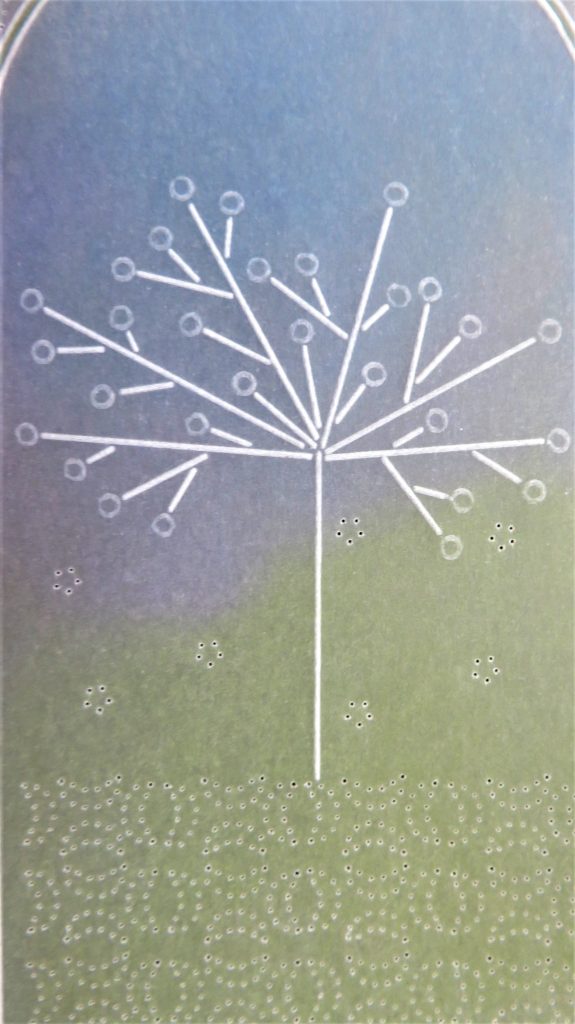
Step 8. Using the handbook as a guide, emboss the perforation patterns along the bottom of the tag, and leave the ones to be snipped alone. For this job, you can use the 1.5mm ball tool, being very careful not to press too hard. Also, emboss the moon shapes around the edge of the tag and dots within the 5-in-a-circle perforations. Use the 3mm ball tool to start off the dots at the ends of all the branches of the tree and finish them with 1.5mm ball tool, very lightly.
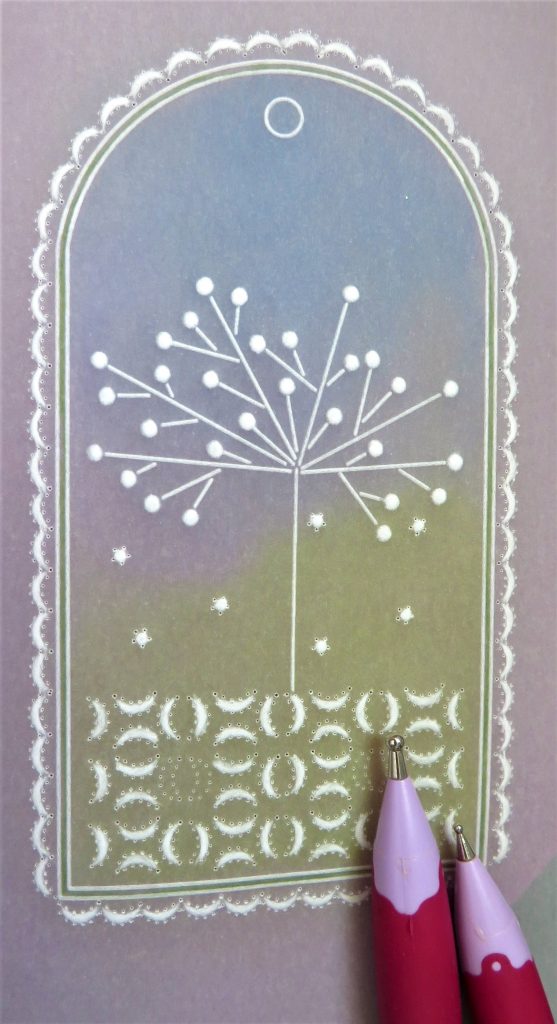
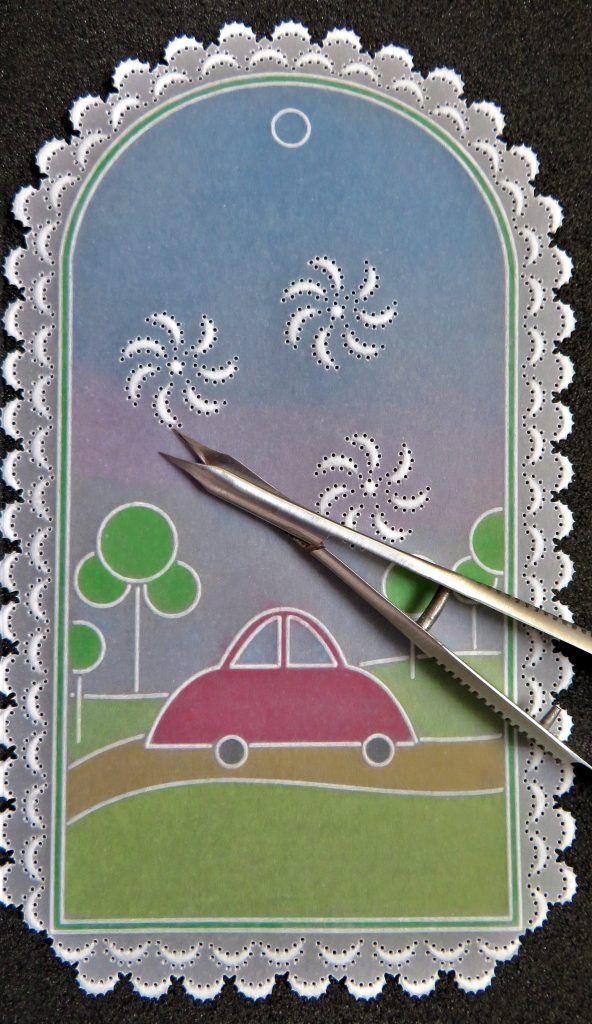
Step 9. Use the single-needle fine tool to fully perforate all the holes. It does take longer to do it this way, but it is kinder on the parchment and does a neat job.
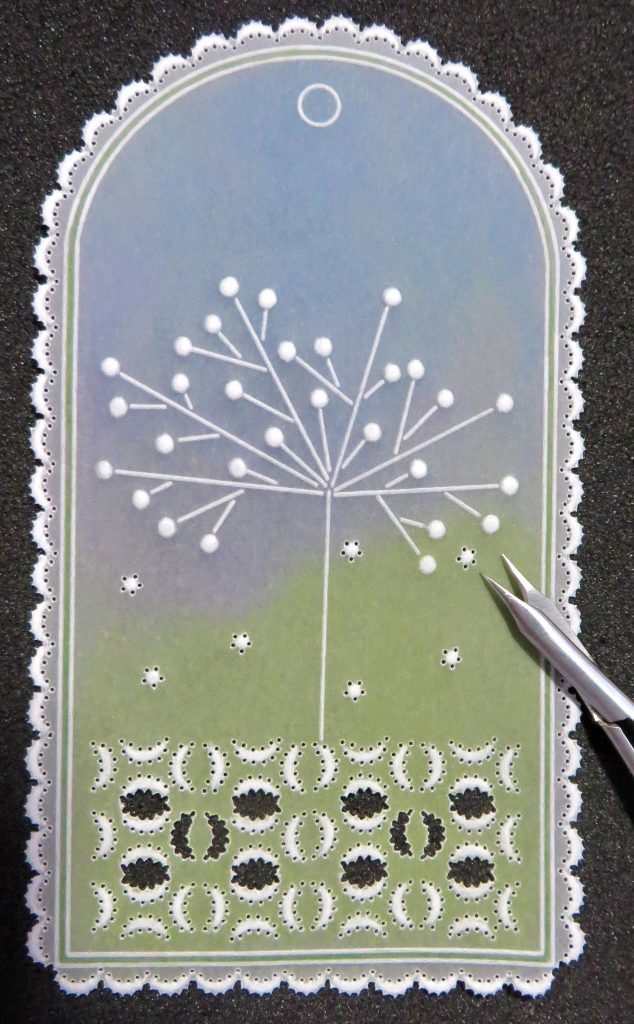
Step 10. Look at the sampler on page 42 of the book, to see where Linda has snipped out the shapes within the perforation pattern. When repeated, this pattern creates an extra row of patterns down the centre. Also, snip around the edge.
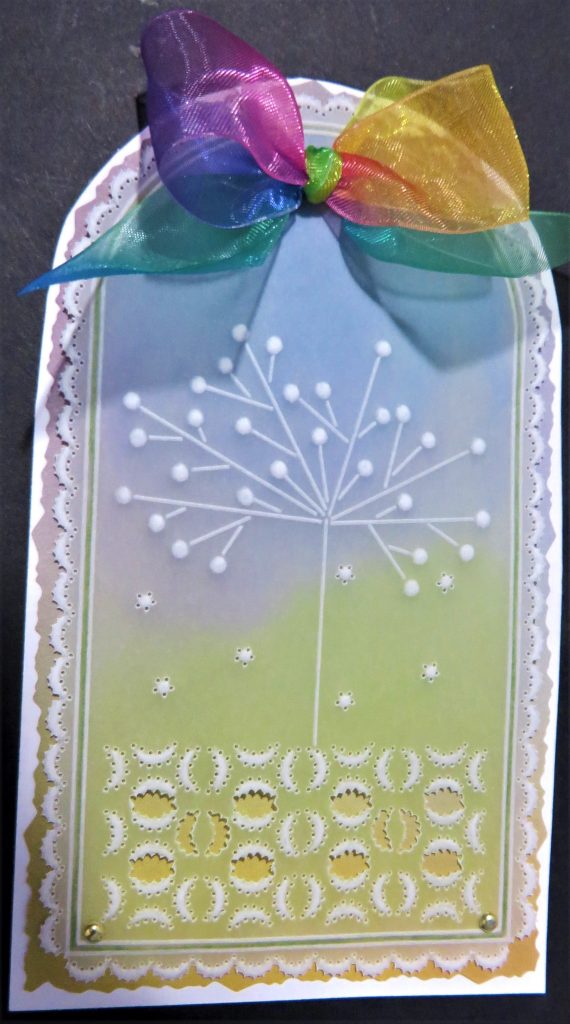
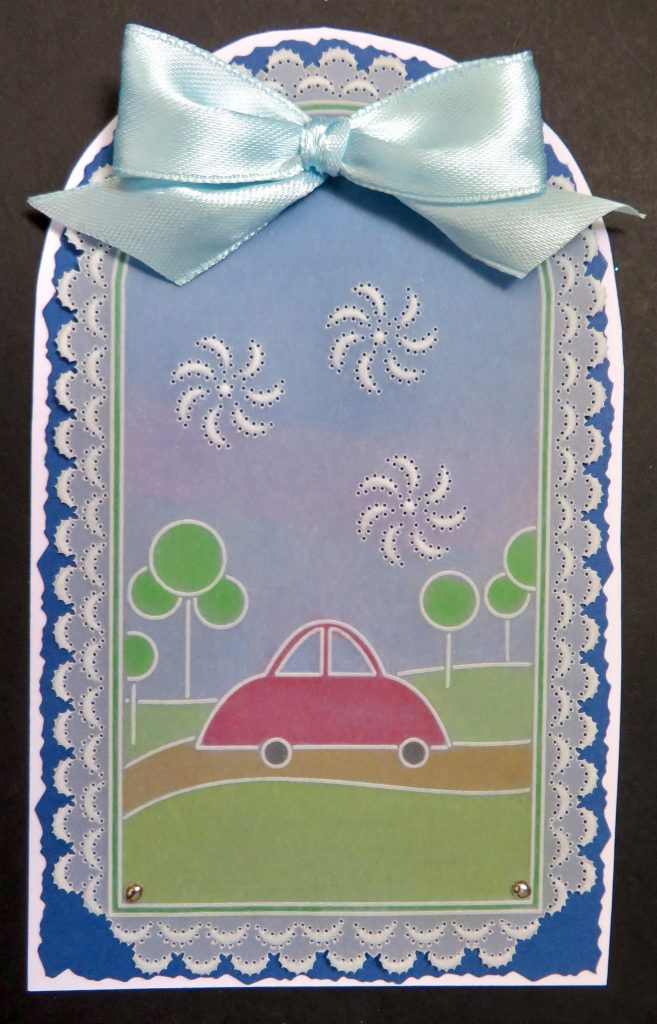
Step 11. Mat and layer the tag onto your chosen backing paper/card and secure it with brads. Add a bow. Your first project is complete!
Moon Perforating Tool – Project 2
Ingredients
Pergamano Handbook for Multi-Needle Tools Vol 2 by Linda Williams (PER-BO-70355-XX)
Nested Arch Tags Groovi Plate A5 (GRO-PA-41465-04)
Tina’s Funky Bow Tie & Bubble Car Layering Shapes A5 Sq Groovi Plate (GRO-PA-41159-03)
Moon Perforating Tool (PER-TO-70031-XX)
5 in a Circle Perforating Tool (PER-TO-70025-XX)
Single Needle Perforating Tool (PER-TO-70035-XX)
1.5mm Embossing Ball Tool (PER-TO-70004-XX)
Groovi Embossing Tool 1&2 (GRO-AC-40026-XX)
Faber-Castell Polychromos Pencils (ACC-PE-30797-XX)
Or Perga-Liner Pencil (B) (PER-CO-70063-XX)
Blending Nibs (PER-AC-70300-XX)
Dorso Oil (PER-CO-70066-XX)
Perga Glue (PER-AC-70133-XX)
Method
Step 1. Trace the 2nd largest tag from the Nested Arch Tag plate.
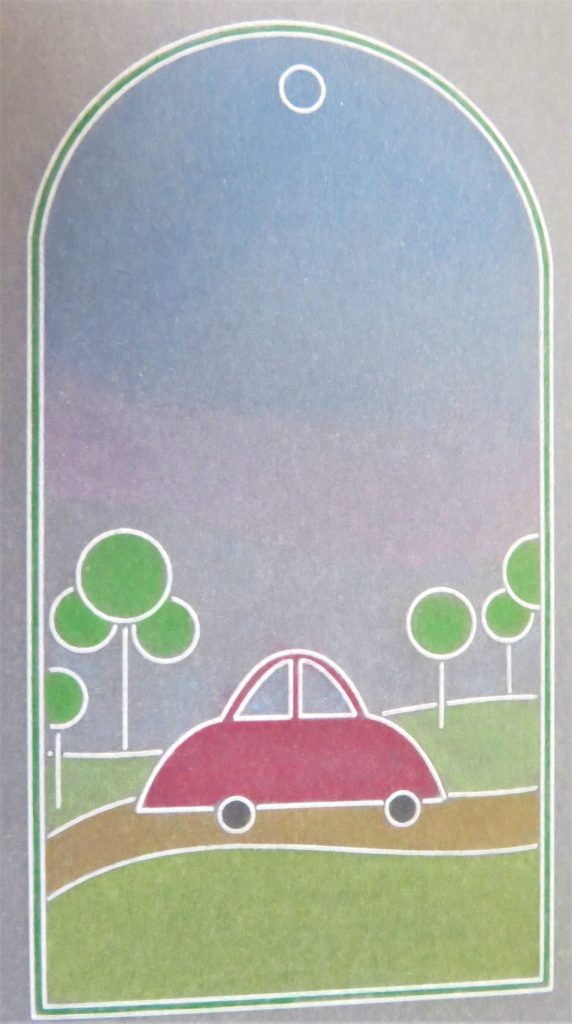
Step 2. Emboss the car and landscape from Tina’s Funky Bow Tie and Bubble Car Layering Shapes Groovi plate.
Step 3. Working on the back of the tag, colour the car, landscape, and trees. Add some blue for the sky. Choose one of the colours to put into the margin. Use blendable pencils and the blending nibs to spread out and smooth the colours.
TOP TIP: It is best to do the colouring at this stage, as once the perforations are in place, it is impossible to colour around them properly.
Step 4. The Moon perforating tool is illustrated by Linda in her Handbook on pages 42-45. The sampler you need to photocopy is on page 45.
Lay the paper pattern down onto a shallow mat with the tag over the perforations you wish to make. Match up all the needles to the dots underneath and shallow perforate. Move the parchment accordingly.
Also, go around the edge using the paper pattern to help you.
Start with a single row of moons, beginning at the bottom of the tag, working from the corners in, spacing them out to meet in the middle. Next, go up the sides doing the same, then put in the second row, following Linda’s example. The first and last needles of the moon match the centre two holes of the moon tool perforations above them. Leave a two-needle-sized space in between all the perforations. The corners have been left as a single layer.
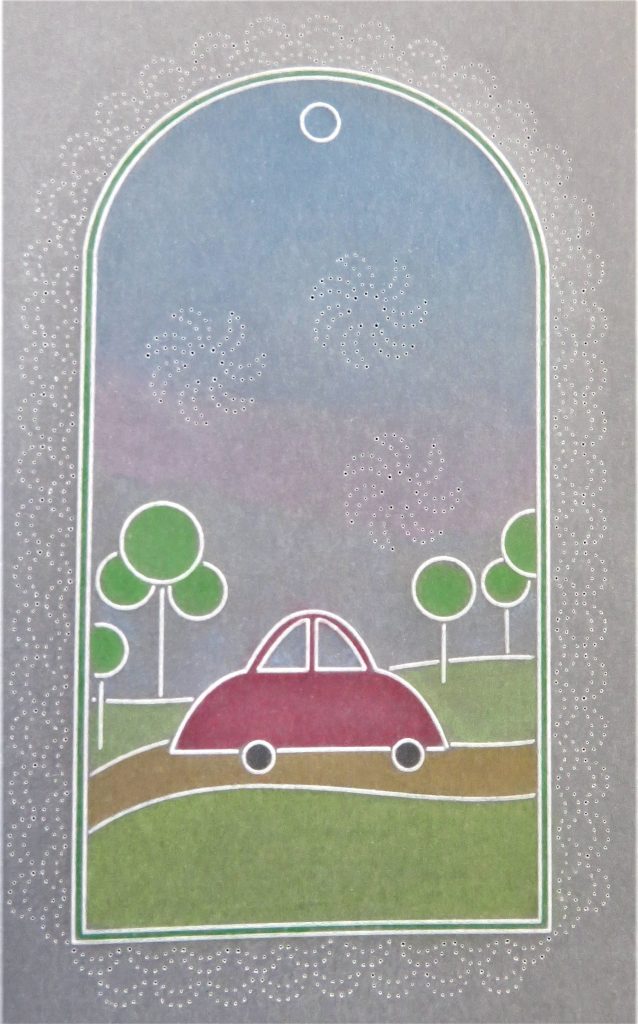
Step 5. Use the number 2 tool or 1.5mm embossing ball tool for embossing into all the moon perforations.
Step 6. At the time of making this blog, the star tool is not available to buy. So as an alternative, use the 5-in-a-circle tool in the centre of the three ‘fan blade’ shapes and emboss a dot into the centre.
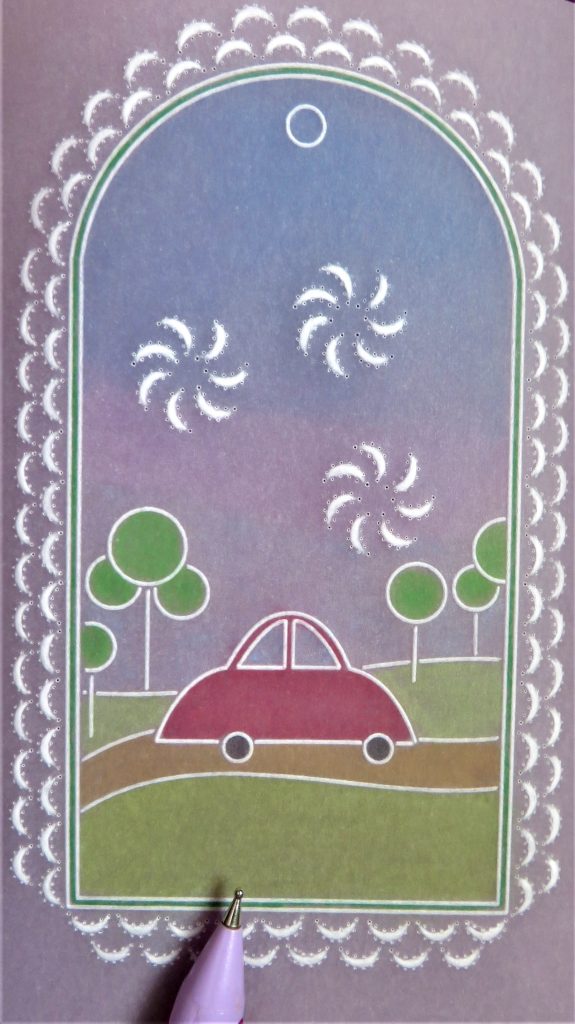
Step 7. Put the work onto a deep perforating mat and with the single needle fine perforating tool, re-perforate all the holes of the moons and 5 in-a-circle shapes. Take your time with this process and remember you only need to go in about halfway with the needle.
Step 8. Carefully snip around the outside perforations, turning the work as you go.
Step 9. Mat and layer the tag onto backing papers/card of your choice, using brads at the two corners and a little sliver of double-sided tape under the circle at the top of the tag. Add a ribbon to decorate. Your second project using the Moon Tool is now complete!
TWO incredible projects! Thank you, Glynis, for sharing your tips and tricks with us. You’re such a fantastic teacher.
Everything that Glynis has used can be found on the Clarity website, HERE.
Now, looking at the week ahead…
Monday 9th October:
In The SHAC with Barbara on Facebook and YouTube, 10am
Tuesday 10th October:
Groovi Tuesday with Paul – 10am Live on Facebook and YouTube
Wednesday 11th October:
One Day Special with Paul on Create & Craft – 6pm & 9pm
Thursday 12th October:
One Day Special with Paul on Create & Craft – 10am & 2pm
Hope to see you there!
Travel gently, friends.
Lotsa love, Grace & Glynis xoxo
Clarity – The Home of Art, Craft, and Well-Being.
I don,t know whether this will go on Saturday share on Sundays projects. BUT I have enjiyed looking at the wonderful cards made in the card gallery and also Sunday,s project. Another 2 beautuful gift tags(cards) from Glynis.
Thank you both. 😊
Another lovely 2 projects for us this week, thank you Glynis & Grace for bringing them to us on here. It would be nice to see a few more finished tags on the FB page. Have a good week everyone xx
Have loved all of these projects Glynis, it’s so helpful to see just what you can achieve with each of the perforating tools! Will be having a play with more of them! Xx