Clarity’s Blog Tutorial: How To Use The Pergamano Bag Template
Hello hello! Grace here.
I hope this finds you well, safe and enjoying your Sunday. We are joined by the brilliant Glynis Whitehead. She has prepared a fabulous step-by-step tutorial for us! I’ll hand you right over to the lovely lady herself…

Pergamano Bag Template
There are four different templates on the Clarity website to choose from, but I thought this time I would concentrate on the bag. It’s so handy for putting small gifts into and there is a choice of sizes on the template. As well as parchment, it can also be made in designer papers! You can also choose different handles for the bag – ideal if you want a more masculine gift bag.
Ingredients
Pergamano Bag Template (PER-TE-70127-XX)
Pink parchment paper – A4
(There are several shades to choose from on the website)
Floral Moon A5 square Groovi Plate (GRO-FL-40446-03)
Pergamano Ruler* (PER-AC-70278-XX)
Groovi Grip* (GRO-AC-40588-XX)
(*Did you know that on the website, the Pergamano Ruler and Groovi Grip have been combined into a kit? ACC-MS-30740-XX)
Number 1&2 tool from the Starter Kit (GRO-AC-40026-XX)
Pergamano Perforating Tool – 2 needle (fine) (PER-TO-70037-XX)
Groovi Tabs (GRO-AC-40437-XX)
Method
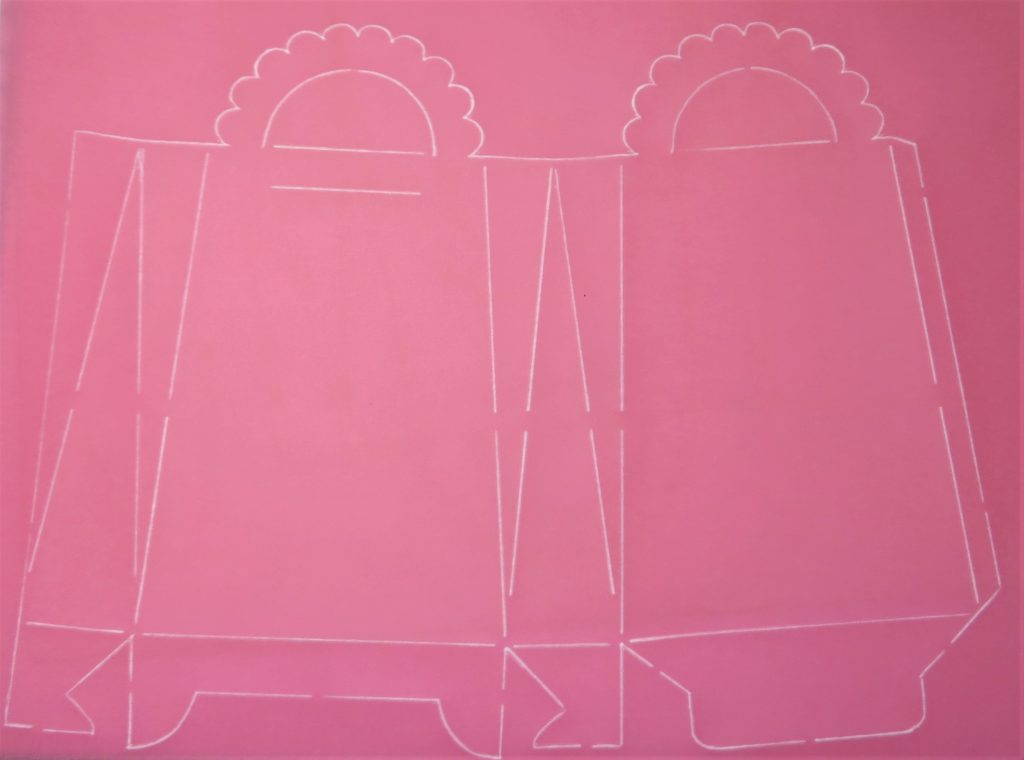
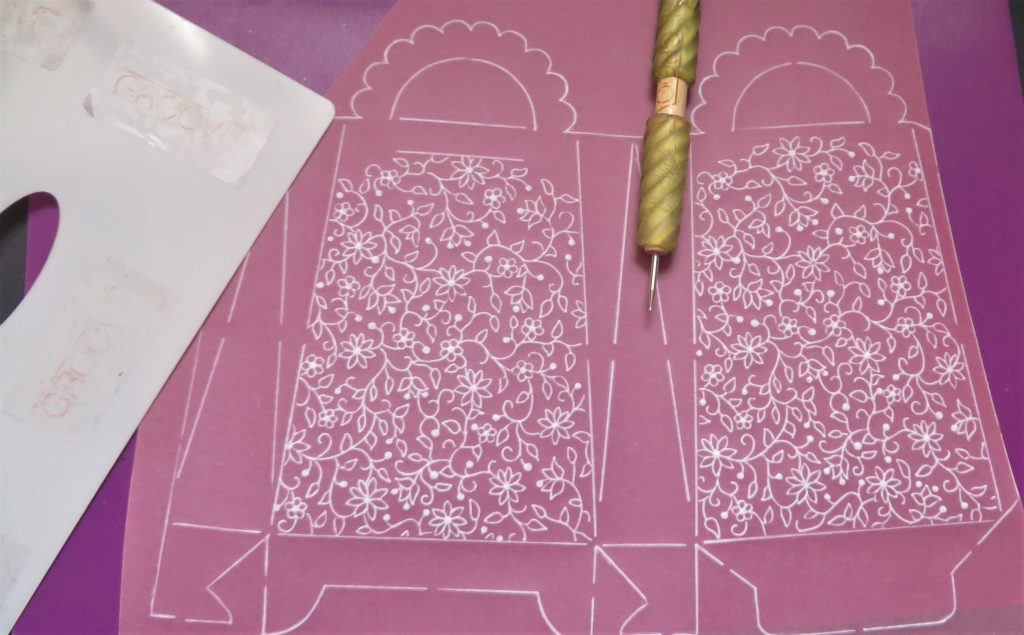
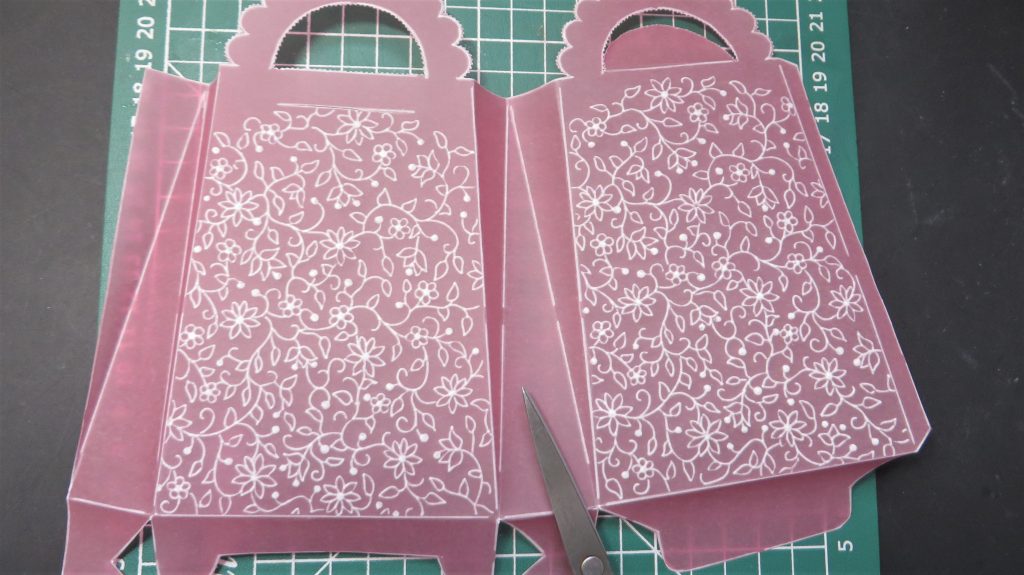
Step 1. Using a light panel is good for this. However, if you do not have one… lay the template down on some dark card so that you can see through the slots. Lay your parchment right side down onto the template (the darker, shinier side of coloured parchment is the one that should be facing up at you). Secure the parchment with Groovi Tabs and wipe with a tumble dryer sheet.
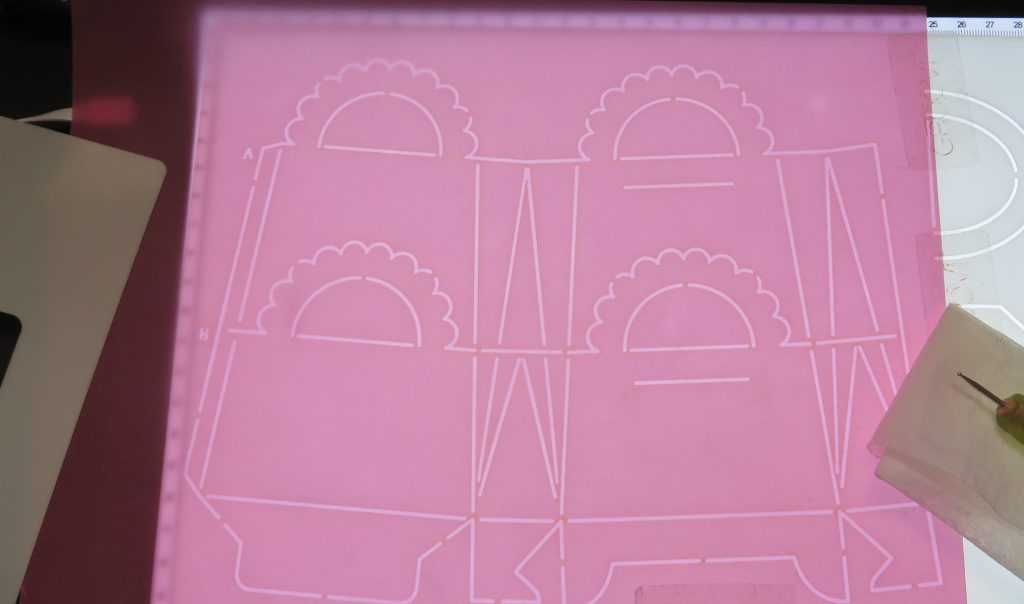
Step 2. Very carefully and lightly, use the number 2 tool to emboss lines through the slots in the parchment. Remember to miss out the lines that do not meet with your needs to make the size of bag you require.
Use your ruler to help you keep the lines straight as you do this. You also need to realign a couple of the scallops on the handle so that you can fill in the gap that is created by the template.
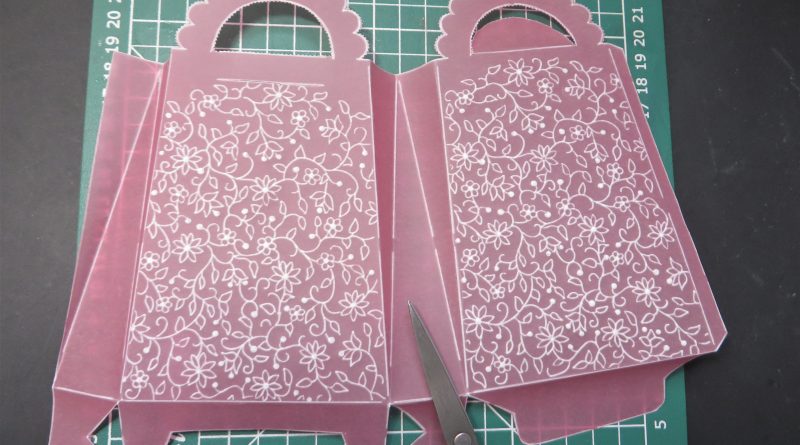
Step 3. Trim off some excess parchment – this is to keep the off-cuts in a good condition, as they will make lovely 3D flowers and butterflies for other projects. We crafters never waste a blimming thing!
Line up the bag onto the Floral Moon Groovi Plate, so that most of the front will be covered with flowers. If you want to add more flowers at the top of the bag you can realign the parchment. I am happy with what I have.
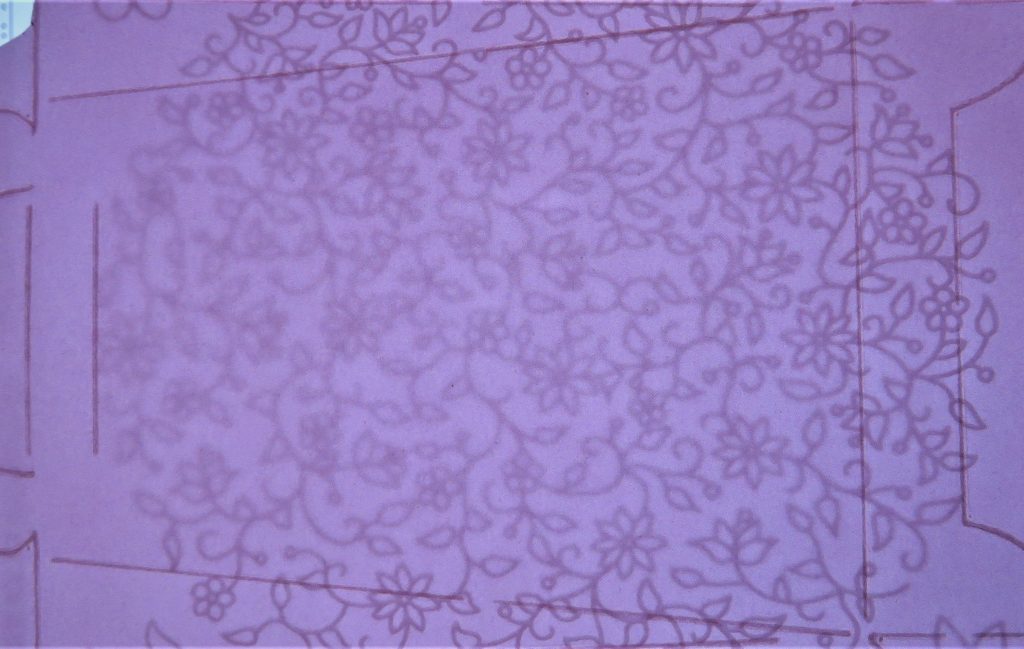
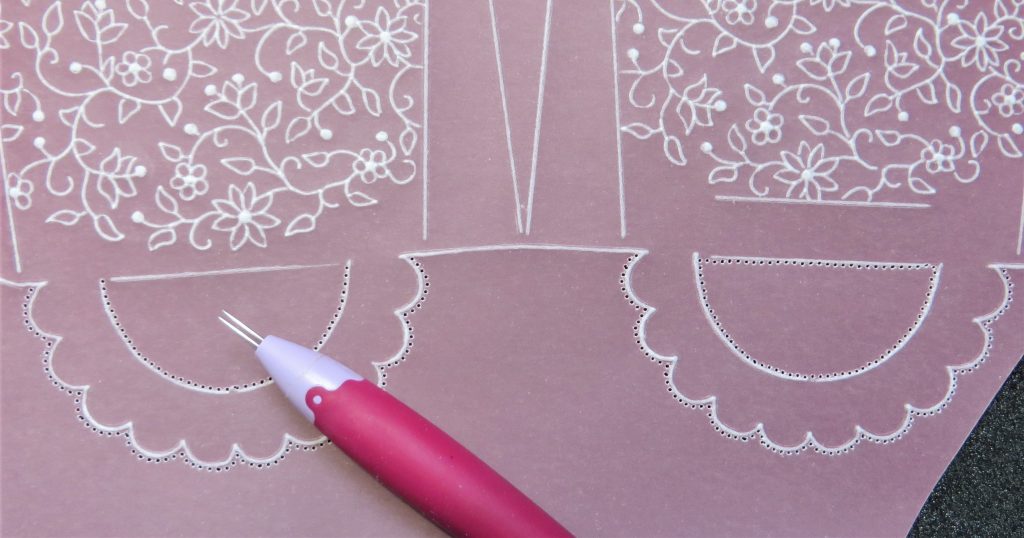
Step 4. Use the number 1 tool to trace out the design – remember to use the number 2 tool if you wish to emboss any elements.
Step 5. As you can see from the below picture, I have embossed all the dots and middles of the flowers. Now it’s time to go around the handle of the bag with a two-needle perforating tool ready for picot cutting. Do not picot cut the straight line of the handle loop without the embossed line underneath it, as this is meant for a closing flap.
Step 6. Cut around the rest of the piece with scissors, as close to the lines as you can, without cutting into them. Then picot cut around the handle.
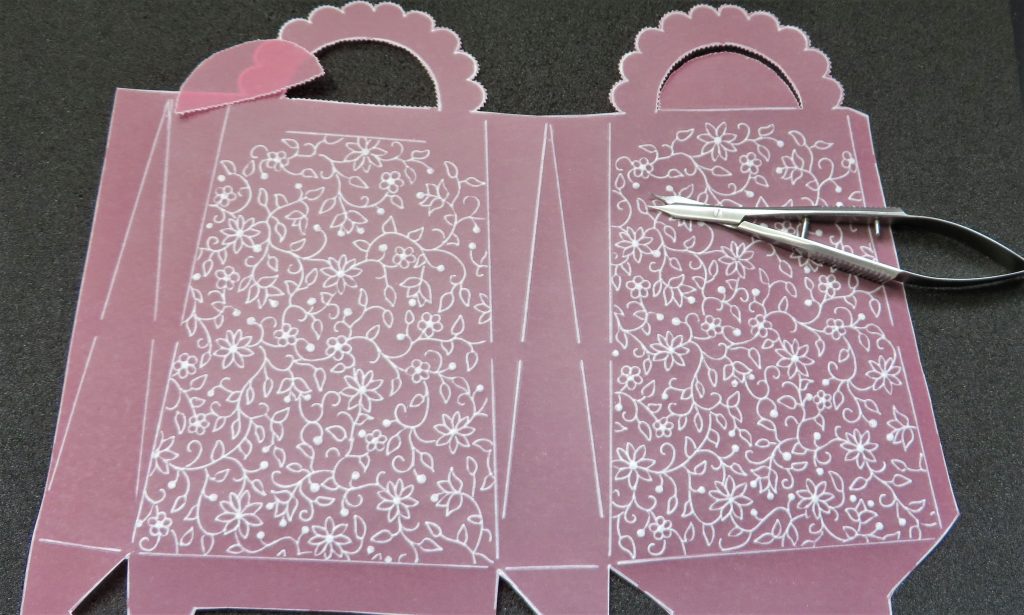
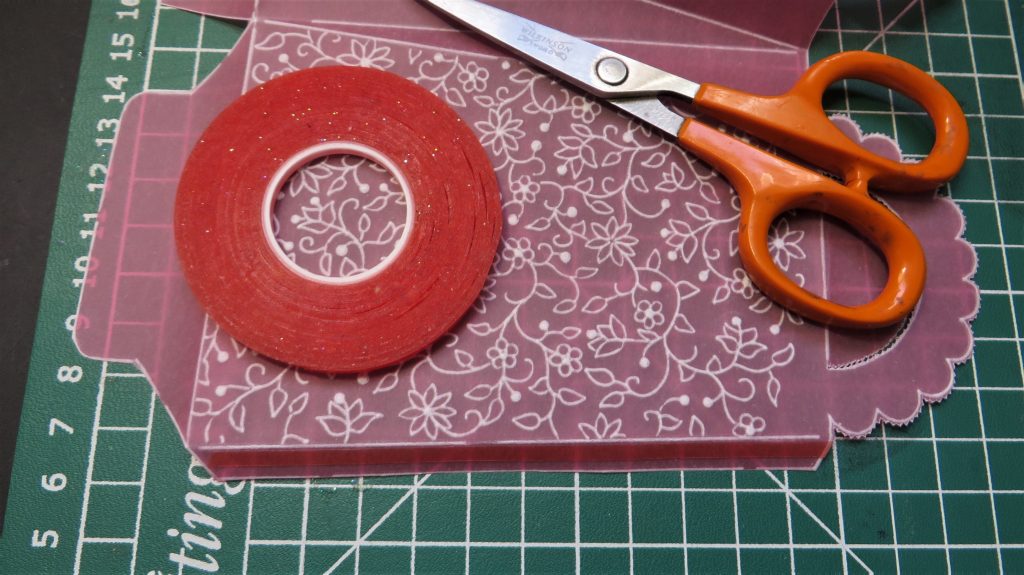
Step 7. Use a craft knife and the steel edge of the Pergamano Ruler to cut the closure line.
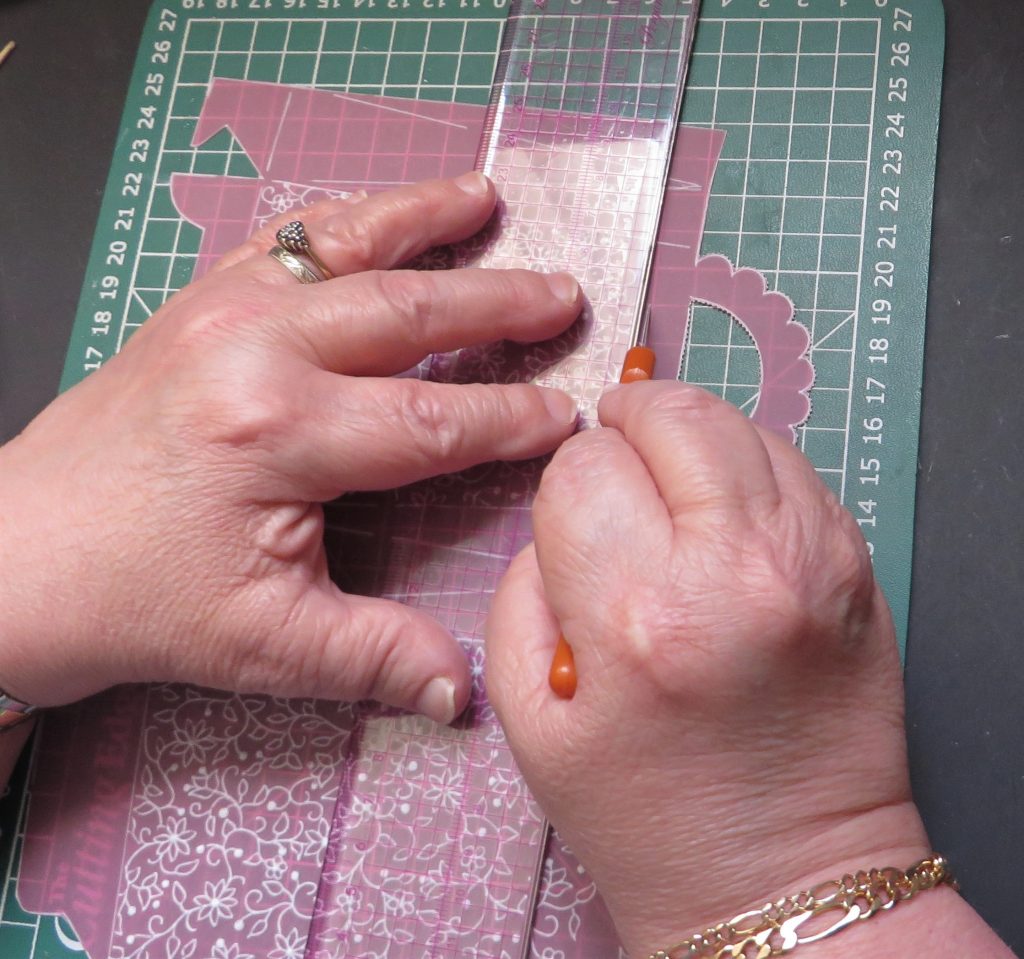
Step 8. Use the ruler to help you fold all the lines. Lay it along the line and push the parchment against it very gently. Note that the lines forming the ‘V’s down the bag sides, are ‘valley’ folds and will be folded inward.
Step 9. Add some red liner tape or extra strong double-sided tape to the flap down the side of the bag.
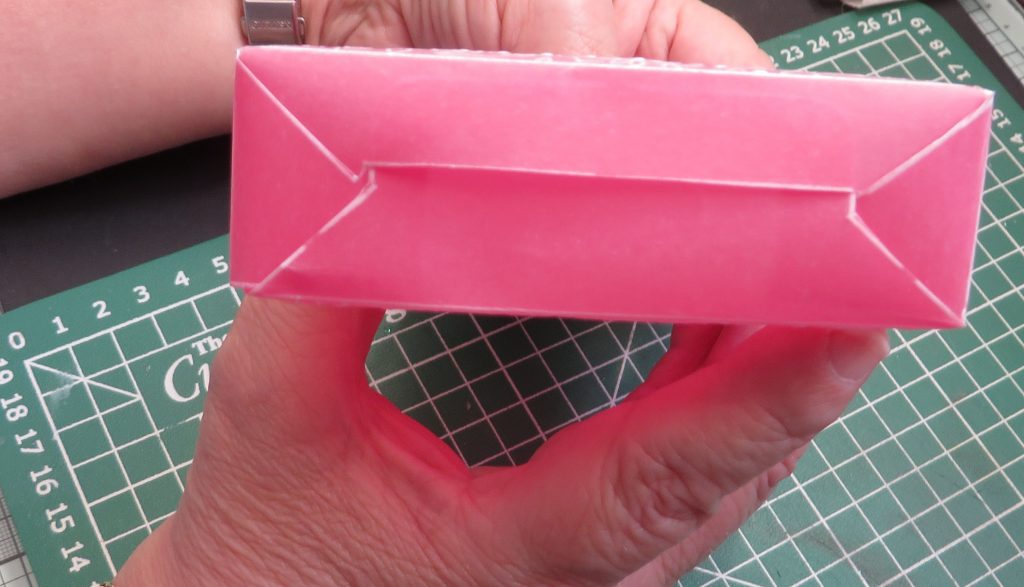
Step 10. Carefully stick down the side and then fold in the bottom flaps. Squeeze the top of the bag together and fold over the flap to close it.
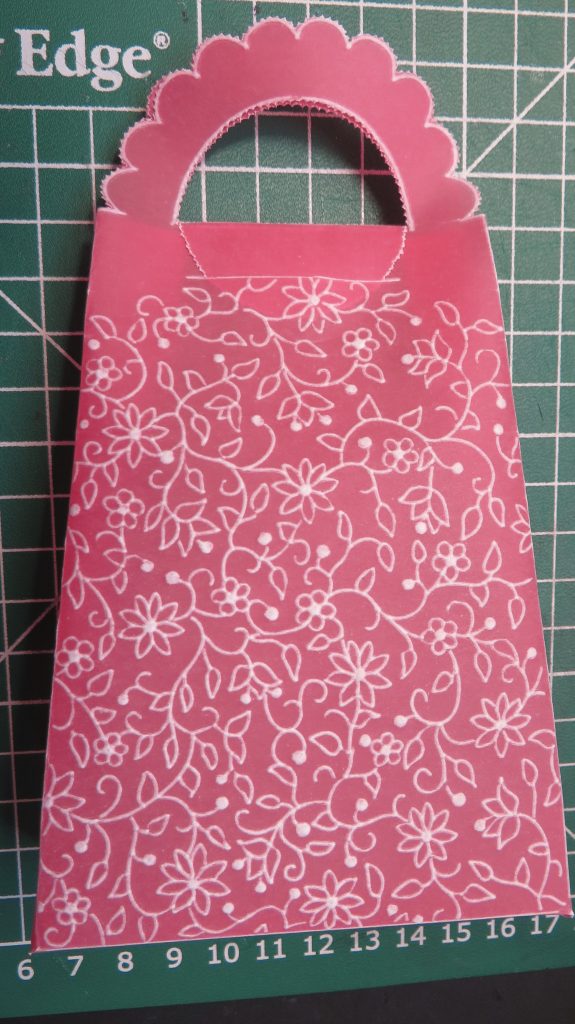
Step 11. There are lots of options for decoration – before you stick the piece together, you can always add gems or glitter. A bow and gift tag will finish it off nicely too. Here is my finished piece.
Absolutely gorgeous! Thank you, Glynis, for sharing your tips and tricks with us.
I immediately think of making little hanging Christmas ornaments with these little bags. Or a gift tag with a chocolate truffle in it! Or personalised wedding place settings. What do you think of?
The crafty, thoughtful possibilities are endless.
Everything that Glynis has used can be found on the Clarity website HERE
Sunday (today) 2nd October – Clarity Classics on Create & Craft with Barbara – 3pm-5pm
Monday 3rd October – SHAC Shack – 10am Live on Facebook and YouTube
Tuesday 4th October – Groovi Tuesday with Paul – 10am Live on Facebook and YouTube
Wednesday 5th October – One Day Special on Create & Craft with Paul – 6pm & 9pm
Thursday 6th October – SHAC Shack – 10am Live on Facebook and YouTube
Thursday 6th October – One Day Special on Create & Craft with Paul – 10am & 2pm
Travel gently, friends.
Lotsa love, Grace & Glynis xoxo
Clarity – The Home of Art, Craft, and Well-Being.
Lovely project, I don’t have this template, why not? As I’m a bag lady ! Will have to add it to my list ! Thanks Josie and Grace xx
Thank you Glynis,
I like the bag templates. This one looks great.
Comes in handy for little christmas gifts too.
Just a few minor changes.
Another lovely project from Glynis, thank you for taking the time to do this step-by-step project for us to follow.
Surprised to say that I have just found this template in my stash so no excuses this week!!
Always handy to have a gift bag ready for those little gifts to make it more special.
Grace, I hope you & Mark have had a lovely few days in Mexico & managed to avoid the rain. Although I would imagine that it was still warm.
Plan to set myself up with the mountain of ironing to do whilst I watch your mom on the TV this afternoon. Thats the plan but we will see how that pans out. Ironing is my least favourite job. I must also finish my project from the SHAC last week as I forgot to take my water brushes with me to the IOW.
Have this template so if I can find out where its safe place is I can have a go. Thanks for the tutorial
Hi Grace & Glynis – Thank you for yet another superb tutorial –
do not have this plate & didn’t even know about them – but will add to my list & also have a peak on the website too !!!
Love Seta Xx