Clarity’s Blog Tutorial: How To Make A Two-Tone Christmas Tree
Hello hello! Grace here.
I hope this finds you well, safe and enjoying your Sunday!
We are joined by the super talented Jane Telford, for a fantastic step-by-step project. If you like this project, then make sure you join Paul on Tuesday for another episode of Groovi Tuesday at 10am on Facebook & YouTube where he will be showcasing both the Tree & Stocking designed by Linda Williams. We have a super offer on both of the plates
Available HERE
Right, time to hand you over to Jane….

How to Make a Two-Tone Christmas Tree
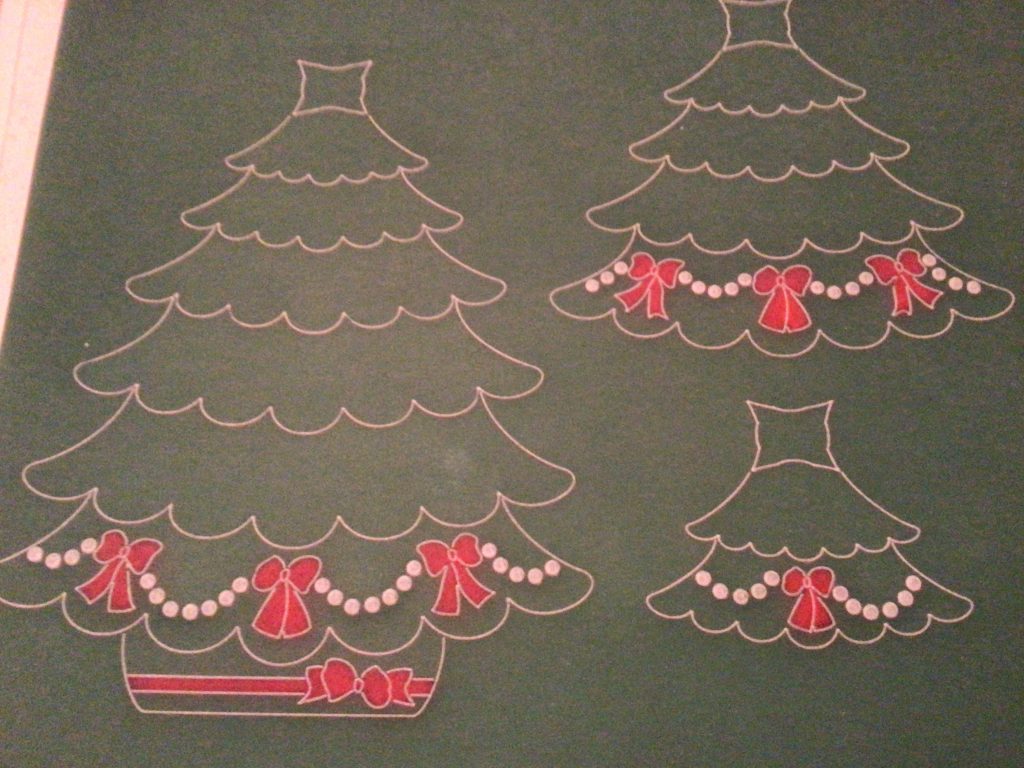
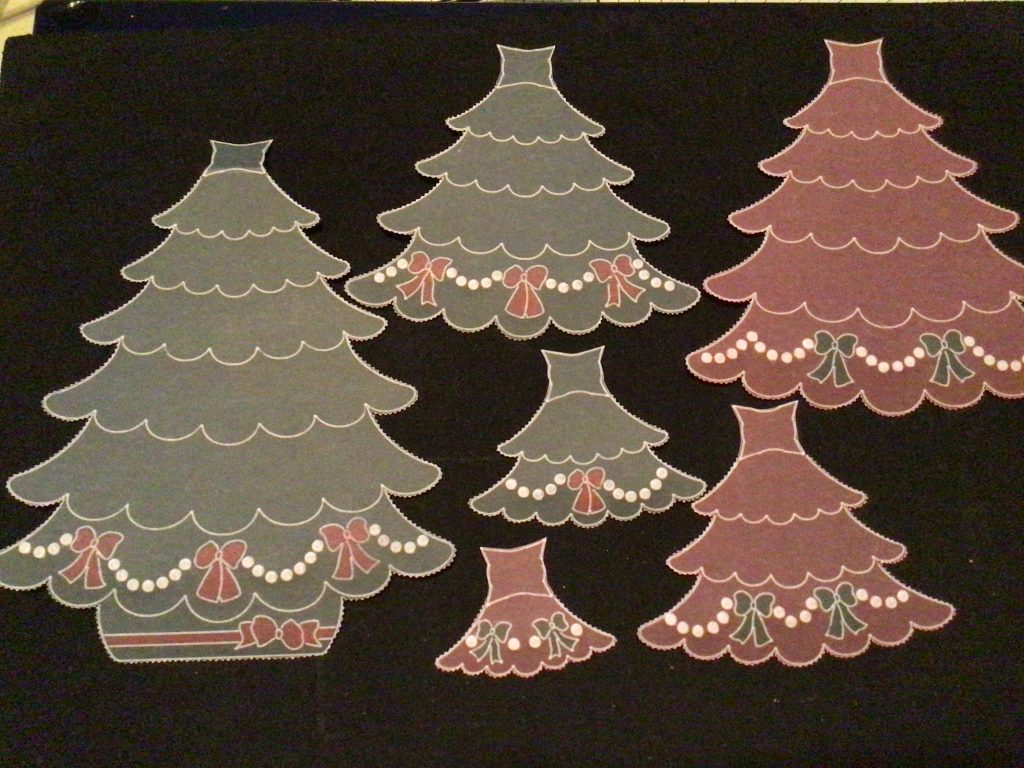
I used the bottled green and cranberry parchment for this tree but you could use any combination of the coloured parchment. Have a look on the website at all the beautiful colours HERE.
Please let us see what combination you make on Groovi Worldwide!
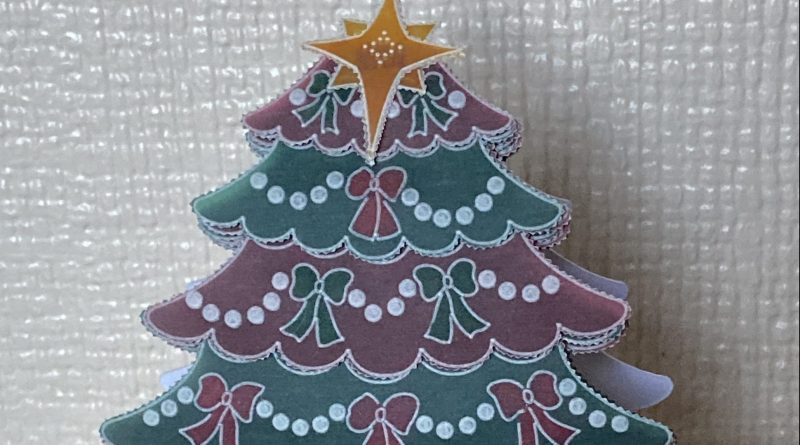
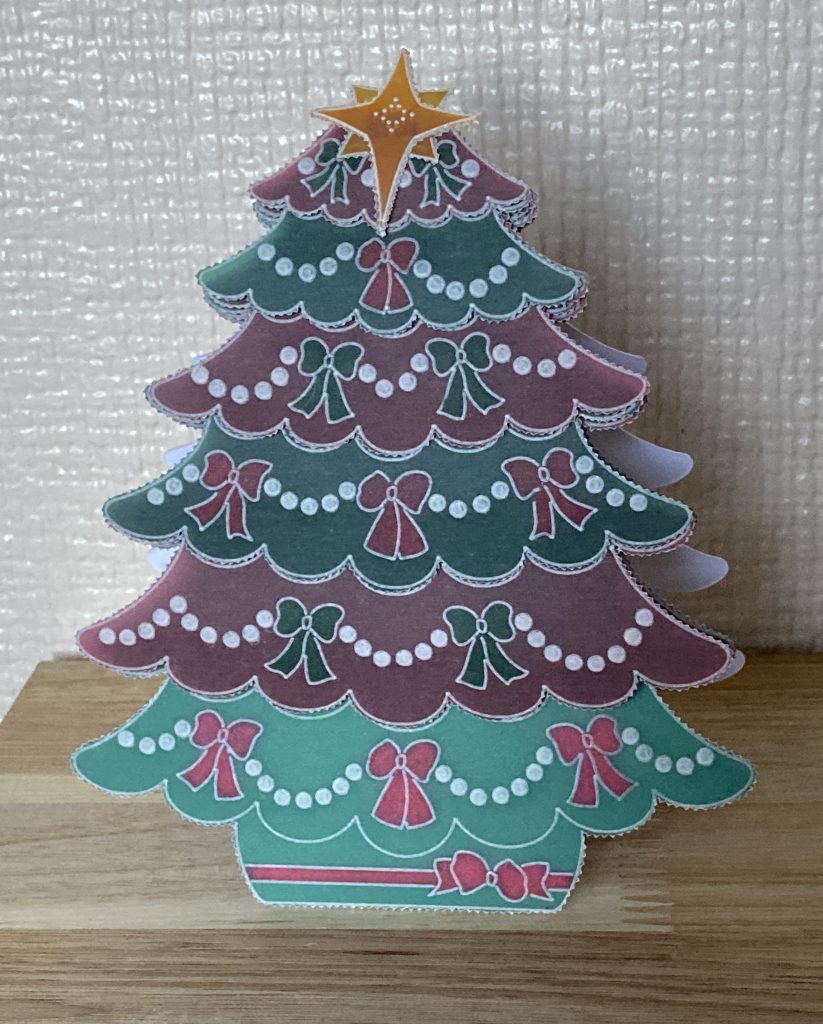
This is where we are headed…

Ingredients
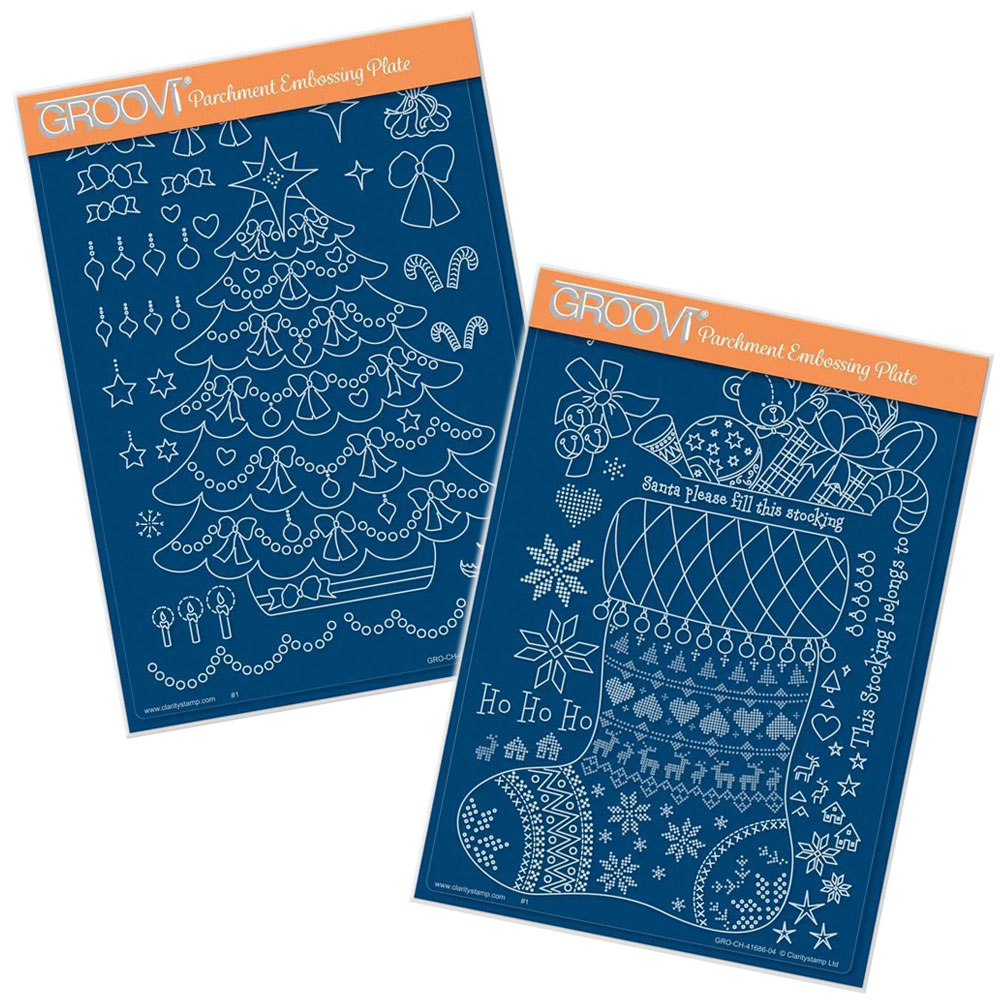
Linda Williams’ Layered Christmas Tree A5 Groovi Plate (GRO-CH-41671-04)
Or both the Tree and Stocking (GRO-CH-41889-04)
Tree – Card Blanks & Envelopes (ACC-CA-31074-XX)
Calligraphy Alphabet A5 Groovi Plate Mate (GRO-MA-40517-08)
Bottle Green & Cranberry Crush x10 Groovi Duo Parchment Paper A4 (GRO-AC-40767-A4)
Small Piece of Plain Parchment (GRO-AC-40020-XX)
Pergamano Excellent – Embossing Mat (PER-AC-70075-XX)
Black Dual-Purpose Groovi Mat A4 (GRO-AC-40194-A4)
12″ X 12″ Black Super Foam (GRO-AC-41757-XX)
Groovi Embossing Tool 0.8mm – 1.3mm (GRO-AC-40026-XX)
Groovi Embossing Tool 2.0mm – 2.8mm (GRO-AC-40027-XX)
Eraser Pencil – Single Ended – White (ACC-PE-30670-XX)
Perga Colours Exclusive (PER-CO-70060-XX)
2 Needle Tool (PER-TO-70037-XX)
Ringlock Scissors (PER-TO-70041-XX)
Red Line Clear Tape (ACC-AD-30375-XX)
Method
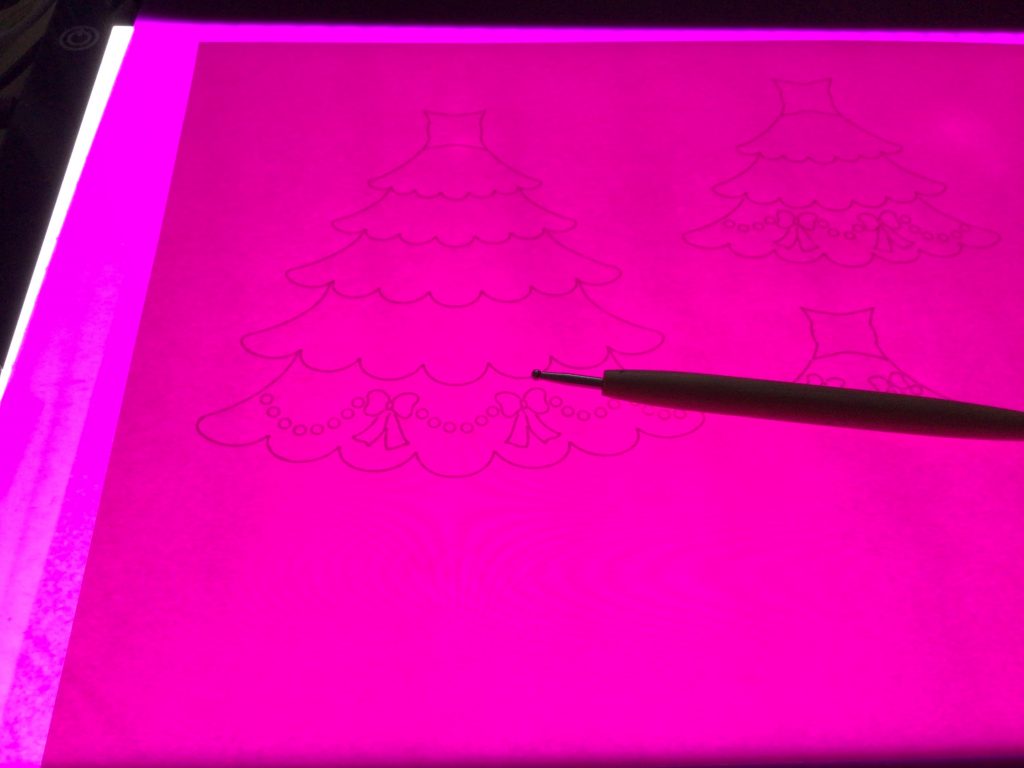
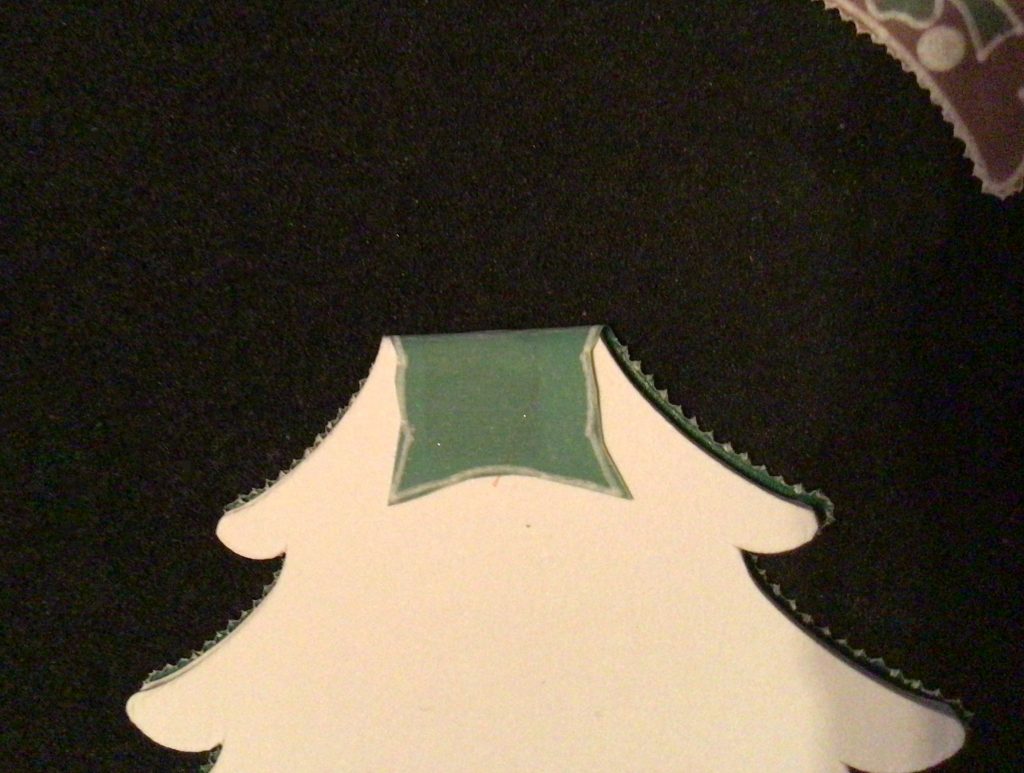
1. Put the tree plate into the A5 plate mate and attach a piece of green parchment to it. Emboss the outline of the complete tree but with nothing in the sections. Emboss the swags and bows in the bottom section only.

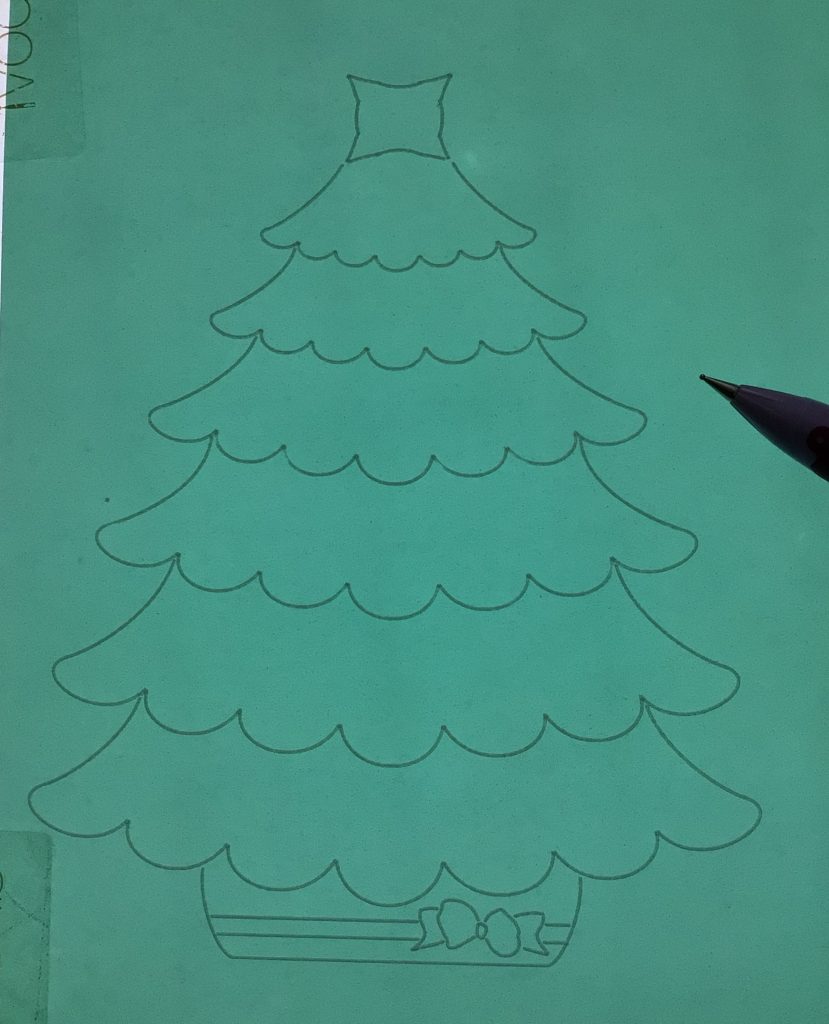
2. Now move the parchment and emboss the top 4 sections. Move it again and emboss the top two sections with the swags and bows in the bottom of each one.
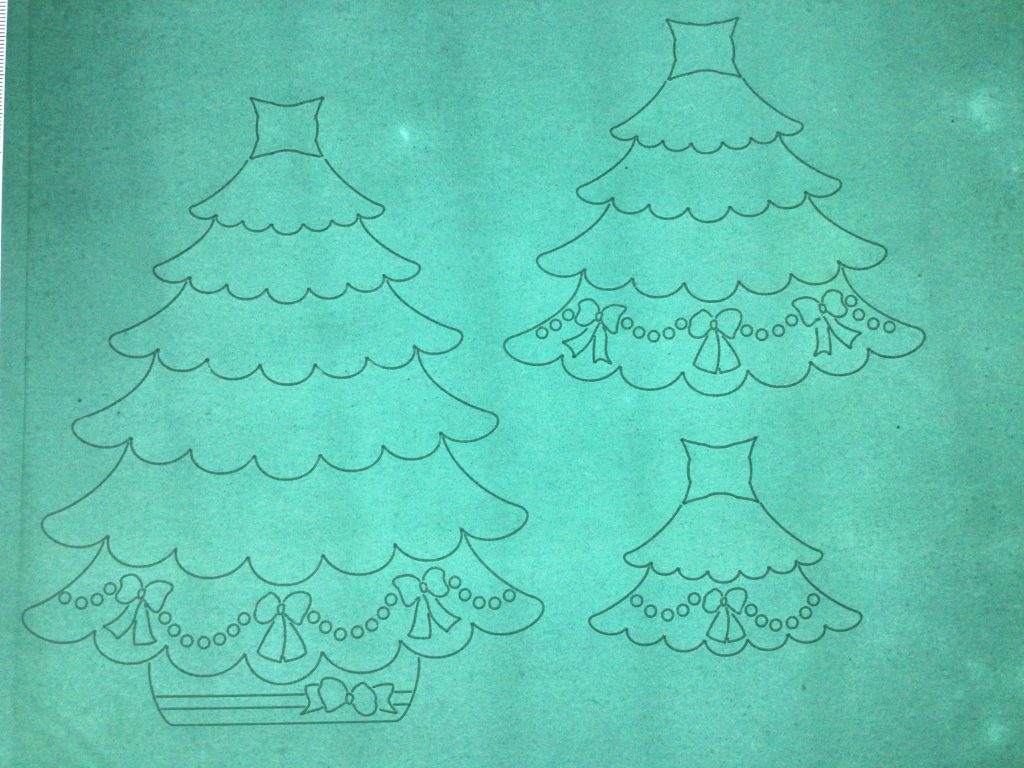
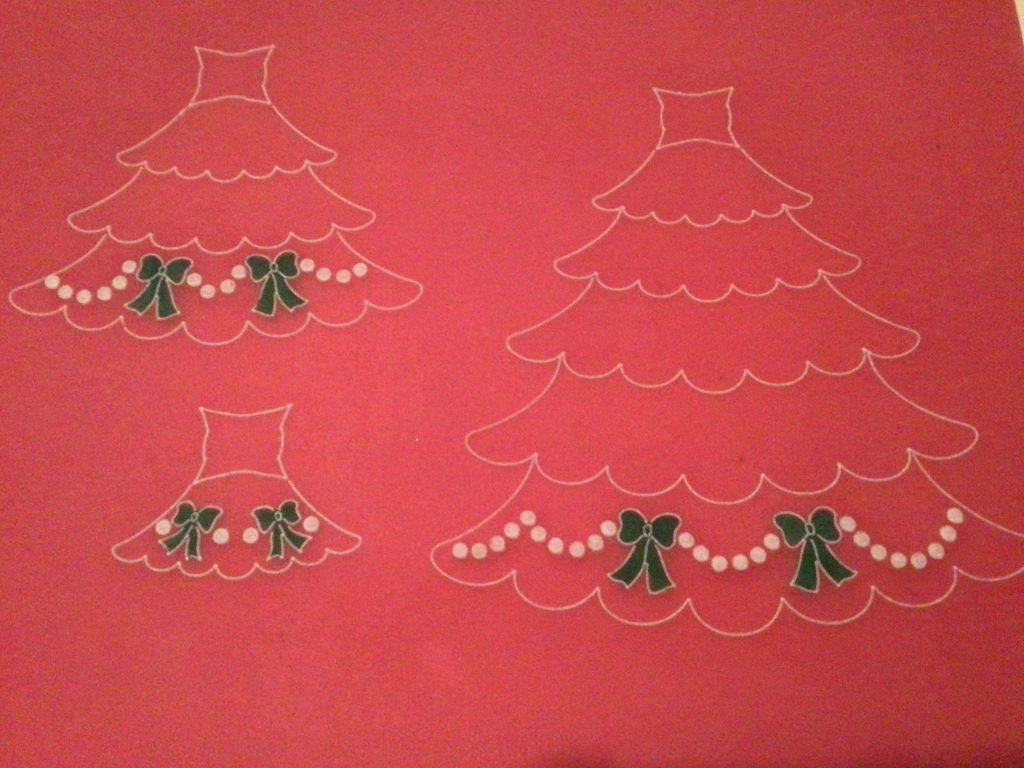
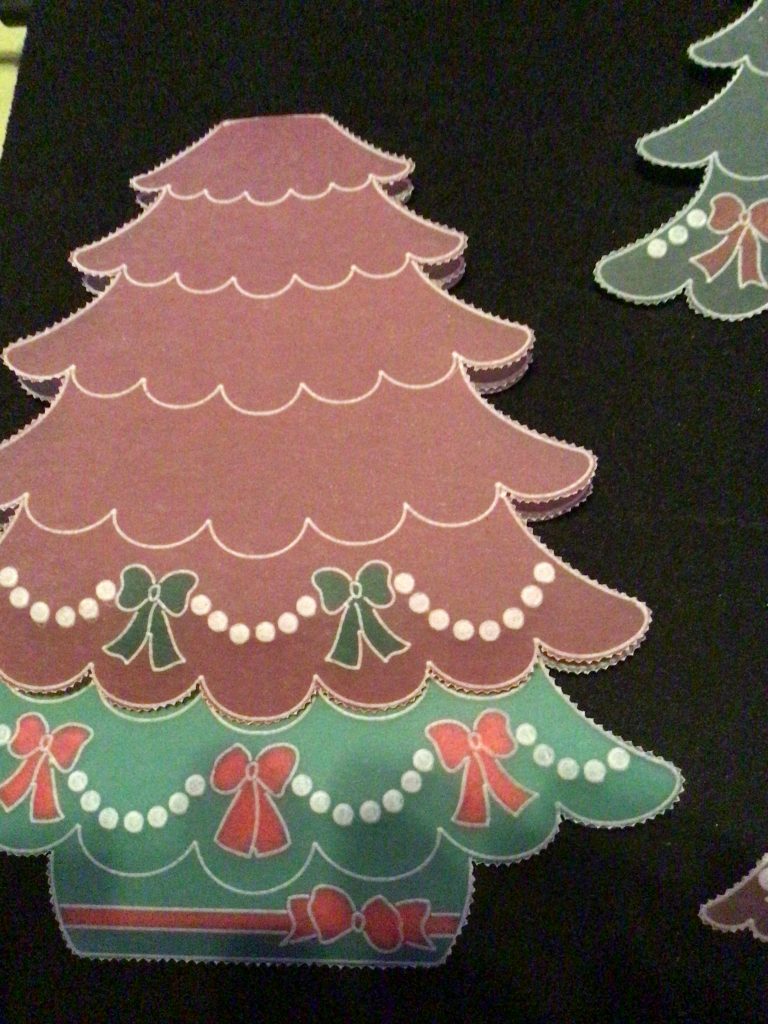
3. Remove the green parchment and attach the red. Emboss the alternate section of the tree as shown.
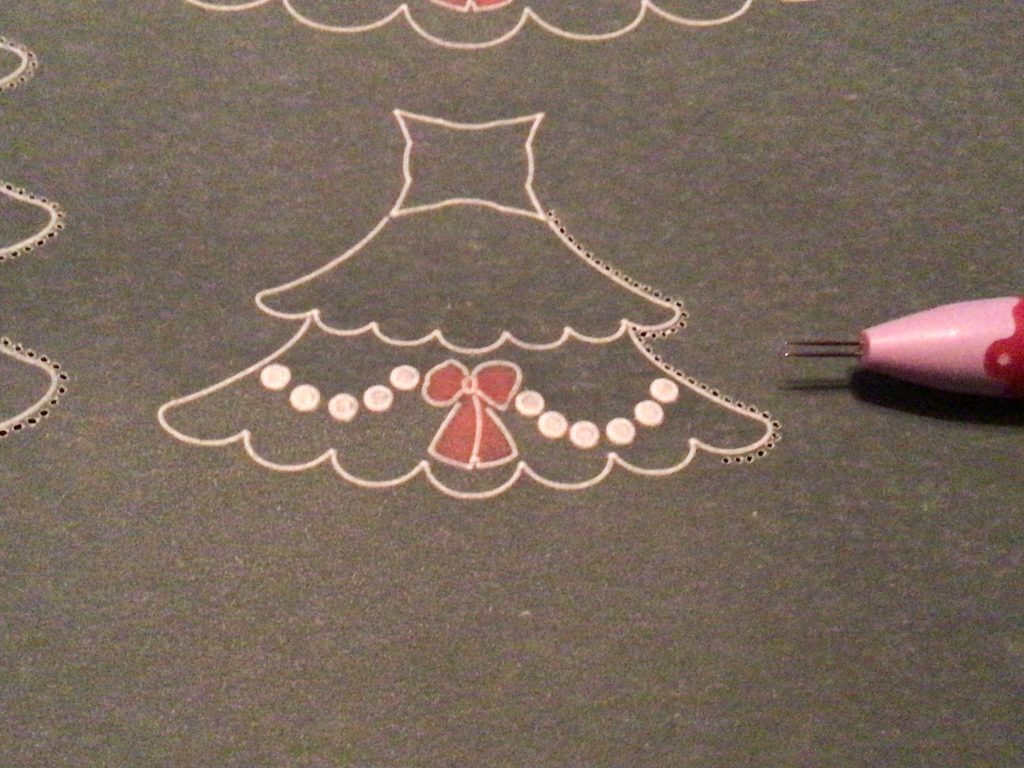
4. Using the pink mat and number 4 Groovi tool, emboss the swag dots on all the sections of the green and red parchment. Leave it to rest, then repeat with the number 3 tool. Repeat until you have the whiteness you want. I did 4 layers.
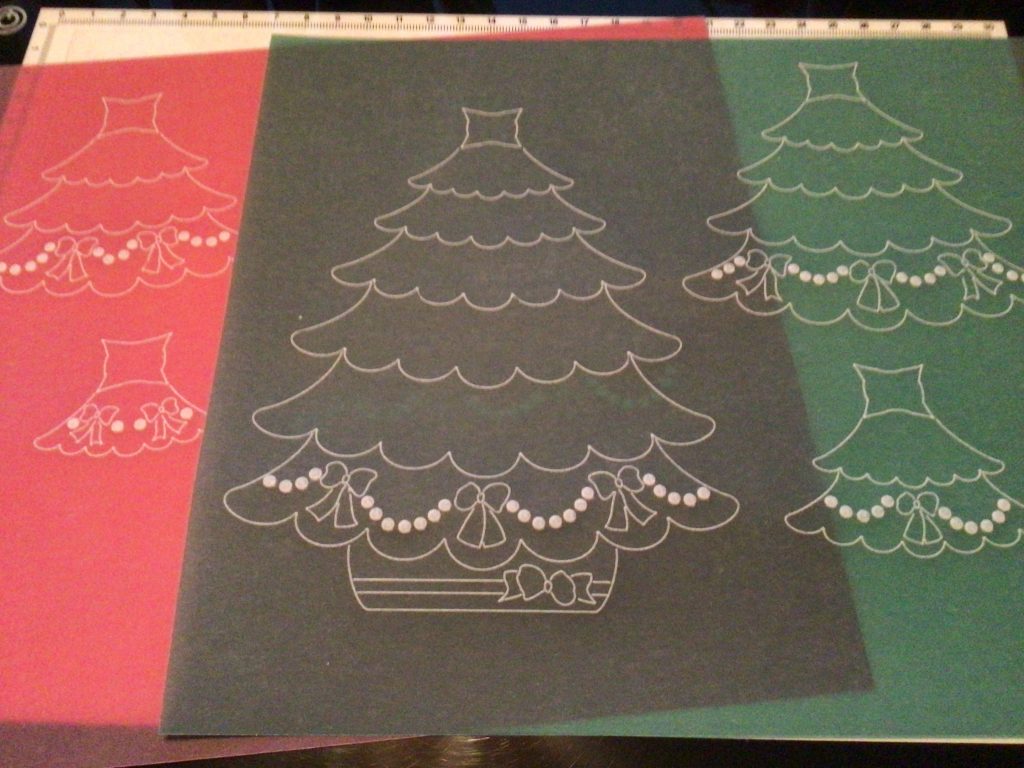
5. Using the white pencil eraser, rub out the colour on the back of the bows on the red and green parchment.
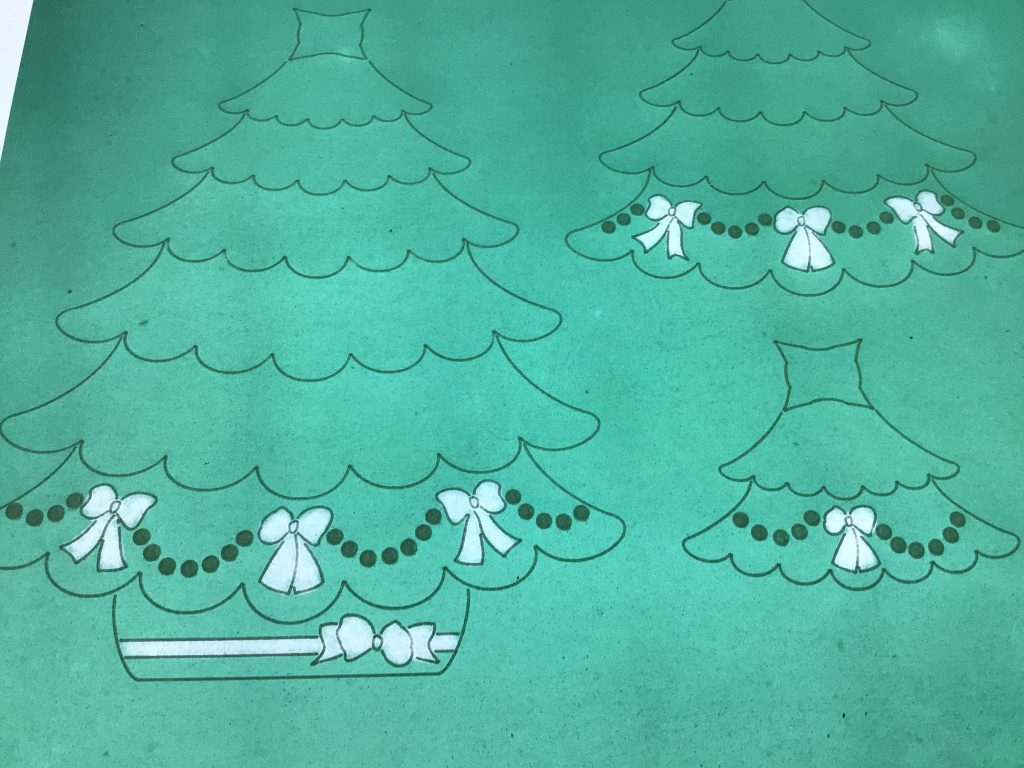
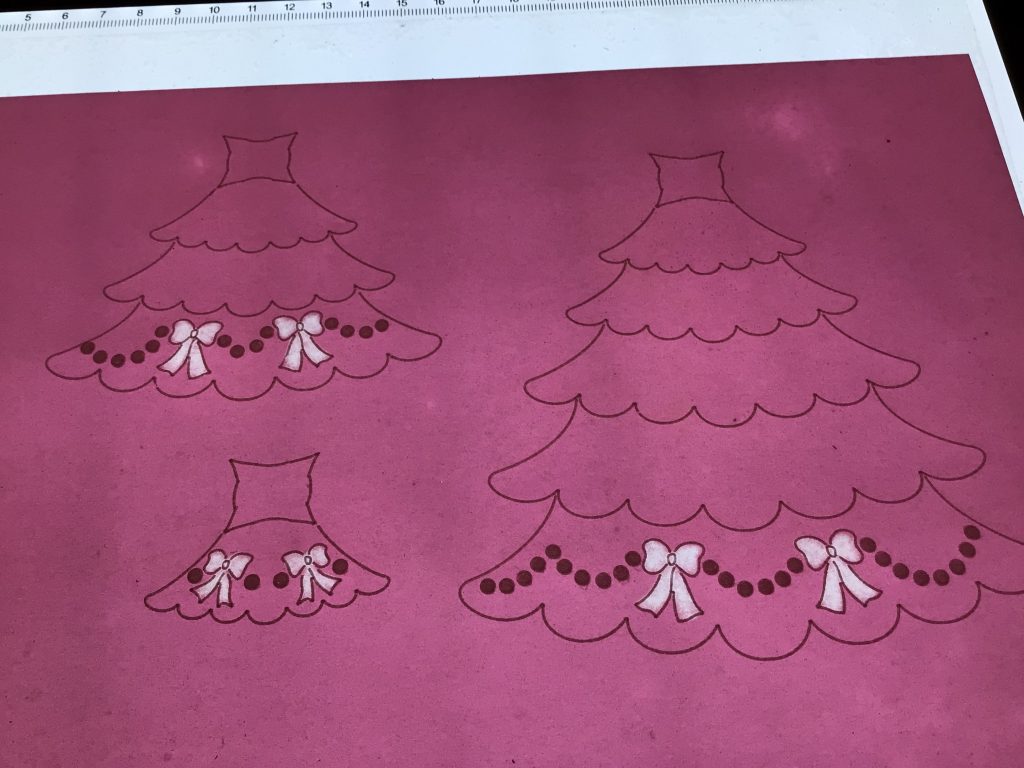
6. Use a red and green Perga colour pen to colour the bows; green pen on red parchment and vice versa.
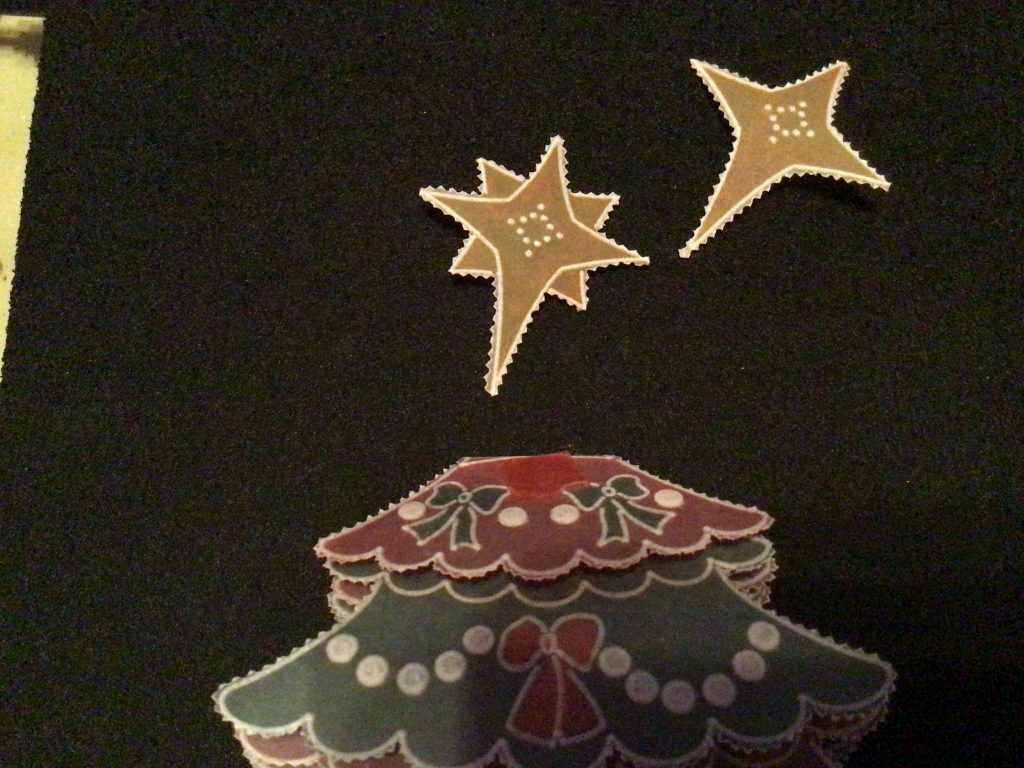
7. Use the two-needle tool to perforate around the tree, leaving the top part unperforated.
8. Snip the perforation around each piece of the tree. Use plain scissors to cut the top section out. You now have all sections of your tree ready to assemble on the card.
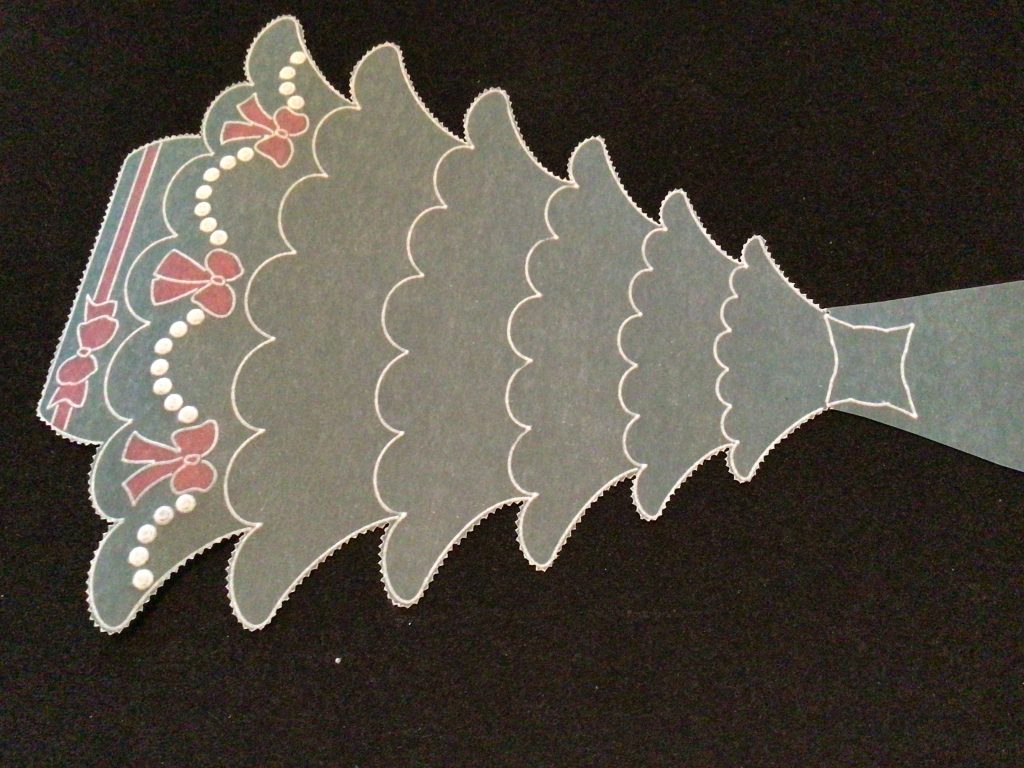
9. Take one of the shaped card blanks and wrap the top part of the tree around the back, sticking it with redline tape or some Perga glue.
10. Line up the next section, fold the top part over and stick it down on the back. Repeat with each section until they are all attached. I found that they benefitted from a good strong press down, to make a firm bond.
11. On a small piece of plain parchment, emboss the star as shown below.
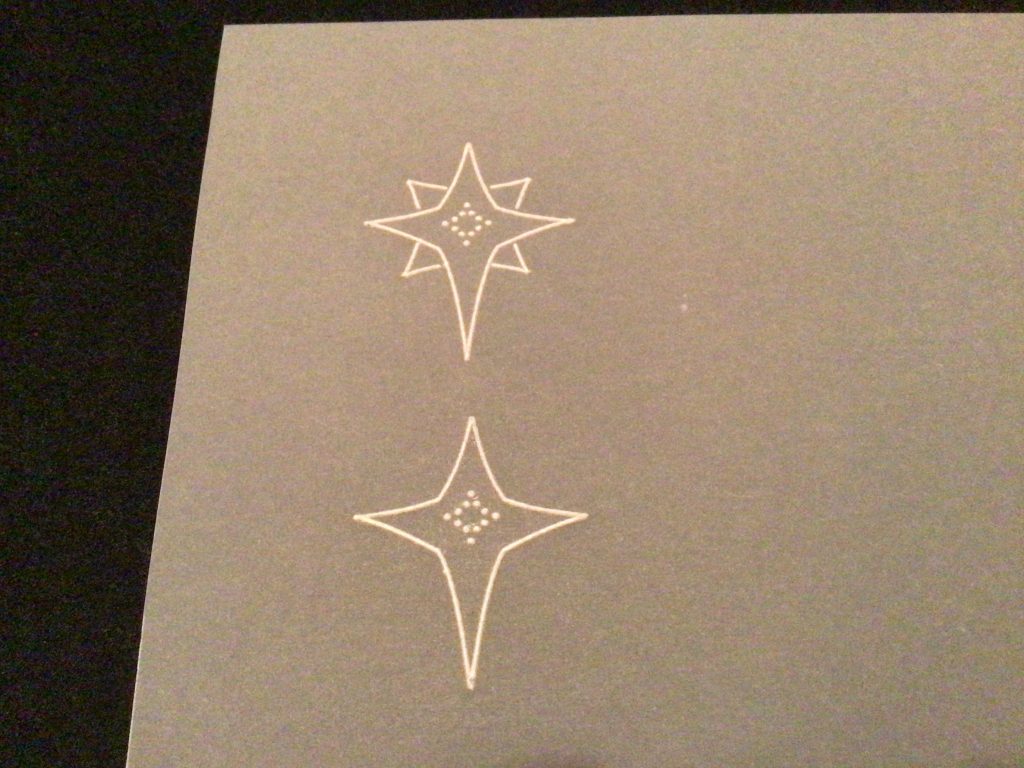
12. Colour (on the back) with a yellow Perga Colour pen.
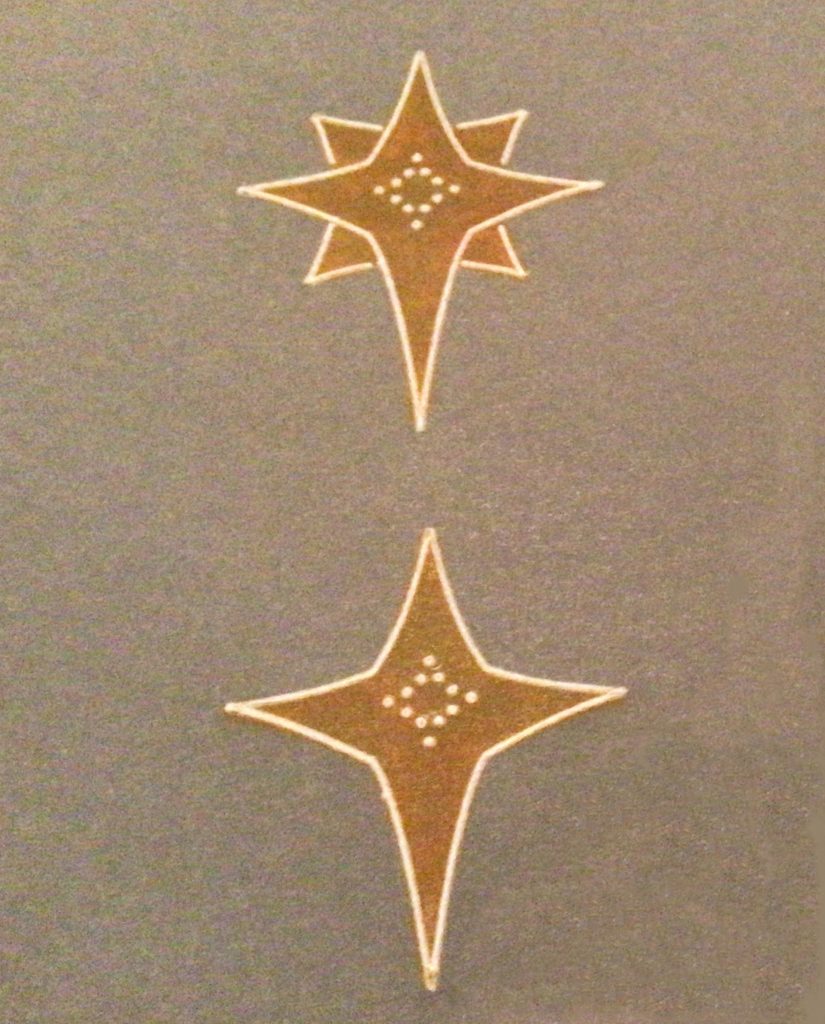
13. Now perforate around the star and snip it out. Stick to the top of the tree using red line tape or Perga glue.
Your tree is now complete. You could bling it up a bit, if you wish, with Perga Glitter or Perga gems (or both). You could also change the swags for different patterns or grid work! The possibilities are endless. Let us see yours!
That is wonderful! Thank you, Jane. I see so many possibilities when I look at that project. Different shades of green, gold bows, glittery bows?! We would love to see your dream tree! There may even be a little prize in it for you!
If you are looking for some more inspiration using this plate, then check out last weeks Clarity Matters Blog from Glynis
Everything Jane has used can be found HERE on the Clarity website
Email me your version of this fabulous project (that’s one Christmas card down too!) and I’ll feature it in a future blog, and give away a few little gift cards.
Another busy week at Clarity Towers coming up:
Monday 26th September – SHAC Shack – 10am Live on Facebook and YouTube
Tuesday 27th September – Groovi Tuesday with Paul – 10am Live on Facebook and YouTube
Thursday 29th September – New & Exclusive on Create and Craft with Barbara at 4pm & 8pm
Friday 30th September – New & Exclusive on Create and Craft with Paul at 8am
Friday 30th September – Crafting with Clarity on Create and Craft with Barbara ay 9am & 1pm
Sunday 2nd October – Clarity Classics on Create and Craft with Barbara 3pm-5pm
Travel gently, friends.
Lotsa love, Grace & Jane xoxo
Clarity – The Home of Art, Craft, and Well-Being.
Thanks Grace and Jane. This tree ( and the stocking ) have so many possibilities to explore.
Stay well 🍒
Hi Grace & Jane – What wonderful tutorial – Thank you so much
Love Seta Xx