Clarity’s Blog Tutorial: How To Create An Easy Floral Layout
Hello hello! Grace here.
I hope this finds you safe and well this Sunday morning!
We are joined this weekend by the fabulous Glynis Whitehead. She’s an absolute creative machine, our Glynis, and makes these step-by-step projects faster than I can put them together! We love her. And we have another brilliant project to share with you.
I’ll waste no more time and hand you over to the pro!

Floral Easy Layout
Ingredients
Linda Williams’ Special Delivery Easy Layout A5 Sq Plate (GRO-LW-41979-03)
Jayne’s Agapanthus Name A5 Sq Plate (GRO-FL-40392-03)
Linda’s Bumbles Bees A5 Sq Plate (GRO-AN-40816-03)
6mm Embossing Tool (PER-TO-70016-XX)
4.5mm Embossing Tool (PER-TO-70015-XX)
3mm Embossing Tool (PER-TO-70005-XX)
1.5mm Embossing Tool (PER-TO-70004-XX)
1mm Embossing Tool (PER-TO-70011-XX)
1-Needle Fine Perforating Tool (PER-TO-70035-XX)
2-Needle Fine Perforating Tool (PER-TO-70037-XX)
Five-Needle Perforating Tool (PER-TO-70019-XX)
5 in a Circle Perforating Tool (PER-TO-70025-XX)
Semi-Circle Perforating Tool (PER-TO-70017-XX)
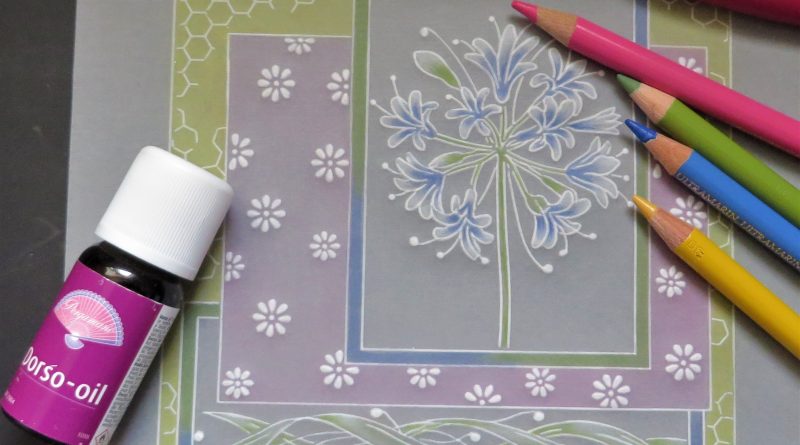
Polychromos Pencils (ACC-PE-30797-XX) or Pergaliners (PER-CO-70063-XX)
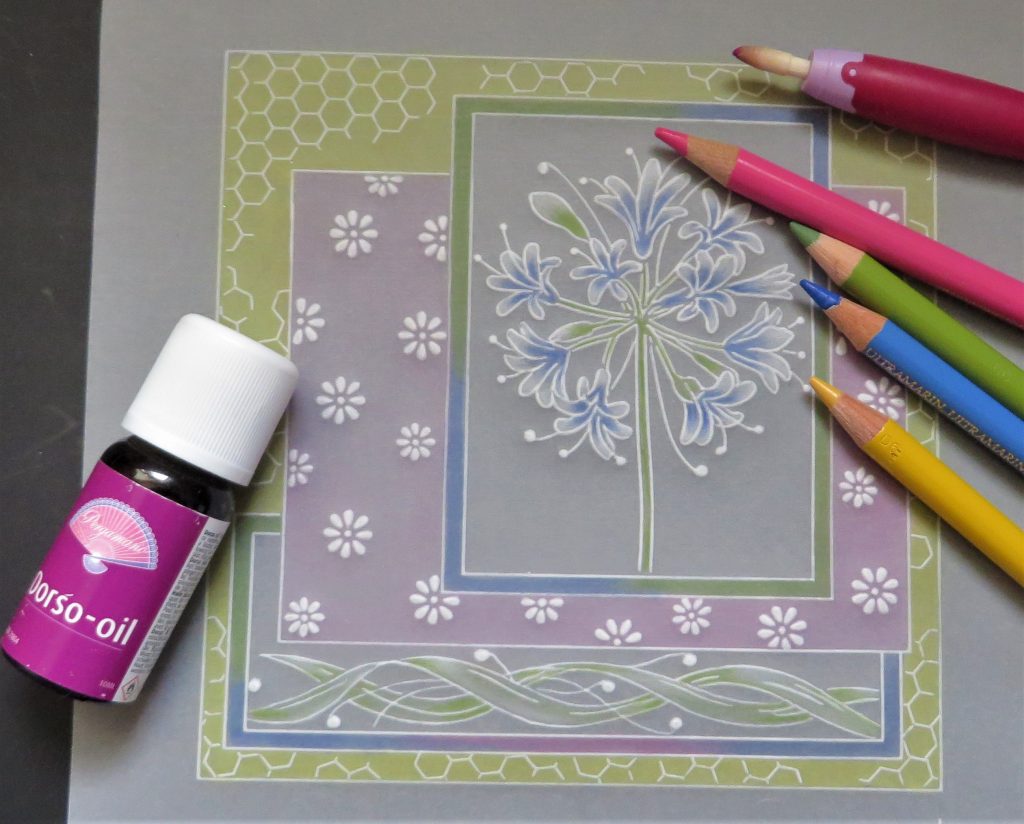
Dorso Oil (PER-CO-70066-XX)
Blending Nibs (PER-AC-70299-XX)
Rainbow River Designer Paper (ACC-CA-30539-88)
Pergamano Brads – Pastel Mix (PER-AC-70270-XX)
Method
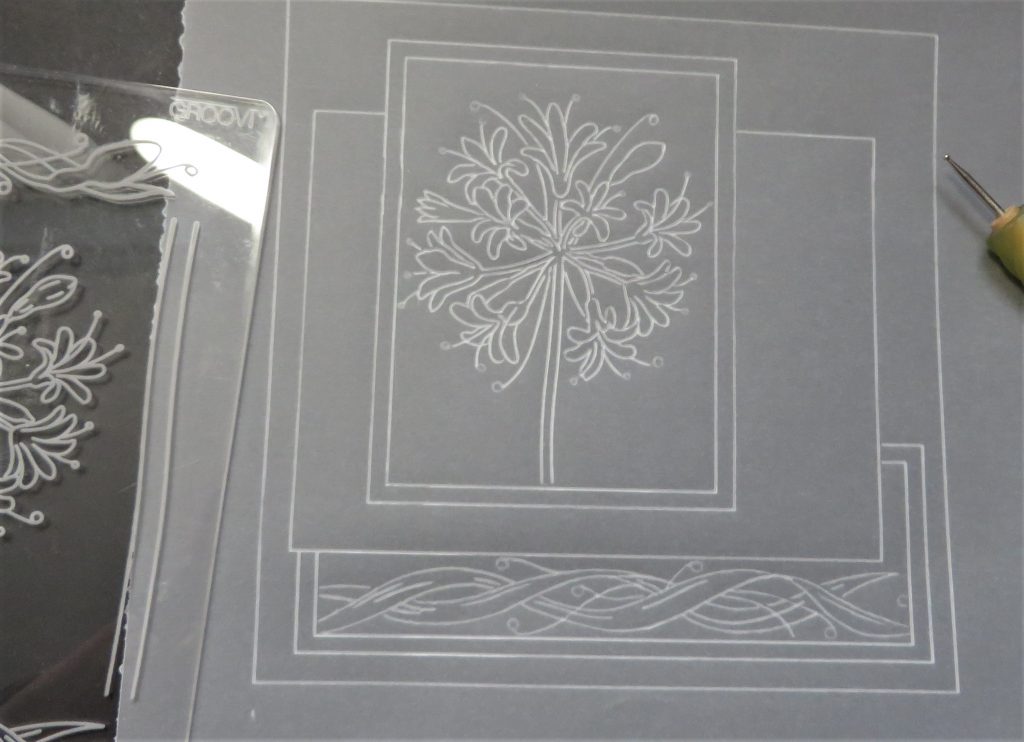
Step 1. Attach a piece of plain parchment to the layout plate and emboss only the straight lines of the layers on the plate.
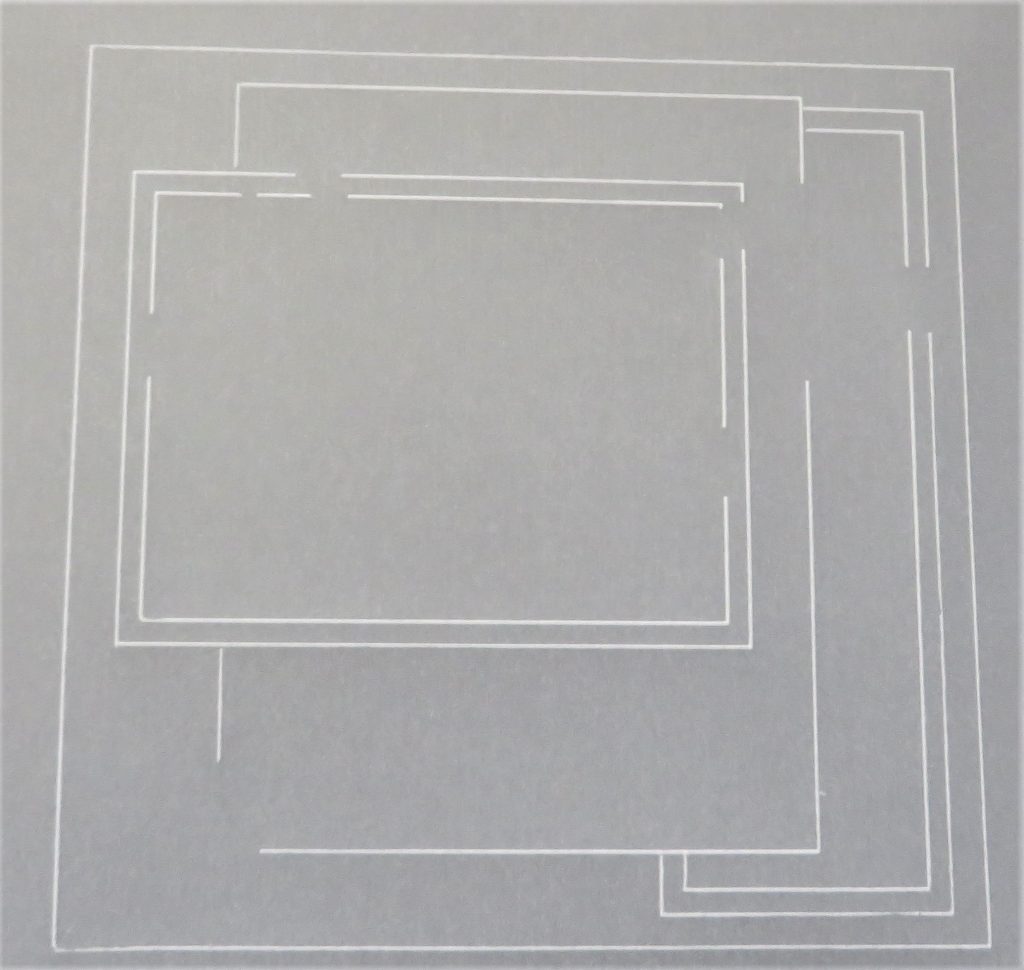
Step 2. Carefully line up all the lines – one at a time onto the plate. When you are lined up the embossed lines on your parchment should ‘plug’ back into the lines on the plate. Hold the parchment down with Groovi Tabs and use your Groovi Guard to help you to fill in all the gaps that are left in the lines.
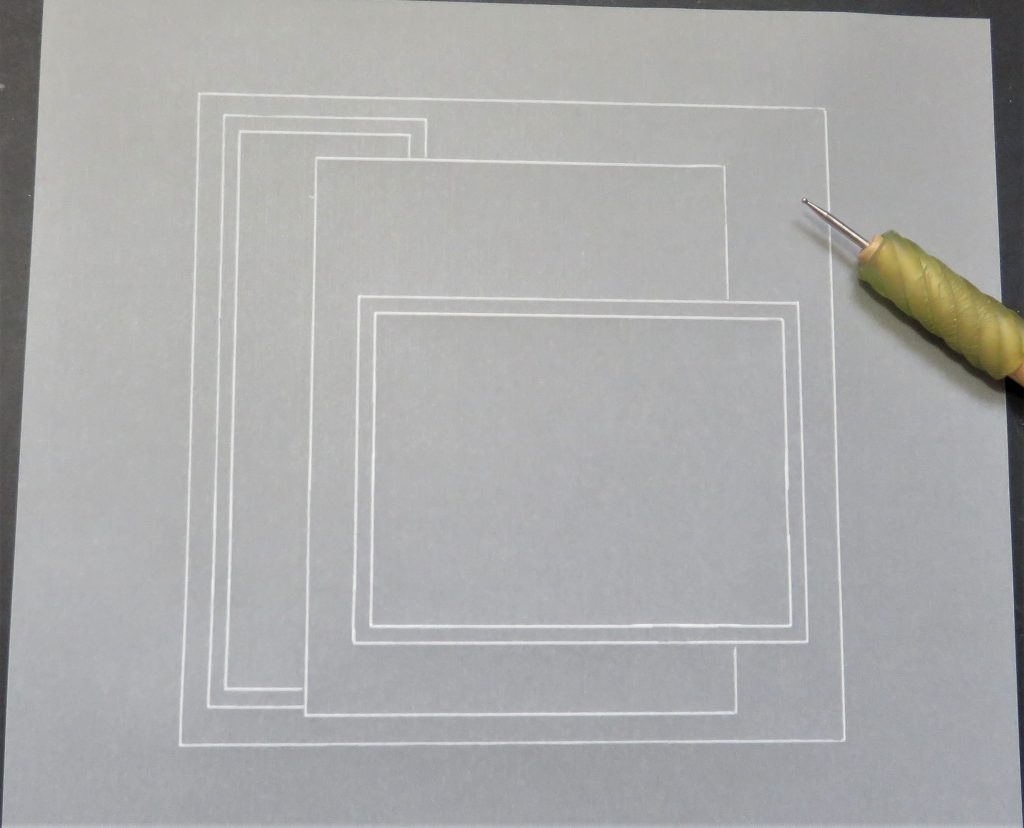
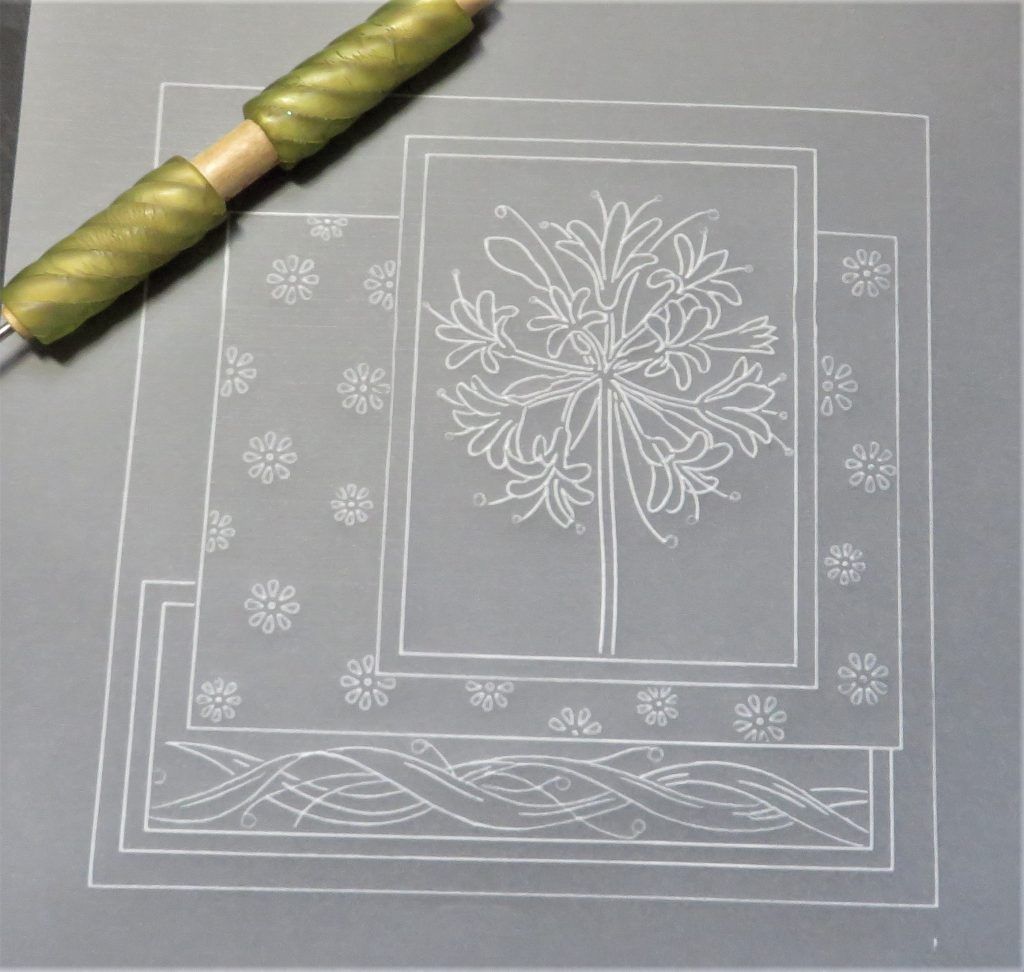
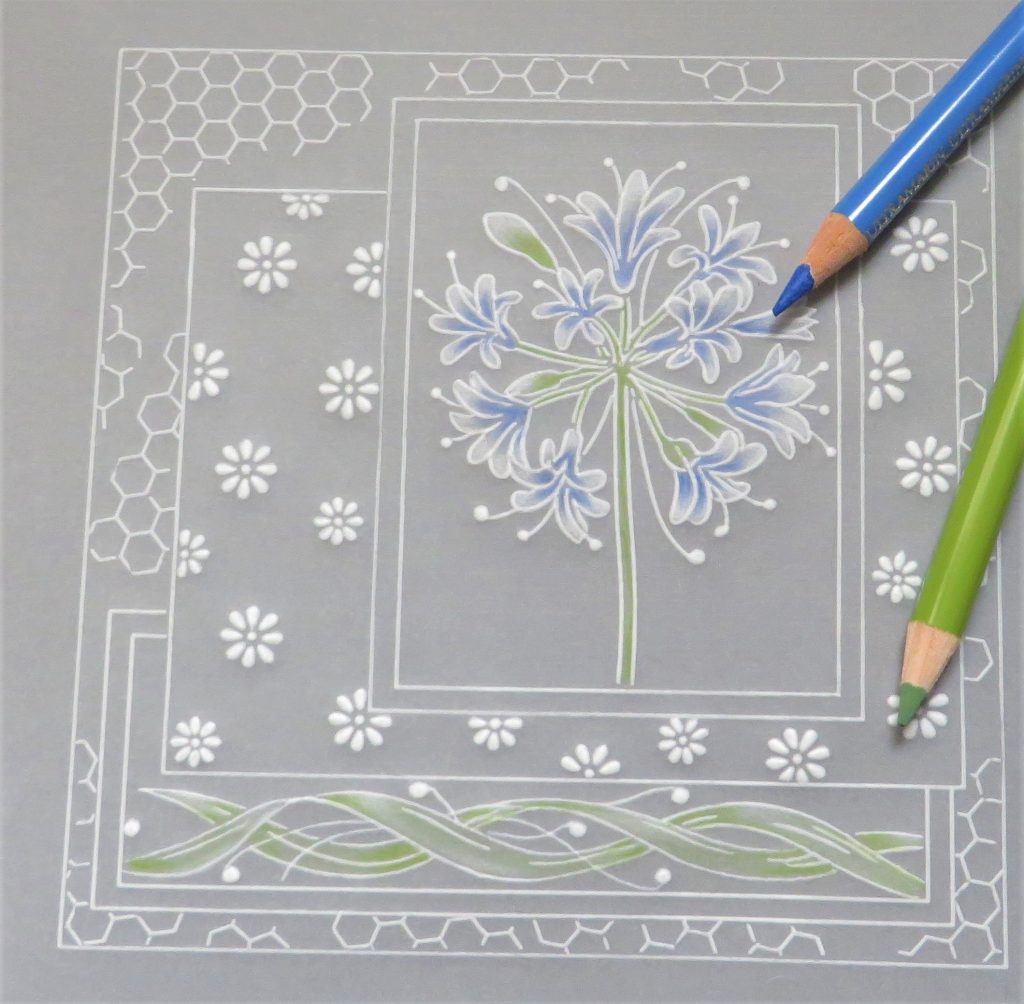
Step 3. Turn the parchment paper around so that the large rectangle is upright. Line up the parchment onto the Agapanthus plates so that it fits nicely in the centre and emboss the whole flower. Remember to do all of the dots on the ends of the fronds with the Groovi number 2 tool (from the Starter Kit).
Step 4. Now use the swag along the bottom of the agapanthus plate to fill in the long rectangle along the bottom of your design. It does not quite fit the space, but if you centralise it so that you get some of the dots within the lines, it will look great. Don’t forget to use the Groovi number 2 tool to emboss the dots.
Step 5. I decided to use the small flowers from Linda’s plate to fill in the layer behind the agapanthus picture. Leave out all of the other icons in this layer and keep moving your parchment around the plate, just placing the little flowers randomly. Put some flowers going off the page to make it look layered. Use the number 2 tool for this as they look lovely embossed white.
Step 6. Use the honeycomb from Linda’s bumblebee plate to add some texture to the main square (bottom Layer). Just random patches here and there.
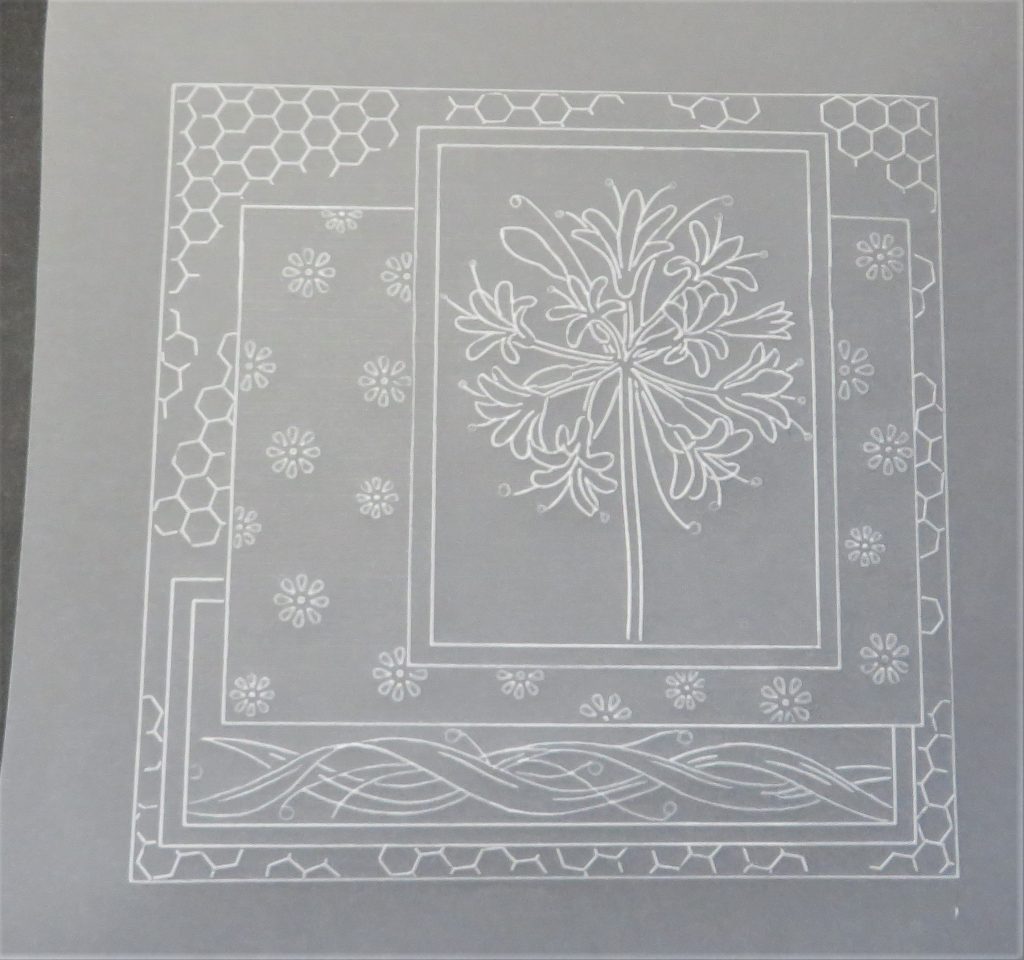
Step 7. Working on the back of the parchment, emboss all of the dots, and small flowers. Using the largest ball tools that will fit in the spaces, emboss the ends of the petals of the agapanthus.
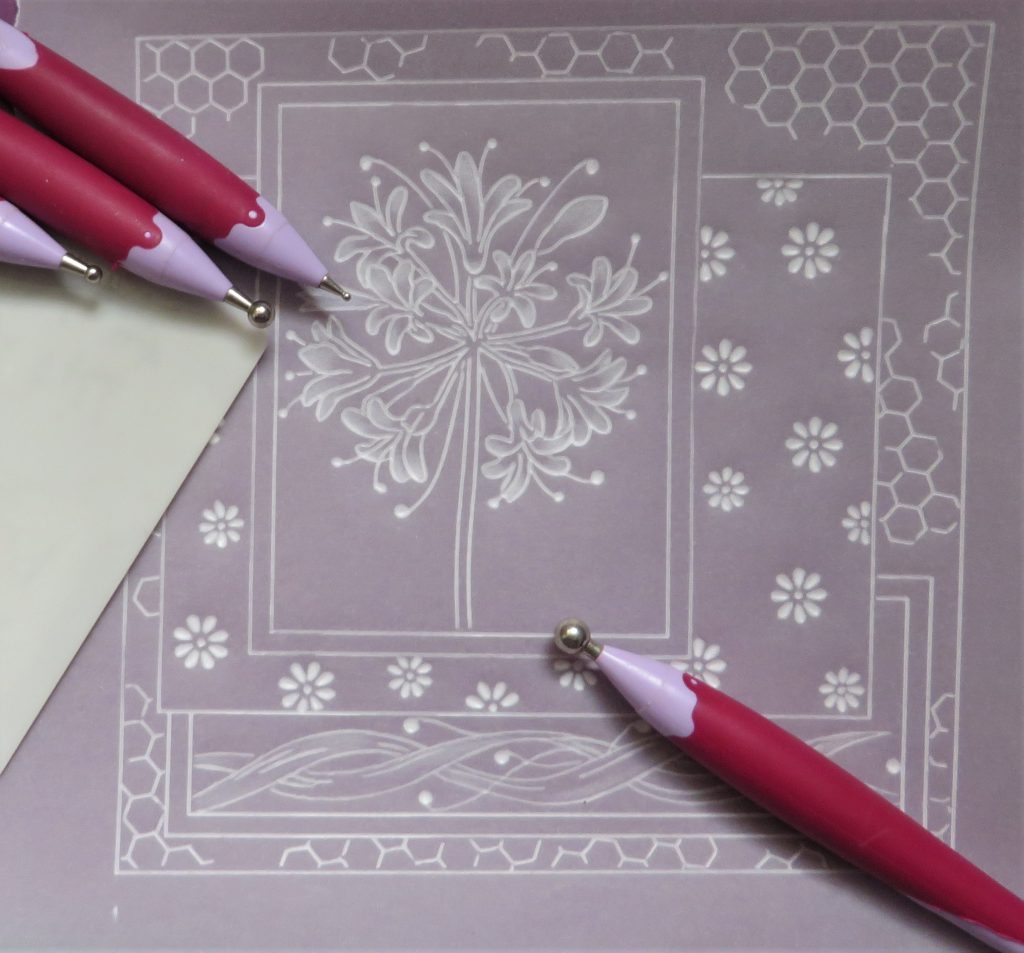
Step 8. Colour the agapanthus on the back, doing the petals one at a time with blue and the stem with green. Also colour the leafy swag at the bottom of the card with the green. Blend the colour out with Dorso oil and a nib. Just add a tiny bit of colour on the front if you wish to have some shading in there, but avoid the white lines.
TOP TIP: You really need very sharp pencils for this.
Step 9. Choose which colours you want for the layers and with the pencils angled on their sides, add the colours and blend them out with Dorso oil and the blending nibs. Pick colours that will blend together so that you can use them in the margins.
TOP TIP: Don’t put pink next to green as it will go muddy.
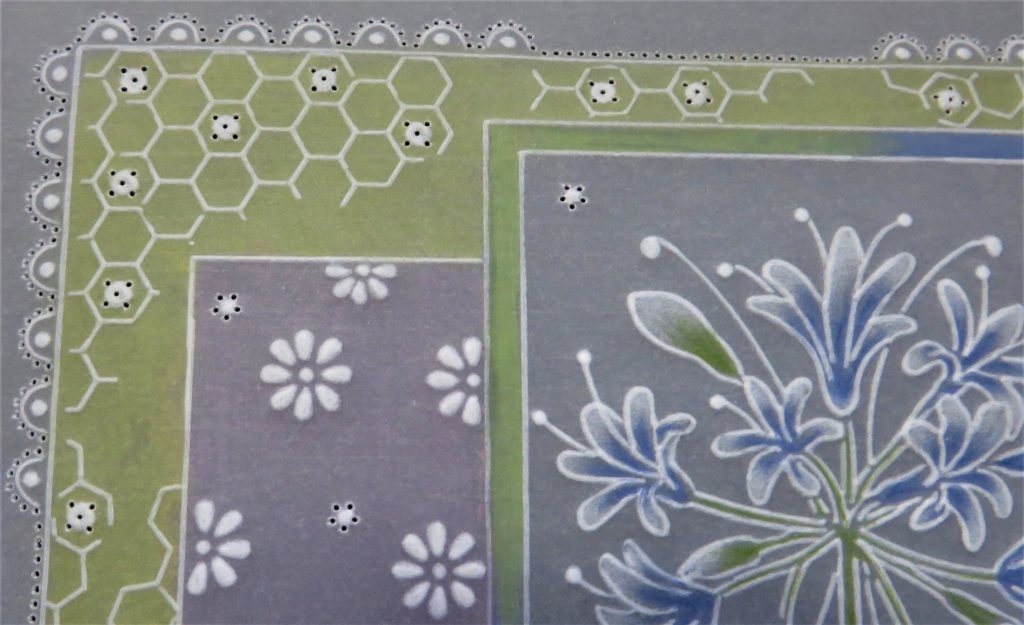
Step 10. Place the work onto a shallow perforating mat and perforate from the front. Use the five-needle tool in just a few of the honeycomb shapes, adding some 5 in a circle perforations at random on the flower layers.
Use the semi-circle perforations on each corner (I did 7 in each direction). Emboss into each perforation, using the 1mm ball tool to emboss a line along the semi-circles and the 1.5mm to emboss a dot into the centre of each. Then put the work onto a deep mat and re-perforate with the single needle tool. Go between the semi-circles, along the outside line with the fine two needle tool.
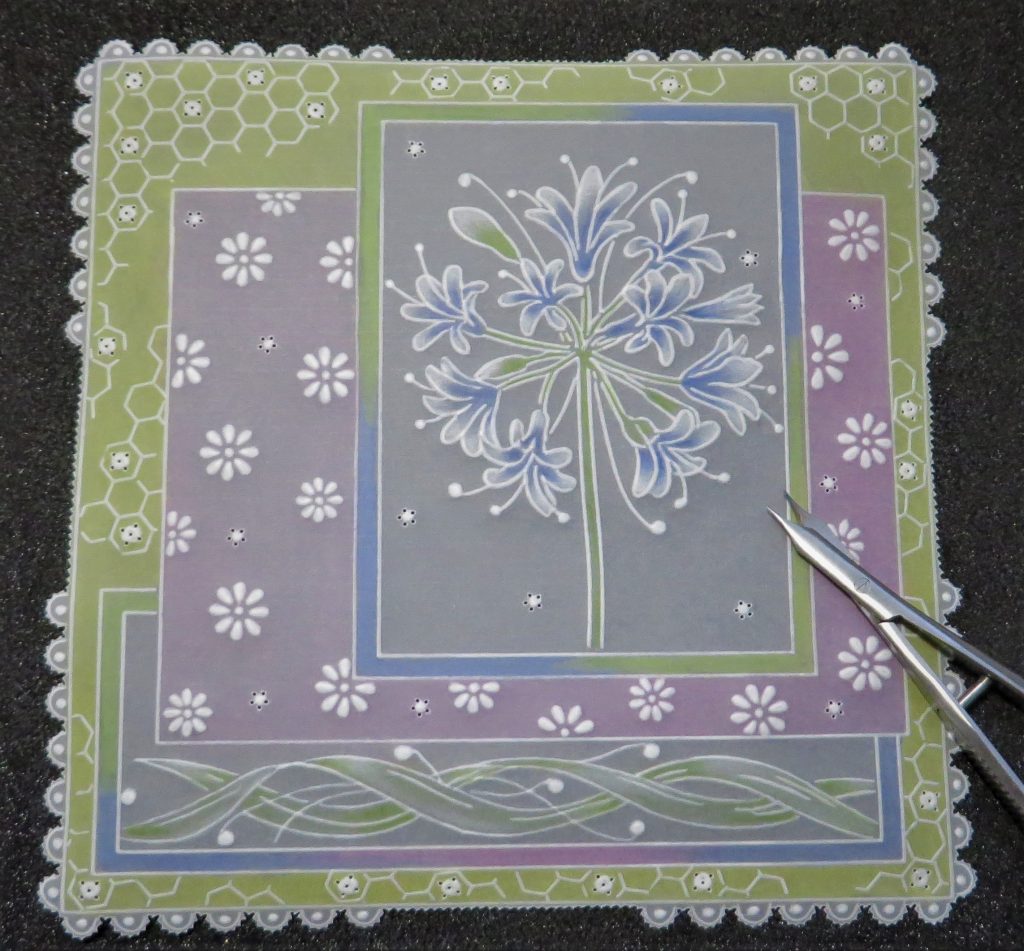
Step 11. Snip out the work, remembering to turn the work as you go.
Step 12. Choose a background to tone in with the colours of your piece. Mine came from the Rainbow River Designer paper pad. Fix it in place with some brads and attach it to the front of a 7×7-inch card blank. And you’re all set!

I just love it 🙂 What a pretty card, Glynis! Thank you for sharing your skills with us. As usual, if you would like to give this a go yourself, please send your artwork to me! We love to see it. Grace@claritystamp.com
Everything that Glynis has used can be found in one place over on the Clarity website HERE
So what is happening at Clarity Towers this week?
Monday, May 16th: SHAC Shack with Barb – Live at 10am on Facebook & YouTube
Tuesday, May 17th: Groovi Tuesday with Paul – Live at 10am on Facebook & YouTube
Thursday, May 19th: SHAC Shack with Barb – Live at 10am on Facebook & YouTube
Saturday, May 21st: Get Groovi with Clarity with Tina Cox on 2pm on Craft Extra and 5pm on Create and Craft Live
Right, I’m off to enjoy the last of the weekend. I hope you’ll be doing the same. Is it a crafty afternoon for you perhaps?
One of my closest friends is celebrating her daughter’s 3rd birthday today, so we’re off to join them in a park in Brooklyn! Kids are a real tonic, and this one is a real treasure, so it should be fun.
Travel gently.
Lotsa love, Grace & Glynis xoxo
Clarity – The Home of Art, Craft and Well-Being.
Have a lovely rest of the weekend Grace and Glynis thank you so much for this beautiful tutorial.
Another lovely project – I really must locate my agapanthus plate. Found it – just messaged my granddaughter & she immediately replied Yeah I have it !! Mystery solved. Now we have a craft session planned for next weekend which we haven’t done for a long time due to restrictions & other things going on when we have met up.
Have a great time at the party Grace & thank you Glynis for taking the time to share your ideas with us.
Another great project from Glynis. I have not used the layout plates yet so I will have a go this afternoon.
Have a pleasant afternoon in the park.
Fab project ! Thank you Glynis and Grace xxx
I like this one. I don’t have the layout plates so might have to play around a bit. Thank you Glynis. X
Lovely project and will definitely be doing that. I have the agapanthus on order so will be exciting. Have a lovely time at the party Grace. Just settled down to a movie and crafting after a nice roast dinner.
Have a lovely week.
Lesley xx