Clarity Matters Blog Tutorial: Christmas Poppet Tag
Hello hello! Grace here.
I hope this finds you safe, well and enjoying your Sunday.
We are joined today by the brilliant Glynis Whitehead, crafter extraordinaire! I’ll waste no time and hand you over to our teacher…

Christmas Poppet Tag
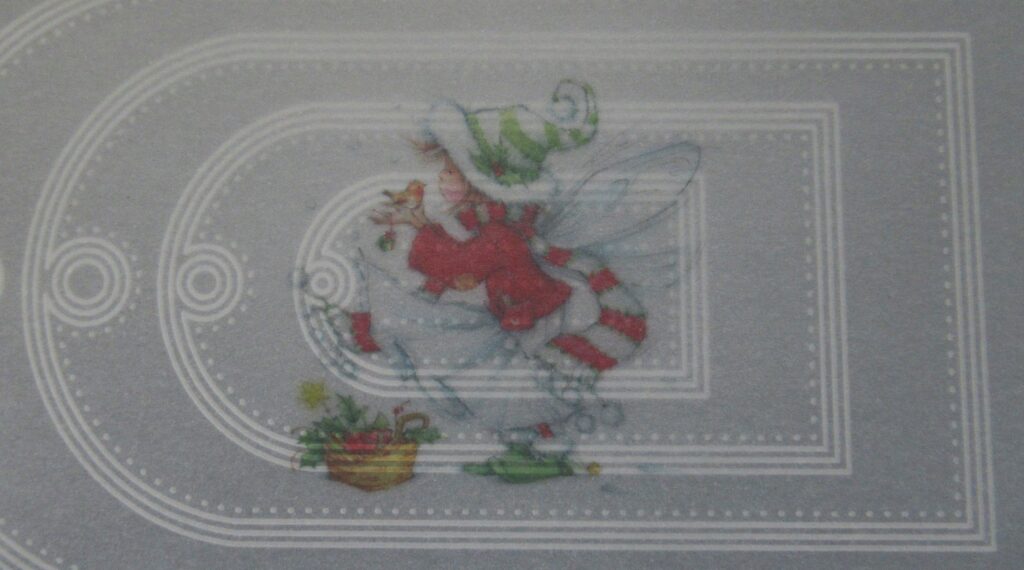
I have been asked for ideas on how people can use the smallest Poppet on the sheets of the gorgeous printed Poppets on the A4 sheet of parchment.
Here is one idea I came up with. It could decorate a parcel or be added to a Christmas card – the choice is yours!
Ingredients
A5 Nested Arched Tags (GRO-PA-41465-04)
A4 Parchment Poppets – Christmas Collection (PER-PA-70393-A4)
Linda Williams’ Peace, Joy & Hope Christmas Treasures A5 Sq Groovi Plate (GRO-CH-41820-03)
Pergamano Colours Exclusives (PER-CO-70060-XX)
V2 Pergamano Perforating Tool (PER-TO-70282-XX)
Pergamano Embossing Tools:
6mm (PER-TO-70016-XX)
4.5mm (PER-TO-70015-XX)
3mm (PER-TO-70005-XX)
1.5mm (PER-TO-70004-XX)
Mapping Pen (PER-TO-70039-XX)
Pergamano Sticky Ink (PER-AC-70134-XX)
Perga Glitter (PER-AC-70252-XX)
Ribbon (ACC-MS-31107-XX)
Your choice of backing paper & white card
Method
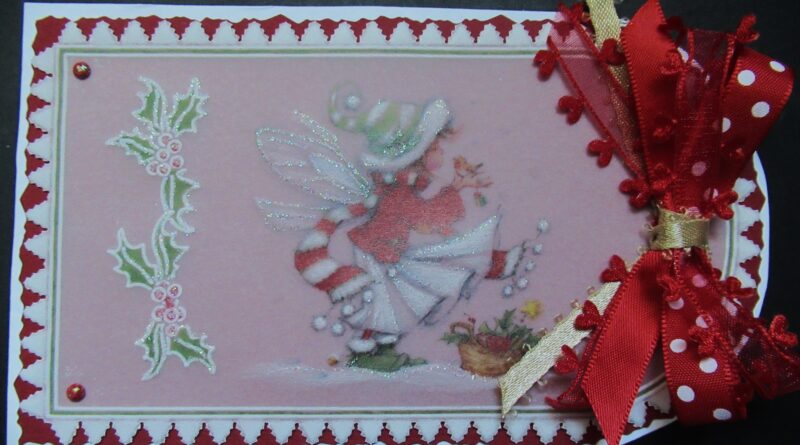
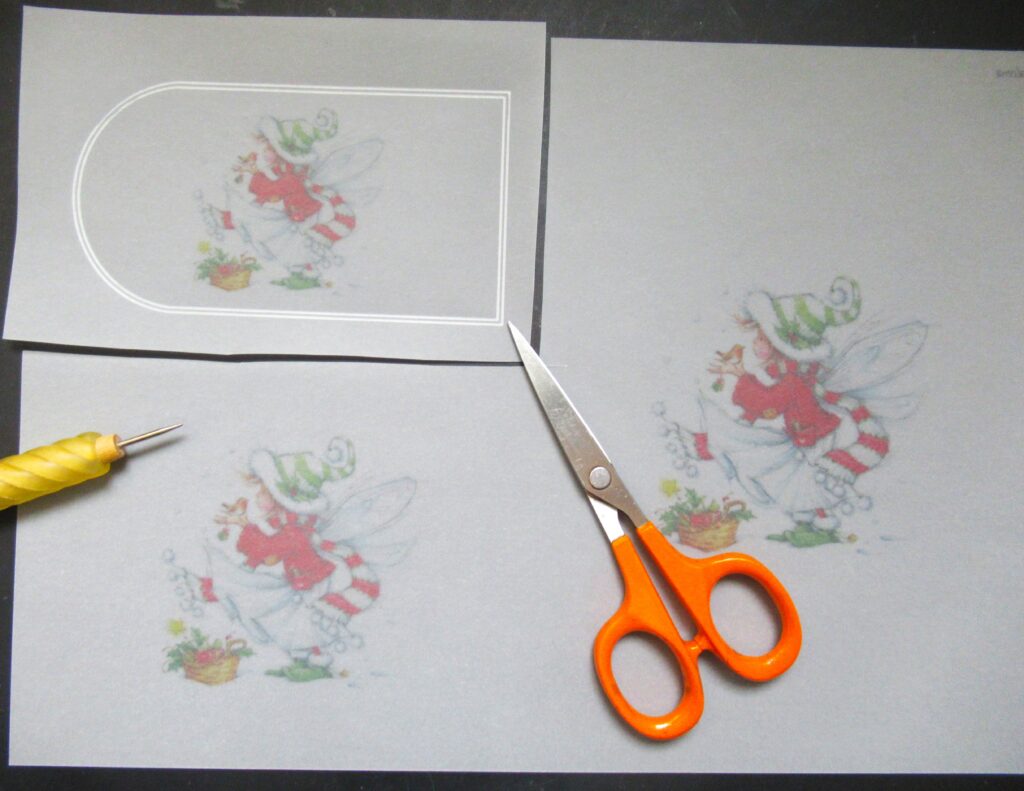
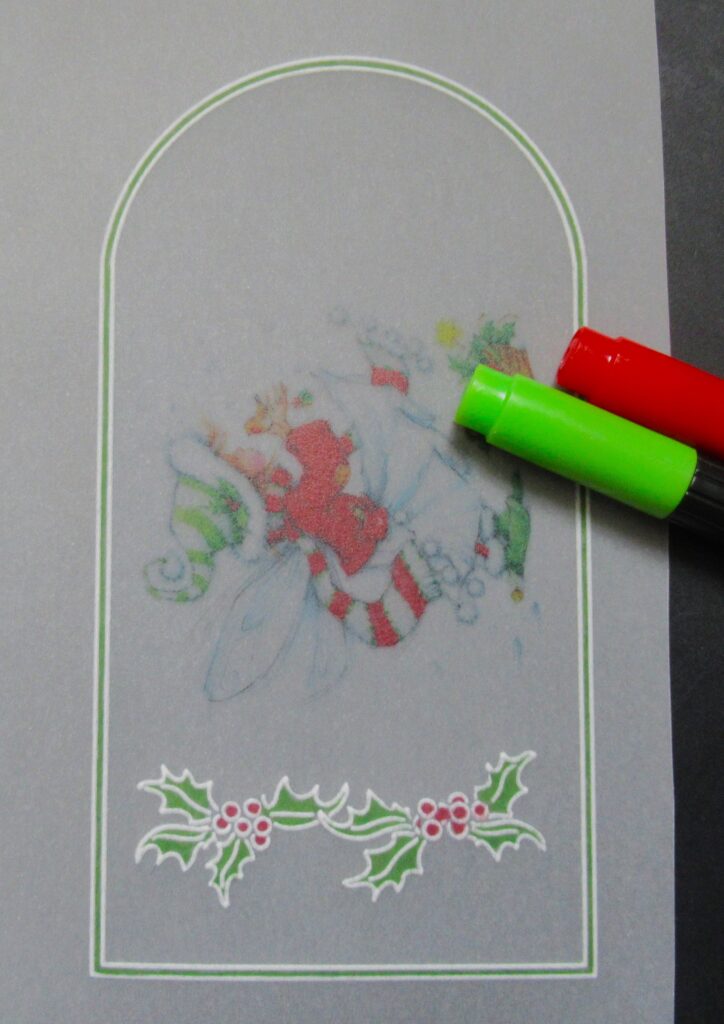
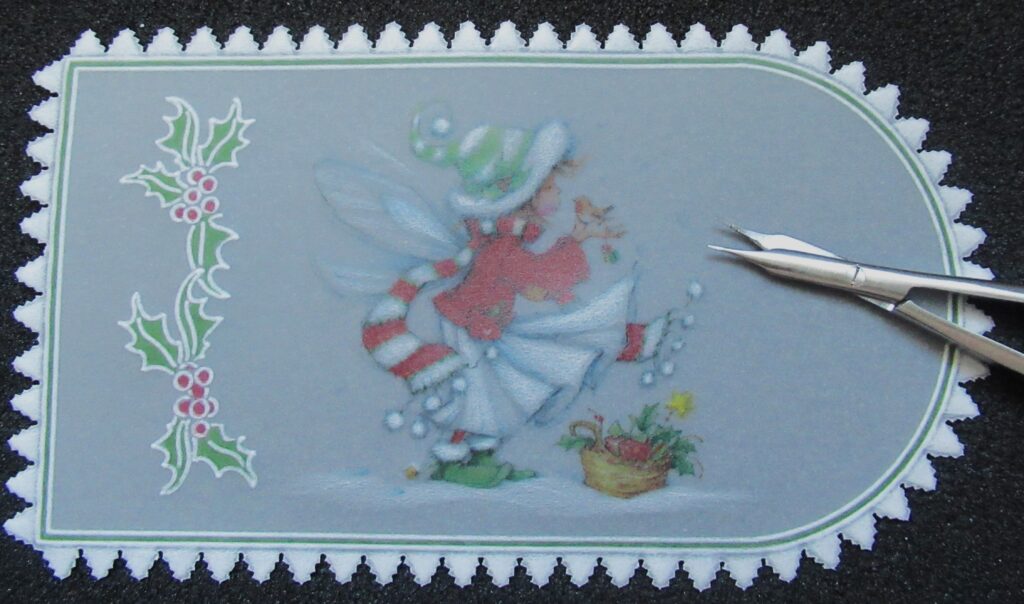
Step 1. Attach the parchment to the second largest tag on the Arched Tag Groovi plate, so that the poppet fits in the tag so that there will be room to add some decoration at the bottom of the tag.
Step 2. Wipe with the tumble dryer sheet and emboss the two outer lines of the tag. You will see that you have plenty of room to do some tool work around the edge and leave a good lot of space for you to work around the other Poppets on the page. Cut out the piece with a pair of scissors.
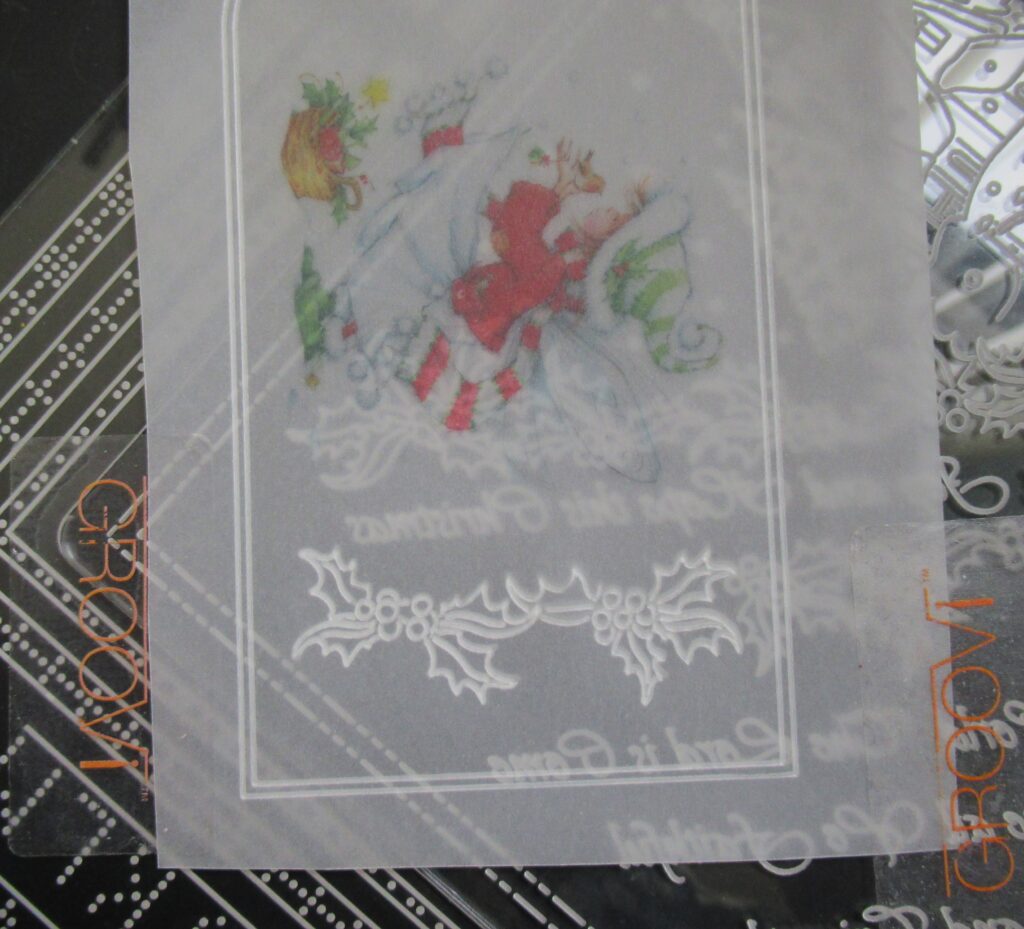
Step 3. Emboss a section from the holly on Linda’s Christmas Treasures plate.
Step 4. Colour the tag margin, holly leaves and berries, using numbers 7 and 16 of the Perga Colours Exclusives.
Step 5. Shallow Perforate around the tag with the V2 perforating tool. Start at the bottom edge, I do a few in each corner and meet in the middle, which gives me a chance to space them out evenly. Go up each side in turn, meeting up at the top of the arch.
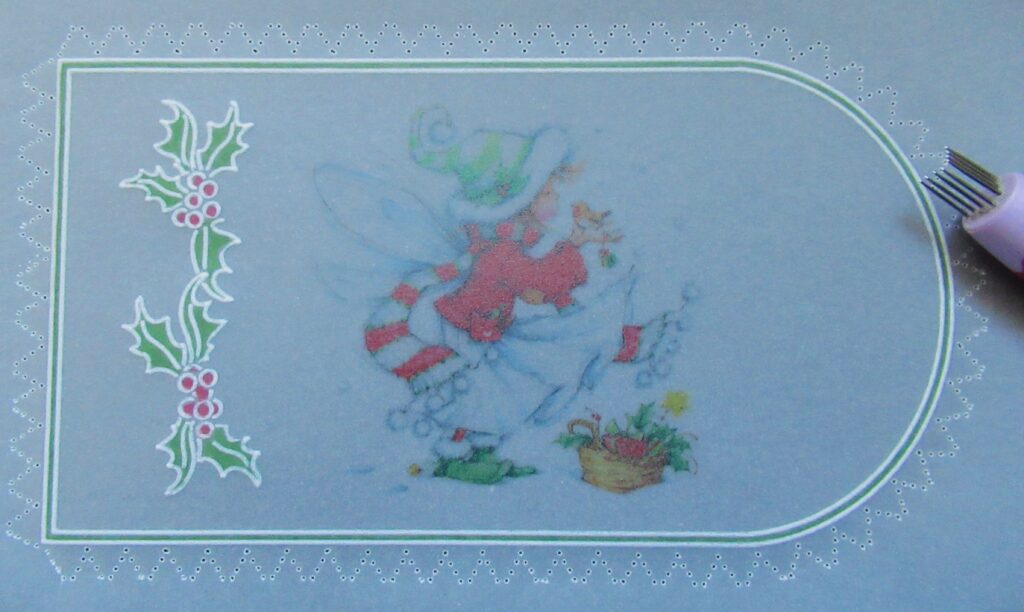
Step 6. Emboss the Poppet skirt with the 6mm ball tool, the fur on the hat with the 4.5mm tool, then the pompoms, the stripes on the hat and the brim with the 3mm tool. The snow is done with the 6mm ball tool. Between the perforations, use the 3mm ball tool. Here is one layer of embossing. Go around the picots at least twice with the 3mm before going over the final time with the 1.5mm ball tool. Don’t try to get things too white too soon or you will crack the parchment and remember to use the largest ball tool that will fit into the space, so that you don’t get stripes.
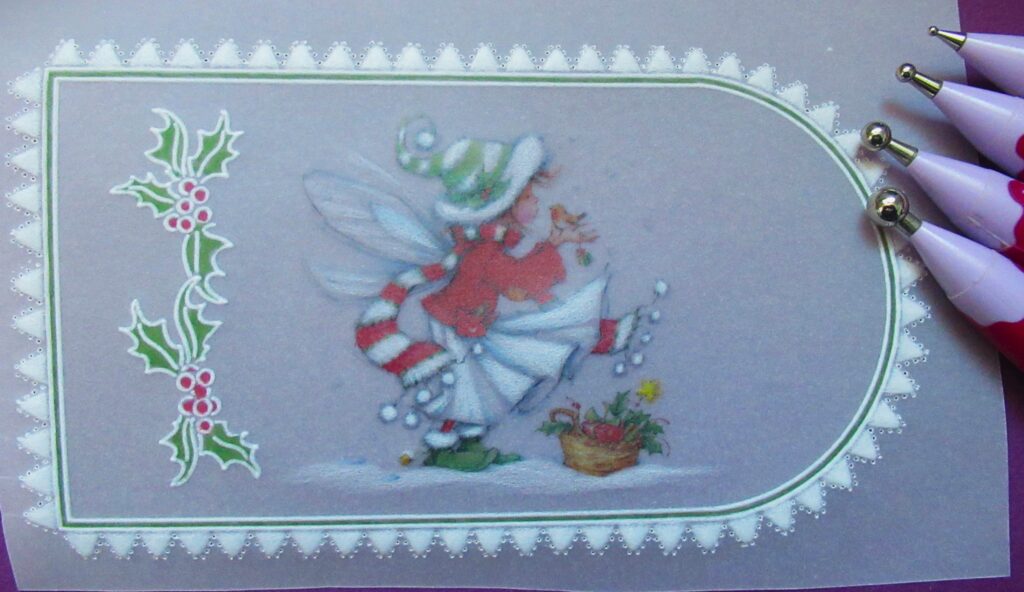
Step 7. Deeply perforate the picot perforations around the tag. If you have trouble relocating the needles of the V perforation tool, re-perforate with the single needle fine tool.
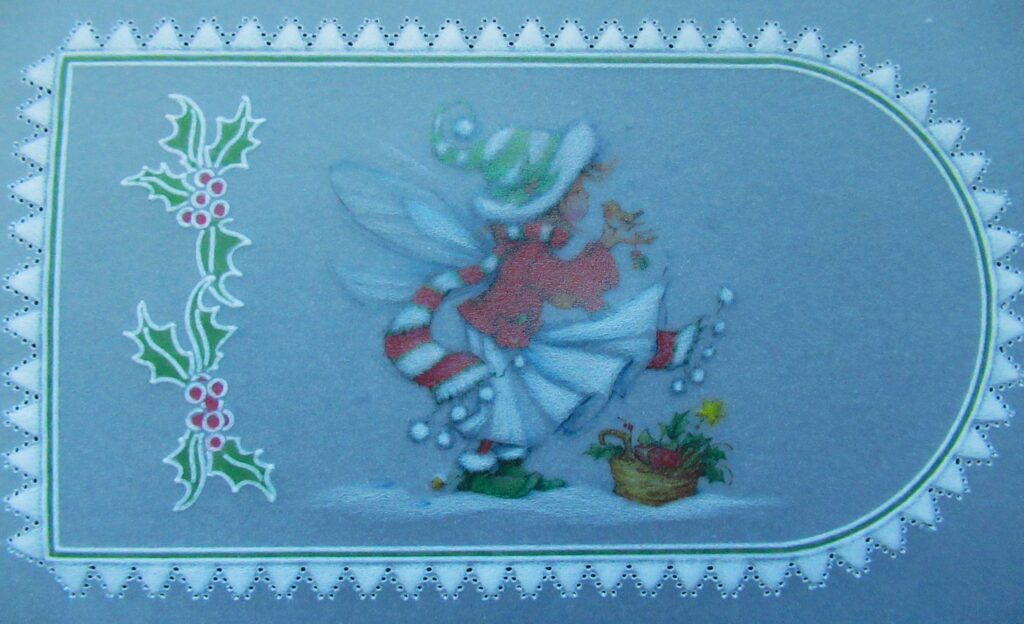
Step 8. Snip out the work.
Step 9. Matt the tag onto a backing paper and cut around it with deckle scissors, then stick it onto a piece of white card and carefully cut around it with plain scissors. Apply some sticky ink and glitter and add a bow.
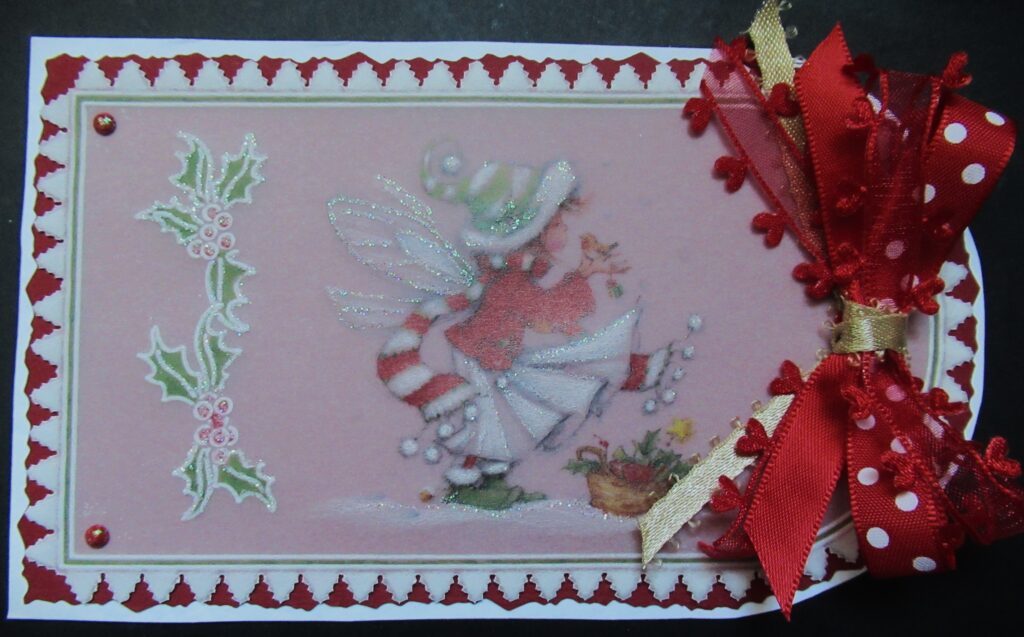
What a gorgeous tag. Imagine receiving a gift with this attached? It’s likely better than the gift itself! Wow.
Thank you, Glynis, for sharing this step-by-step project with us. Very useful. Everything that Glynis has used in this particular project is available in a shopping list, HERE.
Now, looking at the week ahead…
Monday 25th March:
In the SHAC with Barbara – 10am Live on Facebook & YouTube
Tuesday 26th March:
Groovi Tuesday with Paul – 10am Live on Facebook & YouTube
Wednesday 27th March:
Get Groovi with Clarity with Paul – Create & Craft 4pm & 8pm
Thursday 28th March:
Get Groovi with Clarity with Paul – Create & Craft 8am
Thursday 28th March:
In the SHAC with Barbara – 7pm Live on Facebook & YouTube
See you there!
Travel gently, friends.
Lotsa love, Grace & Glynis xoxo
Clarity – The Home of Art, Craft, and Well-Being.
What a fabulous step by step! I love the printed poppets, and this edging is so lovely! Thanks Glynis. I actually want to try this, and spend an hour picot cutting! X
Hi Grace & Glynis, what a lovely project using the smallest Poppet, in fact it could be used with any of the small poppets just change the additional decoration from the holly. The tag could be mounted on to a card as well. Look forward to seeing what everyone creates from this project.
Thanks for sharing your hints & tips again Glynis, I have a couple of Sunday projects to finish so must pull my finger out & get picot cutting !!
Have a good week everyone xx
Dear Grace and Glynis. Another lovely project. Love using the poppets. But can’t picot cut as I can’t see clearly enough to perforate the holes. May try the rest of it, thank you.xx
Happy birthday for yesterday Grace hope you had a lovely day
Another brilliant project, thanks Glynis,will be doing this one ,, need to start catching up on the other Sunday projects, my aim was to do them all lol lol
Happy birthday for yesterday Grace xx I absolutely love this project not sure how to shallow perforate…..??? And my picot cutting is definitely not as good as Glynis…just love the inspiration and education you guys give each week xxx God bless y’all there at Clarity xxx