Clarity Matters Blog Tutorial: How To Shadow Emboss
Hello hello! Grace here.
I hope this finds you well, safe and feeling crafty.
This week, our lovely friend Jane has prepared a fantastic step-by-step blog tutorial project. Jane has had a rough week… very rough! We hope her brilliant hubby Colin has turned a corner now and can begin his recovery. We’re sending love and positive energy to them and their family. Please do the same!
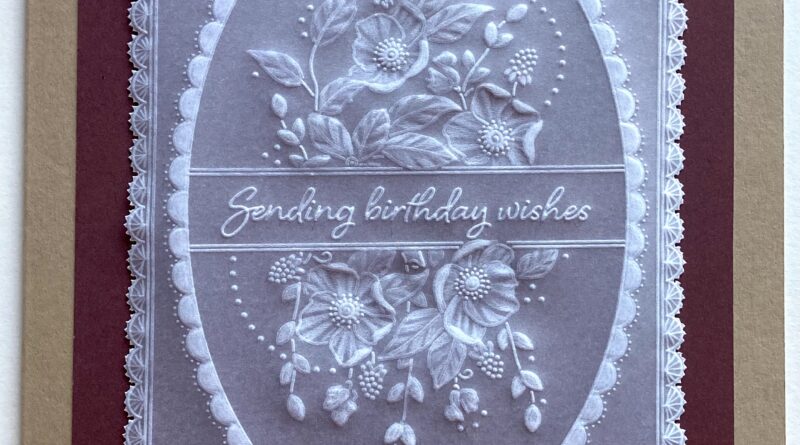
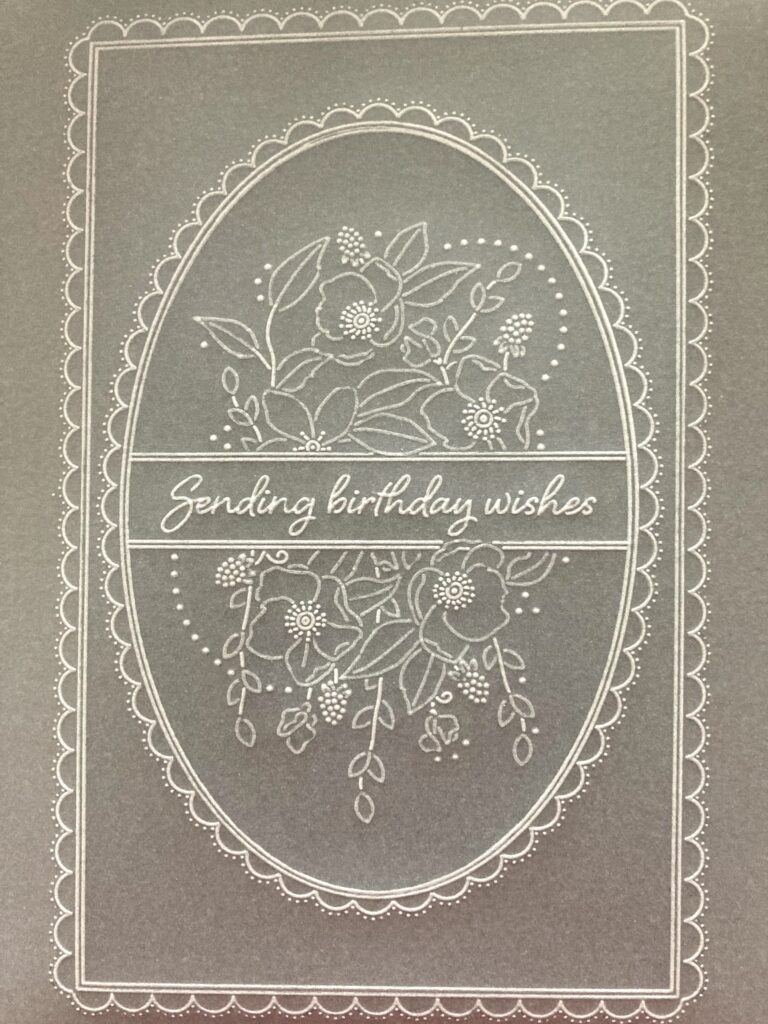
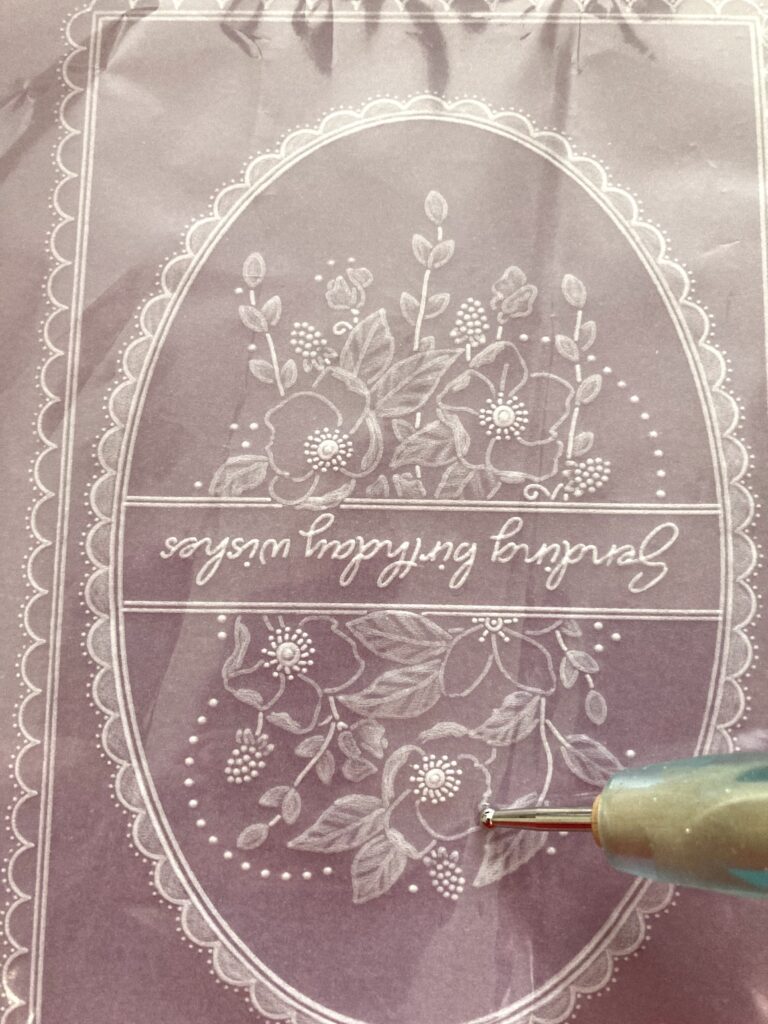
As promised, I have blogged the 2nd hour demo from the shows on February 8th 2024. I love these floral Panels by Jazz and they look great done in colour or in whitework as in this sample. This is where we are headed…
Ingredients
Clear A5 Parchment (GRO-AC-40020-A5)
Deluxe Starter Kit 2024 (GRO-FL-42268-01)
Floral Panels by Jazz A6Sq Groovi Plate Quartet (GRO-FL-42268-01)
Nested Scallops Rectangles & Ovals A5 Groovi Plate Set (GRO-PA-40592-04)
Perga Liner Pencils (PER-CO-70063-XX)
Groovi Guard (GRO-AC-40345-XX)
Groovi Tabs (GRO-AC-40437-XX)
Rainbow River Companion Paper 8″ X 8″ (ACC-CA-31341-88)
Kraft Card Blanks 8”x8” x20 (ACC-CA-30755-88)
x4 Brads (PER-AC-70273-XX)
Tape Runner (ACC-MS-31065-XX)
Pergamano Excellent – Embossing Mat (PER-AC-70075-XX)
Lightwave Led Light Panel & Cover Bundle + Free A4 Translucent Piercing Mat! (ACC-LP-30566-XX)
2-Needle (10261) Perforating Tool (PER-TO-70037-XX)
2-Needle Bold (10288) Perforating Tool (PER-TO-70279-XX)
Ringlock Scissors (PER-TO-70041-XX)
Method
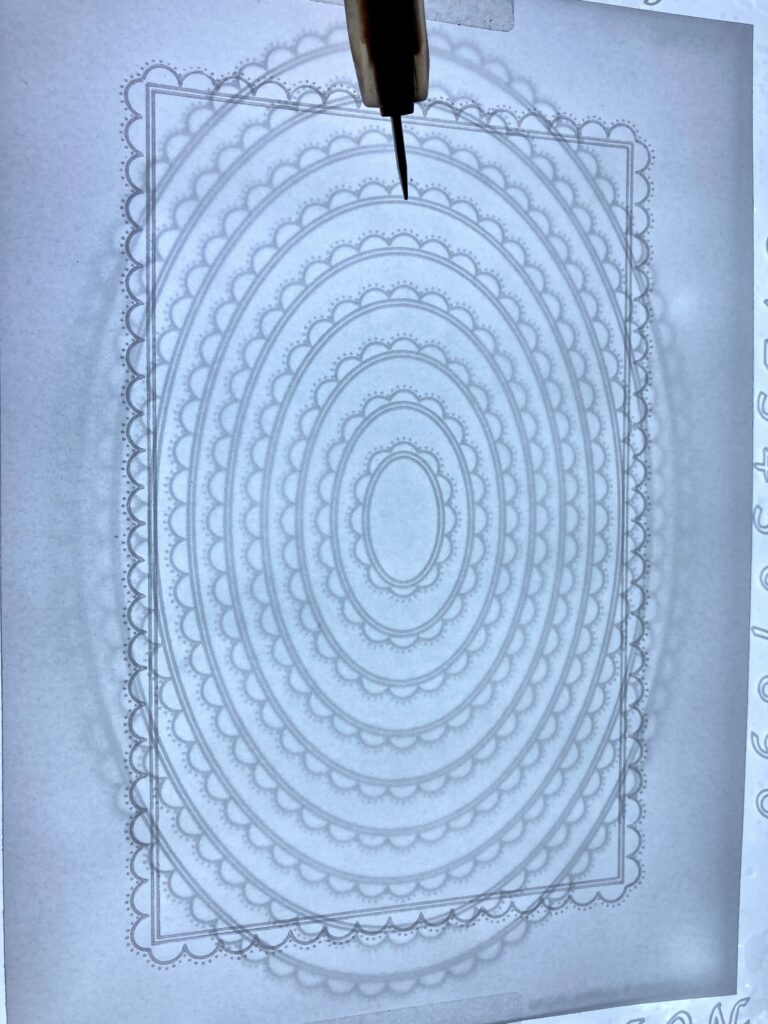
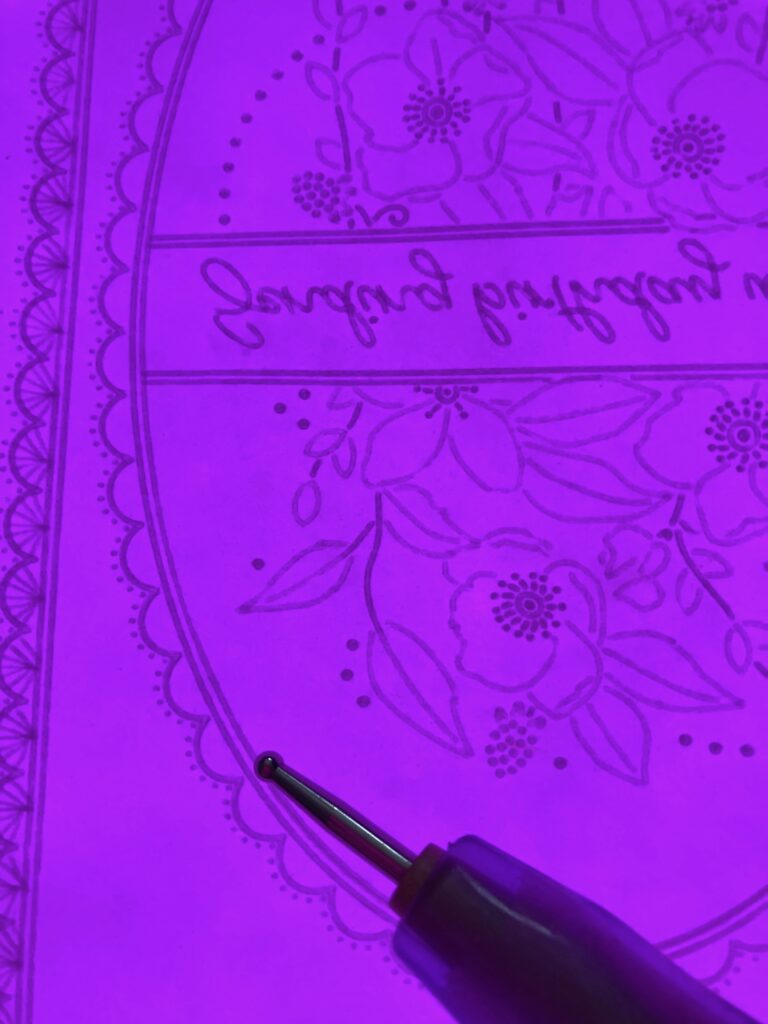
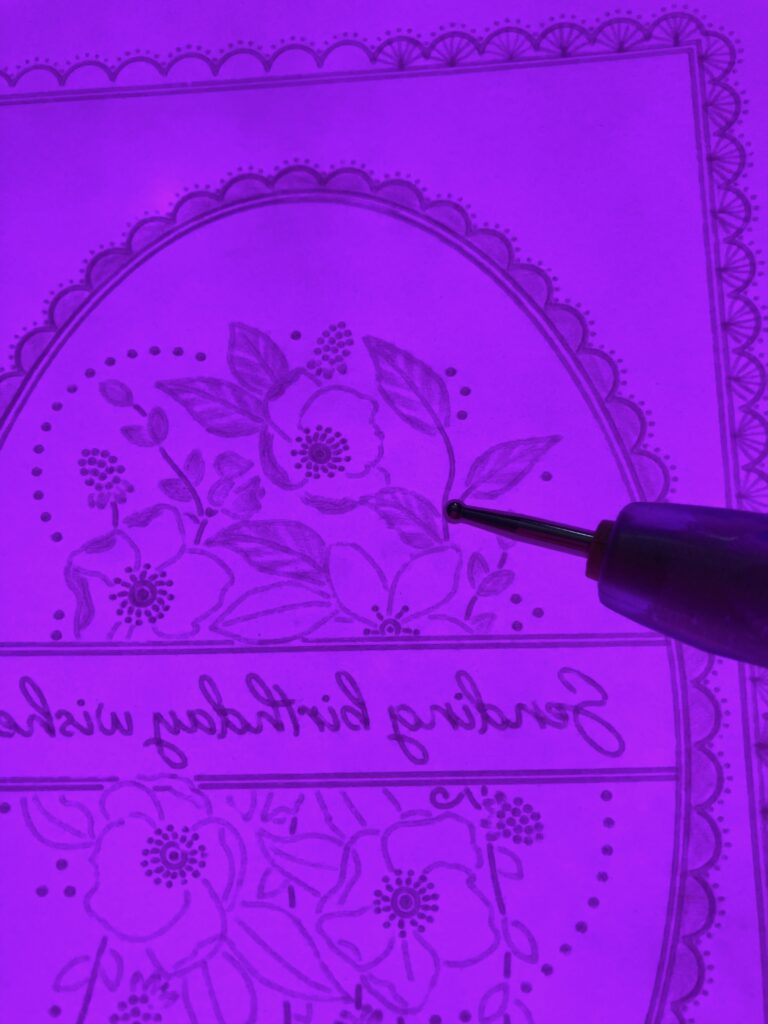
Step 1. Put the Rectangle scalloped plate in the Calligraphy plate mate and on plain parchment emboss the 3rd rectangle and scallops including the tiny dots.
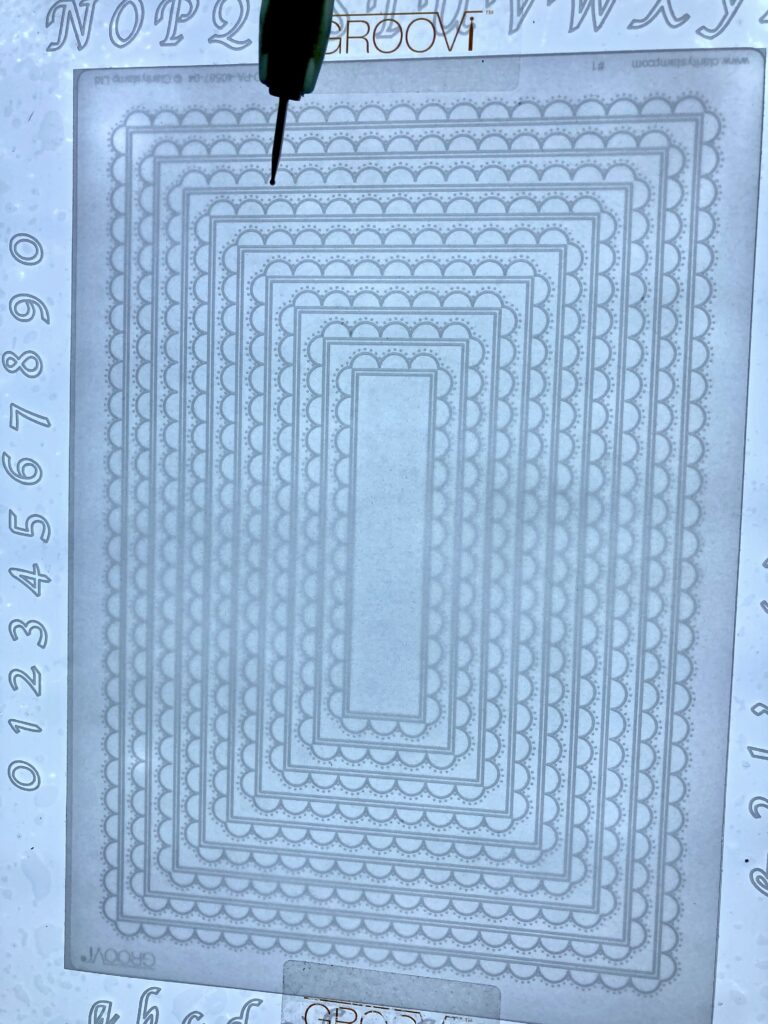
Step 2. Without moving the parchment, change the plate to the oval. Now emboss the 4th oval from the edge with the scallops and the tiny dots.
Step 3. Change to the standard plate mate and put the inset in to hold the baby plate. I chose the ‘Sending Birthday Wishes’ plate as it had more open spaces for white work. It also suited the oval shape better.
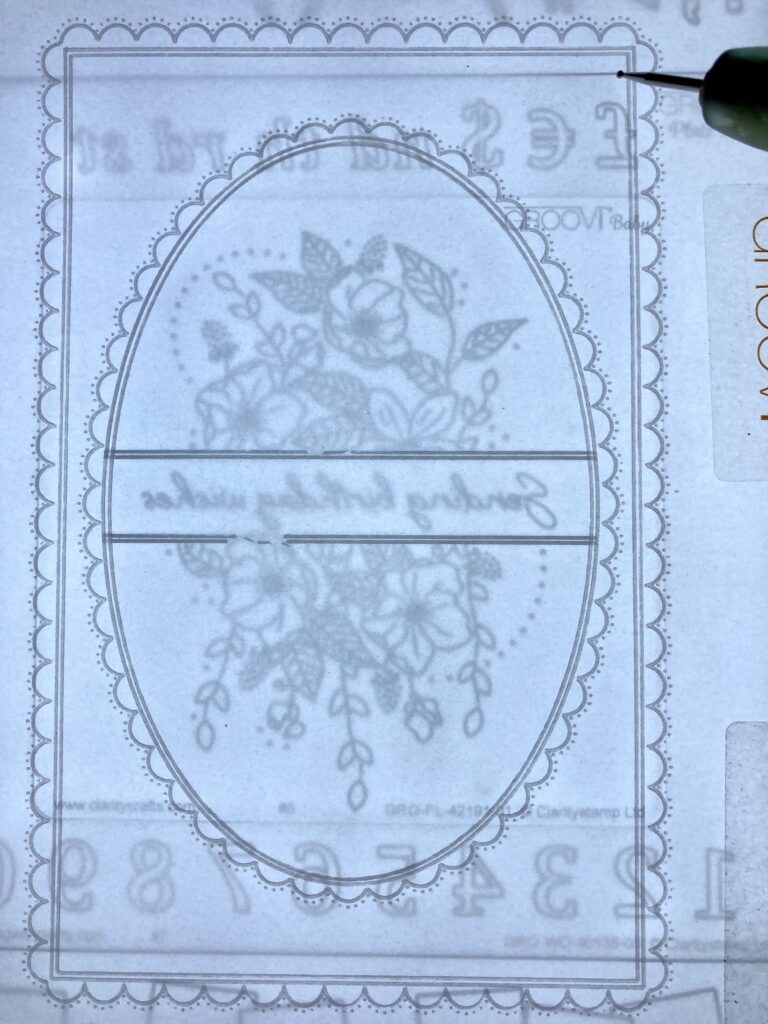
Step 4. Emboss the flower outlines and leaf outlines with the No. 2 tool. The lines and stems should be embossed with the No.1 tool.
Step 5. Emboss the dots with the No. 2 tool.
Step 6. Your composition is now complete.
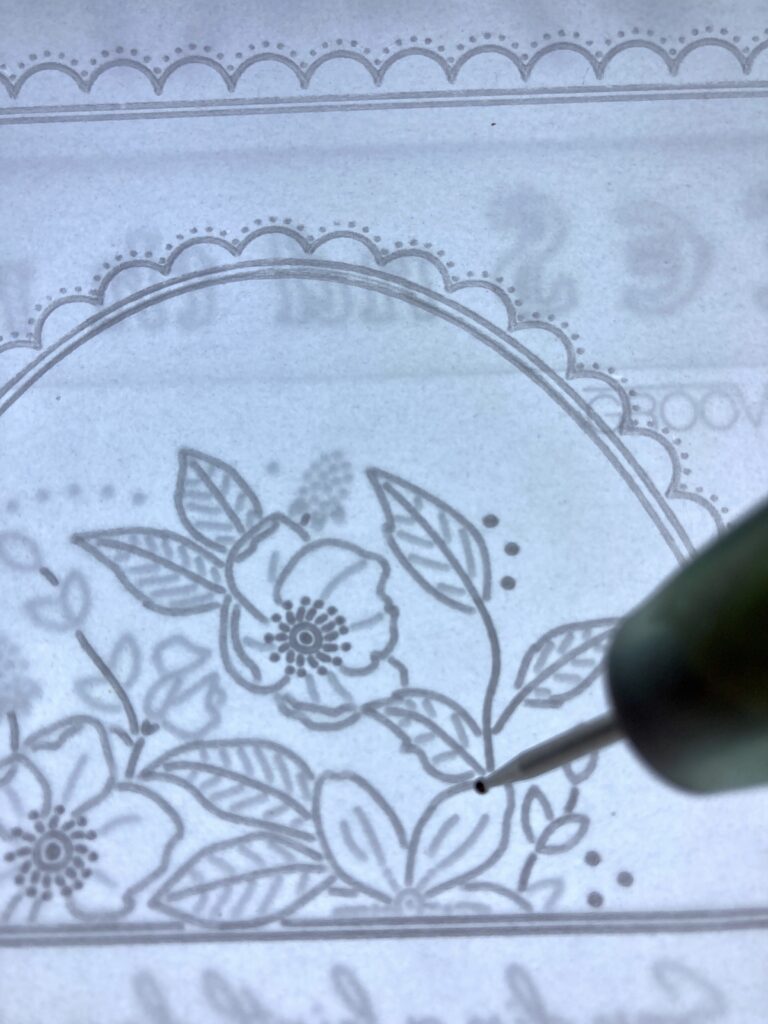
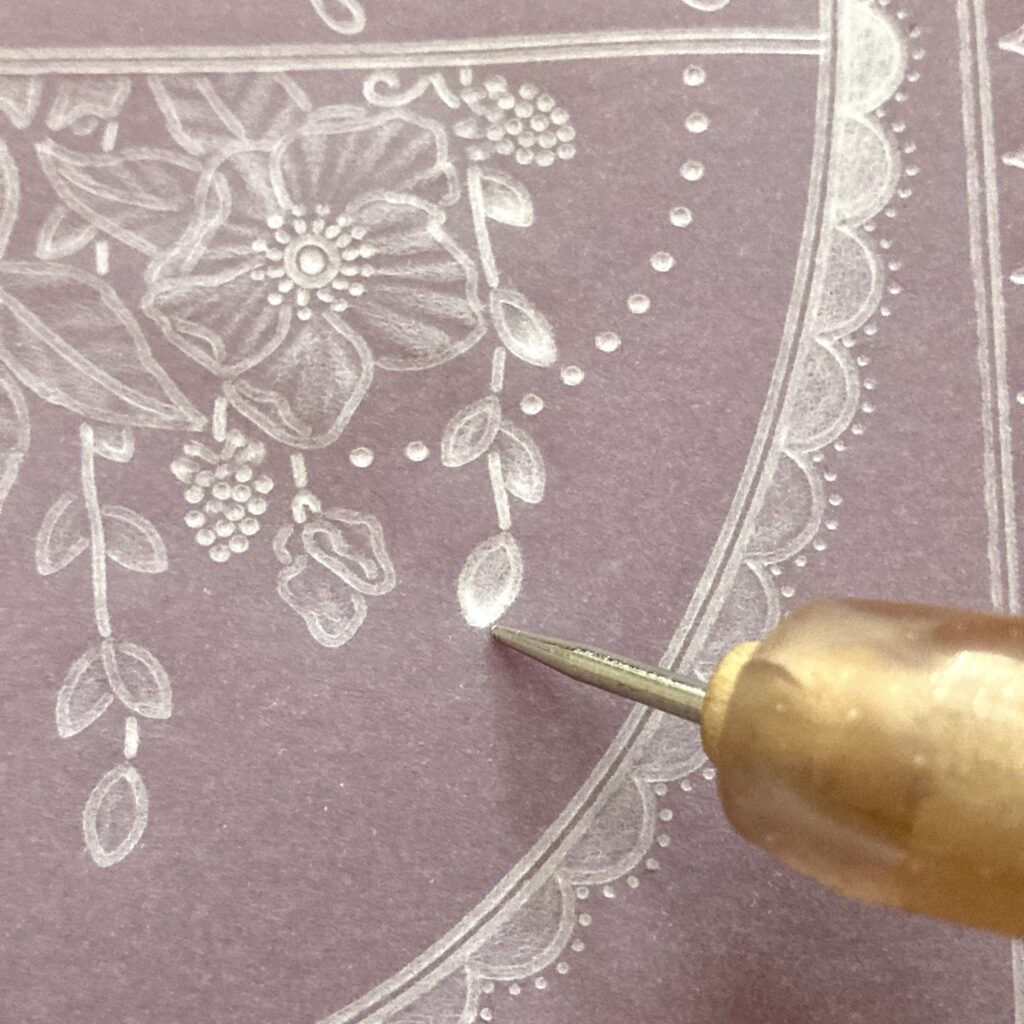
Step 7. Use the No.1 tool to emboss fan shapes in the outer scalloped edge. Use the tiny dots as a guide.

Step 8. Start to do whitework in the scallops around the oval using the No. 4 tool.
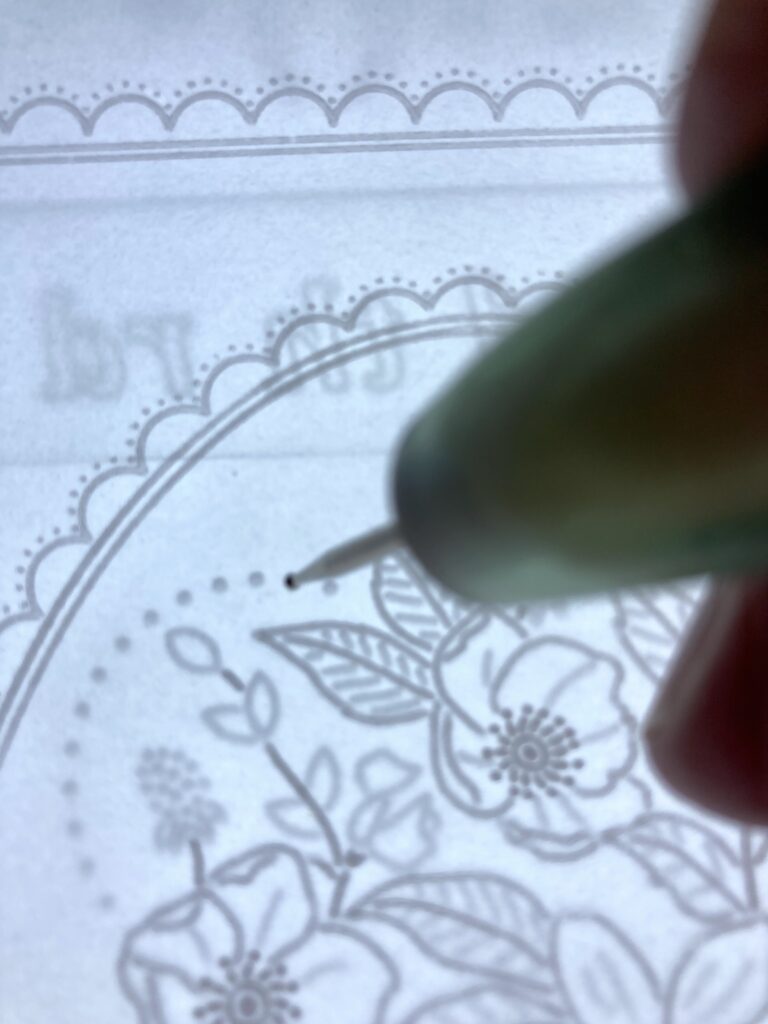
Step 9. Do whitework to the folded edges of the petals on the back of the parchment.
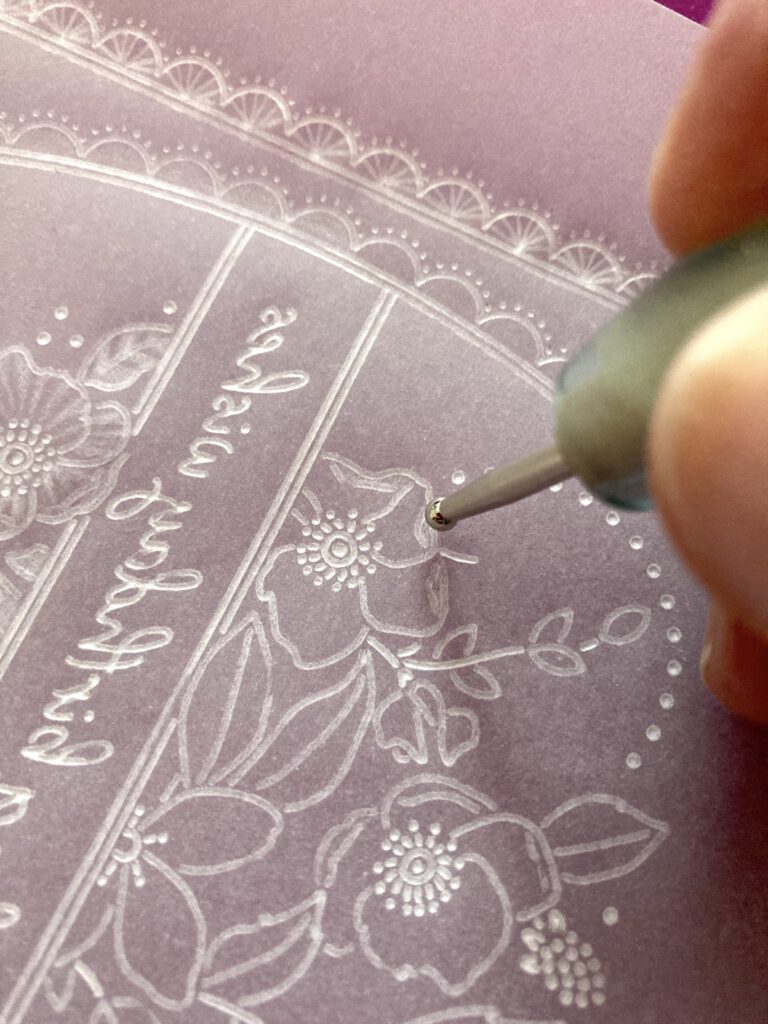
Step 10. Still on the back add white work to the leaves to give them shape and definition.
Step 11. Turn the parchment over and cover it with a piece of cellophane. Now add white work to the petals through the cellophane.
Step 12. Letting the parchment rest continue to add layers of whitework on the back and front until you have achieved the level of whiteness you want. Reduce the size of the ball tool as you do the layers. For the final layer use the No1 tool to add definition to the ends of the pointed areas like buds and leaves.
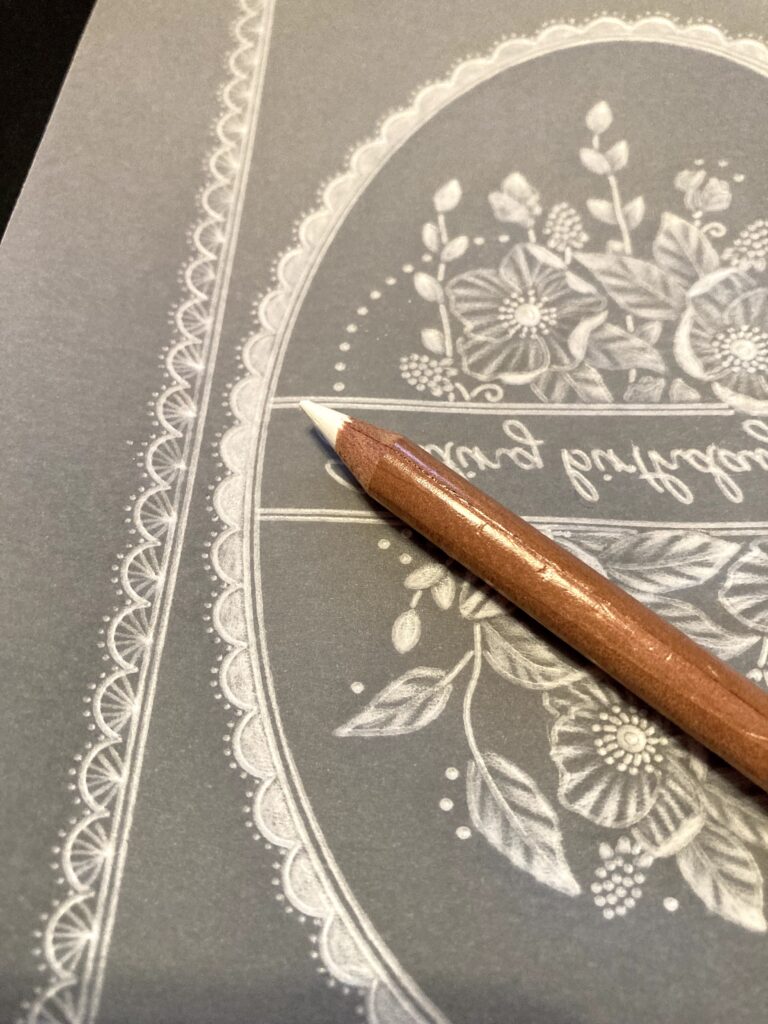
Step 13. To help make the oval frame even whiter use the white Perga pencil on the back of the whitework.
Step 14. Using the 2-needle bold tool perforate at the point the scallops meet first then join up the holes. Ignore the tiny dots. However, if you use the 2-needle fine tool the needles will fit the dots exactly.
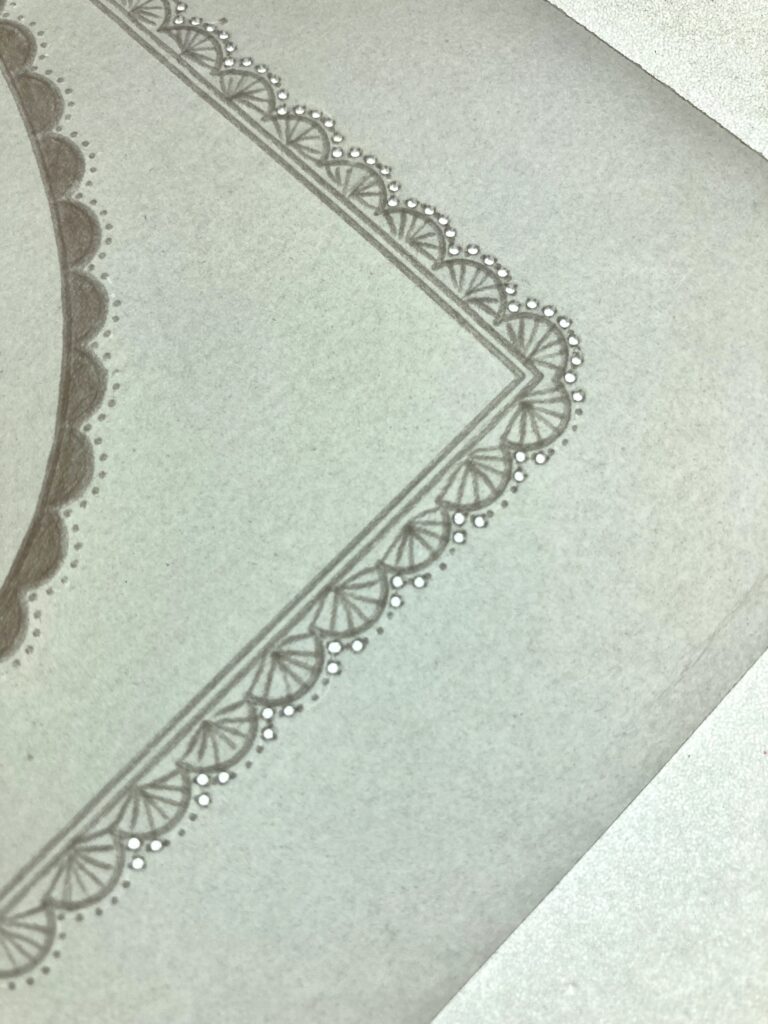
Step 15. Use scissors or snips to cut away the waste from around the outer edge.
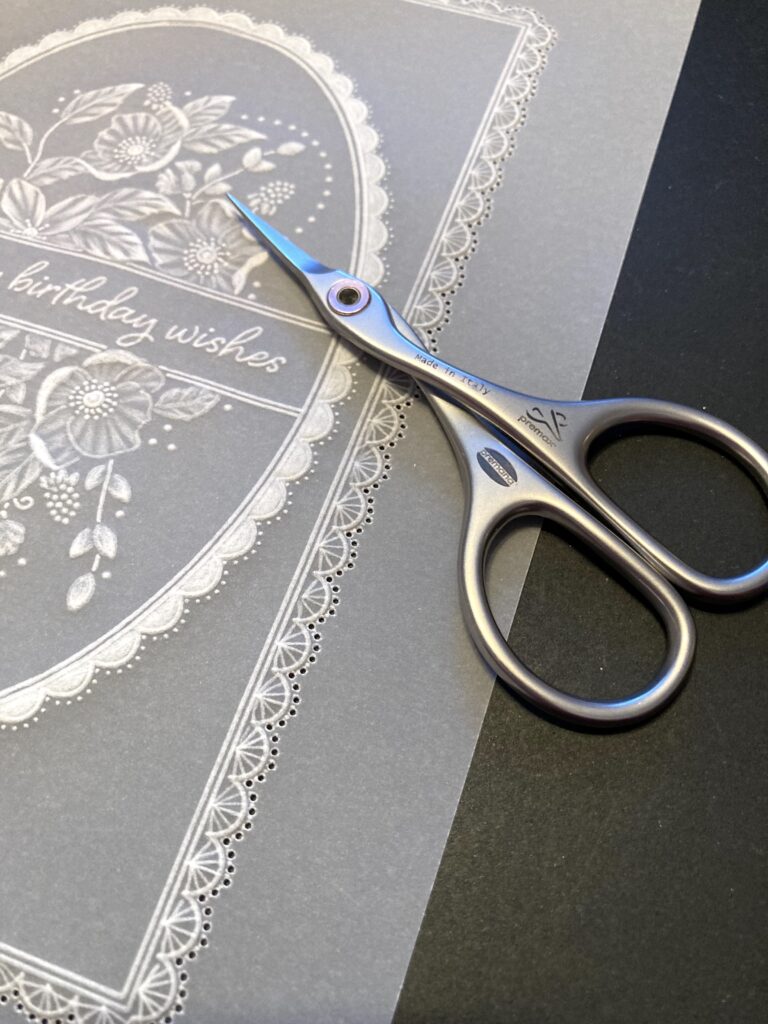
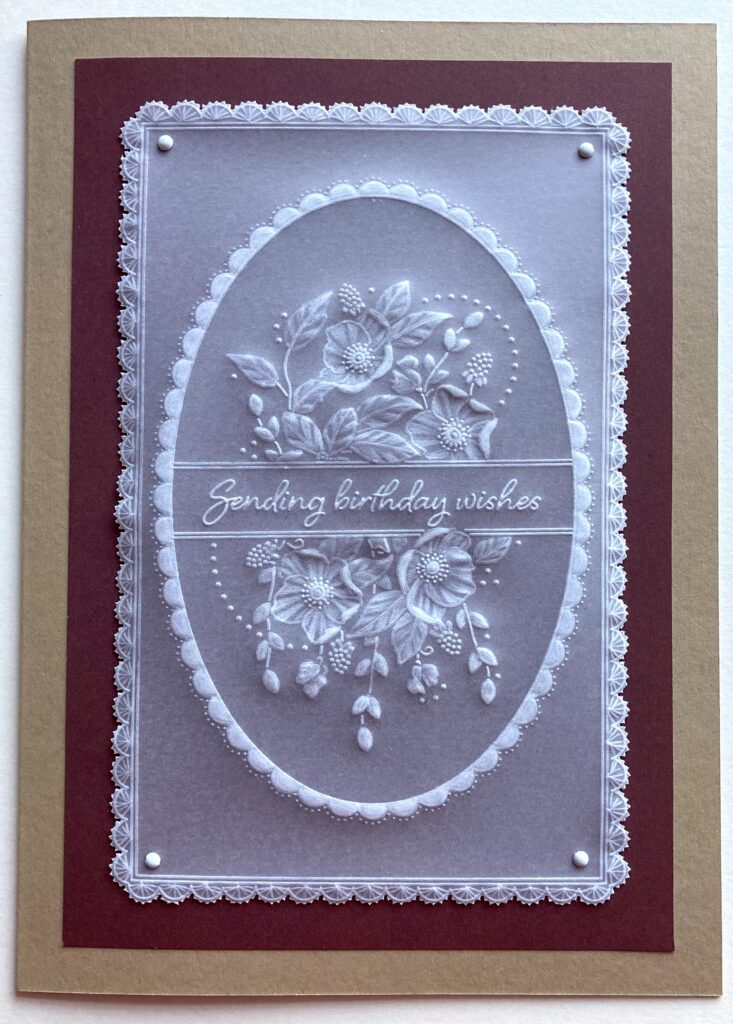
Step 16. Take an 8×8 Kraft card blank and cut 6cm off the edge it opens. Take a piece of companion paper and cut it so that there is a cm showing all around when you attach the parchment to it with brads. Adhere to the card blank.
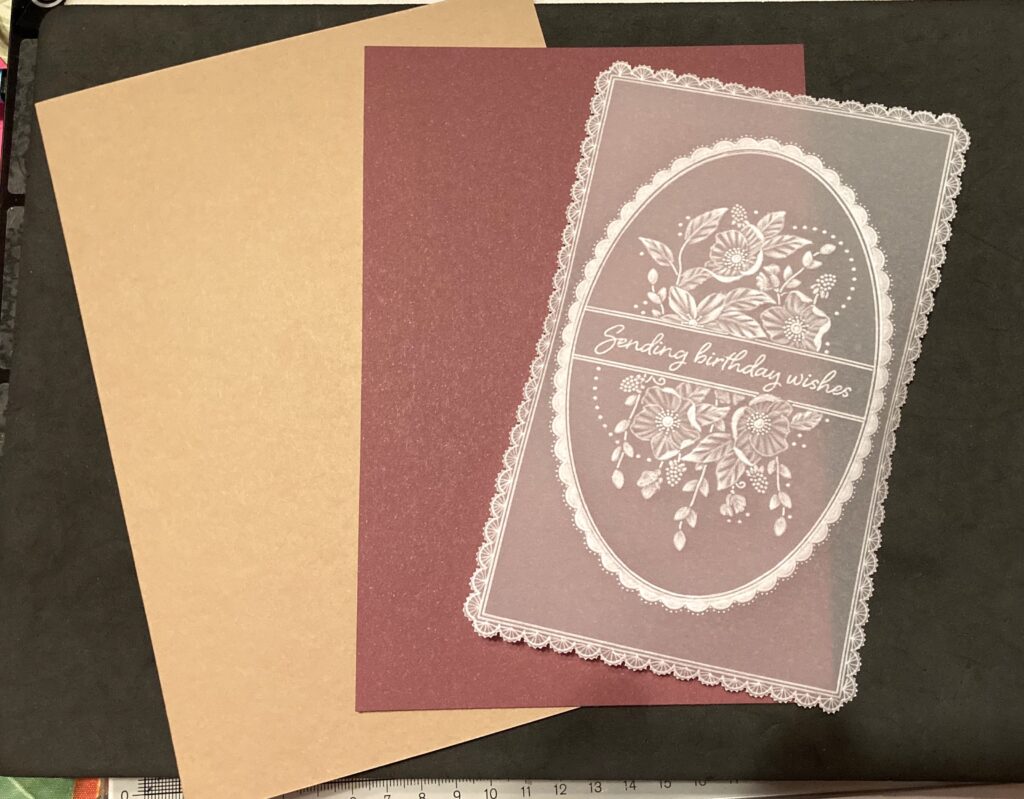
You have now completed your project.
What a stunning finished card! And a perfectly put-together step-by-step project. Many thanks to our beloved Clarity Design Team Member, and friend, Jane Telford.
Everything that Jane has used in this particular project can be found in a shopping list, HERE.
We have been really enjoying seeing your versions of these Sunday step-by-step tutorials on Facebook. Impressive! Thank you for checking out these bloggy tutorials. They do take a lot of work, and we just LOVE seeing your results.
Now, looking at the week ahead…
Tuesday 20th February:
Groovi Tuesday with Paul – 10am Live on Facebook & YouTube
Thursday 22nd February:
Get Groovi with Clarity with Paul on Create & Craft – 1pm & 5pm
Thursday 22nd February:
Fresh Cut Dies with Clarity with Paul on Create & Craft – 3pm
Friday 23rd February:
Crafting with Clarity with Barbara on Create & Craft – 9am & 1pm
There’s no SHAC tomorrow, as Mum & Dave will be traveling back from Cornwall, where they’ve been this weekend to celebrate the life of our much-loved and much-missed friend, Pat Hosking. If you missed yesterday’s Saturday Share, it was a gallery of Pat’s incredible work. You can check it out, here.
I hope to see you there!
Lotsa love, Grace & Jane xoxo
Clarity – The Home of Art, Craft, and Well-Being.
Another lovely project from Jane that I will add to my to do list ready for when my plates arrive. Meanwhile I have found a tag I hadn’t finished from when we were using the tools from Linda’s number 2 book along with several other WIP that got put away whilst I did my Christmas cards so plenty to keep me occupied until then.
Sending love & hugs to Jane & Colin hoping that the worst is over & recovery will mean that Colin can come home soon. Nothing like being in your own bed with home comforts to make you feel much better.
Thanks Grace for another Sunday blog, they seem to be coming round quicker each week – almost the end of February already but then that brings your next trip home nearer xx
I love this card Jane thanks for the instructions.
My daughter and I met you at the last Ditton show, you might remember we were talking about Manchester United, my Dave’s favourite team. You also showed us how to use the Dorso Crayons.
I hope Colin is on the road to recovery and we see you on C & C soon.
Lots of love Janet Cummings. xx
Thank you Jane for a lovely step by step.
Wishing you and Colin all the best.
Lynn
What a lovely project for a wet and grey Sunday to work on. Thank you Jane and sending love to both you and Colin for a speedy recovery and to you of course Grace xxx
Beautiful card, and not a grey pencil in sight for the shade ! It’s good to see the definition of the white work and the shells in the outer border. Thank you. Do hope Colin is recovering well and will be back home soon. X
Beautiful card, Jane, thank you for sharing the instructions.
I hope that Colin is showing signs of improvement.
Sending hugs. X
Thank you Grace x
What a lovely project Jane. Hope Colin has a speedy recovery. Time to get out the nurse’s uniform xx
A great step by step Jane, thank you. Hope Colin is recovering well, Best Wishes to you both, and gentle hugs. xx