Clarity Matters Blog Tutorial: How To Make a Valentine’s Day Card
Hello hello! Grace here.
I hope this finds you enjoying your Sunday.
Maggie Byford (valued and super talented Clarity Craft Design Team Member) has put together a step-by-step project for us.
This is a themed step-by-step, so for those of you lucky enough to have a better half… this comes just in time to put something together for Valentine’s Day!
If you don’t have a partner, have no fear… you are certainly not alone. You can join me in the single camp this year. I think I’m pretty good company 😉 I reckon you/we should make a card for ourselves! Because self-love is also very very important. I hope you ALL have a lovely Valentine’s Day, my loves!
I’ll hand you over to our talented teacher…

How To Make a Valentine’s Day Card
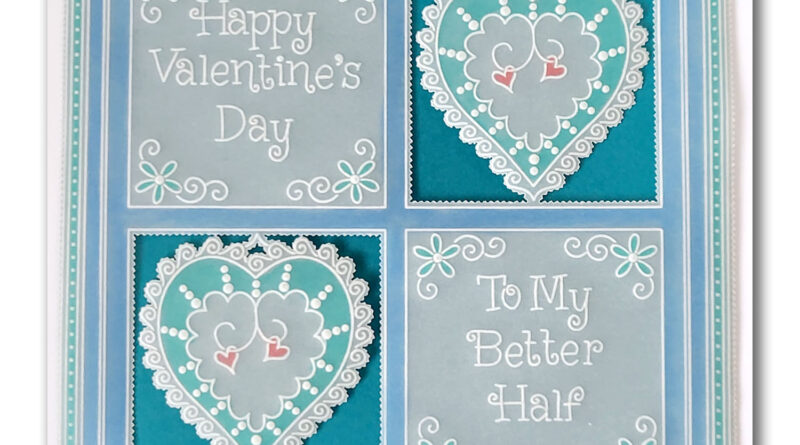
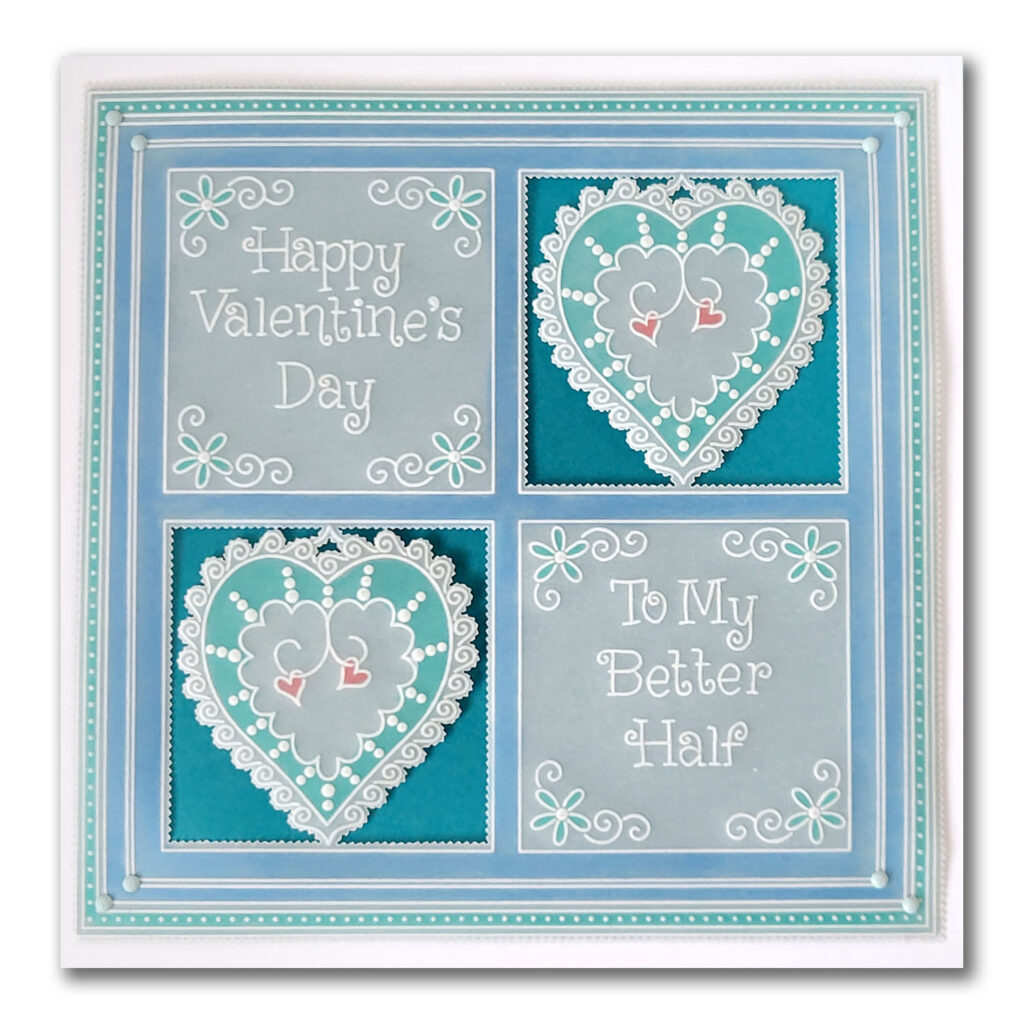
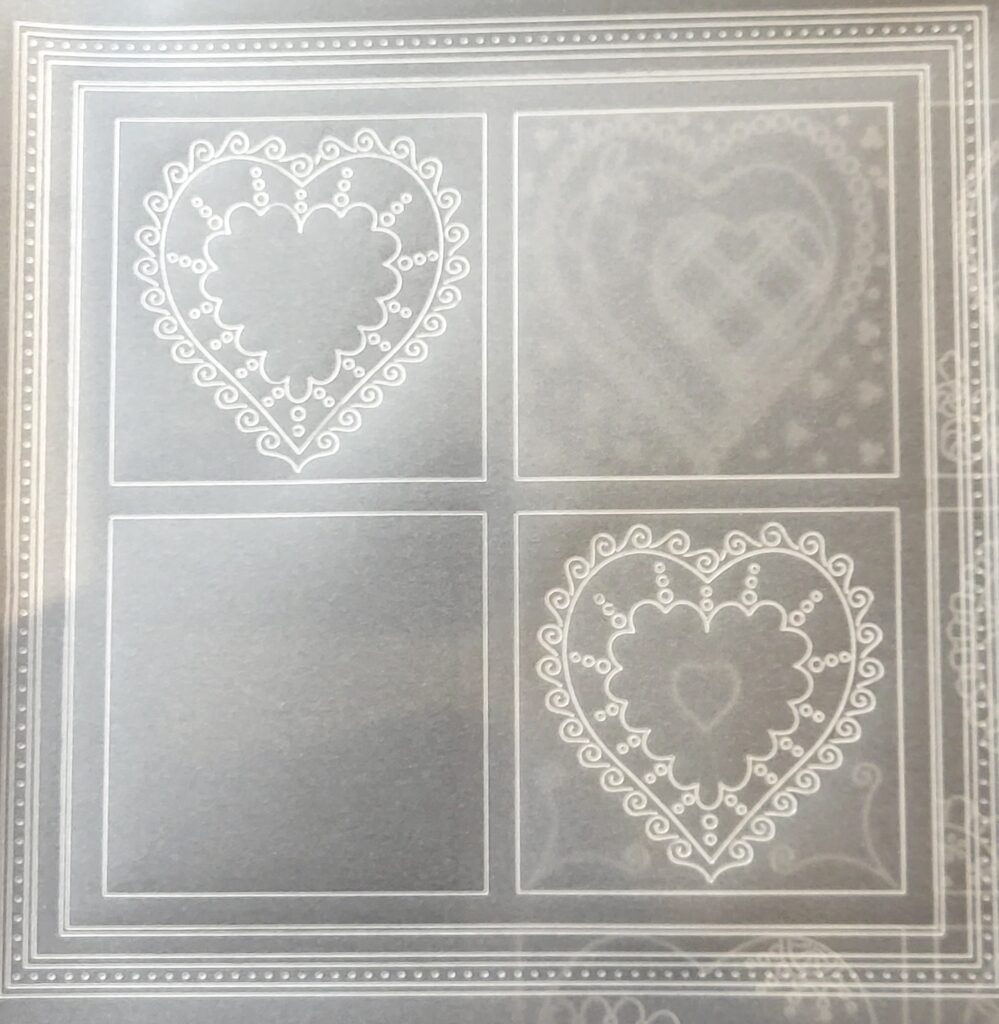
For this tutorial I’ll be showing you, step by step, how to make a Happy Valentine’s Day card suitable for someone’s “better half”, or perhaps for their “other half”. In my case, my “better half” is my hubby and in making this card for him I’ve chosen to keep it simple as it’s the kind of card he prefers. Of course, you can embellish my design in any way that suits you, and if you adjust the wording accordingly it could also make a lovely Wedding or Anniversary card. This is what you are aiming for…
Ingredients
Josie’s Diagonal Embossed Frames & Corners A4 Sq Plate (GRO-GG-42058-24)
Linda’s Heart Sampler A4 Sq Plate (GRO-LO-41226-15)
Nested Scallops Squares Extension A4 Square Plate (GRO-WO-41168-15)
Groovi A4 Clear Parchment Paper (GRO-AC-40024-A4)
2-Needle Bold Perforating Tool (PER-TO-70279-XX)
Pergamano Excellent – Embossing Mat (PER-AC-70075-XX)
Groovi Embossing Tool 1 & 2 (0.8mm to 1.3mm) (GRO-AC-40026-XX)
Groovi Embossing Tool 3 & 4 (2.0mm – 2.8mm) (GRO-AC-40027-XX)
Black Dual-Purpose Groovi Mat A4 (GRO-AC-40194-A4)
A5 Black Super Foam (GRO-AC-41765-XX)
Groovi Sticker Tabs x 16 (GRO-AC-40437-XX)
Groovi Guard (GRO-AC-40345-XX)
Ringlock Scissors (PER-TO-70041-XX)
Pastel Mix Pergamano Brads (PER-AC-70270-XX)
Dorso Oil (PER-CO-70066-XX)
Blending Pen and Refill Nibs (PER-AC-70440-XX)
Spot On Sponges (ACC-MG-30537-XX)
Dry Tumble Dryer Sheet
Spare parchment for practice pieces
Faber Castell Polychromos Pencils:
143 Cobalt Blue, 276 Chrome Oxide Green Firey, 223 Deep Red
Method
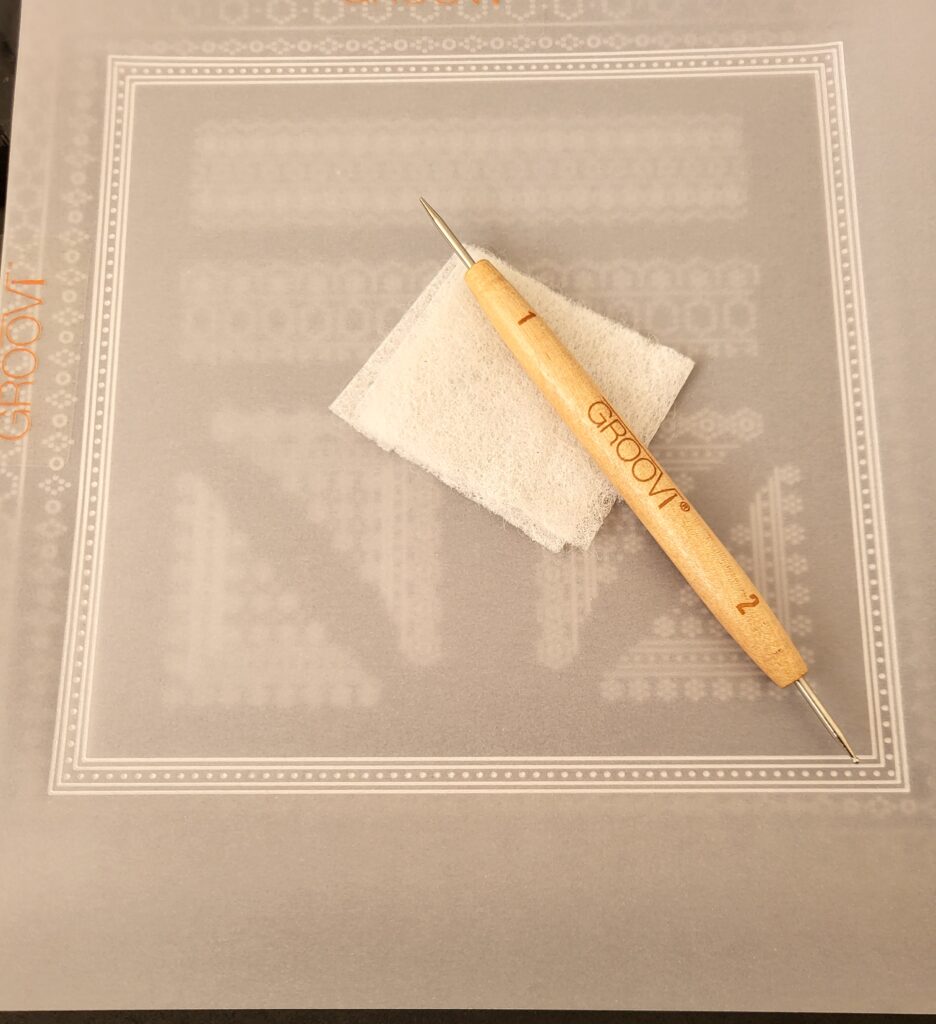
Step 1. Using low tack tape or Groovi tabs, attach clear parchment over Josie’s Diagonal Embossed Frames & Corners plate. Wipe a dry tumble dryer sheet across the surface to make embossing easier, then use the Groovi 1 tool to emboss the third largest patterned frame from the top of the plate (the one that has a row of dots running down the middle with a double-outline frame around it).
TOP TIP: Use the Groovi Guard to keep your parchment flat whilst embossing the lines.
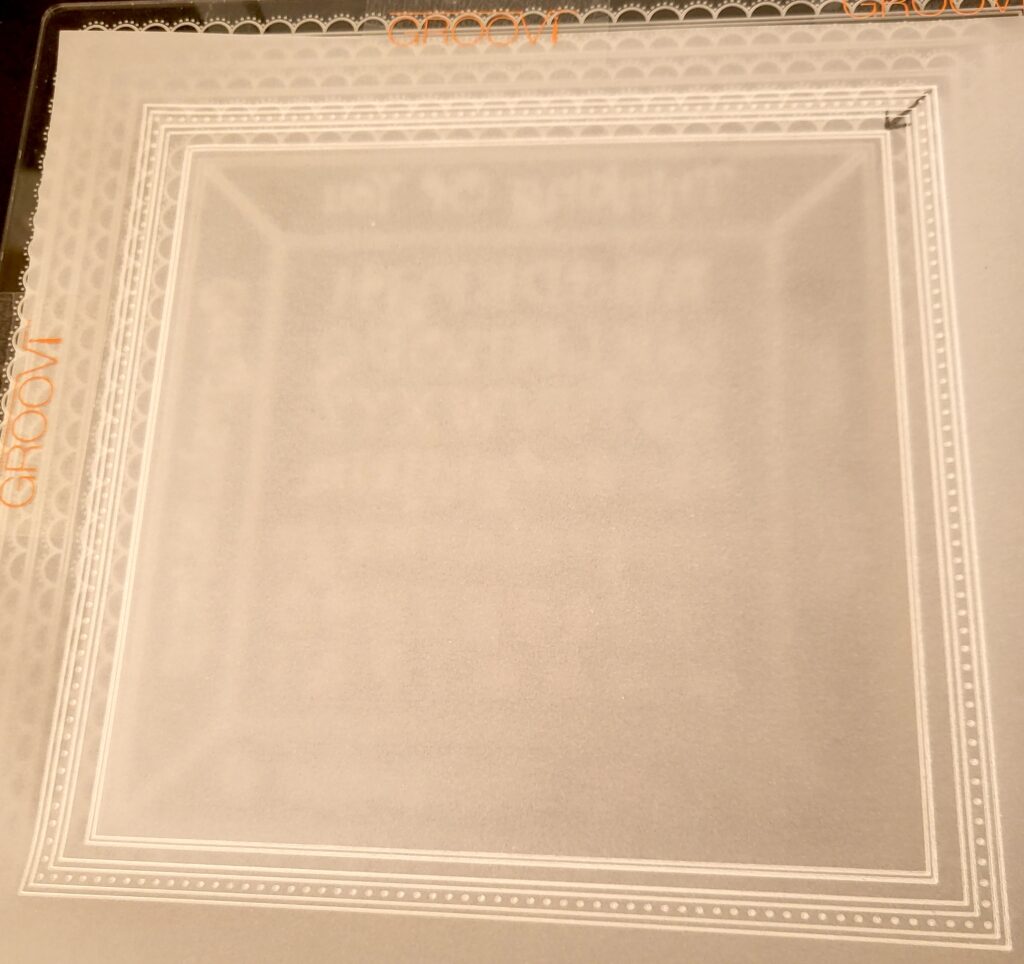
Step 2. Switching to the Nested Scallops Squares Extension plate, centralise your embossed frame over the 5th largest double-outline frame on the plate and emboss only the double outlines (not the scallops) as indicated by the arrow at the top right corner on the picture.
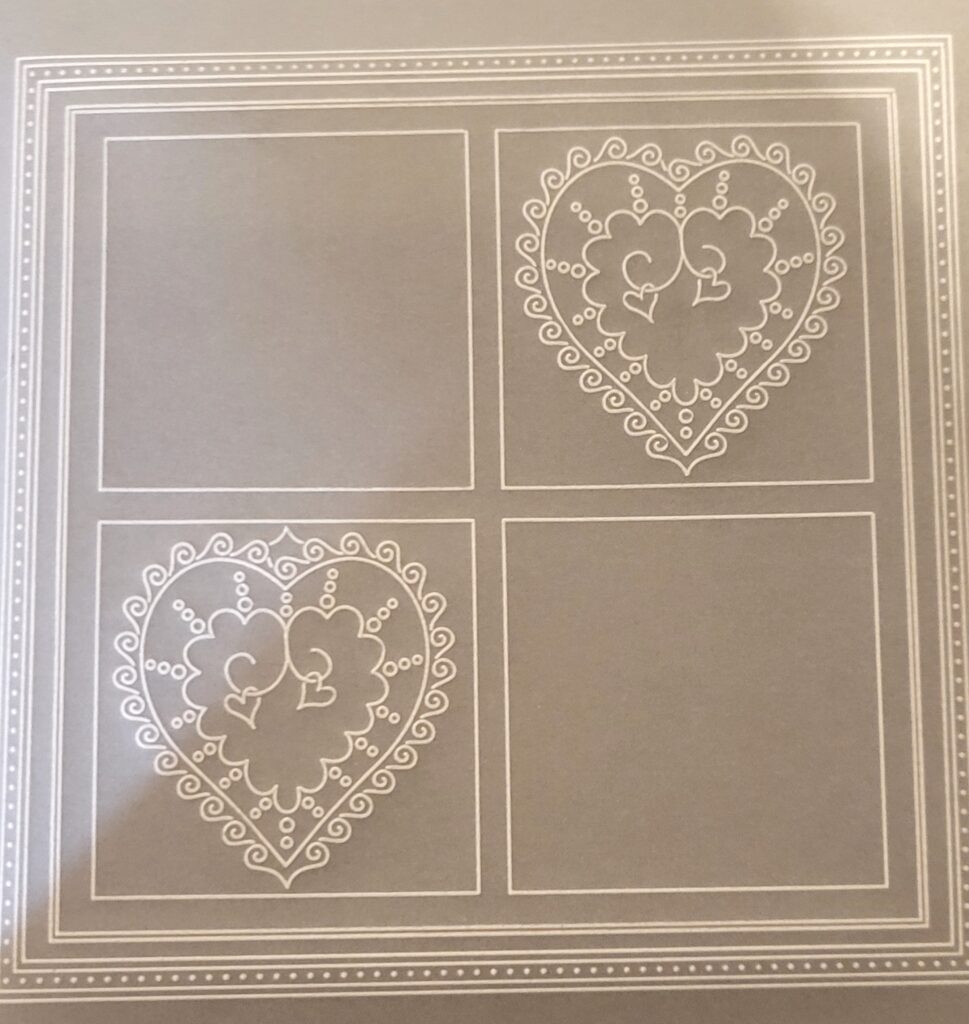
Step 3. Using Linda’s Heart plate until advised otherwise, carefully align your embossed outer frames over four boxes on the plate where indicated by the arrow top right, then emboss them.
Step 4. On the plate, select the left heart on the middle row (which is the one I’ve used). Align and attach the top left box on your parchment over the heart, so that the embossed box on your parchment sits snuggly over the box on the plate. Emboss all elements of the heart (apart from the tiny heart in the centre and the corner designs). Do the same in the bottom right box on your parchment.
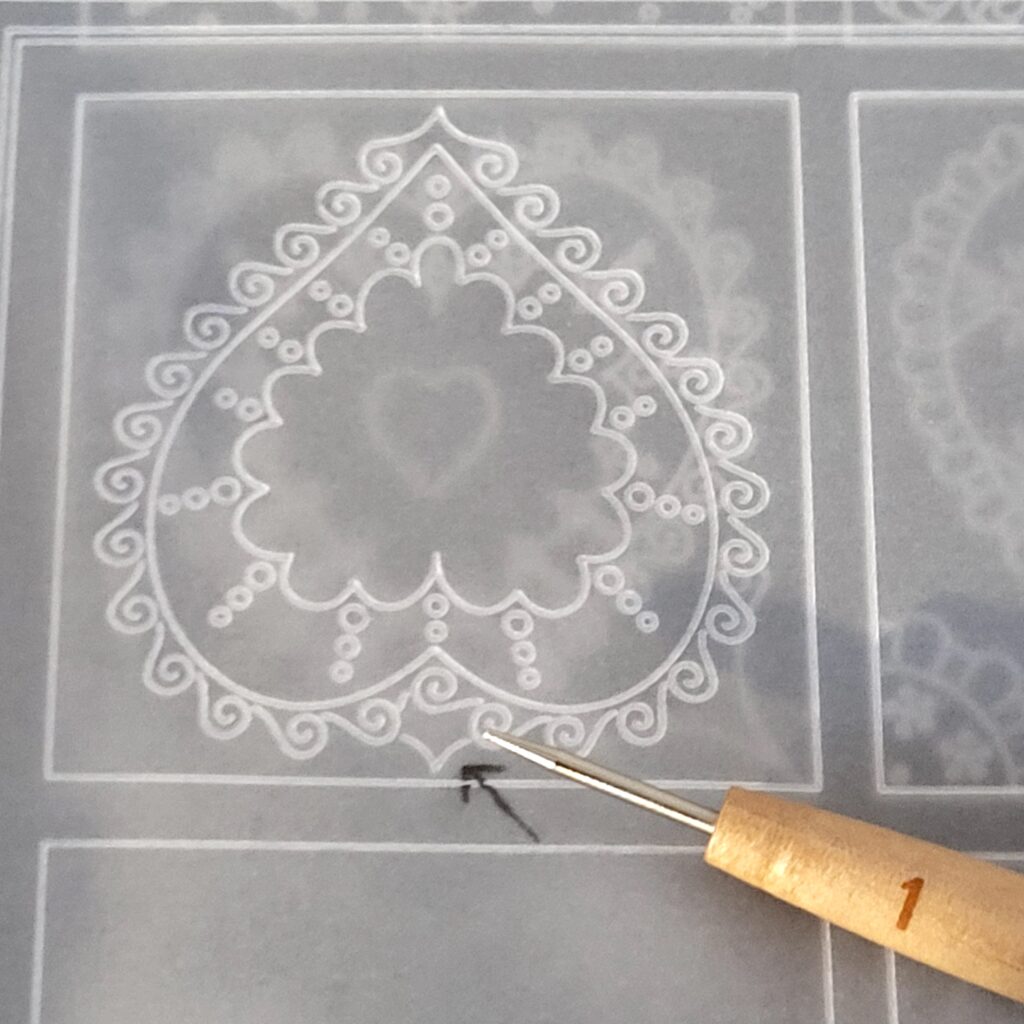
Step 5. Turn your parchment around and align it so that one of your embossed hearts is upside down over the same heart on the plate underneath, and that the outer box around the heart on your parchment matches up with the same outer box underneath. All you need do now is make a “hanger” in the form of a V by embossing a V shape at the top (or in this case bottom) of your parchment heart, as shown by the pencil arrow on the picture.
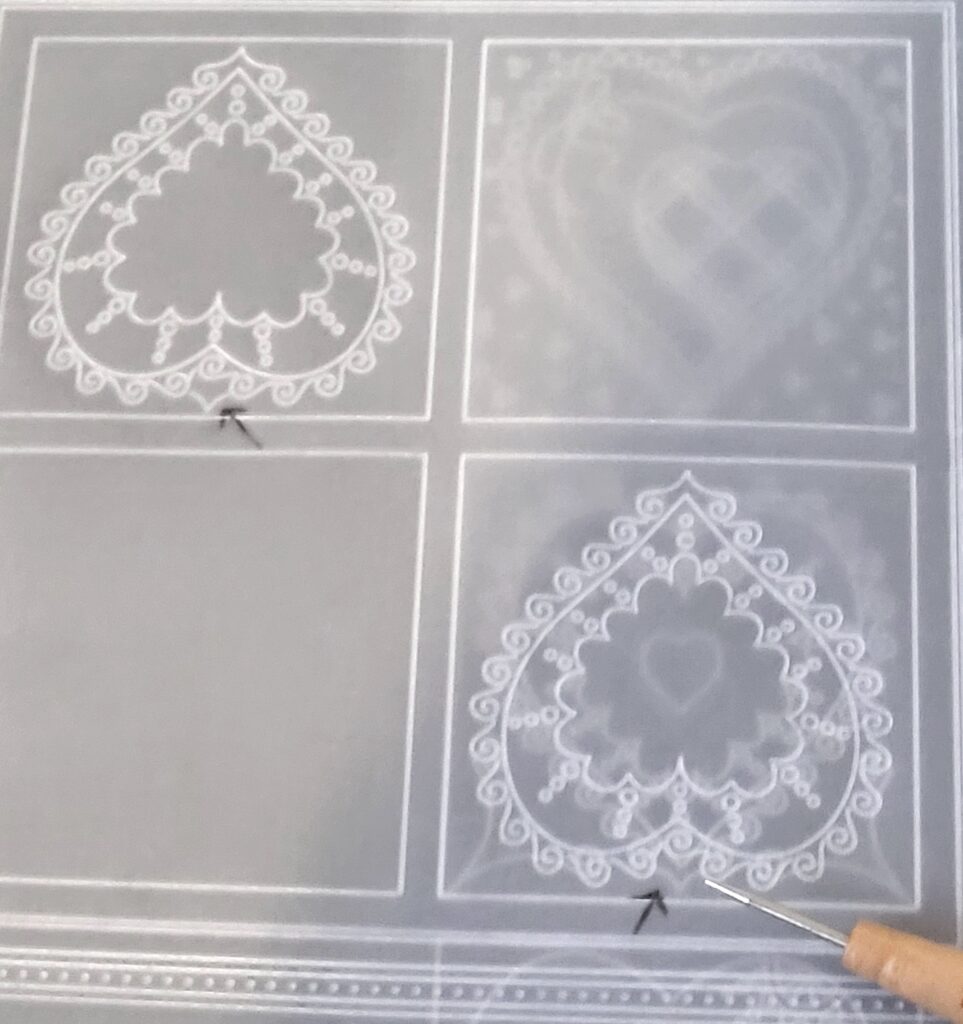
Step 6. Create another hanger in the same way but on the other embossed heart on your parchment. The pencil arrow shows the placement.
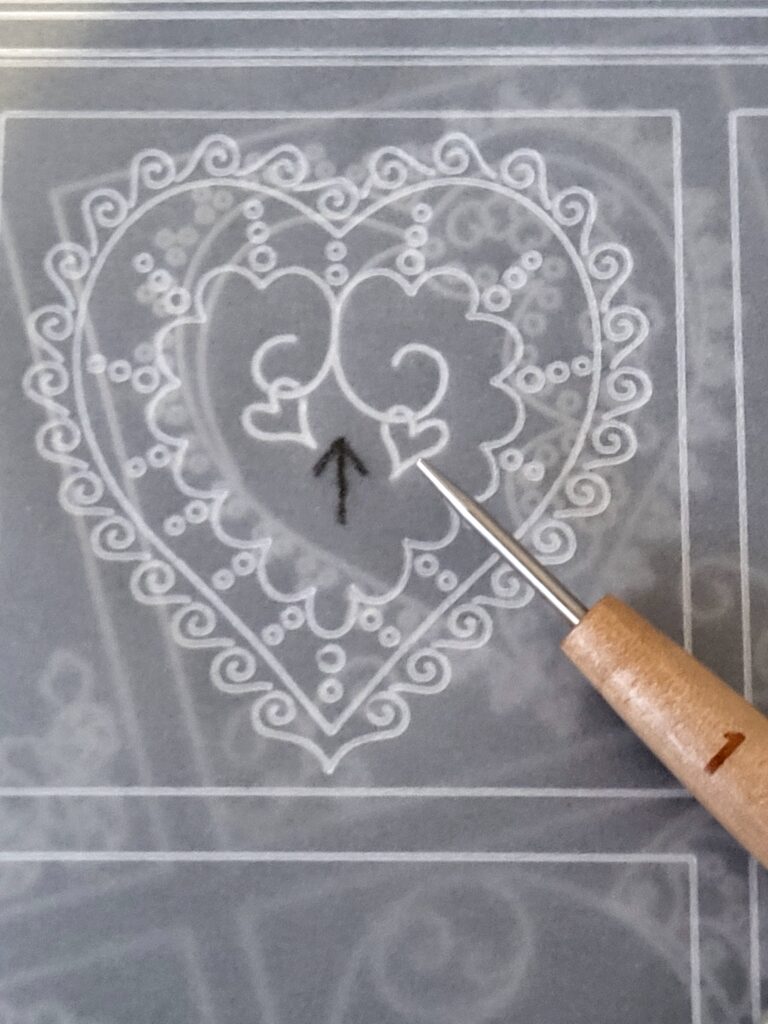
Step 7. You now need to position one of your parchment hearts (but not upside down this time) over the heart on the plate that is directly under the word GROOVI at the top right of the plate, so that you can join up and then emboss the pair of intertwined dangling hearts. The arrow on the picture shows you exactly what and where I mean.
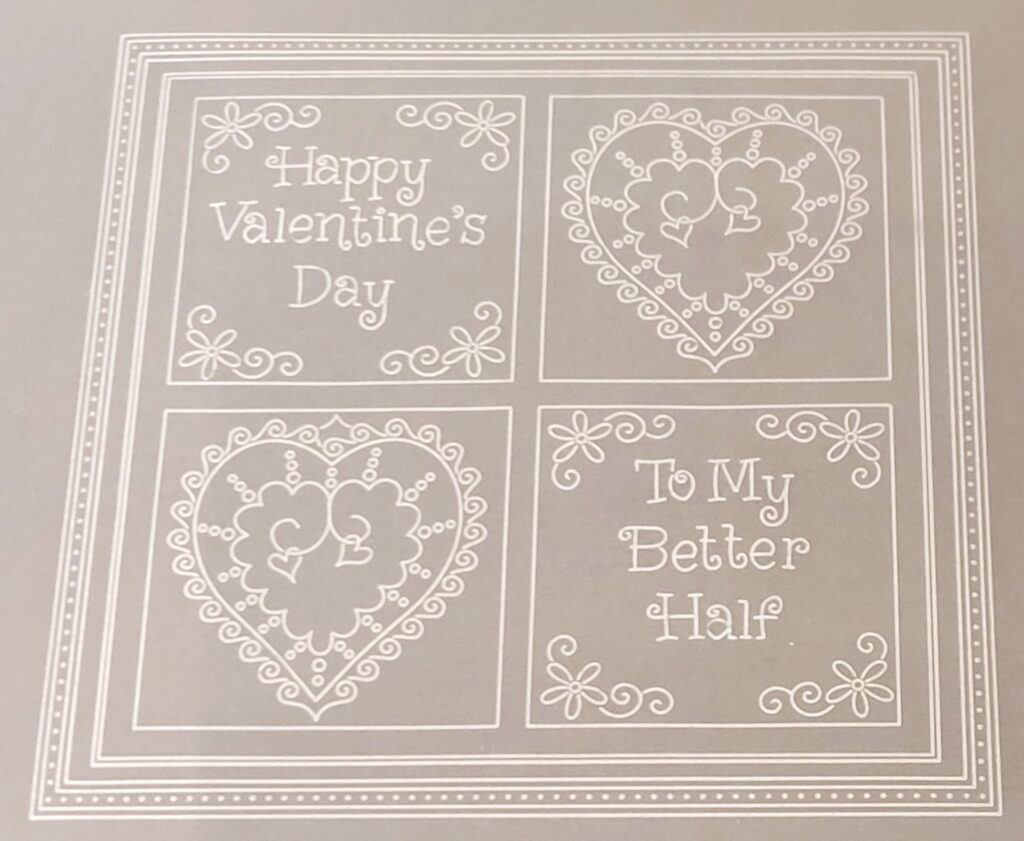
Step 8. Repeat the above on your other embossed heart then put the plate to one side. This is what you are aiming for.
Step 9. Working on the back, insert greetings of your choice in the two empty boxes on your parchment. The plate I used for the lettering was the alphabet section on the Nested Scallops Squares Extension plate, but you could use whatever word chain or alphabet plates you have in your stash. If you wish you can include some embossed designs in the corners as I have done.
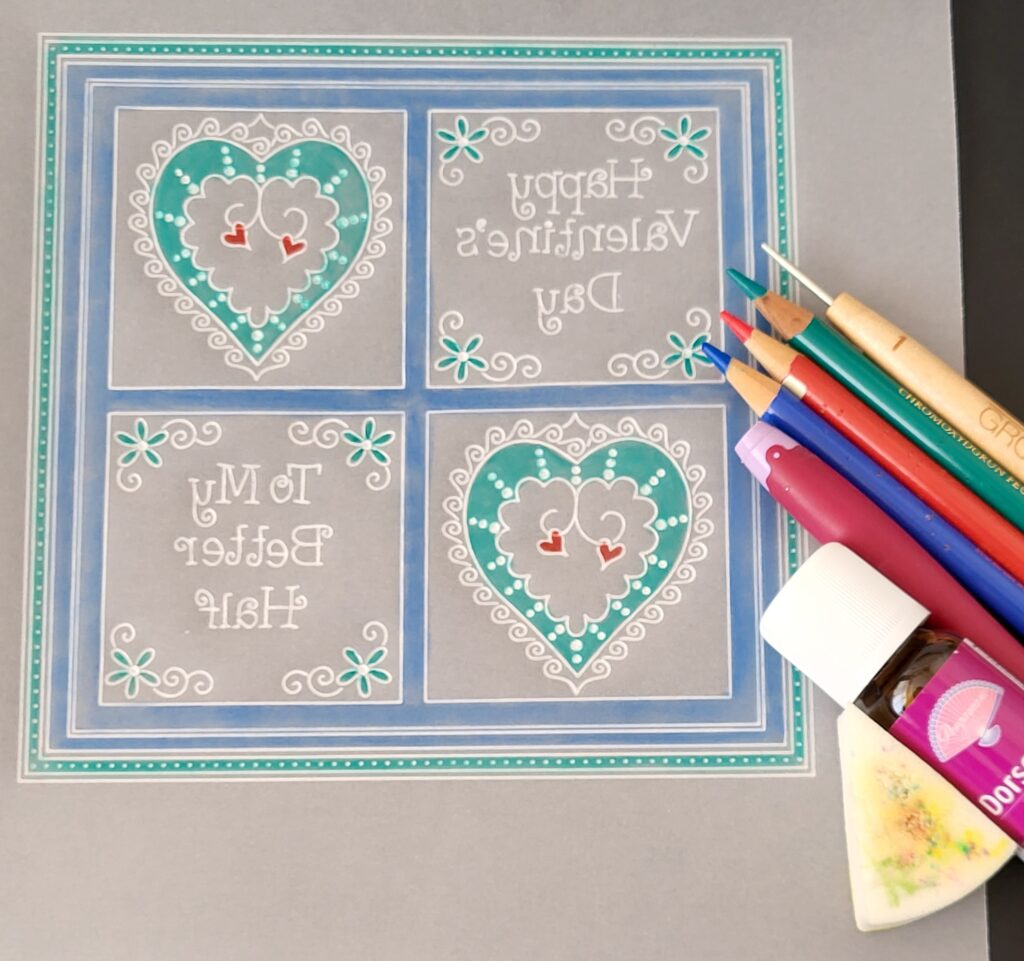
Step 10. Referring to the picture below, add colour to the back of your parchment using Polychromos pencils in the following colours: 143 Cobalt Blue, 276 Chrome Oxide Green Fiery, and 223 Deep Red. Use your blending nib, Dorso Oil and spot-on sponge to blend and smooth out the individual colours.
TOP TIP: If you need to remove any of the blended pencil colouring, simply do so (carefully) with a soft eraser and brush away the residue with a soft brush.
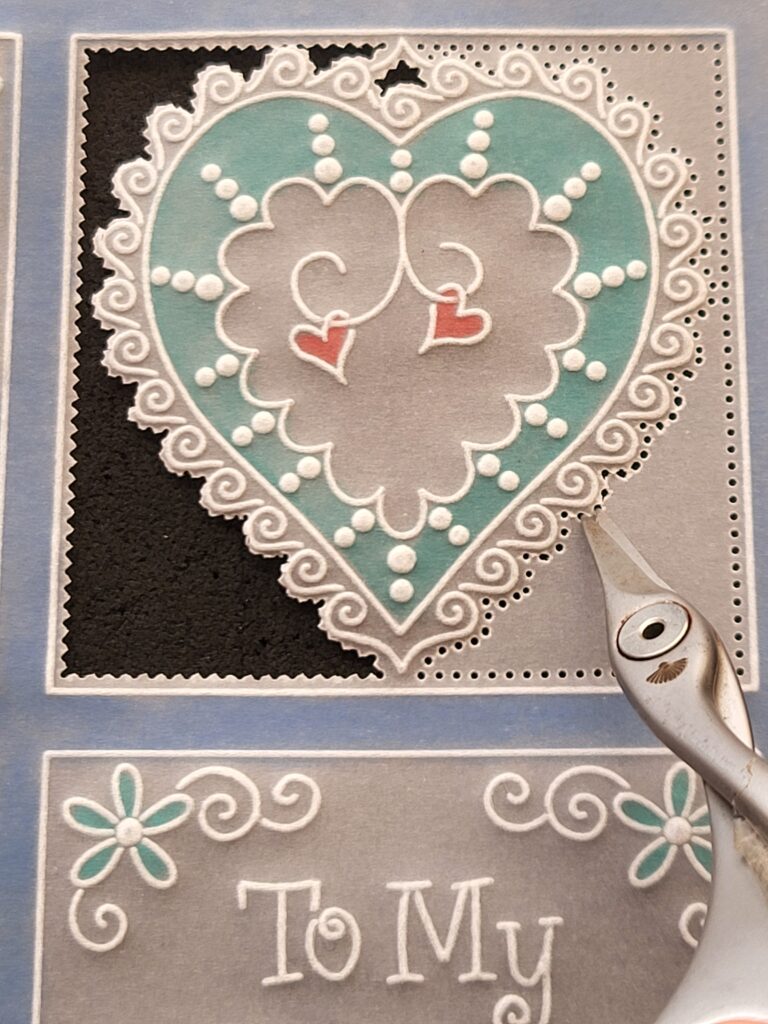
Step 11. On the front, use your 2-needle bold tool to pierce/perforate around the outside edges of the heart, the small space inside the hanger at the top, and then around the inner sides of the box. Do the same for the other heart.
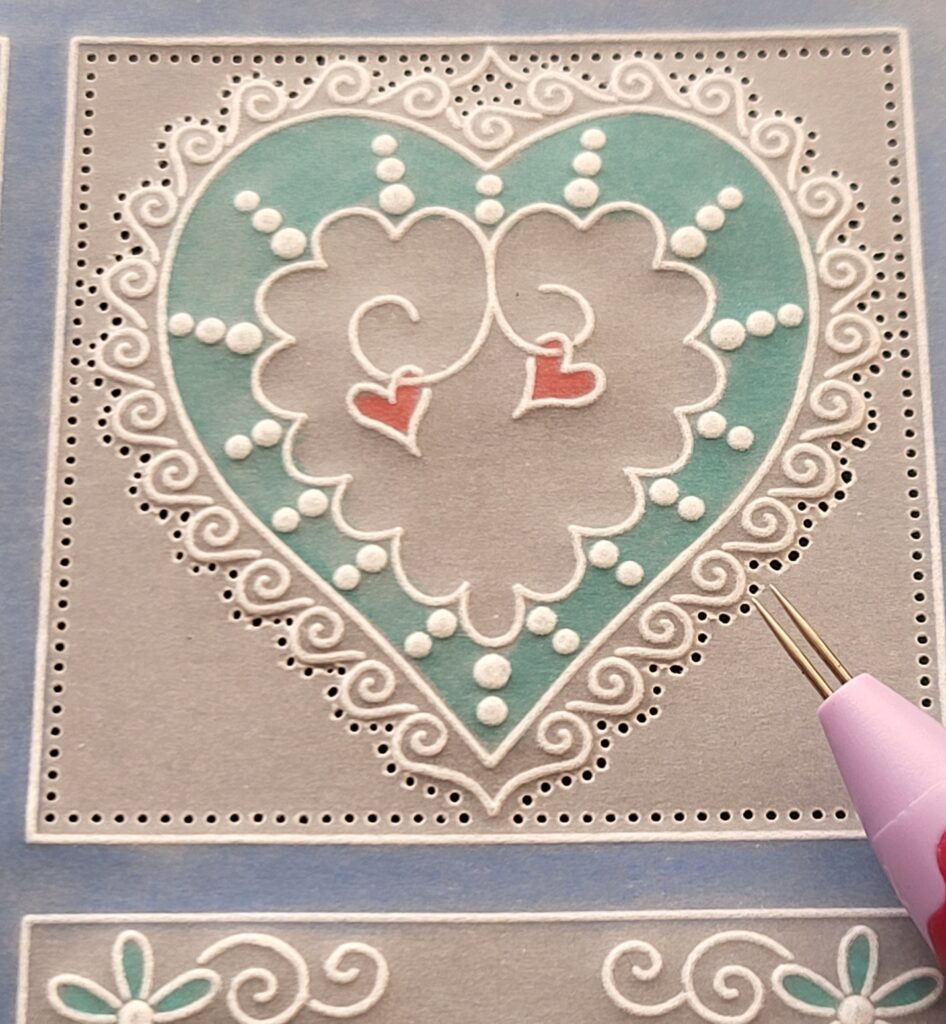
Step 12. Snip between the 2-needle perforations (using parchment scissors or snips) being mindful not to snip all the way across the middle top of the heart, or at the bottom, as the heart itself needs to remain attached to the parchment at these points as you’ll see on the picture below.
TOP TIP: When snipping, make sure that the curve of your scissors is over the waste parchment as you snip. The “waste” is the parchment that you want to drop away after snipping.
Step 13. To finish, use your 2-needle bold to perforate all the way around the outside edges of the outer frame on your main parchment, then snip between the perforations using parchment scissors or snips. Cut a piece of coloured card or paper to fit behind the actual size of the main parchment and attach it together with brads to make a Topper. Mount onto the front of folded white card and this is the finished card you are aiming for.

Wow. That is GORGEOUS! What a lovely project. Thank you, Maggie. I like that it’s not the typical colours, because, of course, you could use whatever colours you like at home! I’m sure Maggie’s hubby will appreciate the card as much as we do. Happy (almost) Valentine’s Day to you, friends.
Sending you lots of love, from me to you xoxo
Everything that Maggie has used in this particular project can be found in a shopping list, HERE
Now, looking at the week ahead… There’s telly to enjoy!
Monday 12th February:
In the SHAC with Barbara – 10am Live on Facebook and YouTube
Tuesday 13th February:
Groovi Tuesday with Paul – 10am Live on Facebook and YouTube
Wednesday 14th February:
Groovi One Day Special with Paul on Create & Craft – 6pm, 7pm & 9pm (2 hour launch at 6pm)
Thursday 15th February:
Groovi One Day Special with Paul on Create & Craft – 10am & 2pm
Craft Along with Barbara – 7pm Live on Facebook and YouTube
Friday 16th February:
Craft Along with Barbara – 7pm on Facebook and YouTube (Repeat show)
Saturday 17th February:
Get Groovi with Clarity with Paul on Create & Craft – 7am & 11am
Craft with Clarity with Deborah Wheeler on Create & Craft – 1pm & 4pm
Busy busy busy 🙂
See you there!
Travel gently, friends.
Lotsa love, Grace & Maggie xoxo
Clarity – The Home of Art, Craft, and Well-Being.
Lovely card, thank you Maggie and Grace. I’m currently making one with the doodled hearts that Maggie designed. This will be next
Hugs to you Grace 😘😘😘
Brilliant project Maggie, I’m sure there will be lots of people attempting their own similar cards for their loved ones or friends as it is so versatile. Have a lovely rest of the weekend both of youand do something nice just for you Grace, you deserve it xx
Really lovely achievable project even just for sending someone a bit of love when they need it, love the colours too. Xxxx
What a lovely design and so versatile too. I can think of many occasions for this. Have a good week Grace and know you are very loved. X
A lovely project, just shows how the various plates can be adapted. Thanks Maggie for doing it for us & as others have said suitable for all sorts of occasions.
Have a good week everyone, take care xx
A great step by step, thank you Maggie, and Grace. Take care and have a good week everyone. xx
Hi Grace & Maggie
Thank you so much for this truly lovely project – what is a super card for valentine’s day.
Thank you for sharing this with us
Xx