Clarity Matters Blog Tutorial: How To Combine Stamping & Parching
Hello hello! Grace here – back in the UK for Christmas.
I hope this finds you well, safe, and enjoying your Christmas Eve.
We are joined this weekend by a lovely member of our Clarity design team, Jane Telford and she has combined both stamping and parching for this weeks step-by-step.
Message from Jane – I think Linda’s Flowers and Lace plates are some of my favourite ones. They have so many ways of being used and I wanted to show this when I demoed at the open days. I also wanted to include some stamping on parchment in my demos and I felt the Pergamano Poppet stamps were just perfect.
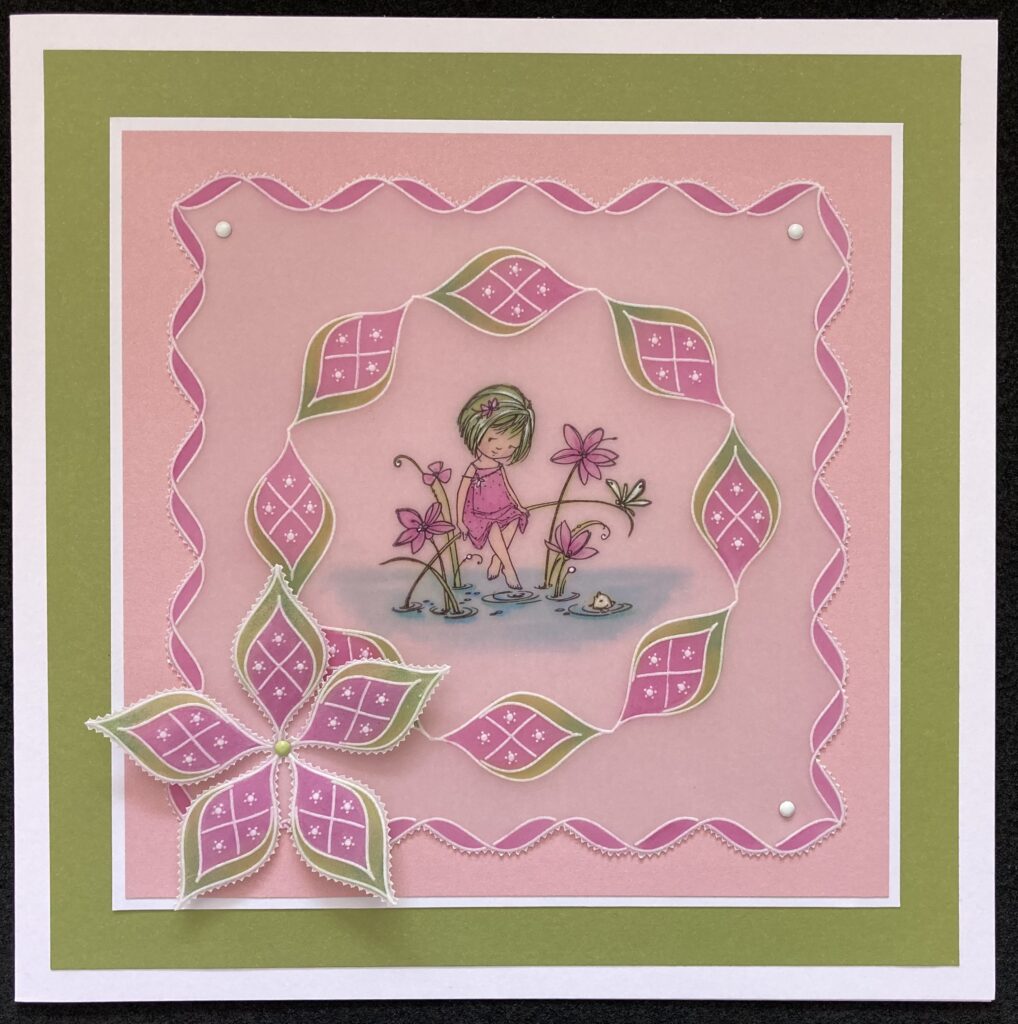
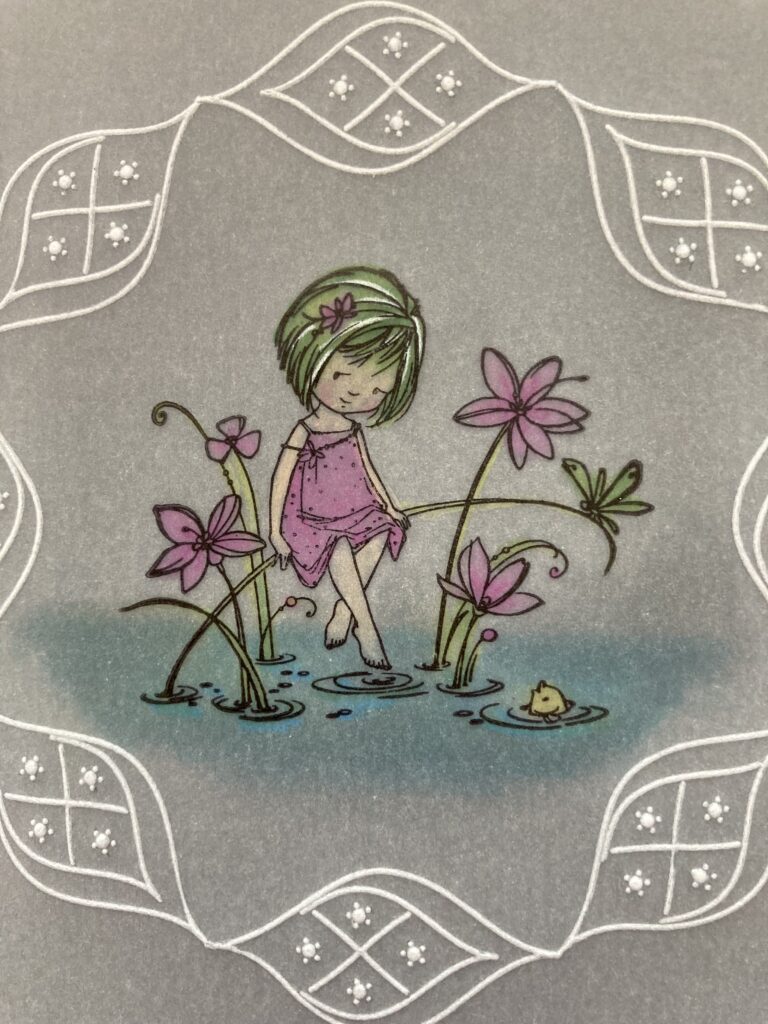
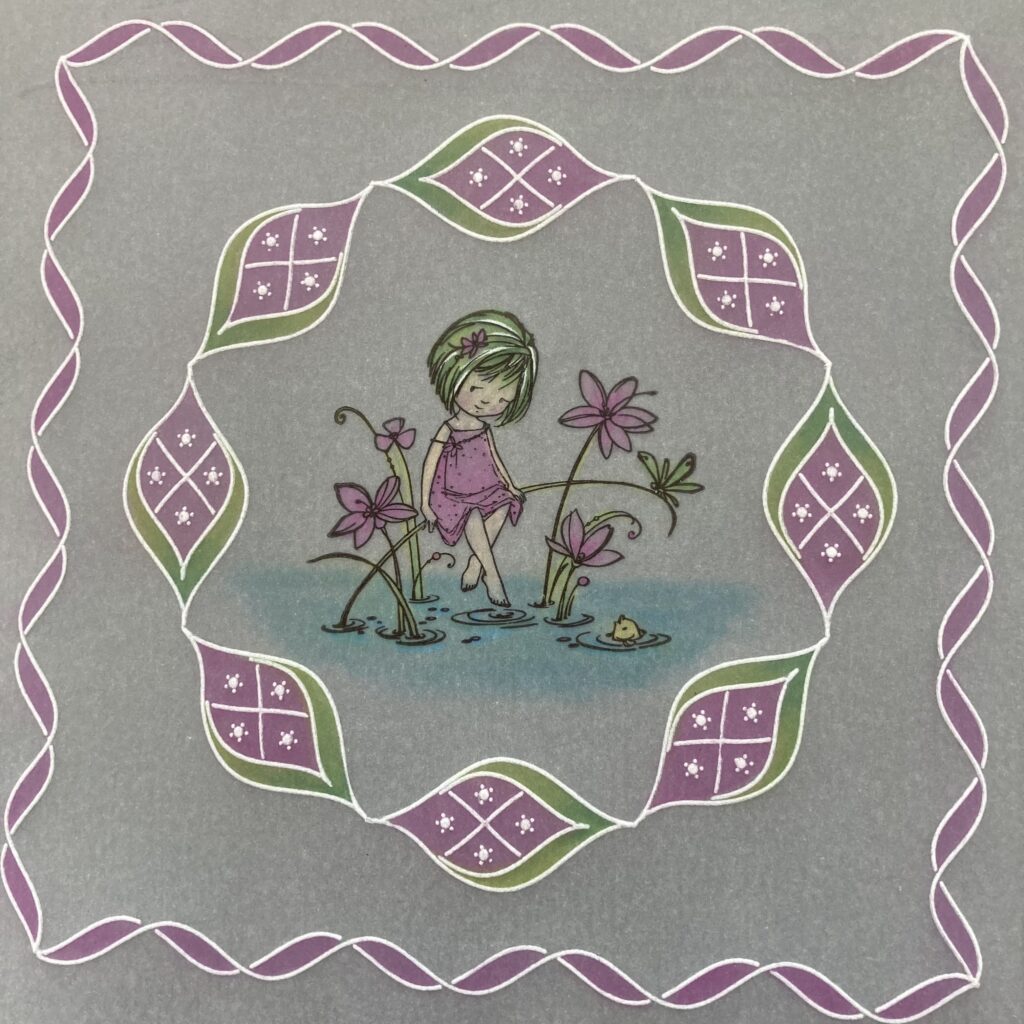
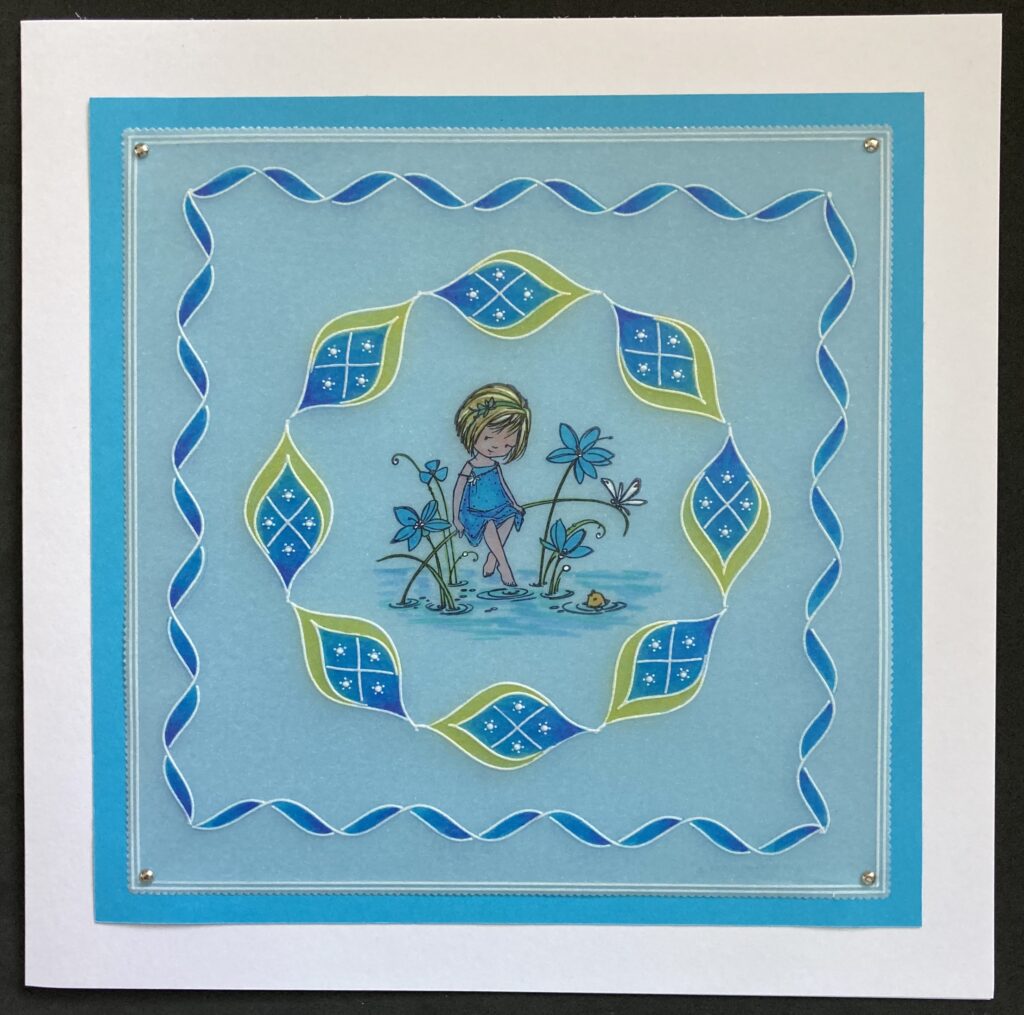
Here is the card I made using the Cosmos Groovi plate and the small Petal Poppet stamp.
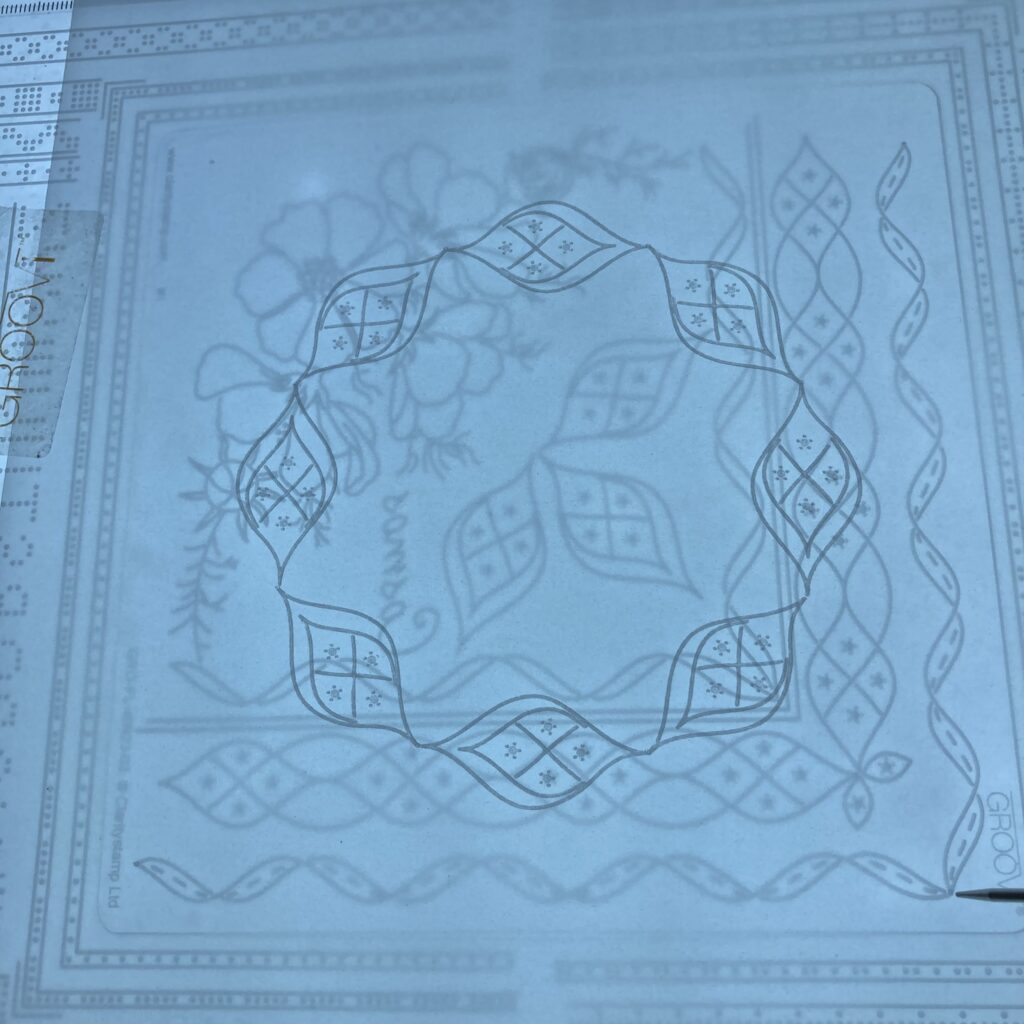
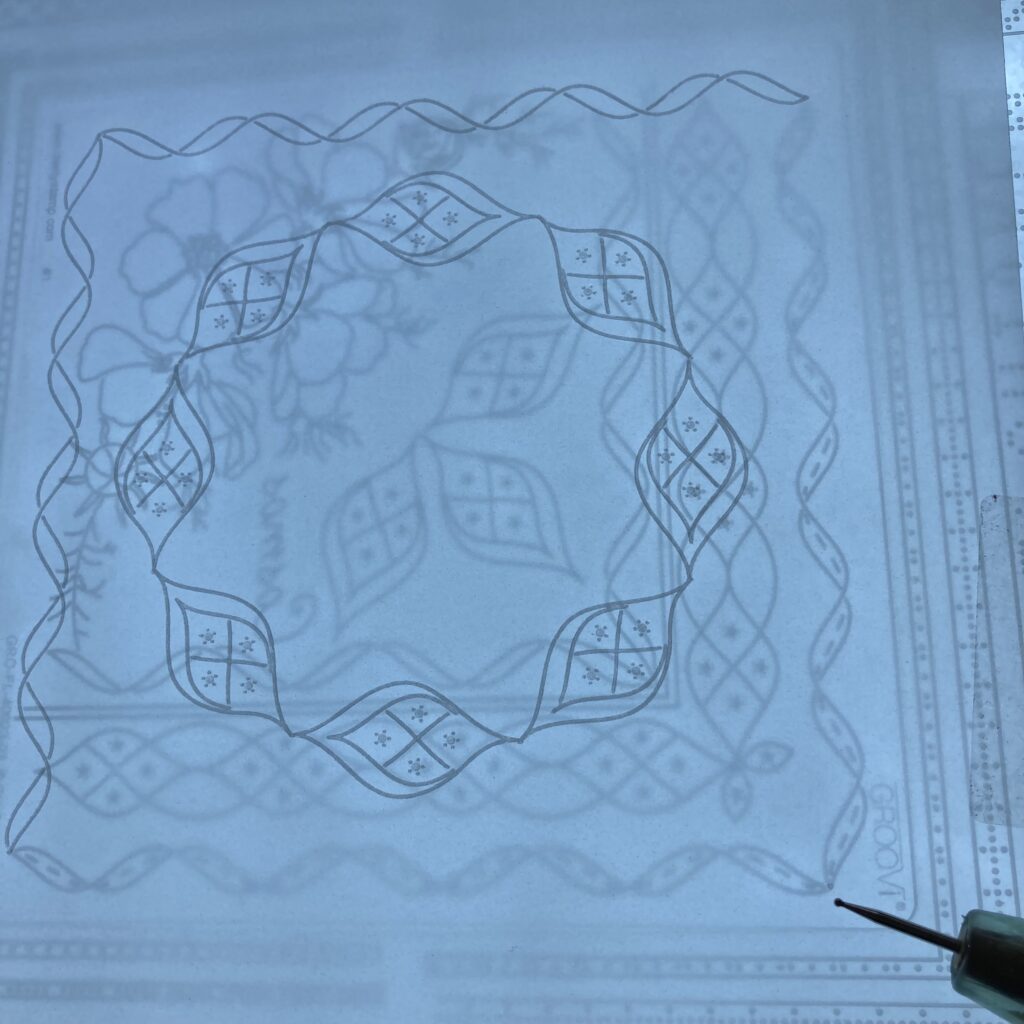
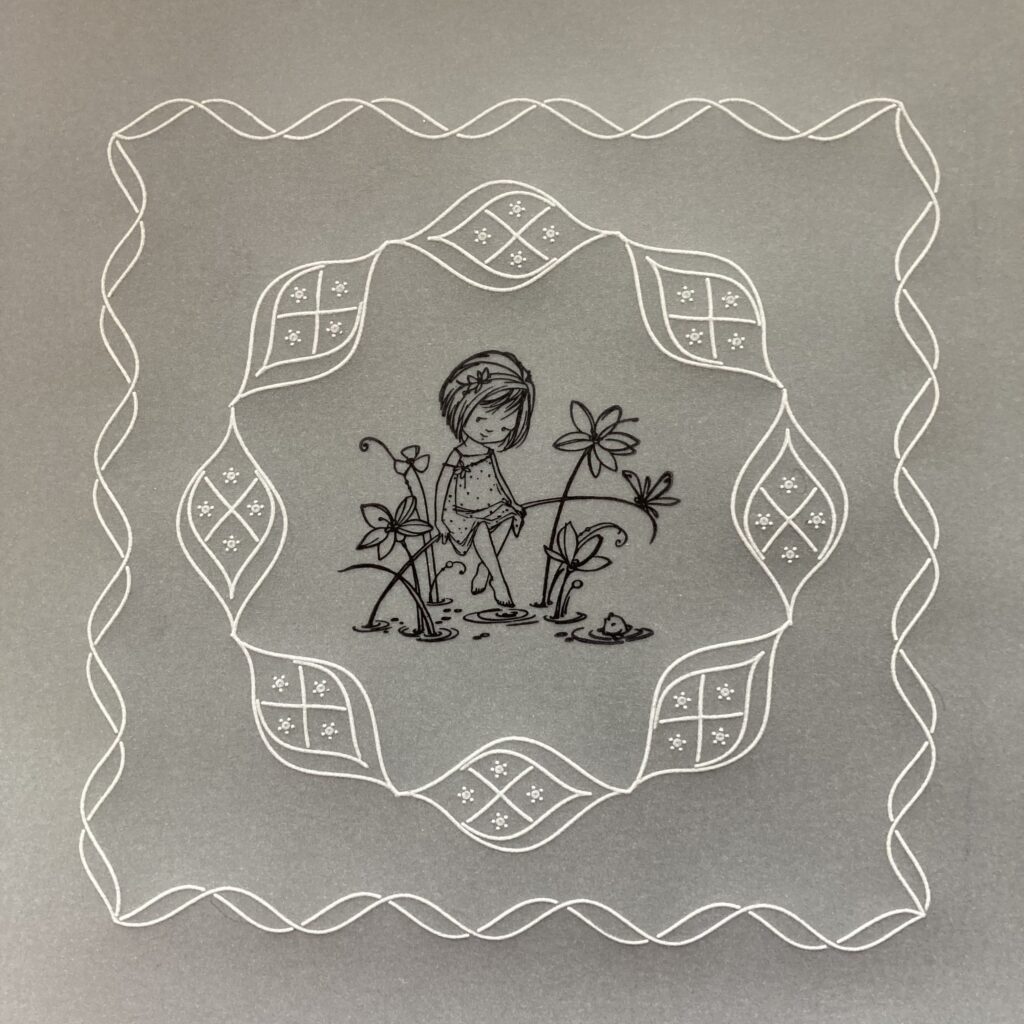
This is where we are headed
Ingredients
Clear Parchment GRO-AC-40024-A4
Linda’s Cosmos & Lace A5 Square Groovi Plate GRO-FL-40923-03
Nested Square GRO-PA-40037-03
Nested Octagon Plate GRO-PA-40119-03
Groovi Plate mate for A5sq grids GRO-CO-41706-08
Light wave ACC-LP-30352-A4
Groovi Embossing Tool 0.8mm – 1.3mm GRO-AC-40026-XX
Groovi Embossing Tool 2.0mm – 2.8mm GRO-AC-40027-XX
A4 Translucent White Super Foam GRO-AC-40603-A4
Flower Mini Poppets A5 Stamp Set PER-ST-70388-A5
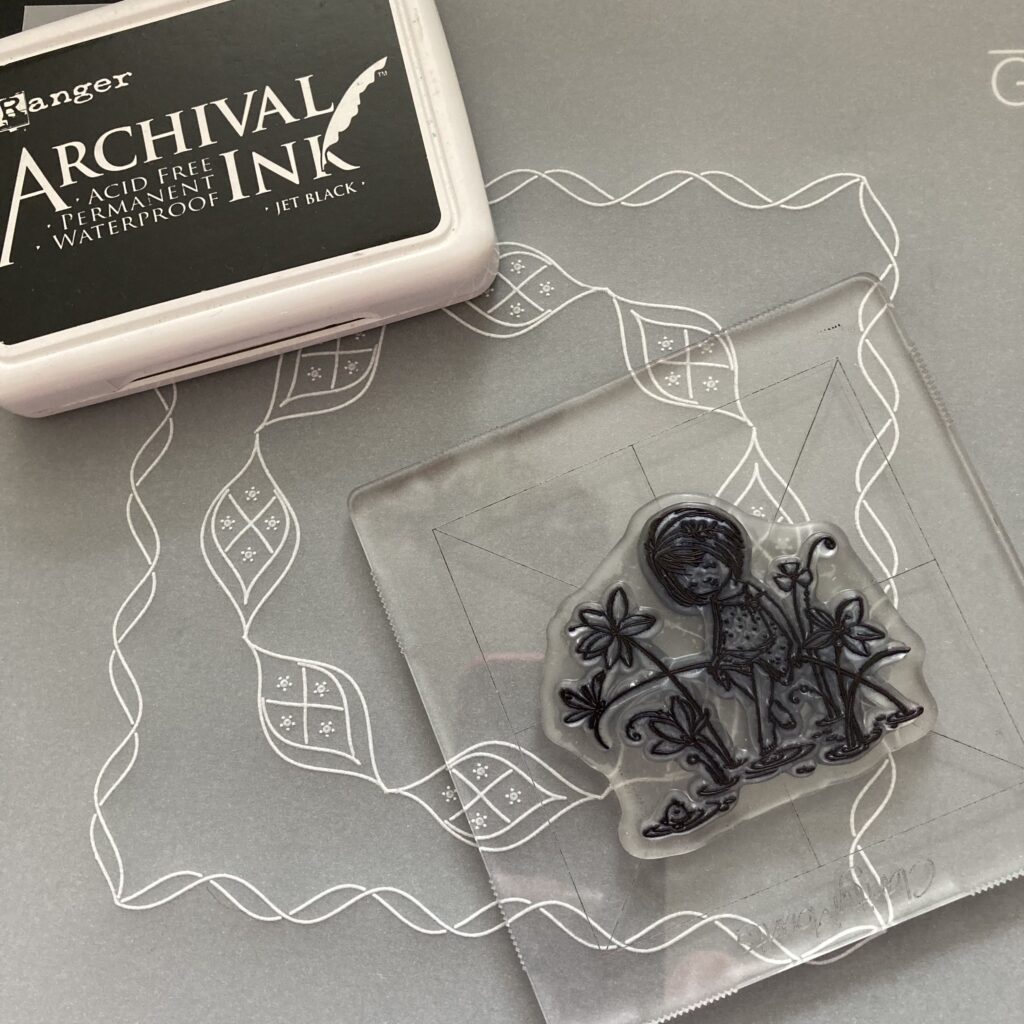
Archival Ink Pad – Jet Black INK-AR-50030-XX
Perga Liners – Combi Box (21452) PER-CO-70063-XX
Pergamano Colouring Essentials Kit PER-AC-70431-XX
Pergamano Blending Pen (10500) With 3 Nibs PER-AC-70300-XX
2-Needle Bold (10288) Perforating Tool PER-TO-70279-XX
4 white brads PER-AC-70269-XX (Due 2024)
1 green brad PER-AC-70270-XX (Due 2024)
Ringlock scissors PER-TO-70041-XX
Amazonia Companion Paper ACC-CA-31344-88
Piece of white card
KISS Words Sticker Collection ACC-SC-31323-A5
8×8 Card Blank ACC-CA-30616-88
Step 1 – Cut a piece of A4 parchment to measure 8×8 inches. This makes it easier to attach to the plate mate with Groovi tabs.
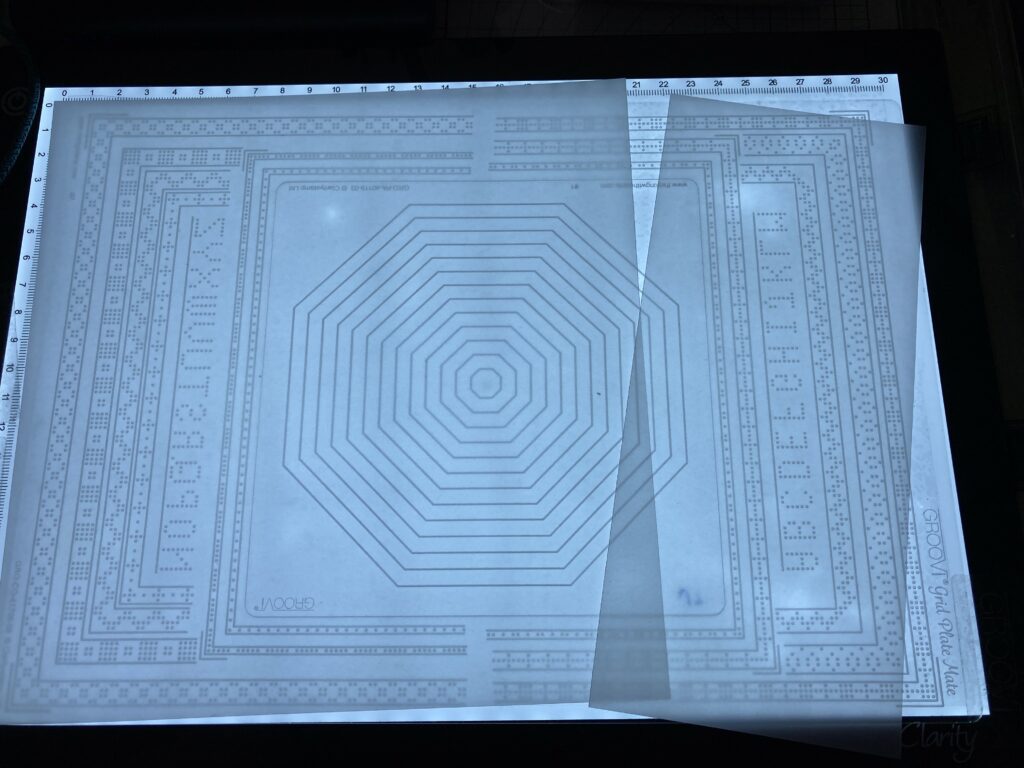
Step 2 – Put the Octagon plate in the Plate Mate and work out which line fits the petal shape best. I found the fifth line was perfect.
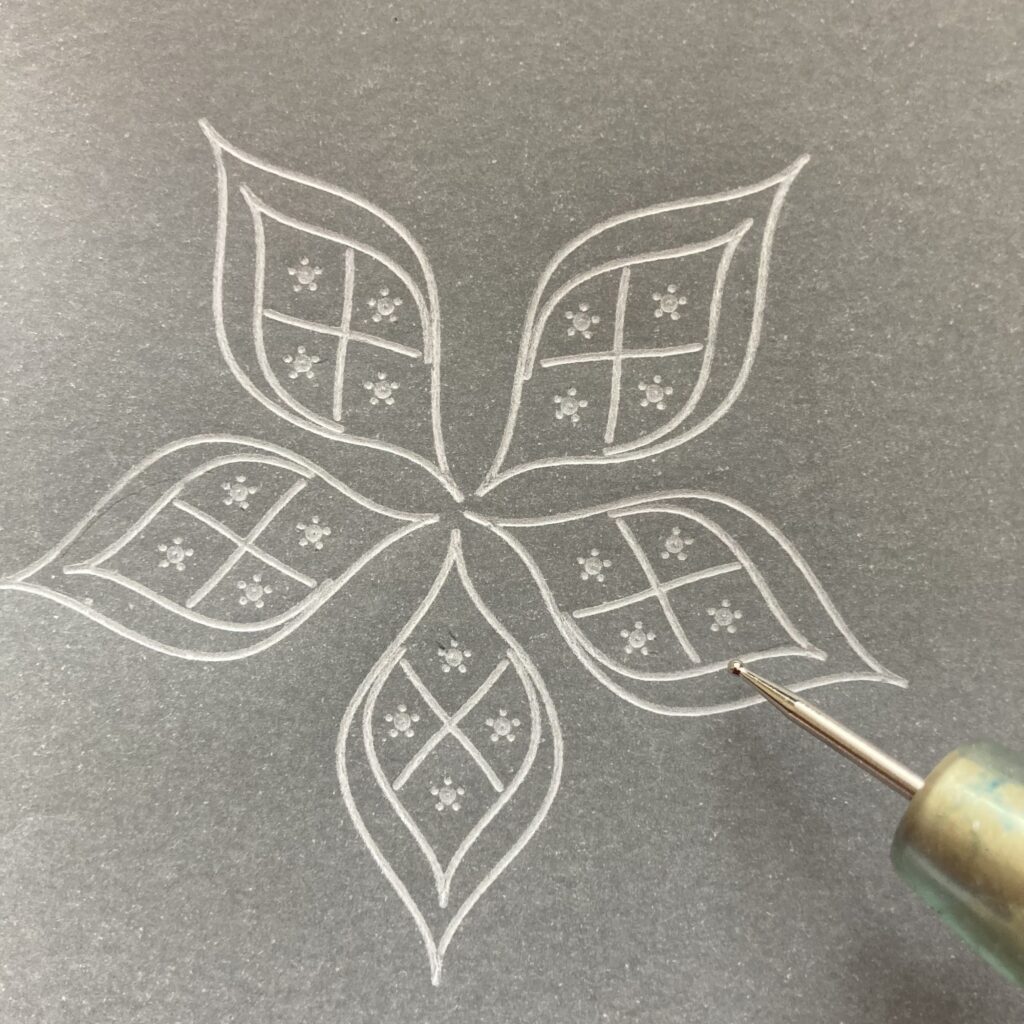
Step 3 – Put the parchment over the octagon plate and stick it to the Plate Mate with Groovi tabs. Mark the 8 corners of the fifth line with the No. 1 tool. You just want little dots.
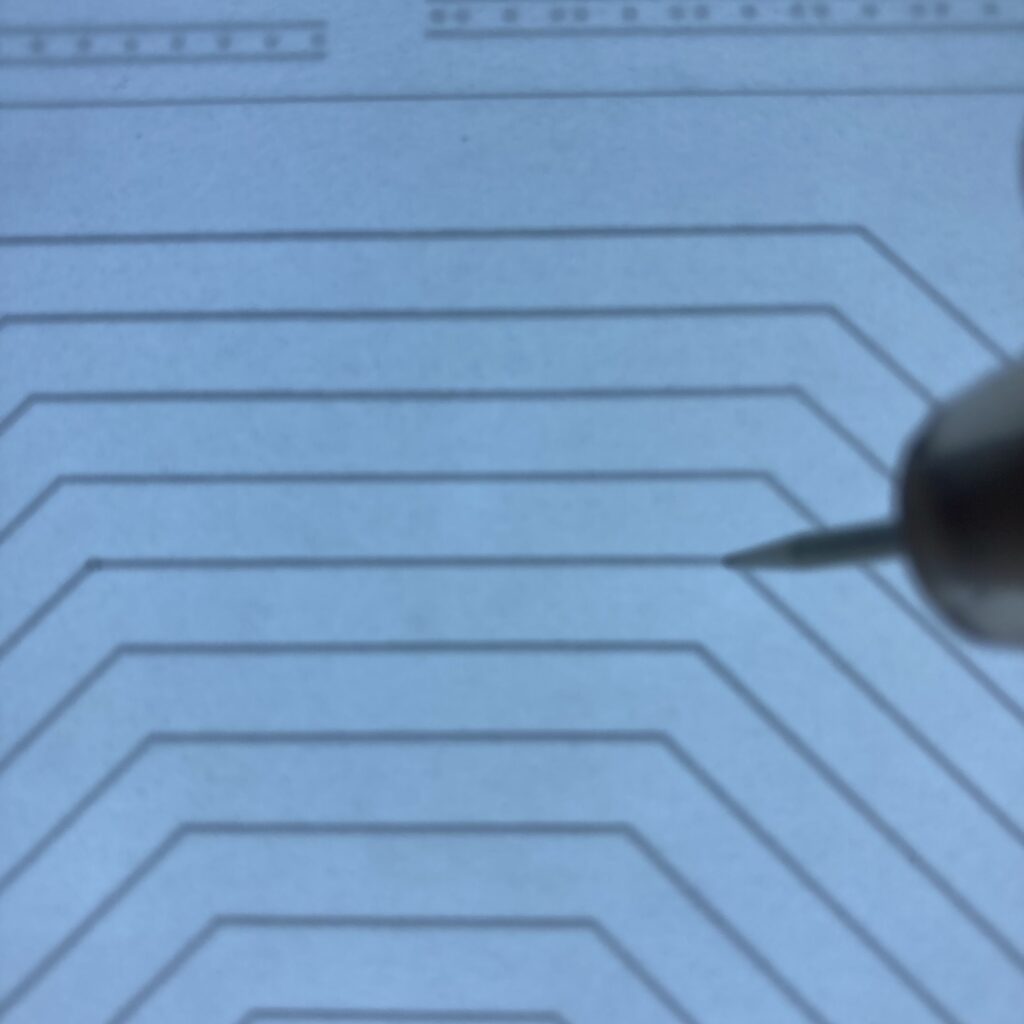
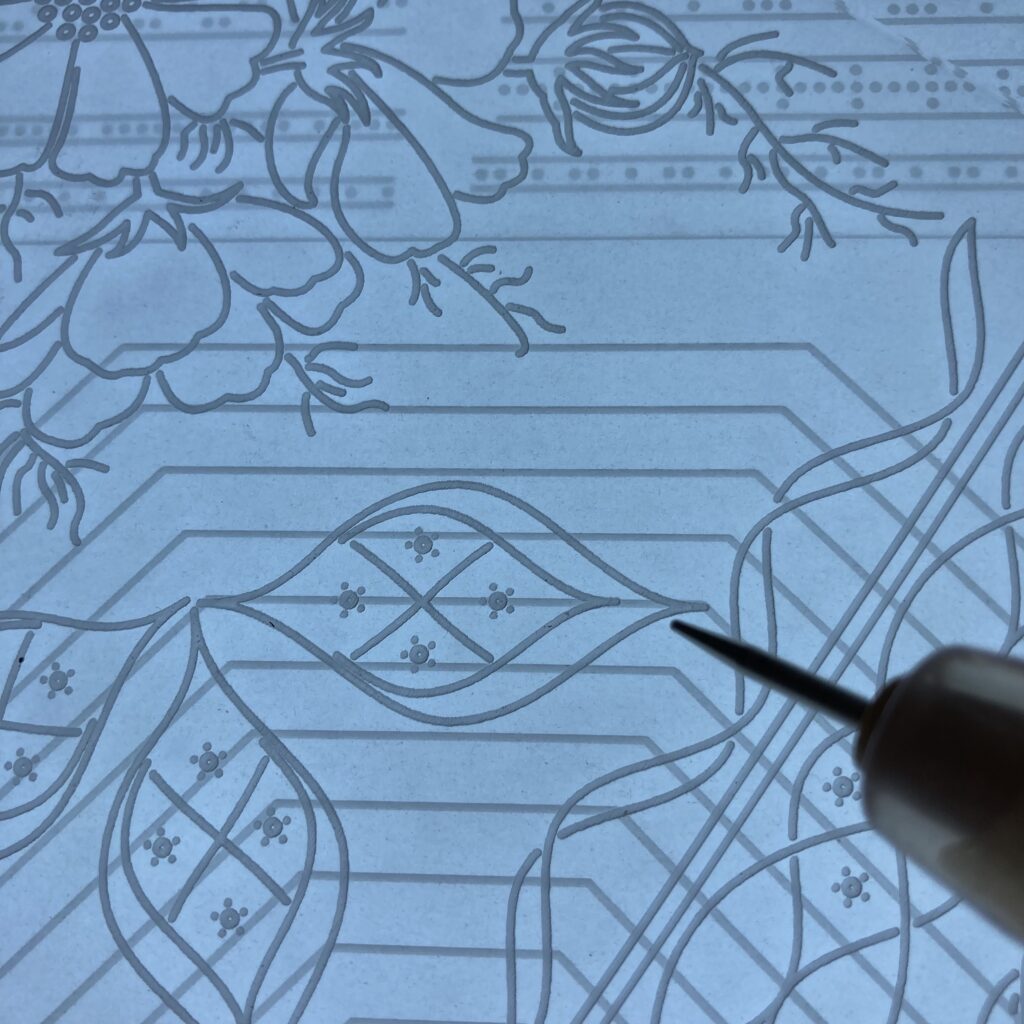
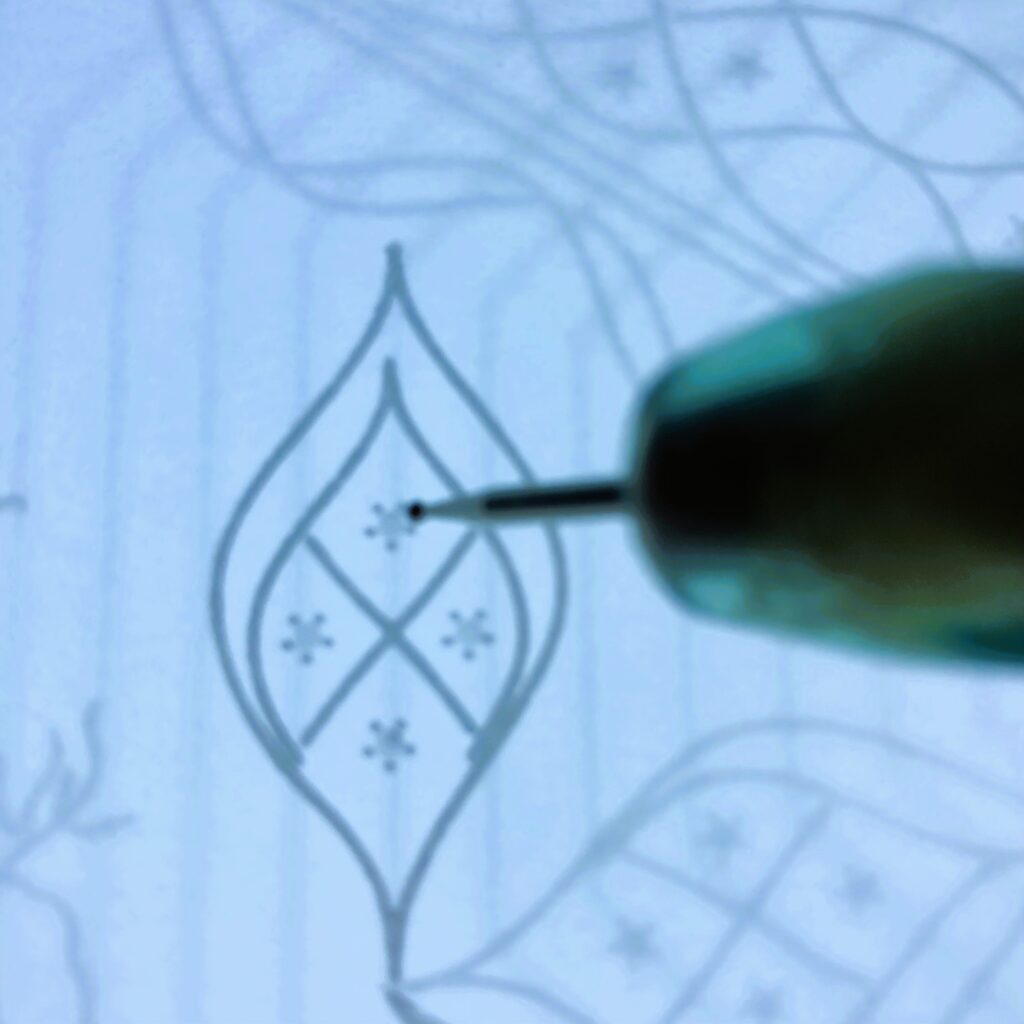
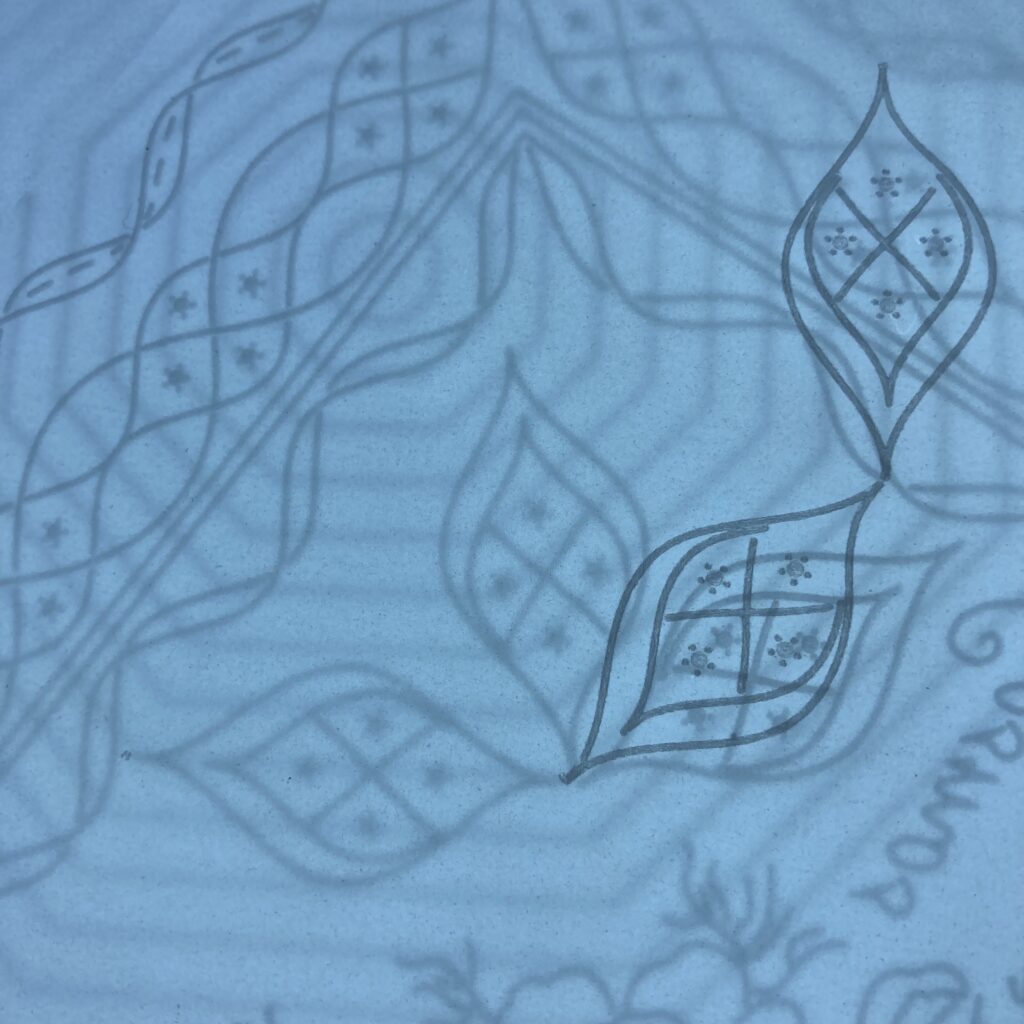
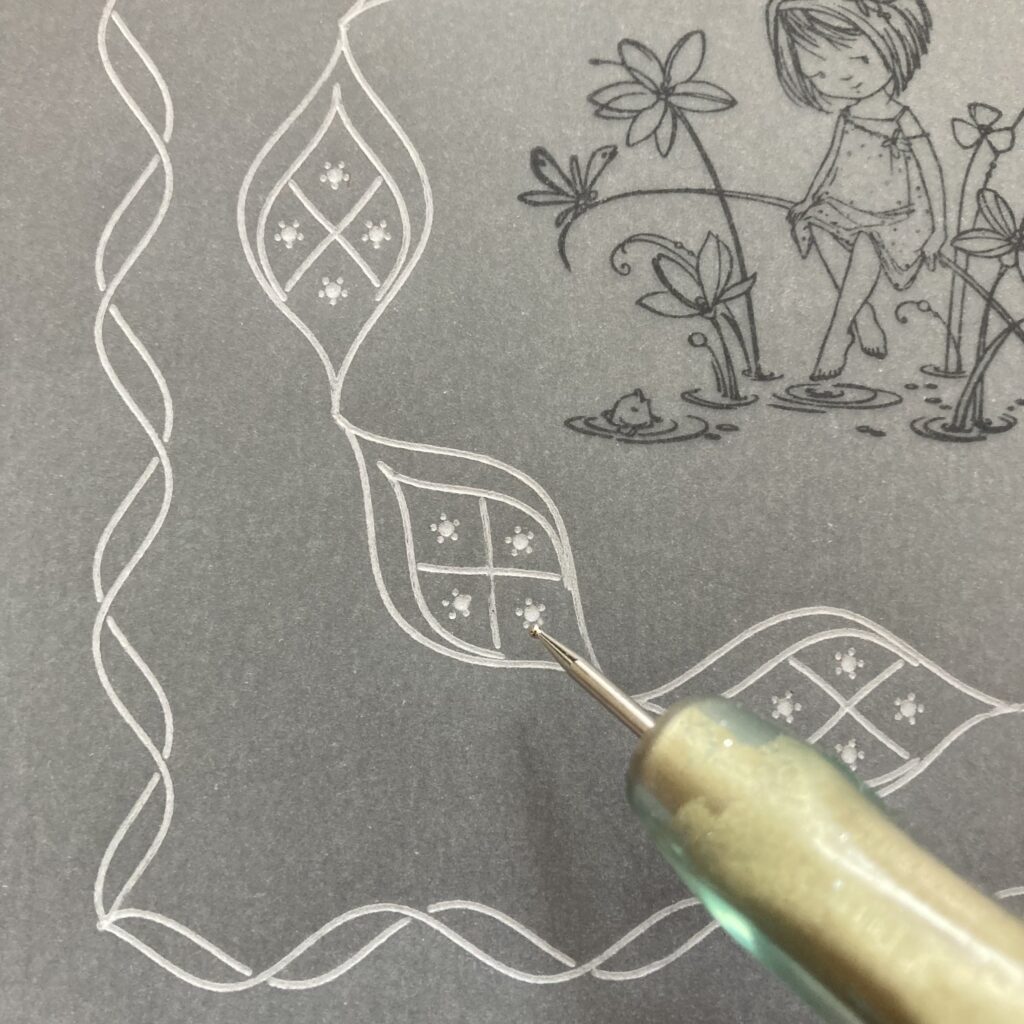
Step 4 – Leave the Octagon plate in place and slide the Cosmos plate between the Octagon and the parchment. Locate the ends of the petal and the dots so they line up. Emboss the petal. Use the No. 2 tool to emboss the tiny circles within the petal.
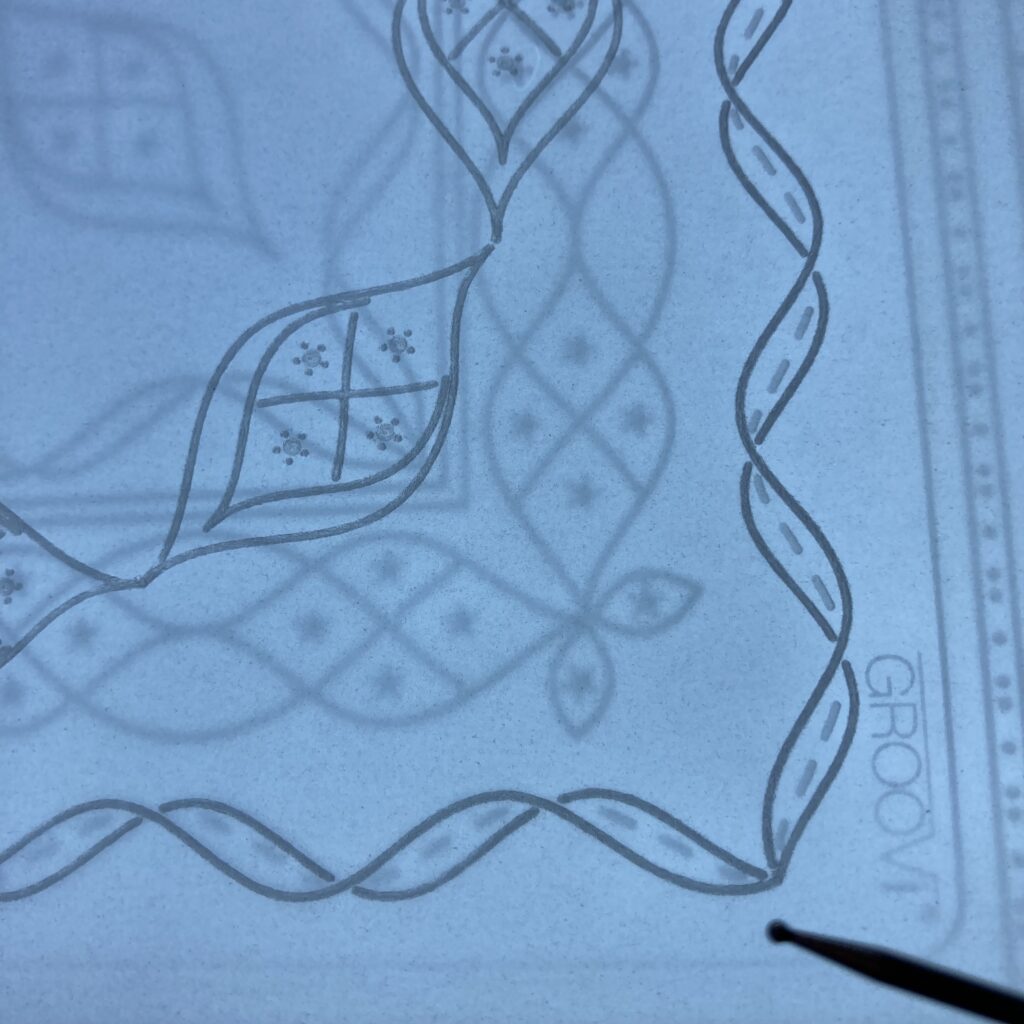
Step 5 – Move the plate round to the next dot. Emboss the petal again. Make sure you use the same petal each time. Continue round the Octagon shape keeping the parchment still as you move the plates. Relocate the Groovi tabs as you need to. Continue until you have a complete circle.

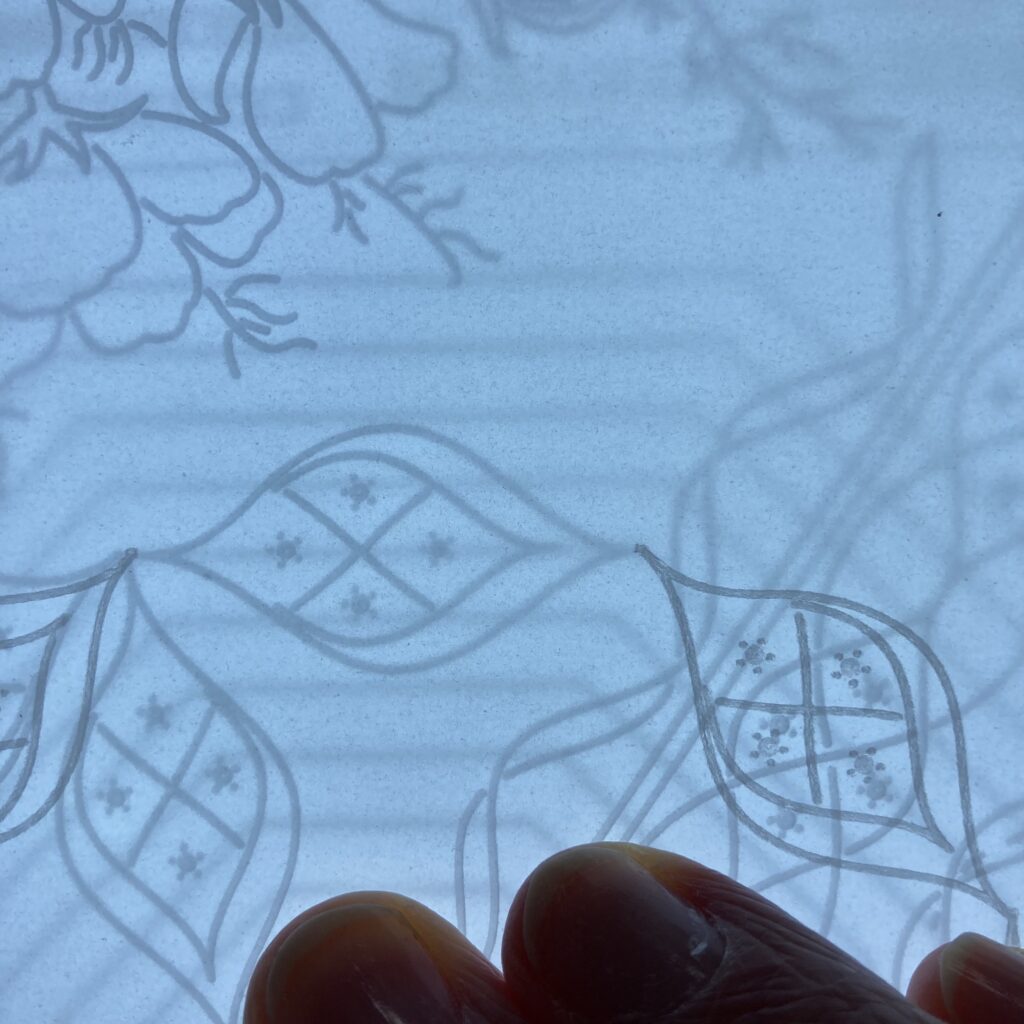
Step 6 – Leave the parchment attached to the Plate Mate and remove the Cosmos and the Octagon plate. Put the Nested Square in the Plate Mate and check the petal circle is in the centre. If you haven’t moved the parchment, it should be. Mark the corners of the square with the No. 1 tool.
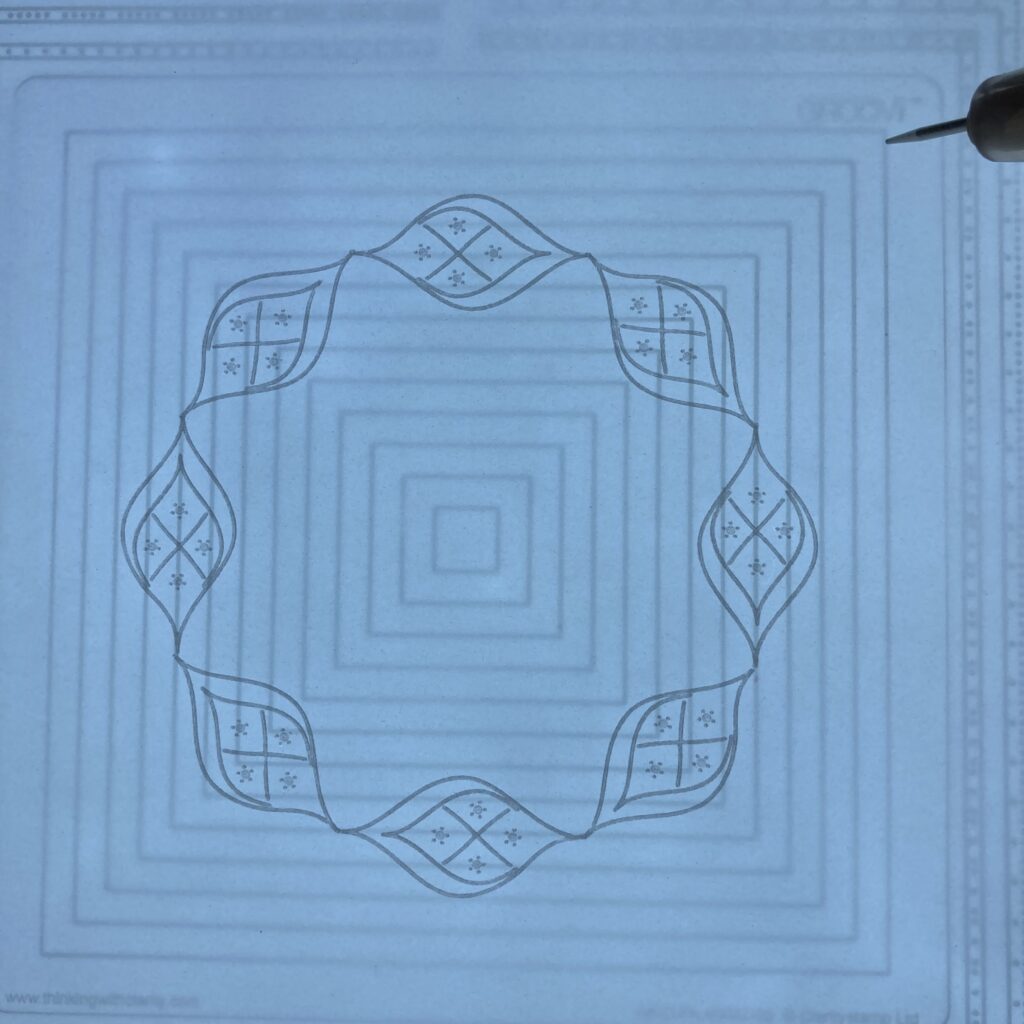
Step 7 – Take the parchment off the platemate and replace the nested square with the cosmos plate. Line up the ribbon corner with the dots you made with the square. Emboss the ribbon corner without the inner dashes. Lift the parchment, turn it and line up the corner again. Emboss it as before. Put this piece of parchment to one side until later.
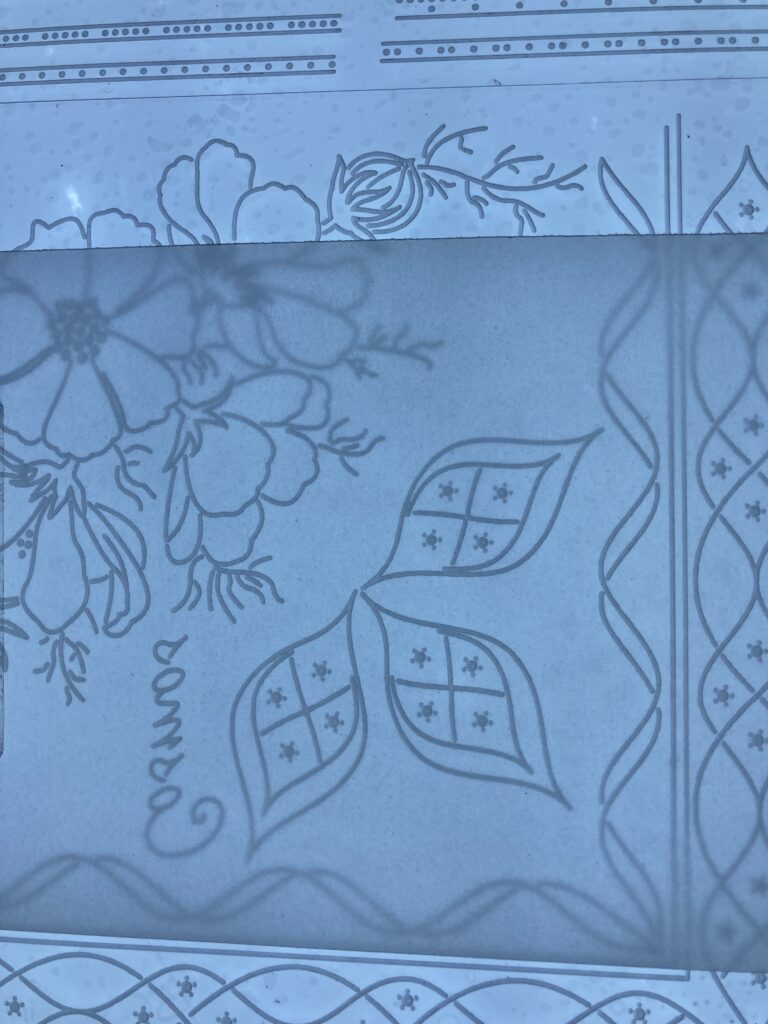
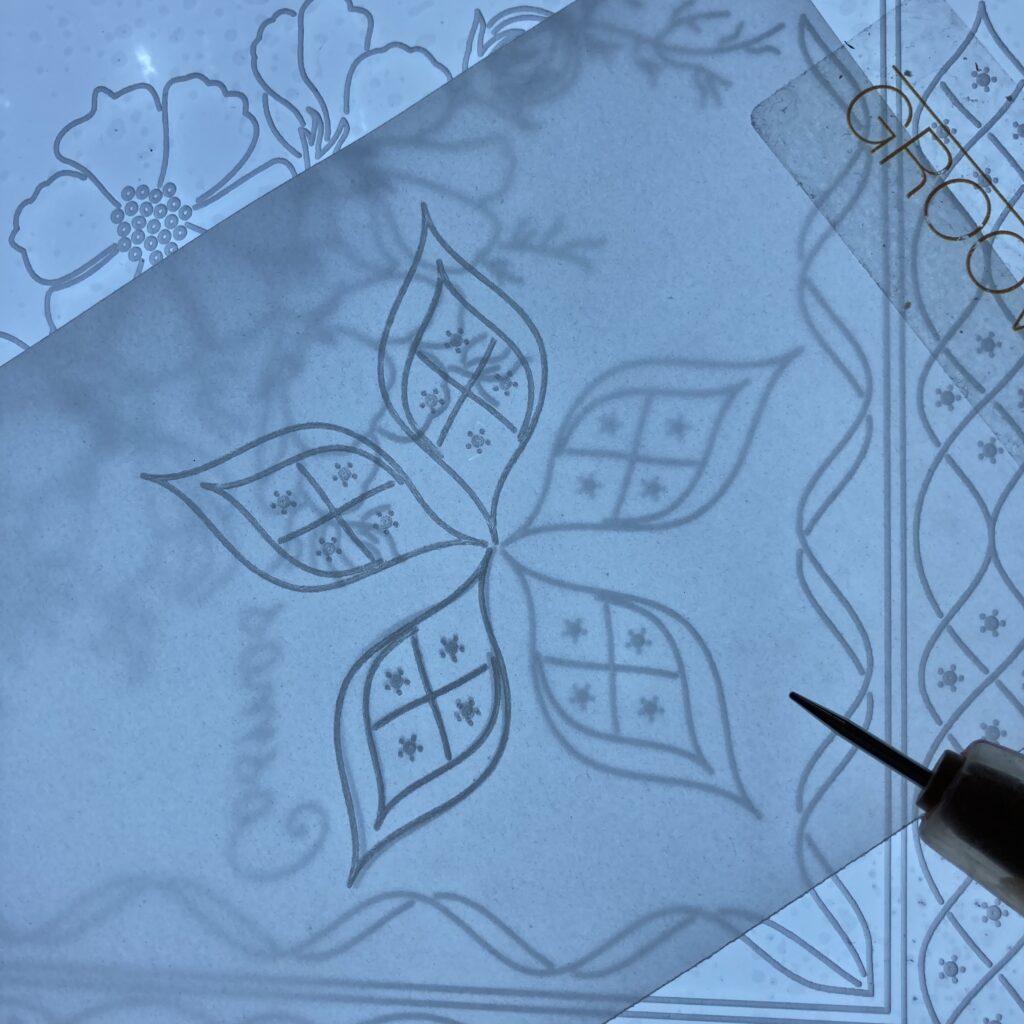
Step 8 – Take the piece of parchment you cut off at the start and attach it to the Plate Mate over the three petals. Leave space to add two more petals. Emboss the three petals as they are on the plate. Relocate the parchment to evenly add another two petals.
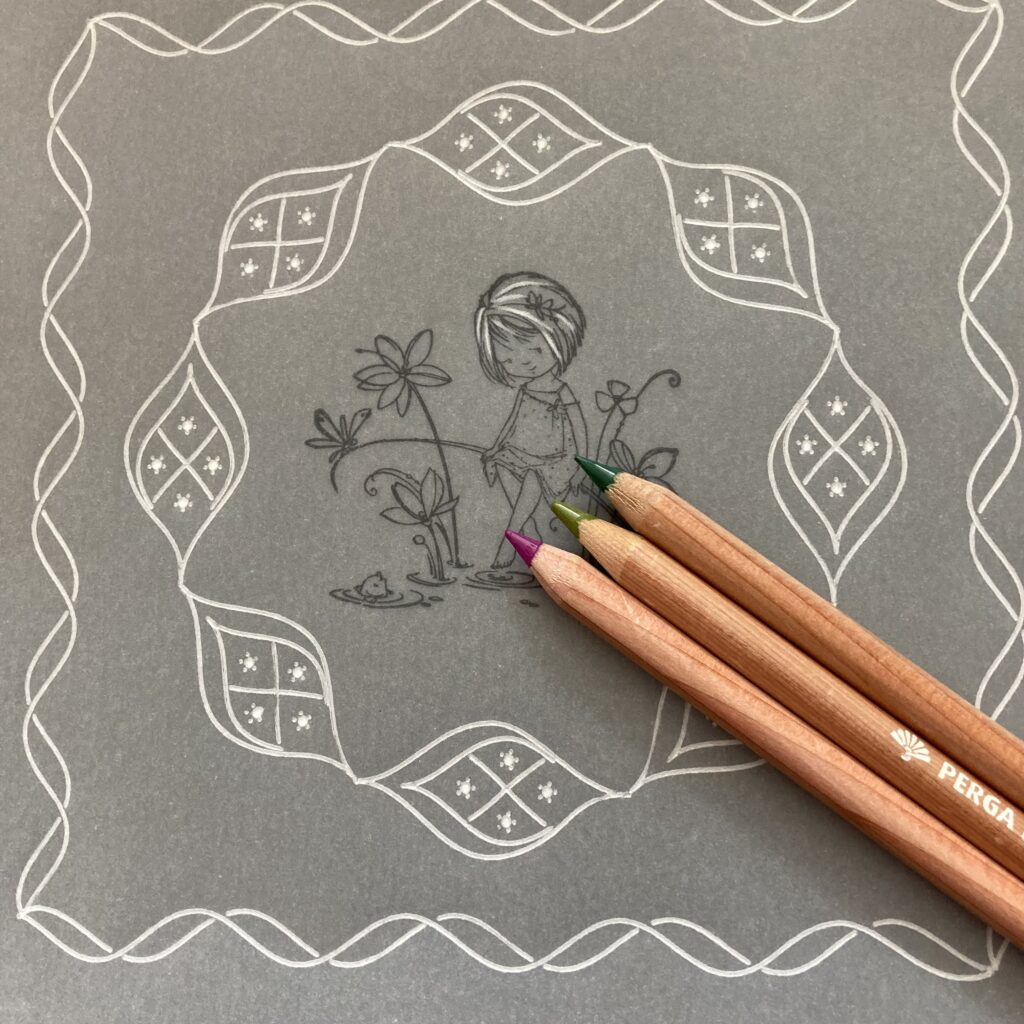
Step 9 – Put the petal and ribbon frame on the hard side of the Groovi mat with the front of the parchment face up. Put the stamp on the mega mount and ink it up with the black archival ink and stamp it in to position being careful not to slide. Firmly press then lift it off the parchment.
Top tip practice stamping on copy paper first. This will season your stamp if it is a new one and stamp better on the parchment.
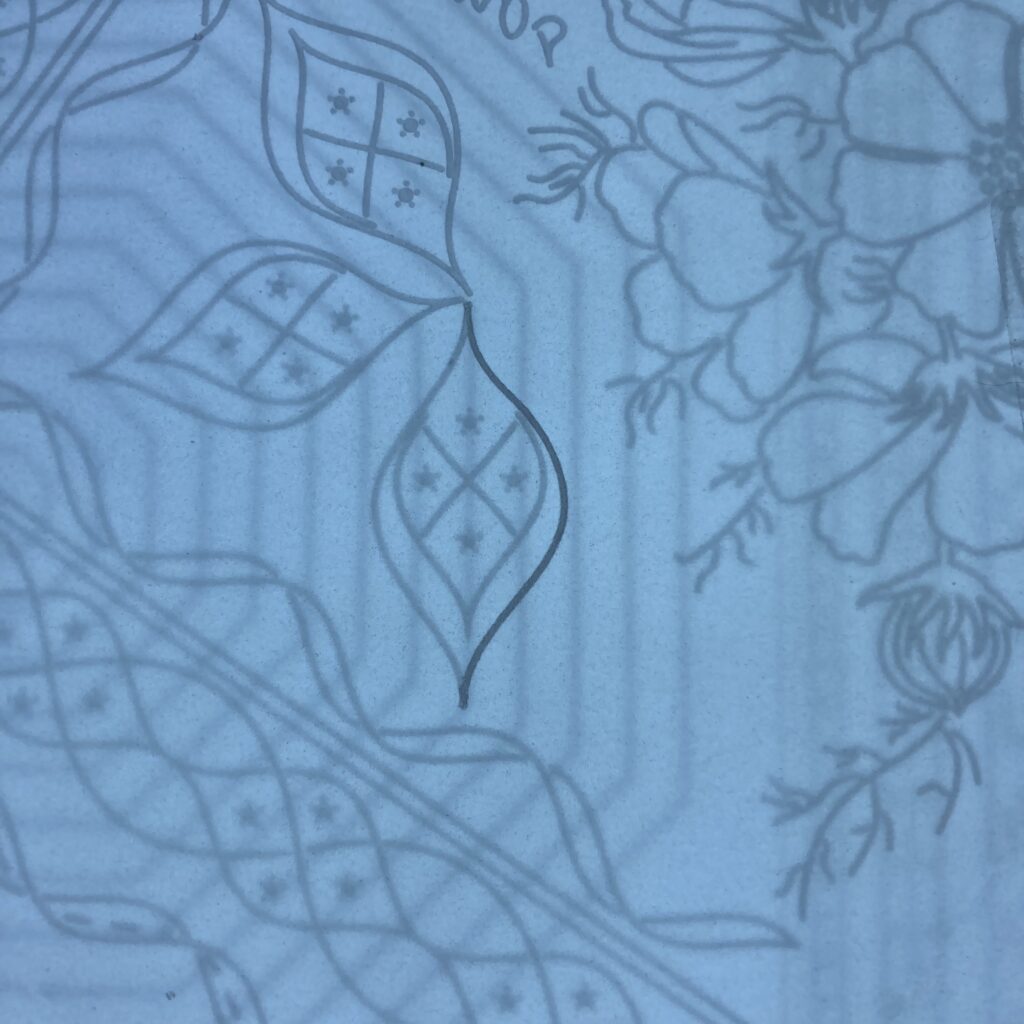
Step 10 – Your work should now look like this. Leave the ink to dry for at least half an hour.
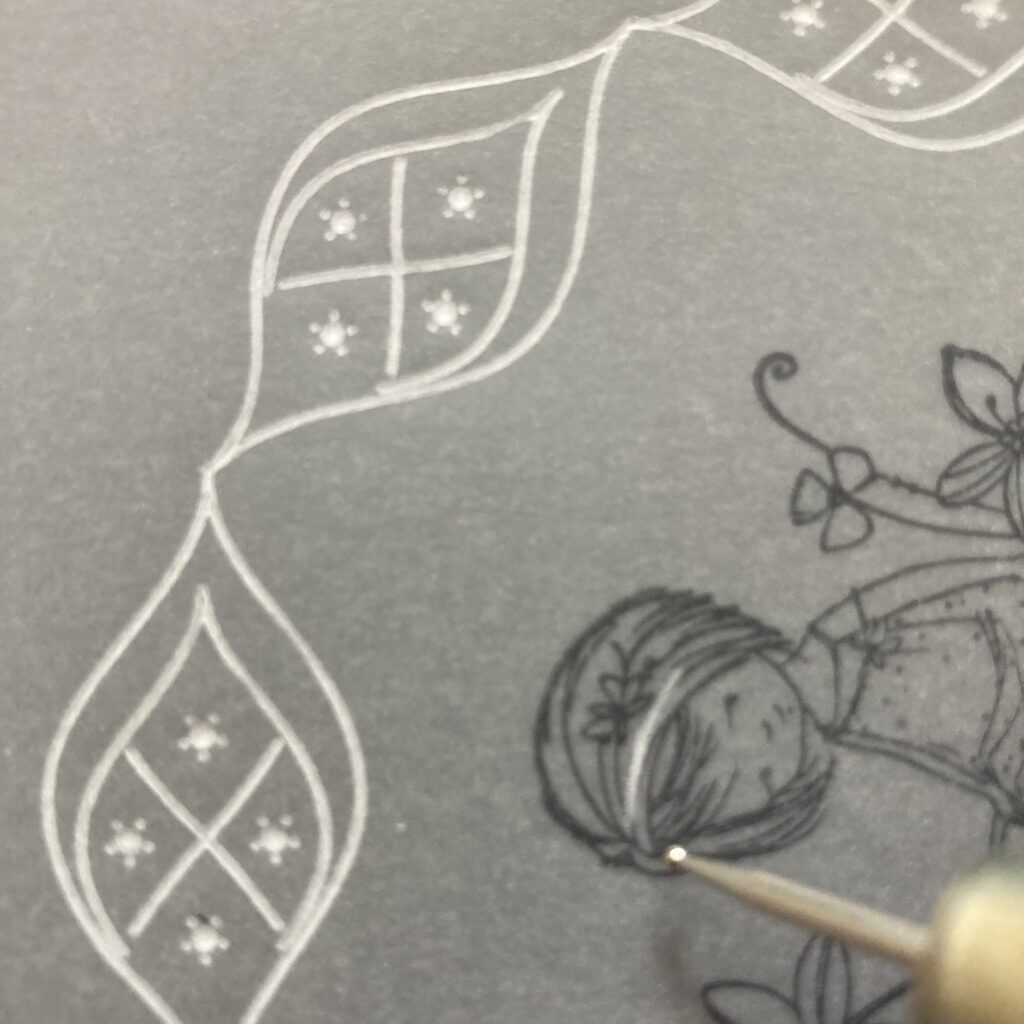
Step 11 – Working on the back of the parchment do a little white work in the dots in the petals, streaks in her hair to create highlights, and little areas in the stamped picture. I did the fish and the dragonfly. Also, the flower on her dress. Do the dots on the separate flower.
Step 12 – Continuing on the back, add colour using the Perga Liner pencils to the design. Blend with Dorso Oil as you go along.
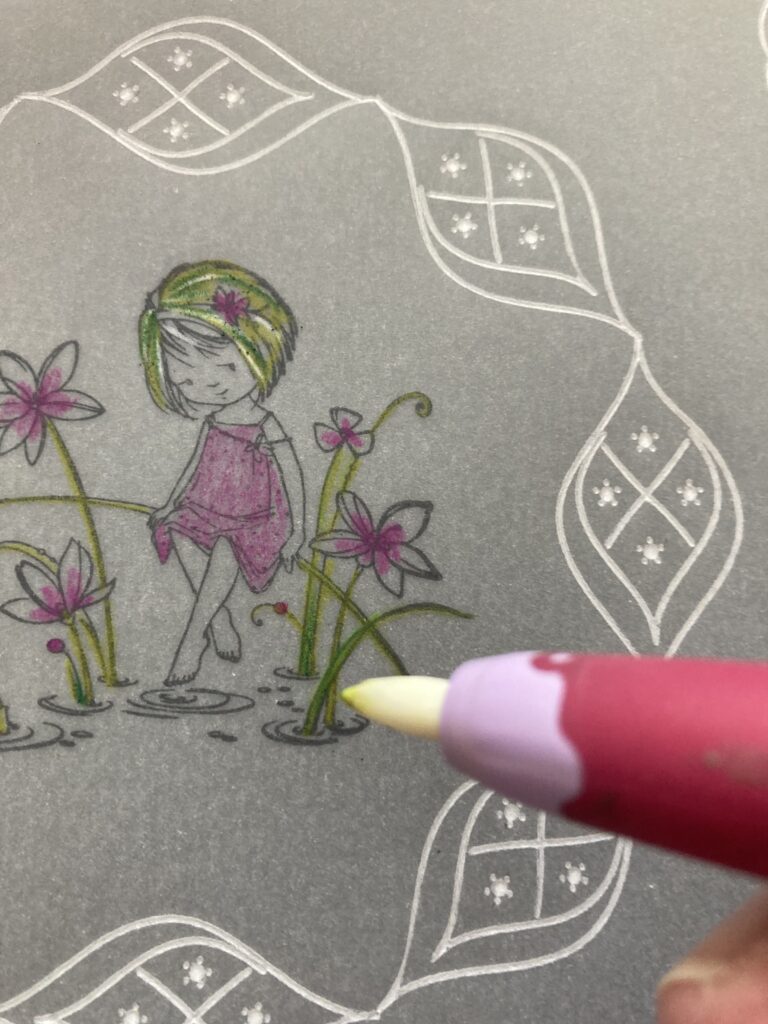
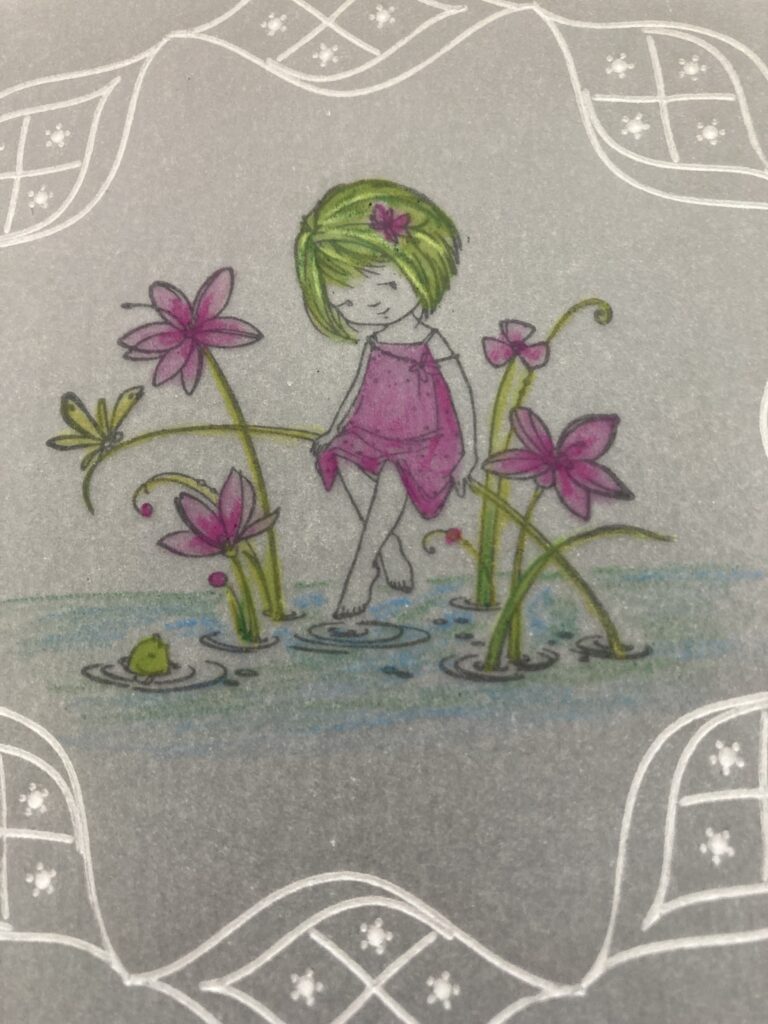
Step 13 – The central artwork should look a little like this when you turn it to the front.
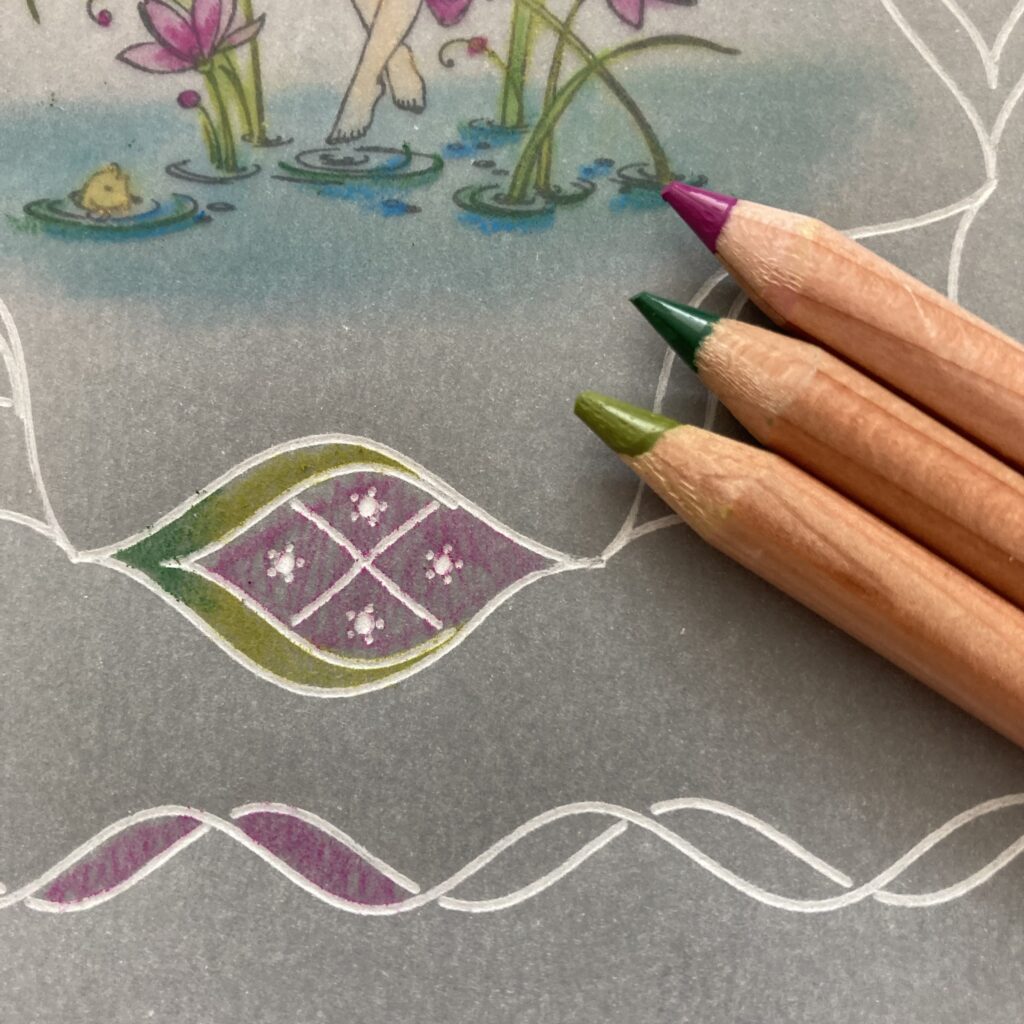
Step 14 – Working on the back use the green and purple pencils to add colour to the petal and ribbon border. Blend with Dorso oil.
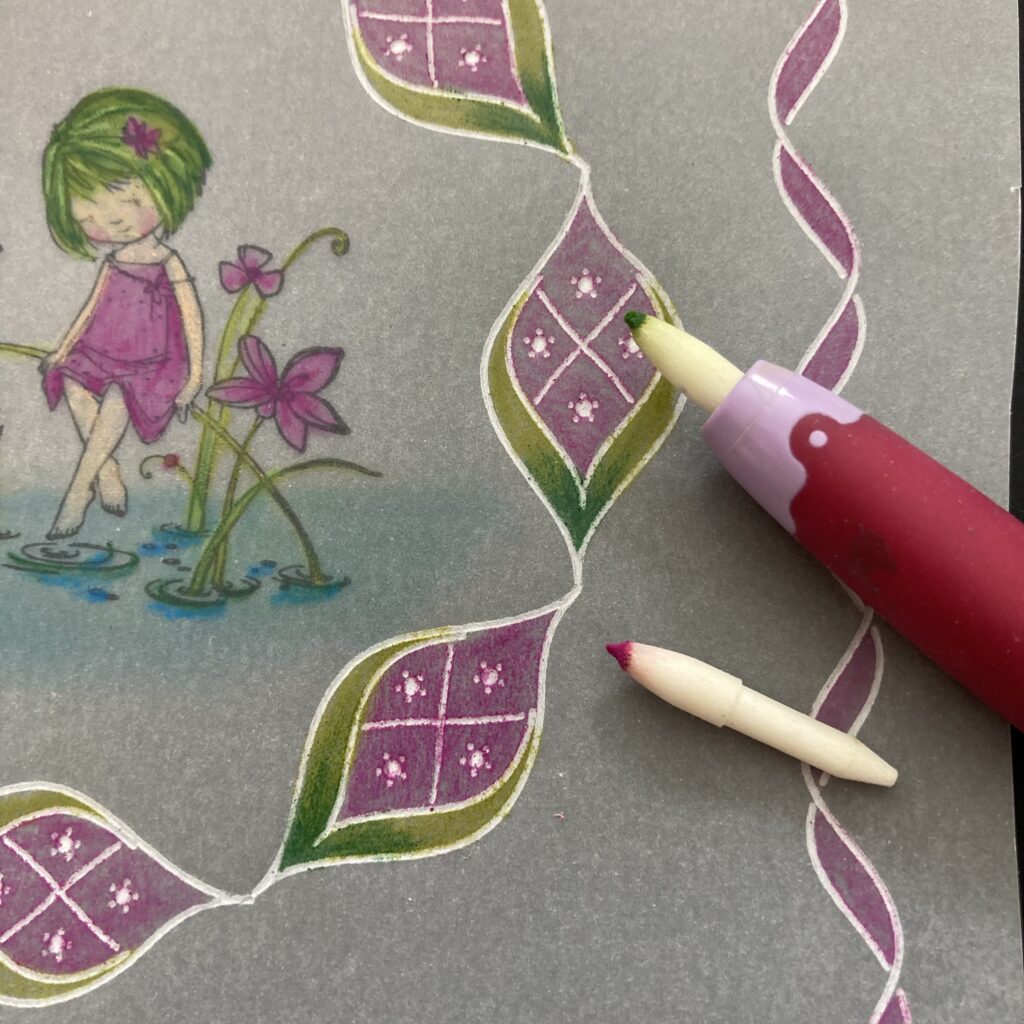
Step 15 – Use the pink eraser pencil to remove any colour that has strayed over the lines.
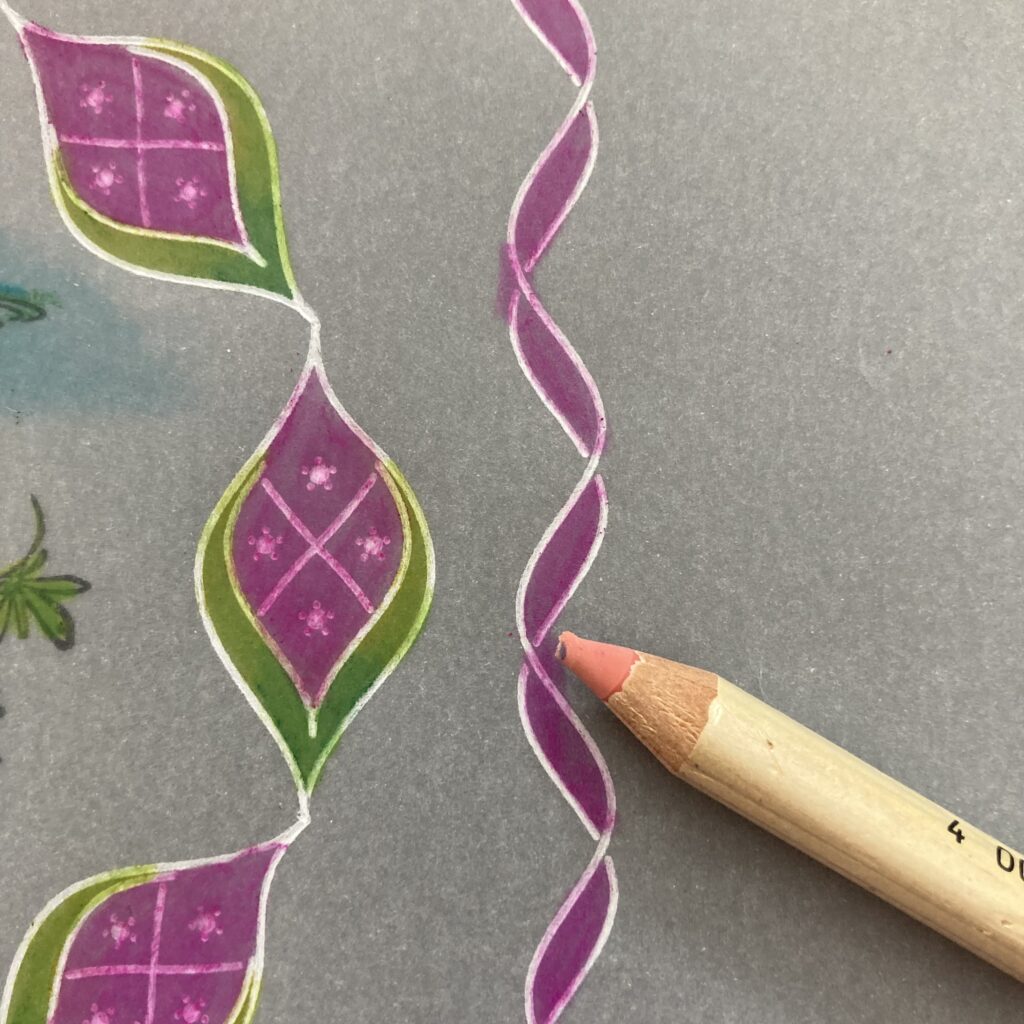
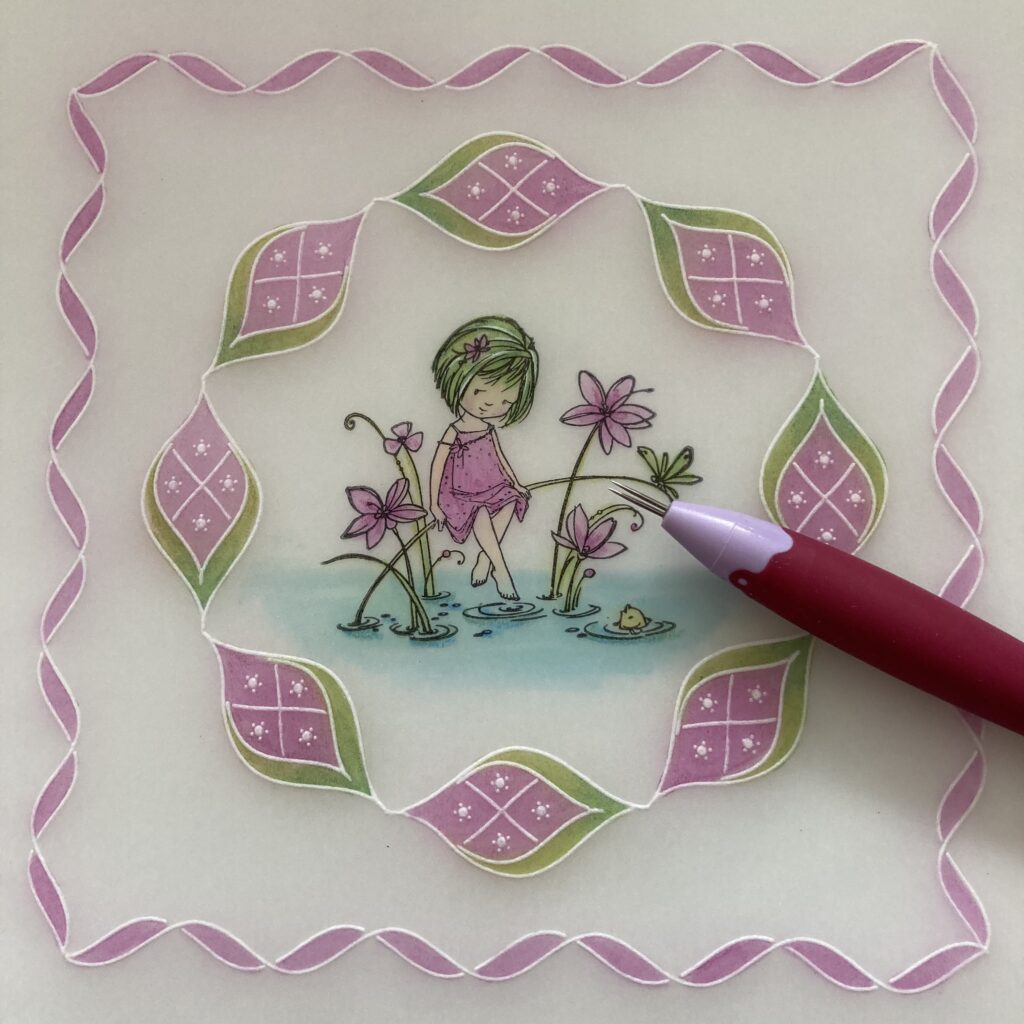
Step 16 – Your artwork should look like this now.
Step 17 – Using the number 2 bold tool you are going to perforate around the ribbon border. Put it on the perforating mat with the front of the parchment facing up.
Step 18 – Use the tool and perforate in the places where each section meets first so you get neat corners.
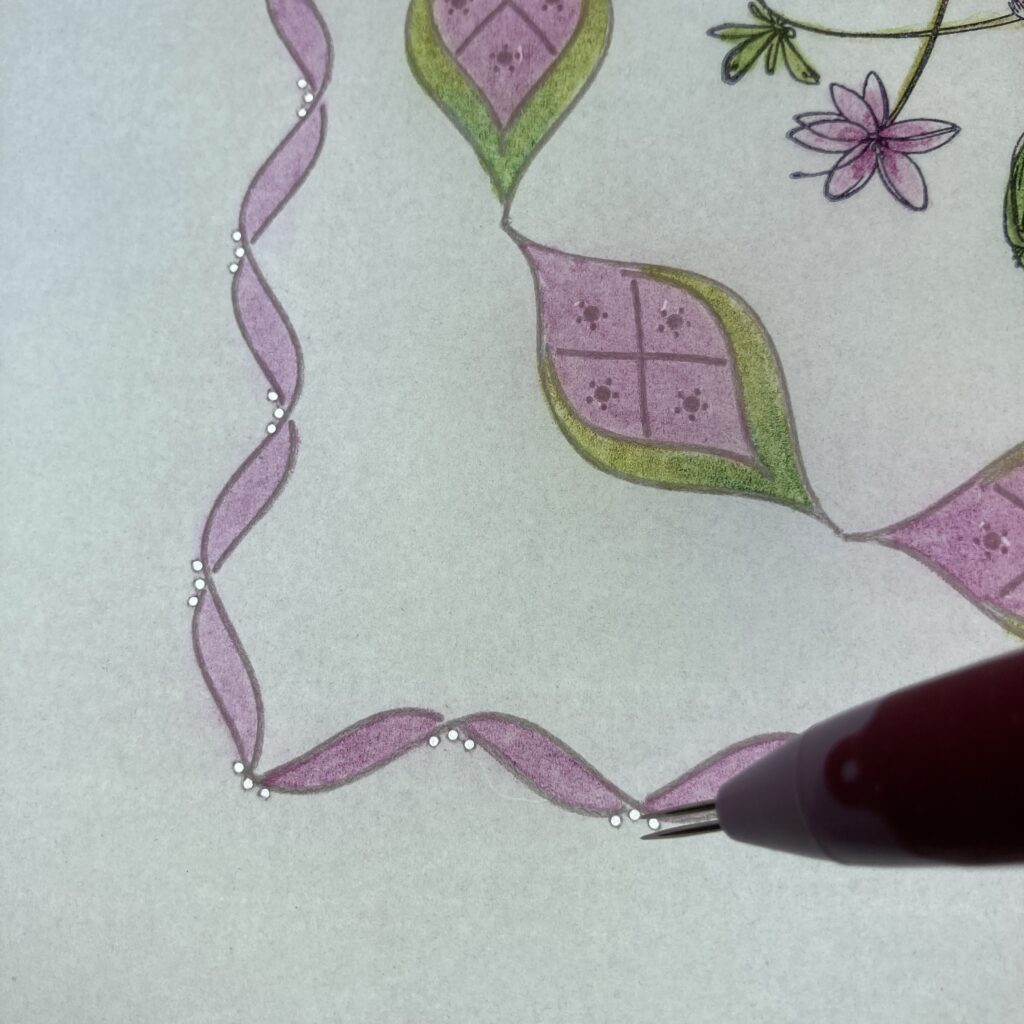
Step 19 – Perforate around the rest of the border then snip away the waste.

Step 20 – Perforate and snip the extra flower out.
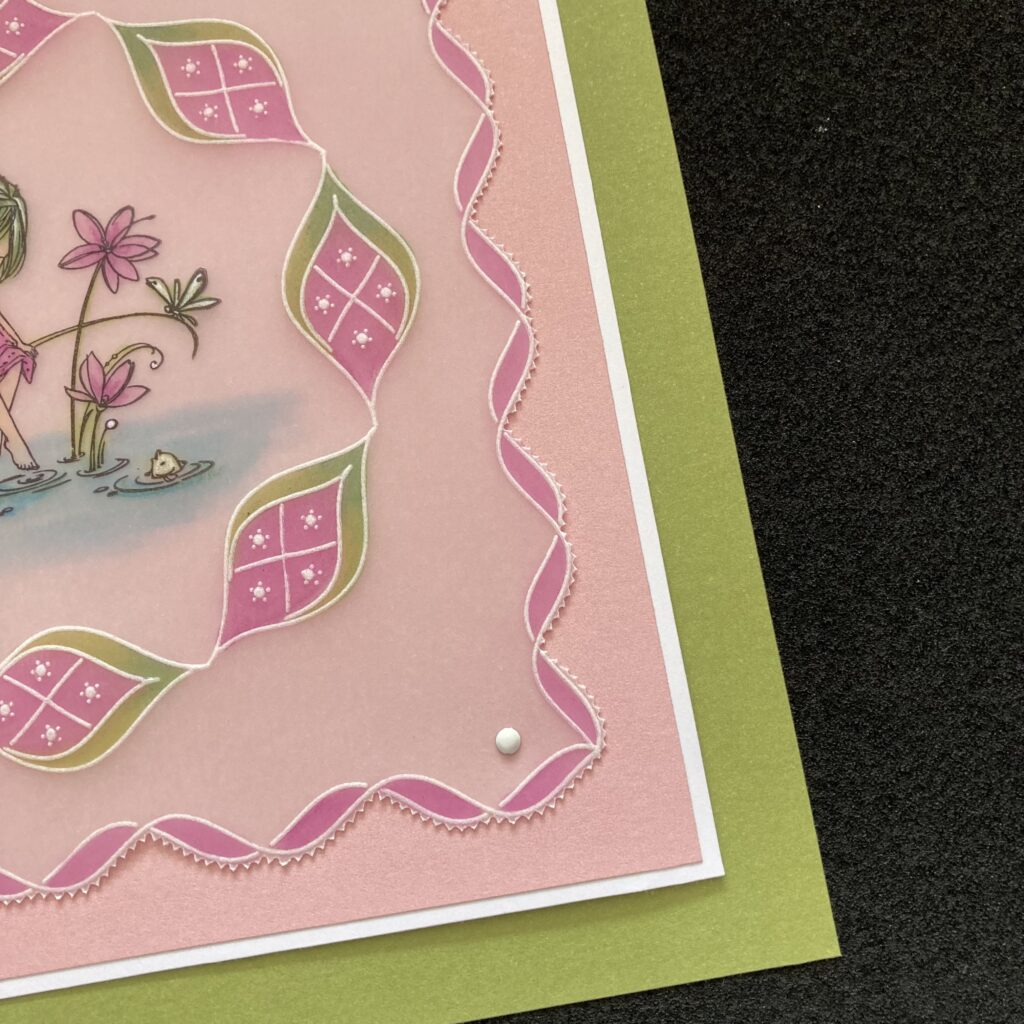
Step 21 – Cut a piece of pink paper to 15½x15½cm. Cut a piece of white card to measure 16x16cm. Cut a piece of green paper to 18½x18½cm. Attach the parchment piece to the pink paper with brads and then mat and layer the white and green.
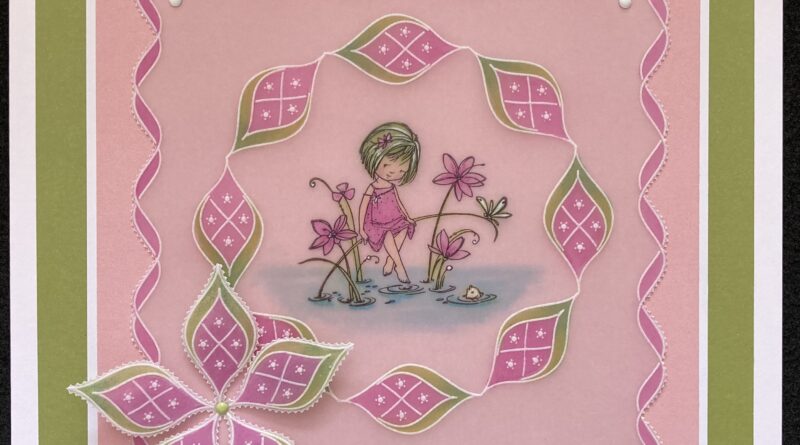
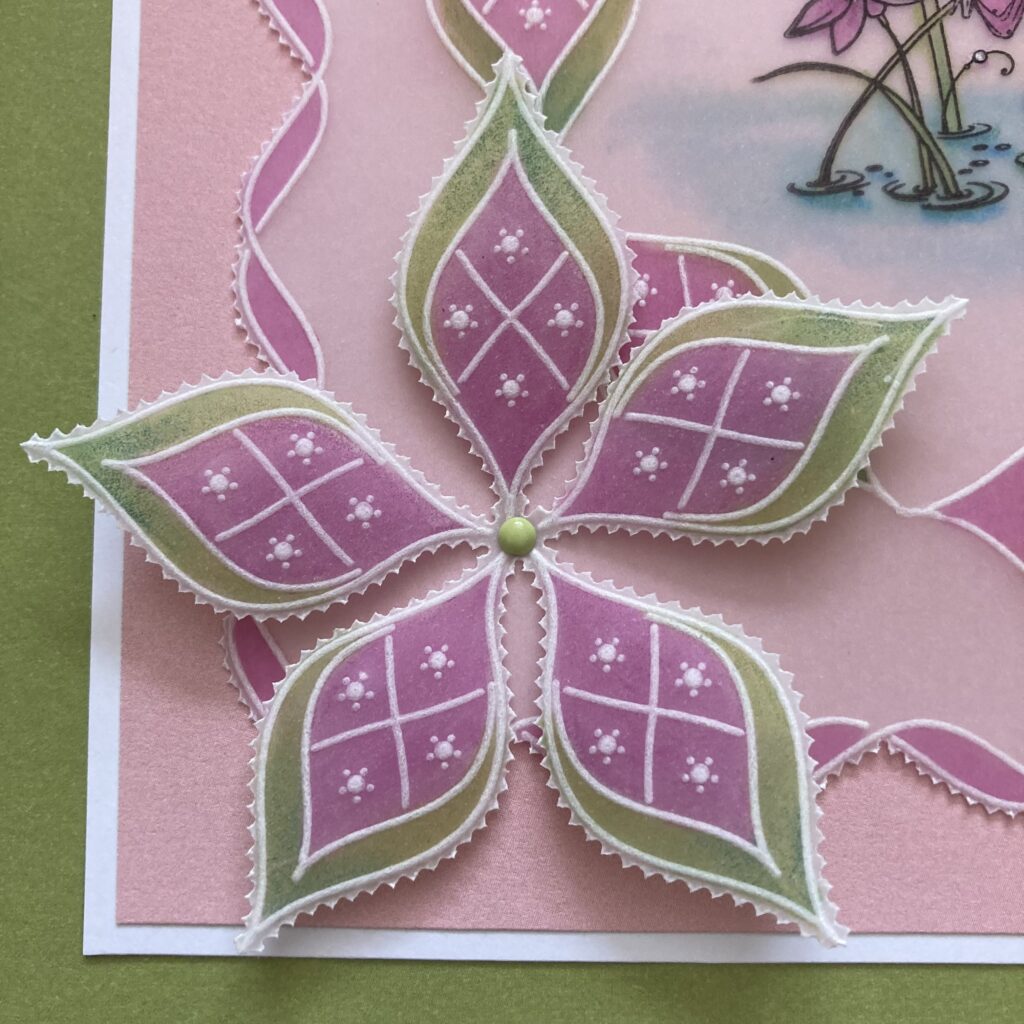
Step 22 – Attach the flower to the piece using a green brad.
Step 23 – Attach to the front of an 8×8 white card blank and you have completed the project
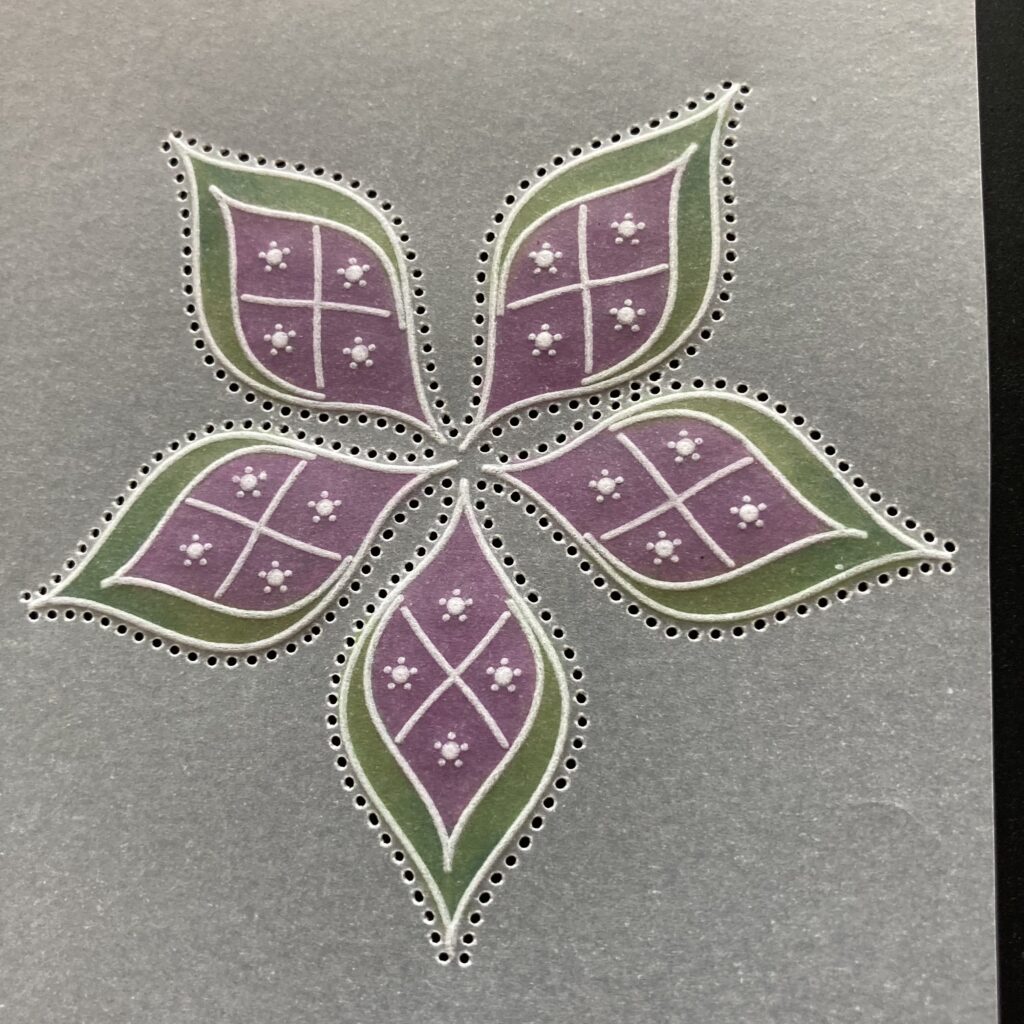
If you didn’t want to do any picot cutting this design will fit on a piece of parchment cut with the largest square die. I have also shown a different colour combination here too.
What a fabulous project! Thank you Jane for sharing this step-by-step with us and also offering us an alternative if we are not ready to start our picot cutting.
Everything that Jane has used in this particular project can be found in a shopping list HERE
With the festive season almost upon us, a quiet week ahead at Clarity Towers. A few of our Clarity Elves will be in the building to keep things ticking along. The office will be open on 27th-29th December between 8am and 12 midday if you need help with anything.
Mum will be doing a festive In the SHAC with Barbara on Christmas Day at 10am – Live on Facebook & YouTube.
Must dash! Off to help Mum with the final prep for the festive season.
Travel gently, friends.
Lotsa love, Grace & Jane xoxo
Clarity – The Home of Art, Craft, and Well-Being.
A lovely card, so pretty.
Wishing all at Clarity a wonderful Christmas and best wishes for 2024.
Thank you for all the work you do for us.
Thank you Jane that’s beautiful and you make it look so achievable. I might even be tempted to give it a go.
Hope everyone at Clarity has a lovely Christmas and a Happy New Year xx
ThNK YOU jANE I JUST LOVE IT YOU HAVE A GREAT IMAGINATION AND SORRY FOR SHOUTING this iPad is so shaky
Thank you Jane for doing the step by step for this project. I did take a photo of it at the Open Day but that was as far as I got !! Will put it on the to do list for the New Year, although that seems to growing at an alarming rate that it may be next Christmas before I get everything done.
What ever you are doing over Christmas, I hope you have a good time x
Another great step by step today and lovely selection of cards yesterday.
Thank you all for the sharing throughout the year.
I may not get to join Barbara tomorrow (that will be a first) as visiting my 97 year old father in law (98 on 13th March) at his lovely care home so I will take this opportunity to wish you all a very happy Christmas and Peaceful New Year.
Thank you for all the inspiration and enjoyment given freely, much appreciated. xx
Thank you for all the tutorials which have been inspirational this year and Grace and the occasional helpers for choosing the art work shown every week.
Wishing the whole Clarity community a VERY HAPPY CHRISTMAS AND A HEALTHY AND HAPPY NEW YEAR.🎅🤶🧚
🍒🍒🍒
Thank you for a brilliant tutorial Jane. Have a wonderful Christmas. Many good wishes to all at Clarity for Christmas and for a bright and peaceful New Year. 🎄🎶
Wow! I must try this. Thank you.
Happy Christmas to you.
Hikary
What a beautiful card and a splendid step by step. Thank you Jane and Grace . Merry Christmas and all the best for 2024. Looking forward to your next design.
Thank you Jane for a lovely design. I love that design on the cosmos plate. Happy Christmas to you. Hello to Grace hope you have had a lovely Christmas Day with the family. I am in Canada this year. In order to see my grandson Tom, and Kirstin and two great grandsons. Archie I saw 5 years ago Finley I haven’t met yet.. they live in New Zealand. Also have 3 granddaughters and 2 great granddaughters here. So special. Best wishes to Barbara, Dave and family xxxxx