Clarity Matters Blog Tutorial: How To Embroider on Parchment – Part 2
Hello hello! Grace here.
I hope this finds you well, safe, and enjoying your Sunday.
We are joined again this weekend by a lovely member of our Clarity design team, Glynis Whitehead.
Glynis has kindly put together a step-by-step blog for us. This is part 2, following on from last week’s project. I’ll hand you over to our teacher!

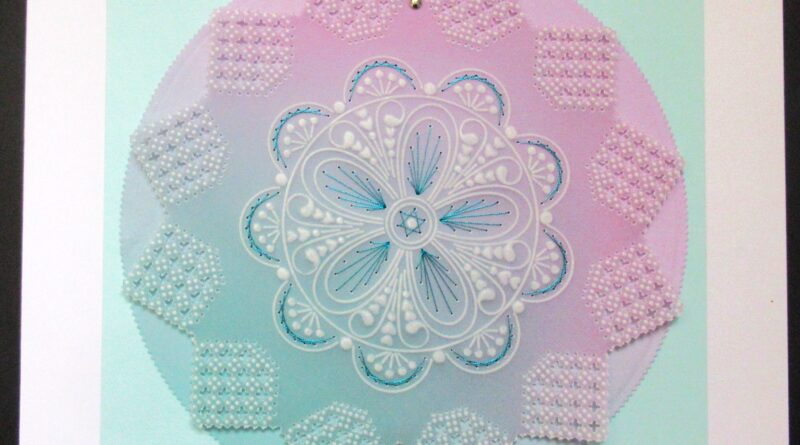
Buttercups and Fans in Lace
Ingredients
Josie’s Circle Lace Duets A5 Sq – Love (GRO-GG-42053-12)
Tina’s Buttercups and Fans Embroidery Parchlet A6 Sq (GRO-FL-42114-01)
Rainbow Parchment – Lavender Fields A4 (GRO-AC-42004-XX)
Rainbow Paper – Lavender Fields A4 (GRO-AC-42016-XX)
Set of 25 Embroidery Needles Size 12 (ACC-MS-30804-XX)
Madeira Metallic Turquoise Embroidery Thread (ACC-MS-30996-XX)
A4 Translucent White Super Foam (GRO-AC-40603-A4)
A4 Black Super Foam (GRO-AC-41957-A4)
Pergamano 1 Needle Perforating Tool Bold (PER-TO-70028-XX)
Pergamano 1 Needle Perforating Tool Fine (PER-TO-70035-XX)
Groovi Number 1 & 2 tools from the starter kit (GRO-AC-40026-XX)
Pergamano Embossing Tool 1.5mm (PER-TO-70004-XX)
Pergamano Embossing Tool 3mm (PER-TO-70005-XX)
Nested Circles Picot Cut Die Set Clarity Fresh Cut Dies (ACC-DI-30680-66)
Double-sided tape or masking tape (to stick the ends of the thread down)
(ACC-AD-30375-XX)
Pergamano Cutters (PER-TO-70042-XX) or Scissors (PER-TO-70041-XX)
7 x 7-inch White Card Blank (ACC-CA-30619-77)
Method
Step 1. After wiping the back with a tumble drier sheet, cut the piece of parchment to A5 size (the back of the coloured parchment is the brighter glossier side). Do a little dot test in the corner if you are not sure. Then secure it over the circle grid right side upwards. We perforate from the front.
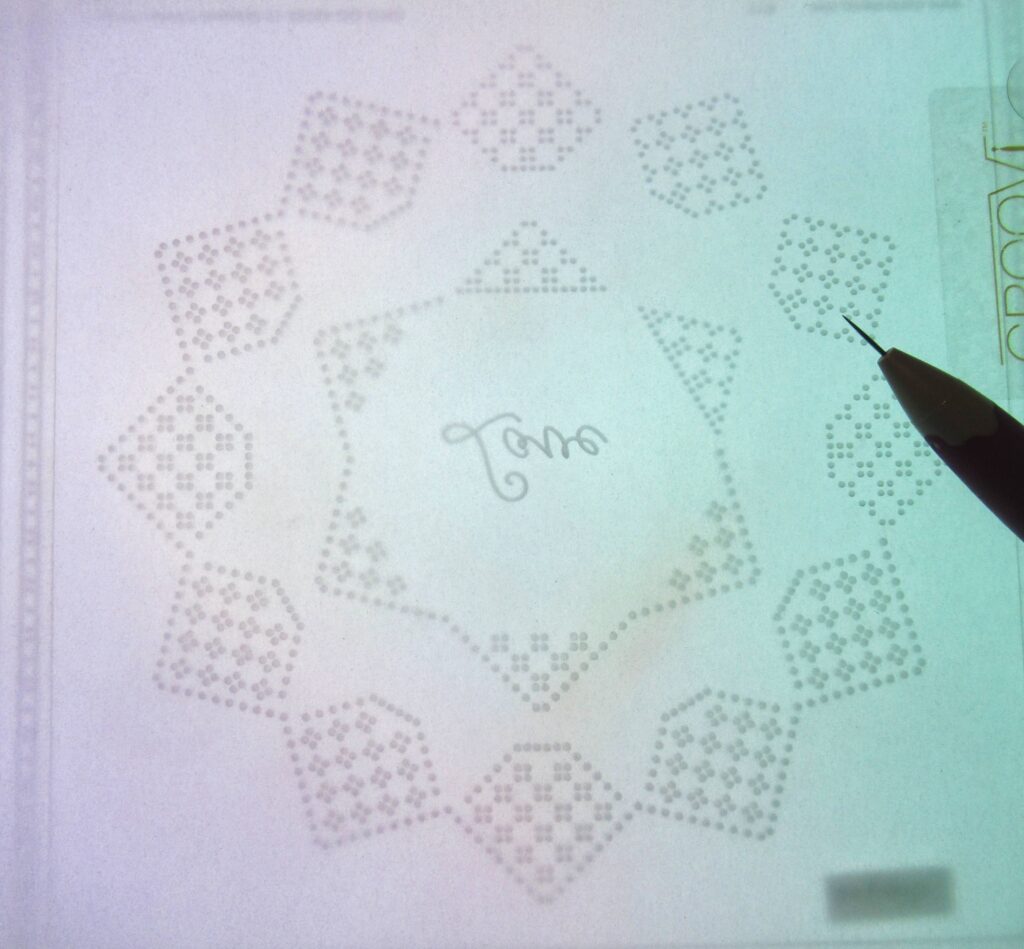
Step 2. With the Bold 1 needle perforating tool, perforate all the holes in the grid. You will find this grid very easy to realign when you turn the parchment around as it ‘plugs’ into the holes you already perforated. As long as you line the paper up along the edges of the plate, you will find that the design will fit onto the parchment perfectly.
Step 3. Turn the work over (to work on the back) and line the holes up so that the dots fit between the holes you have just perforated. Keep turning the work in the same way until you have embossed all the dots in the grid pattern, using the number 2 tool from the Starter Kit.
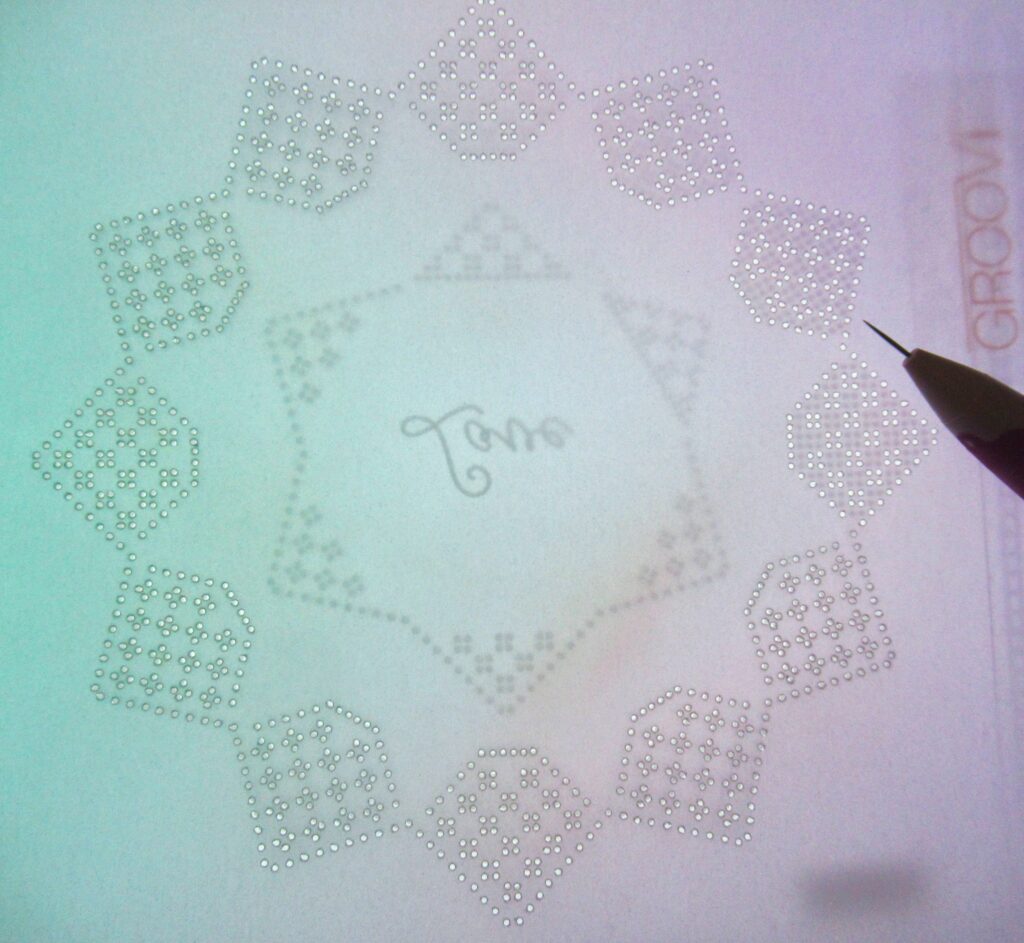
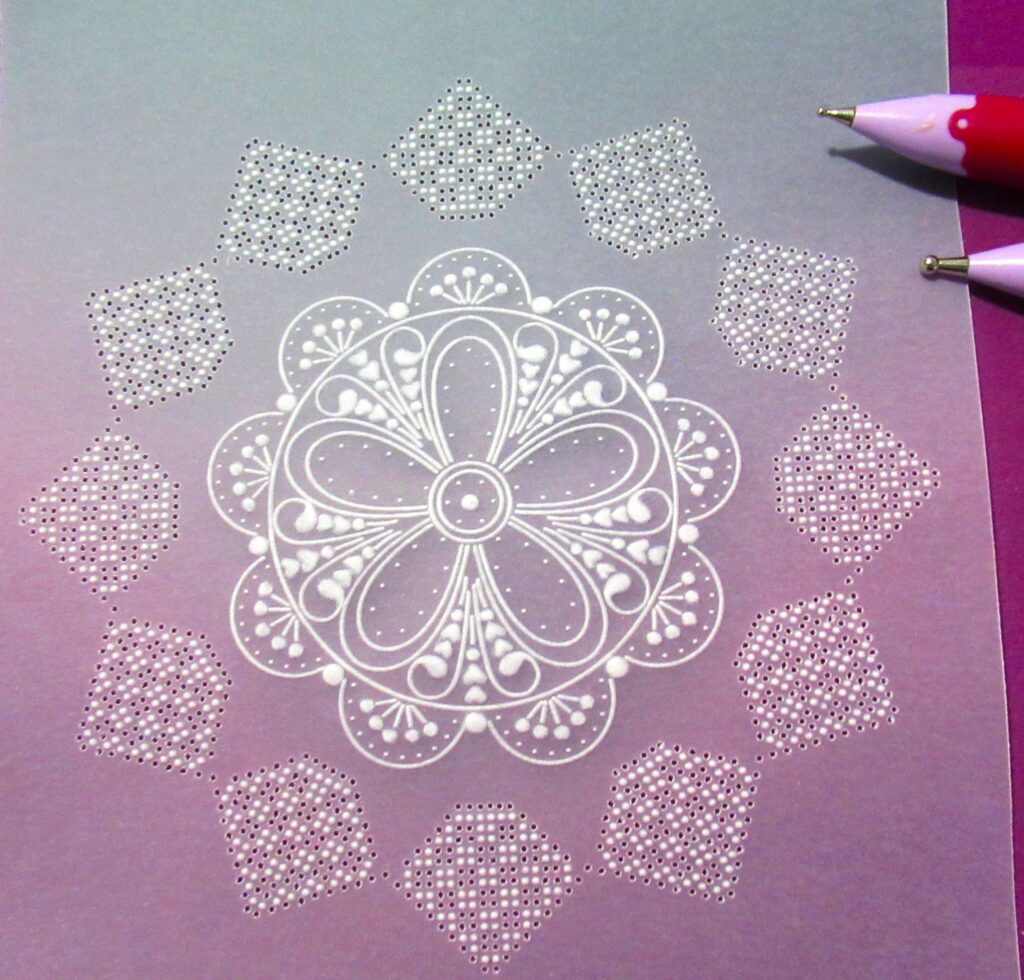
Step 4. Line up the work on the Embroidery Parchlet so that the centre scalloped circle is in the centre. Use the number 2 tool to emboss all the bits (dots, hearts, ends of scrolls) because they are to be embossed later. The rest is to be embossed with the number 1 tool. Make sure to emboss all the dots without missing any.
Step 5. On the back of the work, emboss all the dots, hearts and ends of the scrolls. Use the 3mm ball tool in the larger dots and tear-drop shapes and 1.5mm tool in the smaller circles.
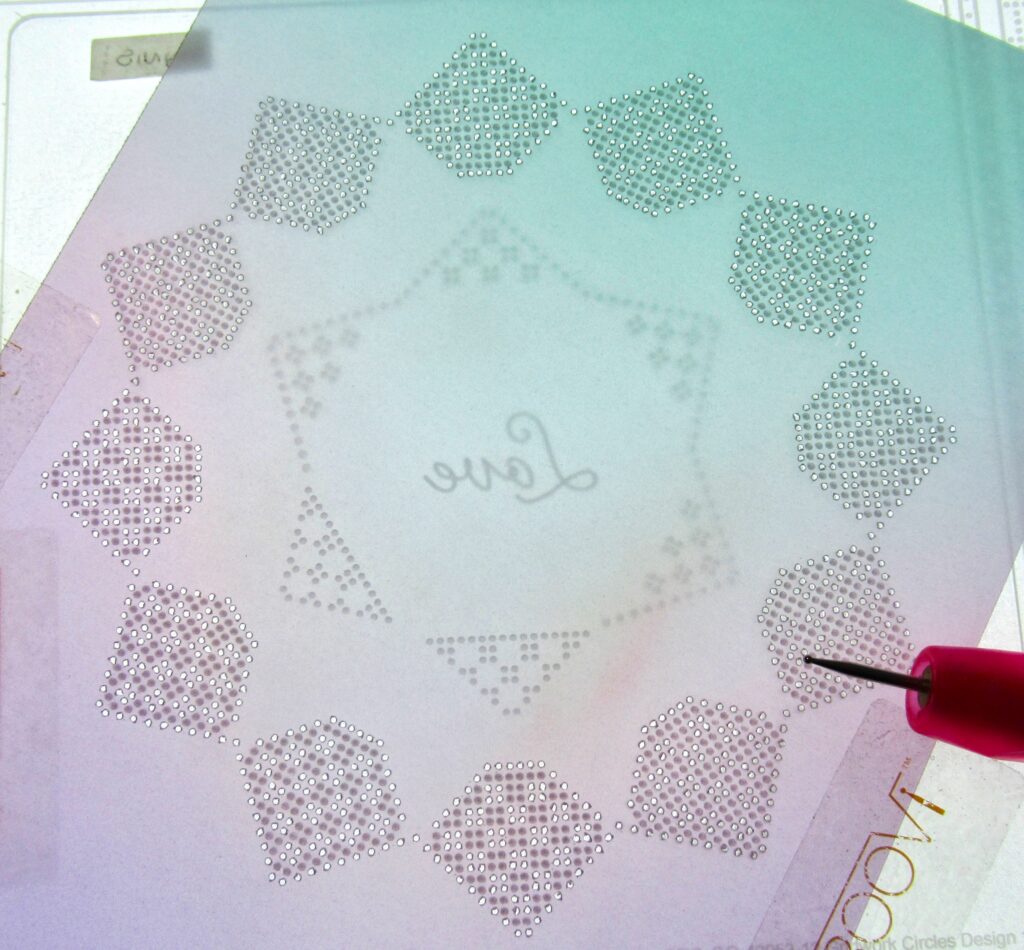
Step 6. Snip all the crosses within the grid pattern and around the outer edge. Leave the inner edge intact.

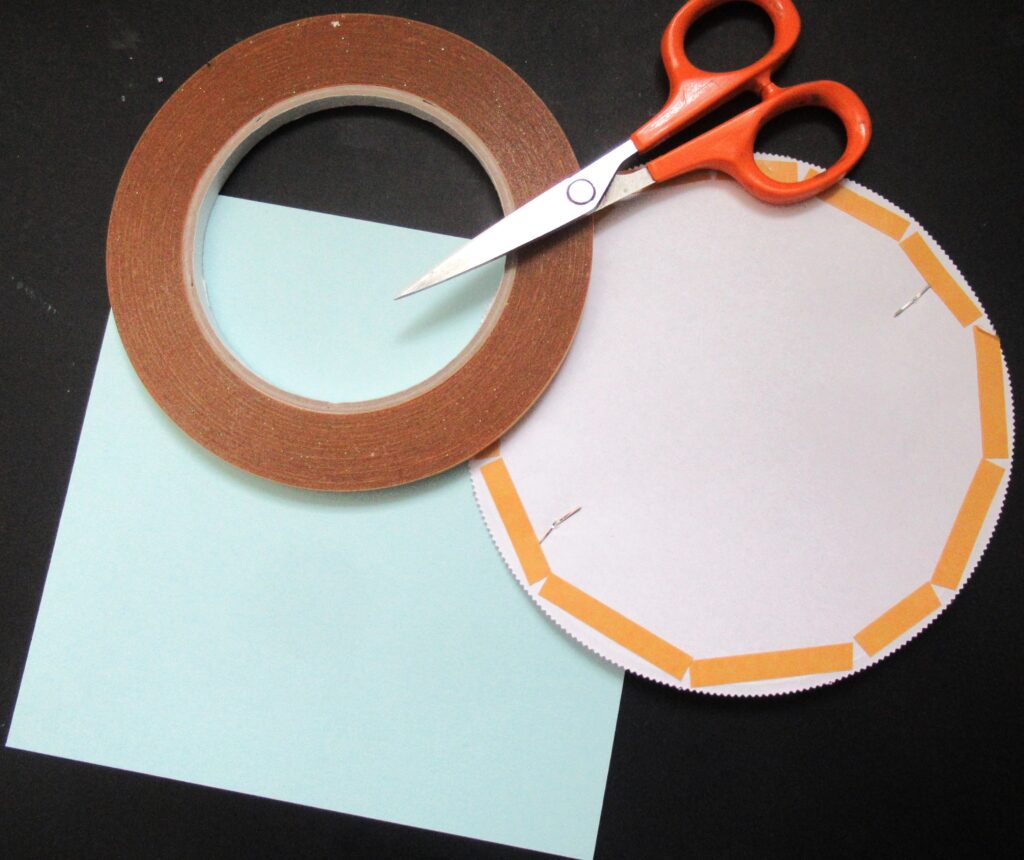
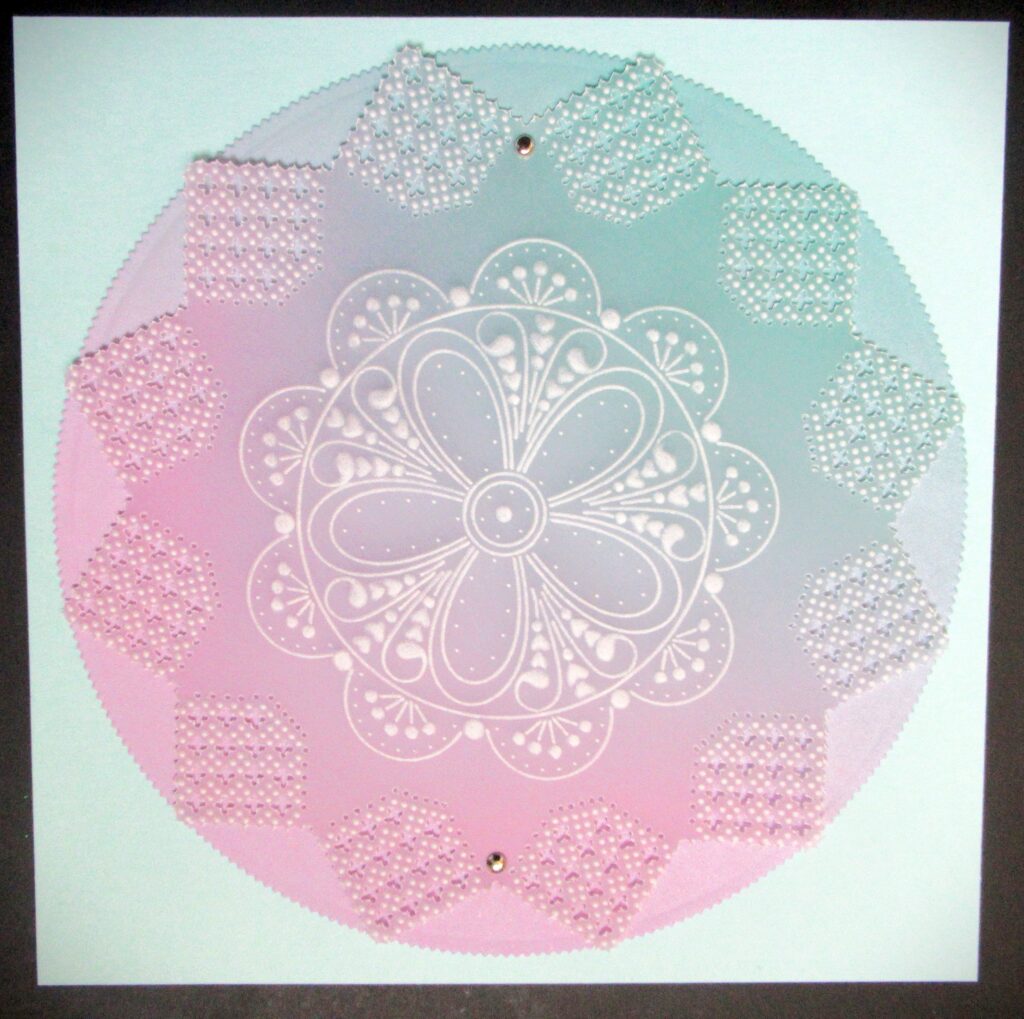
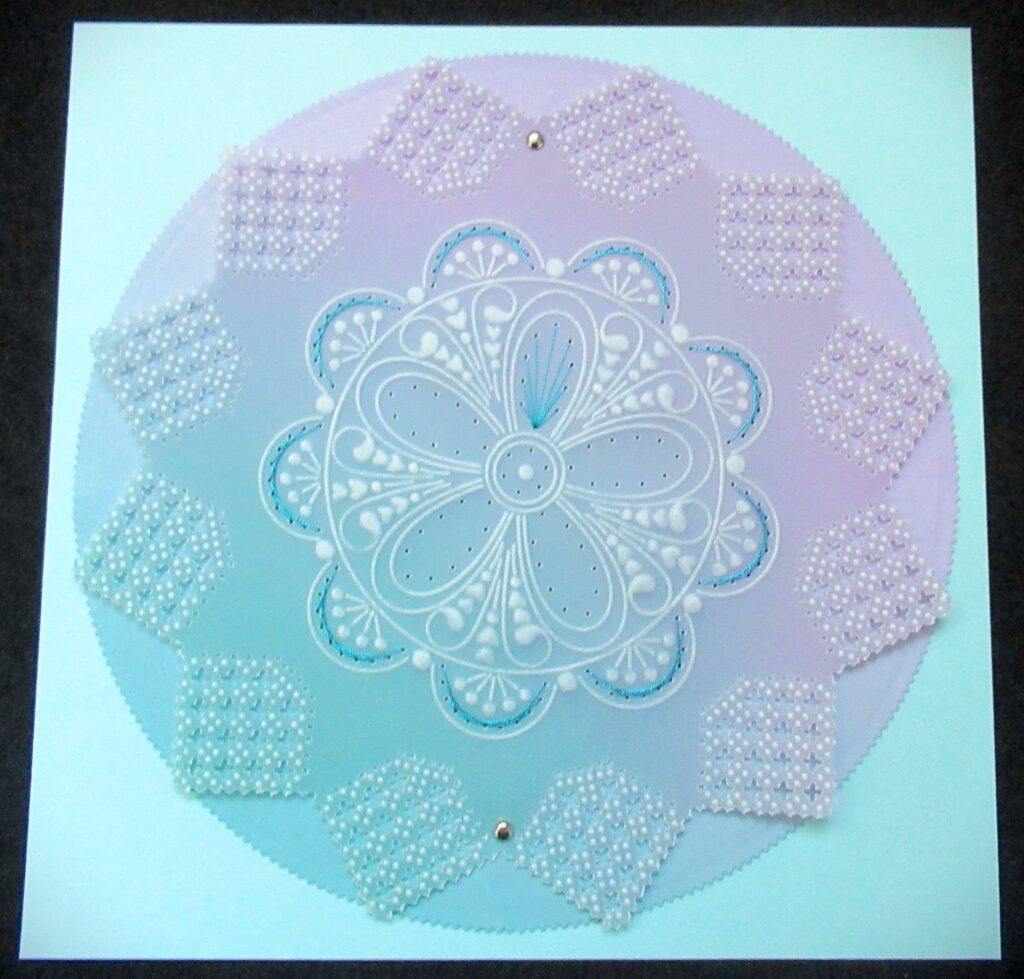
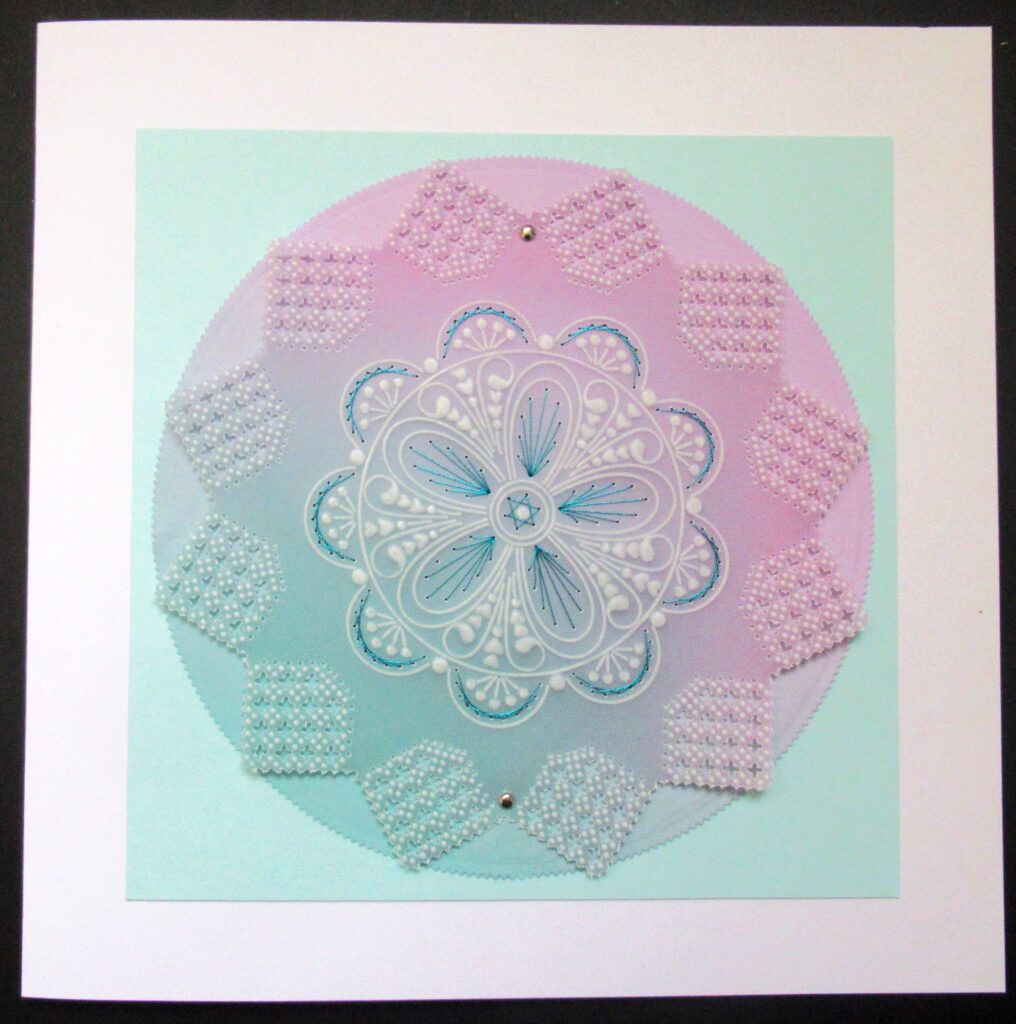
Step 7. Cut a circle from the Rainbow Paper using the third die in from the edge and attach the parchment with a couple of brads at the top and bottom. Then take a piece of card cut to 5.5 inches x 5.5 inches, and stick the circle into the centre. Keep the double-sided tape to the edges as you don’t want tape to be where you are going to stitch.
Step 8. Lay the piece onto a piece of Super Foam and using a Fine single needle tool, carefully pierce through all the tiny dots. Be as accurate as you can, as these are going to be the holes you are sewing through.
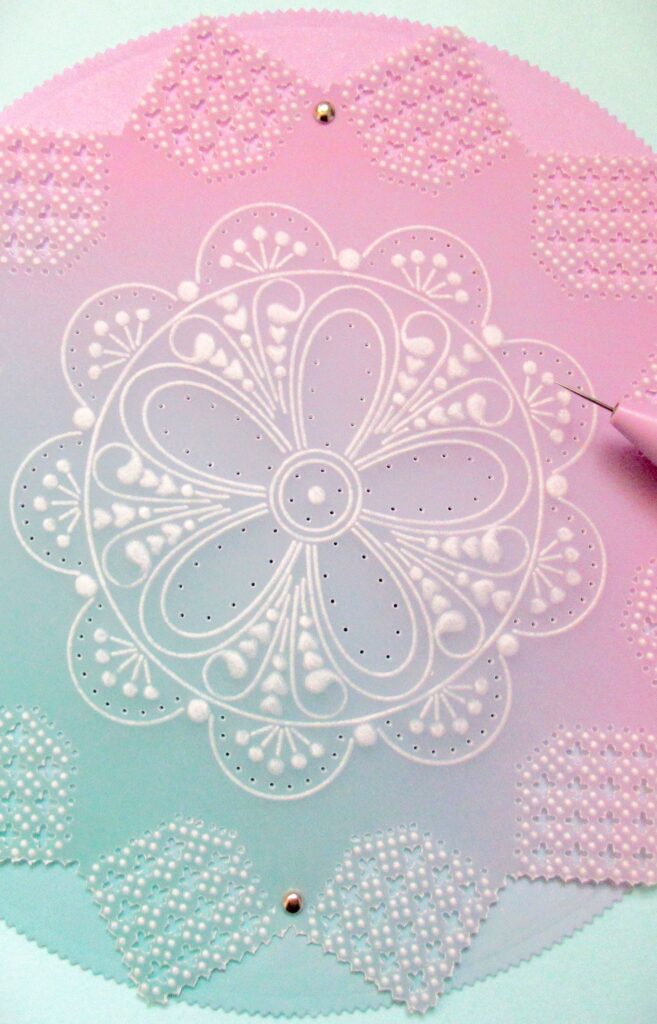
Step 9. When you buy your plate, a sewing guide comes with it. Keep it and don’t discard it as it gives you instructions about stitching the design. In the scallops, the stitches are four holes long. The long stitches in the petals all come down into the centre, bottom hole. The star in the centre is two stitches long. Take a good look at the stitch plan that comes with your plate.
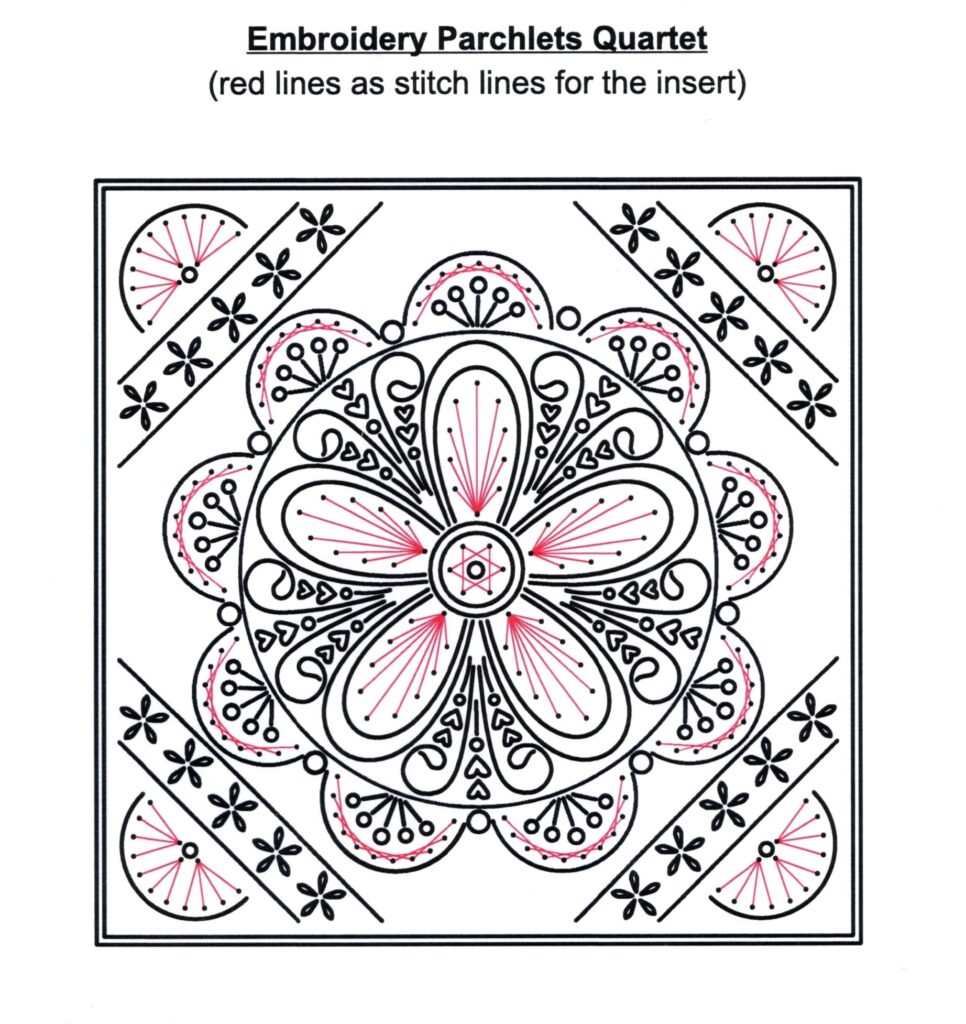
Step 10. When you thread your needle, don’t use long lengths of thread as it only gets tangled around everything. In the scallops, come up at the first hole and secure the thread on the back with a small piece of double-sided tape. Go down into the fourth hole. The pattern goes – UP DOWN 4 5 2 3 6 7 4 5 8 9 6 7 10 11 8
Step 11. All the petals need a long stitch from the outer edges going down at the centre point at the base. Then the stitches around the centre dot are two stitches long, forming a star shape.

Step 12. Attach the work to a 7 x 7-inch card blank. And your project is complete!
What a fabulous project! Thank you, Glynis, for sharing this step-by-step with us.
Everything that Glynis has used in this particular project can be found in a shopping list, HERE.
If you like the look of the lacework/gridwork around the outside, then Paul recently showcased the Groovi Grid Deluxe Starter Kit (on Create & Craft) which contains everything you need to get started…
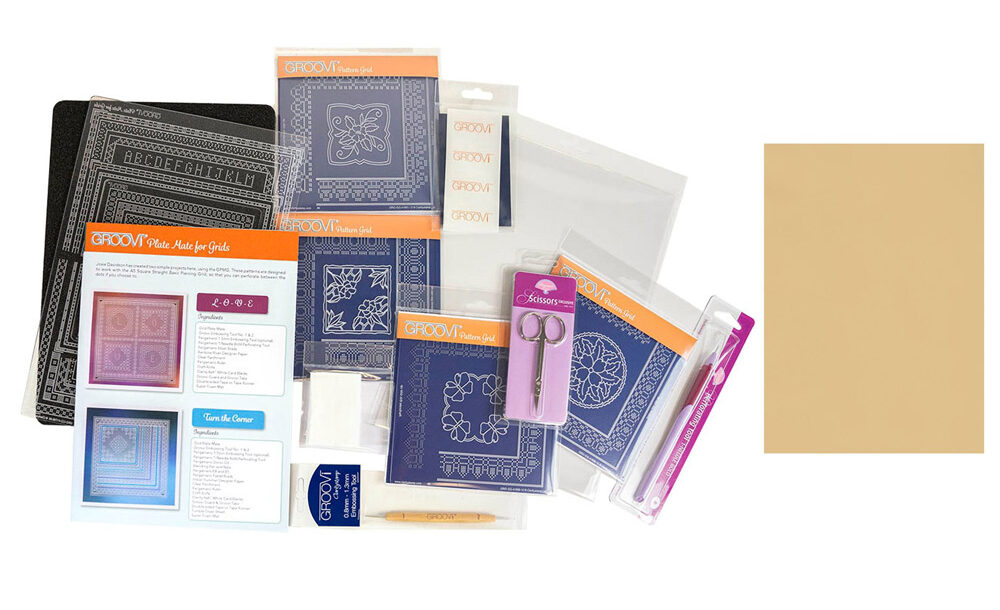
Available HERE.
Now, looking at the week ahead!
Monday 18th December:
In the SHAC with Barbara – 10am Live on Facebook & YouTube
Tuesday 19th December:
Groovi Tuesday with Paul – 10am Live on Facebook & YouTube
Thursday 21st December:
Fresh Cut Super Saver One Day Special on Create & Craft with Paul – 6pm & 9pm
Thursday 21st December:
In the SHAC with Barbara – 7pm Live on Facebook & YouTube
Friday 22nd December:
Fresh Cut Super Saver One Day Special on Create & Craft with Paul – 10am & 2pm
Must dash! A big week ahead.
Travel gently, friends.
Lotsa love, Grace & Glynis xoxo
Clarity – The Home of Art, Craft, and Well-Being.
Fabulous tutorial- thank you. Hope everyone has a good week xx
That looks really pretty- thanks, Glynis!