Clarity Matters Blog Tutorial: How To Embroider on Parchment – Part 1
Hello hello! Grace here.
I hope this finds you well, safe, and enjoying your Sunday.
We are joined again this weekend by a lovely member of our Clarity design team, Glynis Whitehead.
Glynis has kindly put together a step-by-step blog for us. I’ll hand you over to our teacher!

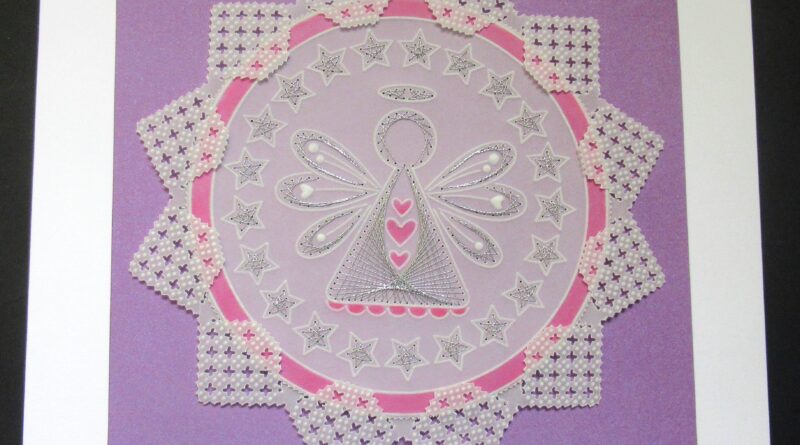
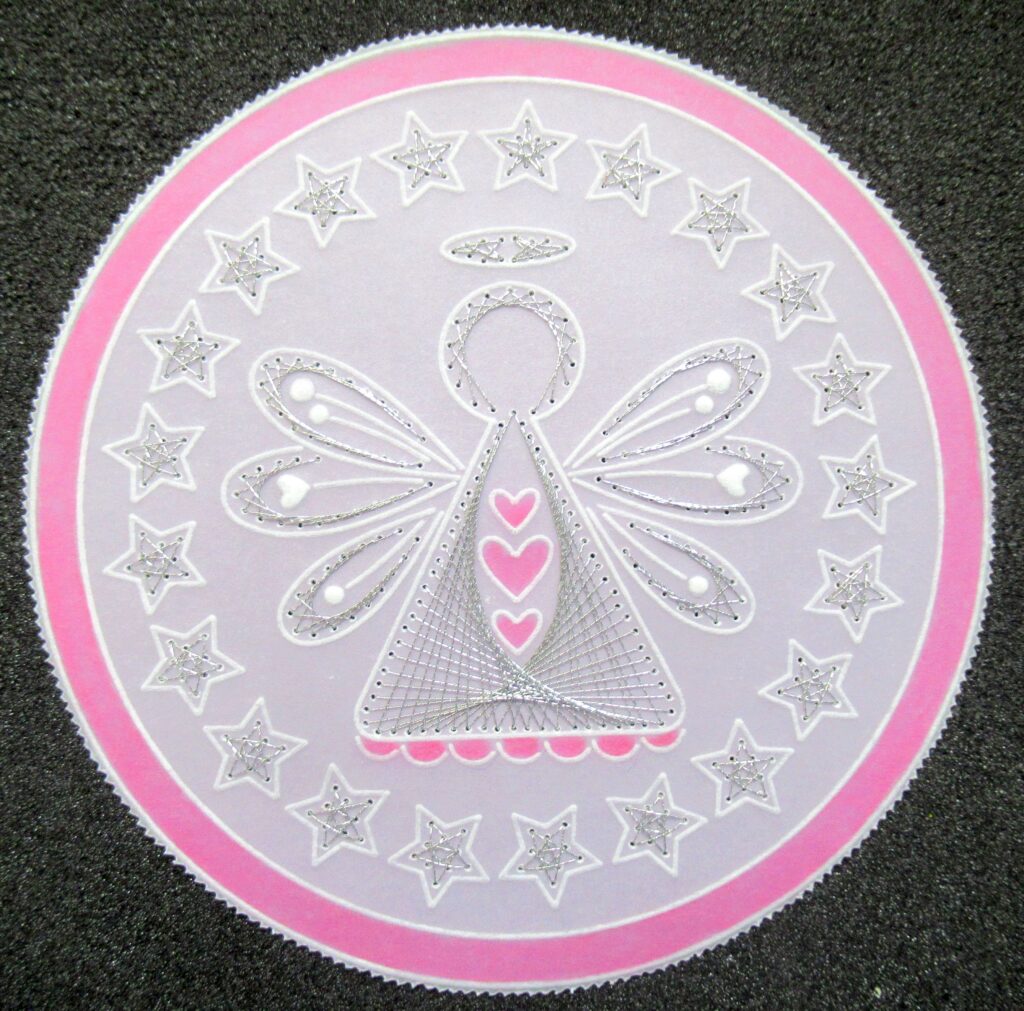
Embroidered Angel
It was requested that we show how to use the embroidery plates designed by Tina Cox. So, I thought once you had made this delightful little angel, it would give you the tools to build up your skills.
Ingredients
Tina’s Embroidery Angel A5 Sq Groovi Plate (GRO-CH-41297-03)
Josie’s ‘LOVE’ Circular Lace Duet A5 Groovi Plate (GRO-GG-42053-12)
Nested Circles A5 Groovi Plate (GRO-PA-40051-03)
Groovi Embossing Tool 0.8mm – 1.3mm (Number 1 Tool from the Starter Kit) (GRO-AC-40026-XX)
Pergamano 1 Needle Perforating Tool Fine (PER-TO-70035-XX)
Pergamano 1 Needle Perforating Tool Bold (PER-TO-70028-XX)
Pergamano 2 Needle Perforating Tool Fine (PER-TO-70037-XX)
or Bold (PER-TO-70279-XX)
Embroidery Accessories Kit (ACC-MS-31398-XX)
If you already have the perforating tool & a Superfoam Mat, you can get the needles and thread separately
Set of 5 Size 12 Embroidery Needles (ACC-MS-31399-XX)
These needles have been thoroughly researched. Many different ones have been tested and these came out as the best ones for this job
Madeira Silver Embroidery Thread (ACC-MS-30865-XX)
Northern Lights Companion Paper (ACC-CA-31339-88)
White 7 x 7-inch Card Blank (ACC-CA-30619-77)
Roll-A-Tape Super Strong Glue Tape Runner (ACC-MS-31065-XX)
Two pieces of matching backing paper measuring 4.5 x 4.5″ and 5.5 x 5.5″
Method
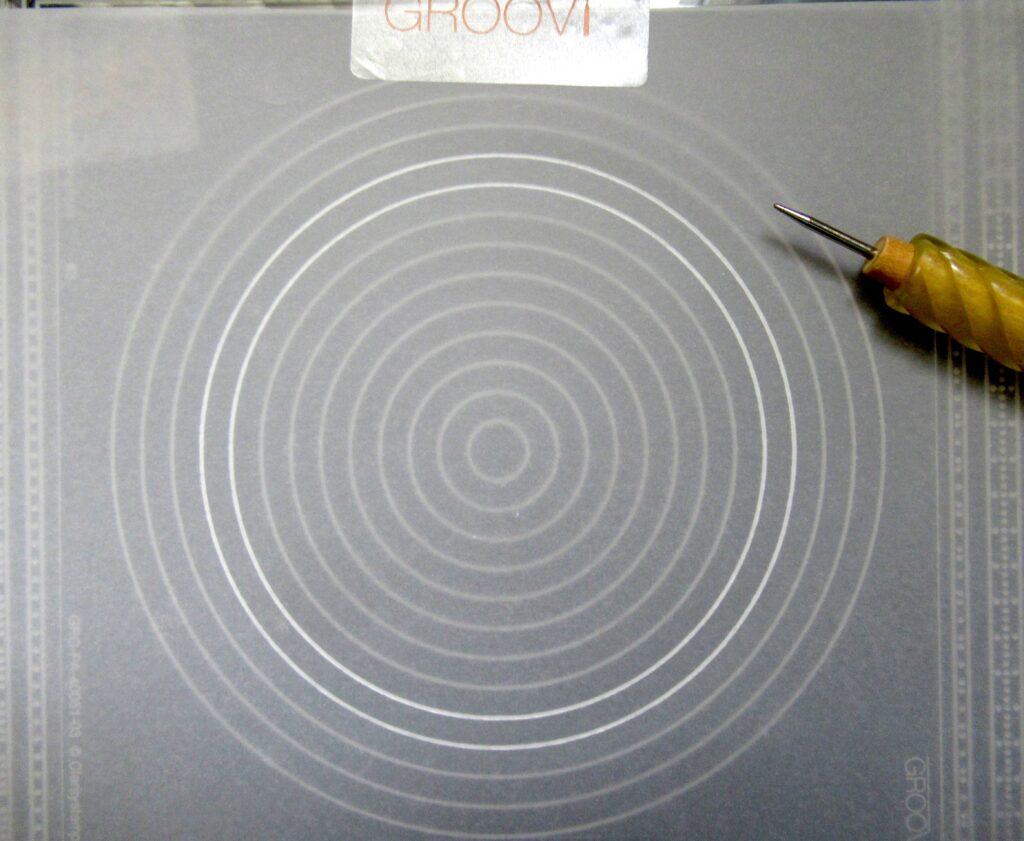
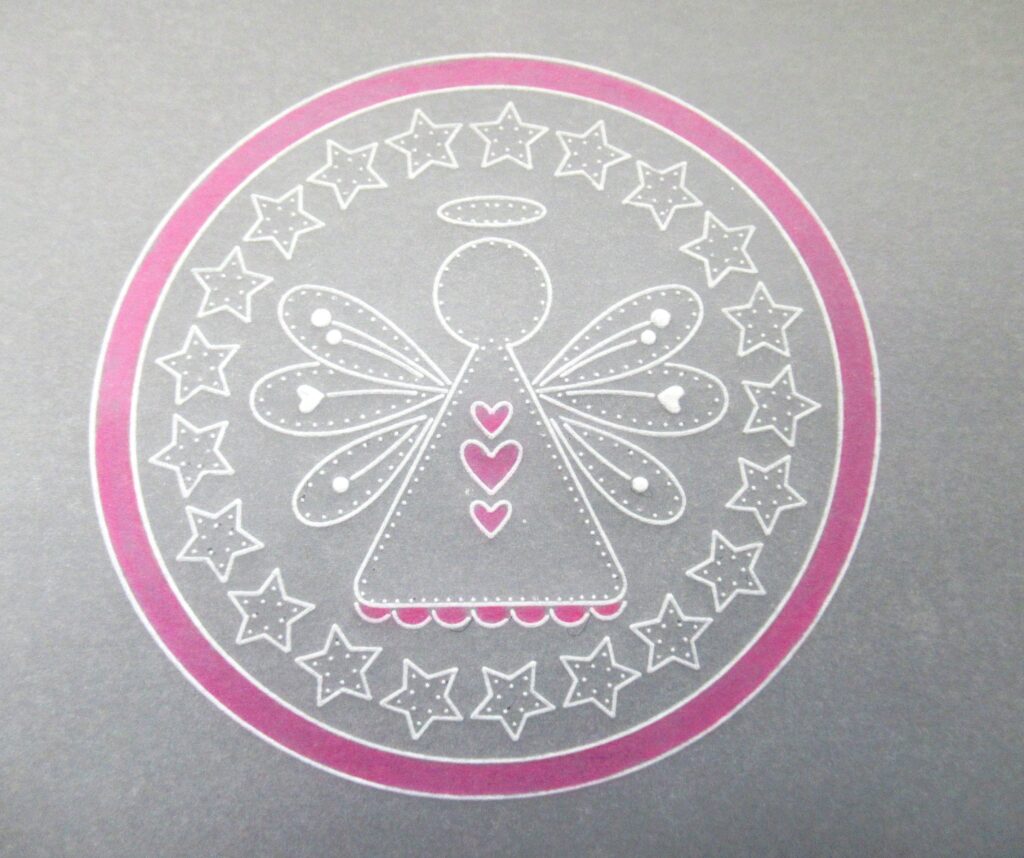
Step 1. Attach a piece of parchment to the nested circles plate and emboss the 4th and 5th lines in from the edge.
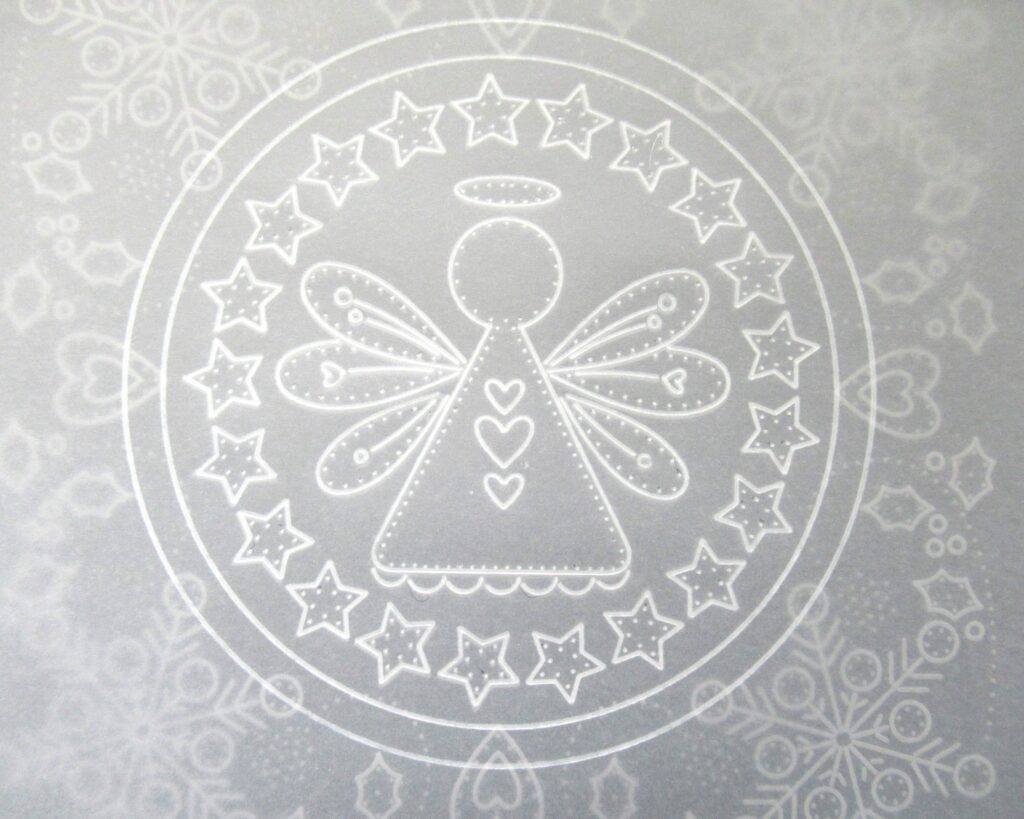
Step 2. Do not move your parchment from the Plate Mate, just take out the nested circles and replace them with the Angel plate and the design will automatically be in the centre of your frame. Use the number 1 tool from the starter kit to emboss all the tiny dots and lines of the design within the circle.
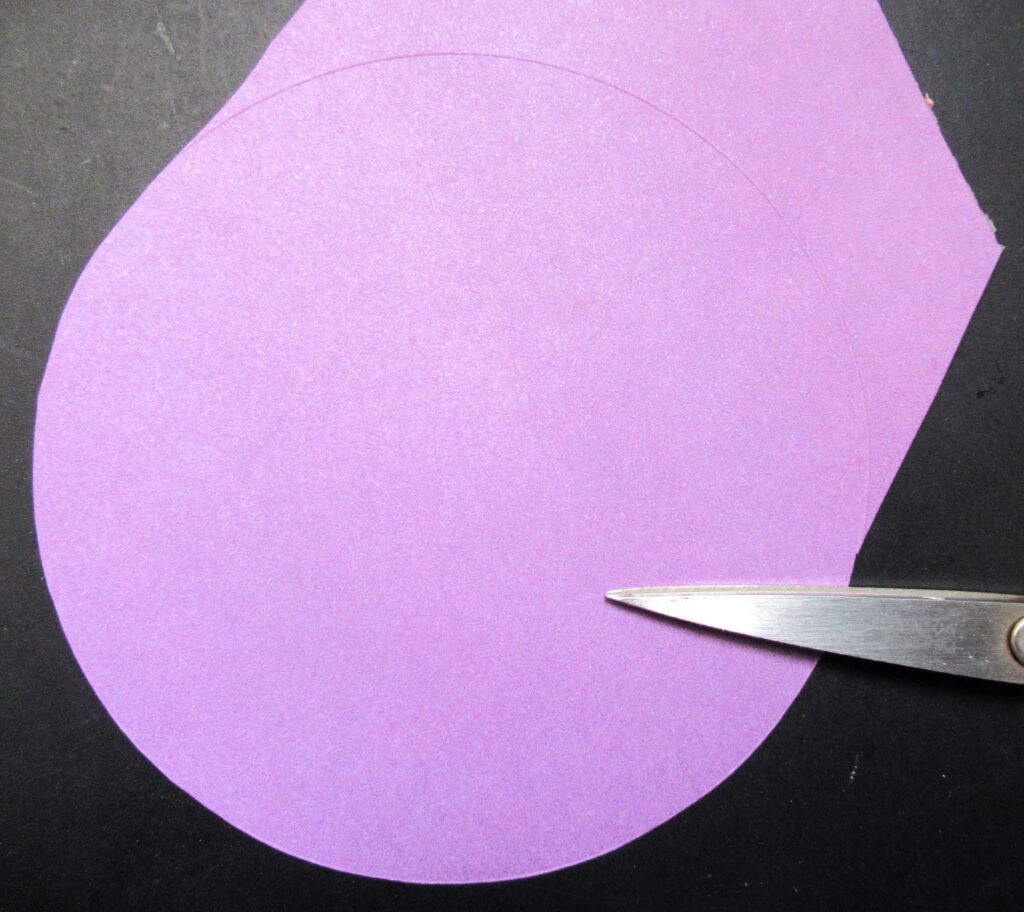
Step 3. Before you put your Nested Circle Groovi Plate away, attach your backing paper and with the number 2 tool, emboss the 4th line in from the edge. You can then cut around this and it will fit under your parchment design. Use your tumble dryer sheet on the back of the paper to help your tool to glide around the circle. You then have a line to show you where to cut the piece out.
Step 4. Working on the back and with the number 2 tool, emboss the small dots and hearts within the wings. Colour the border, the larger hearts on the angel’s body and the scallops of the dress. I chose pink and coloured it with a Polychromos pencil, but you can use whatever colour you like.
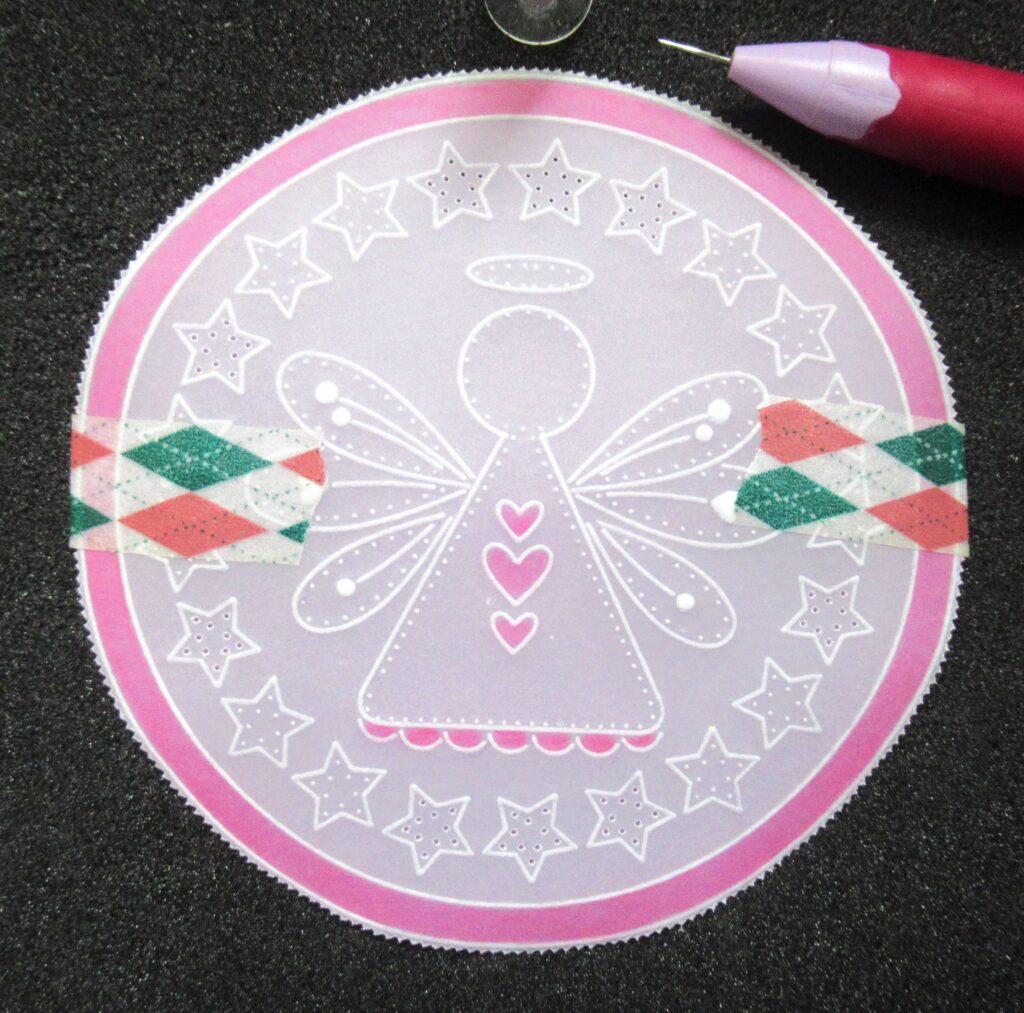
Step 5. Go around the outside of the circle with a 2-needle perforating tool and then snip out the work. Once you have cut it out, secure the circle of backing paper underneath with some low-tack tape.
Step 6. Use the FINE 1 needle tool to perforate into a few stars around the edge of the design. Perforate where the tiny white dots are. Take your time with this and be as accurate as you can when you perforate, then you won’t get a white halo around the perforation. We perforate these few stars so that we can stitch them to secure the backing paper to the parchment. Then we can continue to perforate and sew the rest of the design.
Step 7. When you buy the embroidery plates, Tina supplies a stitching guide.
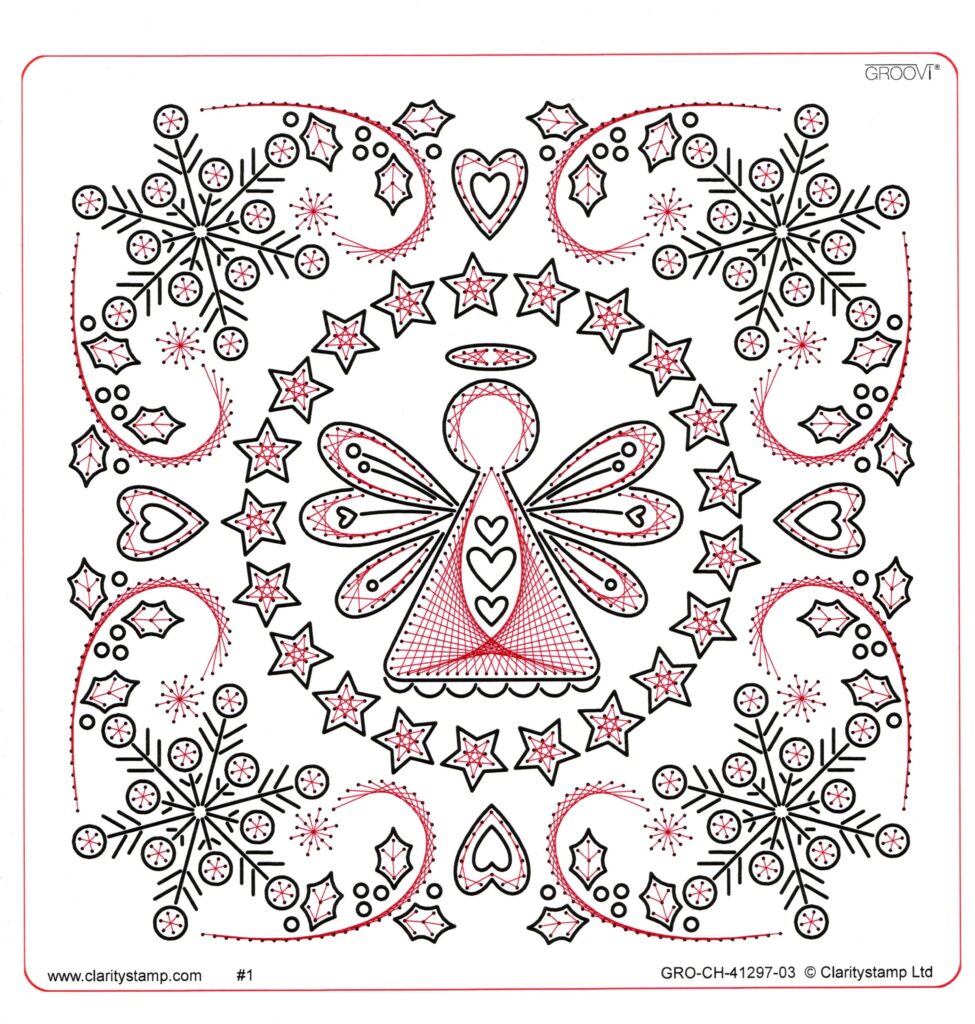
Never throw this away, it is valuable information. Thread your needle with a length of metallic thread – not too much, as if you use too long a piece you will find it can tangle.
A good tip is to draw the thread through your tumble dryer sheet as it helps it glide through the layers of parchment and paper. Follow the stitching guide and draw the thread through the first hole. Secure the end on the back with some tape (I use double-sided tape without taking off the carrier paper). Make sure you don’t put tape where you are going to stitch in the future, it really makes hard work for yourself – ask me how I know that one! Work into the stars that you have perforated. If you look carefully, there are two sets of holes within the star. These make a small star in the centre of a bigger star. I do the tiny star first and then sew it into all five corners to make the larger one. Now you have a few done, you can go ahead and take off the masking tape, as your backing will be secure.

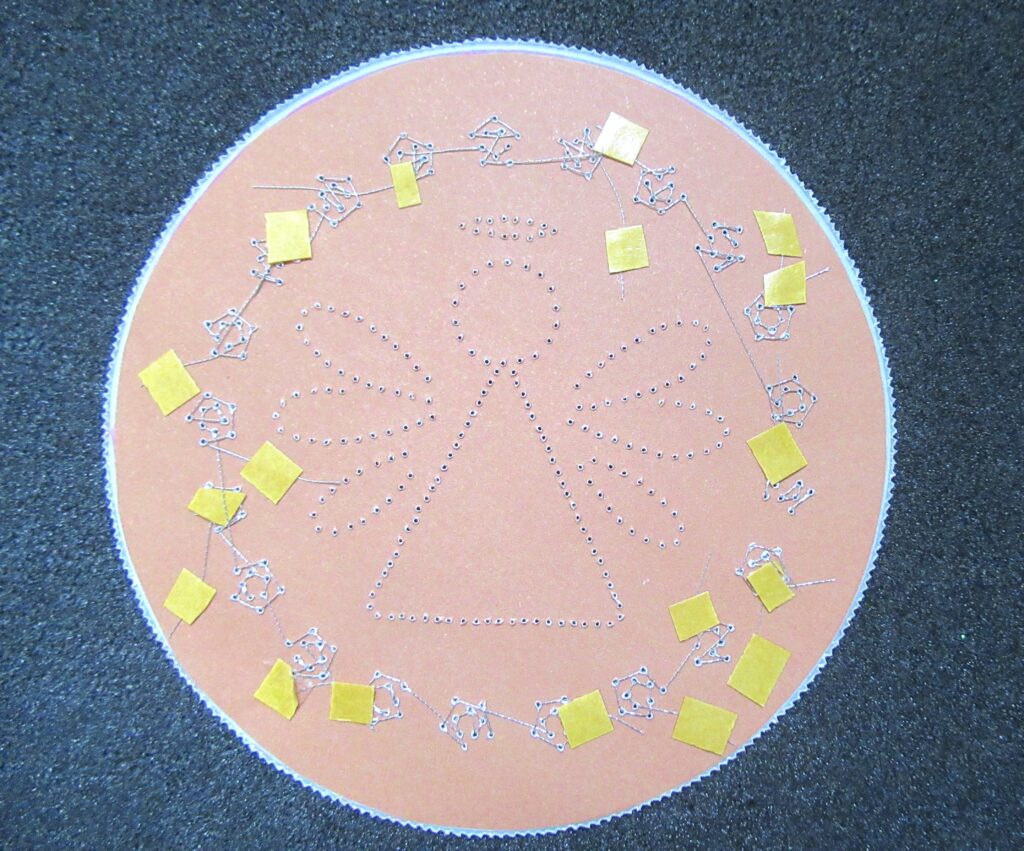
Step 8. Now that you have the tape removed, you can perforate through the rest of the dots in the design. Make sure to keep your perforating tool upright, this will make it a lot easier to locate the sewing holes through the back of the work. Work the rest of the stars.
This is what the back is looking like.
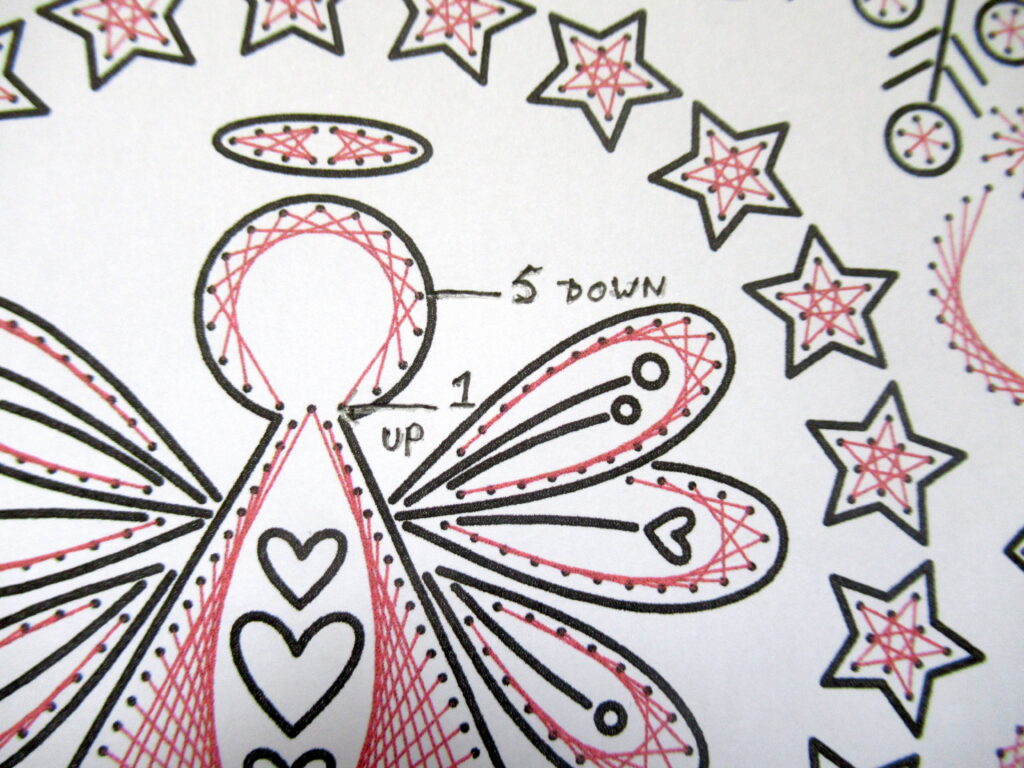
Step 9. The halo is stitched in two parts – check out the stitching plan. Therefore it is best to stitch one side before moving across to the other side. The stitches framing the face, go from one side of the neck to the other side, leaving a hole in the centre to start the gown. I have marked on the stitching plan where you need to start and have numbered the first two holes. The pattern skips three holes, and so you need to come up at number 1, and go down at number 5. You are just advancing one hole at a time, keeping the stitches at 5 holes distance, and the pattern just emerges. If you have freshly threaded your needle, you should have enough thread to start on the gown, so come up again in the centre hole in the neck.

Step 10. For the gown, as shown in Pic 9a, we start at the neck, take a long stitch right down to the corner of the garment, where the stitch will go down, then move along the hem to the next hole where the stitch will come up again. Another long stitch to the next hole at the top and down again. Follow this pattern of stitching all the way around the gown. I have drawn in the first two stitches to help you, but the stitching plan that Tina provided is very good to look at.
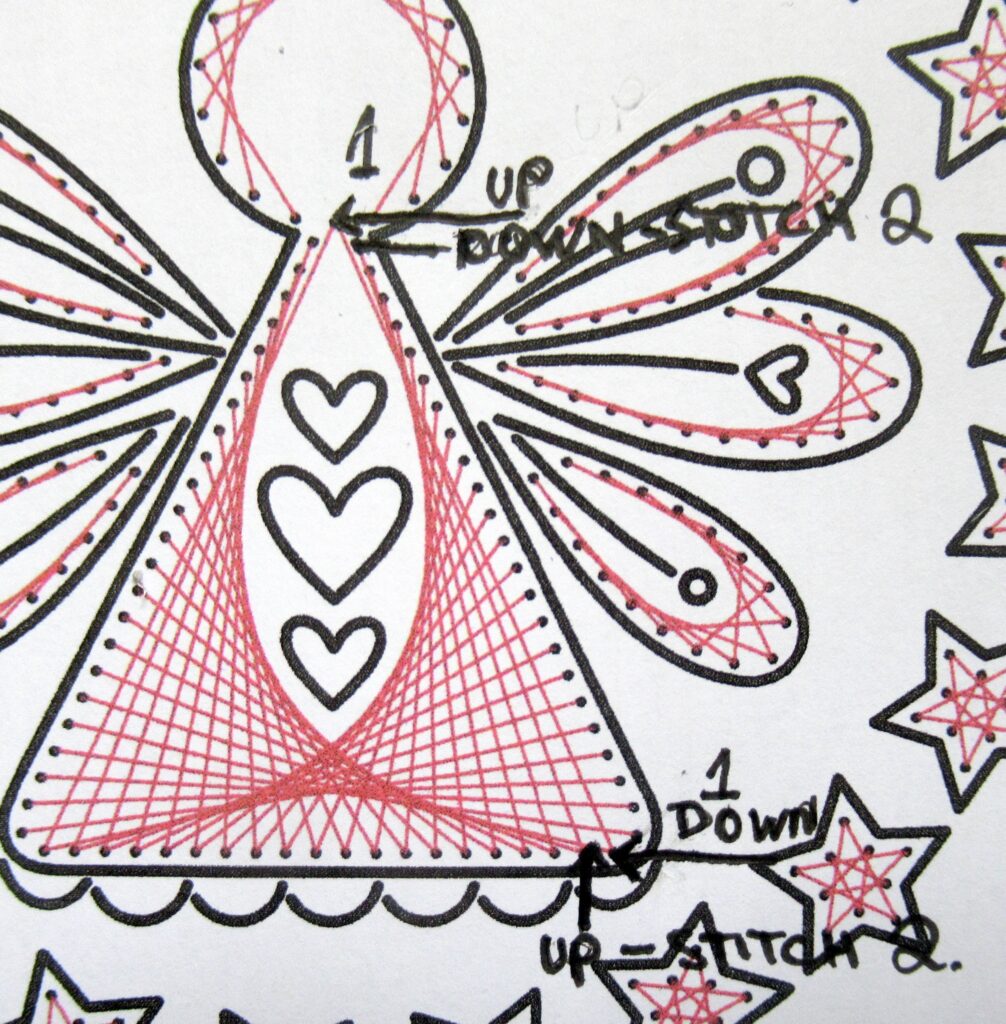
Step 11. The pattern in the wings is achieved in exactly the same way as with the one framing the face (in step 9) in that the stitches are five holes long. Start at the bottom of each wing and work around to the end.
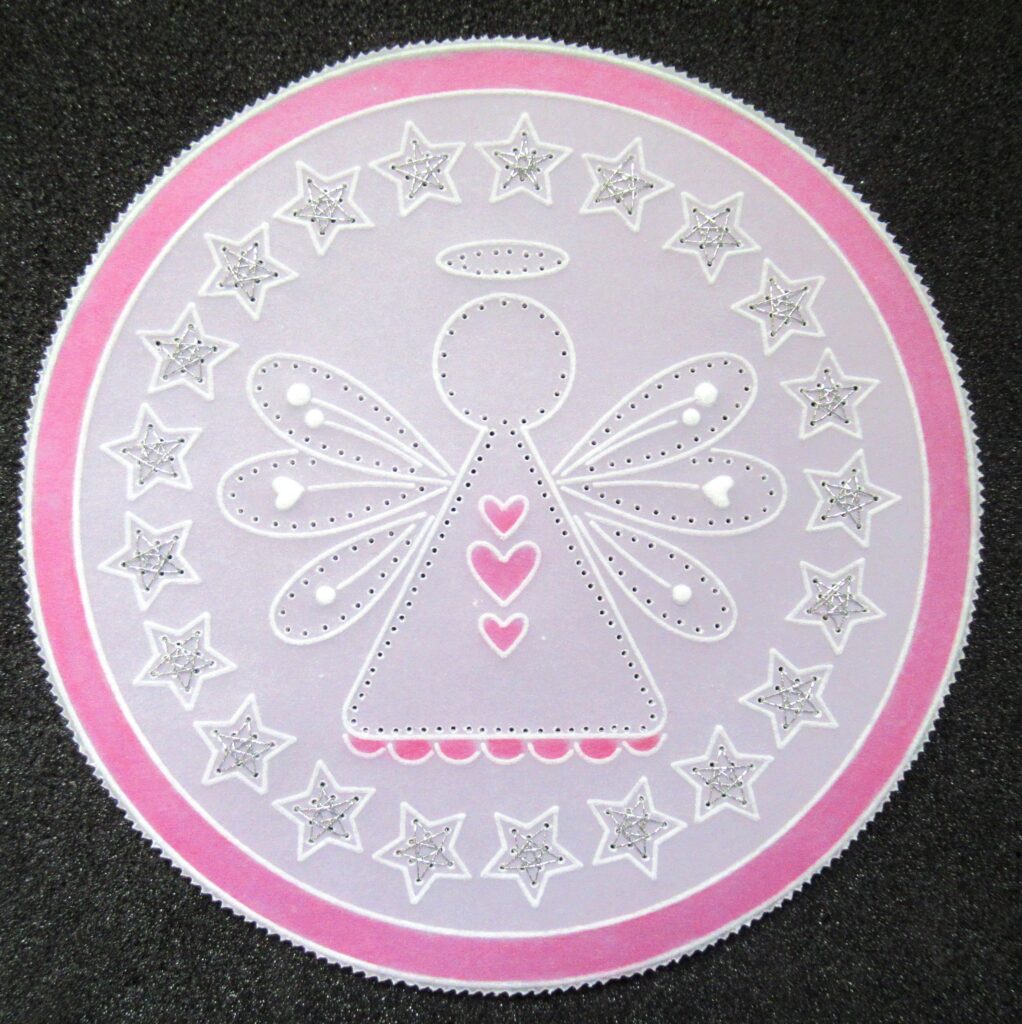
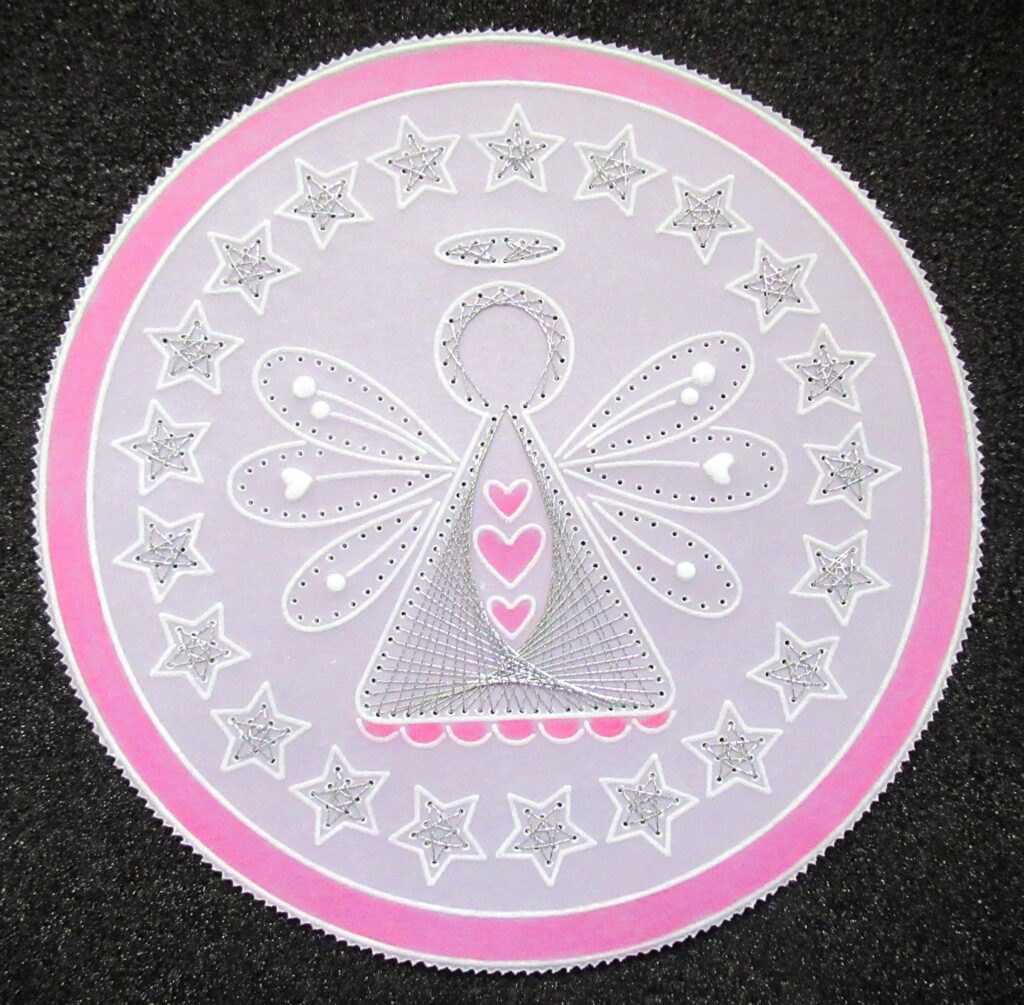
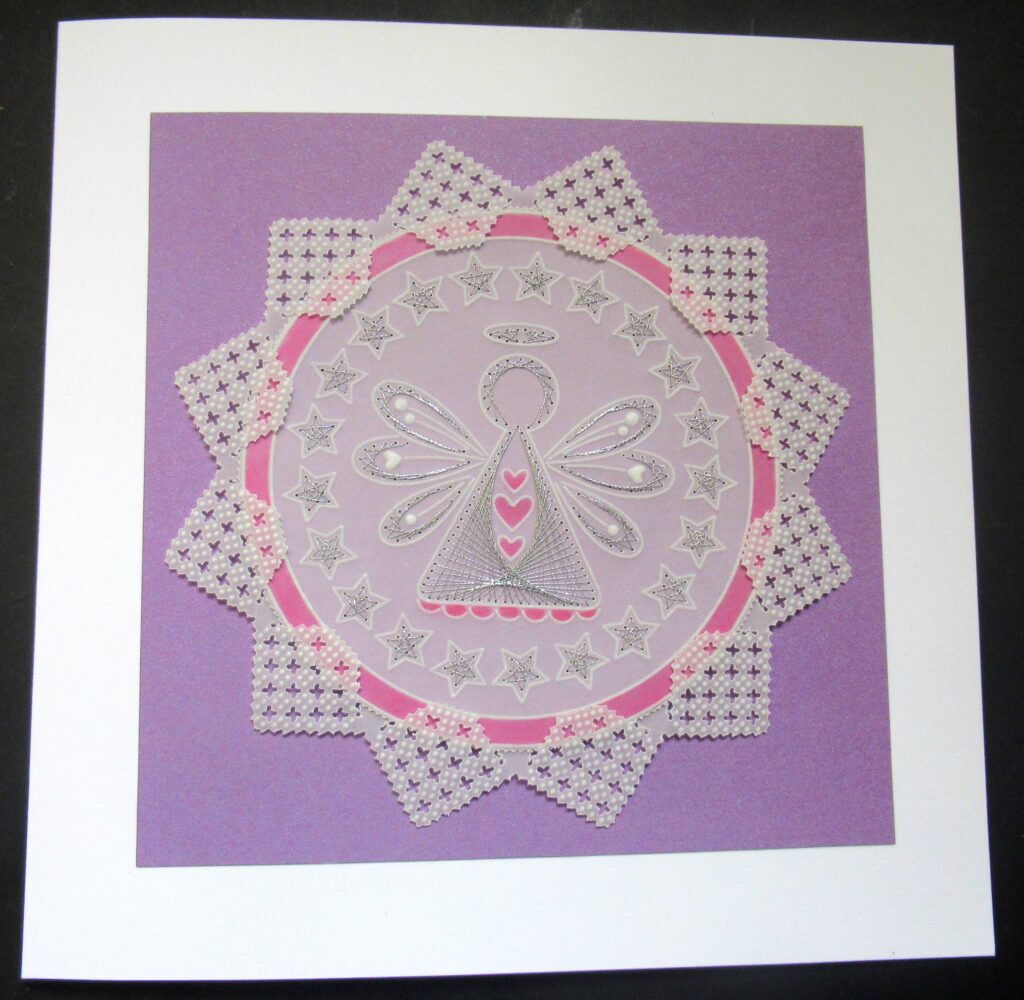
Step 12. I chose to use the Circular Lace Duet (Love) to frame my piece of work. I featured this grid in the Clarity Matters Blog entitled ‘Woodland Animals in a Frame’. I matted it onto a piece of backing paper that would tie in with my embroidered topper. I applied Roll-A-Tape to the back of the circle, and to the backing paper and then stuck it all to a 7 x 7 inch card blank. And your project is complete!
Wow, another INCREDIBLE project from the crafting machine that is Glynis Whitehead. Everything that Glynis has used in this particular project can be found on the Clarity website, HERE.
Looking at the week ahead…
Tuesday 12th December:
Groovi Tuesday with Paul – 10am Live on Facebook & YouTube
Friday 12th December:
Craft Along with Paul – 7pm Live on Facebook & YouTube
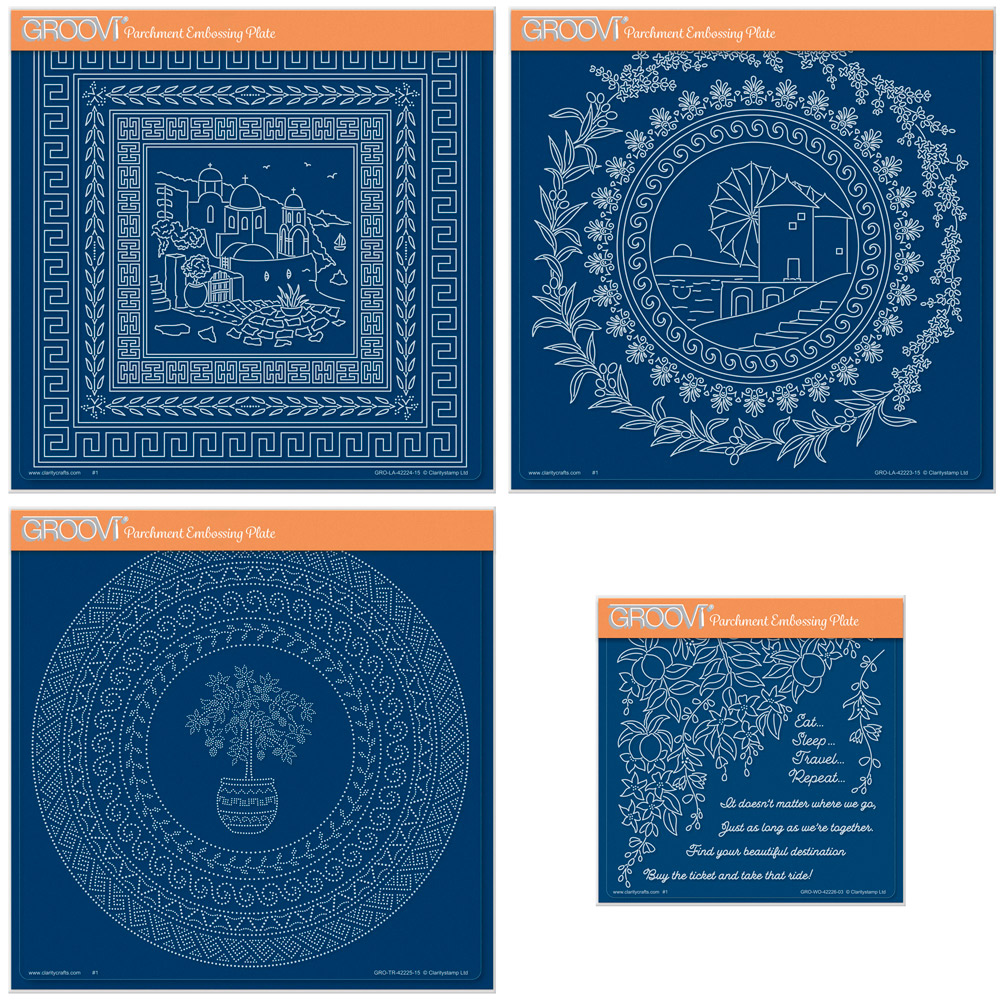
Paul will be doing another Craft Along with the final instalment of Linda Williams’ Layering Frames Set 6 – Greek – available HERE
Travel gently, friends.
Lotsa love, Grace & Glynis xoxo
Clarity – The Home of Art, Craft, and Well-Being.
Lovely project Glynis, hope you are having fun with your mum Grace. Enjoy the rest of your weekend ladies xx
What a fantastic project Glynis thank you. Hope you are enjoying your time with your Mum Grace and am looking forward to another Saturday share next week if possible. Just off to find a penguin xx
Thank you Glynis for doing the step by step for the topper. I did a few embroidery tags with Tina during November for her charity fundraiser & I really enjoyed it. In fact I ordered this plate in the sale along with a couple of others to make up the set. Once you get going it is quite relaxing watching the patterns develop. One tip Tina did give us was to tie a single knot in the thread at the eye of the needle to stop it sliding. It certainly worked as it stopped the friction on the thread so didn’t wear through or come unthreaded. I will give it ago when I have put my tree up & found the penguin.
Enjoy the rest of the time with the family Grace, this week seems to have flown by x