Clarity Matters Blog Tutorial: How To Use The Almond & Heart Tool
Hello hello! Grace here.
I hope this finds you well, safe, and enjoying your Sunday morning.
Have you been following Paul and his Groovi Tuesday sessions on Facebook & YouTube? He is currently working his way through the various multi-needle tools that are showcased in the Pergamano Handbook for Multi-Needle Tools – Volume 2. This week he moved on to the next tools in the book – The Almond Tool & The Heart Tool.
If you missed those last sessions, then you can catch up here:
Picot V Small Perforating Tool – HERE
Picot V Medium Perforating Tool – HERE
Picot V Large Perforating Tool – HERE
Angle Perforating Tool – HERE
Cross Perforating Tool – HERE
4-In-4 Perforating Tool – HERE.
During Groovi Tuesday this week, Paul started working with the Almond Tool and the Heart Tool. You can catch up on that episode, HERE.
Meanwhile, the lovely Glynis Whitehead has made two more projects to go with this most recent tool tutoring. I’ll hand you over to Glynis…

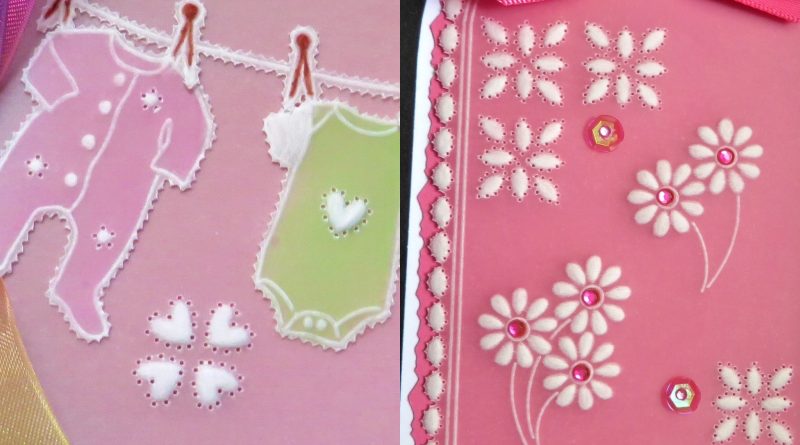
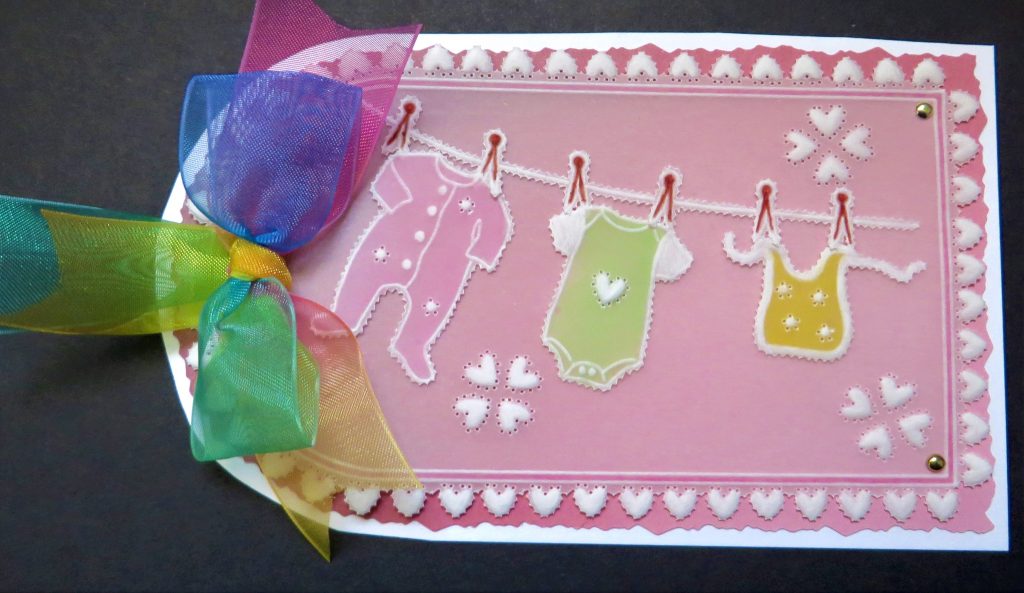
Almond and Heart Perforating Tool – Project 1
Ingredients
Pergamano Handbook for Multi-Needle Tools Vol 2 by Linda Williams (PER-BO-70355-XX)
Nested Arch Tags Groovi Plate A5 (GRO-PA-41465-04)
Baby Clothes A6 Sq Groovi Plate (GRO-CN-40290-01)
1-Needle Perforating Tool (PER-TO-70035-XX)
2-Needle Fine Perforating Tool (PER-TO-70037-XX)
5 in a Circle Tool (PER-TO-70025-XX)
1mm Embossing ball Tool (PER-TO-70011-XX)
1.5mm Embossing Ball Tool (PER-TO-70004-XX)
3mm Embossing Ball Tool (PER-TO-70005-XX)
4.5mm Embossing Ball Tool (PER-TO-70015-XX)
Groovi Embossing Tool 1&2 (GRO-AC-40026-XX)
Pergamano Colour Exclusives (PER-CO-70060-XX)
Faber-Castell Polychromos Pencils (ACC-PE-30797-XX)
Or Perga-Liner Pencil (B) (PER-CO-70063-XX)
Blending Nibs (PER-AC-70300-XX)
Dorso Oil (PER-CO-70066-XX)
Perga Glue (PER-AC-70133-XX)
Method
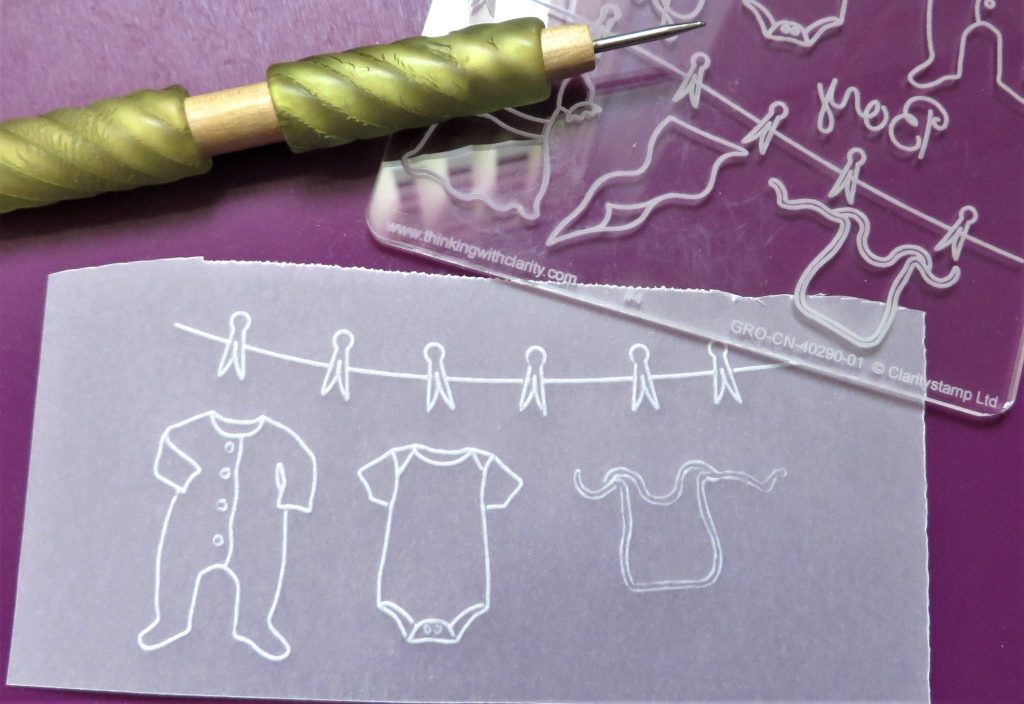
Step 1. Trace the 2nd largest tag from the Nested Arch Tag plate.
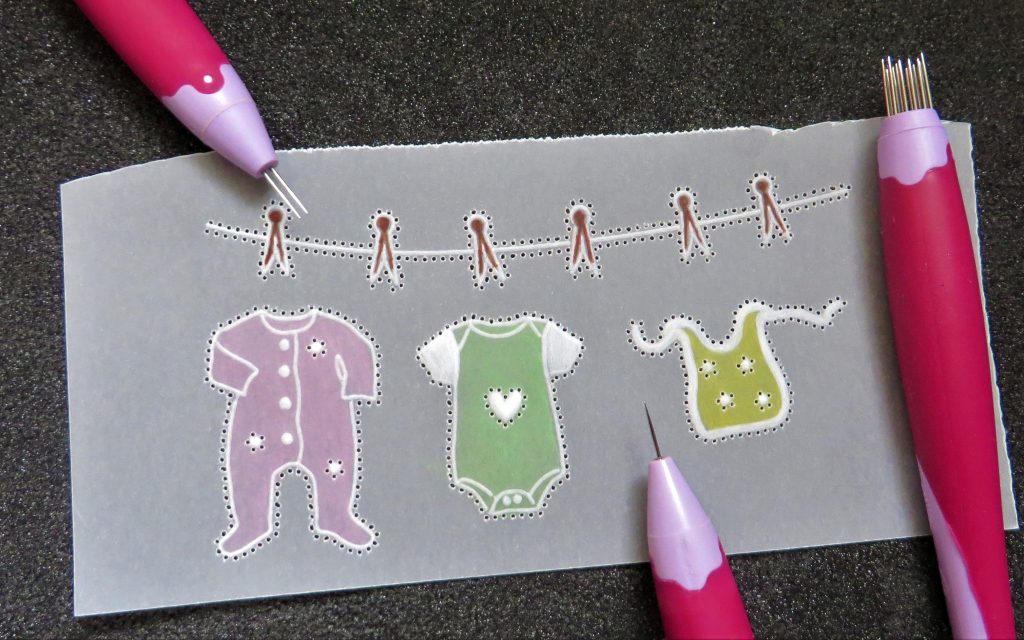
Step 2. Trace the garments from the Baby Clothes Groovi plate. It is good to get these ready first so that they can be tried on the tag, in order to decide where to put the perforation combos. Remember to use the number 2 tool from the starter kit (or 1.5mm Pergamano ball tool) to do the bits you wish to emboss white.
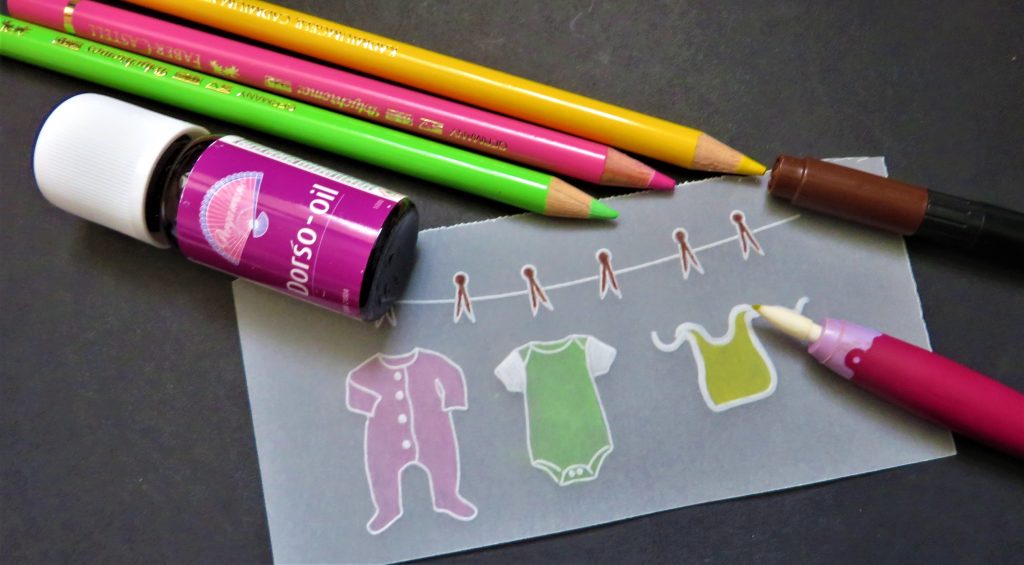
Step 3. Emboss and colour the clothes and pegs. Use Pergaliner B pencils (or Polychromos blended with nibs and Dorso oil) and use a Pergamano Colour Exclusive pen to colour the pegs. When you emboss, remember to use the largest tool to fit the space, before moving down to a smaller ball tool.
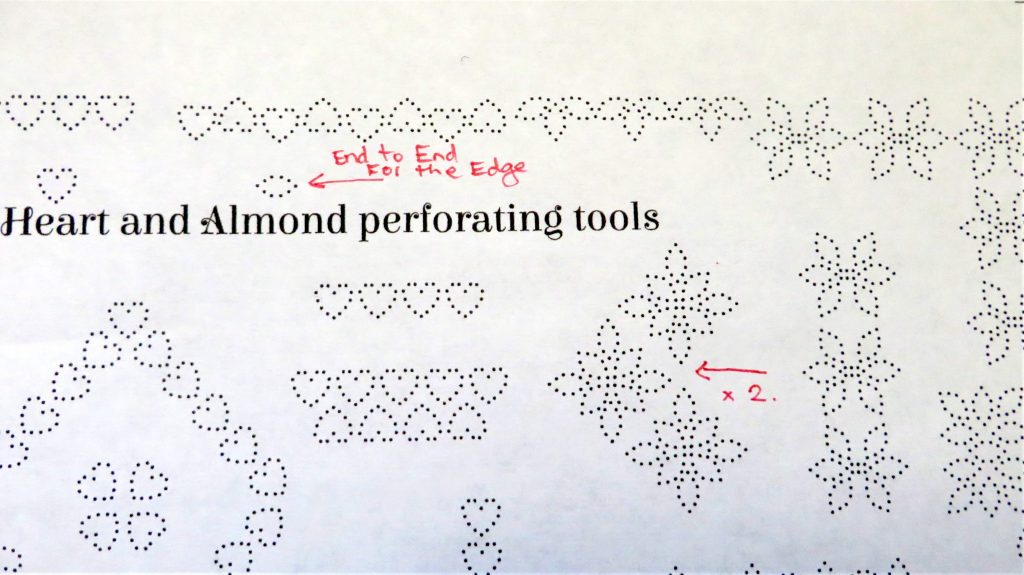
Step 4. The Heart and Almond Perforating tools are illustrated by Linda in her Handbook on pages 38-41 and the sampler you need to photocopy is on page 41. The patterns used for this project are marked with a red arrow.
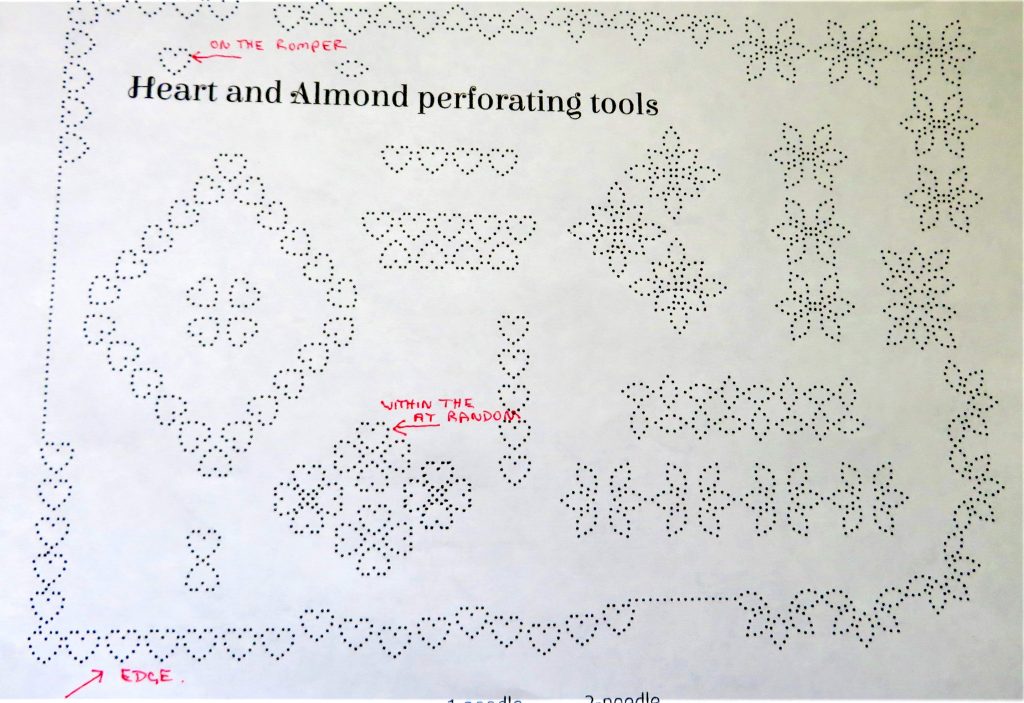
Step 5. Place a heart in the centre of the romper, and some 5 in a circle perforation decoration into the other garments. Shallow perforate and then emboss them. Then go around the edges of all the garments, the clothesline and pegs with the 2-needle fine tool.
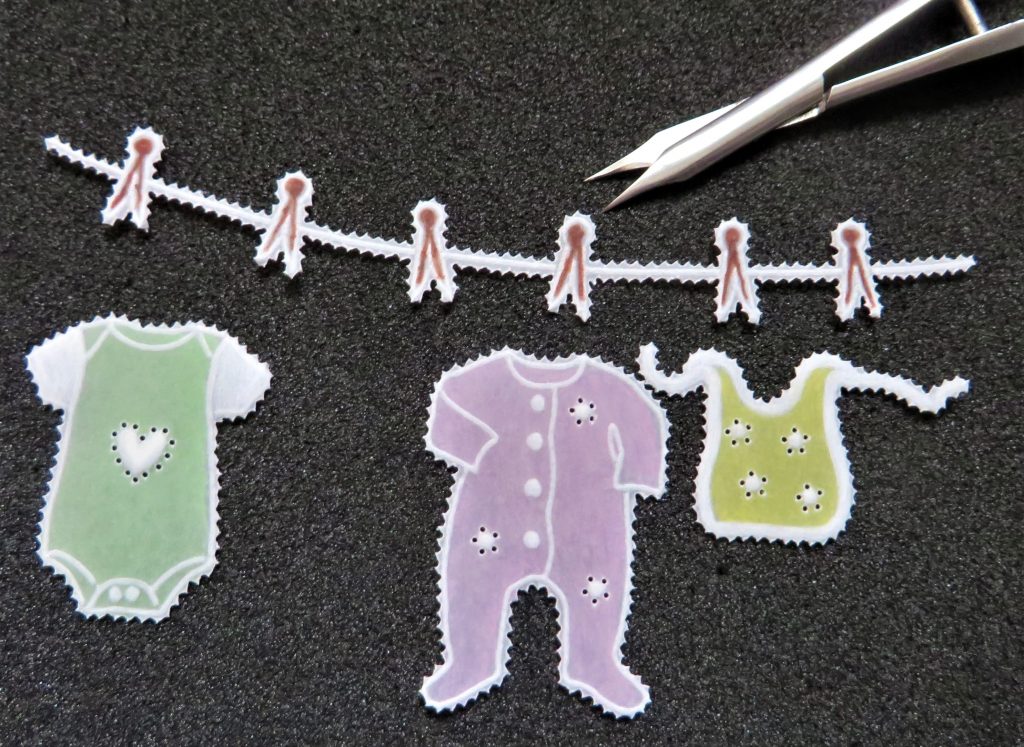
Step 6. Snip out the washing line and garments.
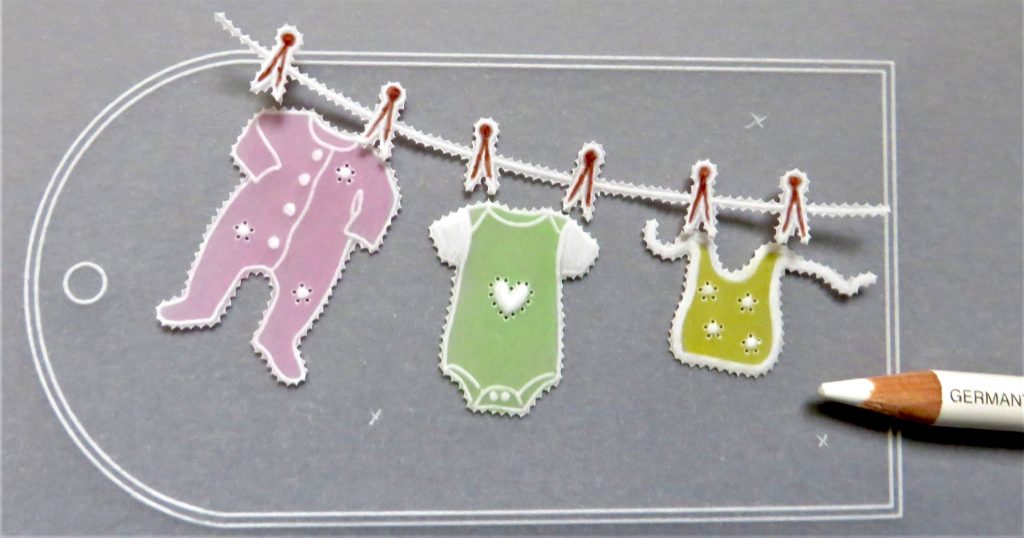
Step 7. Place them on the traced tag so that you can make up your mind about where you want the perforation patterns to be. Mark the places with a little white cross.
Step 8. Put the paper pattern onto a shallow mat and line up the parchment over it, matching the needles to the dots on the pattern. Add perforations to the tag and go around the outside with the heart perforations. Emboss within the perforations using the largest tool to fill the space.
TOP TIP: Remember that the dots on the handle of the tool will help with keeping it straight.
Step 9. Deeply re-perforate all the hearts with a single needle tool.
Step 10. Snip out the work, snipping in the dip, as Linda has explained.
Step 11. Mat and layer the tag onto your choice of backing paper/card. Then the tag will be ready to assemble.

Step 12. Use Perga Glue to stick on the clothesline, pegs and garments. To do this, put a little puddle of glue onto a saucer or glass mat. Do not apply glue to the middle of the piece to be glued. Use a cocktail or pickle stick to apply tiny amounts of glue to the picots around the edge of the pieces.
Step 13. Add ribbons at the arch of the tag. Your first project is complete!
Almond and Heart Perforating Tool – Project 2
Ingredients
Pergamano Handbook for Multi-Needle Tools Vol 2 by Linda Williams (PER-BO-70355-XX)
Nested Arch Tags Groovi Plate A5 (GRO-PA-41465-04)
Tina’s Flower Fun A6 Sq Groovi Plate (GRO-FL-40945-01)
1-Needle Perforating Tool (PER-TO-70035-XX)
2-Needle Fine Perforating Tool (PER-TO-70037-XX)
5 in a Circle Tool (PER-TO-70025-XX)
1mm Embossing Ball Tool (PER-TO-70011-XX)
1.5mm Embossing Ball Tool (PER-TO-70004-XX)
3mm Embossing Ball Tool (PER-TO-70005-XX)
Groovi Embossing Tool 1&2 (GRO-AC-40026-XX)
Baby Pink Parchment (GRO-AC-40403-A4)
Perga Glue (PER-AC-70133-XX)
A few gems for the 3D flower (PER-CR-70402-XX)
A scrap of red parchment paper
Method
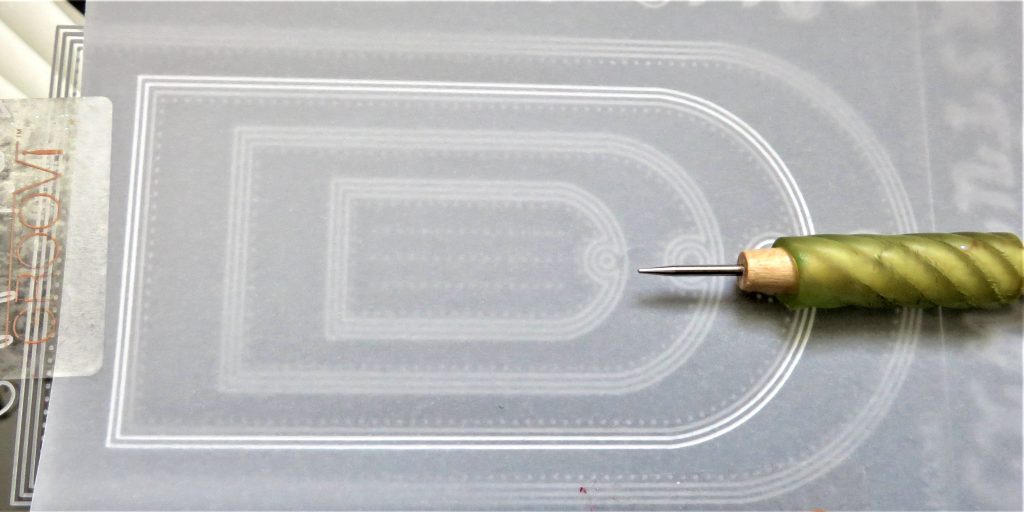
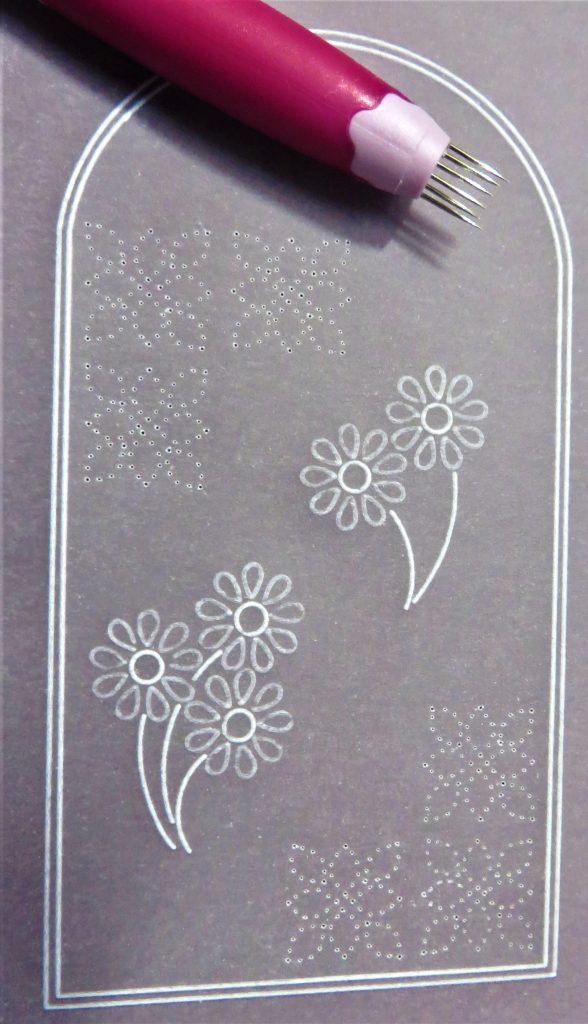
Step 1. Trace the 2nd largest tag from the Nested Arch Tag plate onto the pink parchment.
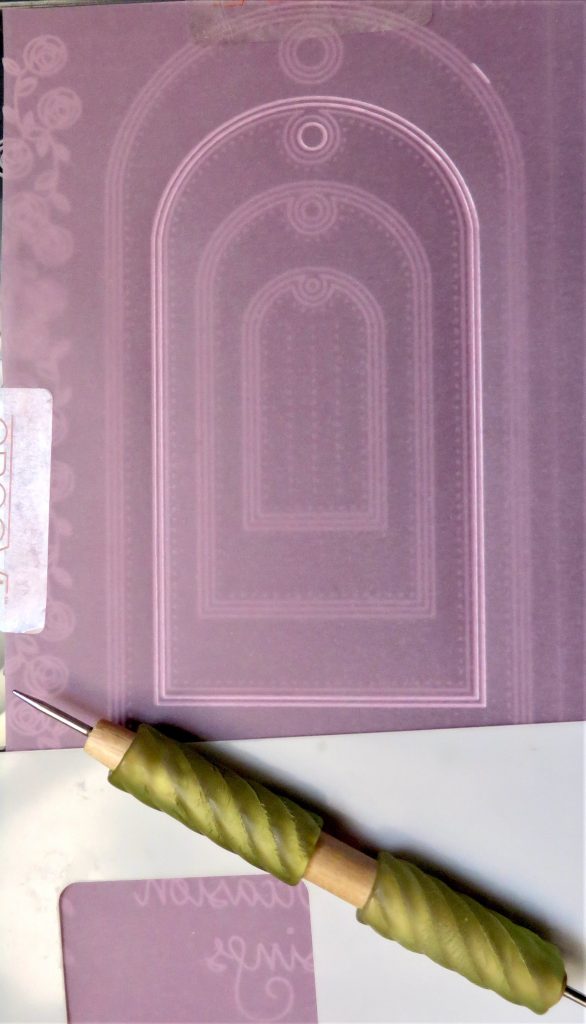
Step 2. Trace the small daisies from Tina’s Flower Fun Groovi Plate, remembering to use the number 2 tool or 1.5mm ball tool for the elements you wish to emboss.
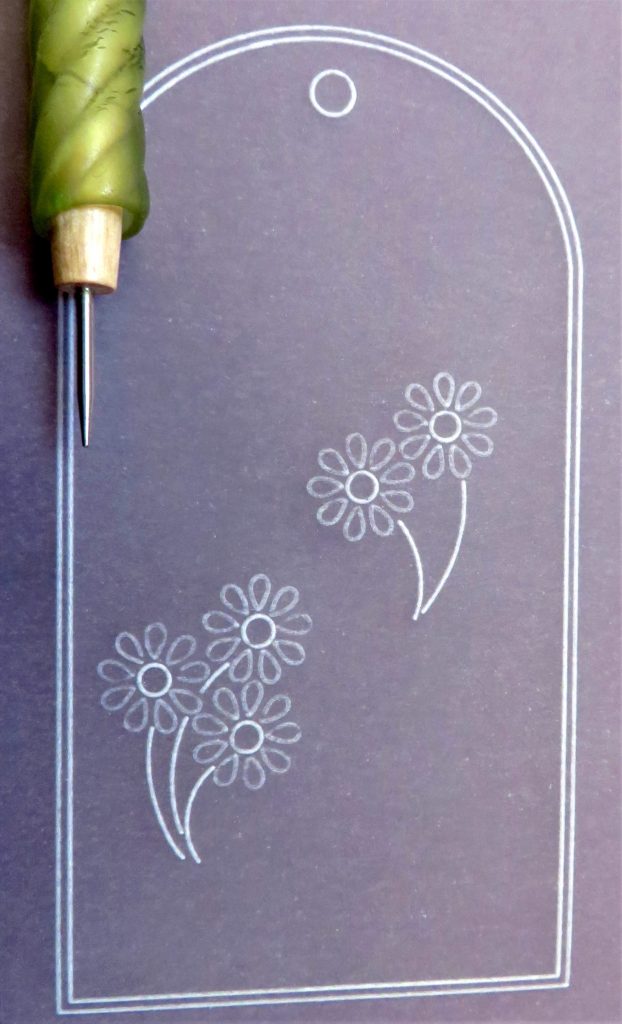
Step 3. The heart and Almond Perforating tools are illustrated by Linda on pages 38 – 41 of her Handbook. The sampler you will need to photocopy is on page 41 and I have marked the perforation patterns used for this tag with red arrows.
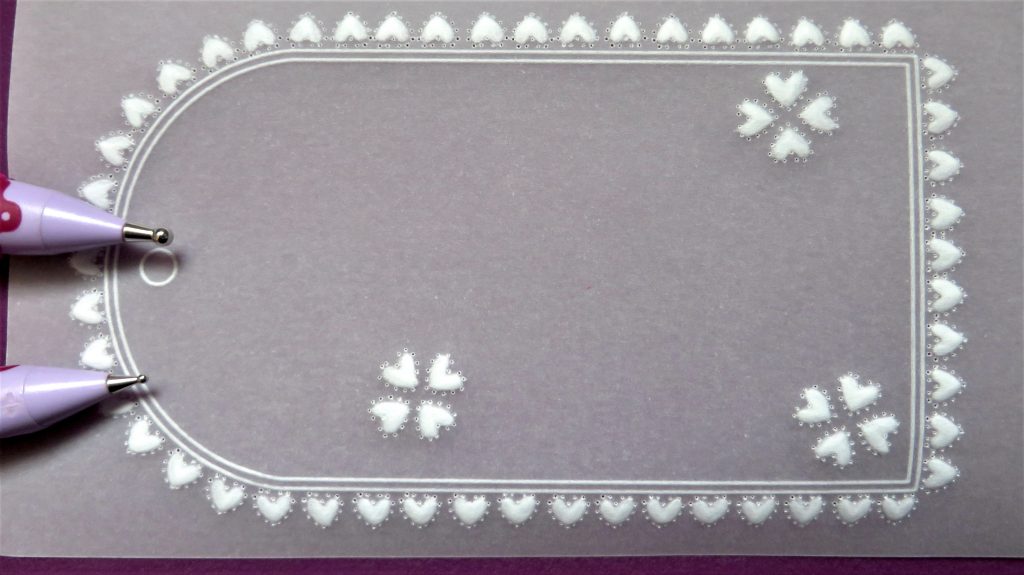
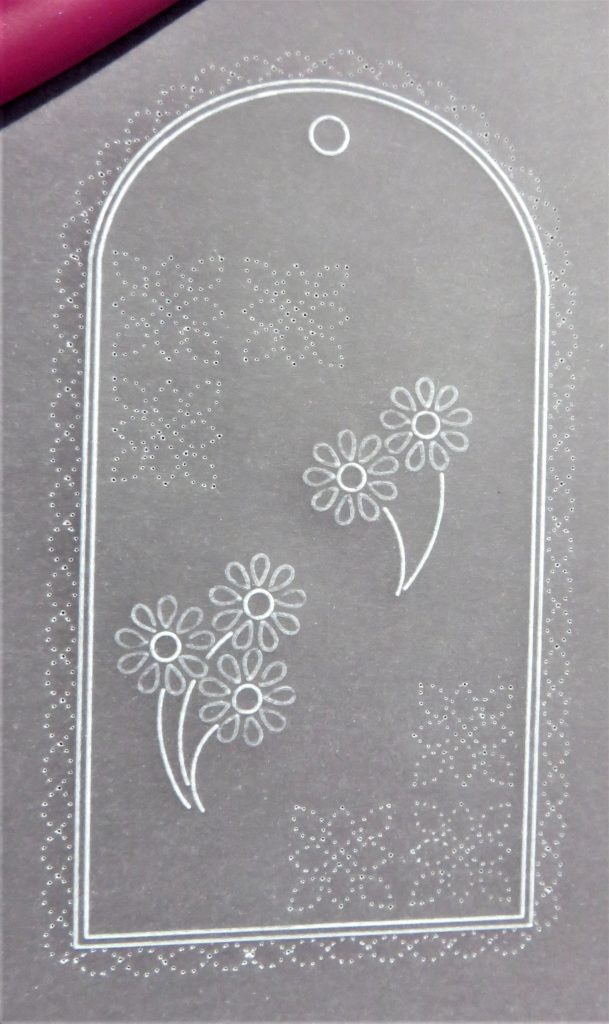
Step 4. Place the photocopied paper pattern onto a shallow mat with the parchment attached on top. Perforate through the parchment and the pattern, matching the needles to the dots underneath. Use the dot on the handle to help keep you straight. Do the corner perforations first.
Step 5. Now go around the edge, placing the almond perforations end to end. Start at each end of the bottom of the tag and work inward to the middle so that you can space out the perforations to fit. Then start from each corner up the sides of the tag to meet at the top of the arch, again spacing the almond shapes out over the arch.
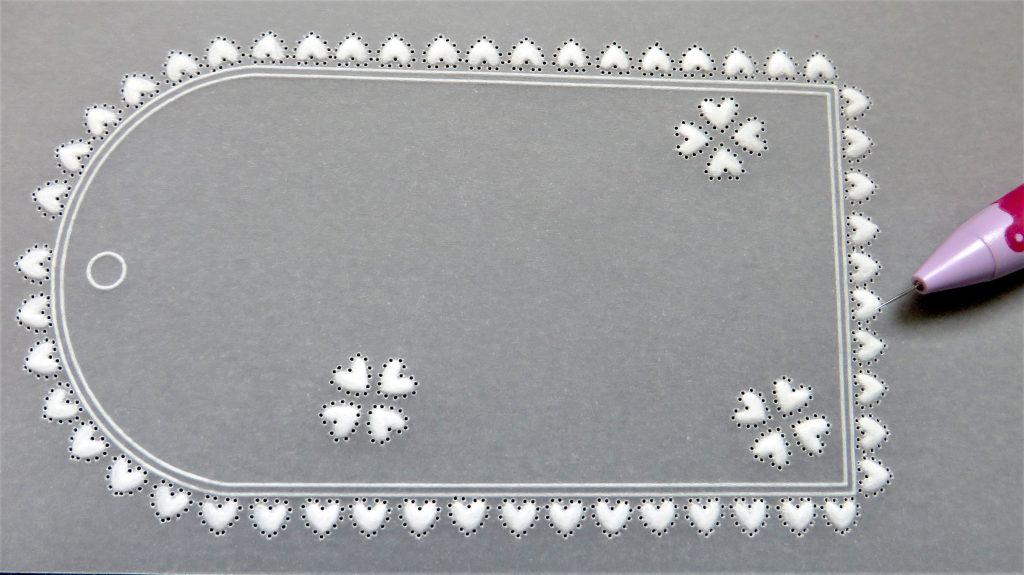
Step 6. Starting with the 3mm embossing ball tool, emboss within all the almonds and petals of the daisies. They shouldn’t be made white too soon. Go over them twice with the 3mm ball tool before moving down to the 1.5mm tool. Try to fill all the space within the perforations.

Step 7. With the single needle tool, re-perforate deeply all the almond shapes.
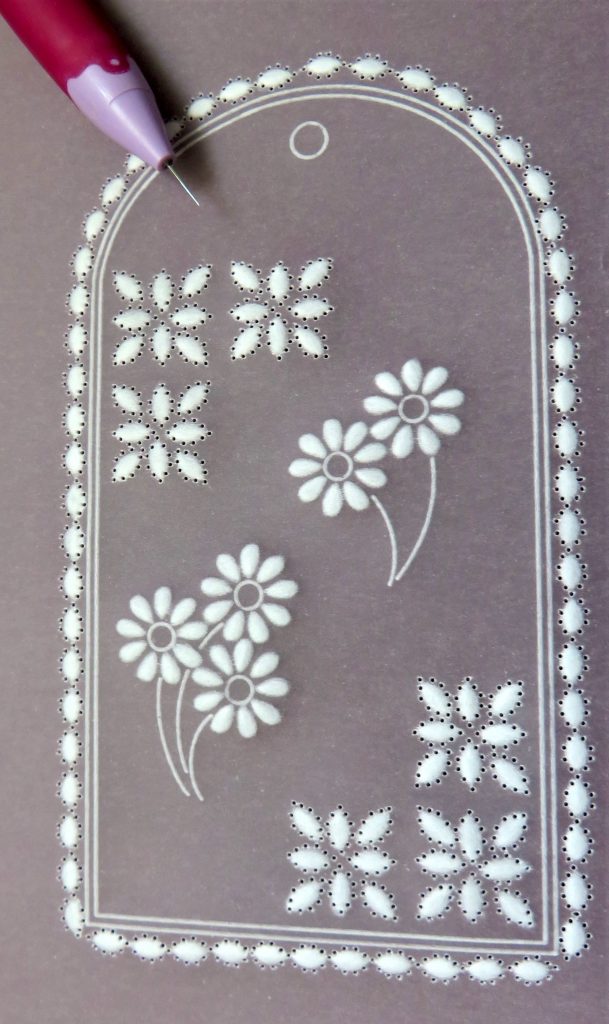
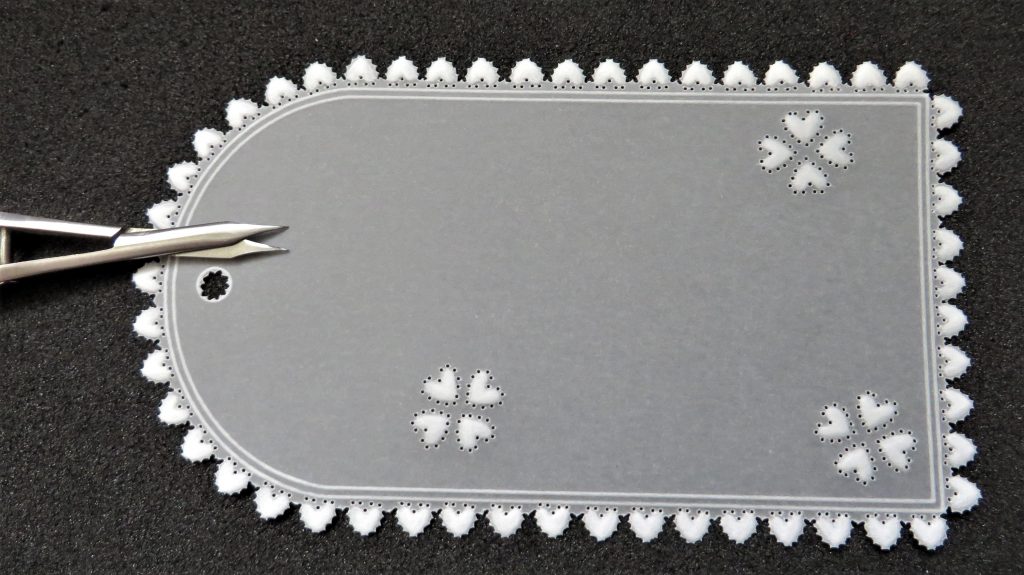
Step 8. Carefully snip around the outside shape of the almonds around the tag.
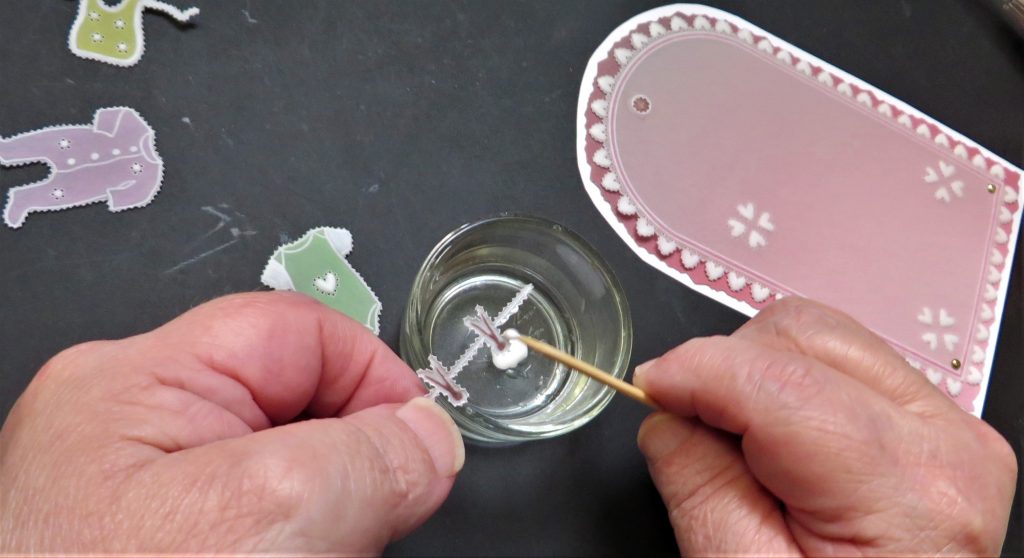
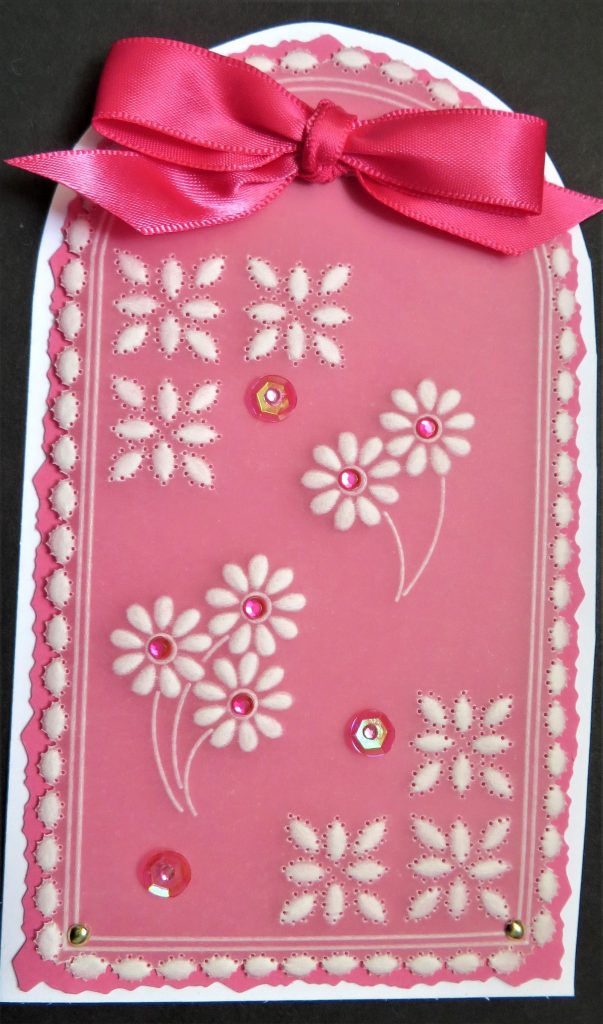
Step 9. Mat and layer the tag onto your chosen backing papers/card and add some gems into the centre of the flowers, using Perga glue applied with a cocktail/pickle stick. I have also decorated the tag with some sequins. Give the glue some time to dry and then add a bow. Your second project is complete!
Such fabulous projects! Thank you Glynis, for sharing your tips and tricks with us. We are so grateful.
Everything that Glynis has used can be found on the Clarity website, HERE.
Now, looking at the week ahead. Guess who is back in the SHAC?!
Monday 2nd October:
In The SHAC with Barbara on Facebook and YouTube, 10am
Tuesday 3rd October:
Groovi Tuesday with Paul – 10am Live on Facebook and YouTube
Thursday 5th October:
The Pergamano Show with Tina Cox on Create & Craft, 4pm & 8pm
Don’t forget to join Mum this afternoon. She’s on Create and Craft 3pm – 5pm.
Hope to see you there!
Travel gently, friends.
Lotsa love, Grace & Glynis xoxo
Clarity – The Home of Art, Craft, and Well-Being.
Brilliant projects as always Glynis xx
Another 2 pretty tags this week, just realised as I saw the gems on the 2nd one that I forgot the gem on the gnome’s hat last week !! will do that later.
Thanks Grace & Glynis for bringing us another Groovi Sunday blog & projects.
Along with 2 hours this afternoon with Barbara there is plenty to keep us occupied this week. xx
Loving the tags, thanks for another great project x
I was so enjoying these particular tools when, happily snipping away, the end of my new ‘squeezy’ picot cutters broke off! Another phone call to wonderful Clarity tomorrow. Hopefully I can catch up.
So pretty, thank you for showing these.
Hopefully after my imminent eye op I will be able to get back to using the multi needle tools which are currently languishing in my craft bag. Lots of inspiration from Glynis for when the time is right.
Thank you Glynis. I never realised you could do such lovely patterns using the different hole punching tools.
Very nicely illustrated and easy to follow. You’re a star 🌟.
Lovely tag projects all, Glynis. I am wondering though where to find the pretty deckled edge that you use for backing all these lovely tags. I have searched high ‘n low so assuming it may be a “retired” die.