Clarity Matters Blog Tutorial: How To Use the Pergamano Picot V Medium Tool
Hello hello! Grace here.
I hope this finds you well, enjoying your Sunday and feeling crafty. If you are in the UK, I hope you’re enjoying the Bank Holiday weekend!
Have you been following Paul and his Groovi Tuesday sessions on Facebook & YouTube? He is working his way through the various multi-needle tools being showcased in the Pergamano Handbook for Multi Needle Tools – Volume 2. This week he moved onto the next tool in the book – the Picot V Medium Perforating Tool. If you missed the last session, then you can catch up, HERE.
To go hand in hand with that video tutorial, Glynis Whitehead has kindly put together TWO step-by-step projects to show off this particular tool.
I’ll hand you over to the fabulous Glynis to see what she has come up with this week…….

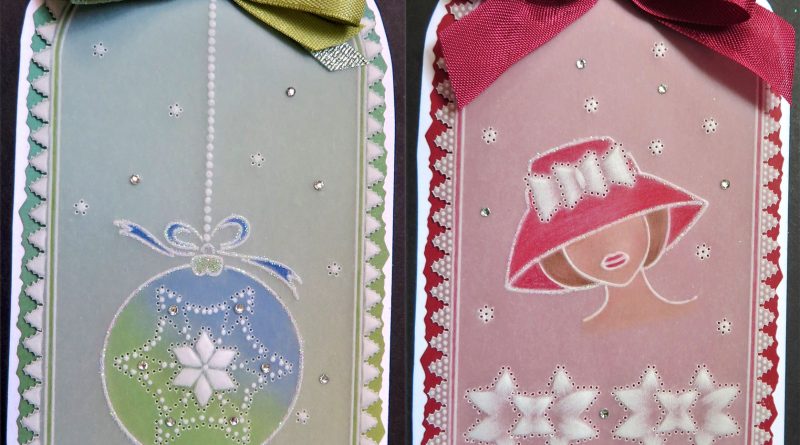
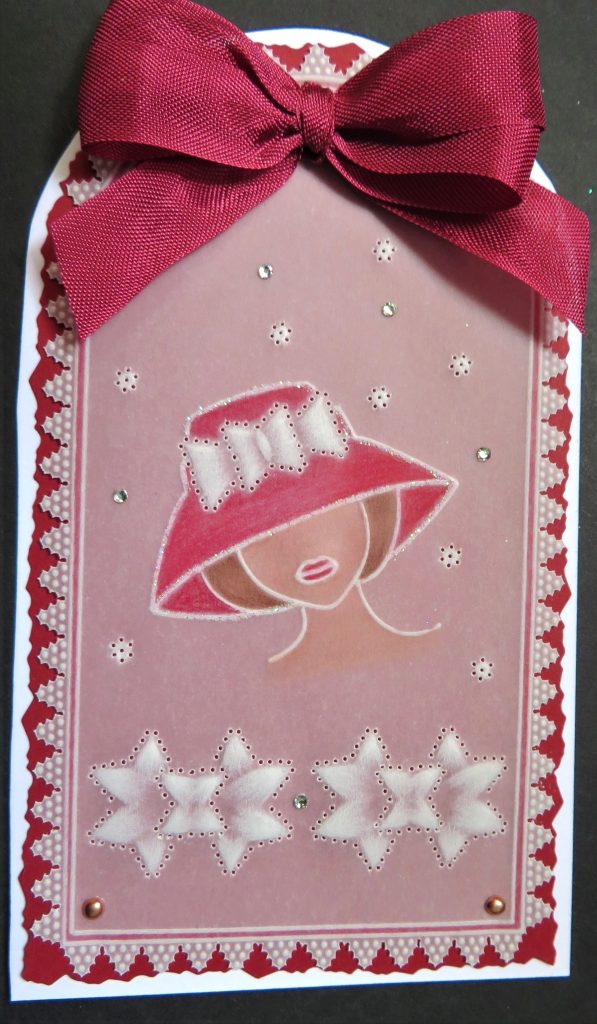
Picot-V Medium Tool 1 – Project 1
Ingredients
Pergamano Handbook for Multi-Needle Tools Vol 2 by Linda Williams (PER-BO-70355-XX)
Nested Arch Tags Groovi Plate A5 (GRO-PA-41465-04)
Hats 1 Groovi Border Plate (GRO-FA-40499-09)
Diagonal Border Grid 1 (GRO-GG-40354-14)
Picot-V Medium Perforating Tool (PER-TO-70282-XX)
Single Needle Perforating Tool (PER-TO-70035-XX)
Flower Perforating Tool (PER-TO-70018-XX)
1.5mm Embossing Ball Tool (PER-TO-70004-XX)
3mm Embossing Ball Tool (PER-TO-70005-XX)
Embossing 1 & 2 Tool (From the Starter Kit) (HERE)
Faber-Castell Polychromos Pencils (ACC-PE-30797-XX) or Perga-Liner Pencil (B) (PER-CO-70063-XX)
Blending Pen (PER-AC-70300-XX)
Dorso Oil (PER-CO-70066-XX)
Pergamano Sticky Ink (PER-AC-70134-XX)
Perga Glitters (PER-AC-70252-XX)
Perga Glue (PER-AC-70133-XX)
Perga Crystals (Starlight Sparkle) (PER-AC-70402-XX)
Method
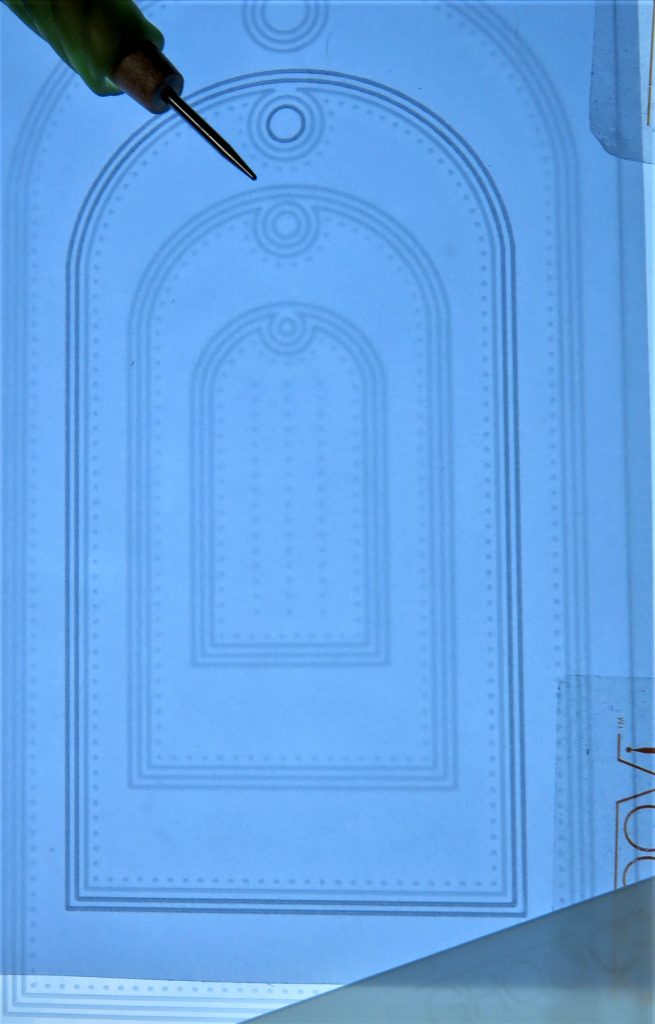
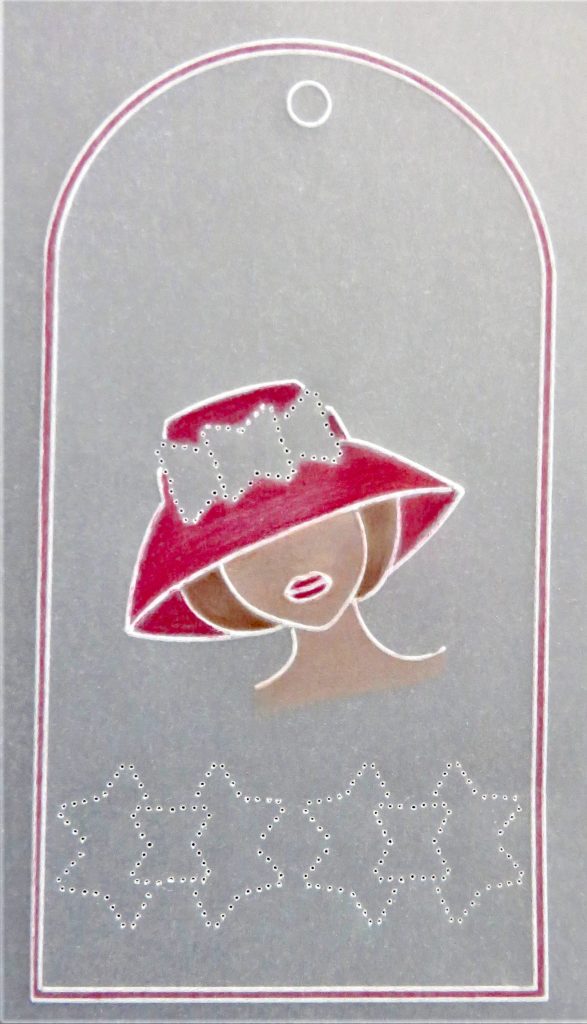
Step 1. Trace the 2nd largest tag from the nested arch tags Groovi Plate.
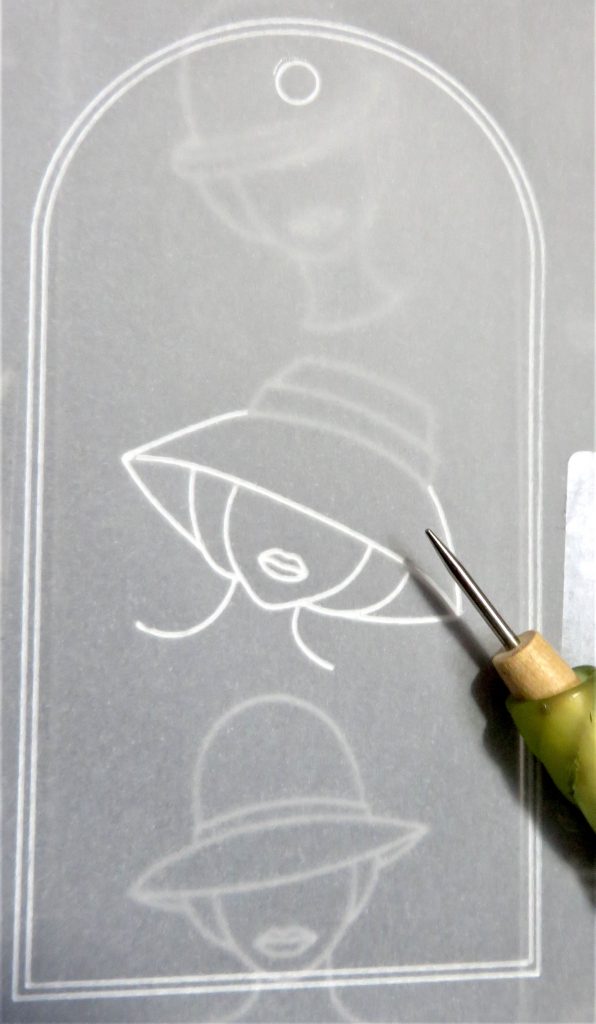
Step 2. Emboss the 3rd hat down from the top on the Hats 1 Border Groovi plate, in the middle 1/3rd of the tag. Do not complete the crown of the hat as you need to leave space for the ‘picot V bow.
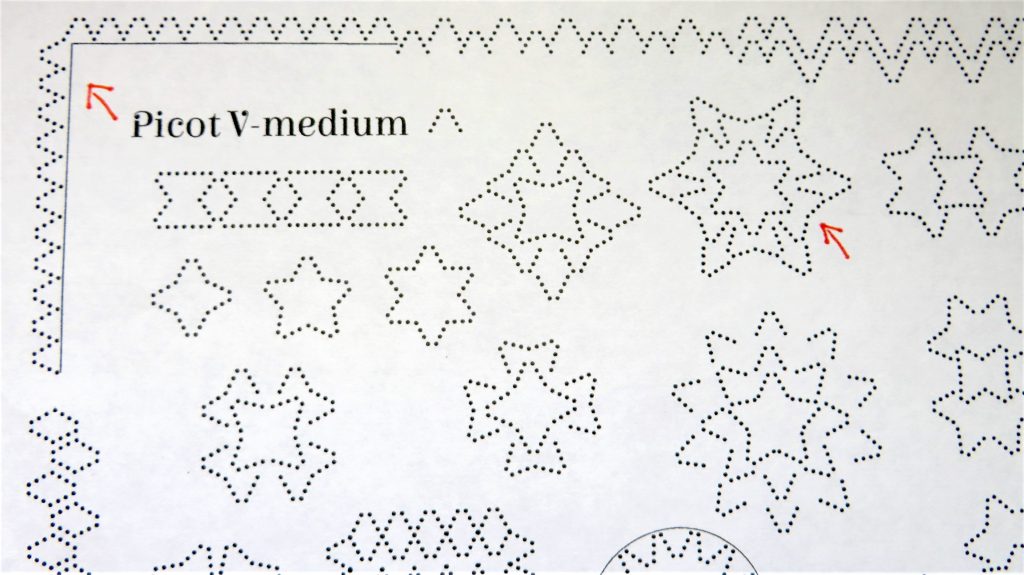
Step 3. The Picot-V Medium perforating tool is illustrated in Linda’s Handbook on pages 18-21 and the sampler you need to photocopy is on page 21. I have marked the patterns I will use for this project with red arrows.

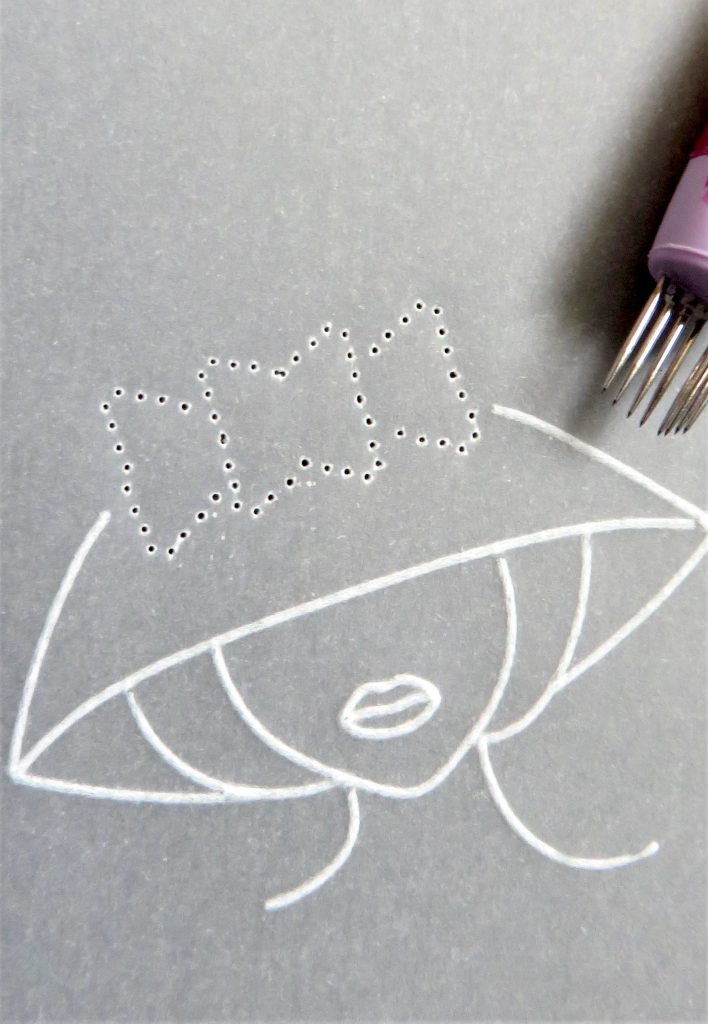
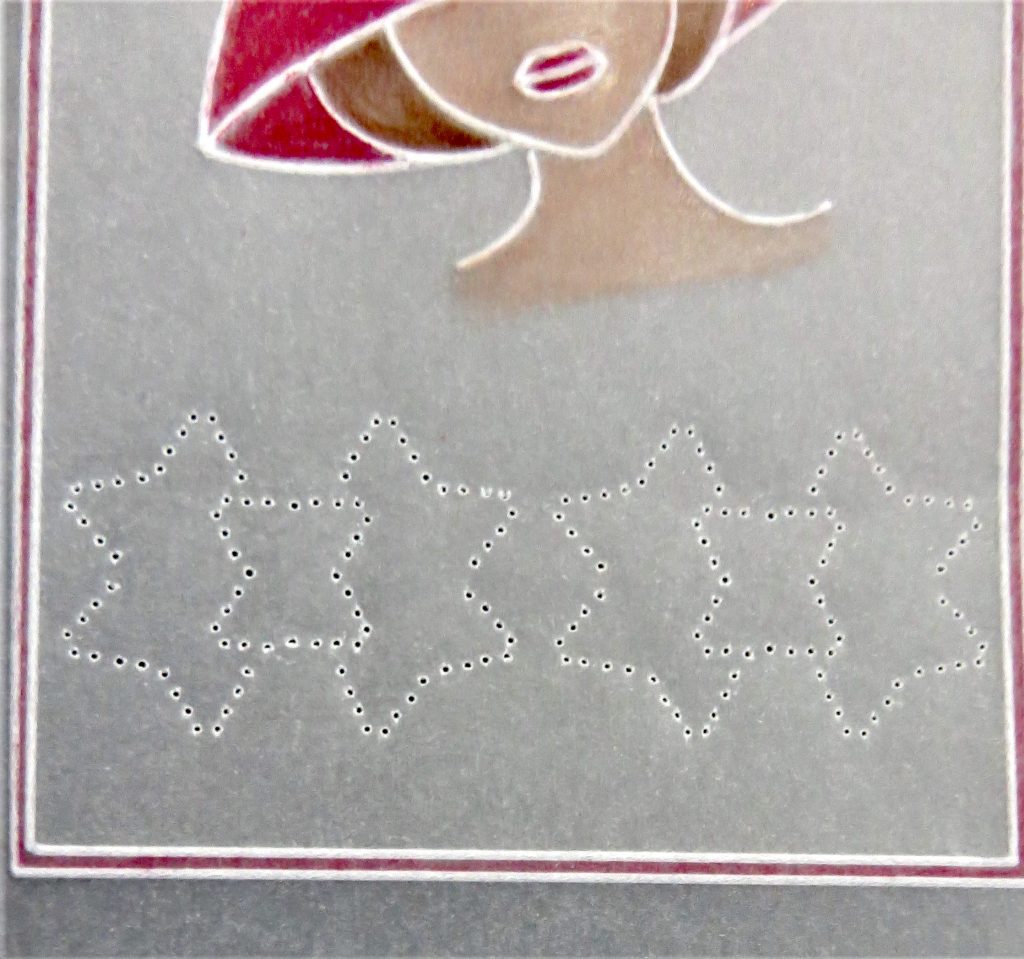
Step 4. Lay the pattern down on to a shallow perforating mat with the parchment over the top and perforate shallowly, matching all the needles to the dots underneath the parchment. Pierce through the parchment and the pattern. Line up the hat with the bow shape at the bottom right-hand corner of the sampler.
Step 5. Line the parchment back up onto the hat and finish it off, avoiding the holes you have just perforated.
Step 6. Line up the parchment with the perforation combo on the top right-hand side of the sampler. Shallow perforate two of these combos along the bottom of the tag.
Step 7. Colour the lady and her hat, also in the margin with the same colour as the hat, blending with a little Dorso oil and a blending nib.
Step 8. Emboss the perforations within the tag, according to Linda’s instructions in the book. Use a 3mm ball tool to soften the parchment, two layers of embossing is good to start. Go with the shapes of the perforations and go from the corner in ‘striking a match’ motion, lifting off the parchment before reaching the middle. Whiten it some more with the 1.5mm tool, taking the embossing right up into the corners. Add some decoration around the tag with the Flower tool and emboss them with the 1.5mm tool.
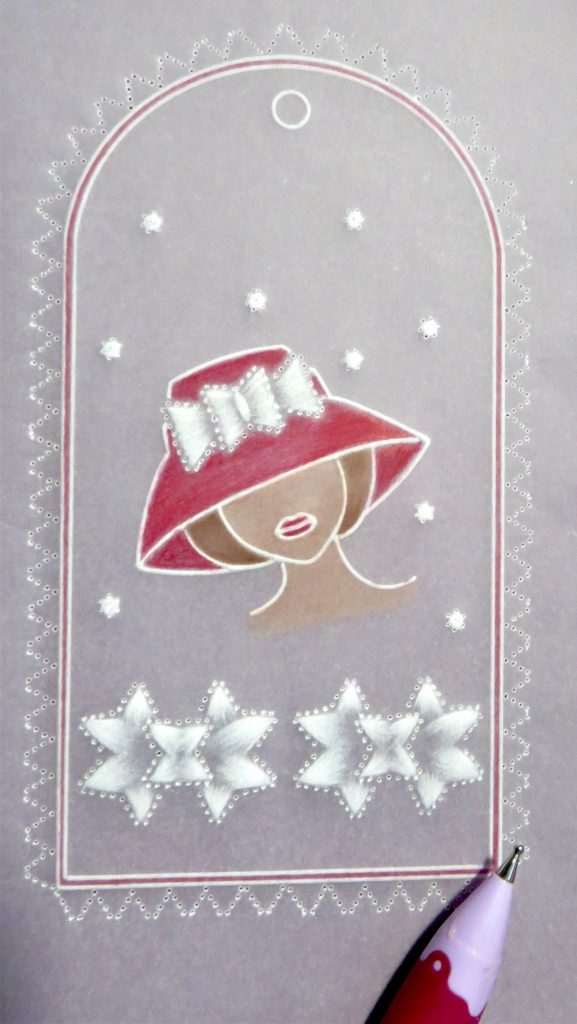
Step 9. Working on the back, line up each picot-V with a 6 dot formation and emboss the dots. Keep moving the tag along, lining up with the same formation each time, until you have worked all the way around the tag.

Step 10. Use the single needle tool to re-perforate all the holes, then snip the tag out.
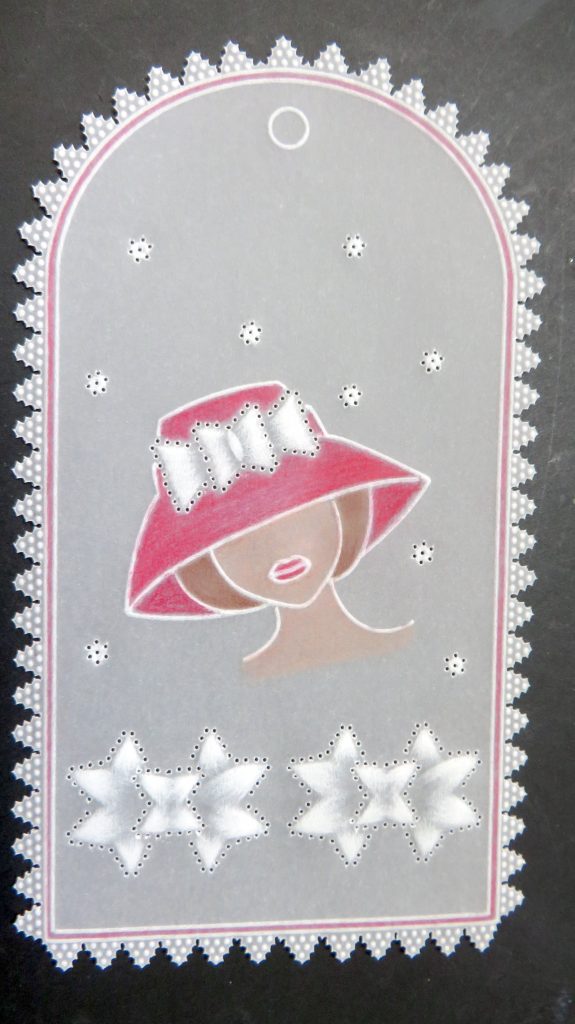
Step 11. Mat and layer the tag onto your chosen papers and card, then add glitter, gems and a bow. And you’re all done!
Now, on to our second project…
Picot-V Medium Tool 2 – Project 2
Ingredients
Pergamano Handbook for Multi-Needle Tools Vol 2 by Linda Williams (PER-BO-70355-XX)
Nested Arch Tags Groovi Plate A5 (GRO-PA-41465-04)
Tina’s Christmas Baubles A4 Sq Groovi Plate (GRO-CH-41009-15)
Picot-V Medium Perforating Tool (PER-TO-70282-XX)
5 in a Circle Perforating Tool (PER-TO-70025-XX)
Single Needle Perforating Tool (PER-TO-70035-XX)
1.5mm Embossing Ball Tool (PER-TO-70004-XX)
3mm Embossing Ball Tool (PER-TO-70005-XX)
Embossing 1 & 2 Tool (From the Starter Kit) (HERE)
Northern Lights Designer Paper (ACC-CA-30443-88)
Faber-Castell Polychromos Pencils (ACC-PE-30797-XX) or Perga-Liner Pencil (B) (PER-CO-70063-XX)
Blending Pen (PER-AC-70300-XX)
Dorso Oil (PER-CO-70066-XX)
Pergamano Sticky Ink (PER-AC-70134-XX)
Perga Glitters (PER-AC-70252-XX)
Perga Glue (PER-AC-70133-XX)
Perga Crystals (Starlight Sparkle) (PER-AC-70402-XX)
Method
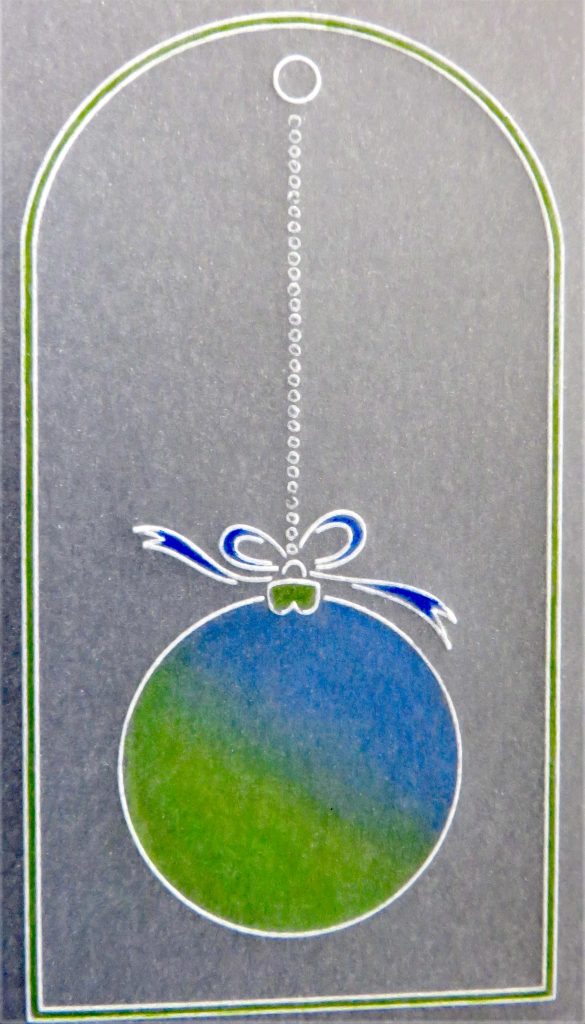
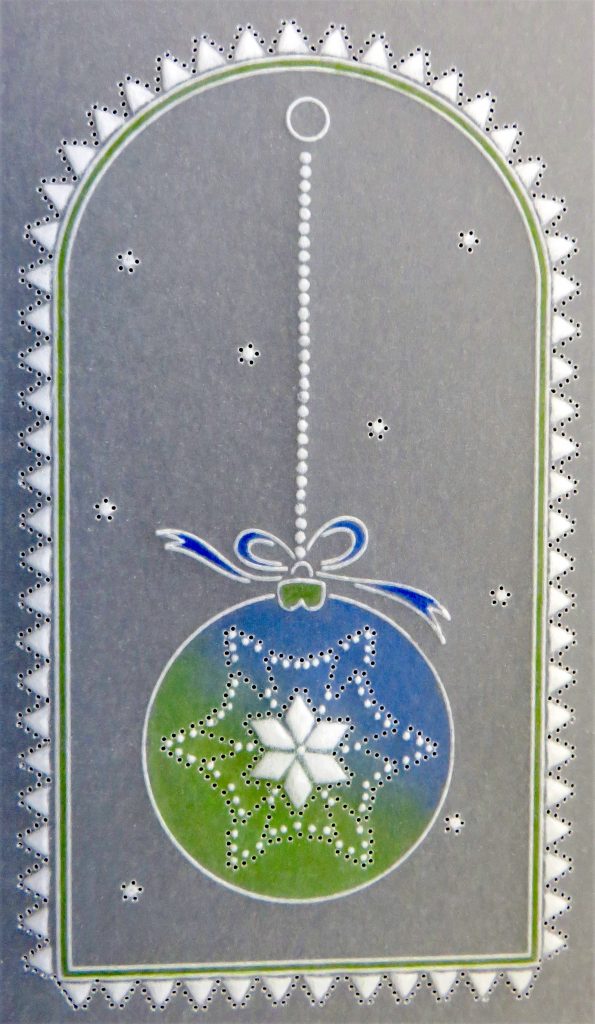
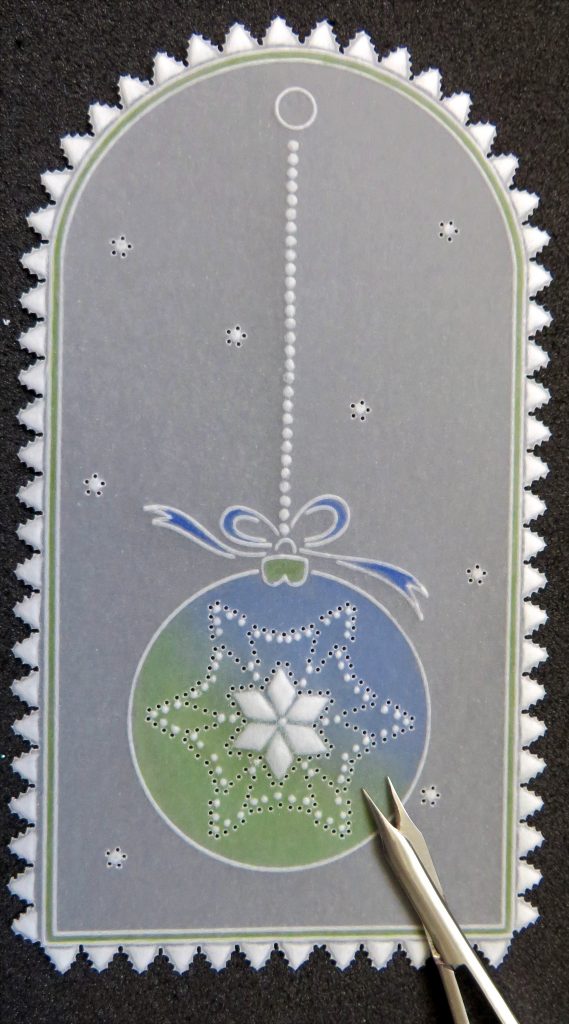
Step 1. Trace out the 2nd largest tag from the Nested Arch Tag Groovi plate.

Step 2. The Picot-V Medium perforating tool is illustrated in Linda’s Handbook on pages 18-21 and the sampler you need to photocopy is on page 21. I have marked the patterns I will use for this project with red arrows.
Step 3. Emboss the bauble from Tina’s Christmas Bauble plate, extending the suspension thread up to where the bow will be. If you want to emboss dots, make sure to emboss them with the number 2 tool from the Starter Kit. Choose the 2nd largest round bauble from the plate as this fits our ‘star burst’ design perfectly.
Step 4. Add some colour to the bauble and blend with a little Dorso oil and a blending nib.
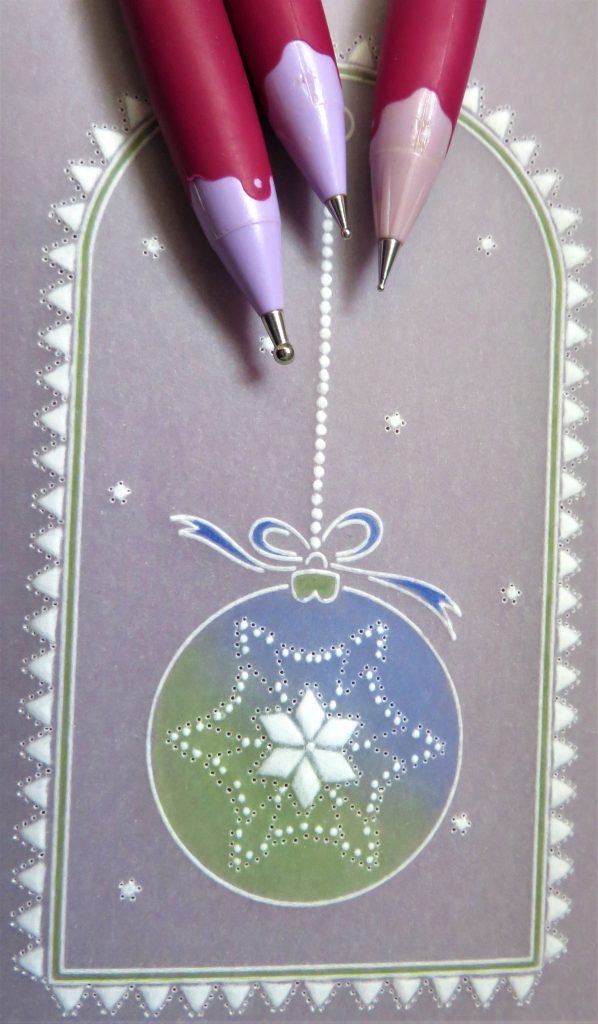
Step 5. Place the pattern down onto a shallow perforating mat. The ‘starburst’ marked with an arrow should fit nicely into the bauble. Perforate shallowly through the parchment and pattern, matching the needles to the dots. Then go around the edge of the tag using the pattern marked at the top left-hand corner. Add some Five in a circle tool perforations to represent snowflakes.

Step 6. Follow Linda’s illustrations on page 19 of the Handbook and emboss the starburst, 5 in a Circle tool perforations and picots around the edge. Start with the 3mm ball tool and neaten off into the points of the stars with the 1.5mm. Use a 1mm ball tool for the dots within the starburst. Don’t try to make the embossing white too soon, soften the parchment first, before going in with a second coat.
Step 7. Use the single needle fine perforating tool to re-perforate all the holes, taking care not to crack the parchment in between the perforations.
Step 8. Snip out the tag, snip all the diagonals in one direction first, turn the work to snip the opposite ones. Snip all the straight perforations last. This leaves some structure to the parchment and protects it from tearing.
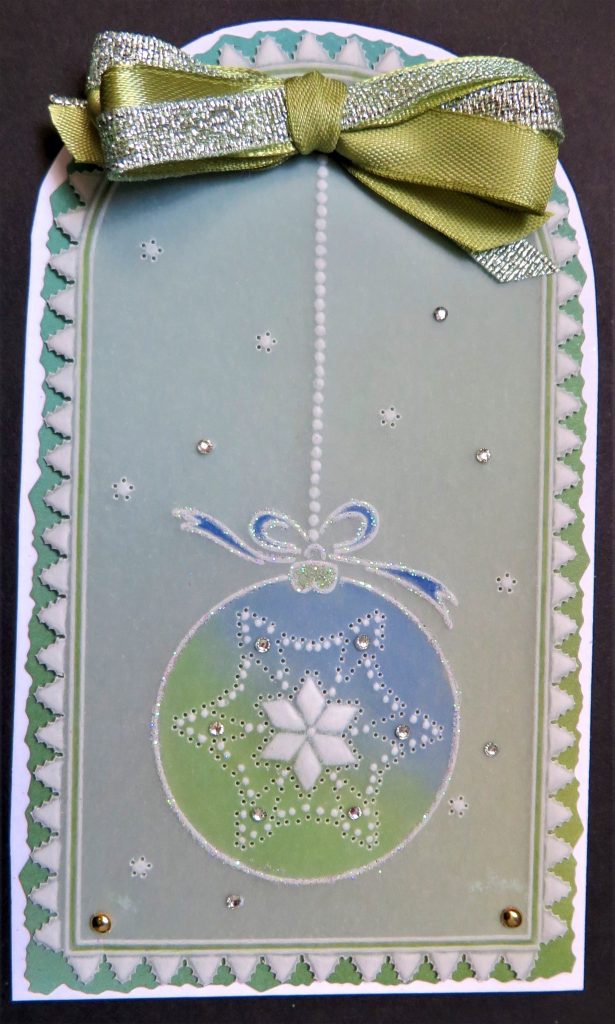
Step 9. Mat and layer onto your choice of papers/card and add bow, glitter and gems to decorate.
What beautiful projects!
That is unbelievably helpful. Thank you, Glynis, for sharing your tips and tricks with us. And thank you to Paul for holding down the Groovi Tuesday fort. Between the tuition you get from him on Tuesday’s, combined with these Step-by-Step blog projects from Glynis, you should be well on your way to creating some incredible results!
Everything that Glynis has used can be found over on the Clarity website, HERE.
Also, on a side note – the fashion hats that Glynis used in her first project is currently part of the Design of the Week, Celebrating 30 Years of Clarity, with 30% off – plus Craft Club discount! Available HERE.
Don’t forget, the latest Layering Framers Collection from Linda Williams’ – Oriental is now available on our website, HERE.

We have a smashing line up for you this week too…
Tuesday 29th August:
Groovi Tuesday with Paul – 10am Live on Facebook and YouTube
Then we kick of the Clarity 30th Birthday Celebrations on Create & Craft
Friday 1st September:
One Day Special on Create & Craft with Barbara & Paul – 6pm & 9pm
Saturday 2nd September:
One Day Special on Create & Craft with Barbara & Paul – 10am & 2pm
Christmas Crafting with Clarity with Barbara & Paul – 5pm & 8pm
Sunday 3rd September:
Crafting with Clarity on Create & Craft with Barbara – 2 hours – 3pm-5pm
We’ll see you there!
Travel gently, friends.
Lotsa love, Grace & Glynis xoxo
Clarity – The Home of Art, Craft, and Well-Being.
Brilliant projects as always Glynis, hope everyone is having a great Bank holiday weekend xx
I find it difficult to use most of the multi needle tools as my eyes are not as good as they should be. I purchased Linda’s book when it was first issued and found it very useful in the past. The projects by Paul and Glynis are great and when and if I get my eye surgery (current wait is 65 weeks) I will give them a try. Meanwhile Groovi rocks.
Thank you both for today’s blog.
Fab projects, thanks so much Glynis and Grace. The tags are a favorite of mine at the moment. X
Hi Grace & Glynis, great projects again this week. The step for adding the picot V perforations round the edge of the tag seems to be missing from both projects but presumably if we follow the process from last week it should work out ok. I will try it later as these tags are a great way for trying new things. I also need to assemble last weeks as I did the tag straight away but it got put away when I tidied up for visitors .
Will hopefully be checking in on Tuesday for Groovi Tuesday if not I will catch up later, its the last full week of the school holidays so not sure yet what is planned /needed.
Will be there for the Birthday Celebrations at the weekend – have a good week everyone xx
I have the picot V tool, but have not yet used it, so must find time to have a go. Thanks for the inspiration. x