Clarity Matters Blog Tutorial: How To Combine Designs
Hello hello! Grace here.
I hope this finds you well and enjoying your weekend. Feeling crafty?
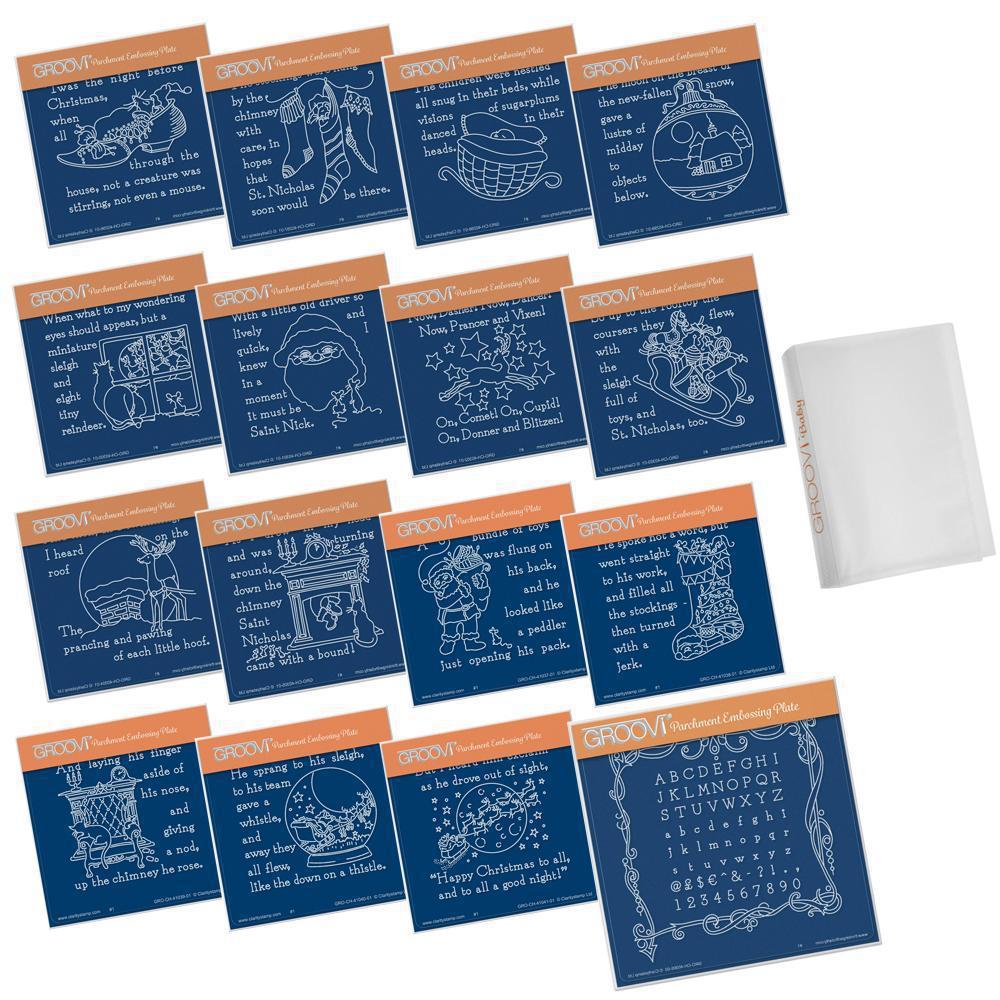
Well, good! Because we are joined by the fabulous Josie Davidson. Our beloved Clarity Design Team Member has kindly prepared a step-by-step project for us, using the Twas the Night plates and the Joy To The World Bauble. Just in time for Christmas 😉
I’ll hand you right over to Josie…
Using The Twas The Night Plates With The Joy To The World Bauble

Ingredients
Twas the Night 13 – Chair (GRO-CH-41039-01)
Joy To The World A5 Plate (GRO-CH-41388-03)
Grid Plate Mate (GRO-CO-41706-08)
A4 Straight Grid (GRO-GG-40528-17)
Extender Plate For Baby Plates (GRO-WO-40133-11)
Groovi 1 & 2 Tool (GRO-AC-40026-XX)
Pergamano Bold Single-Needle Tool (PER-TO-70028-XX)
Scissors or Snips
Blending Pen, Nibs & Dorso Oil (PER-AC-70431-XX)
Black Dual-Purpose Groovi Mat (GRO-AC-40194-A4)
Translucent White Super Foam (GRO-AC-40603-A4)
Pergaliners 1, 2, 6, 8, 12, 13, 16
Black Micron Pen (ACC-PE-30778-XX)
Plain Parchment (GRO-AC-40024-A4)
Groovi Tabs (GRO-AC-40437-XX)
Waimea Falls Companion Paper (ACC-CA-31343-88)
Gold Brads (PER-AC-70274-XX)
Clarity Satin Ribbon (ACC-MS-31107-XX)
6×6 White Card Blank (ACC-CA-30618-66)
Red Lined Double Sided Tape (ACC-AD-30375-XX)
Method
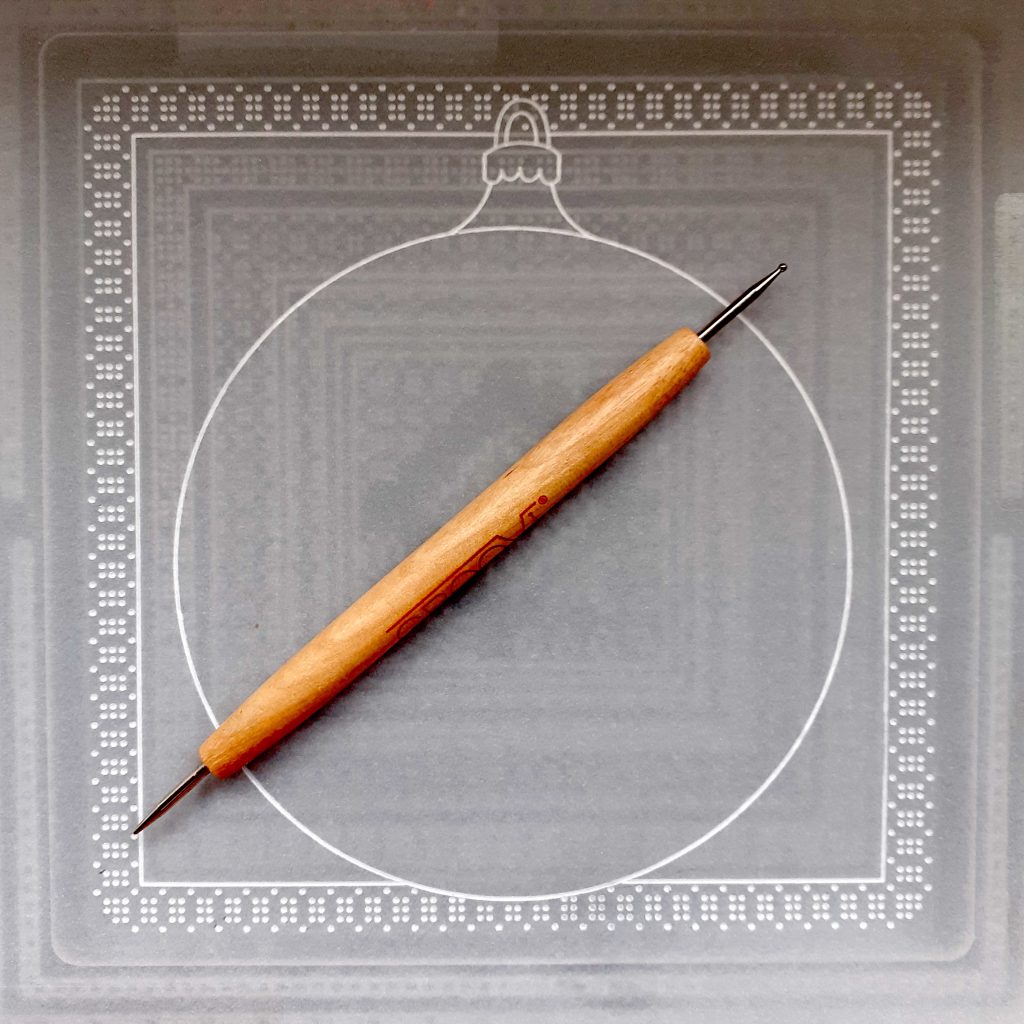
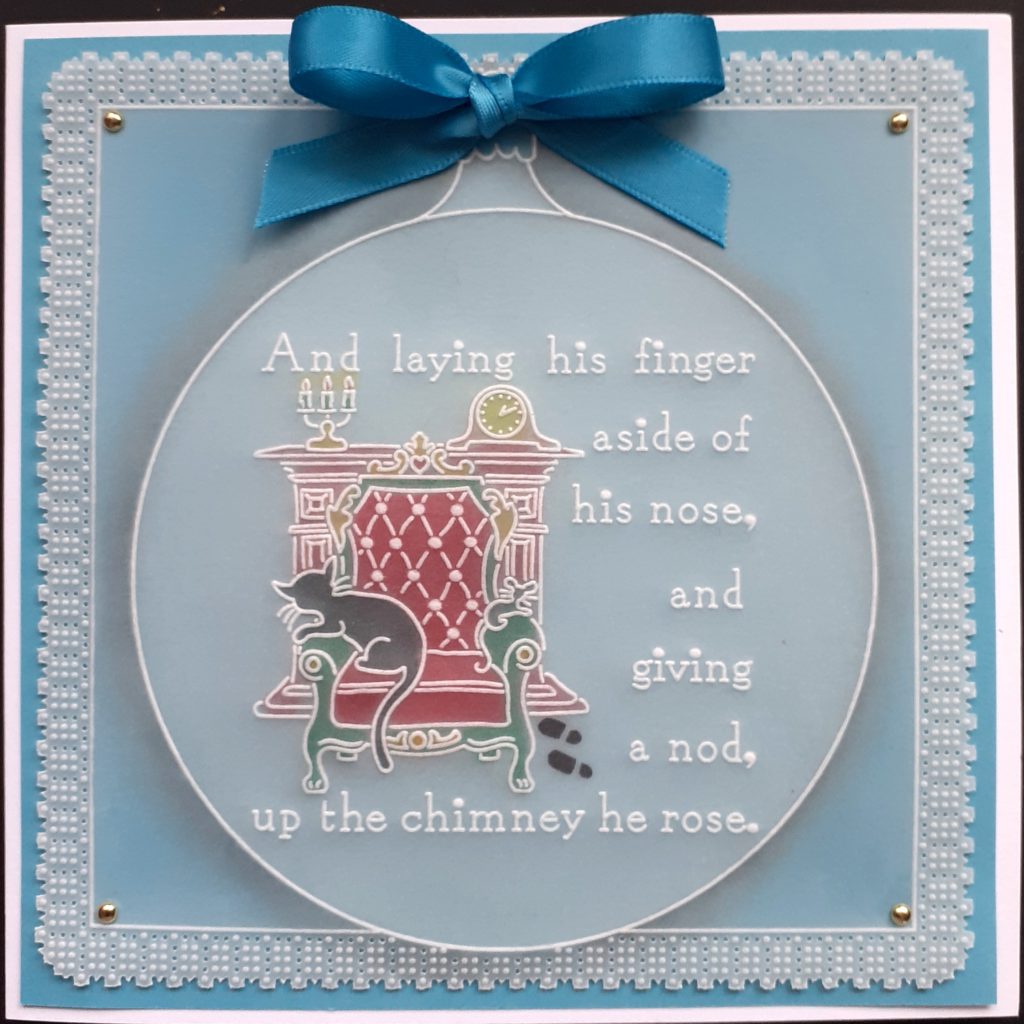
Step 1. Trace the outline of the bauble onto the parchment using the number 1 Groovi tool.
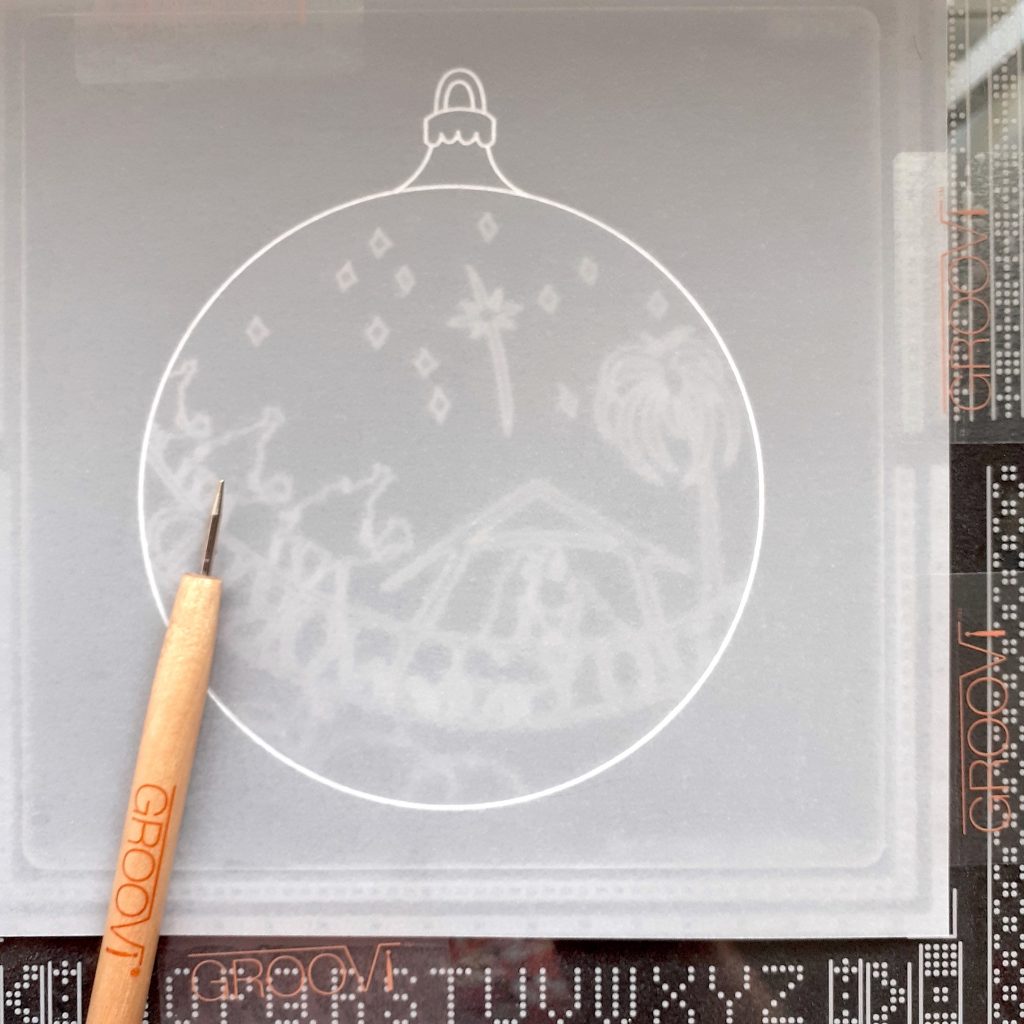
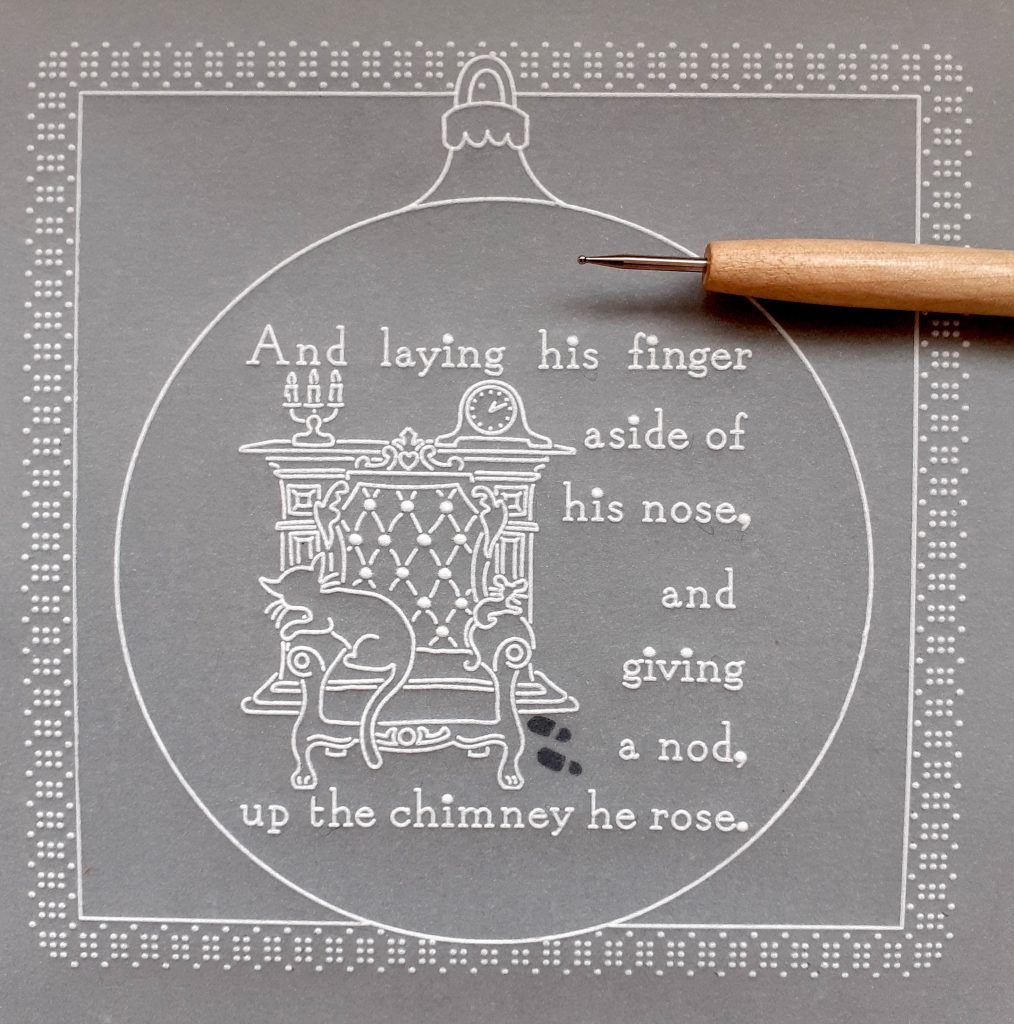
Step 2. Centralise the bauble inside the outer complete frame of the patterned grid plate and emboss the dots with the number 2 Groovi tool. The top and bottom of the bauble will sit inside the dots so be careful to avoid embossing the ones in the bauble. Emboss the line inside the frame with the number 1 Groovi tool around the bauble.
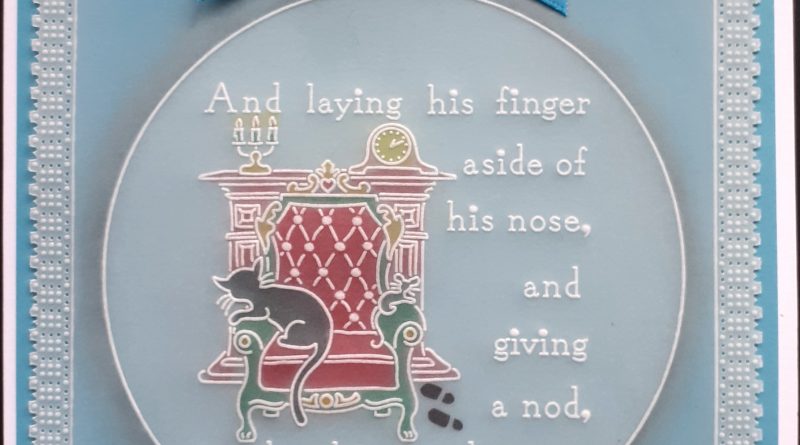
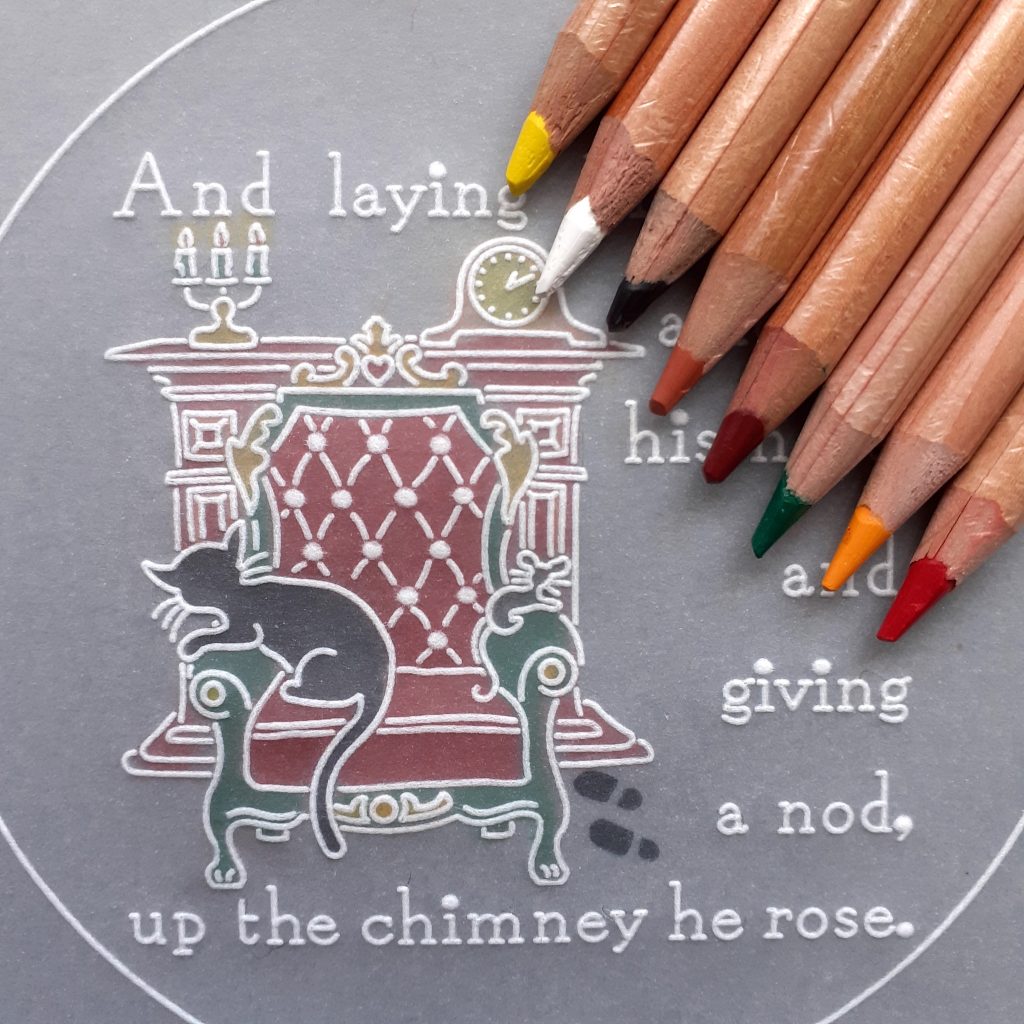
Step 3. Emboss the design from the Twas the night plate inside the bauble. Use the number 2 tool to emboss all of the dots lightly, including the ones in the verse. Emboss the remainder of the design with the number 1 tool but avoid Santa’s footprints. Trace the footprints with a Micron pen and fill them into solid black.

Step 4. Emboss the dots in the chair and the verse using the number 2 tool from the back of the work.
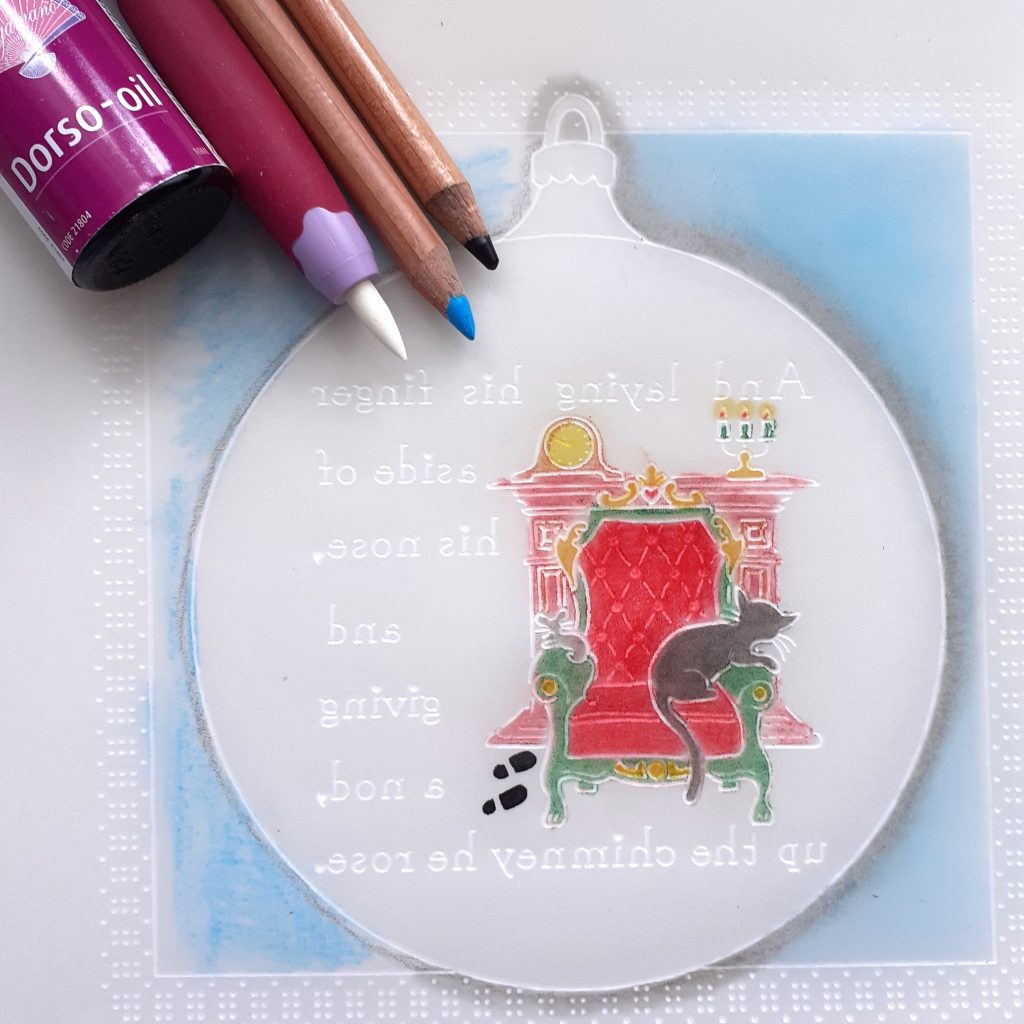
Step 5. Colour the picture on the back with the perga liners, and use your blending pen and Dorso Oil to spread the colour evenly.
Step 6. I chose a turquoise backing paper and so I used the turquoise perga liner to work the next part but you can use any colour backing paper and matching pencil. On the back of your work, apply some of the turquoise pencil between the bauble and the line of the border. Use the side of the pencil to do this to avoid harsh lines which will be more difficult to blend. Add a thin line of black pencil around the outline of the bauble. Use dorso oil to blend the blue pencil, starting in the corners and along the outline of the border. Once the blue is blended then blend it into the black pencil to create shading around the bauble.
TOP TIP: If you are struggling to get a nice blend in the larger areas with the blending nib, then fold a piece of tissue and use that to blend the pencil.
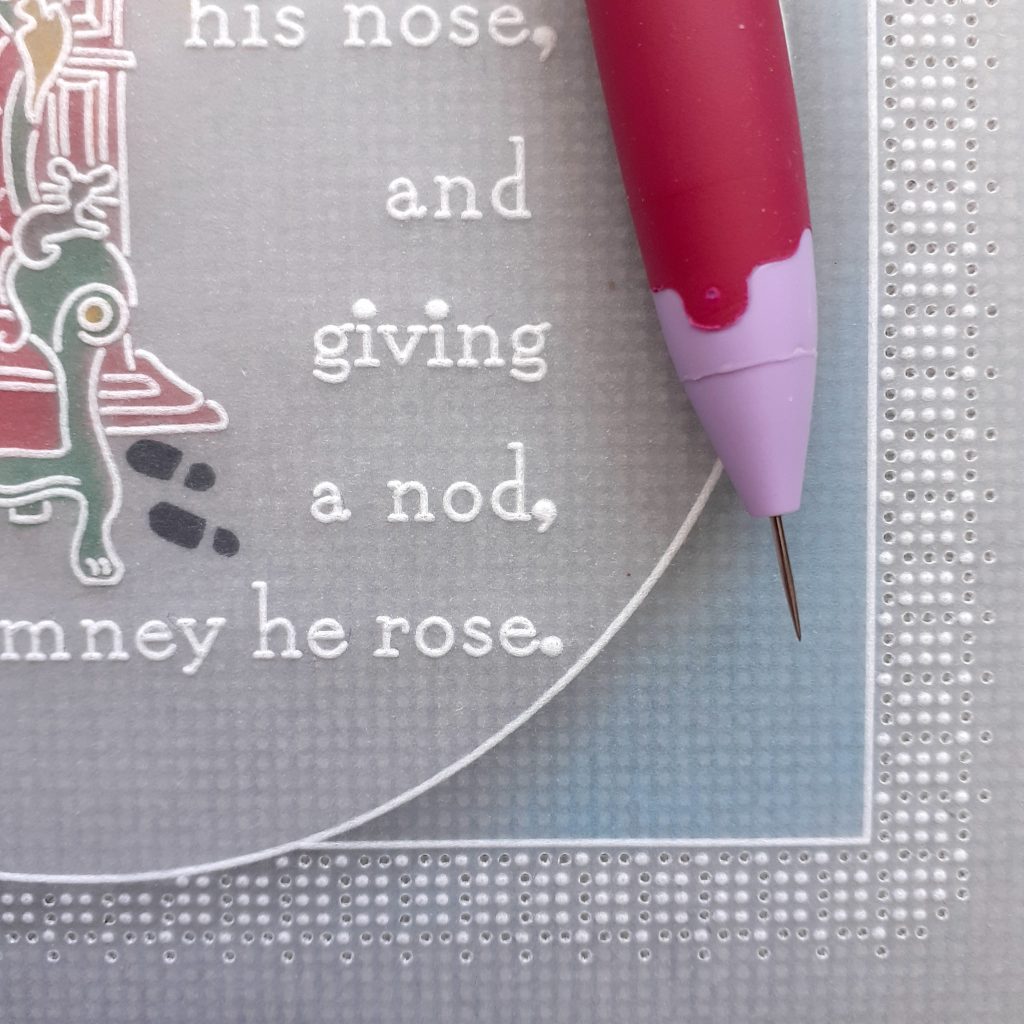
Step 7. With the front of your work facing you, line up the dots of your border with the holes on the grid and tape your parchment down well to prevent it from moving while you work. If it does move then detach it and realign the dots and holes. Perforate with the one needle tool around the dots.
TOP TIP: When perforating holes on the grid, push the needle as far into the hole as it will go as this will give a nice even hole for when you are doing the picot cutting.
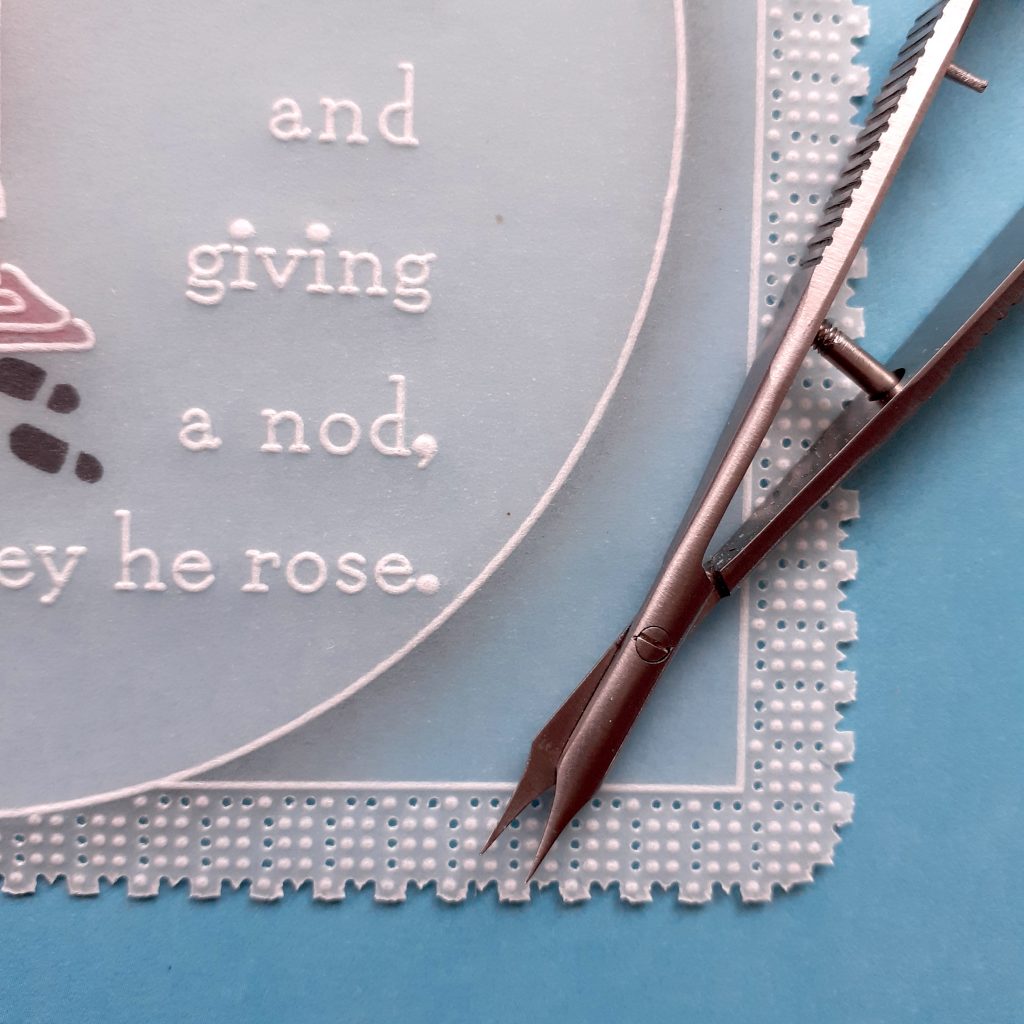
Step 8. Using scissors or snips, picot cut around the outer perforations.
TOP TIP: If you have wider spaces between some of the holes, ie. diagonally instead of straight, cut these first as you will get a much more even picot between the holes
Step 9. Trim your backing paper to size and attach your finished piece of work to it using the brads. Attach to your card blank with double-sided tape. Make a bow with the ribbon and stick it in place at the top of the bauble with red liner tape.
I didn’t add glitter to my finished project but you could add sparkle with Pergamano glitter if you wish.
What a lovely project! thank you, Josie, for sharing your tips and tricks with us. A fabulous project to get us ready for Christmas. *Head Spins*
Everything that Josie has used can be found over on the Clarity website HERE
Once you have the outline, you could use any of the 15 Twas’ the Night designs to create your finished piece
Available HERE
Here is a little video I narrated a few years back, reading the story
Another busy week ahead at Clarity Towers, with lots to keep you entertained:
Monday 14th August :
In the SHAC with Barbara – 10am Live on Facebook and YouTube
Tuesday 15th August:
Groovi Tuesday with Paul – 10am Live on Facebook and YouTube
Wednesday 16th August:
One Day Special on Create & Craft with Barbara & Paul – 6pm & 9pm
Thursday 17th August:
One Day Special on Create & Craft with Barbara & Paul – 10am & 2pm
Thursday 17th August:
New & Exclusive on Create & Craft with Dawn Wheeler – 4pm & 8pm
Friday 18th August:
New & Exclusive on Create & Craft with Dawn Wheeler – 8am
Friday 18th August:
Craft Along with Paul – Linda William’s Layering Frames Set 2 – Live on Facebook & YouTube – 7pm
Saturday 19th August:
Get Groovi with Tina on Create & Craft – 1pm & 5pm
Right, we’re off! Enjoy the rest of your weekend.
Lotsa love, Grace & Josie xoxo
Clarity – The Home of Art, Craft, and Well-Being.
What a lovely project, thank you Josie, one that everyone can do and nice for batch making! Have a great rest of the weekend Grace and Josie xx
Gorgeous project Josie and those plates fit beautifully into the bauble! 💙 xx
Such a lovely project Josie! What a superb way to frame the verses. Thank you x x x Barb
Gorgeous project Josie. Great explanations in the step by step photos. Thank you Grace for putting another blog together for us.
Great Inspiration; thank you.
A lovely project that could be adapted with several of the other Christmas plates. Thank you Josie for the detailed step by step instructions.
Wow definitely a busy week ahead for Clarity Towers, so much for everyone having some down time !!
Safe journey tonight Grace & enjoy your stay in the UK with the family. Perhaps we will see you in the SHAC xx
Thank you Josie for this lovely tutorial- the tips are really helpful. xxxx