Clarity Matters Blog Tutorial: How To Build A Scene
Hello hello! Grace here.
I hope this finds you safe, happy, and enjoying your Saturday morning!
We are joined this weekend by the fabulously talented Julie Campbell. Julie is an adored member of our Clarity Design Team, whose artwork you have most likely seen all over our Facebook communities, and been impressed by her artwork samples on Create and Craft.
I’ll hand you over to our teacher…
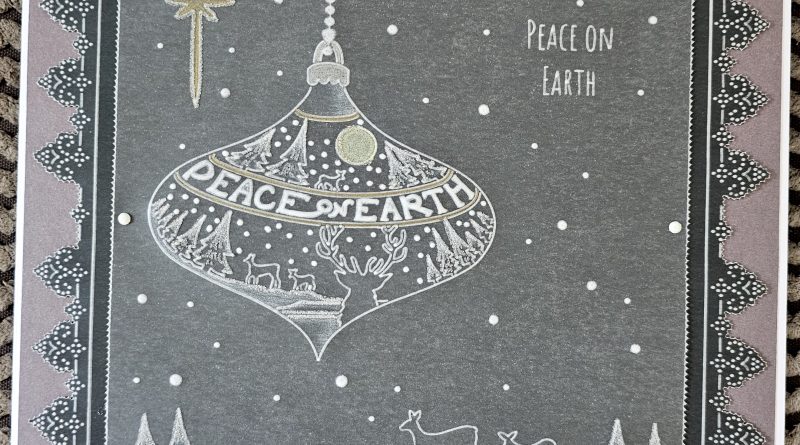
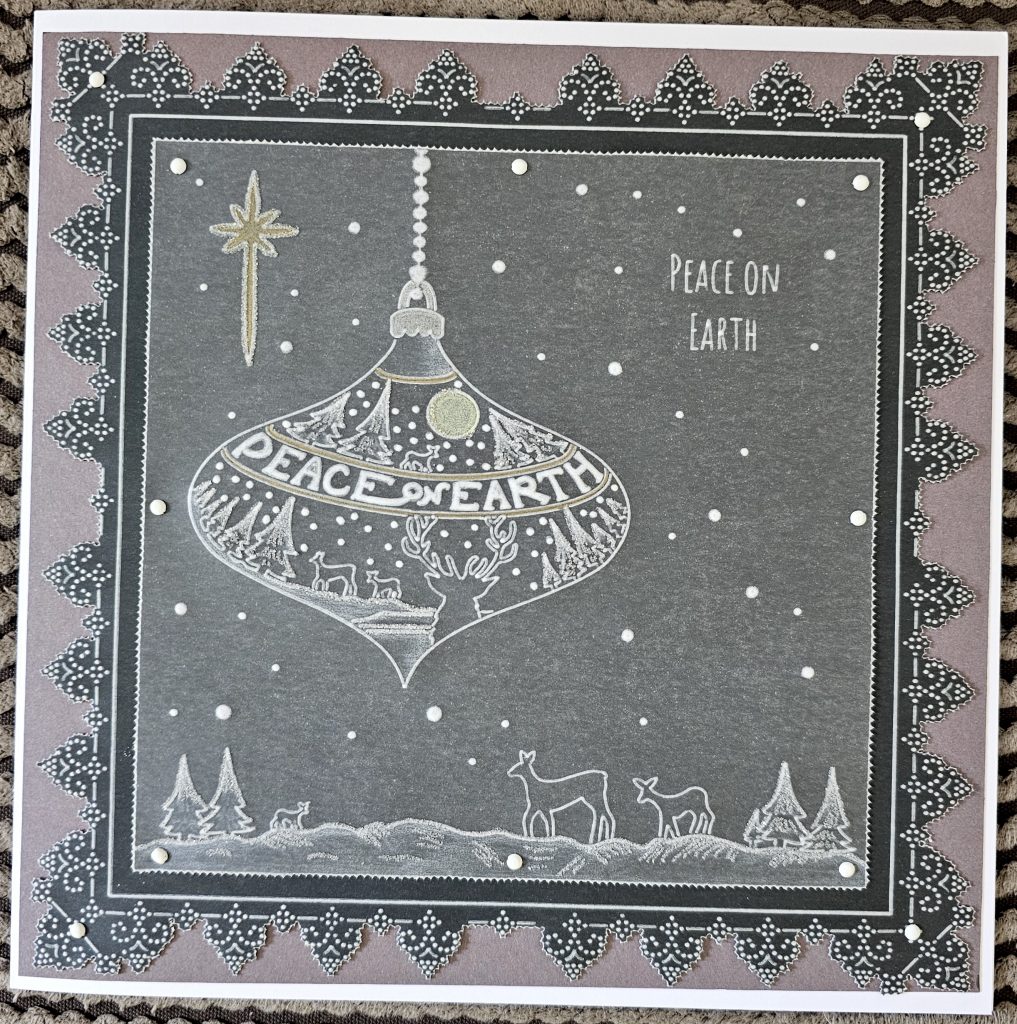
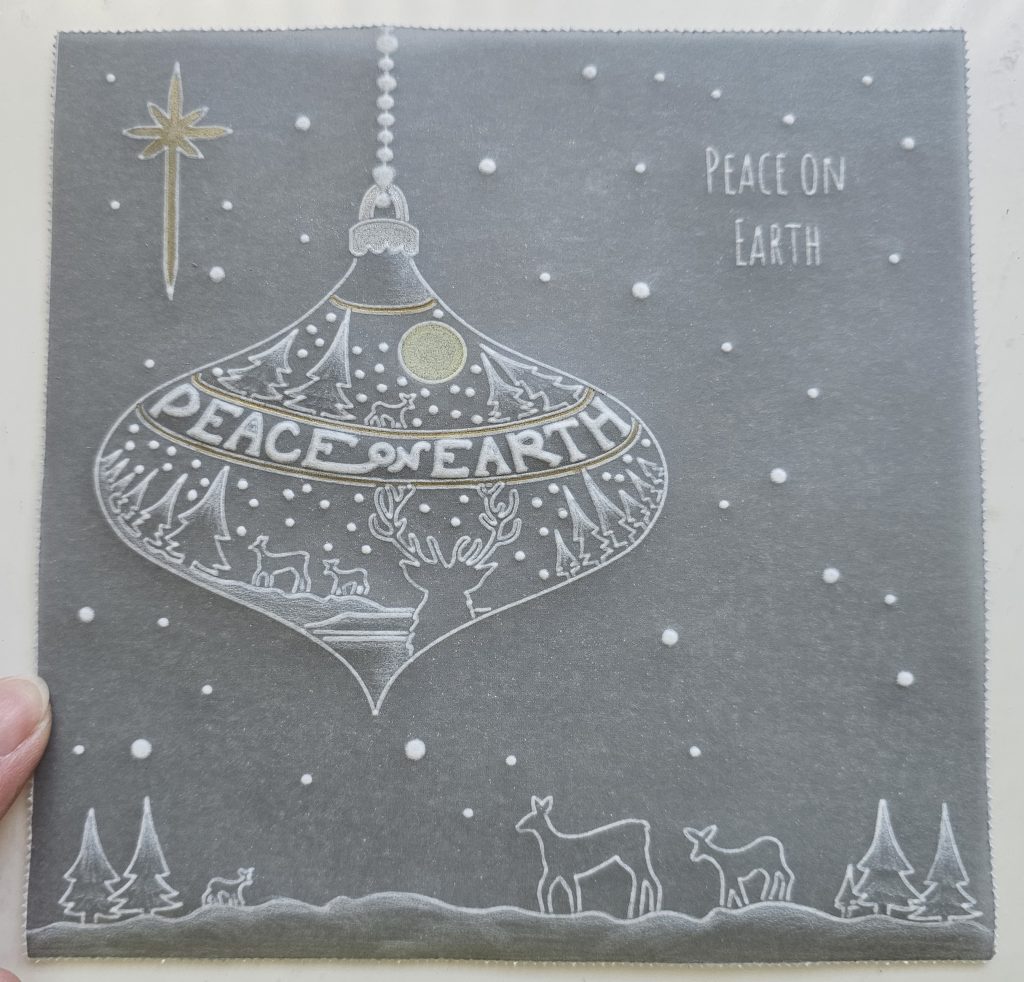
Peace on Earth Bauble
Ingredients
Nested Square Extension Plate (GRO-WO-40538-15)
Bijou Bauble Plate (GRO-CH-42132-04)
Barbara’s SHAC Baubles – Season’s Greetings A5 Sq Plate (GRO-CH-42122-03)
Embossing Tools:
1mm Ball Tool (PER-TO-70012-XX)
1.5mm Ball Tool (PER-TO-70004-XX)
3mm Ball Tool (PER-TO-70005-XX)
4.5mm Ball Tool (PER-TO-70015-XX)
6mm Ball Tool (PER-TO-70016-XX)
Pergamano Eraser Pencil (ACC-PE-30611-XX)
2-Needle Bold Tool (PER-TO-70279-XX)
Faber Castell Polychromos – Cream, Silver & Gold (ACC-PE-31031-XX)
Blending Pen & Nibs (PER-AC-70440-XX)
Dorso Oil (PER-CO-70066-XX)
Blending Pen & Dorso Oil Bundle of Essentials (PER-AC-70431-XX)
Lightwave (ACC-LP-30352-A4)
Indian Summer Companion Paper (ACC-CA-31338-88)
8” x 8” Card Blank (ACC-CA-30620-88)
Mapping Pen and Nib (PER-TO-70039-XX)
Sticky Ink (PER-AC-70134-XX)
Perga Glitter (PER-AC-70252-XX)
Perga Glitter Bundle of Essentials (PER-AC-70305-XX)
Black & Silver Parchment
Mini Brads
Tumble Dryer Sheet
Method
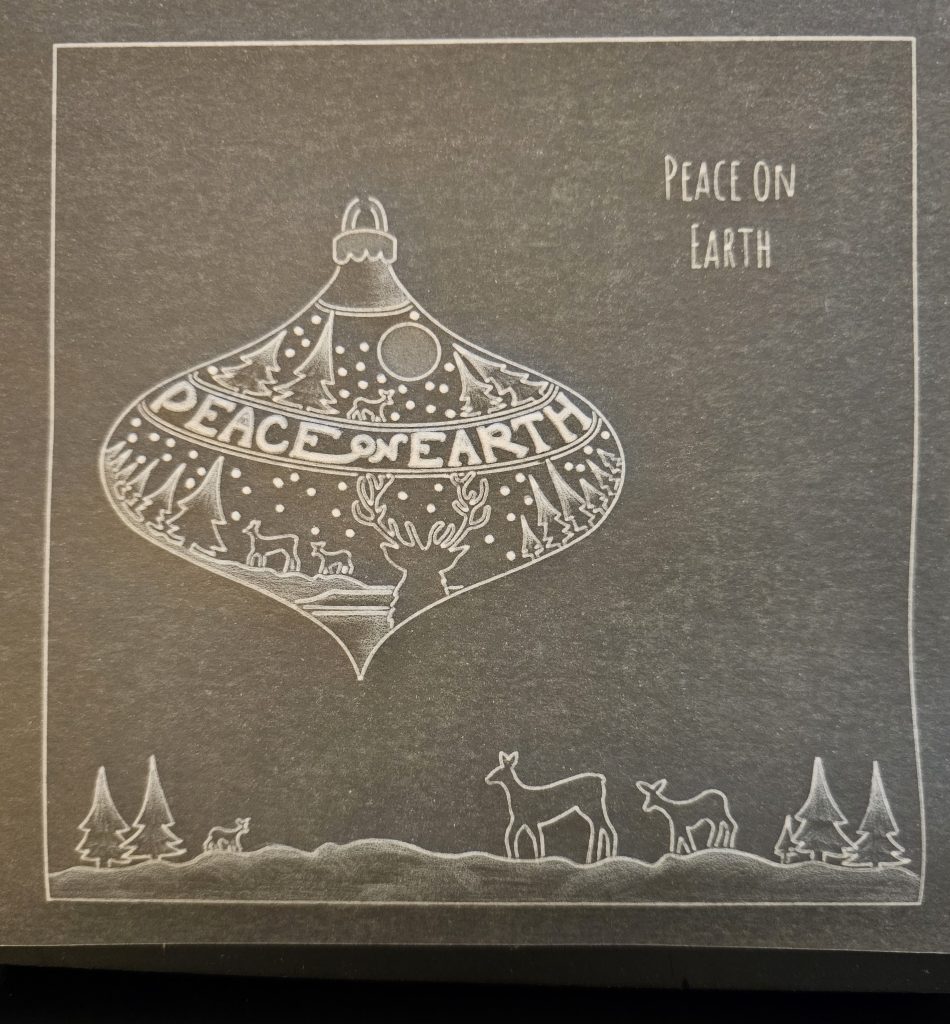
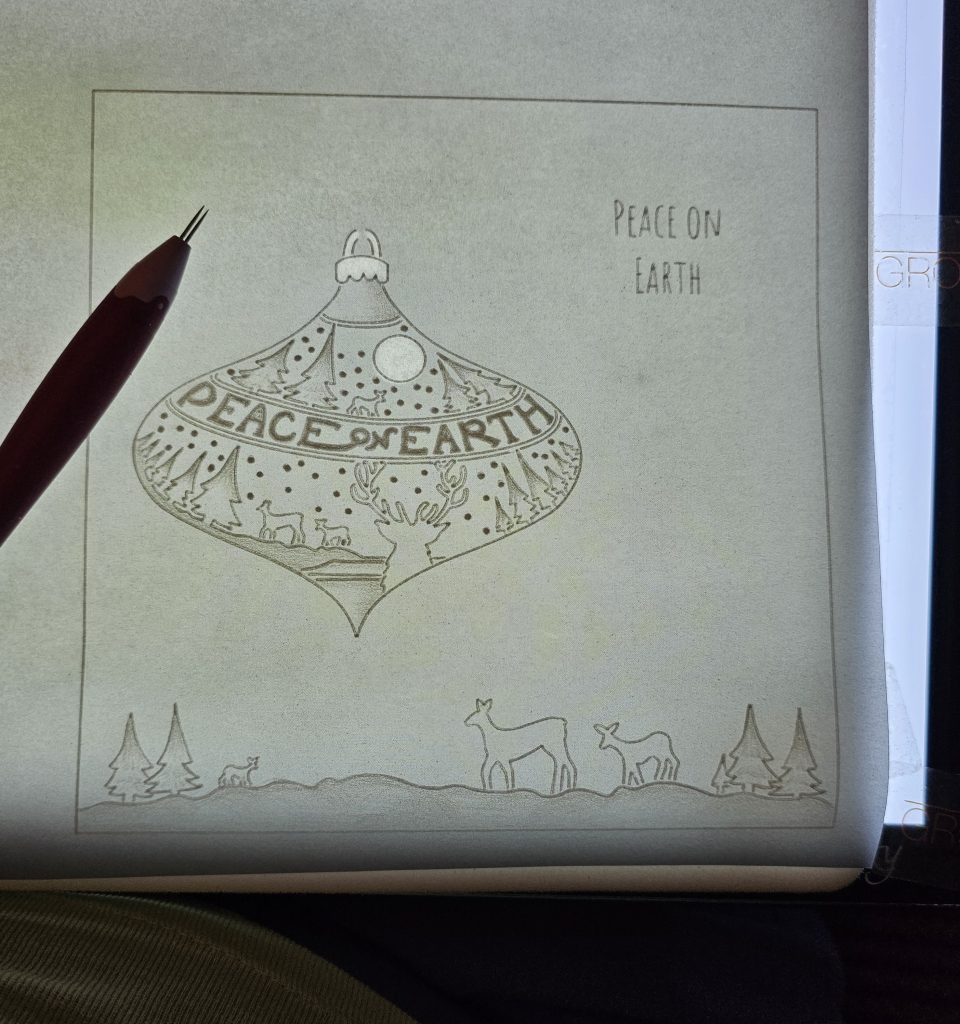
Step 1. Using silver parchment and the Nested Square Extension Plate, emboss the 6th square in from the outside.
Step 2. Decide where you want to place the bauble and trace it out from the plate, making sure you leave a gap at the top for the hanger.

Step 3. Emboss the deer and landscape at the bottom of the square. Move the landscape along to complete the bottom square. Add trees at the bottom from the bauble and small deer. Then add Peace on Earth at the top ensuring it is straight on the parchment.

Step 4. Emboss snow, trees, and the Peace on Earth sentiment on the bauble. Don’t forget the snow and trees at the base of the card.
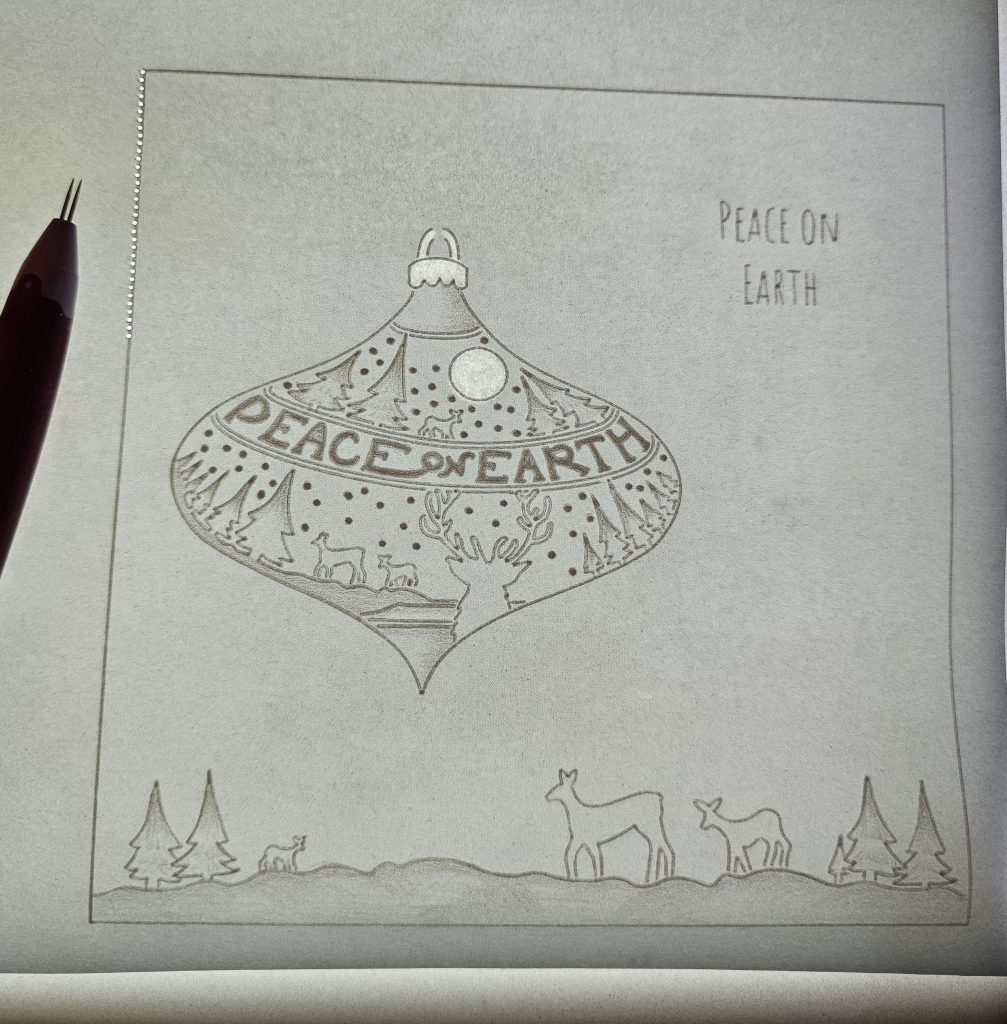
Step 5. Erase the ink on the back of the parchment where the moon and bauble hanger are.
Step 6. Using a number 2-Needle Bold Tool, pierce around the square and picot cut. Alternatively, if you have the nested dies, use the correct size die to cut the square out.
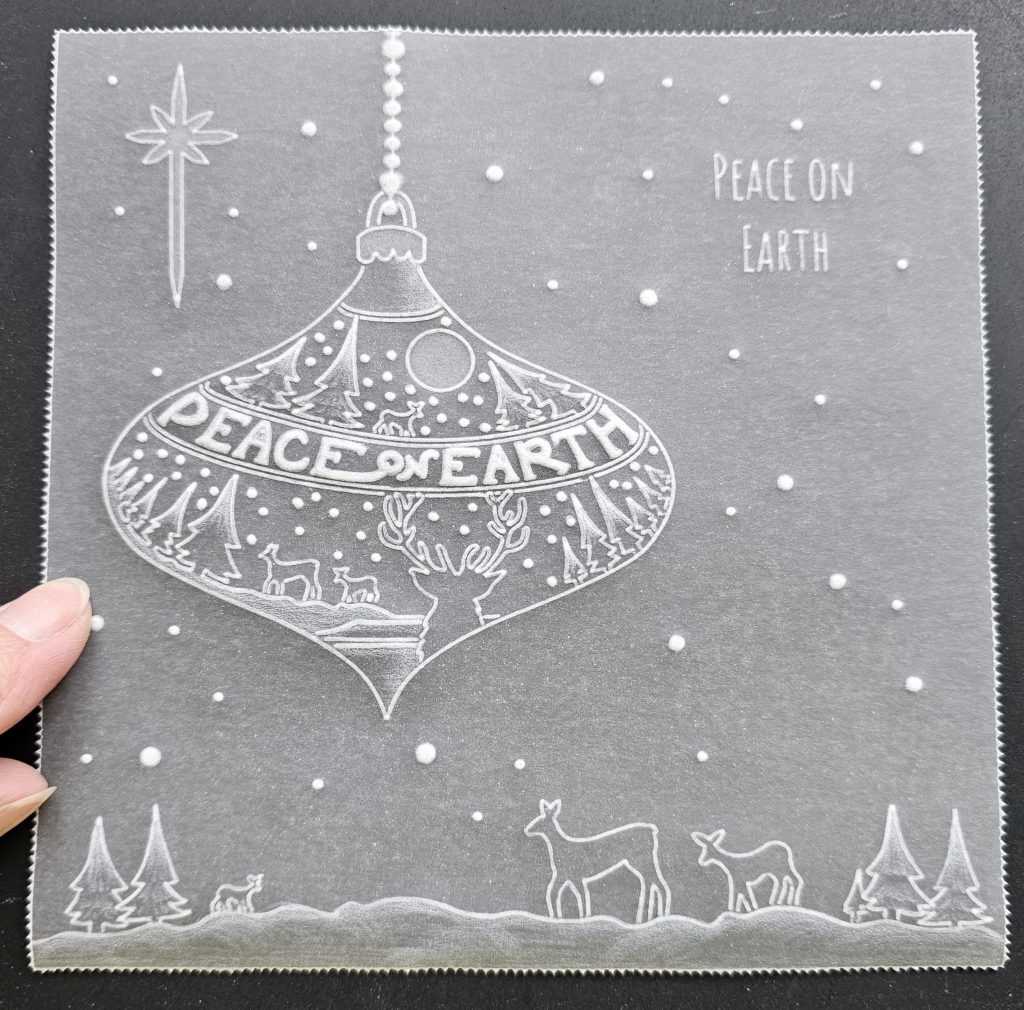
Step 7. Using circles from the GRO-CH-42122-03 plate, create a hanger for the bauble to go to the top of the square.
Step 8. Emboss the circles to finish off the hanger for the bauble.
Step 9. Place the Star in the top left corner (right, on the back of your work).
Step 10. Add snowflakes outside the bauble randomly.
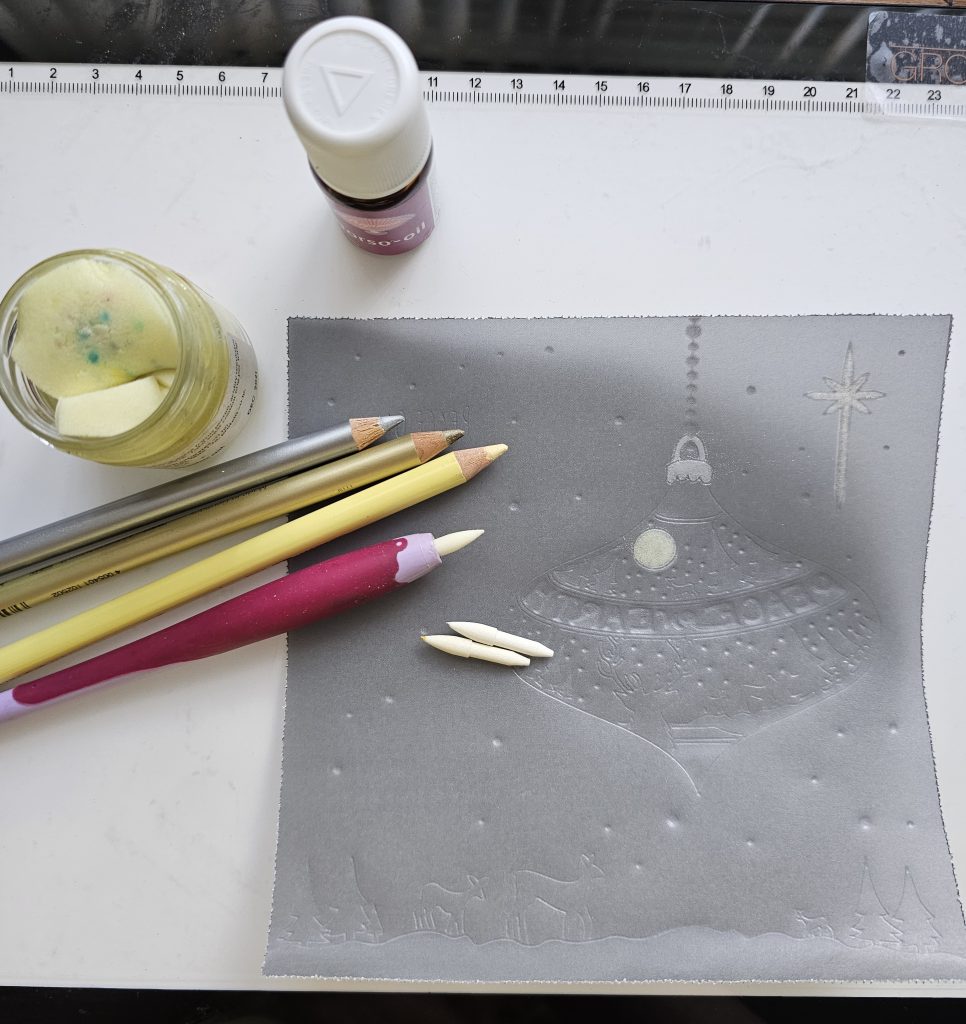
Step 11. On the reverse of your work, colour the moon cream and the top of the bauble hanger silver. Colour the star gold. Blend the colours with dorso oil. On coloured parchment, I always use my lightwave so that I can see properly. Once everything is dry, colour with those same colours on the front of your work.
Step 12. Picot cut out the silver square using the 2-Needle Bold Tool.
Step 13. Move on to Black parchment.
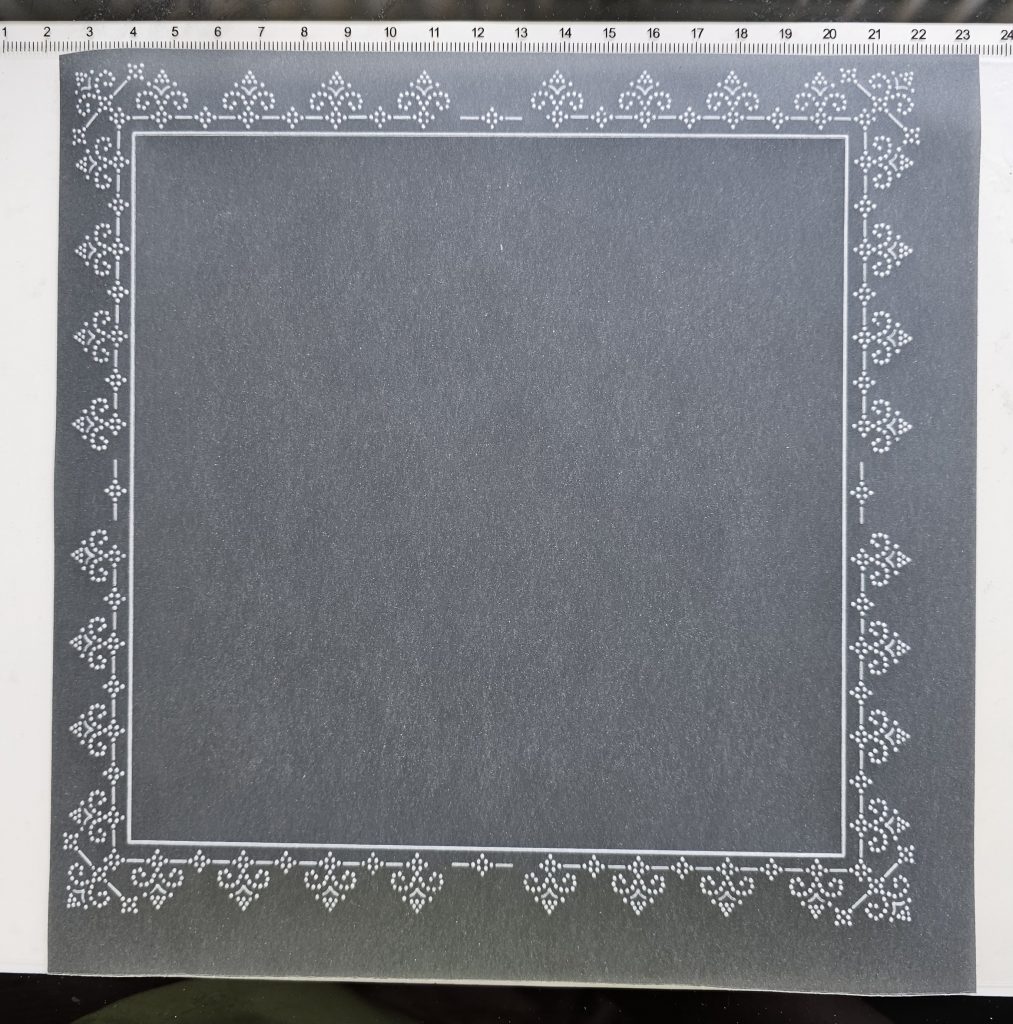
Step 14. Draw a square from the nested extension plate (GRO-WO-40538-15), 5th line in from the outside of the plate using the number 1 tool. Don’t forget to use your tumble dryer sheet (I did at first but soon realised!)
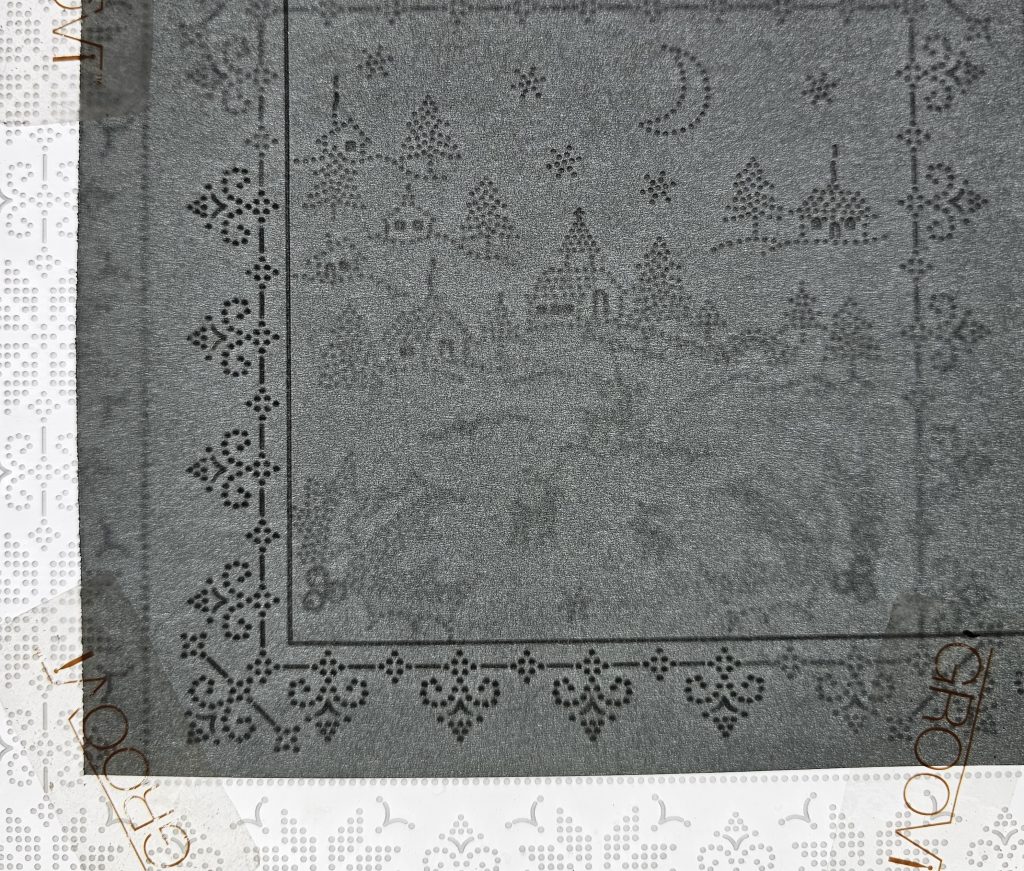
Step 15. Now using Linda’s Dotty Cross-Stitch Christmas Layering Frame A4 Sq Plate, line up a corner so that the dots from the lower triangles don’t touch the line you have drawn.
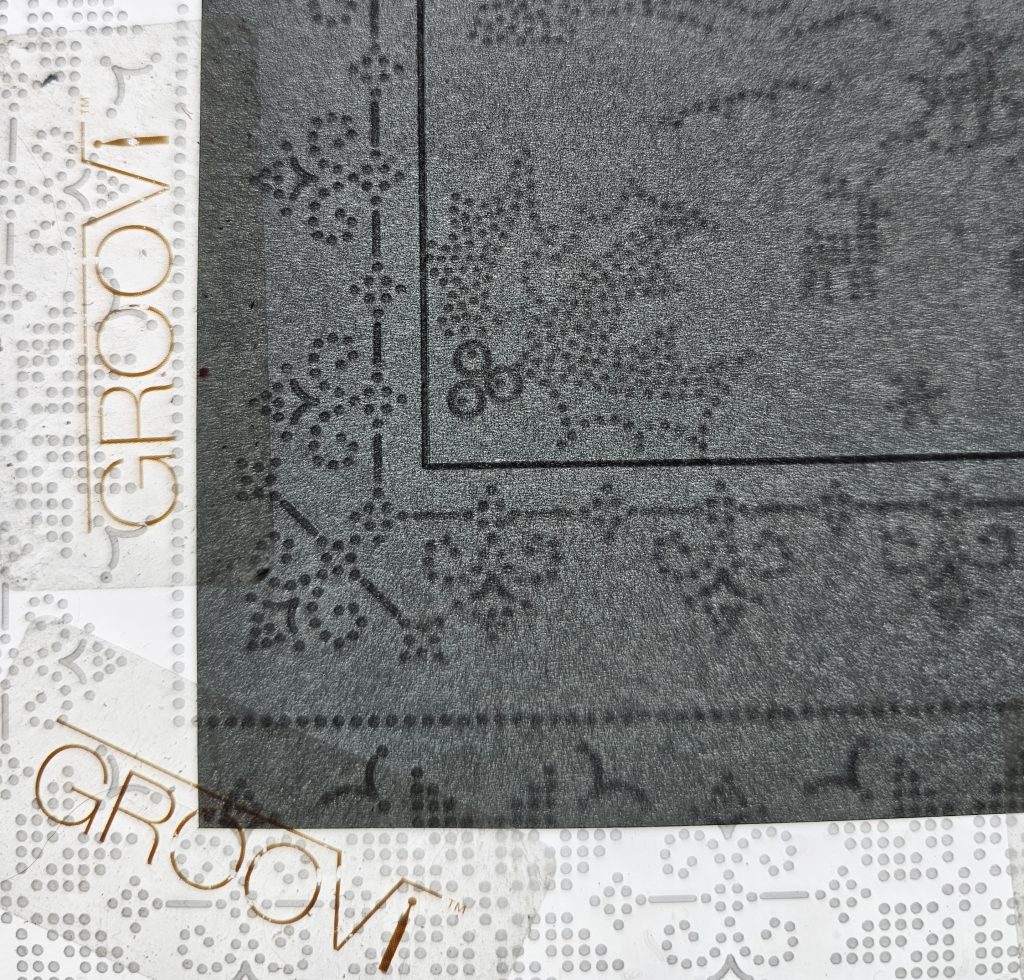
Use a number 1 tool and do the dots around the corner to 4 repetitions each side or the corner.
Turn to the next corner and repeat until all 4 corners are done.
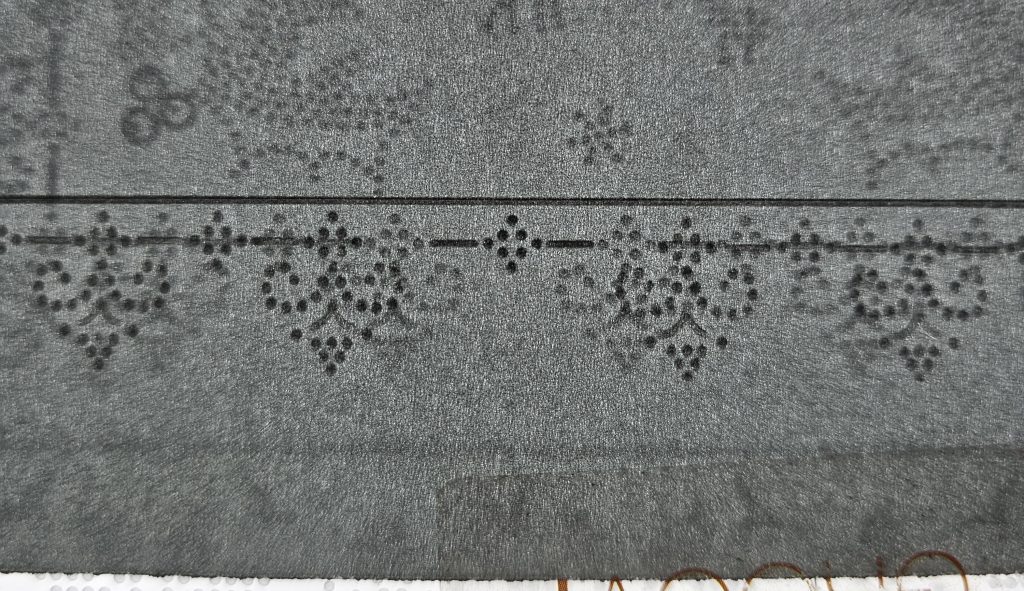
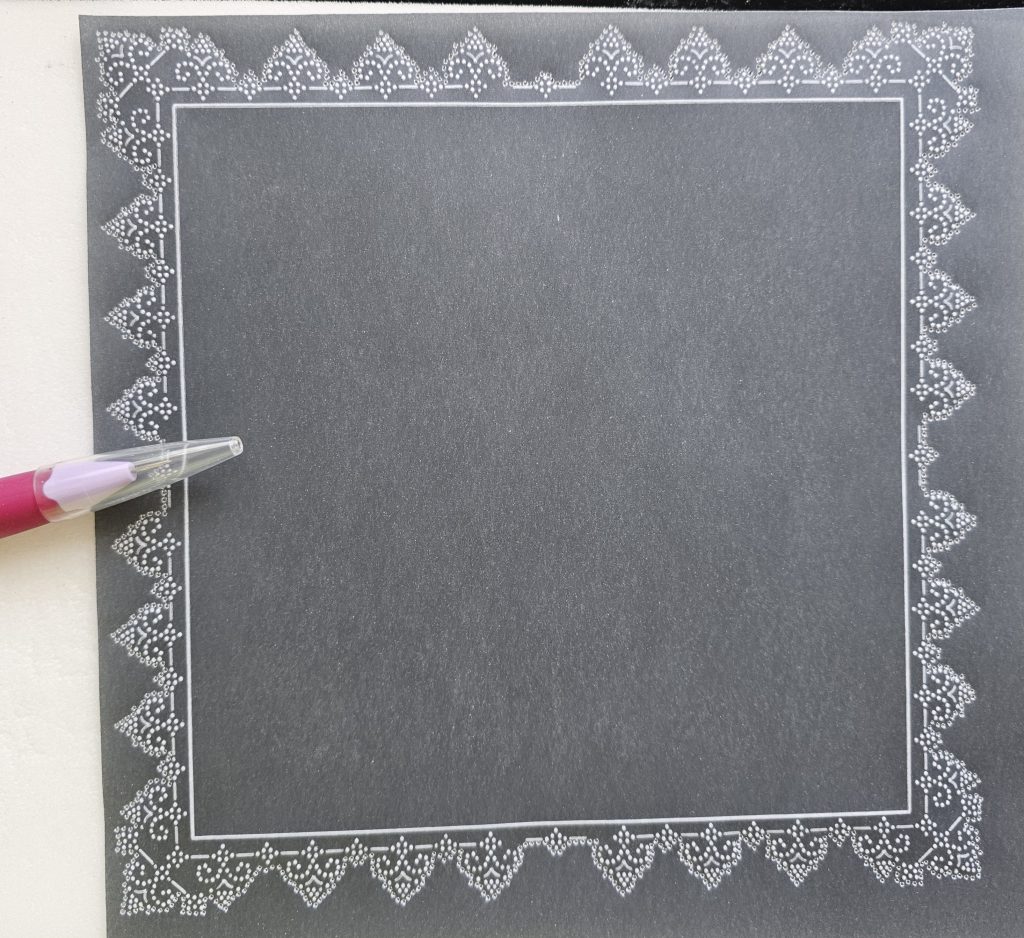
Step 16. Having done all 4 corners, you will see that the corners do not join together in the middle. To get the centre square of dots equal, I have moved the parchment around so that a small dotted square and 2 dashes form the centre like the image below.
When you have completed all 4 sides (when viewed from the front) it will look like this…
Step 17. You now have choices; you can either pierce with a 2-needle bold tool around the outline (as I intend to do) or you can draw another square and cut out from there. If that’s the case you will need to use square 1 from the outside of the nested squares extension plate, so make sure you allow yourself enough space on your parchment. Then cut out your work as you would normally do.
Step 18. Using the 2-Needle bold Tool, pierce around the outside of the dots all the way around your work.)
Step 19. Having pierced around your work, it should now look something like this….
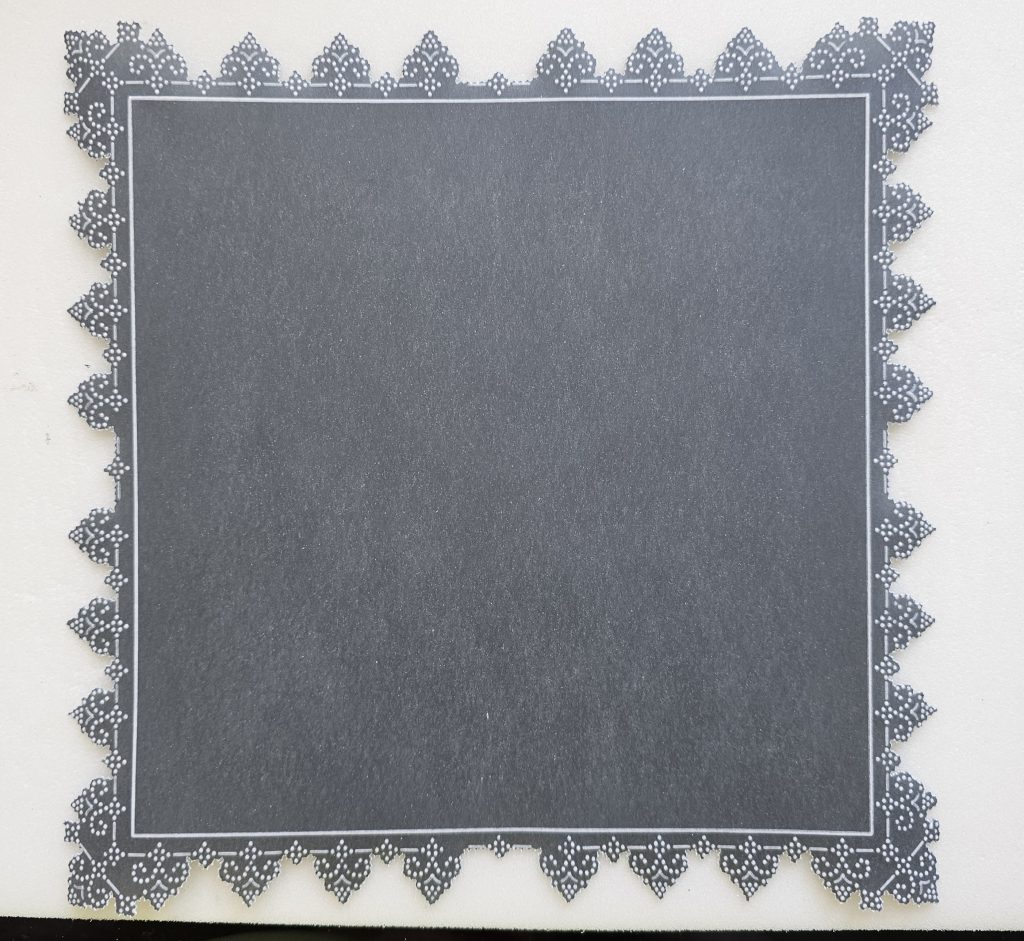
Step 20. Now picot cut out your work.
Step 21. Once picot cutting is complete your backing parchment should look something like this.
Step 22. Find backing paper for your work (I have chosen a grey from the Indian Summer Companion papers) and cut to size. Now attach the middle parchment design to the back, piercing into the backing paper with a piercing tool and secure with mini brads.
Step 23. Mount your work on 8” x 8” card stock.
Step 24. Finally, use a mapping pen and sticky ink in places of your choice to highlight certain parts of your work and shake perga glitter over for that added touch of sparkle.

Hey presto! One completed Christmas card for your collection xx
That is wonderful! Thank you, Julie, for sharing your tips and tricks with us. Learning learning!
Everything that Julie has used can be found over on the Clarity website, in a shopping list, HERE.
If you belong to the Clarity Craft Clubs, then the Half Price Members Sale is on and a lot of the products used by Julie are included

Click HERE to investigate
Now, let’s look at the week ahead…
Monday 17th July :
In the SHAC with Barbara – 10am Live on Facebook and YouTube
Tuesday 18th July:
Groovi Tuesday with Paul – 10am Live on Facebook and YouTube
Friday 21st July:
A Moment of Clarity with Barbara – 7pm Live on Facebook and YouTube Saturday 22nd July:
Get Groovi with Tina on Create & Craft – 1pm & 5pm
Another week of loveliness! See you there.
Travel gently, friends.
Lotsa love, Grace & Julie xoxo
Clarity – The Home of Art, Craft, and Well-Being.
Thought I was running late this morning but appear to be first here !!What a lovely design from Julie, although I haven’t got all of the plates I am sure elements of it can be used with others. Another busy week for us in the SHAC & I hadn’t realised the Moment of Clarity was becoming a regular event so look forward to finding out what we are doing this week.
Have a good week & I will catch up with you next weekend xx
This a a lovely Christmas card. I definitely will make a few. Thank you Julie. As always the step by step are very clear and easy to follow. 😊
Another lovely piece of inspiration.
Awww gorgeous tutorial, Julie ❤️ I love the border! OXOX
I do love black and white projects, but why do I not have the silver paper? I see another purchase coming along.
Lovely. Thank you Julie for such detailed instructions. Must try that.