Clarity Matters Blog Tutorial: How To Remove & Add Colour to Designer Parchment
Hello hello! Grace here.
I hope this finds you well and enjoying your Sunday morning.
We just wanted to remind you about our Hoppy Happy Easter event over on the Clarity website. If you order over £30 worth of goodies, you will get 10% off your order.

Oh! AND the launch of our new Coronation range of stamps…

And of course, we had to make the Royal Gnomes available in Groovi Plates too!
Lots of new and lovely products to buy! And an opportunity to get 10% off your order. Happy Easter!
Now back to our regularly scheduled program… We are joined by our fabulously skilled Clarity Design Team member, Glynis Whitehead. She has generously put together a step-by-step project, to show us how to remove & add colour to designer parchment. So useful!
I’ll pass you over to our talented teacher!

Hanging Wreaths Blog
Ingredients
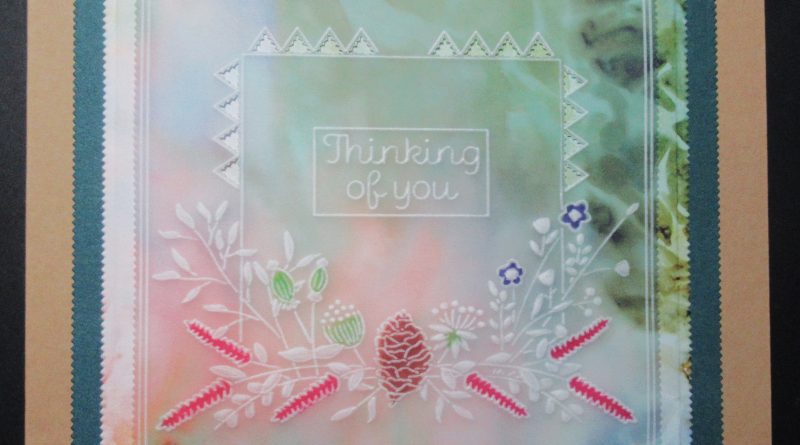
Floral Delights Hanging Wreath Thinking of You A6 Plate (GRO-FL-41939-02)
Nested Square Picot Cut Die Set (ACC-DI-30666-66)
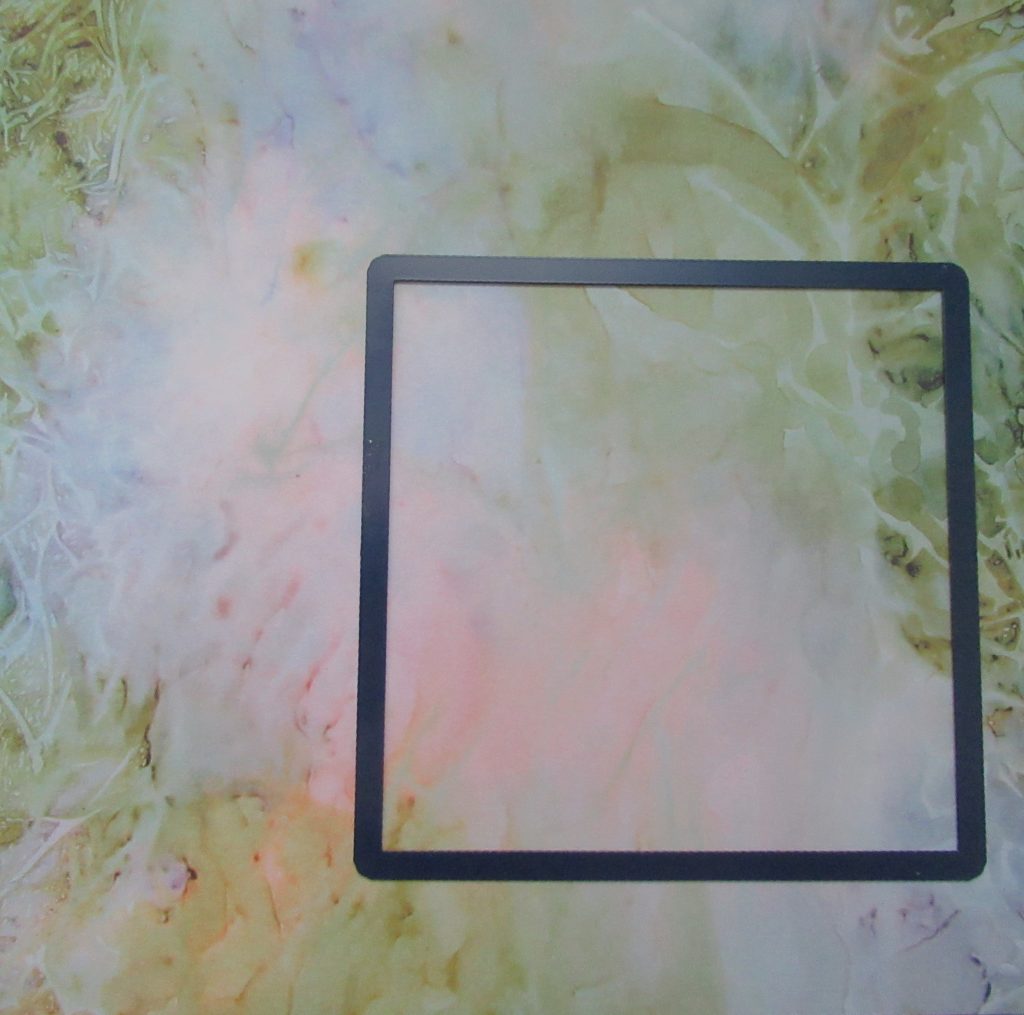
Toscana Designer Parchment (ACC-CA-30933-88)
Toscana Designer Paper (ACC-CA-30891-88)
Toscana Companion Paper (ACC-CA-31342-88)
Groovi Tools 1 & 2 (GRO-AC-40026-XX)
Groovi Tool 3 & 4 (GRO-AC-40027-XX)
Pergamano Two Needle tool (Fine) (PER-TO-70037-XX)
Pergamano Colours Exclusives (PER-CO-70060-XX)
6 x 6 Kraft Card Blank (ACC-CA-30753-66)
Method
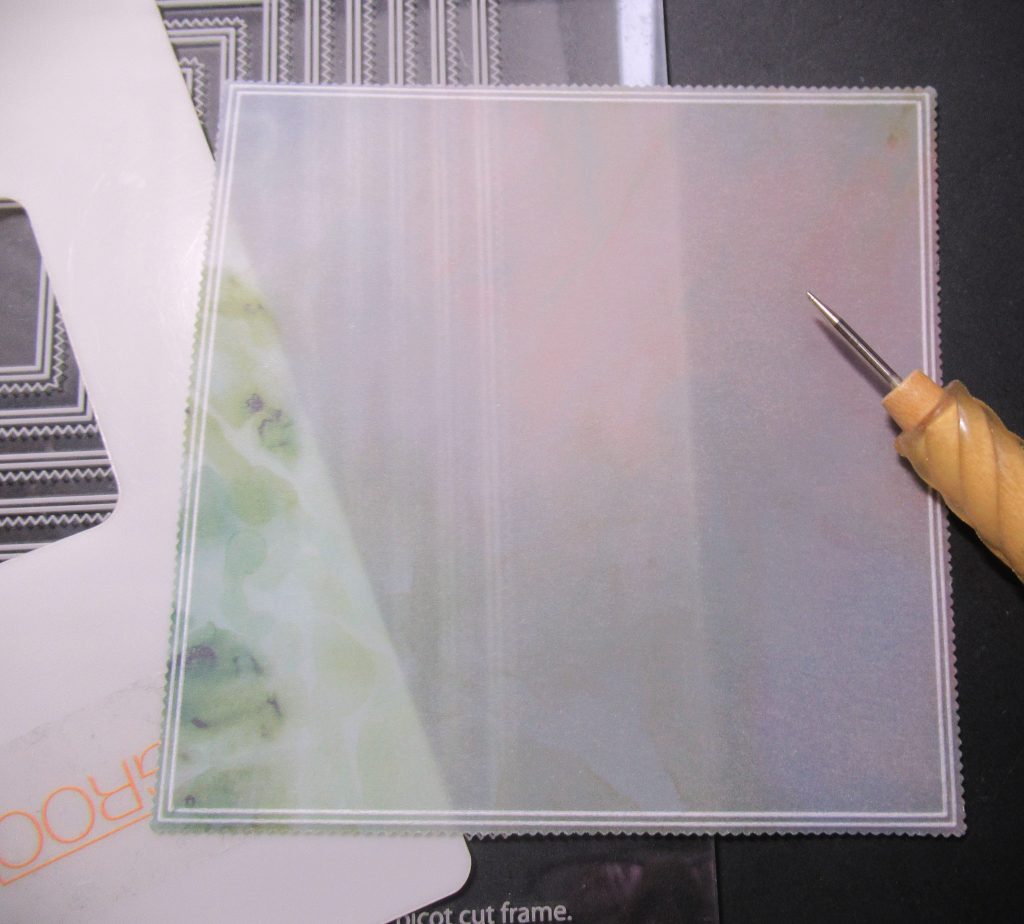
Step 1. Choose which part of the designer parchment you would like your square to be cut from. Use the 5th die in from the outer edge.
TOP TIP: Do not forget that the lightest side of the parchment is the right side and you need this facing up when you place the die face down.
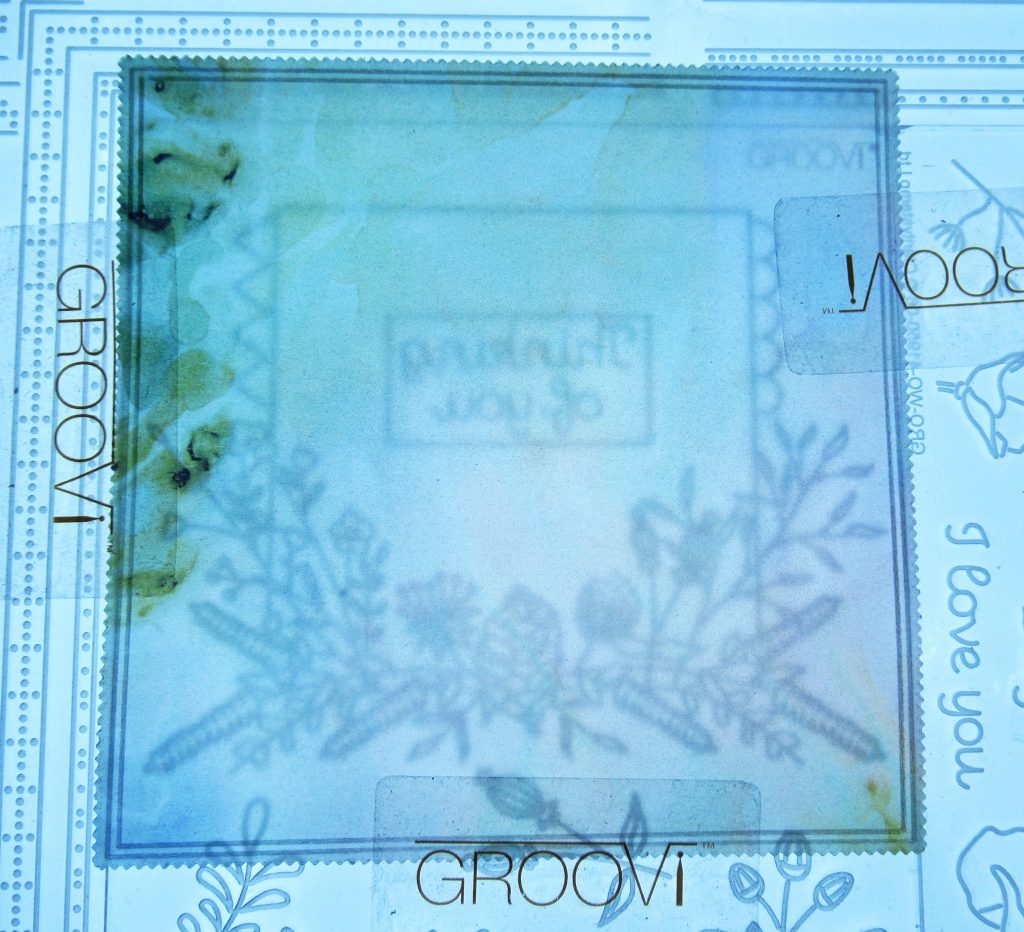
Step 2. On the back (and working from the centre of the piece outwards) wipe the square with a tumble dryer sheet, then line it up with the corresponding square on the picot dies Groovi plate. Use Groovi tabs to attach them on each side.
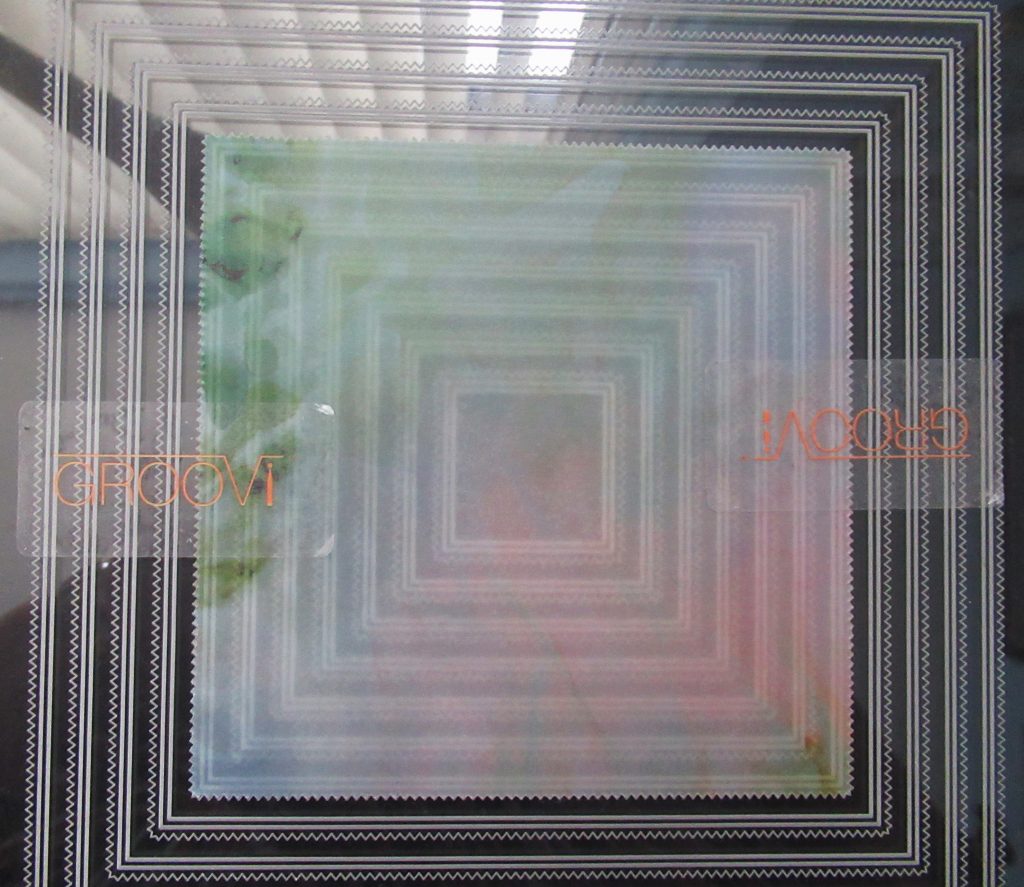
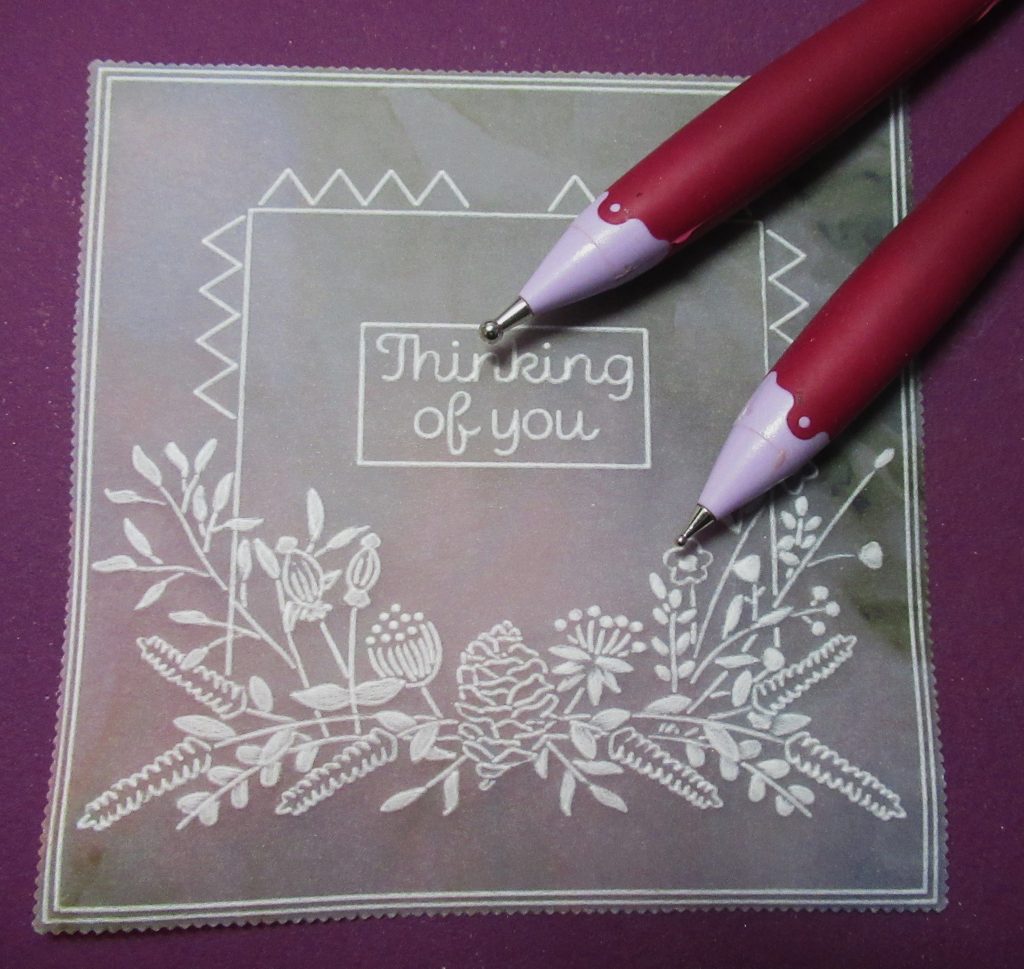
Step 3. Using your Groovi guard to hold the parchment down, and your number 1 Groovi tool, emboss the lines – top and bottom. Then, whilst holding down the parchment, move the Groovi tabs to the other sides, where you have already embossed and fill in the lines of the gaps that are left.
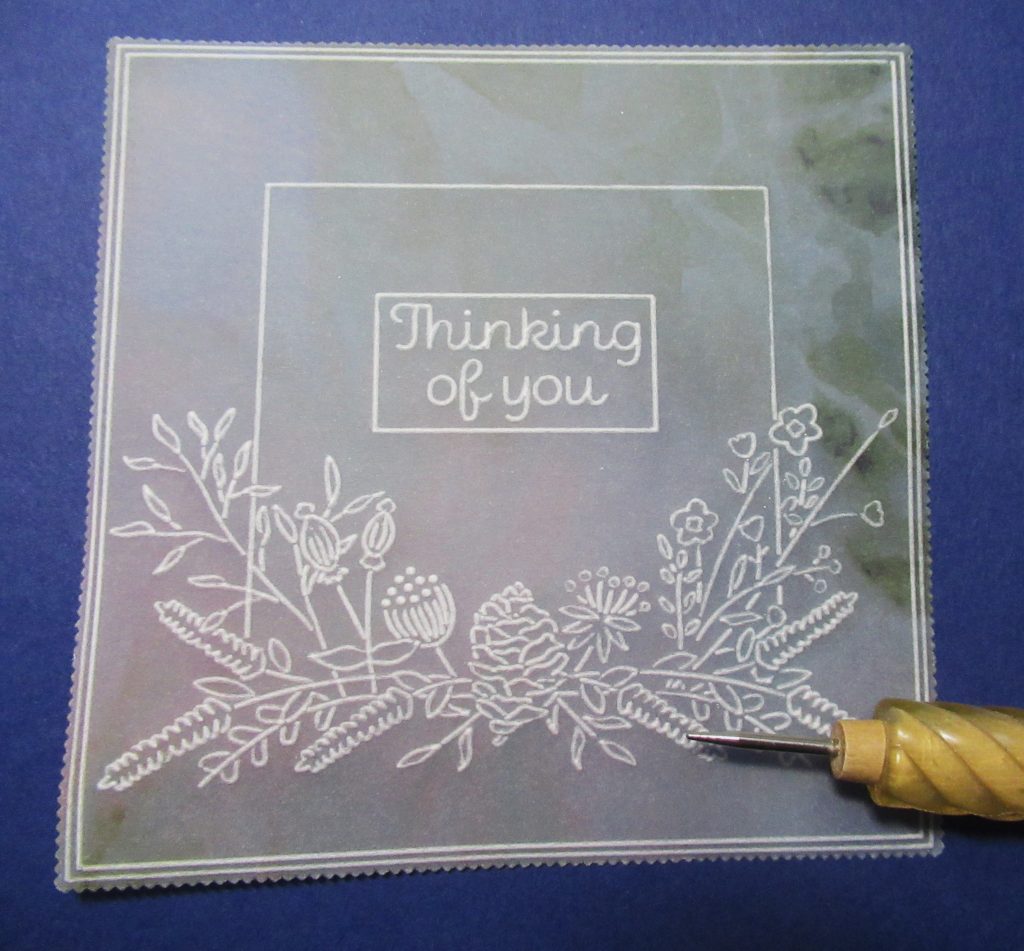
Step 4. If you are using an A5 square Plate Mate, you will need the spacer that comes with the Hanging Wreaths bundle. There are other spacers available on the Claritystamp Website and they all have designs on them so that no inch of acrylic is wasted. Line up the parchment so that the wreath design is in the centre, leaving enough room at the top to get your triangles in.
Step 5. Trace out the design. Use the number 2 Groovi tool for the bits you wish to emboss white and the number 1 for all the other bits. Leave out the scallops and the triangles for now.
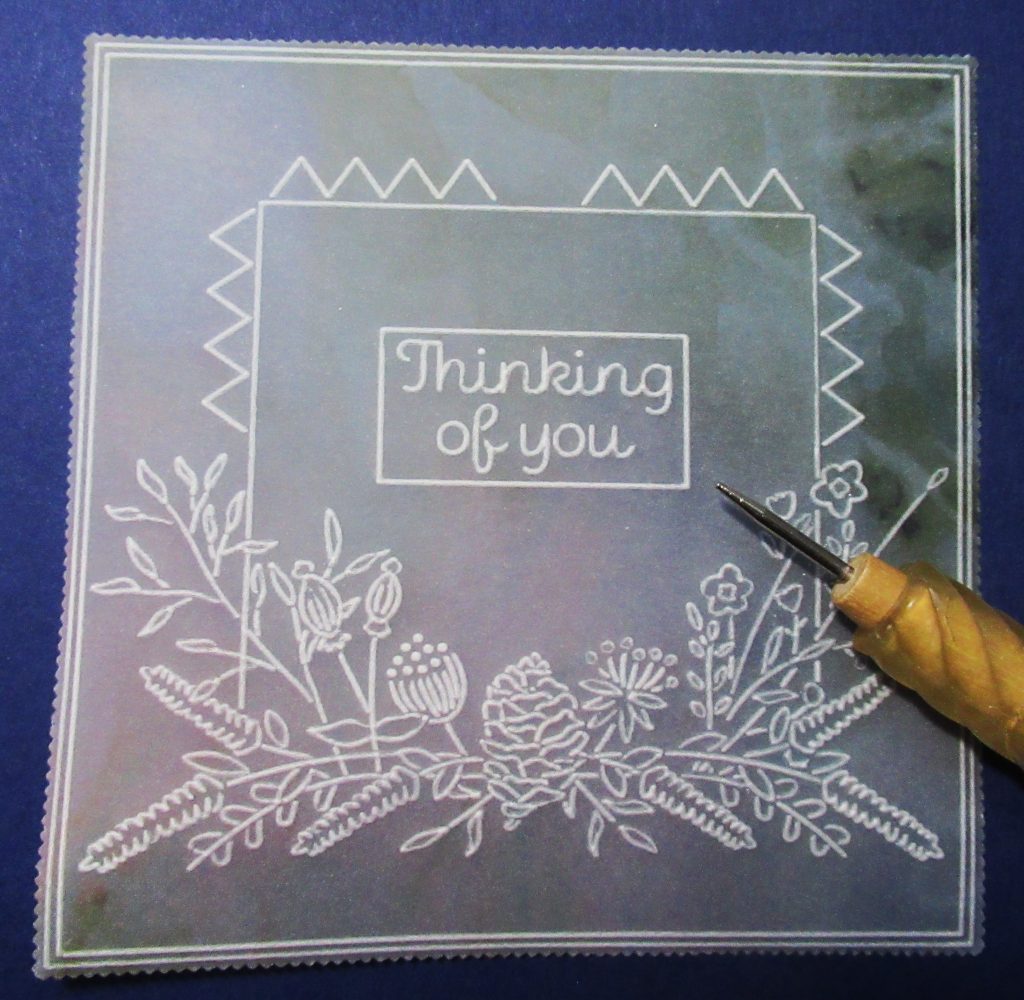
Step 6. Line up the design so that there are four triangles at each corner of the wreath.
Step 7. Use a 3mm ball tool (or number 4 Groovi tool) and a 1.5 mm ball tool (or number 2 Groovi tool) to emboss the leaves, dots and small flowers in the floral spray.
Step 8. Working on the back, use a white eraser to remove the ink from the parts of the designer parchment to which you would like to apply colour.
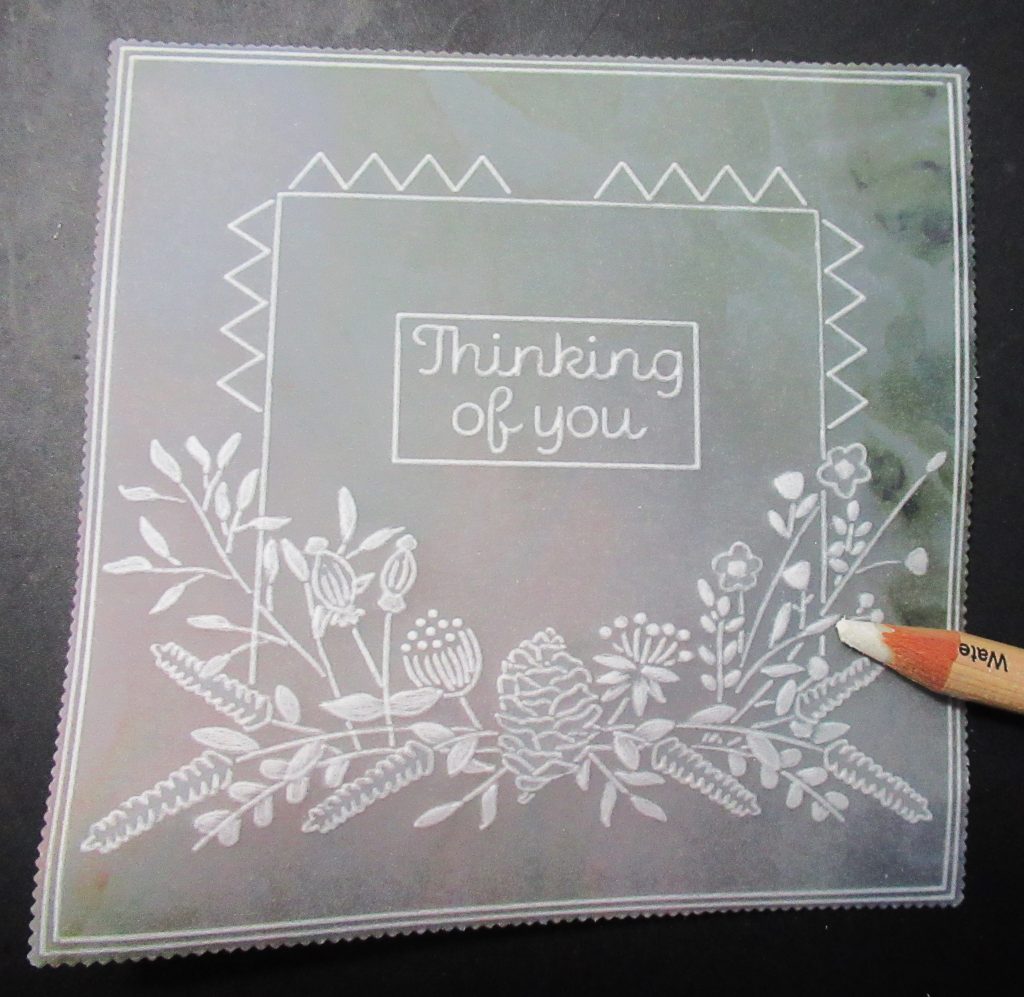
Step 9. Working on the back, apply colour to the flowers and cone. The colours used here are numbers 6, 10, 16 and 21.

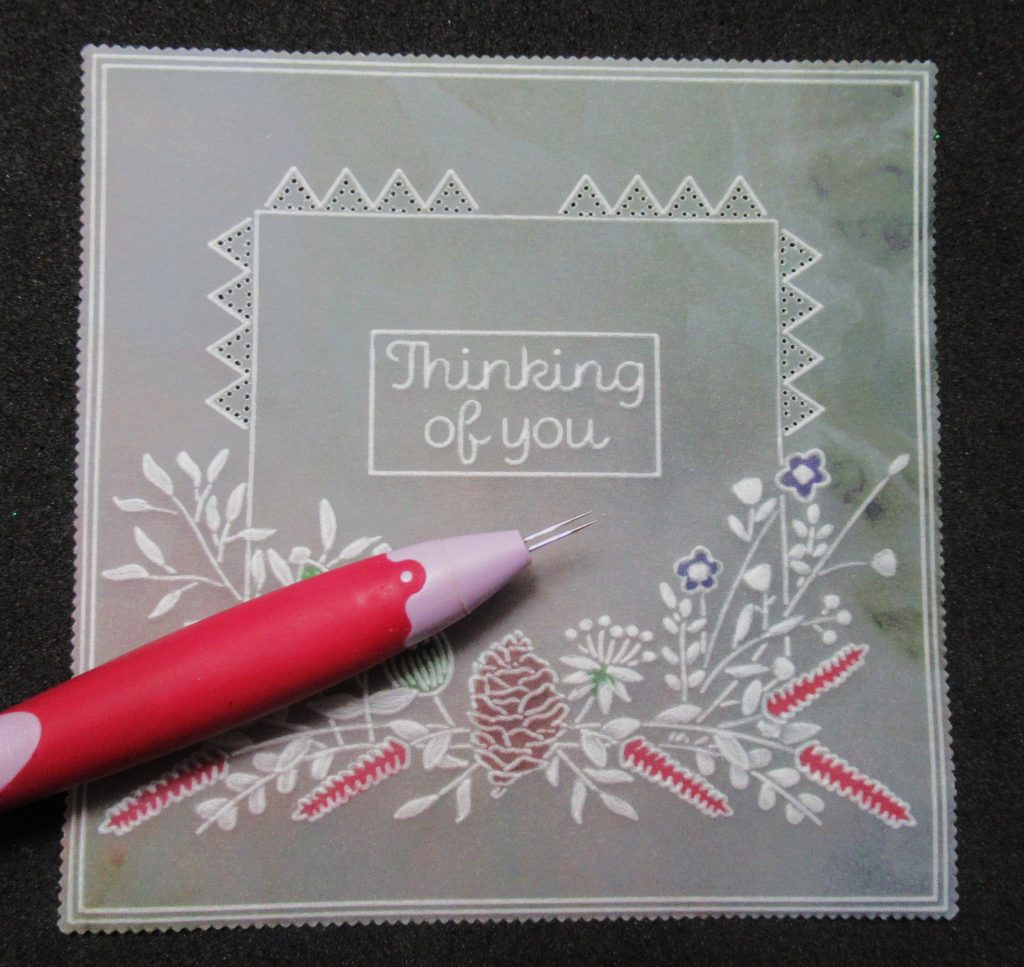
Step 10. Use a 2-needle to perforate around the insides of all the triangles.
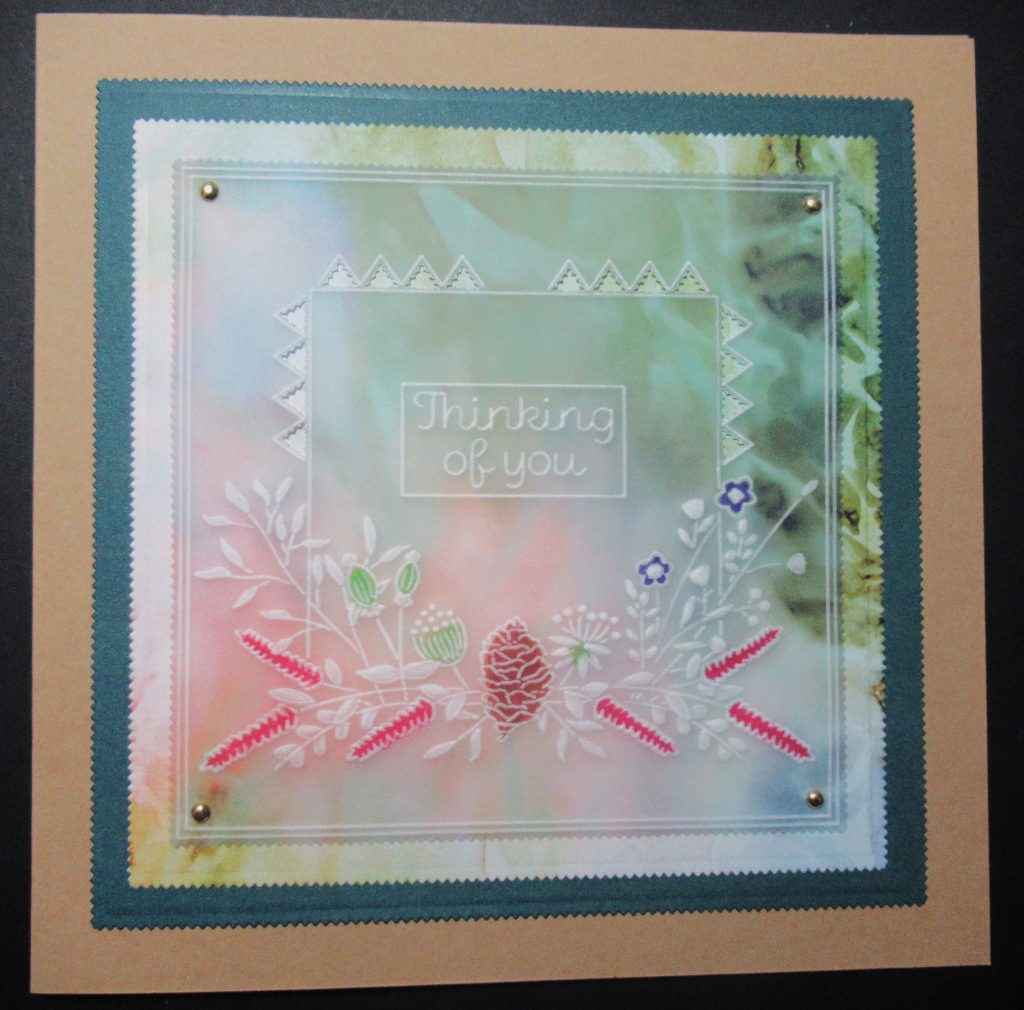
Step 11. Cut a square of matching designer paper to correspond with the parchment square you have been working on, using the next size up of the dies. Then use brads to attach your parchment design.
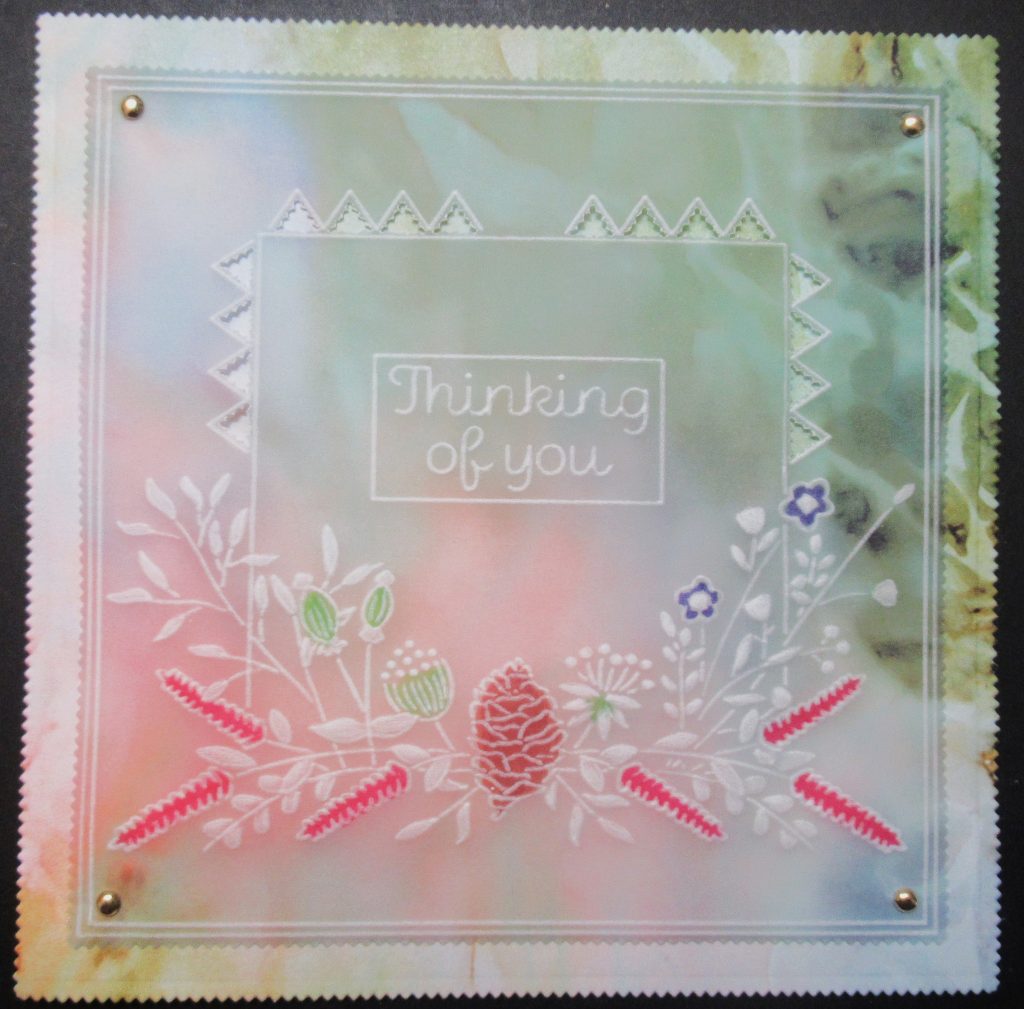
Step 12. Now cut a square of Companion paper to tone in as a background. Use the next size up of picot square die again, and layer your artwork onto it.
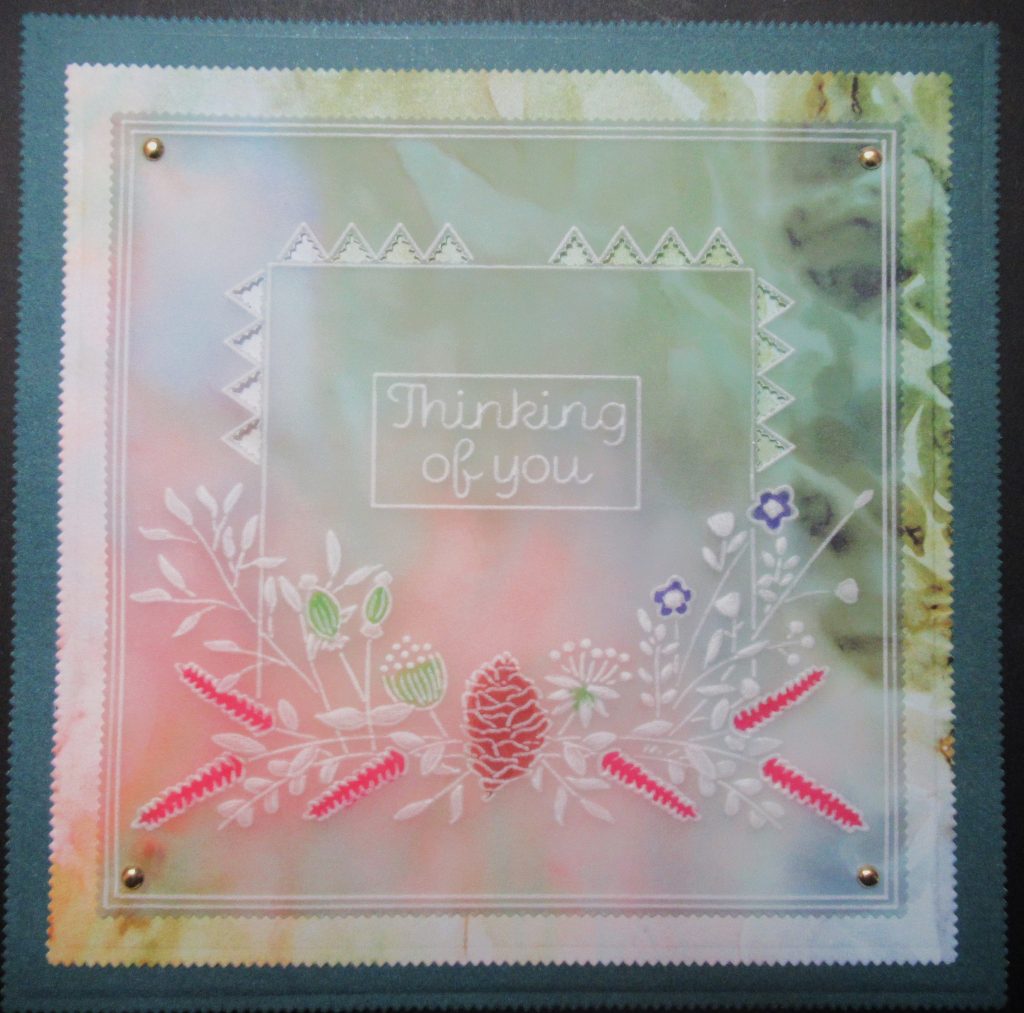
Step 13. Mount it onto your choice of a card blank. You’re all done!
What a lovely project! Thank you, Glynis, for sharing your tips and tricks with us, as always. We so appreciate you and your tutorials.
Everything that Glynis has used can be found on the Clarity website HERE.
If you give this beautiful project a go yourself, don’t froget to share it on Groovi Worldwide! And/or email it to me (grace@claritystamp.com). We love to see it!
Oooh, some great news! A Moment Of Clarity is BACK!! If you love all things Groovi & Stampy, then don’t forget to join Mum for a Moment Of Clarity Craft Along on Friday, April 14th at 7pm Live on Clarity Facebook and YouTube – more information HERE.
Weekly schedule ahead:
Tuesday 11th April:
Groovi Tuesday with Paul – 10am Live on Facebook and YouTube
Wednesday 12th April:
One Day Special with Paul on Create & Craft – 6pm & 9pm
Thursday 13th April:
One Day Special with Paul on Create & Craft – 10am & 2pm
Friday 14th April:
Craft Along with Barbara – Clarity Facebook & YouTube Live 7pm
Lots to look forward to, so that’s it from me!
Enjoy your Easter weekend and travel gently, friends.
Lotsa love, Grace xoxo
Clarity – The Home of Art, Craft, and Well-Being.
Another beautiful project to inspire and a great step by step to assist you achieve this design. Thank you Glynis.
Thanks to you both for sharing this project.
Lovely sunshine on this HAPPY EASTER SUNDAY .
Stay safe. 🍒
Great step by step demo, thank you Glynis. x
I did read this early this morning before taking mom to Church but forgot to come back & make a comment. Another lovely project from Glynis which I am sure could be adapted with other plates as I haven’t added these to my collection yet. I have a few days planned doing Groovi with my granddaughter this week so I will take a few plates & see what we come up with whilst cruising down the Oxford canal !! After the lovely sunny weekend I have a feeling the weather is about to change so we could have plenty of Groovi time. xx
Thank you Glenys for another great tutorial. Love working with designer parchment. Its always a great finished product. Happy Easter to you and Grace.