Clarity Matters Blog Tutorial: How To Create Embellishments
Hello hello! Grace here.
I hope this finds you well, enjoying your Sunday and feeling crafty.
We are joined this weekend by the wonderful craft machine that is Glynis Whitehead. She’s a force of nature. I just love these beautiful embellishment cards. And she’s kindly put together a step-by-step to show us how.
I’ll pass you over to our teacher…

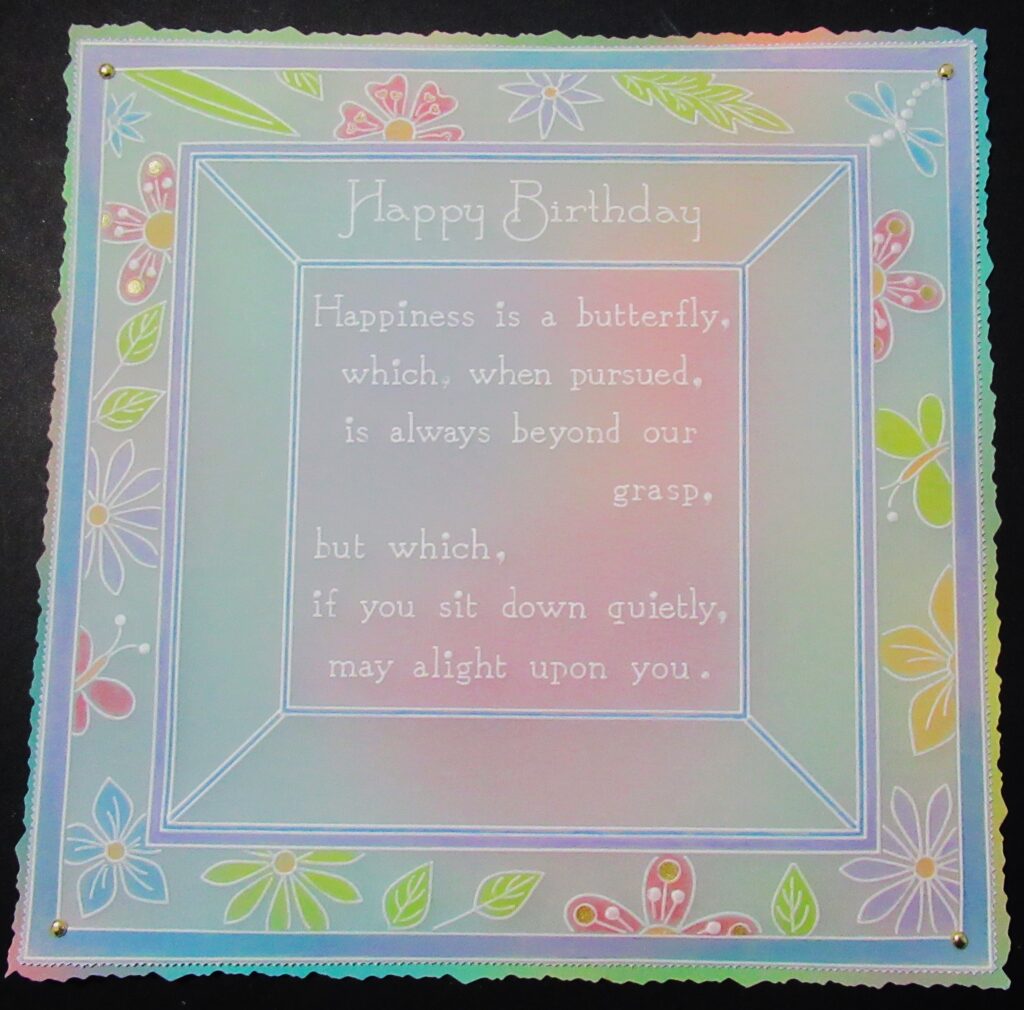
Poetry, Flowers and Butterflies
Ingredients
Tina’s 3D Flowers & Butterflies A4 Sq (GRO-FL-40553-15)
Nested Squares Extensions & Alphabet Frame A4 Sq (GRO-WO-40538-15)
Happiness Is A Butterfly A5 (GRO-WO-40523-04)
(Did you know that there’s an alternative to picot cutting your flowers? Tina’s Picot Flower & Leaves Die Set & Groovi Plate Collection (ACC-DI-30940-XX)
Dorso Crayons – Lively (PER-CO-70061-XX)
Perga Liner B Pencils (PER-CO-70063-XX)
Dorso Oil (PER-CO-70066-XX)
Pergamano Blending Pen (PER-AC-70300-XX)
Pergamano Set of 7 Metallic Gel Pens (PER-CO-70449-XX)
Number 1 & 2 Groovi Embossing Tool (GRO-AC-40026-XX)
Pergamano Perforating Tool – Fine 2 Needle (PER-TO-70037-XX)
Plain Parchment (GRO-AC-40024-A4)
White Card Blank 8 x 8 (ACC-CA-30620-88)
Northern Lights Designer Paper (ACC-CA-30443-88)
Perga Crystals Crystal Blossom (PER-CR-70401-XX)
Perga Glue (PER-AC-70133-XX)
Off-Cuts of Coloured Parchment
Method
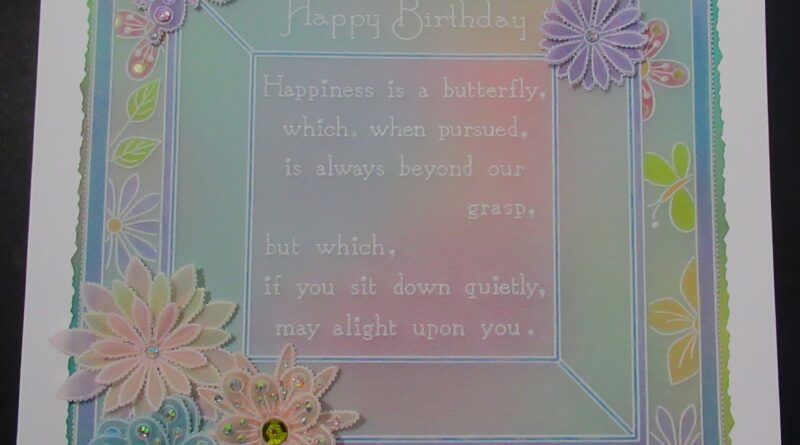
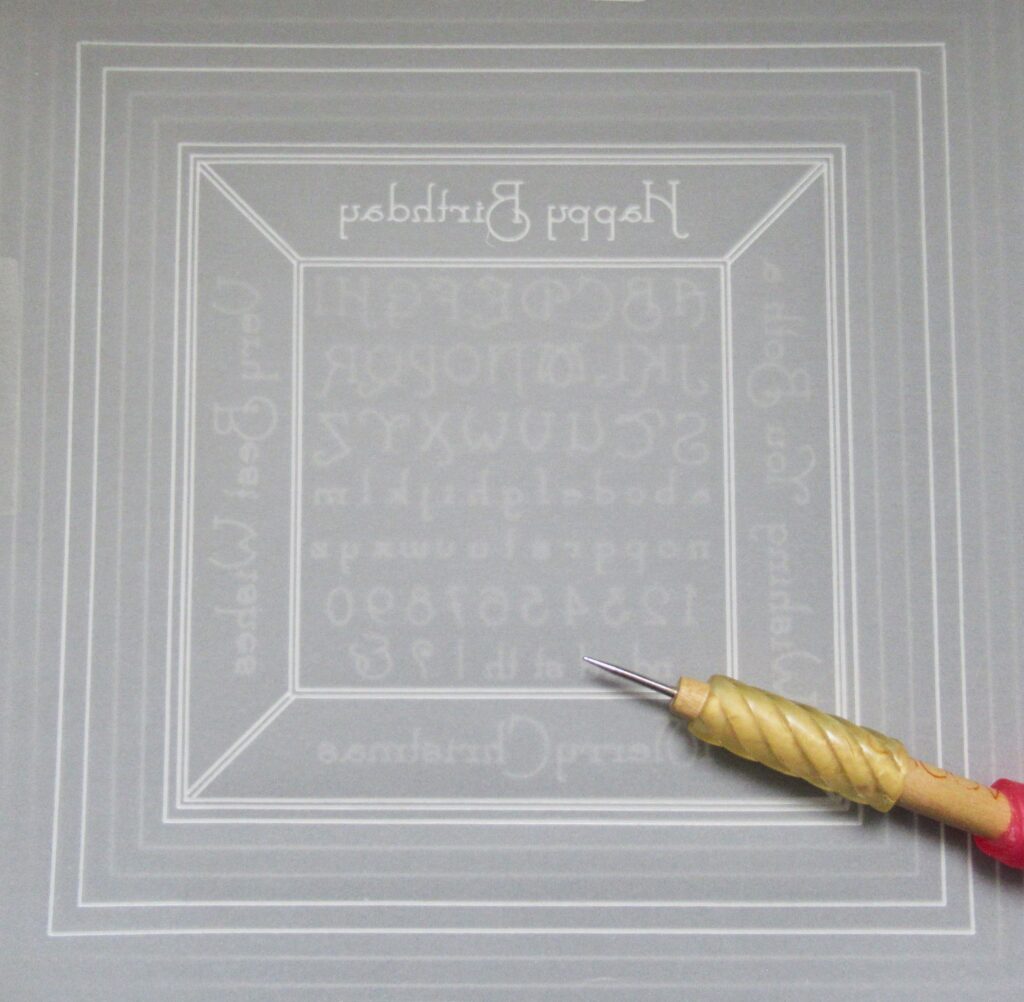
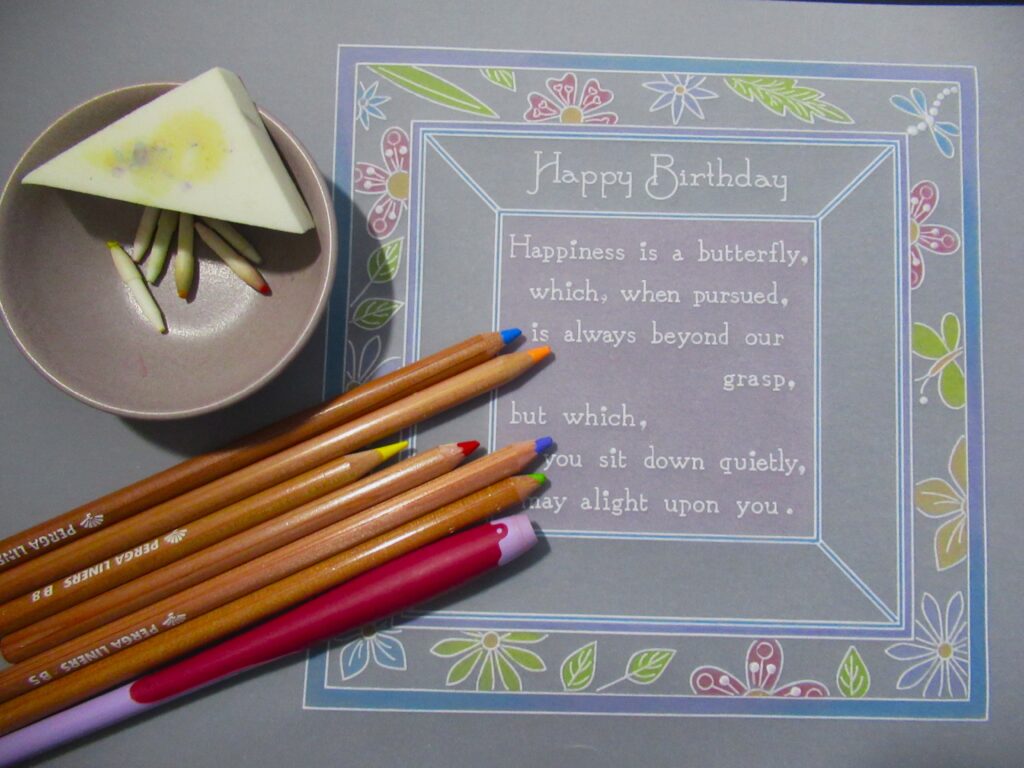
Step 1. On a plain piece of parchment attached to the Nested Squares Extension plate, and with the number 1 tool from the starter kit, trace out the central frame and the next line out. Then trace the 4th and 5th lines in from the edge of the plate. Add a sentiment – I chose ‘Happy Birthday’ but there are three others on the plate to choose from.
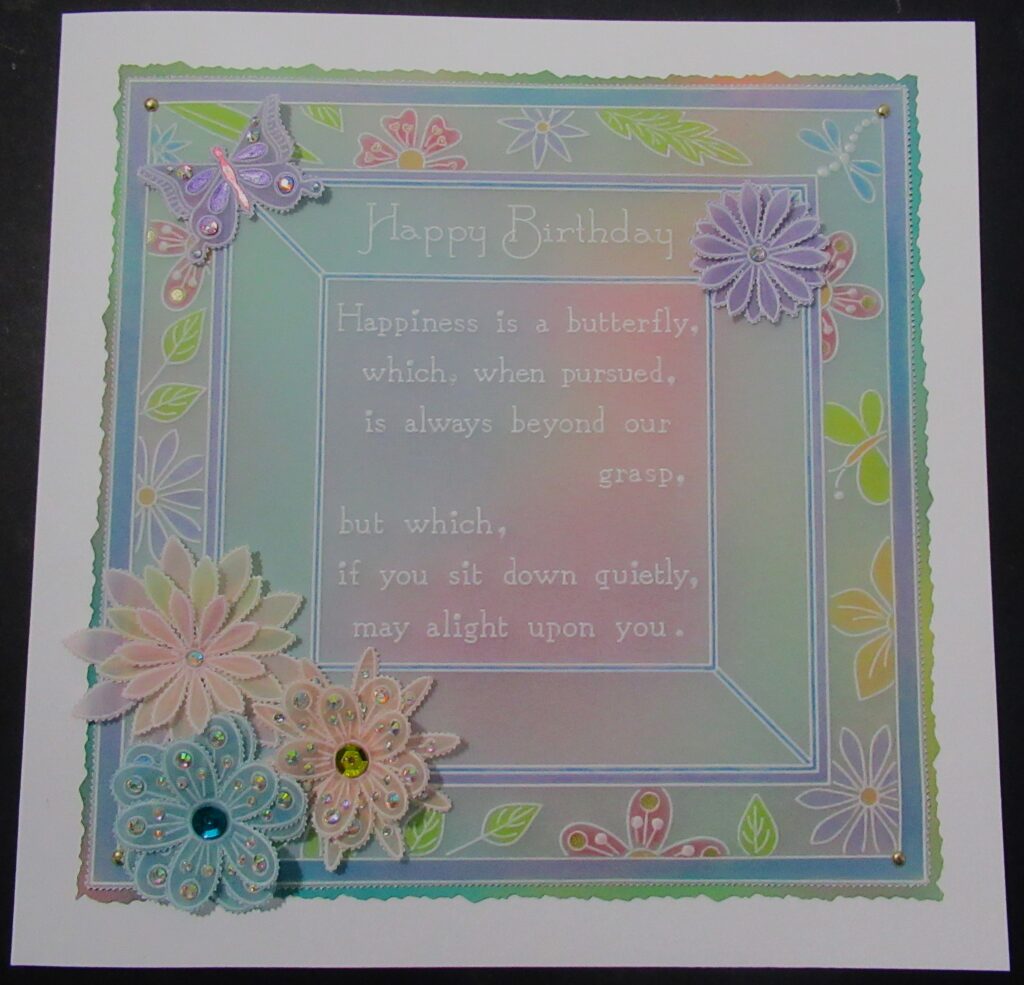
Step 2. Swap out the plate and use the 3D Flowers and Butterflies plate to add some random ‘partial’ flowers and butterflies into the gap between the margins.

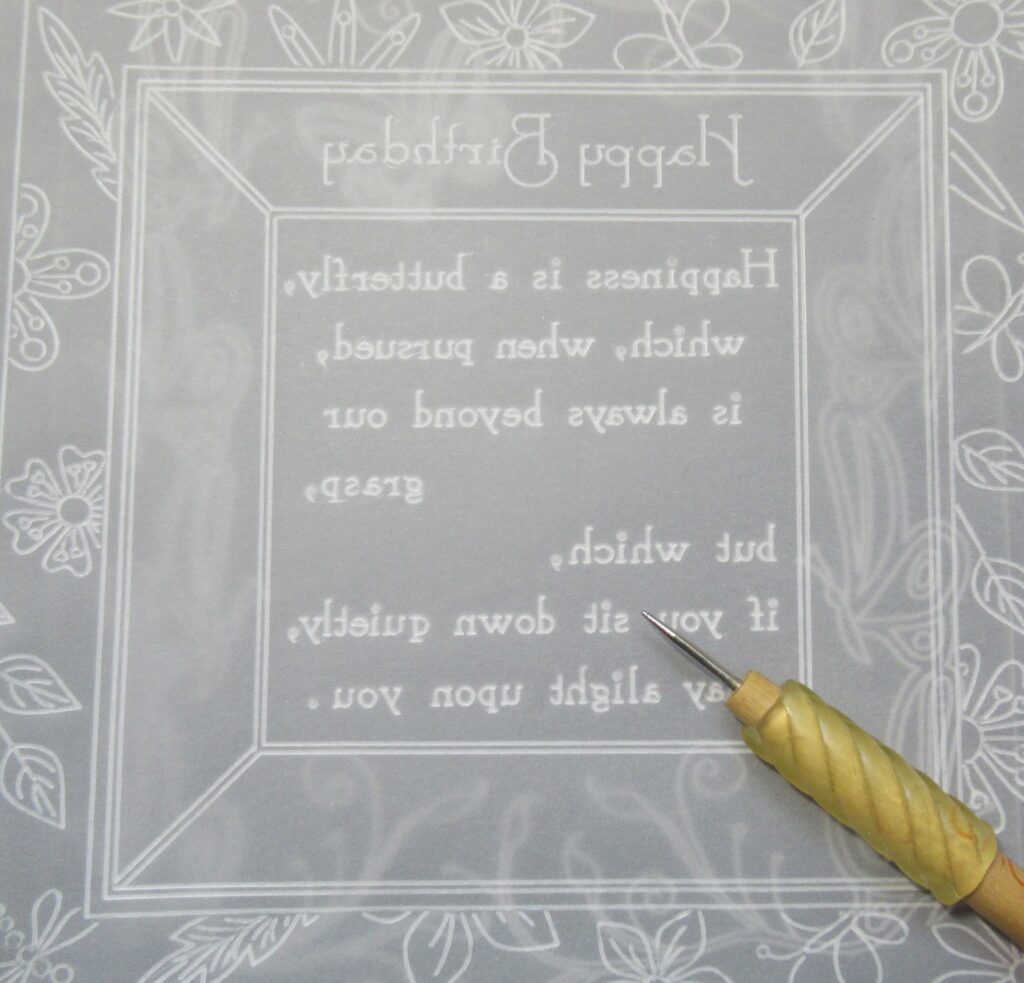
Step 3. Add the poem into the middle of the frame.
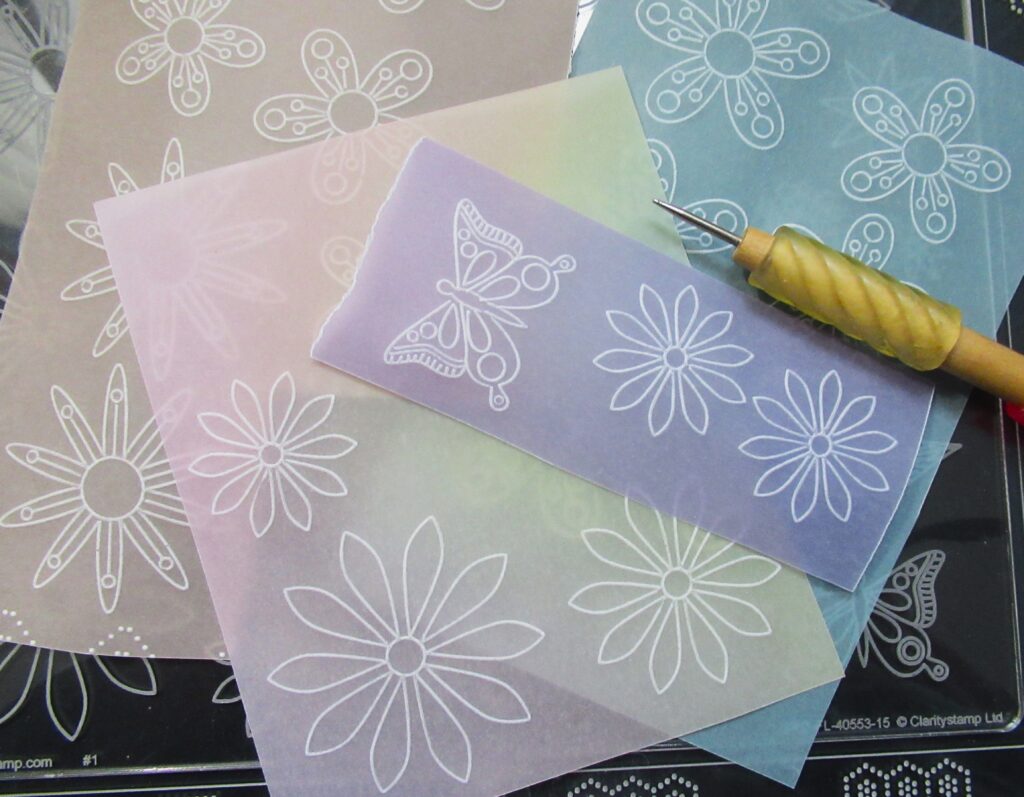
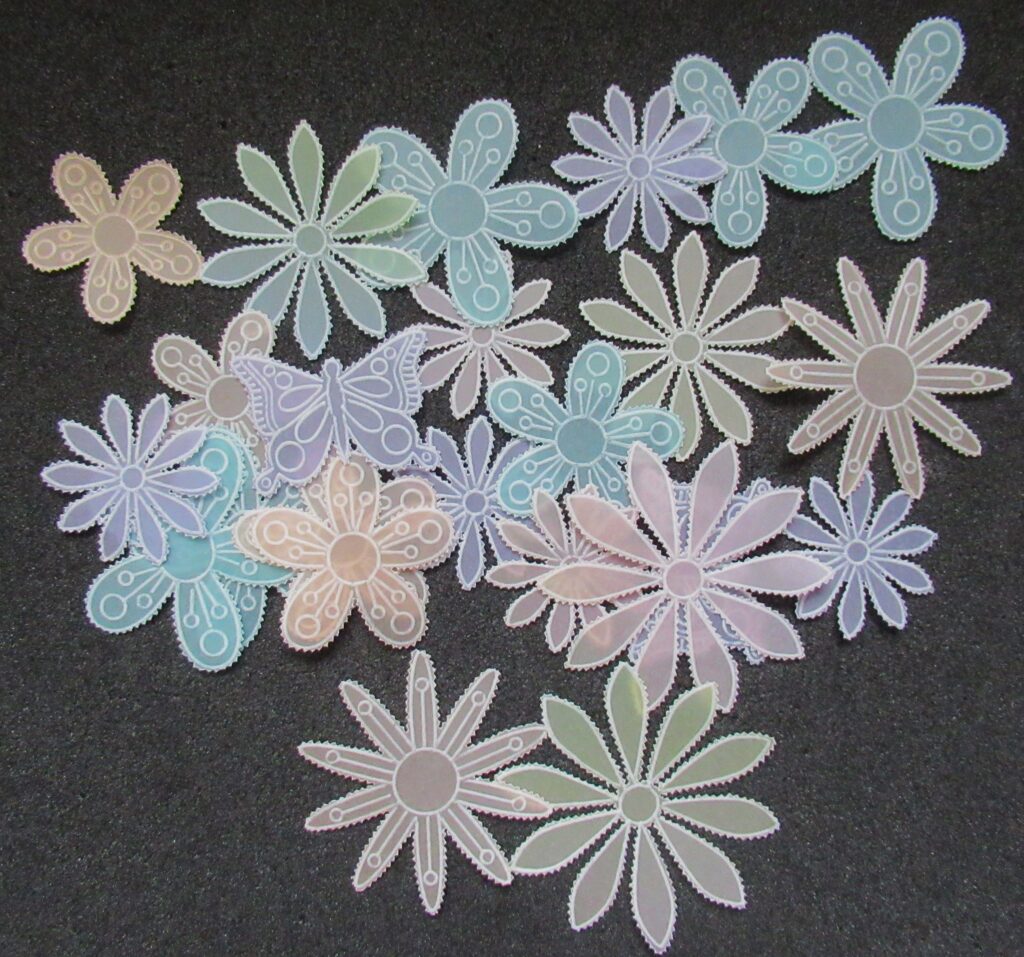
Step 4. Use different coloured parchment papers to trace out some 3D flowers and a butterfly. The plate has various sizes of flower petals, which all layer up nicely once cut out.
Step 5. It is up to you whether you want to picot cut all the flowers out, or whether you want to cut them with scissors. If you want to picot cut them out, go around the outside of all the petals and the butterfly with the 2-needle perforating tool.

Step 6. Snip around the perforated flowers. I always make extra whilst I am doing this job, then I keep the flowers in a tub for when I need an embellishment. You could also use the Dies and Groovi plates listed above in the ingredients list if you do not wish to do the picot cutting.
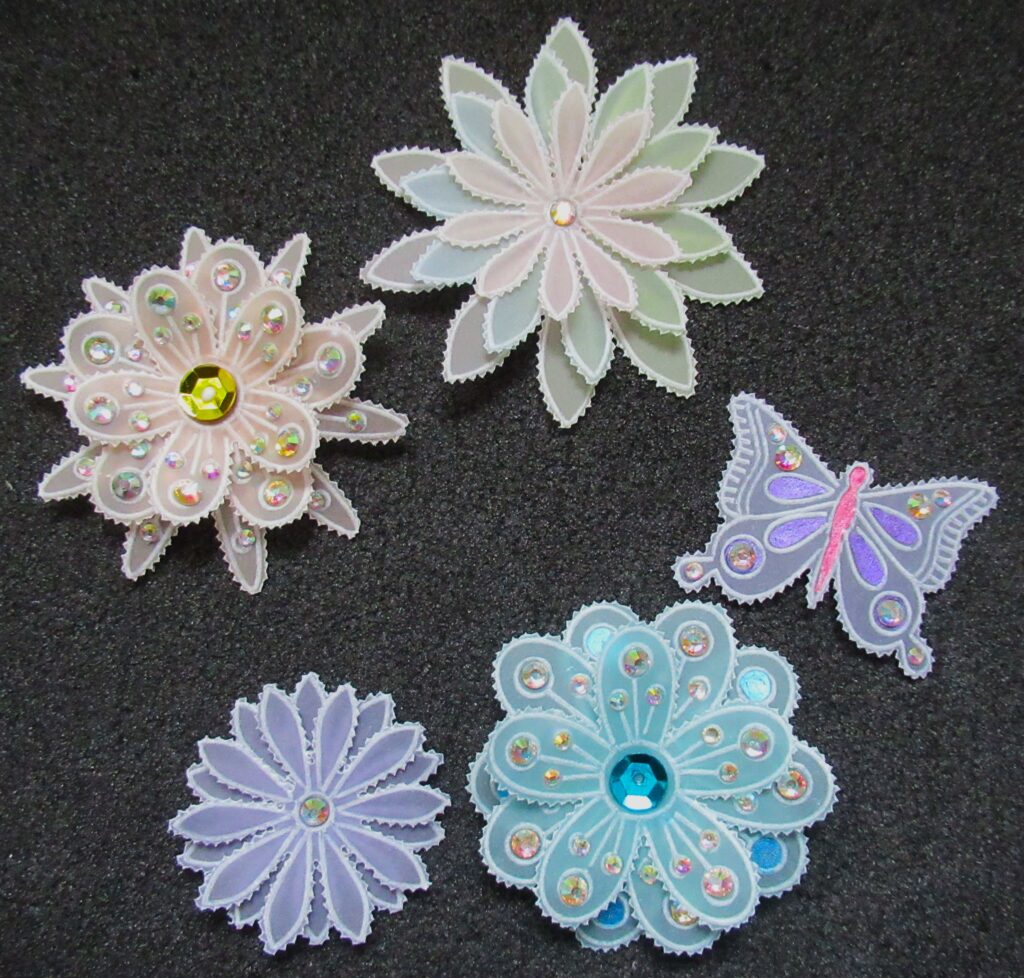
Step 7. Layer up your flowers, adding gems, crystals, and filling in some parts with Perga Gel pens. I use Perga-glue for this, applied with a pickle/cocktail stick, and I also used some sequins in the centre of some of the flowers. Let the glue sit for a few seconds before pressing things in place.
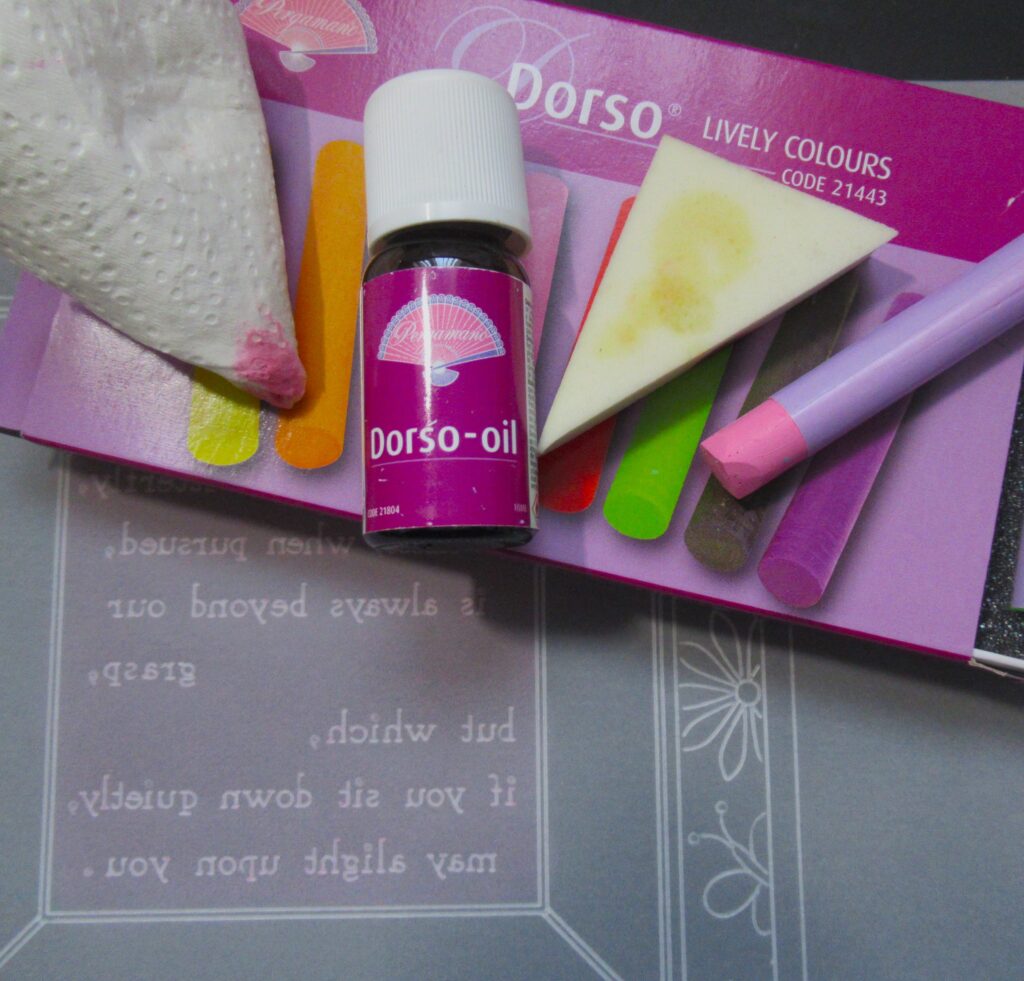
Step 8. Set the flowers aside and start work on the main card. First Dorso the centre of the frame to highlight the verse. Put some Dorso oil onto a Spot-on Sponge, then put a layer of this down on the parchment first.
Scribble on some crayon from the Dorso Crayon Lively Pack – I chose pink, then put a bit of oil onto the tissue and blend out the crayon until the colour is spread nicely without streaks.
Step 9. Using the B pencils, colour in the flowers, leaves and butterflies and margins. I used numbers 4, 5, 7, 8, 10 and 11. The blue and purple blends nicely in the margins. Blending nibs and Dorso Oil to spread out the colours.
Step 10. Go around the edge of the piece with a two-needle tool and then snip the work out. Then attach it to a piece of backing paper with brads.
I have cut around my paper with fancy scissors, but you can use a paper trimmer etc.
Step 11. Attach the work to a card blank and then arrange some flowers onto it. I have put mine on in a ‘triangle’ pattern, which helps to draw the eye to the centre of the card and the poem.
Such a lovely card! And a brilliantly put-together step-by-step project. I just love these glitzy embellished flowers. Many thanks to our super talented Clarity Design Team Member, and friend, Glynis Whitehead.
Everything that Glynis has used in this particular project can be found in a shopping list, HERE.
We continue to enjoy seeing your versions of these Sunday step-by-step tutorials shared on Facebook. Thank you for joining us each Sunday to learn from these bloggy tutorials.
Now, looking at the week ahead…
Monday 18th March:
In the SHAC with Barbara – 10am Live on Facebook & YouTube
Tuesday 19th March:
Groovi Tuesday with Paul – 10am Live on Facebook & YouTube
Thursday 21st March:
Get Groovi with Clarity with Paul on Create & Craft – 1pm & 5pm
See you there!
Lotsa love, Grace & Glynis xoxo
Clarity – The Home of Art, Craft, and Well-Being.
Good morning Grace & Glynis, another pretty project. I need to dig out my dies & plates as its been a while since I used them. Don’t know why other than the fact that there are so many great plates to use you get spoilt for choice of what to use first.
Another busy week at Clarity Towers, TV shows aren’t on the schedule yet although there is something already in the 9am slot on Friday but will check back later in the week to check that out.
Have a good week everyone x
Another truly amazing blog. Love these flower dies. Thank you Glynis.
Thank you so much again for sharing your knowledge and talent xx lots of love to all xx
Thank you Glynis and Grace. Always a great project on the Sunday. I have multiple flowers and butterflies stored. Not only for decoration, but handy as cover ups too.😊
Thank you Glynis and Grace for sharing this project, I love it.
Beautiful project, I forget the flowers and the dies, now is it better to cut them out first and then emboss or the other way around, I’m going to have to practice. X
Hi grace how are you doing tonight from hope to chat again soon all fab pictures
Beautiful project! I haven’t used the flowers for a while so time to get them out 😀
Thank you so much Glynis, I love these flowers.. a very special design love it. I have a box I keep flowers in ready for this kind of card. Hope you’re both ok. Xxxxx
Enjoying the BLOG TUTORIALS.