Clarity Matters Blog Tutorial: How To Create A Sentiment with an Alphabet
Hello hello! Grace here.
I hope this finds you well, safe, and feeling crafty.
This week, our talented friend (and Clarity Design Team Member) Maggie Byford has prepared a brilliant step-by-step blog tutorial project for us.
I’ll hand you over to our teacher…

How to line up letters to make your own word chains
How to line up letters to make your own word chains is a topic that some of you have asked for, and in this tutorial I’ll be showing you step by step how I go about creating my own word chains.
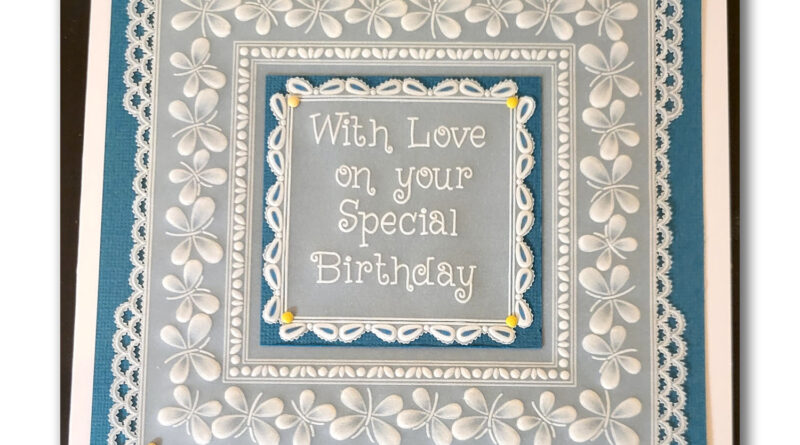
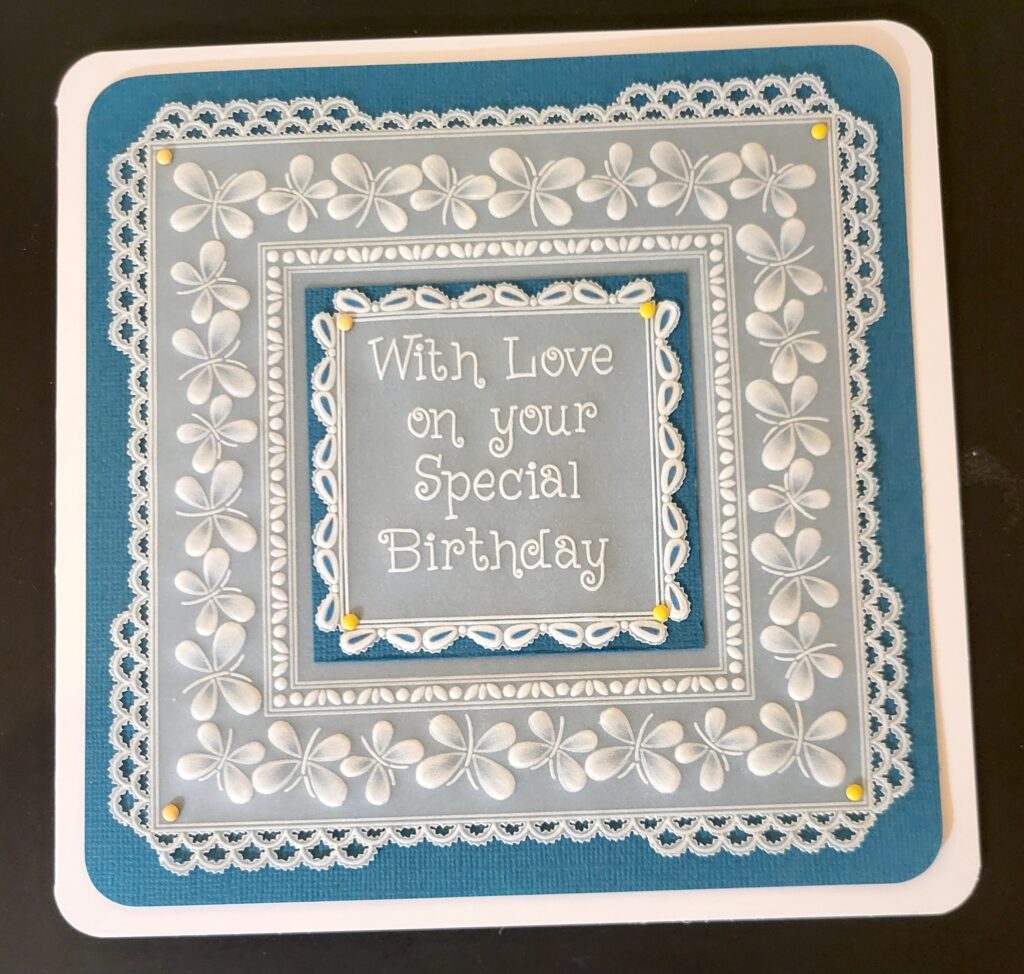
Although the act of lining up letters to make words can seem like a daunting task, with the help of some preparation beforehand it’s surprising how easily it can all come together once you give it a go. I would add, though, that it does need quite a bit of concentration so it’s always best to work on some practice pieces until you’re happy with the results. The word chains I’ve put together for this tutorial form the centre piece of this whitework butterfly card…
Ingredients
Alphabet A5 Square Plate Mate (GRO-MA-40002-07)
Nested Scallops Squares Extension A4 Square Plate (GRO-WO-41168-15)
Tina’s Butterfly and Floral Frames A5 Square Plate (GRO-FL-41178-03)
Groovi A4 Clear Parchment Paper A4 (GRO-AC-40024-A4)
2-Needle Bold Perforating Tool (PER-TO-70279-XX)
Pergamano Excellent – Embossing Mat (PER-AC-70075-XX)
Pergamano Ball Embossing Tool 3mm (PER-TO-70005-XX)
Pergamano Ball Embossing Tool 4.5mm (PER-TO-70015-XX)
Groovi Embossing Tool 1 and 2 (GRO-AC-40026-XX)
Groovi Embossing Tool 3 and 4 (GRO-AC-40027-XX)
Black Dual-Purpose Groovi Mat A4 (GRO-AC-40194-A4)
A5 Black Super Foam (GRO-AC-41765-XX)
Groovi Sticker Tabs x 16 (GRO-AC-40437-XX)
Groovi Guard (GRO-AC-40345-XX)
Ringlock Scissors (PER-TO-70041-XX)
Pastel Mix Pergamano Brads (PER-AC-70270-XX)
Dorso Oil (PER-CO-70066-XX)
Blending Pen and Refill Nibs (PER-AC-70440-XX)
Spot On Sponges (ACC-MG-30537-XX)
Dry Tumble Dryer Sheet
Soft pencil eraser (ACC-PE-30612-XX)
Soft brush (optional)
Spare parchment for practice pieces
Faber Castell Polychromos pencil: 153 Cobalt Turquoise (ACC-PE-30797-XX)
METHOD
Step 1. Using low tack tape or Groovi stickers, attach clear parchment to the Nested Scallops Squares Extension plate and wipe a dry tumble dryer sheet across the surface to make embossing easier. Use the Groovi 1 tool to emboss the double-outlines and scallops on the 5th largest square from the top to form a frame.
Top Tip: Use the Groovi Guard to keep your parchment flat whilst embossing the lines.
Step 2. Leave the plate where it is, release your parchment, and move it up the plate slightly so you can emboss a second row of scallops – but this time only 6 scallops at each end of a row.

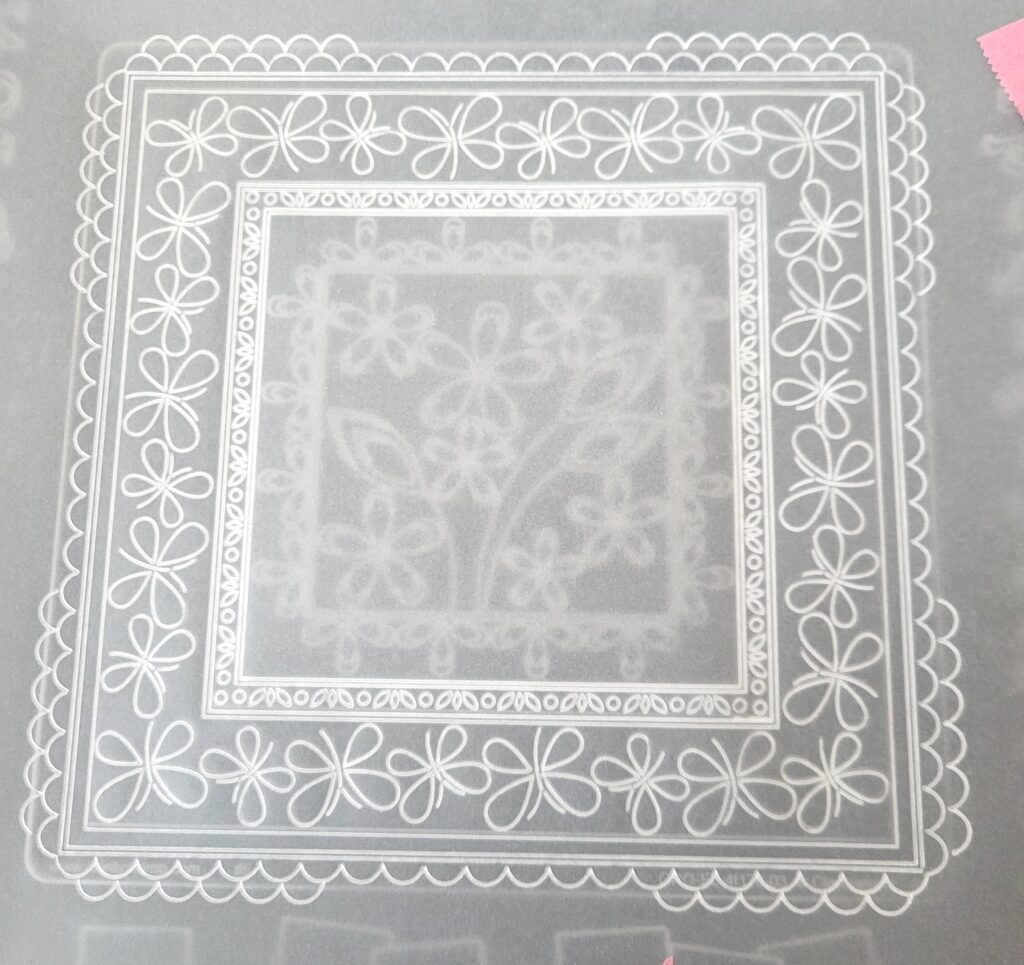
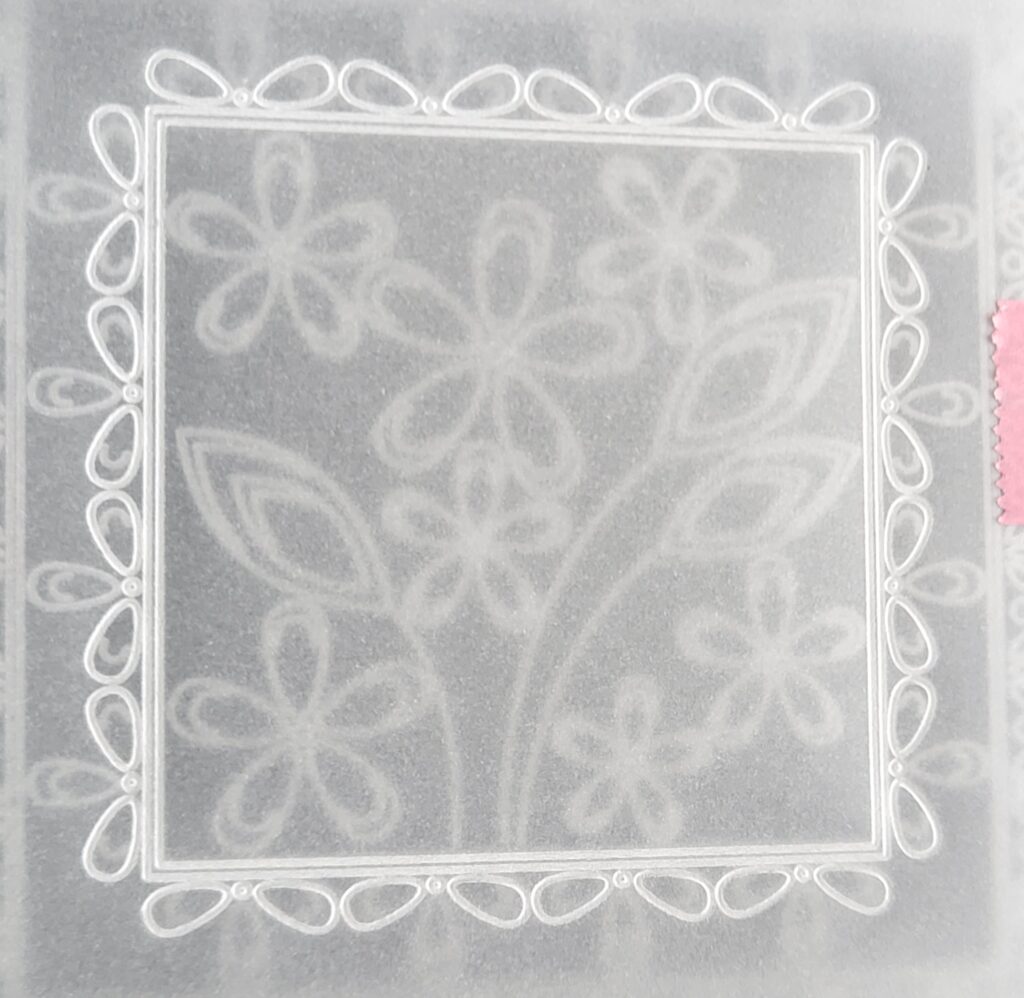
Step 3. Using Tina’s Butterfly plate, carefully centralise your embossed scallops frame over the entire design on the plate. Emboss all of the butterflies and the double-outline frame that has the tiny leaves design inside it. Put your parchment to one side for later.
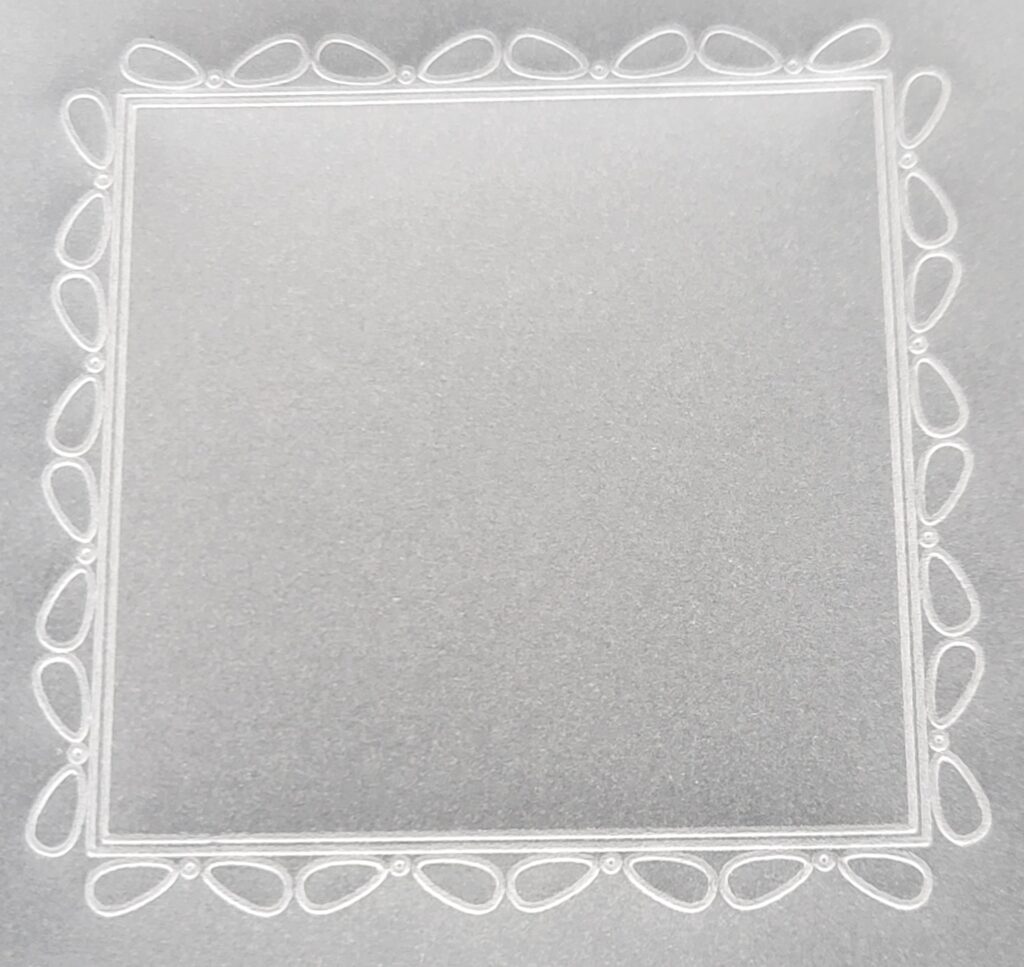
Step 4. Leave the plate where it is and attach a piece of spare clear parchment over the smallest inner border design. Emboss the inner double-outline frame and only those outer leaves as shown on the picture. This will be the greetings panel.
This is what it should look like. Put to one side for later.
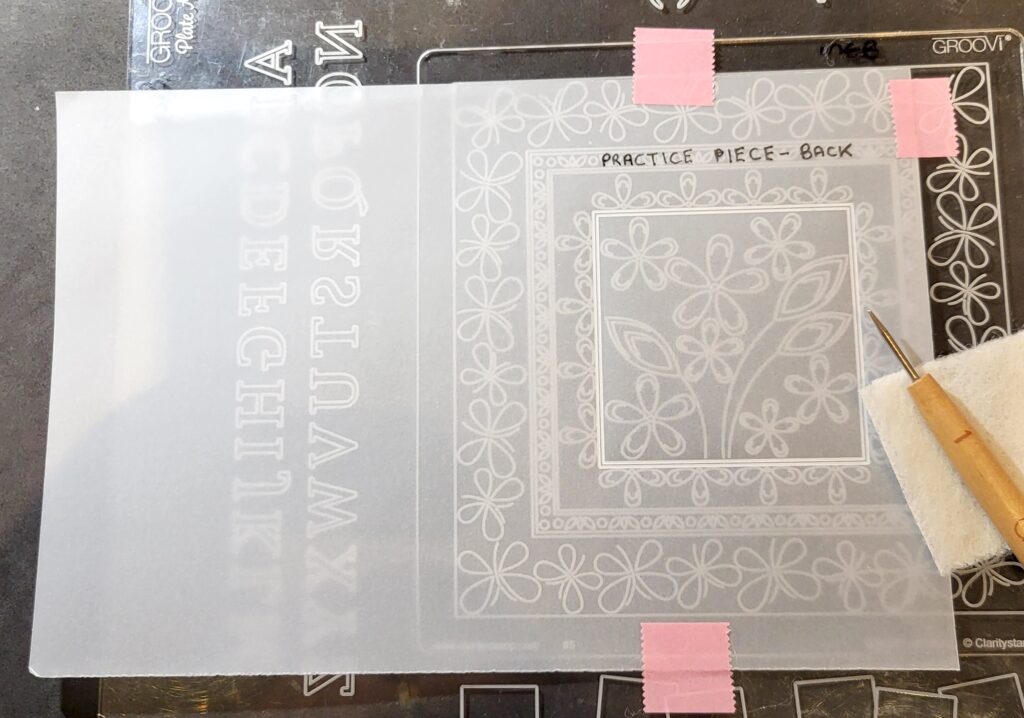
Step 5. Now it’s time for you to start the process of creating the word chains in the greetings panel which involves quite a few steps and, assuming you haven’t done this before, you need to prepare a Practice Piece to work on first of all.
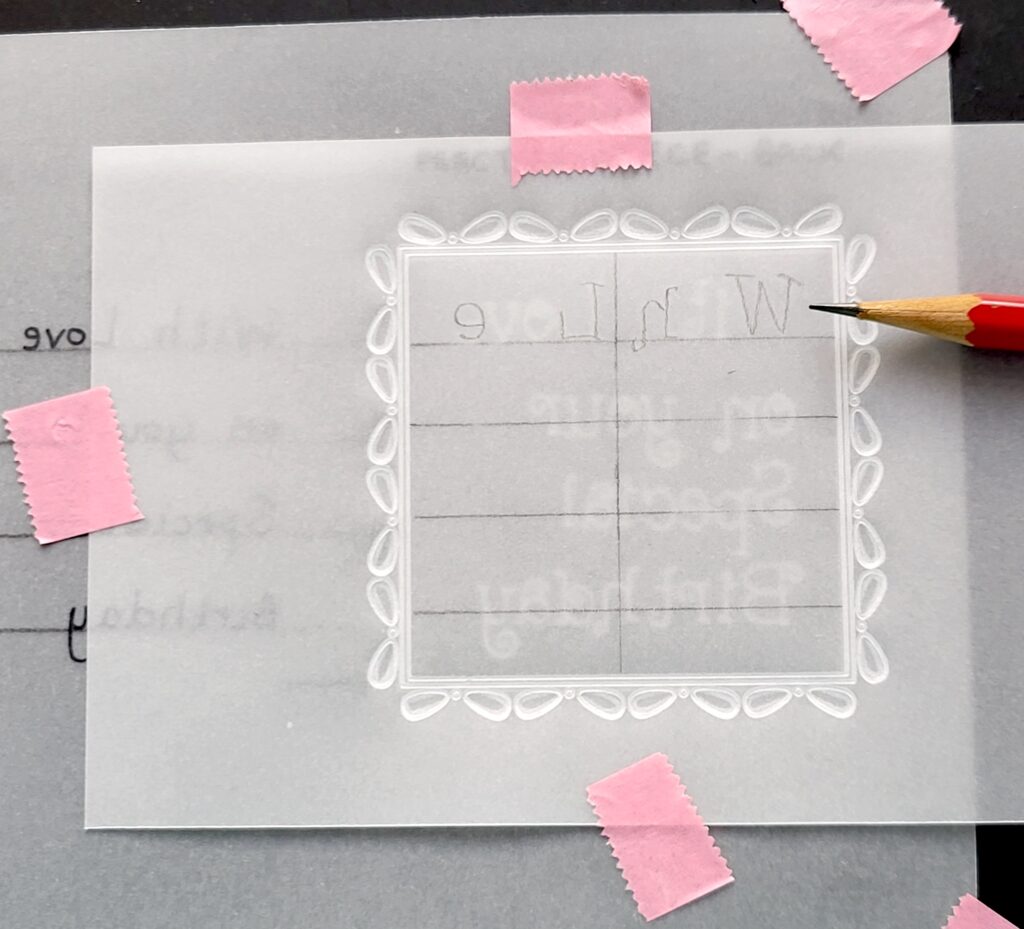
To do this, attach a spare piece of A5 parchment paper horizontally over Tina’s Butterfly plate as shown on the picture. On the right-hand side of your parchment, emboss the smallest inner double-outline frame only, then at the top of the frame write the words Practice Piece – Back, using either a 0.5 Micron Pen or an ordinary pencil.
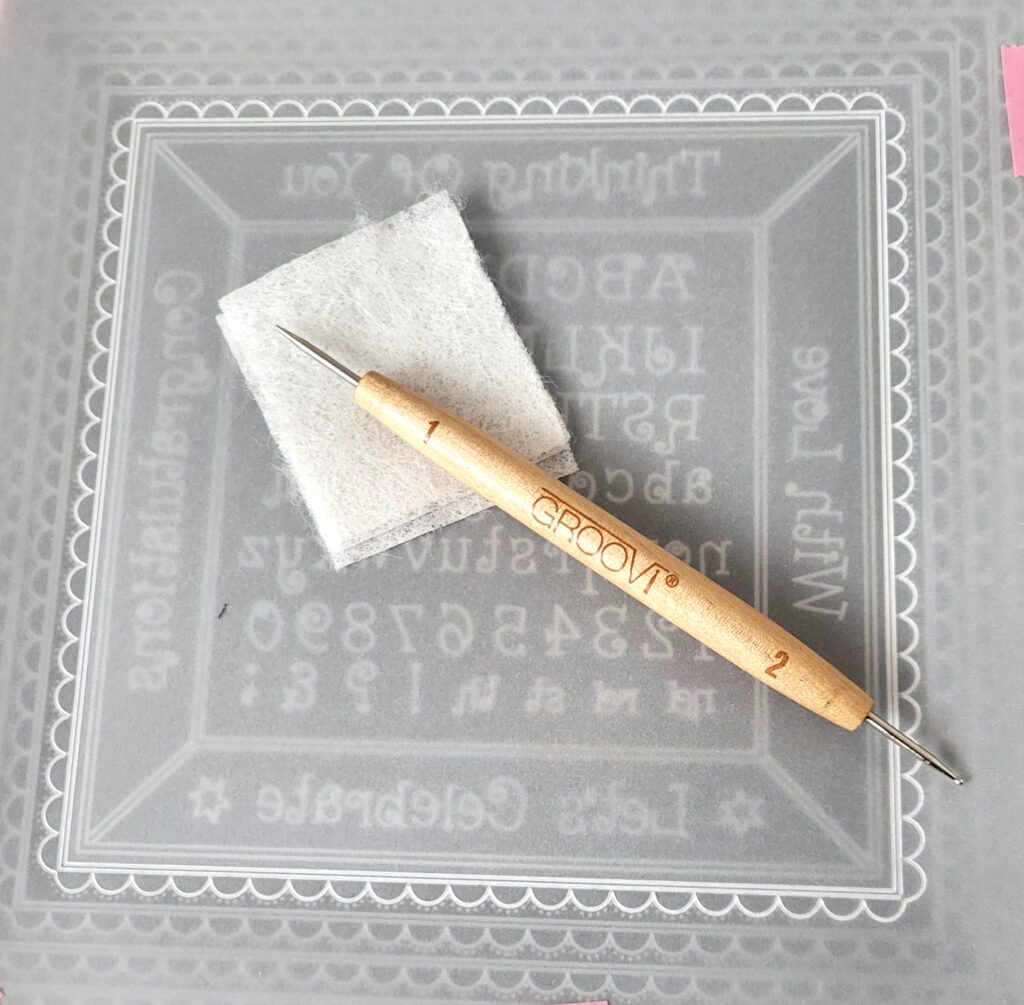
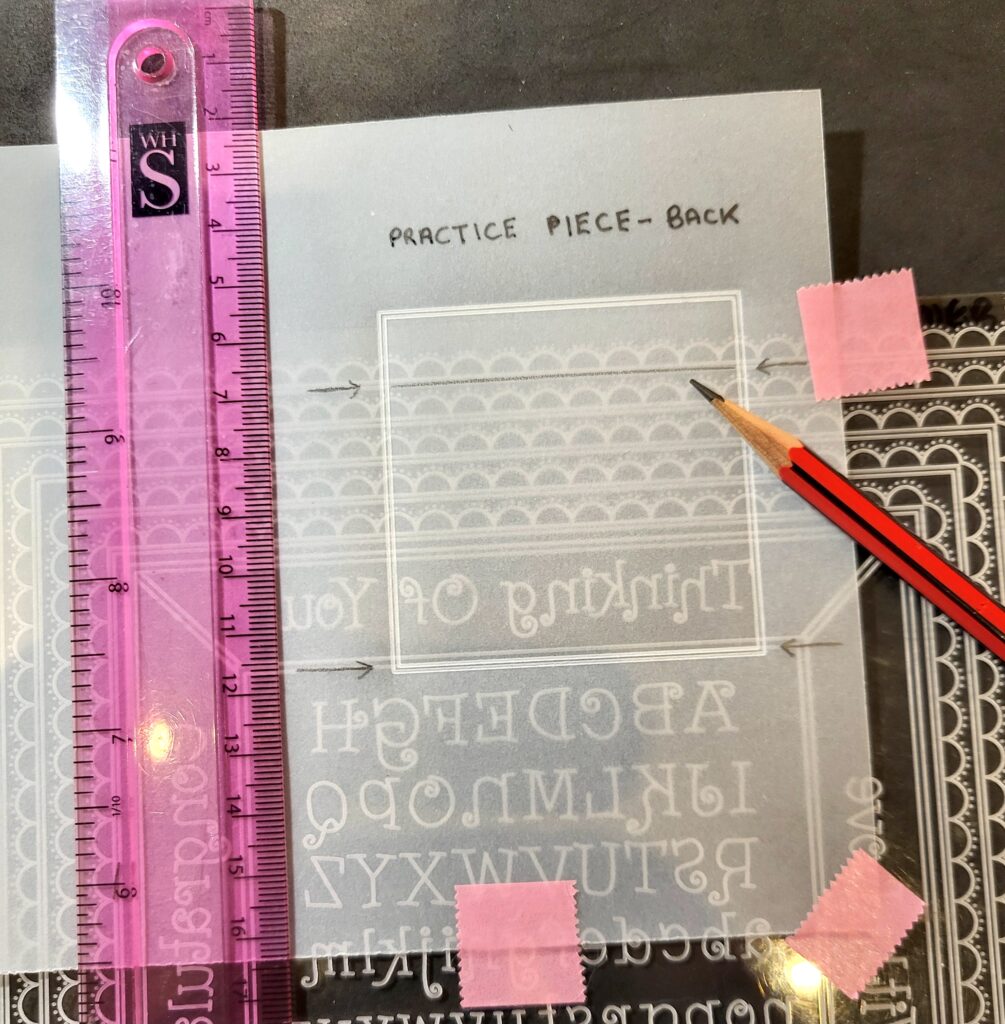
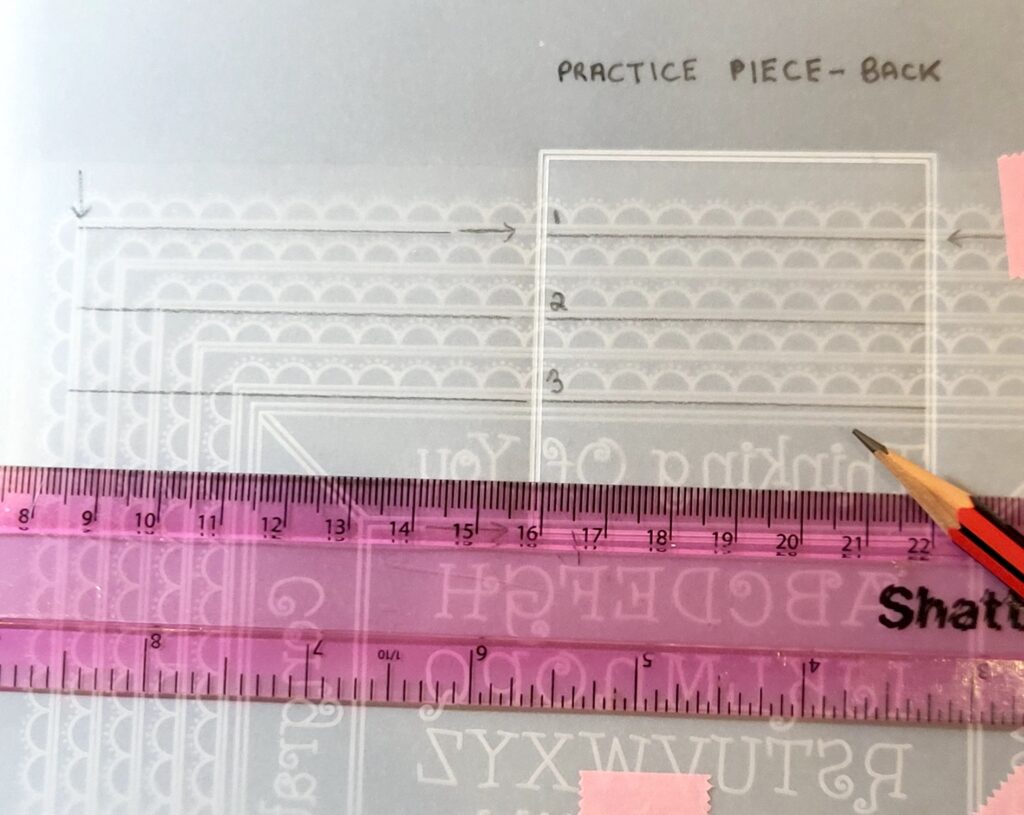
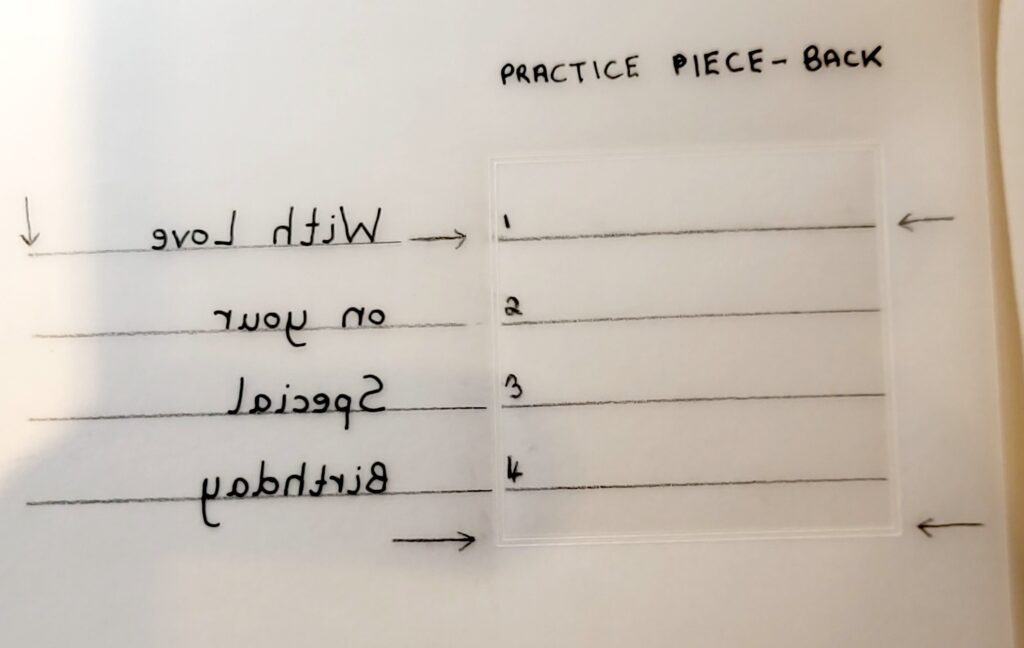
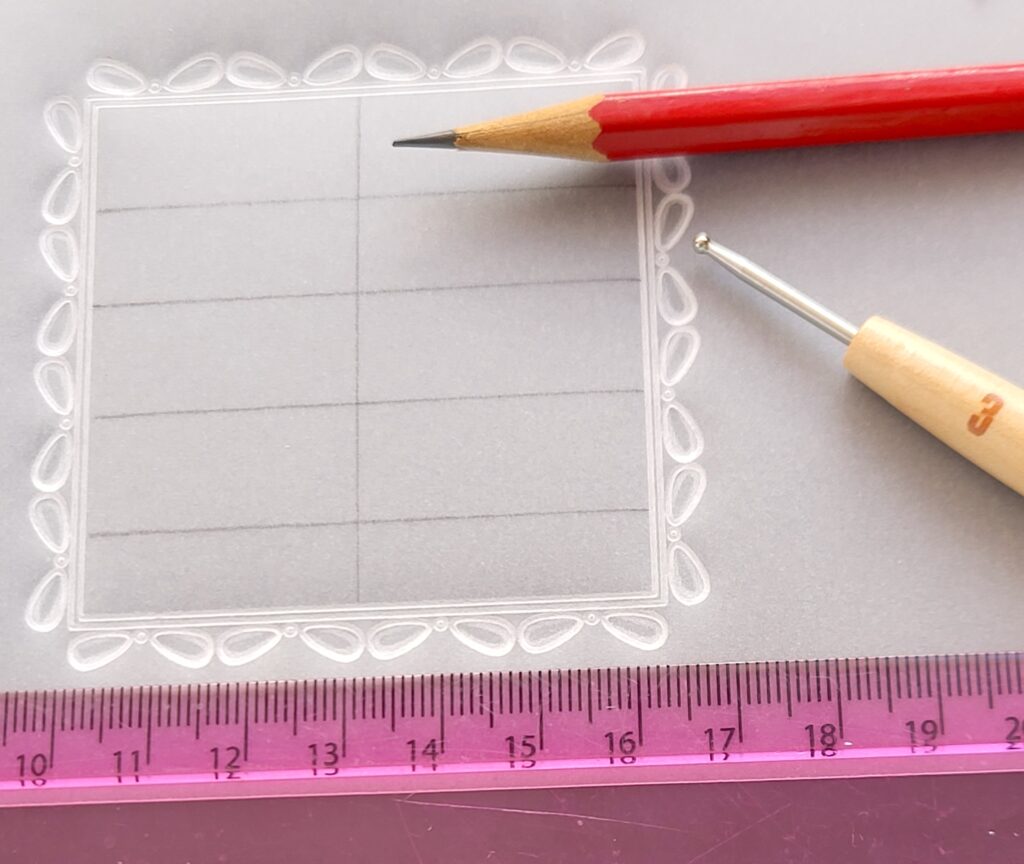
Step 6. Take a look at the next picture as it shows you how your Practice Piece should be aligned over the top section of the Nested Scallops Squares Extension Plate. But before you attach it, make sure that the bottom double-outline on your parchment sits just below the double line on the plate under the words Thinking Of – you’ll see I’ve marked arrows at each side to indicate where the alignment should be. I’ve also put arrows at the top and these show you where to draw a horizontal line the full width inside the frame with a ruler and a sharpened ordinary pencil.
Step 7. Leave your parchment where it is and draw two more horizontal lines in the frame, noting that you’ll miss a row on the plate each time. Use your ordinary pencil to mark lines 1, 2 and 3 as shown. These lines set the spacing for the letters and/or numbers you’ll be using for this particular plate.
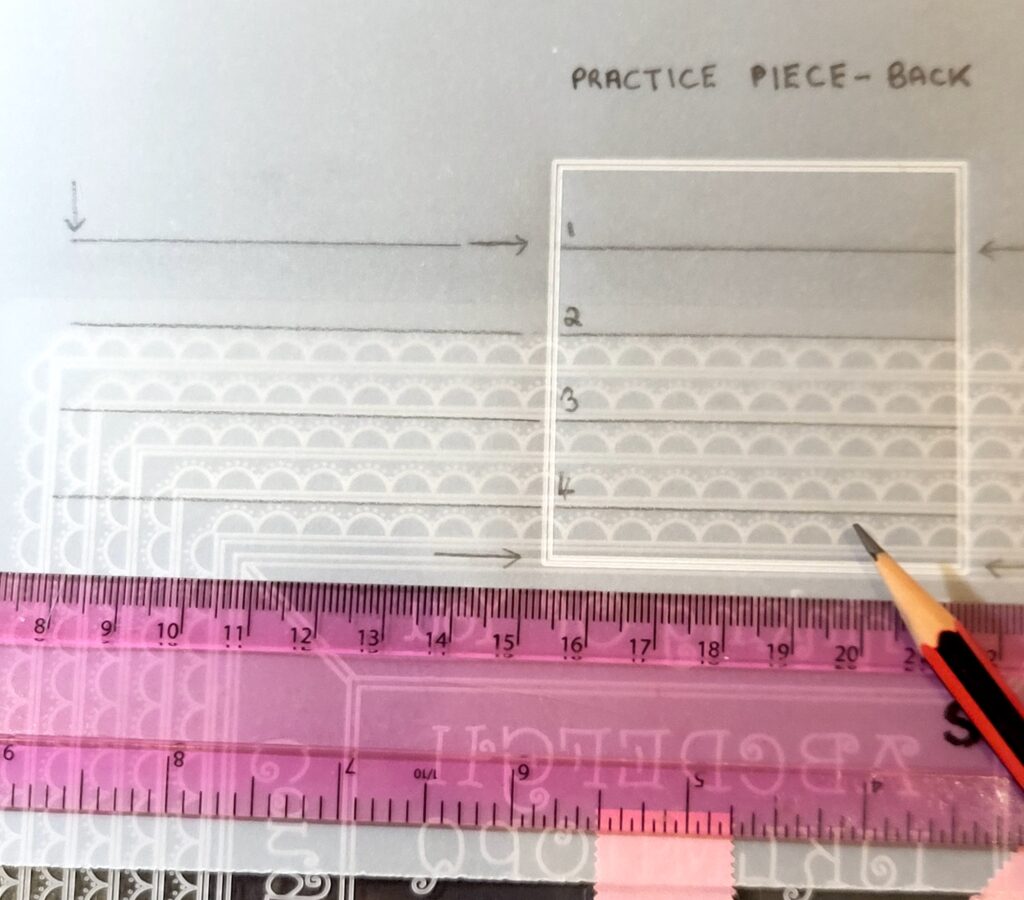
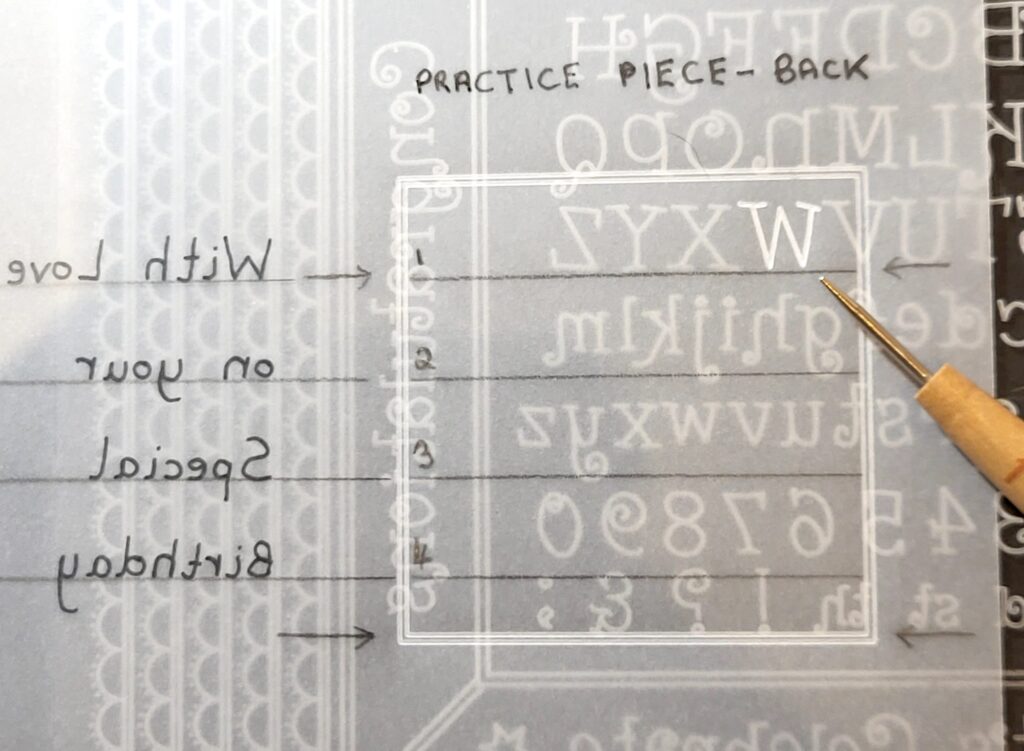
Step 8. You now need to draw in a fourth line, and to do this simply move your parchment upwards slightly so that your Line 3 sits on the second line down on the plate. On the picture you’ll see where the bottom double-outline of your frame should sit, as indicated by the arrows at either side.
When you are happy with the alignment, draw in your fourth line and mark it 4, but before you remove the parchment from the plate draw in another set of 4 lines to the left of the frame, to correspond with the lines you’ve just drawn. You’ll see I’ve marked a downward arrow at the far left which indicates how far to the left you should draw these extra lines.
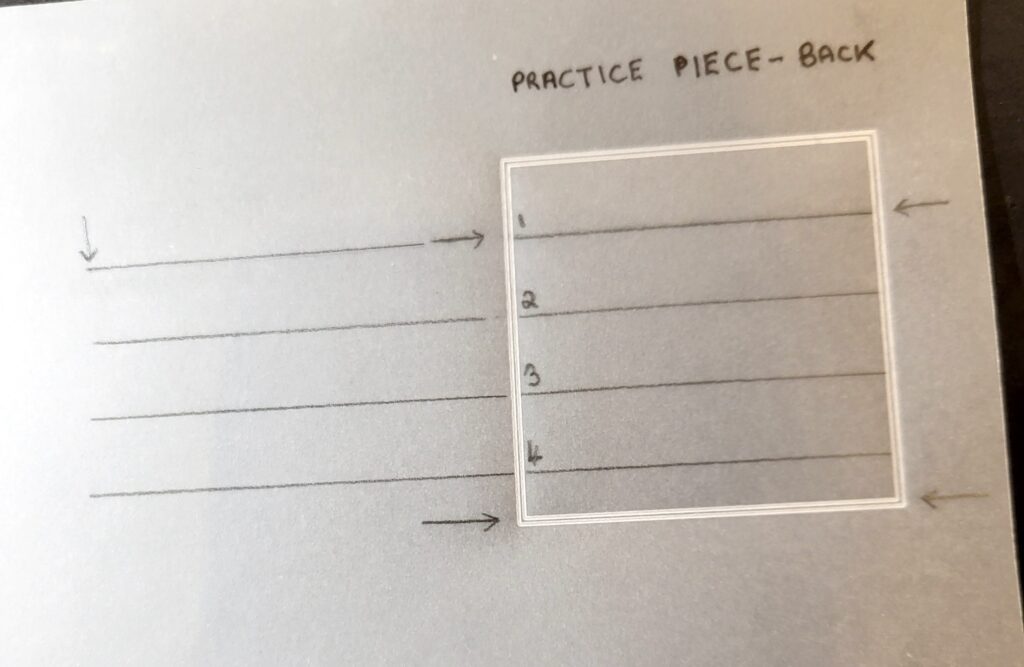
Once removed from the plate your Practice Piece should look like this…
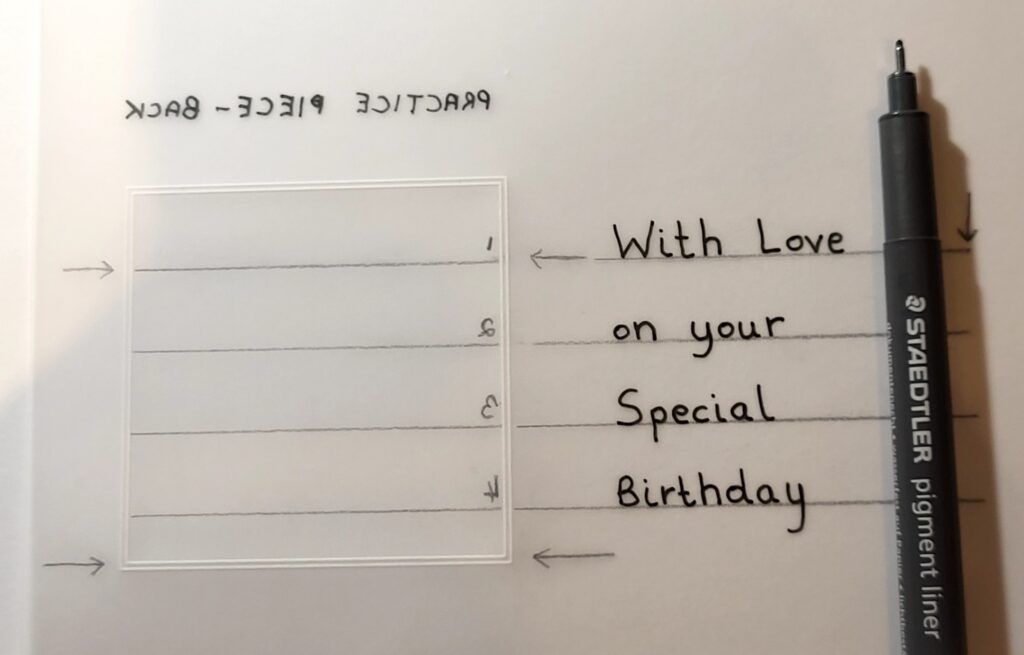
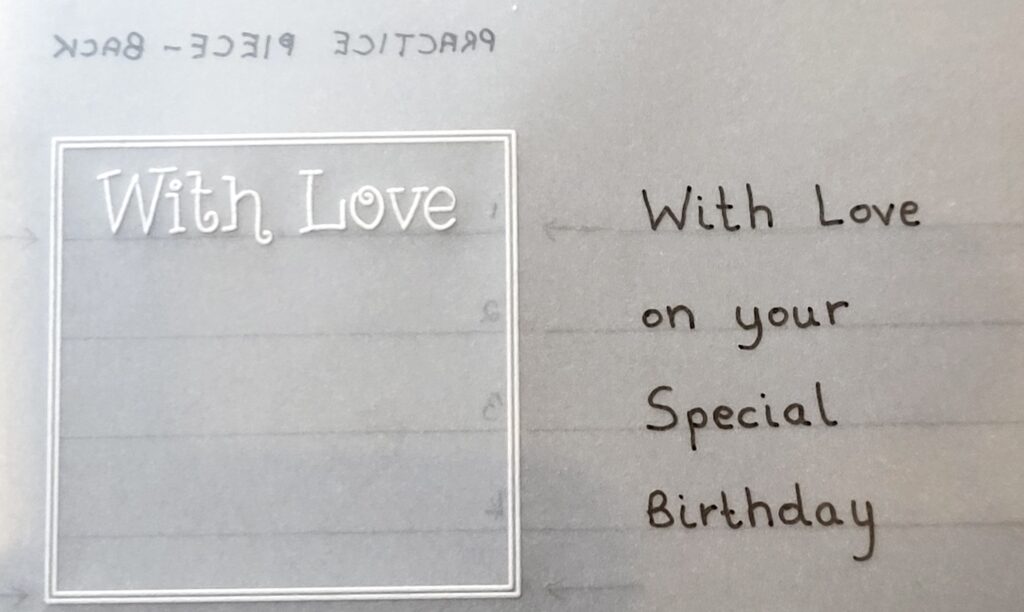
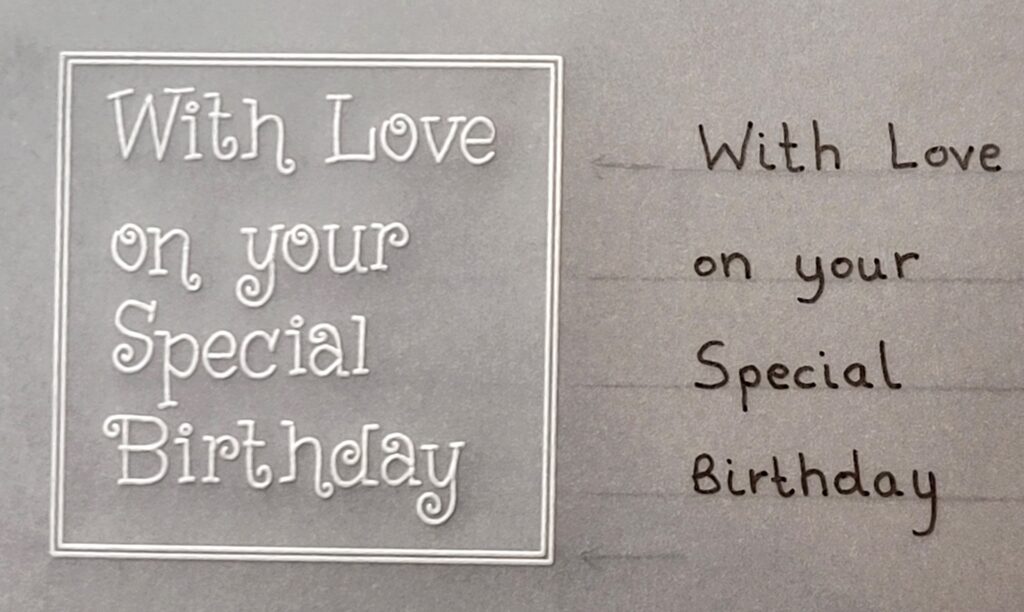
Step 9. Turn your Practice Piece over so that the front is facing upwards, then lay it on a sheet of A4 white paper or card so you can see your pencil lines more clearly. Using a 0.5 Black Micron Pen, write the greeting on the right-hand side of the parchment as shown in the picture, and for this practice we’ll be using the same words I’ve used.
TOP TIP: Note that I haven’t joined up the letters but have instead left a tiny gap between them, and that I’ve also left a slightly bigger gap between each word. This is because you are going to be reading the letters and words backwards on the back of your parchment later on, therefore they all need to be clear and identifiable for you to read through the parchment.
On Line 1 write the words With Love.
On Line 2 write the words on your in lowercase.
On Line 3 write Special.
On Line 4 write Birthday.
You’ll see I’ve lined up the first word on each line directly under each other for now, but the words will be centered on the actual finished piece. This is what it should look like from the front.
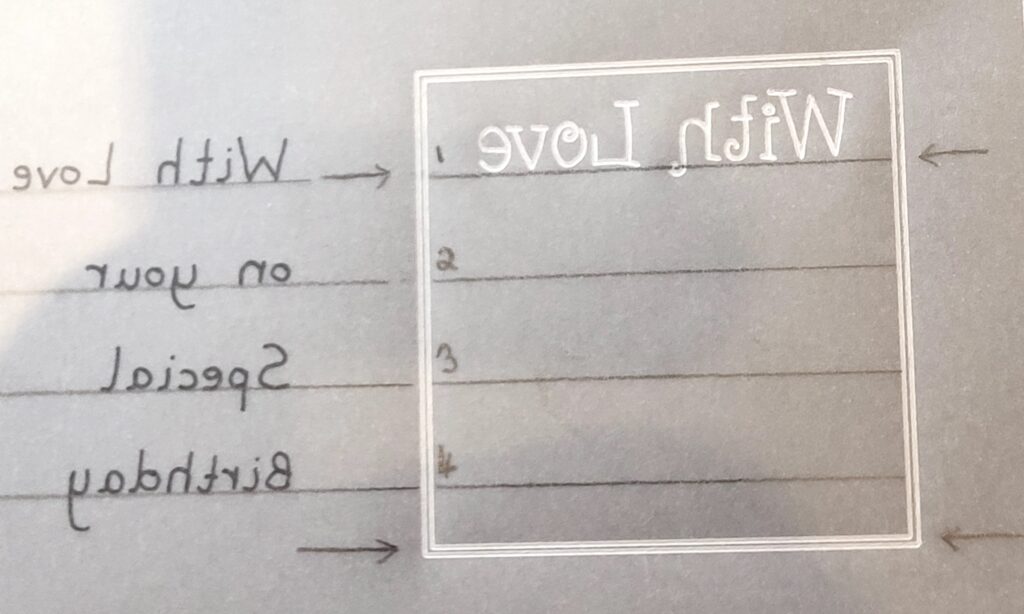
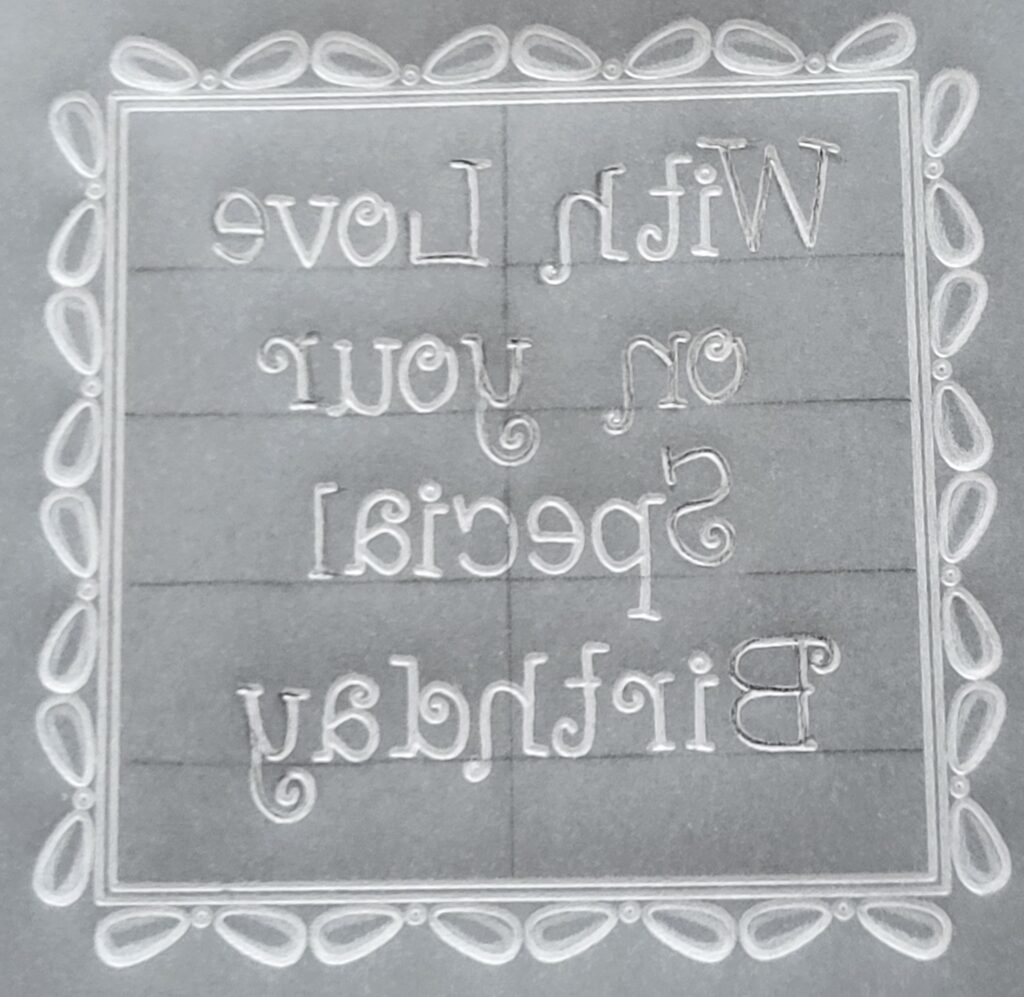
This is what it will look like from the back.
TOP TIP: By handwriting your words first it helps you work out how many words you can fit on a line, how the letters look when written backwards, and when to use uppercase or lowercase letters. It also reminds you of the spelling, and to not mistake lowercase d for b, or q for p, on the plate.
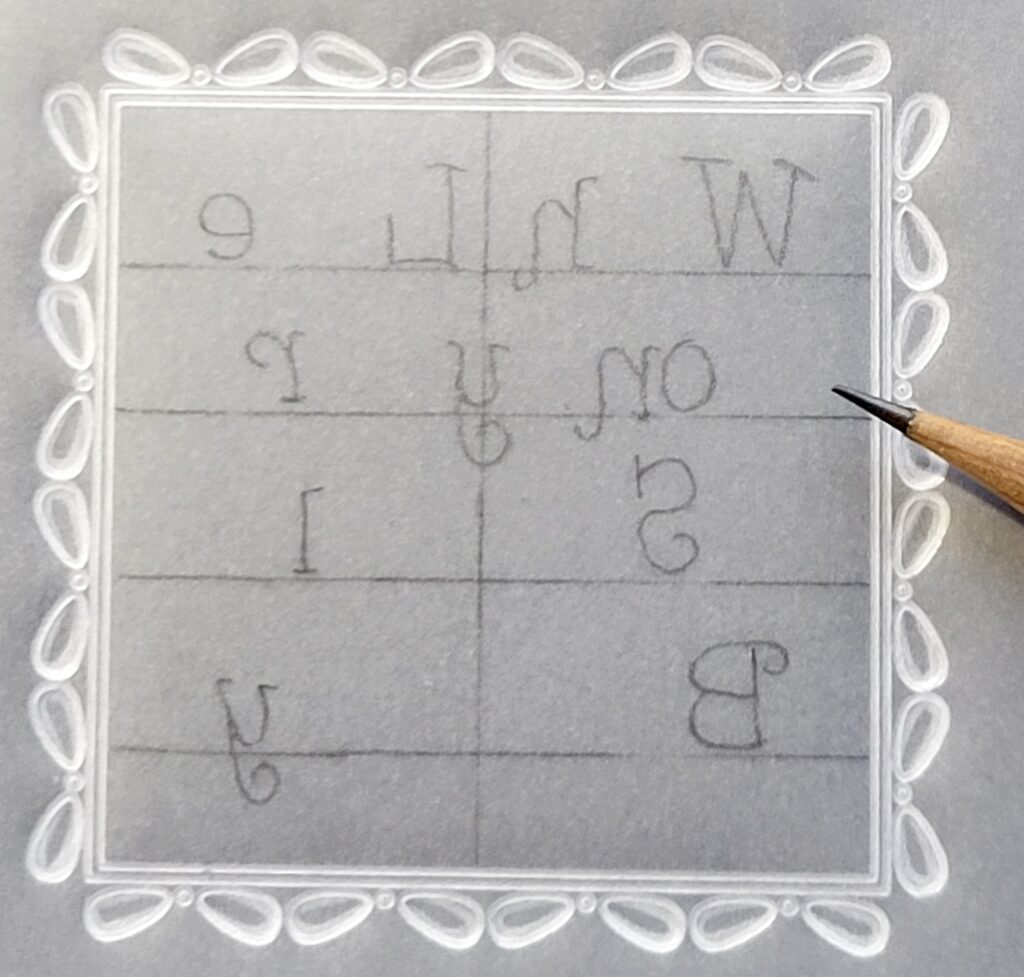
Step 10. Wipe a dry tumble dryer sheet across the back of your practice piece. Using the Nested Scallops Squares Extension plate you’ll now be inserting each letter onto the pencil lines in your frame, exactly as you’ve written them on the left, working from inside the frame and always starting from the right-hand side as you’ll be inserting the letters backwards from right to left.
TOP TIPS:
(a) Carefully work out the spacing in between each letter and word.
(b) Be mindful to pay attention to where the tall letters fit in between the lines, such as lowercase b, d, h, k, l and t, as well as any fancy uppercase (capital) letters.
(c) Allow enough space in between the lines for the dangling lowercase letters such as g, j, p, q and y.
It’s important to be aware of this as tall letters, capital letters and dangling letters can sometimes impact onto other letters either above or below the line you are working on.
The first letter to emboss is uppercase W on Line 1. Try to keep your frame as straight as possible over the plate, and perhaps use a visual aid to help, for instance such as checking that the left side of your frame matches with a vertical line down the left side of the plate, or the bottom of your frame matches a straight line near or underneath it.
Step 11. Following the same rules as above – as well as referring to your written wording down the left-hand side – continue to emboss letters to make the words With Love onto Line 1.
This is how it should look on the front.
Step 12. Continue to emboss letters to form words onto Lines 2, 3 and 4. When you’ve finished, use a soft eraser to very carefully rub out all of the pencil lines. This is how it should look from the front.
TOP TIP: Practice is the key when it comes to learning how to write your letters and words backwards on parchment paper. If something doesn’t look quite right then you can practice it again, or be mindful to change it on your actual piece. But beware when using coloured parchment as you won’t be able to make any pencil marks on the darker (shiny) side as this is where the colour has been applied and any erasing of pencil lines would erase the colour from the parchment as well. Instead, apply any pencil to the front of the coloured parchment and carefully erase with a soft eraser as you would if it was on the back of clear parchment.
Step 13. Now it’s time to apply your practice to the pre-prepared inner double-outline frame you created at Step 4. Wipe the back of your parchment with a dry tumble dryer sheet. Use Groovi 3 embossing tool to emboss around the inside of the leaves along the outside of the frame, leaving a central unembossed area to which you can apply some pencil colour if desired. (Alternatively you can simply fill in the entire area with embossing, or don’t emboss it at all and just fill in with colour). Still working on the back, use a sharp ordinary pencil and a ruler to trace over the horizontal lines 1-5 as prepared on your practice piece at Step 8, then draw a vertical line down the middle of the frame to help you centralise your words.
Step 14. For the next few steps, temporarily attach your practice piece face down onto a firm surface, such as the hard side of your black dual purpose mat. Lay your inner frame face down over the practice piece frame so that they fit together over each other, then fasten everything down onto each other as well as to the mat so nothing moves. Using the vertical line as a guide you’ll see that the words With Love on the top line are more or less centralised horizontally on the line – in that the gap to the right of the W is the same width as the gap to the left of the o. Working on the top pencil line use a sharp ordinary pencil to trace over the first and last letter of each word showing through on the practice piece underneath, ie W and h, L and e.
Step 15. Release your top parchment a little and move it slightly to the right so the words “on your” on the second line are centralised underneath the words With Love above it, then trace over the first and last letter of each word with pencil as you did before.

Step 16. Continue to slightly move the parchment over the practice piece so you can centralise and trace with pencil the first and last letters of the words on Lines 4 and 5. When you’ve finished this is what it should look like from the back.
Step 17. Still working on the back and using the pencil lettering as a guide, use Groovi 1 and the alphabet on the Nested Scallops Squares Extension plate to emboss your wording, starting with the first and last letters then filling in the rest of the letters in between. Start on Line 1 being careful to ensure each letter is as level and as properly aligned on the straight pencil line as you can. This is what it should look like on the back.
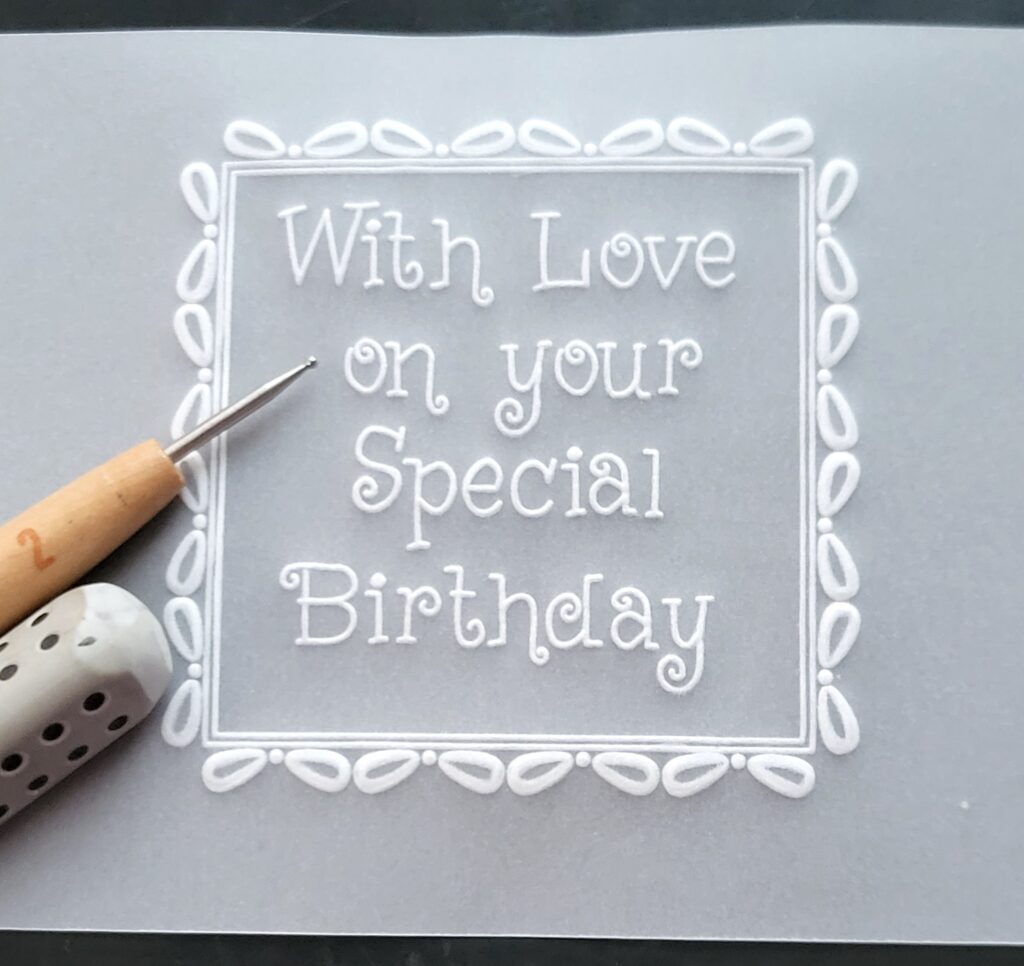
This is what it should look like on the front.

Step 18. Use a soft eraser to very carefully erase all the pencil from the back of your parchment. Use Groovi 2 to re-emboss the leaves around the outer edge of the frame so they look whiter, then fill in the dot above the ”i” in Birthday. Put to one side for later.
Step 19. Working on the back of your butterfly parchment, use Pergamano No 4.5 and No 3 to emboss the butterflies, then Groovi 2 and 3 to emboss the leaves and dots within the inner panel.
On the back of the separate greetings panel, colour the centres of the outer leaves with 153 Cobalt Blue then blend with a blending nib, Dorso Oil and blending sponge.
Use your 2-Needle Bold piercing tool and parchment scissors or snips to pierce then snip around the outside edges of both your main parchment and the greetings panel.
Cut a piece of coloured background card to your desired size to fit around the main parchment, and a smaller piece to fit around the greetings panel. Secure all the pieces together with Perga Brads to form a Topper.

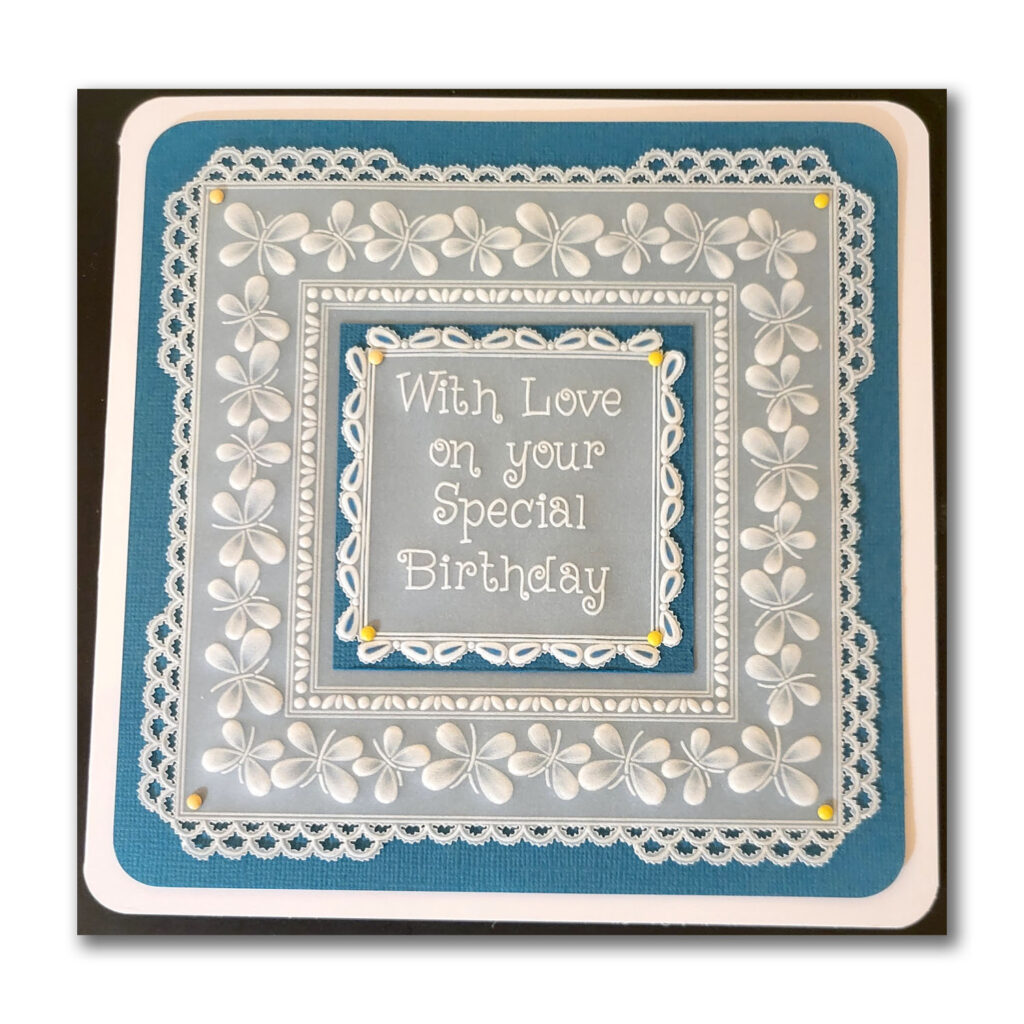
Step 20. Attach the Topper to the front of folded white clarity card 8×8” and this is your finished card…
Such a gorgeous card! And a brilliantly put-together step-by-step project. Many thanks to our super talented Clarity Design Team Member, and friend, Maggie Byford.
Everything that Maggie has used in this particular project can be found in a shopping list, HERE.
We continue to enjoy seeing your versions of these Sunday step-by-step tutorials shared on Facebook. Thank you for joining us each Sunday to learn from these bloggy tutorials.
Now, looking at the week ahead…
Sunday 10th March:
Create and Craft – 10am, 2pm and 3pm – 5pm
Monday 11th March:
In the SHAC with Barbara – 10am Live on Facebook & YouTube
Tuesday 12th March:
NO GROOVI TUESDAY
One Day Special with Paul on Create & Craft – 6pm & 9pm
Wednesday 13th March:
One Day Special with Paul on Create & Craft – 10am & 2pm
Thursday 14th March:
Craft Along with Barbara – 7pm Live on Facebook & YouTube
Saturday 16th March:
Crafting with Clarity with Deborah Wheeler on Create & Craft – 1pm & 4pm
See you there!
Travel gently, friends.
Lotsa love, Grace & Maggie xoxo
Clarity – The Home of Art, Craft, and Well-Being.
Wonderfully clear instructions- thank you,Maggie!
Thank you, Maggie for great step by step instructions.
Thank you for the instructions/tips on how to achieve the written wording, very helpful xxx
Hi Grace & Maggie, thank you for some useful hints & tips on how to do freestyle sentiments & getting it all to sit central. Those few pencil lines make so much difference & only take a few extra seconds to put in place.
Another busy week at Clarity Towers but there is nothing today, we had that fun last week !!
Safe travels Grace back to the UK & have a fabulous week with your family here.
Have a good week everyone xx
Hi Maggie,
A very nice card with an excellent step by step to do lettering on parchment.
Thank you.
Hi Grace and Maggie, Lovely project, love the double scallop border bit especially. I’ve just been doing words around the outside edge of a circle – that’s a bit thought provoking ! I had to write it out first and still went a bit wonky. Thanks for the demo. Have a safe trip to the UK Grace and hope to see you in the Shac xx
Thanks Maggie, I have struggled with this, thank you again for the clear instructions looking forward to putting this into practice. Xx