
Clarity Matters Blog Tutorial: How To Use Oxide Ink To Colour Parchment And Use Stencils
Hello hello! Grace here.
I hope this finds you enjoying your Sunday.
My talented friend and valued Clarity Craft Design Team Member, Jane Telford, has put together a step-by-step project for us. Lucky us!
I’ll hand you over to our teacher…

The Layering frame plates designed by Linda are really brilliant but they also have a companion plate with each set which is what I used here. I also wanted to show you how to create your own patterned parchment using stencils and Distress Oxide ink pads.
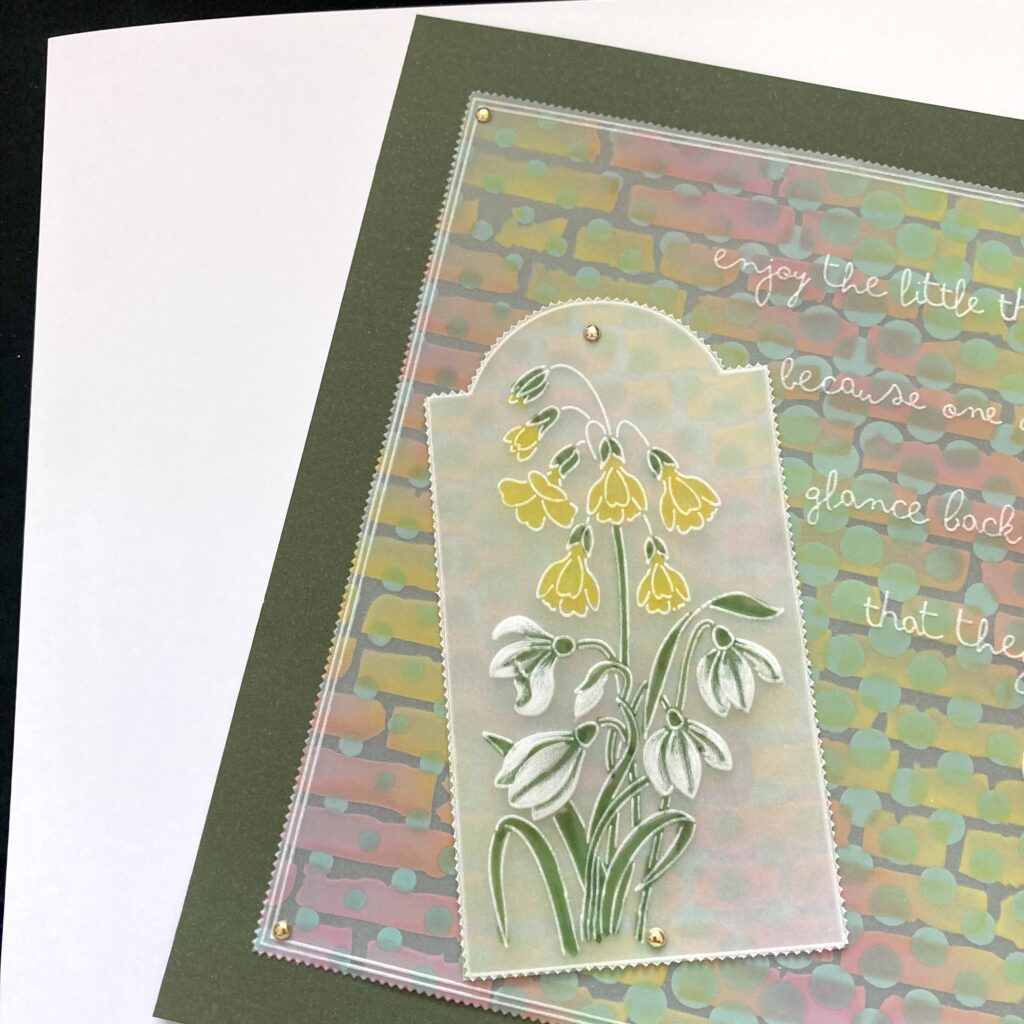
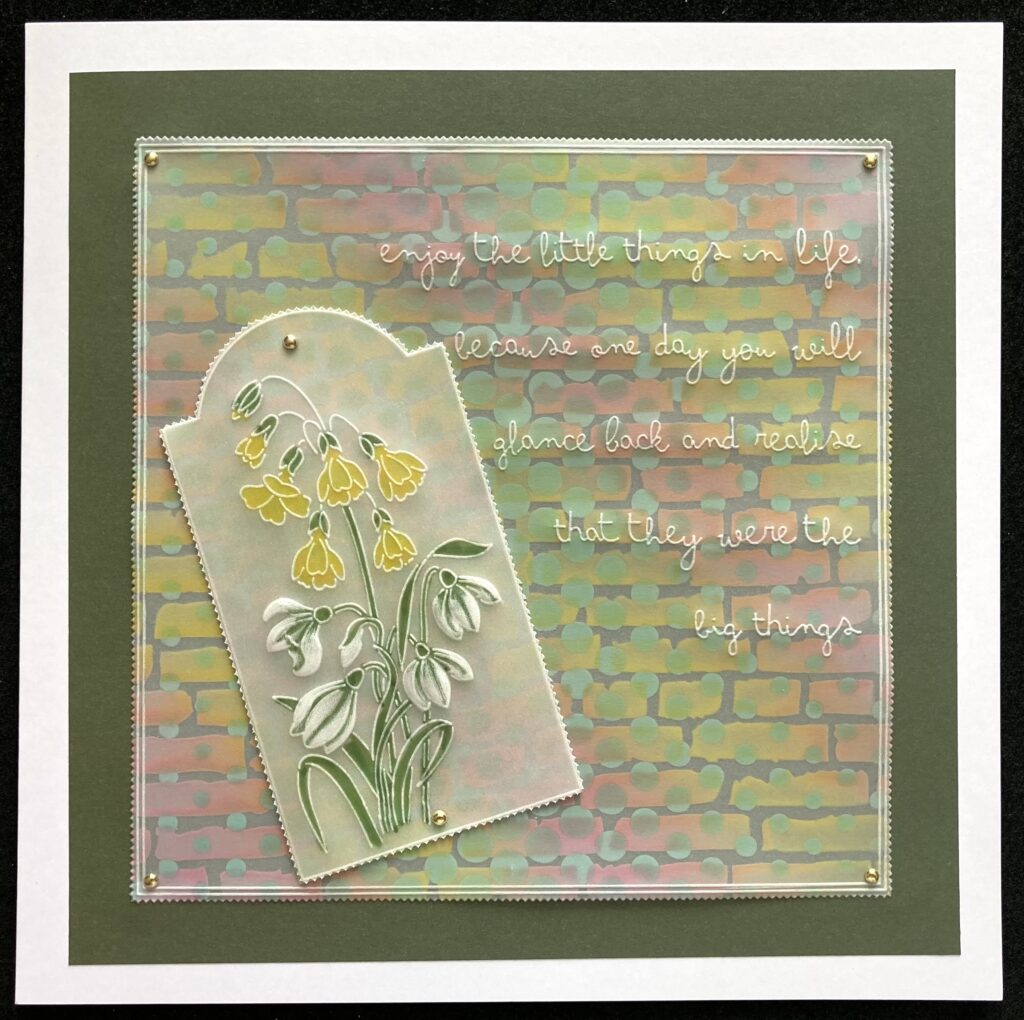
This is where we are headed…

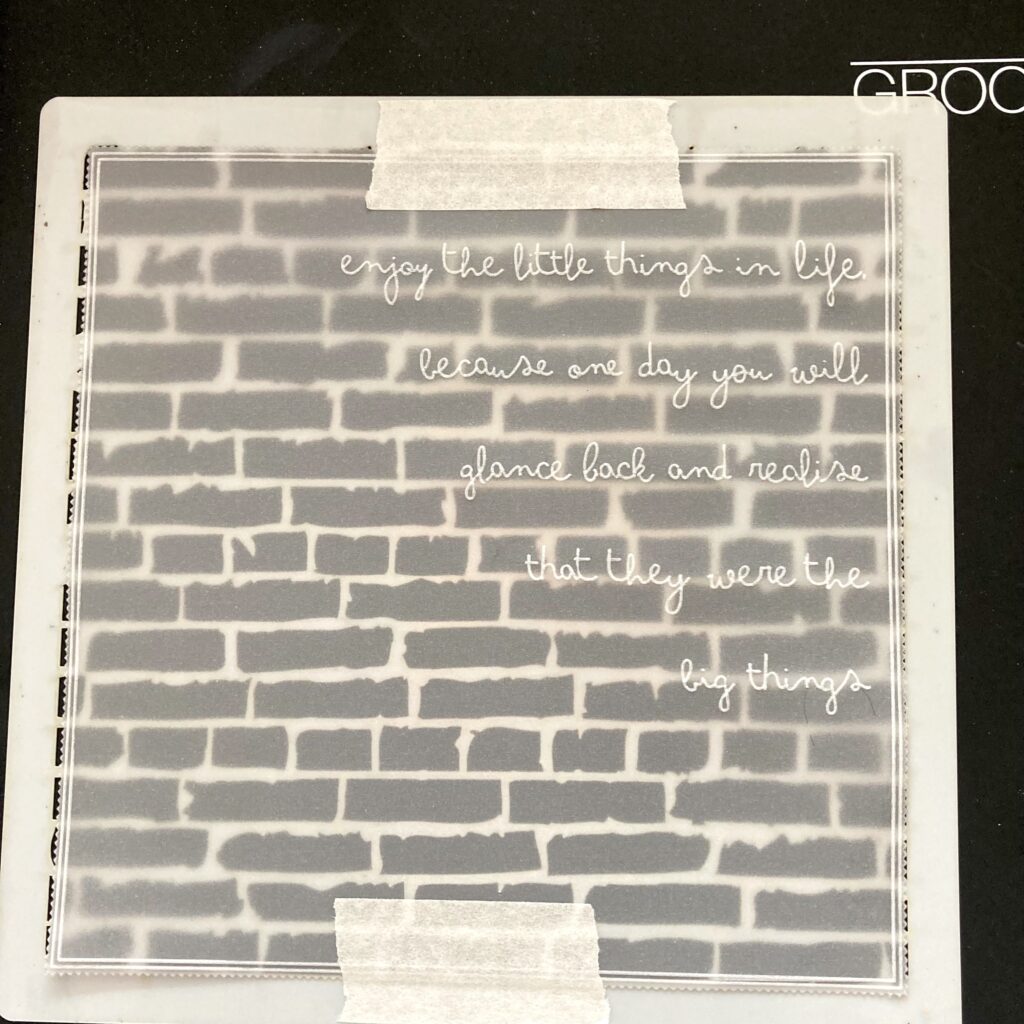
Linda’s Enjoy the Little Things Companion A5 Sq Groovi Plate (GRO-WO-42139-03)
Nested Tags A5 Groovi Plate (GRO-PA-40654-04)
Dotty Wave 7″ X 7″ Stencil (STE-PA-00003-77)
Brick Wall 7″ X 7″ Stencil (STE-PA-00010-77)
Distress Oxide Ink Pad – Kitsch Flamingo (INK-AR-50505-XX)
Distress Oxide Ink Pad – Scattered Straw (INK-DO-50469-XX)
Distress Oxide Ink Pad – Salvaged Patina (INK-AR-50504-XX)
Stencil Brushes (ACC-BR-30006-XX)
Nested Squares Picot Cut Die Set & Groovi Plate (ACC-DI-30698-66)
Groovi Plate Mate for A5 Sq Grids (GRO-CO-41706-08)
Calligraphy Alphabet A5 Groovi Plate Mate (GRO-MA-40517-08)
Black Dual-Purpose Groovi Mat A4 (GRO-AC-40194-A4)
Lightwave (ACC-LP-30352-A4)
Groovi® Embossing Tool 0.8mm – 1.3mm (GRO-AC-40026-XX)
Groovi® Embossing Tool 2.0mm – 2.8mm (GRO-AC-40027-XX)
2-Needle Bold Perforating Tool (PER-TO-70279-XX)
White Eraser Pencil (ACC-PE-30670-XX)
Perga Colours Exclusive (PER-CO-70060-XX)
6 Silver Brads (PER-AC-70275-XX)
Perga Cutter – Curved (PER-TO-70042-XX)
Shenandoah Companion Paper (ACC-CA-31340-88)
8×8 Card Blank (ACC-CA-30620-88)
Scissors (ACC-CT-30223-XX)
Low Tack Tape (ACC-AD-31211-XX)
Method
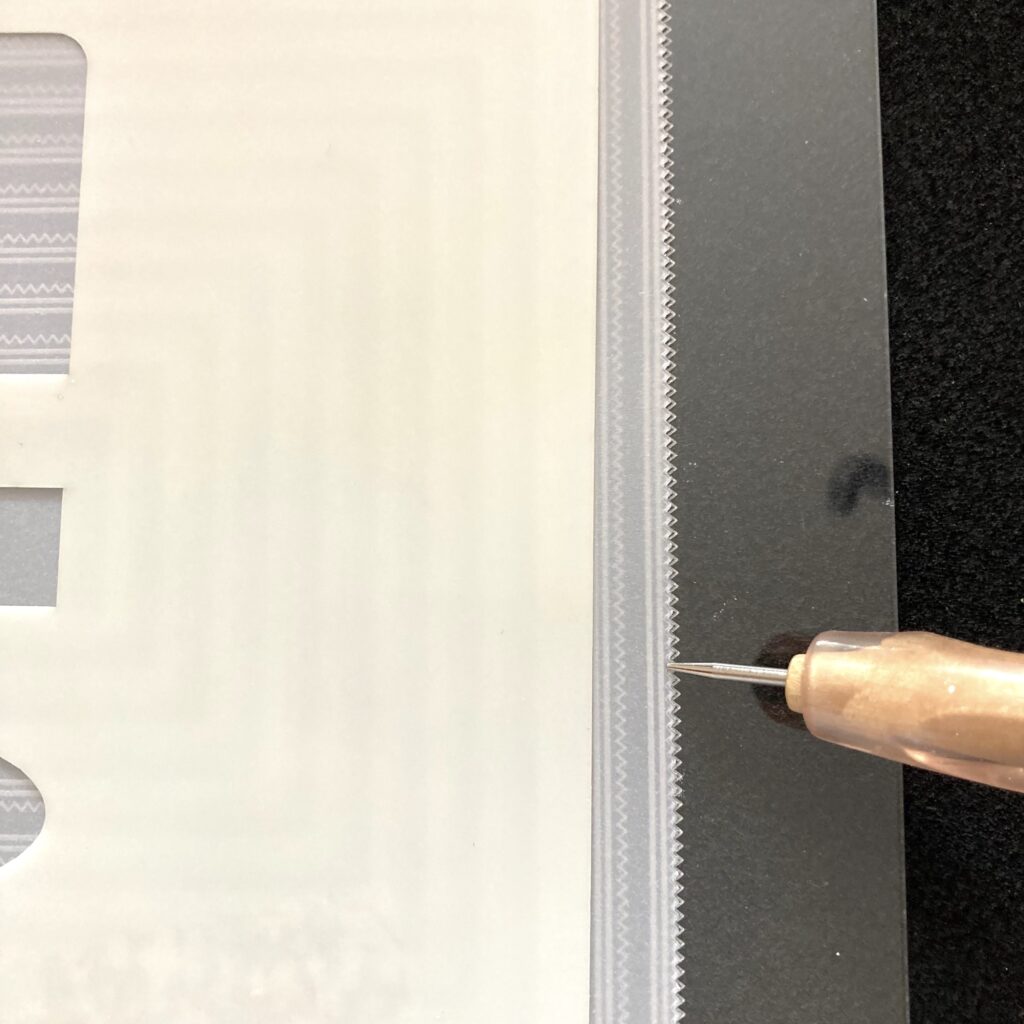
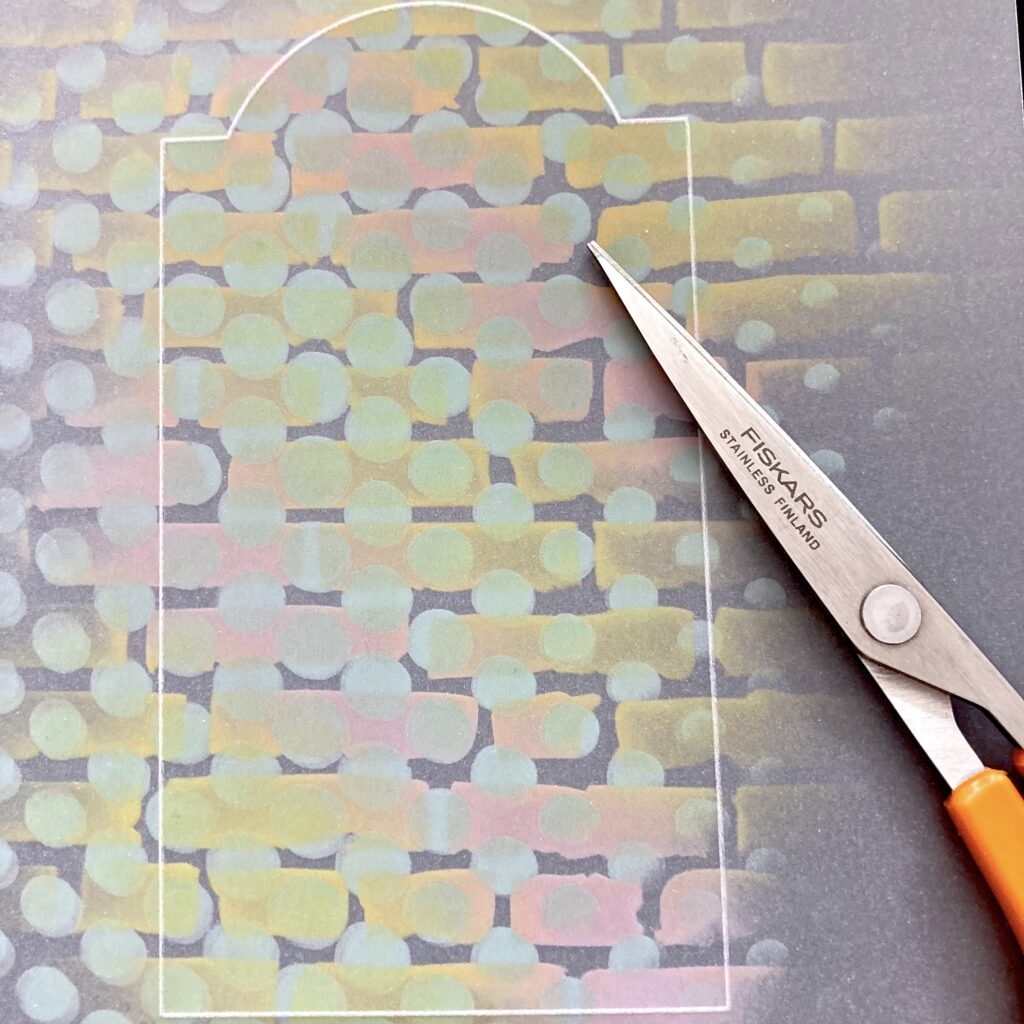
Step 1. Cut a piece of parchment using the largest square picot die. Save the piece that you cut off for later.
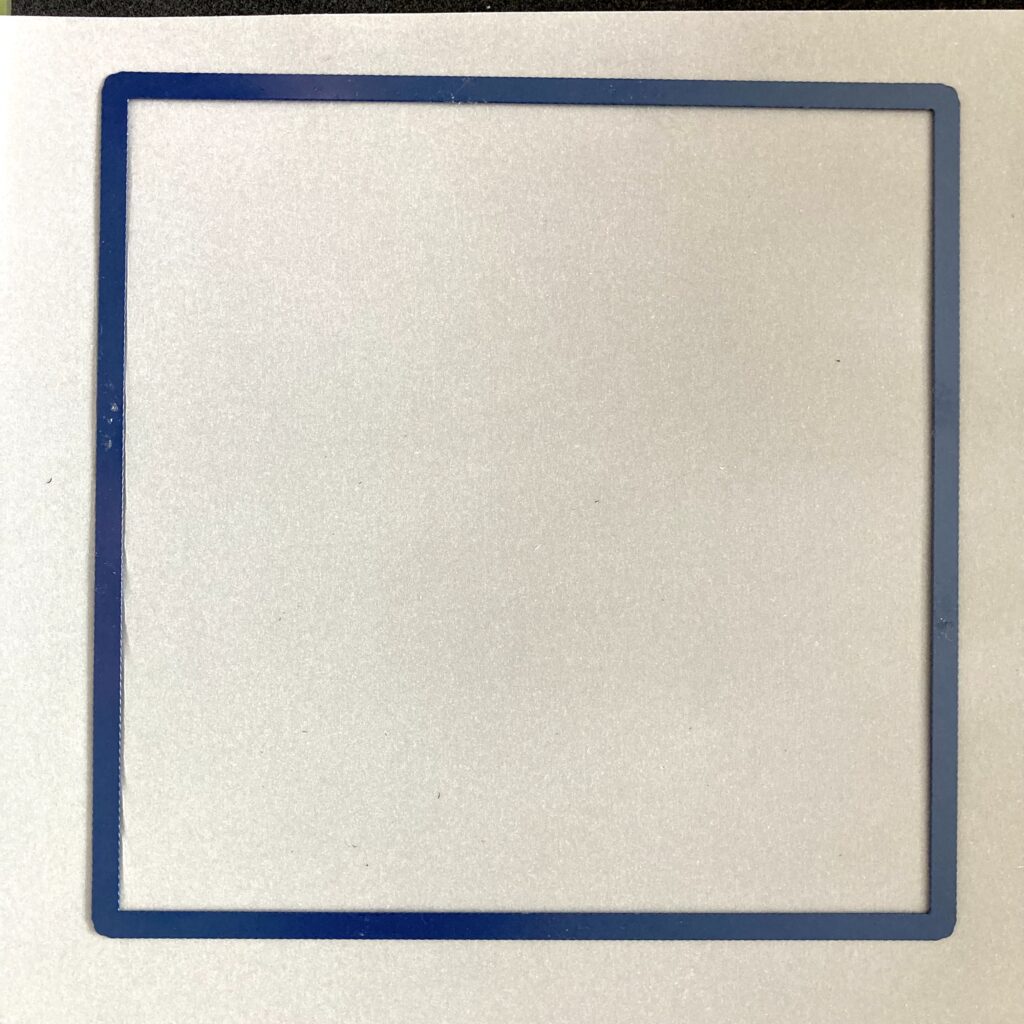
Step 2. Attach to the Picot Square plate and emboss the lines around the very edge.
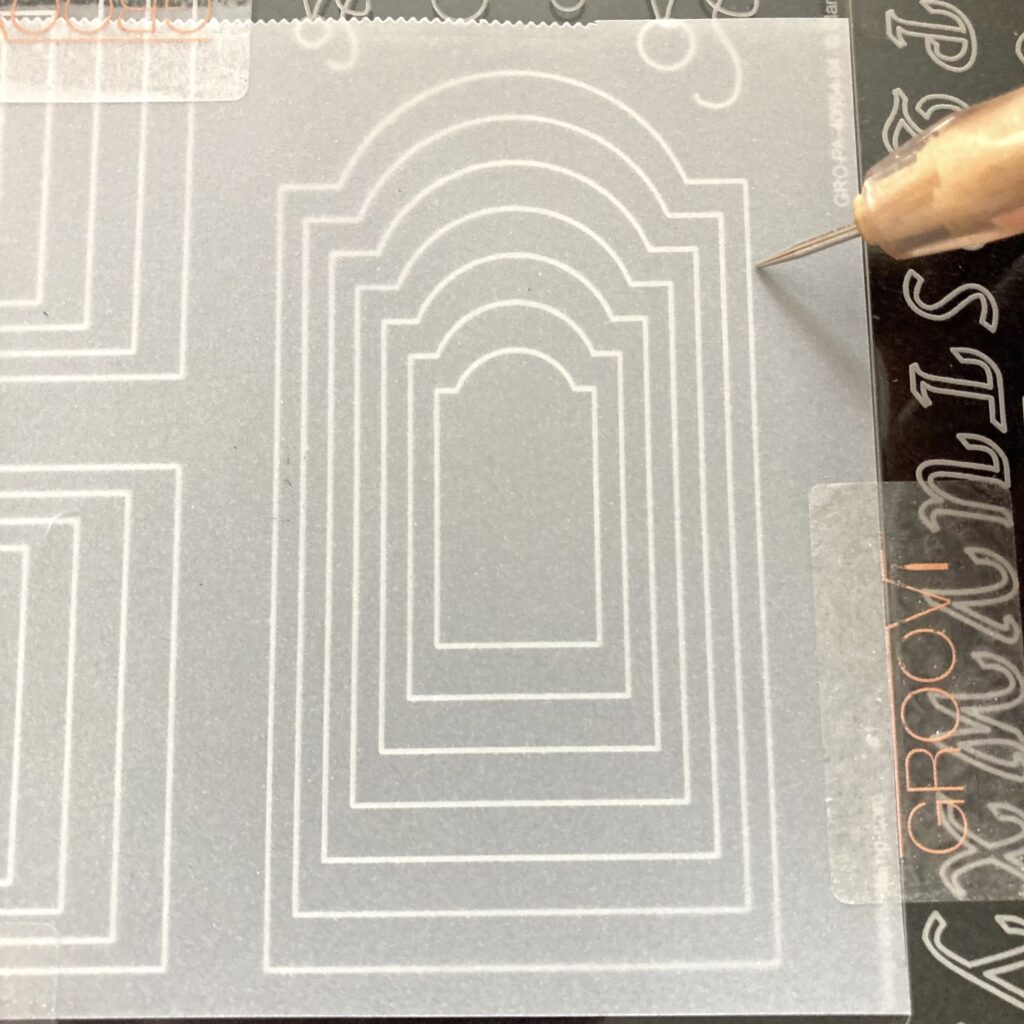
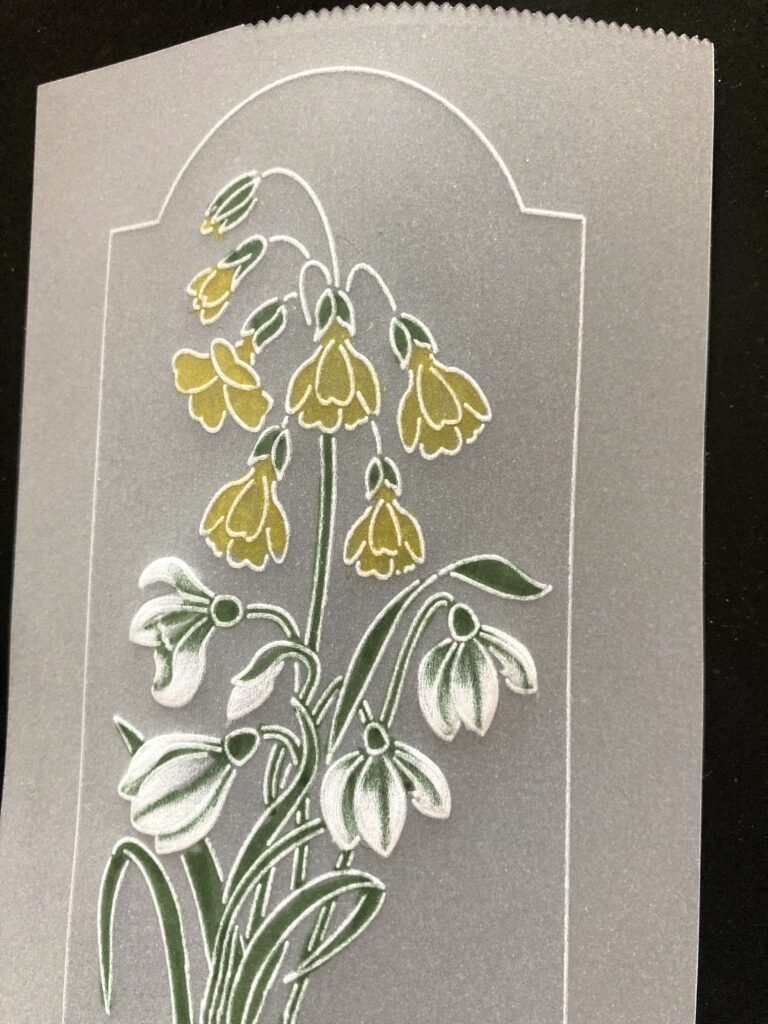
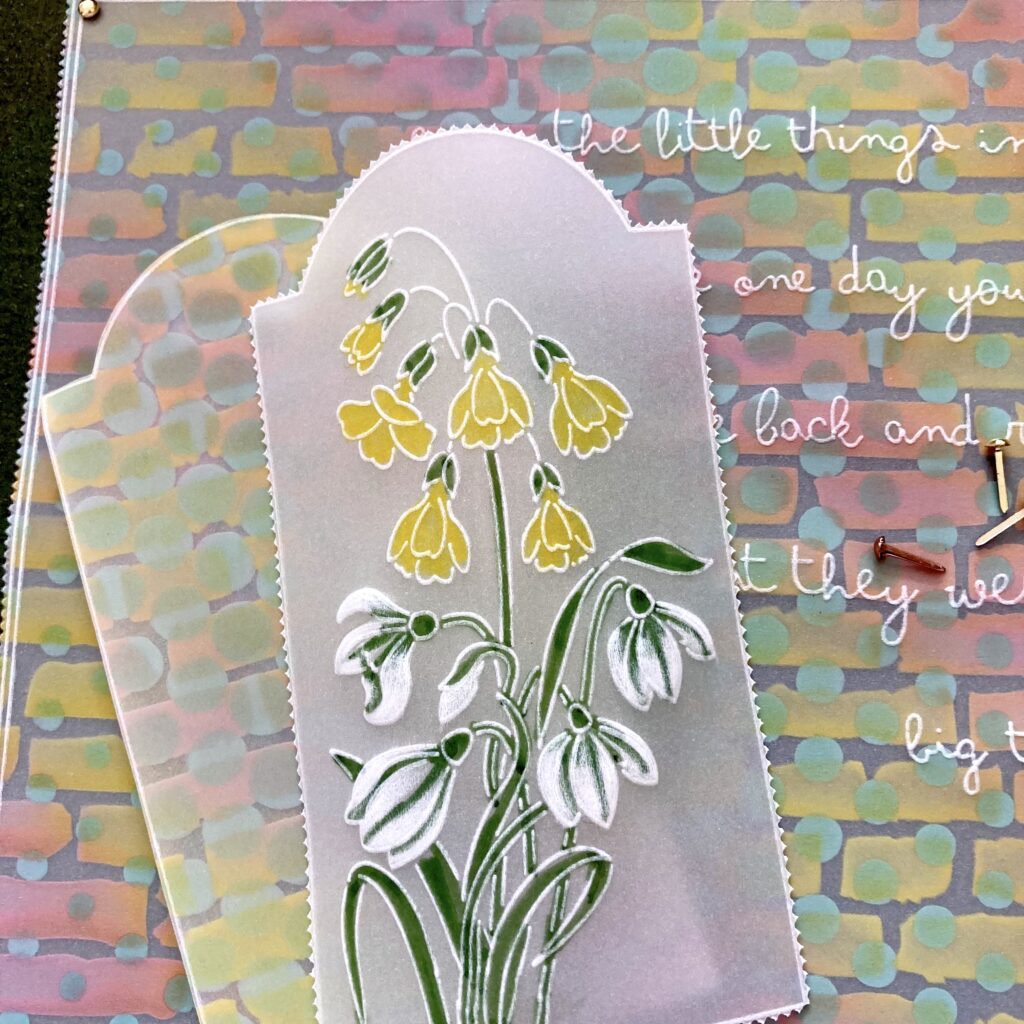
Step 3. Put the tag plate in the calligraphy plate mate and on the parchment left from cutting the square. Trace out the largest tag as shown.
Step 4. Put the companion plate in the plate mate and attach the parchment tag over it at an angle so the tallest flower fits into the tag comfortably.
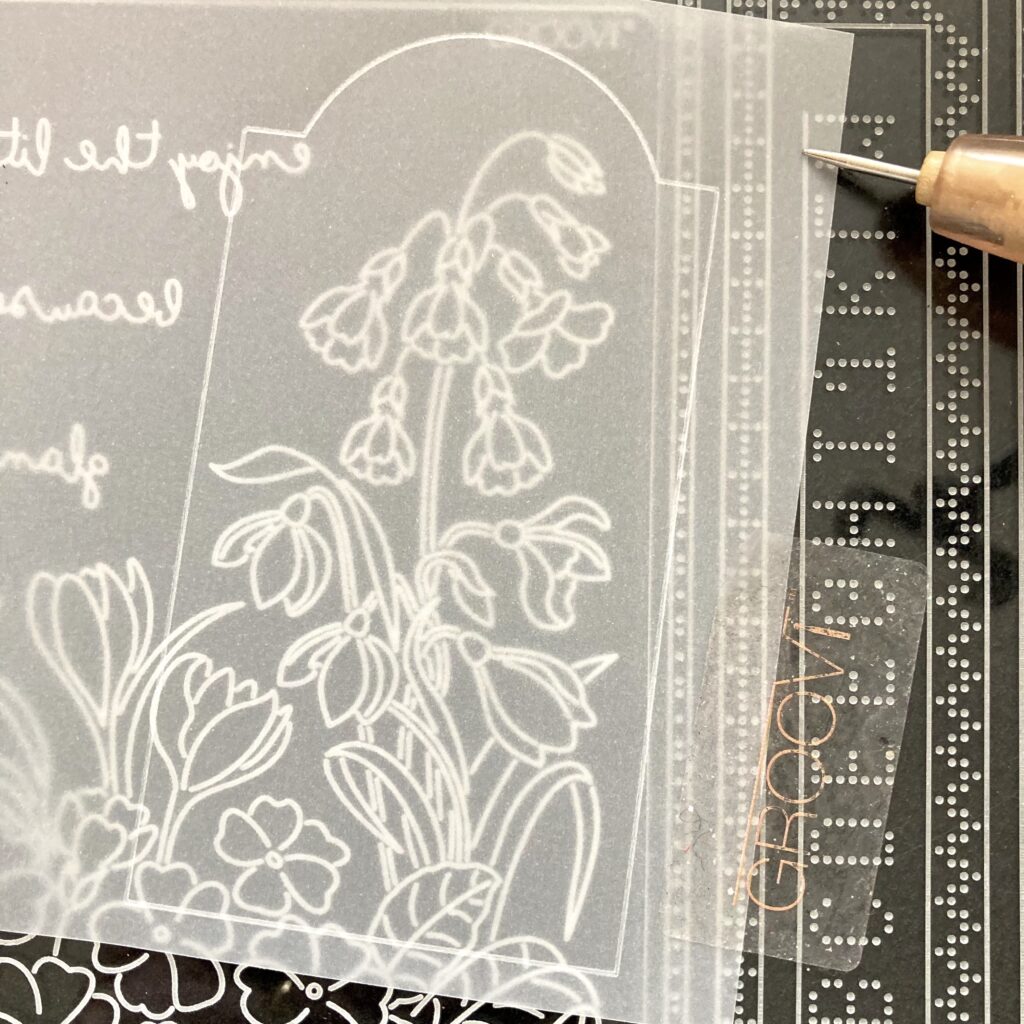
Step 5. Using the No. 1 tool, emboss the flowers as shown.
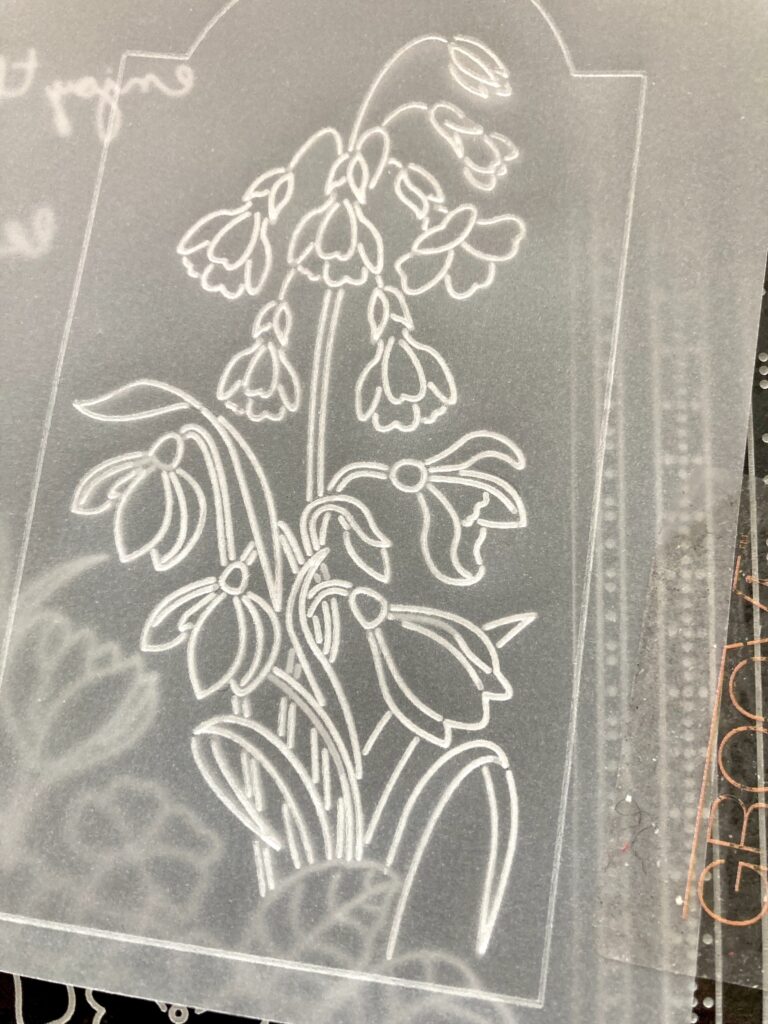
Step 6. Extend the lines from the flowers down towards the bottom line of the tag. I used lines in the plate to do this. Put this to one side.
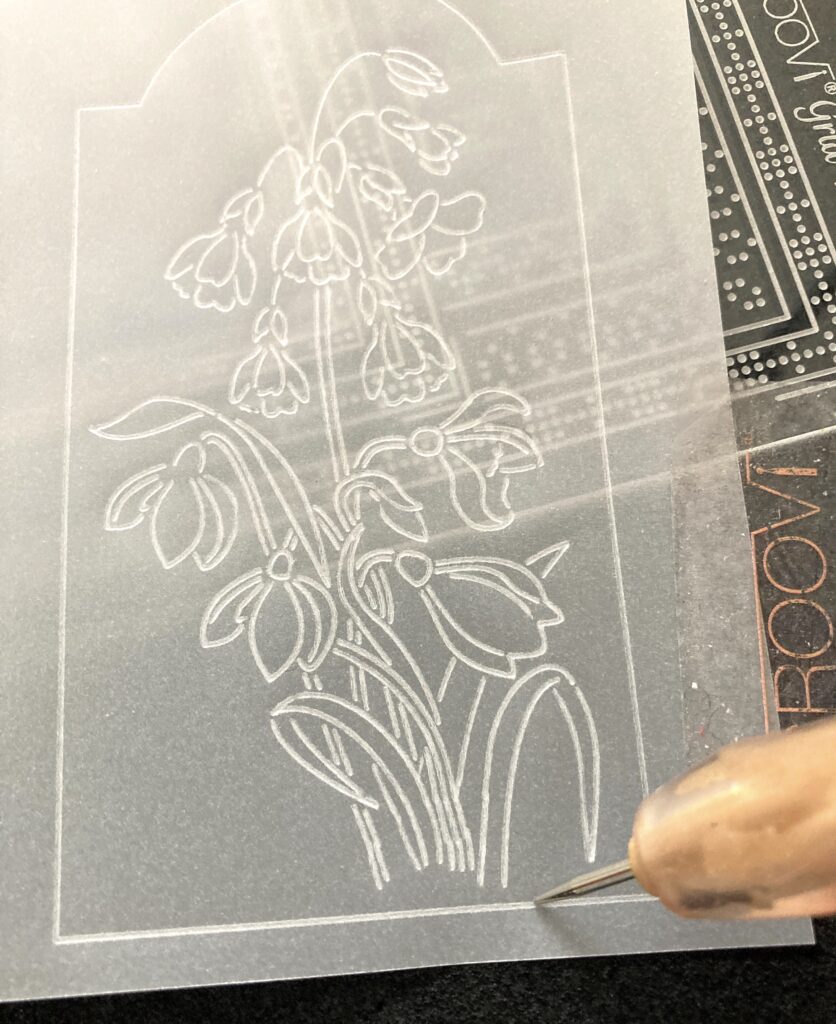
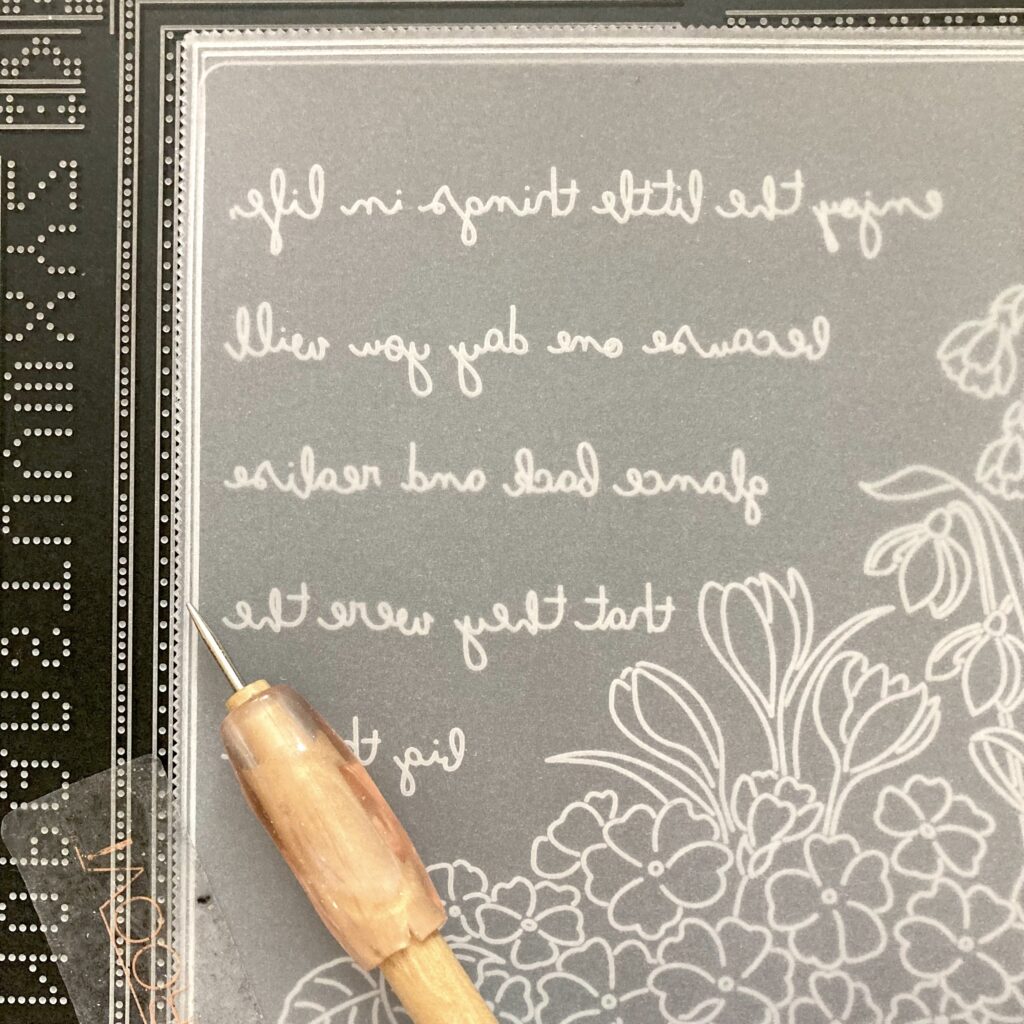
Step 7. Take the square of parchment you cut earlier and position it over the companion plate, lining up the lines on the parchment with the edge of the plate. Emboss the verse as it is on the plate using the No. 1 tool.
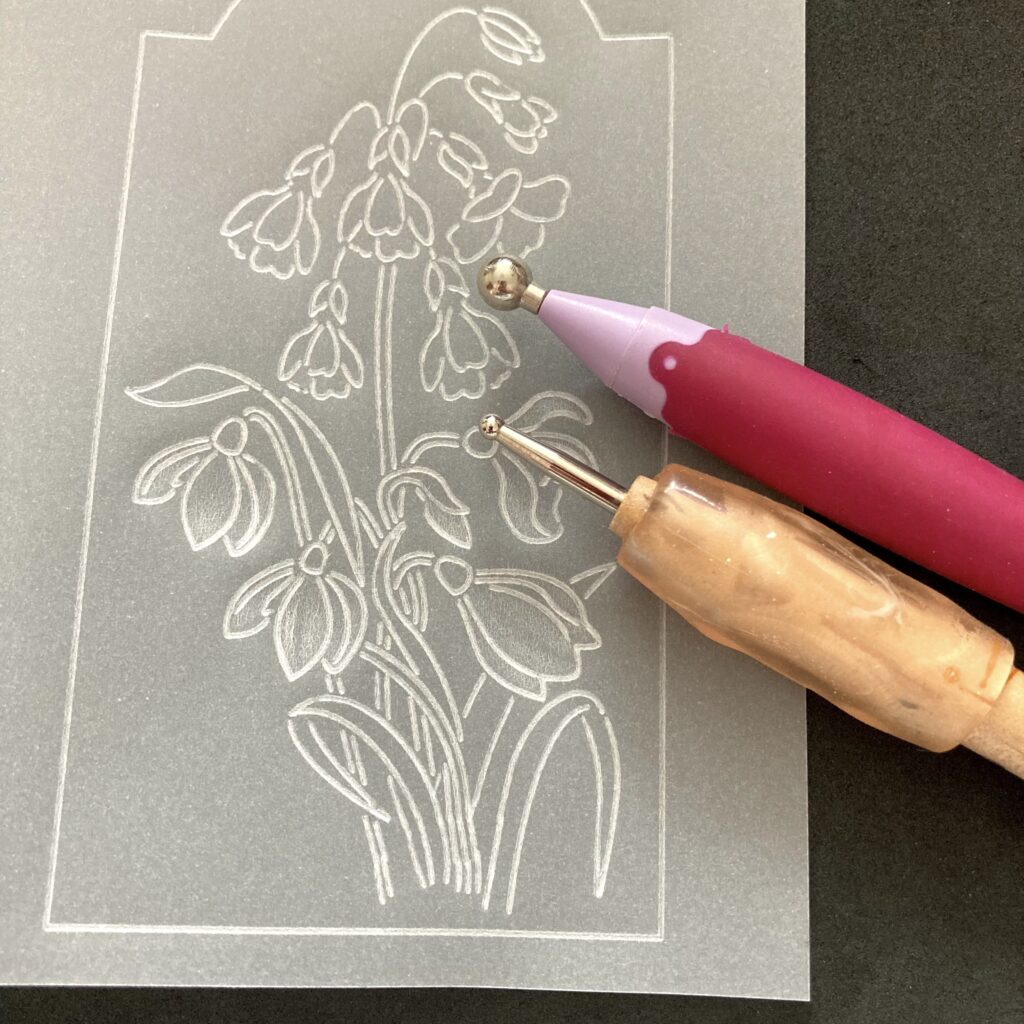
Step 8. Take the embossing tools to do white work on the snowdrop flowers. I didn’t do it up to the top of the petals. If you look at the finished project you can see I also left gaps in the white work up the middle of the petals.
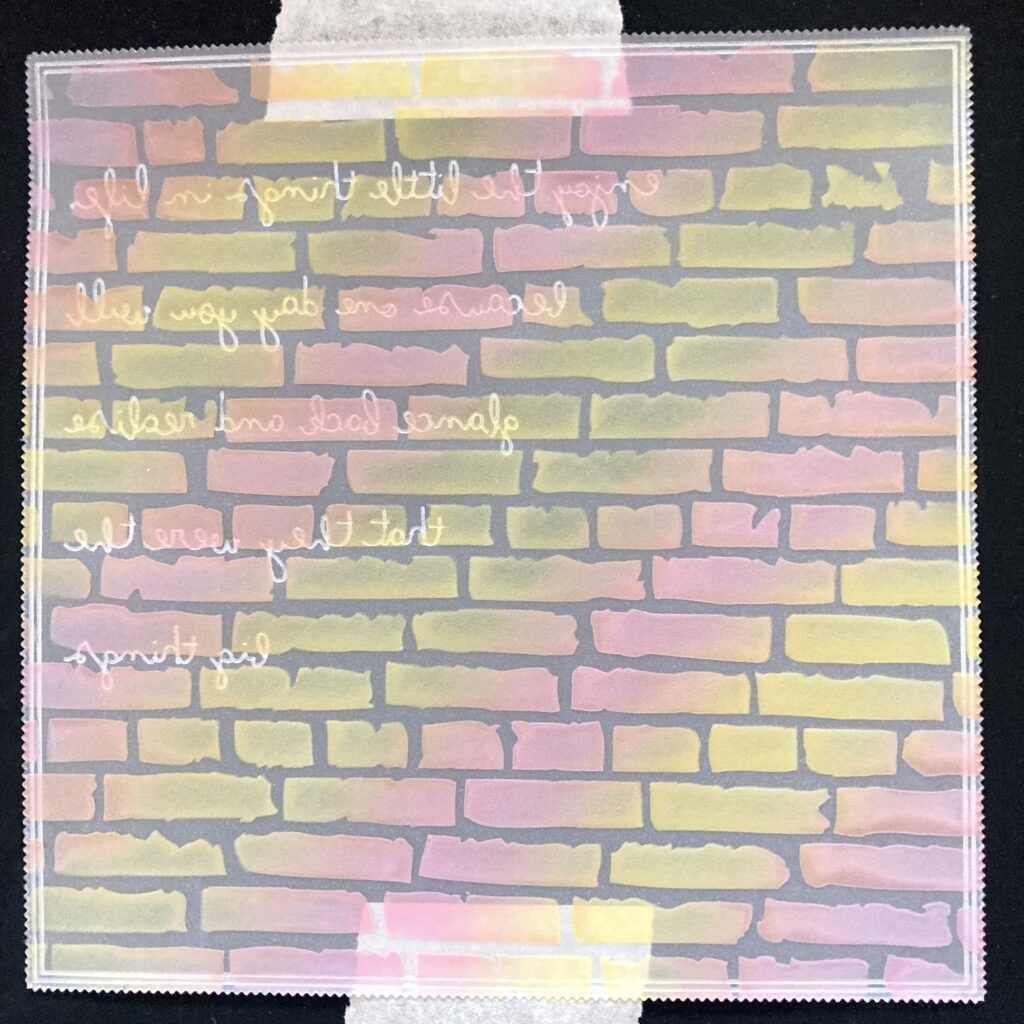
Step 9. Go back to the square of parchment and attach the brick stencil to the back of it with a piece of low tack tape. Don’t worry, this won’t spoil the parchment. If you prefer, you could use Groovi tabs but they may get ink on them which is why I used tape.
Step 10. Turn it over so the stencil is on top of the parchment and then get the yellow and pink ink and the stencil brushes ready. I would put a piece of paper under the parchment too.
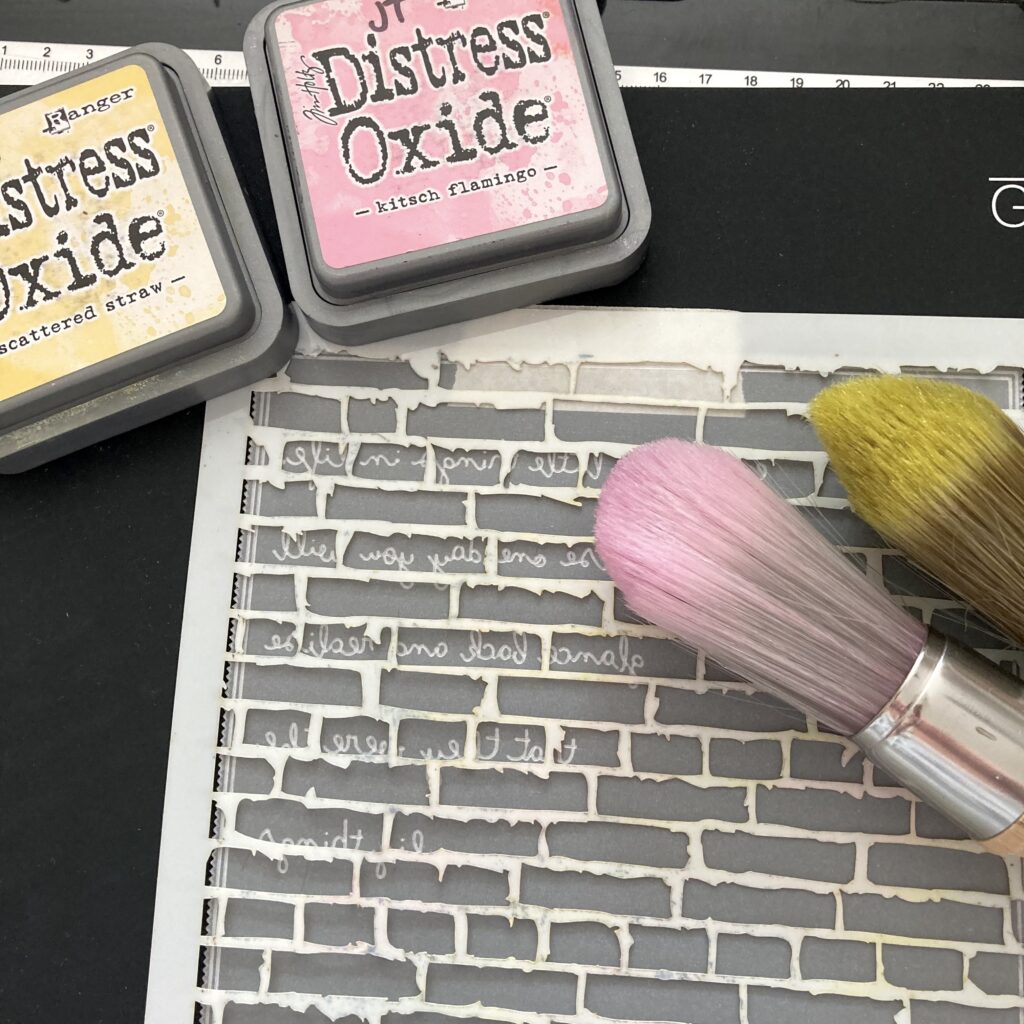
Step 11. Brush diagonal yellow stripes across the stencil. You can see how it goes through the stencil onto the parchment.
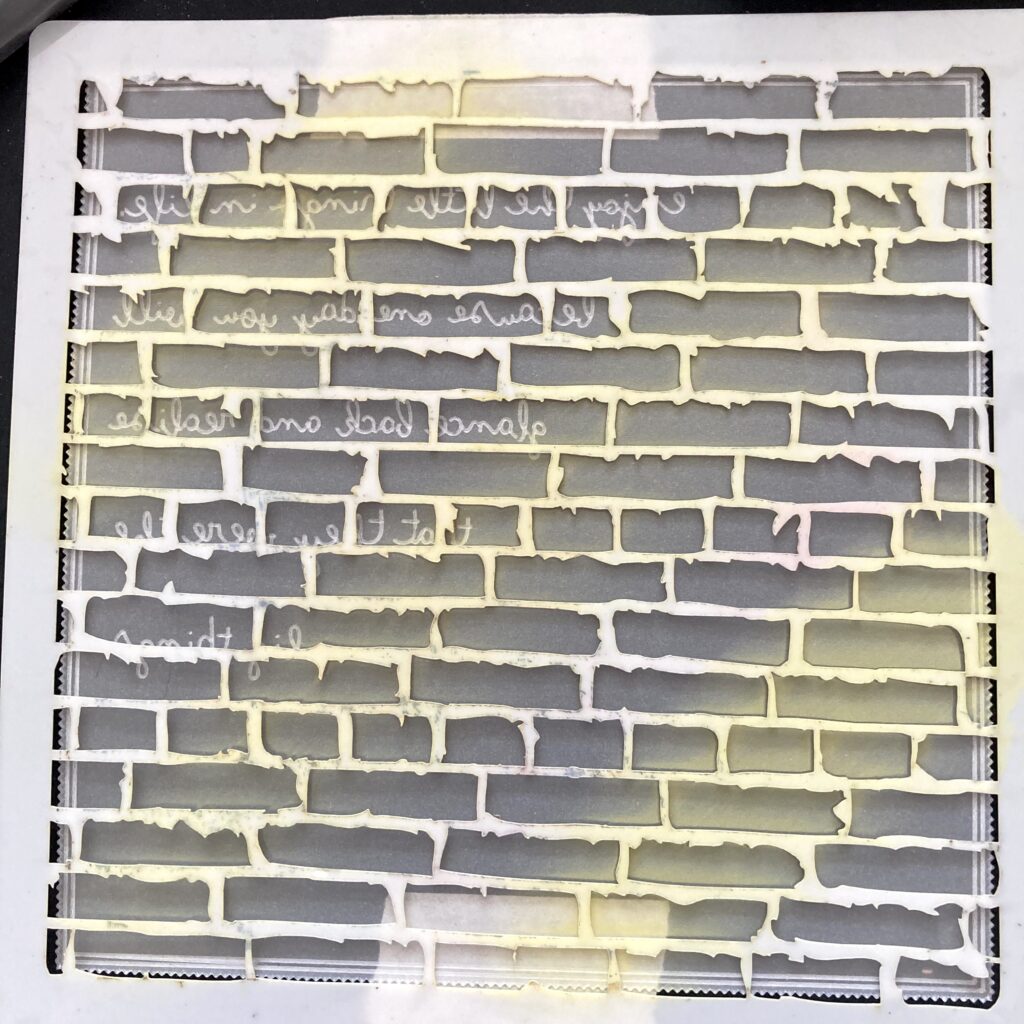
Step 12. Brush pink ink in stripes to fill in the gaps overlapping slightly with the yellow.
Step 13. Remove the stencil but leave the tape in place.
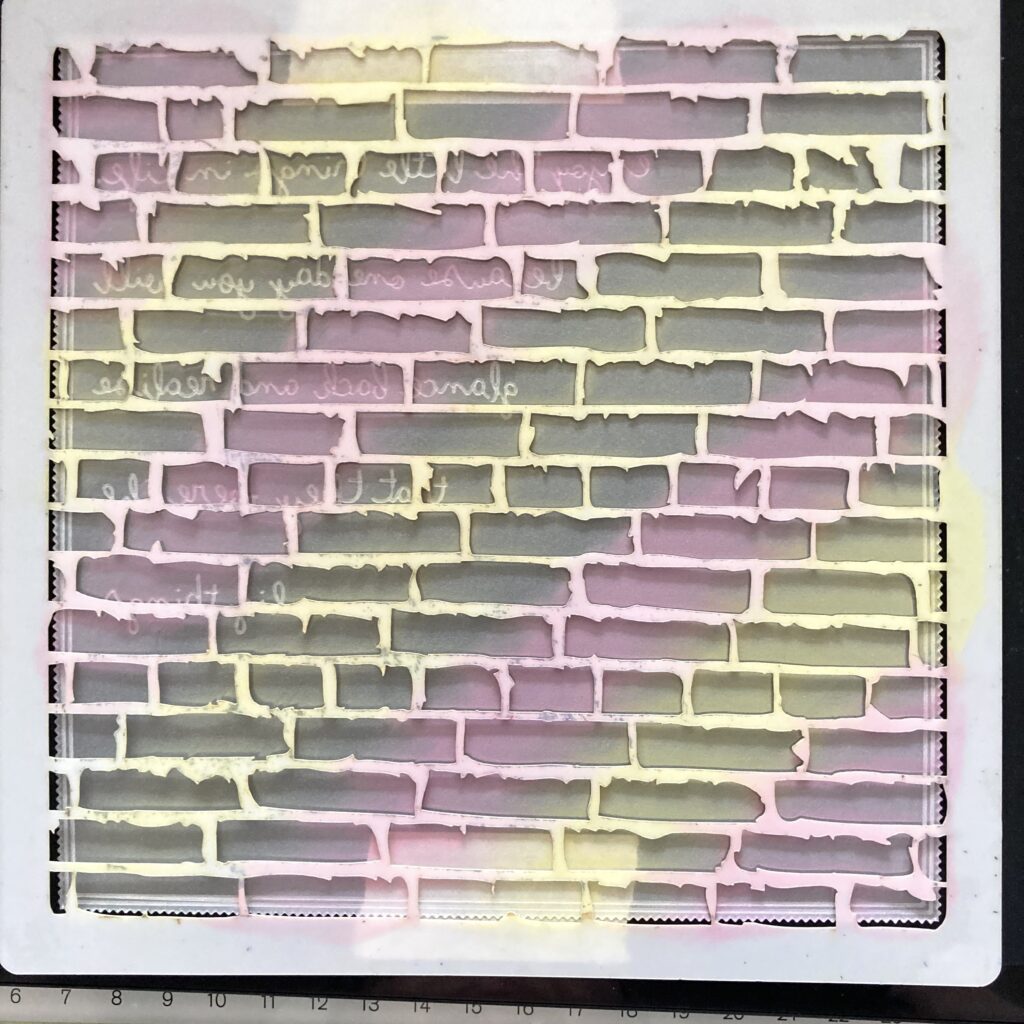
Step 14. Put the dotty stencil on the top of the parchment and use the tape to hold it in place.
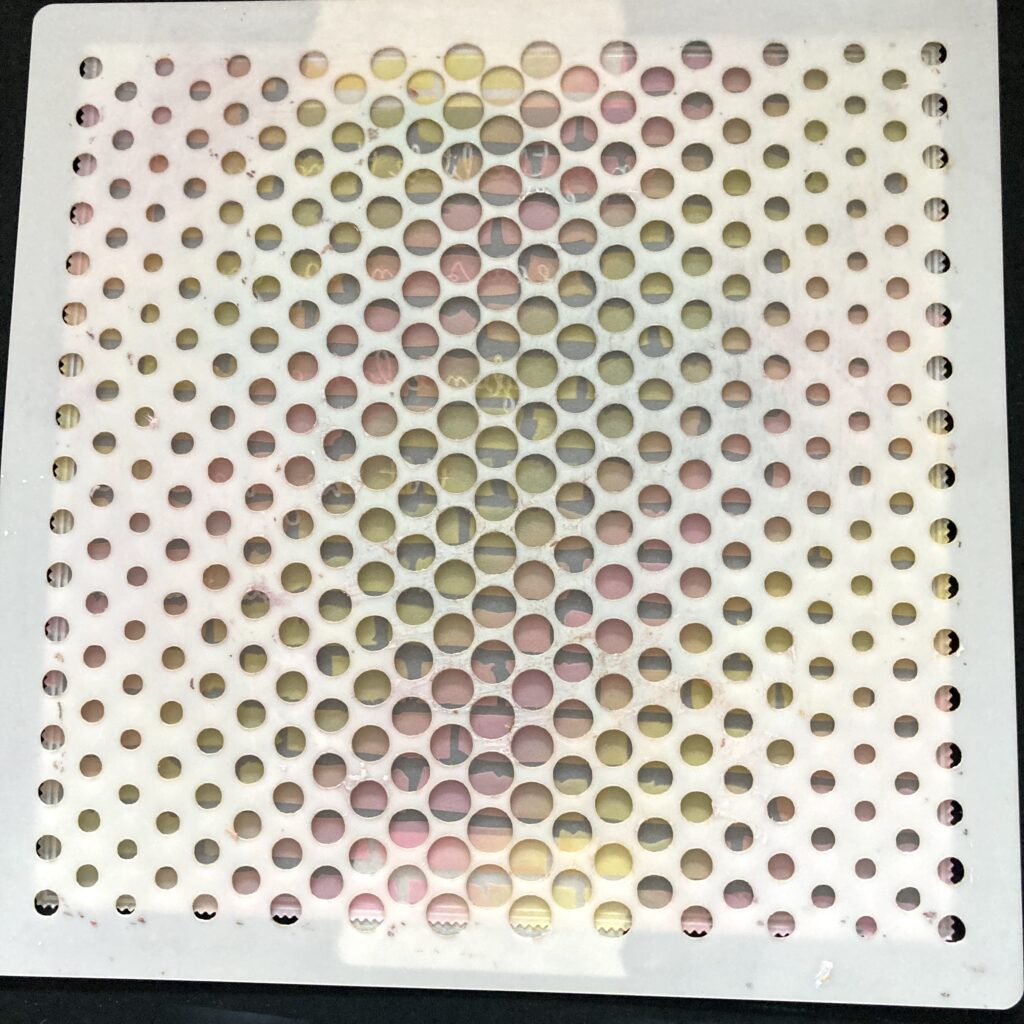
Step 15. Use the salvaged patina ink to brush through the stencil. Remove the stencil and put to one side to dry.

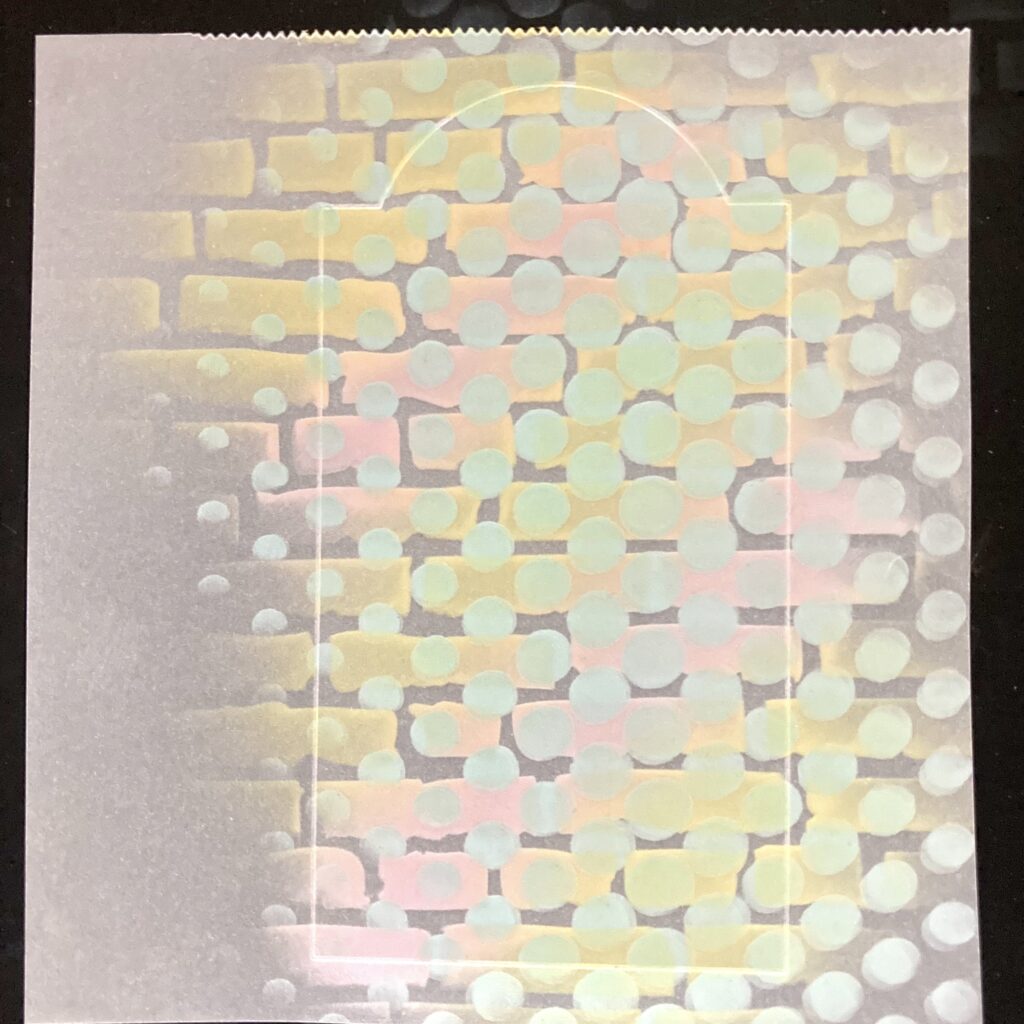
Step 16. On another scrap piece of parchment, emboss the same size tag as before and then use the two stencils in the same way as on the square, to colour the back of the parchment.
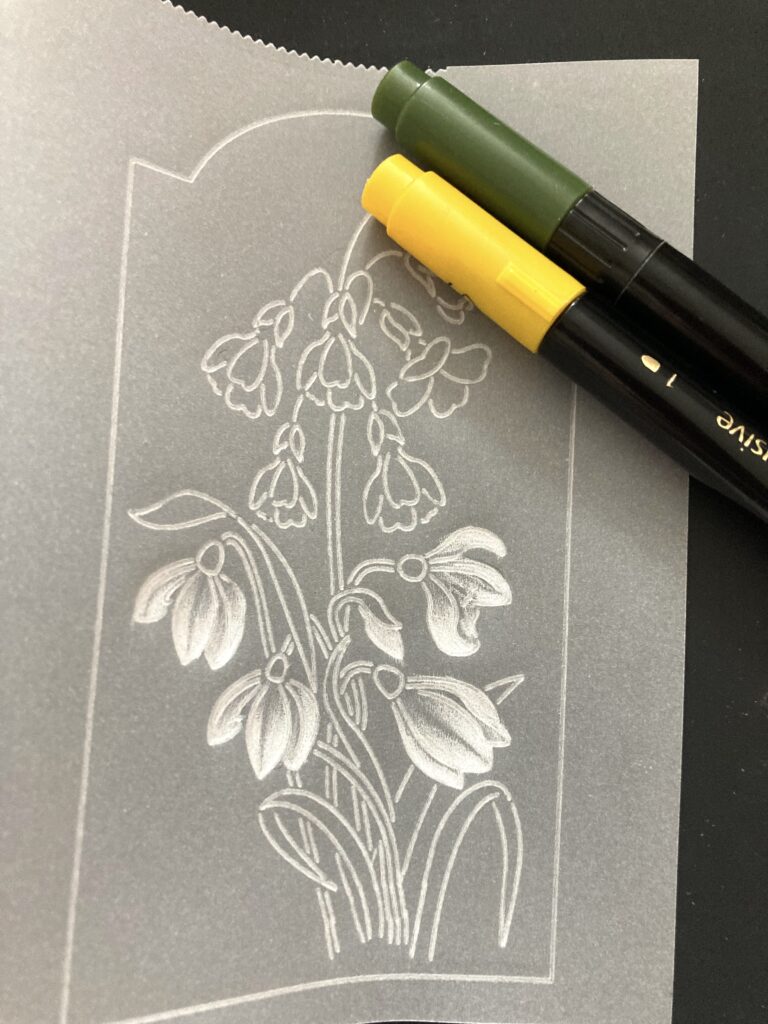
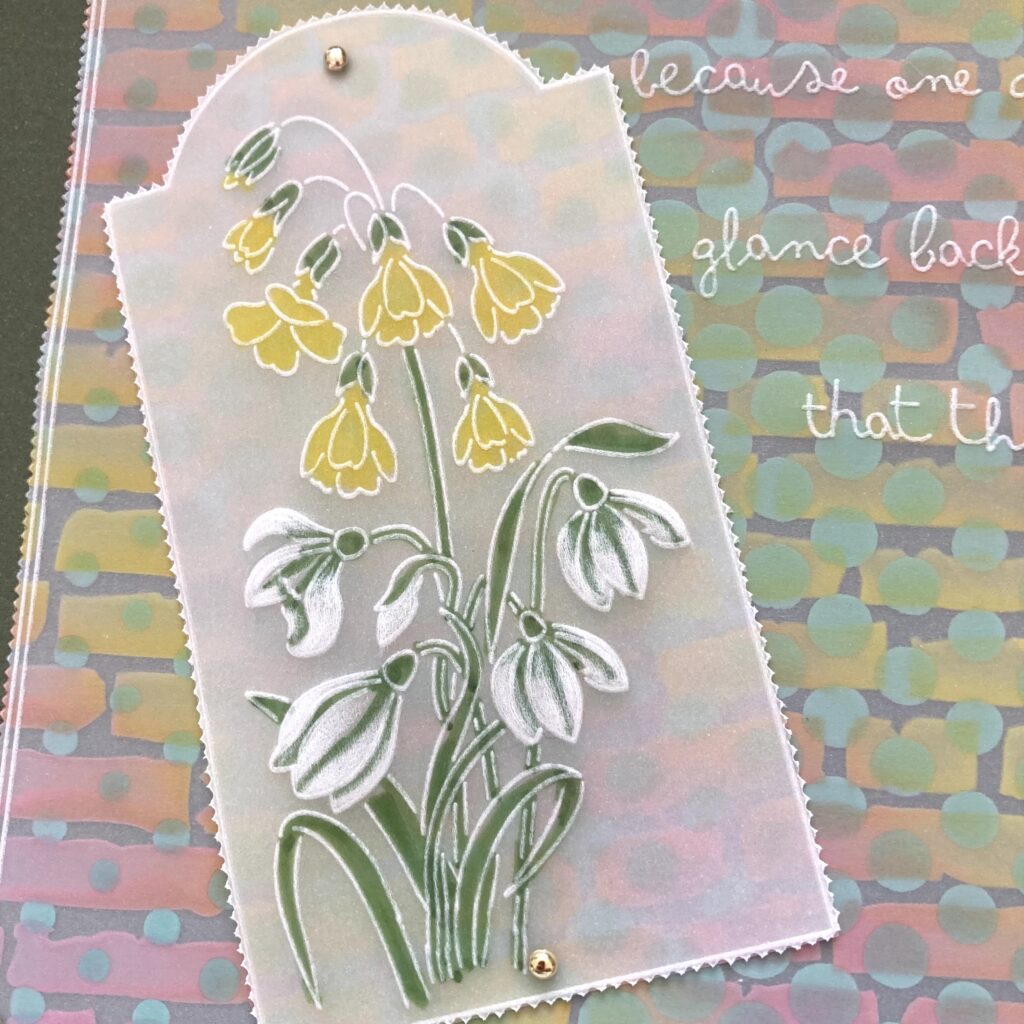
Step 17. Go back to the first tag with the flowers and use Perga colours to colour the flowers.
Step 18. This is how it will look on the back after colouring.
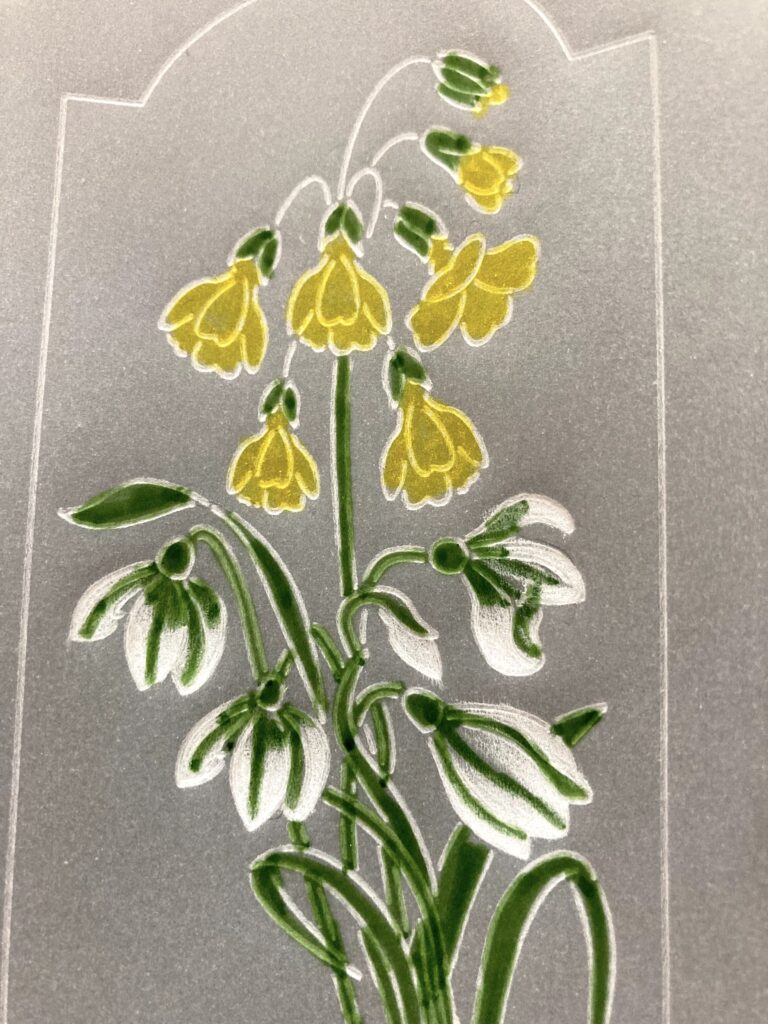
Step 19. This is how it looks on the front.
Step 20. Use a 2-needle tool to perforate around the tag shape.
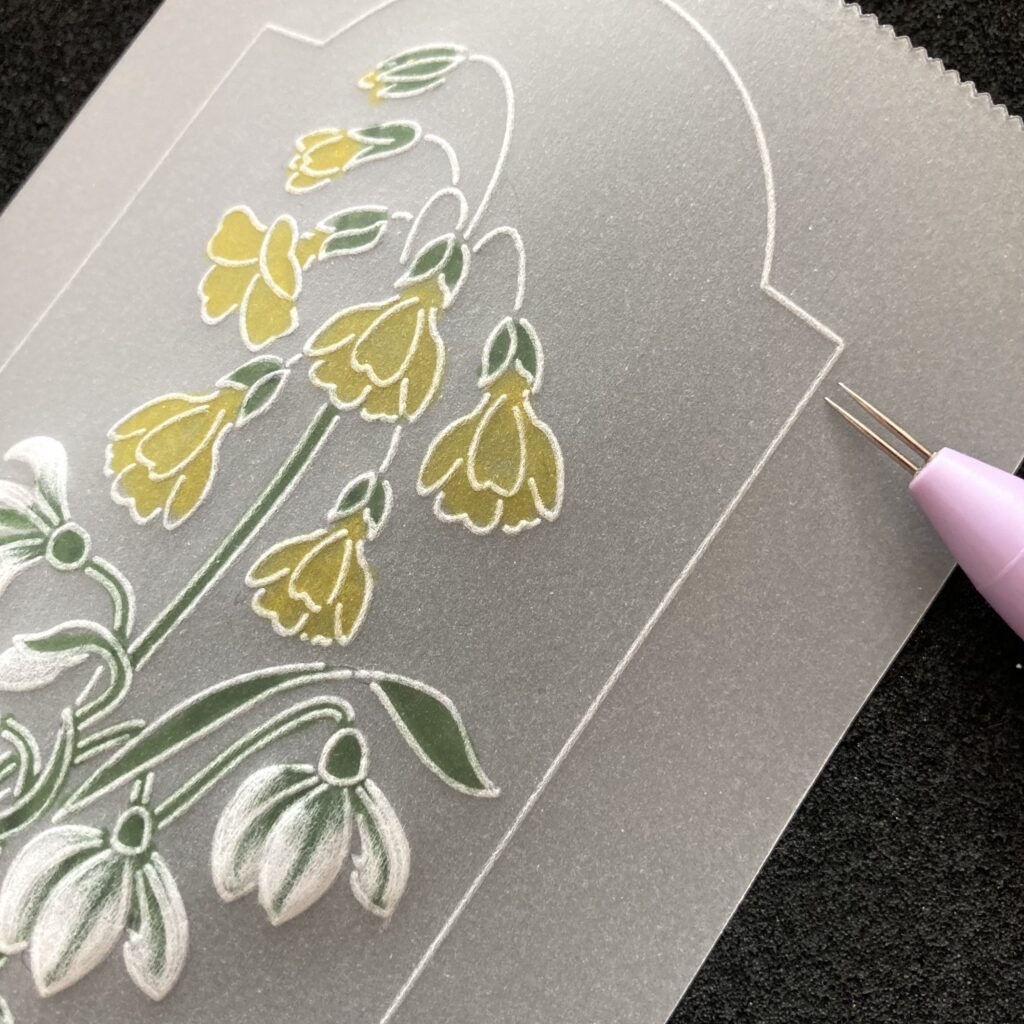
Step 21. Use snips or scissors to picot cut around the outside of the tag.
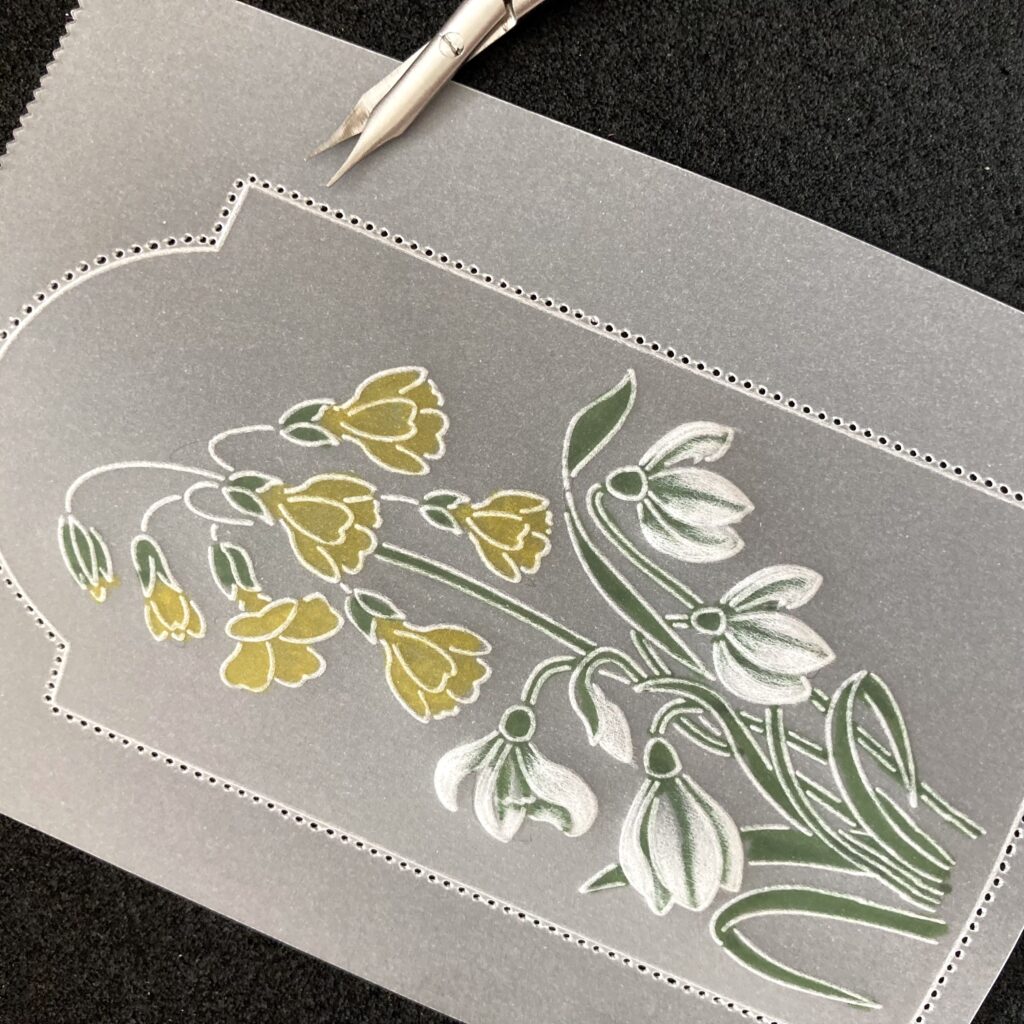
Step 22. Cut the other tag out with a pair of straight scissors.
Step 23. Cut a piece of companion paper to measure 7½” x 7½”. Attach the parchment to the paper using brads.

Step 24. Layer the tags in the position you want them and attach them with two more brads at the top and bottom.
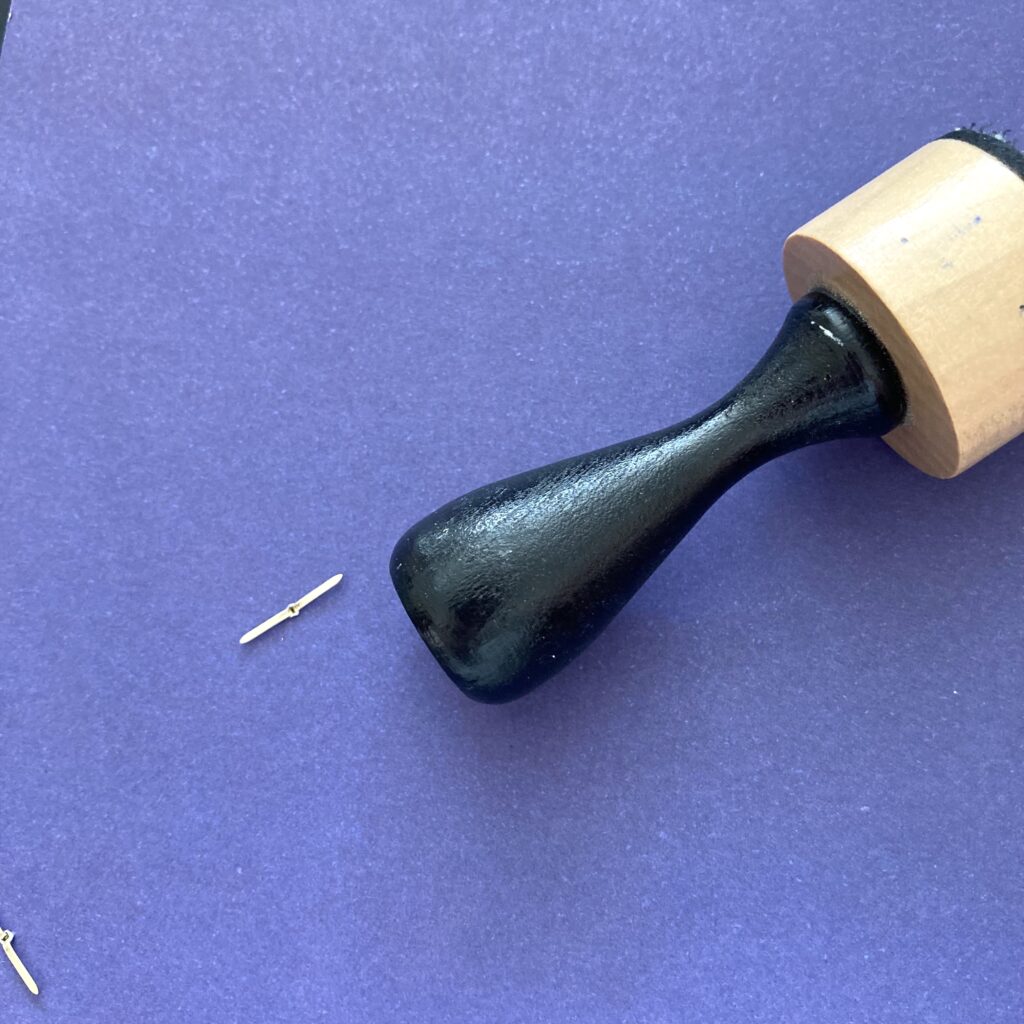
Step 25. Turn the paper over and on the hard side of the black mat flatten the brads down. I use the end of a blending tool. This means the card will sit flat when you attach it to a card.
Step 26. Attach to the front of an 8×8 card blank.
You have now completed your project.
What an incredible card! And a very easy-to-follow step-by-step project. Thank you, Jane, for putting that together for us. We hope to see your versions shared in the media folders of Groovi Worldwide.
Everything that Jane has used in this particular project can be found in a shopping list, HERE.
Now, looking at the week ahead… (there’s some telly today to enjoy!)
Sunday 4th February:
Crafting with Clarity (with Barb) on Create & Craft – 3pm-5pm
Monday 5th February:
In the SHAC with Barbara – 10am Live on Facebook & YouTube
Tuesday 6th February:
Groovi Tuesday with Paul – 10am Live on Facebook & YouTube
Thursday 8th February:
The Pergamano Show with Jane Telford on Create & Craft – 11am & 3pm
In the SHAC with Barbara – 7pm Live on Facebook & YouTube
Saturday 10th February:
Crafting with Clarity (with Barb) on Create & Craft – 1pm & 4pm
See you there!
Travel gently, friends.
Lotsa love, Grace & Jane xoxo
Clarity – The Home of Art, Craft, and Well-Being.
Love this project Jane and what a lovely way to use the ink pads on the parchment, truly multi media at its best! Have a great rest of the weekend both of you x
Wow Jane what a beautiful project & great step by step instructions. This answers a few questions that have been on Groovi Worldwide recently & makes sense of your reply yesterday !!
Definitely on the to do list as I found the companion plate yesterday after much searching amongst my A5sq plates to find it in with the A5 plates. It obviously thought it was bigger than it was !!
Thanks Grace for bringing us another Sunday Claritymatters blog & hopefully a few more will try doing the project & show us all on the FB page.
Have a good week everyone, there is plenty happening at Clarity Towers to keep us occupied xx
I love this! xx
Love this Jane.
Certainly going to do this card.
Thank you for another wonderful step by step.
Going to have to try this! Just wondering if the ink dries quickly? Thanks Jane and Grace. x
They don’t take long to dry. By the time I’d done both pieces that needed inking, cleaned my stencil and put it away the ink was dry enough to work on.
Oh and it can be removed using the white pencil eraser.
Thanks Jane. X
Another great tutorial and inspiration. Thank you.
Ooohhh – I never would have thought of using stencils on parchment to colour them. Brilliant Jane, thank you xxxx
Jane can you use other inks besides the distress oxides? This is a lovely card, thankyou.
I have used the ordinary distress ink but they are more translucent. The oxides make a more opaque colour.
My advice is if you’re unsure try it on some scrap parchment.
Thanks🤗