Clarity Matters Blog Tutorial: How To Add Embroidery Elements To Your Parchment Design
Happy Sunday everyone! Paul here.
Time for another fabulous step by step project, this week created by Glynis Whitehead

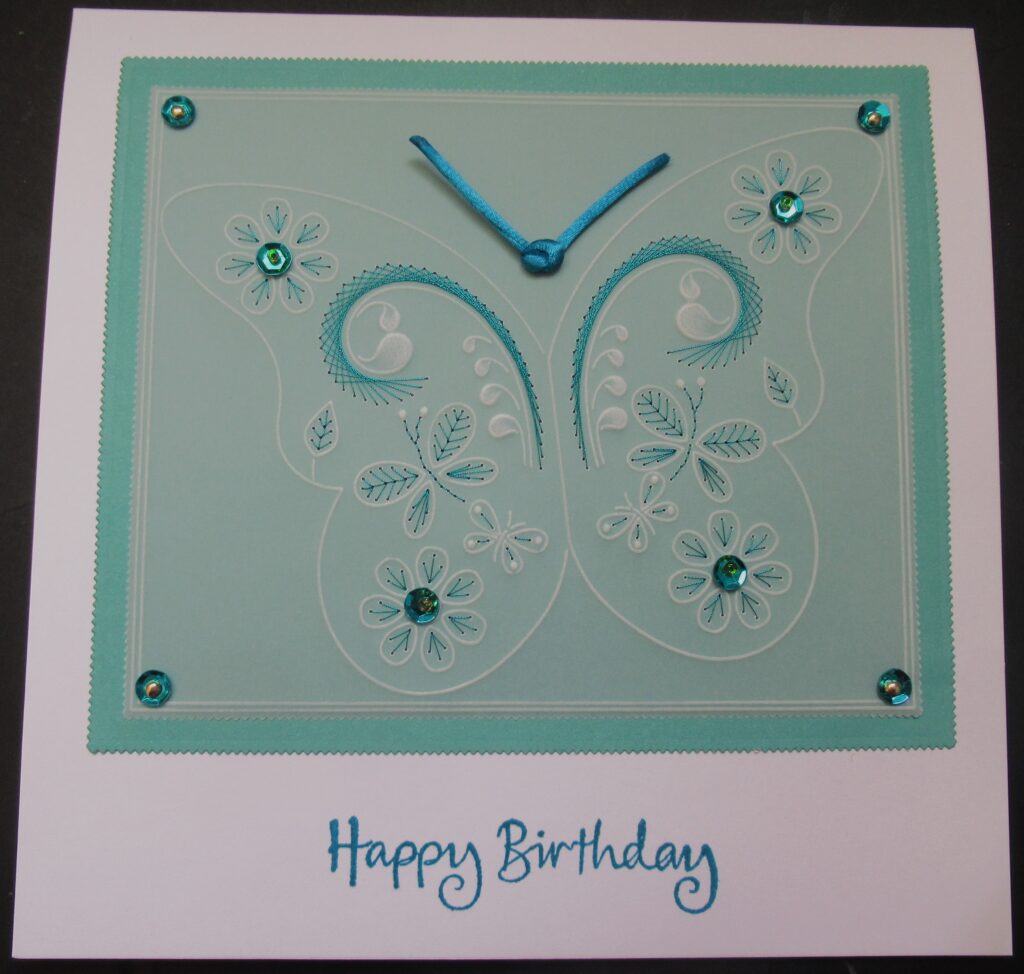
This is where we are heading today
Ingredients:-
Leafy Swirl Butterfly A6 – GRO-AN-42108-02
Tina’s Butterflies and Daisies Embroidery Parchlet A6 Square – GRO-FL-42115-01
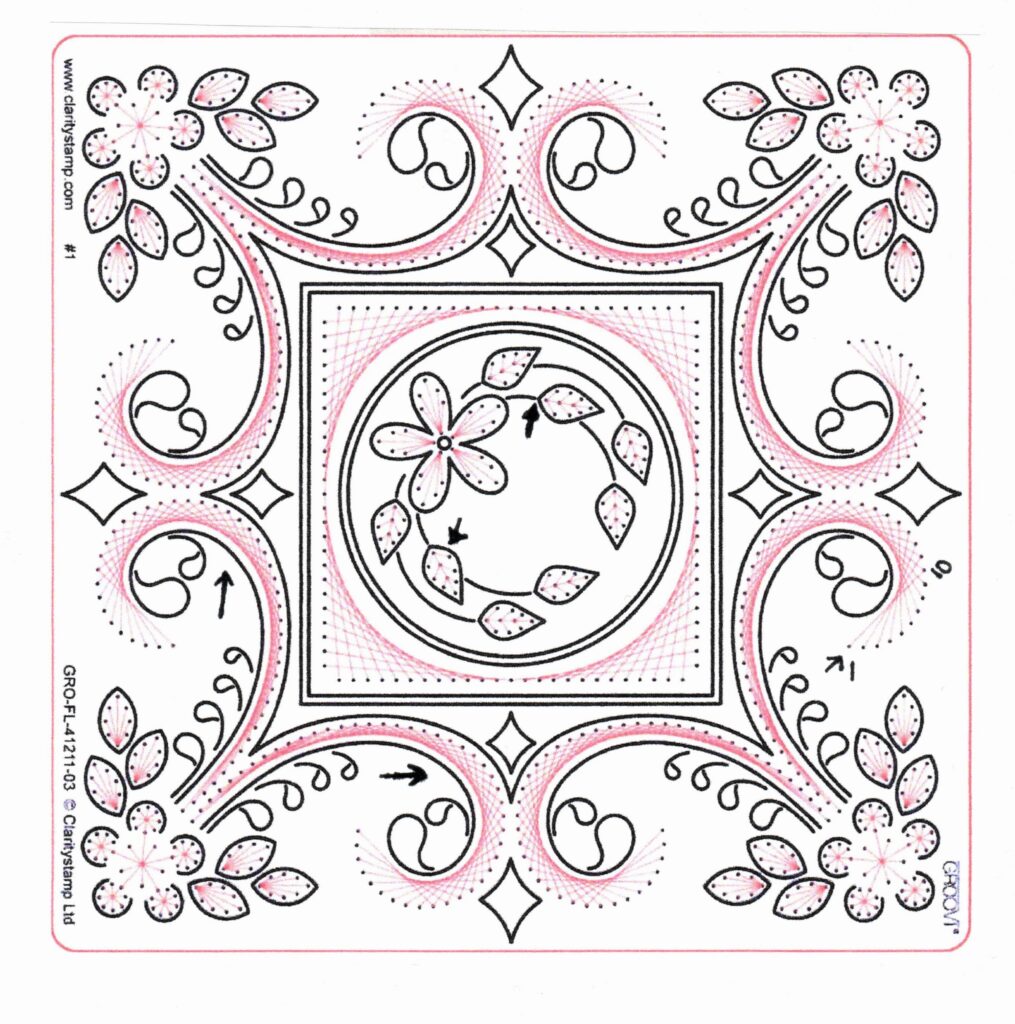
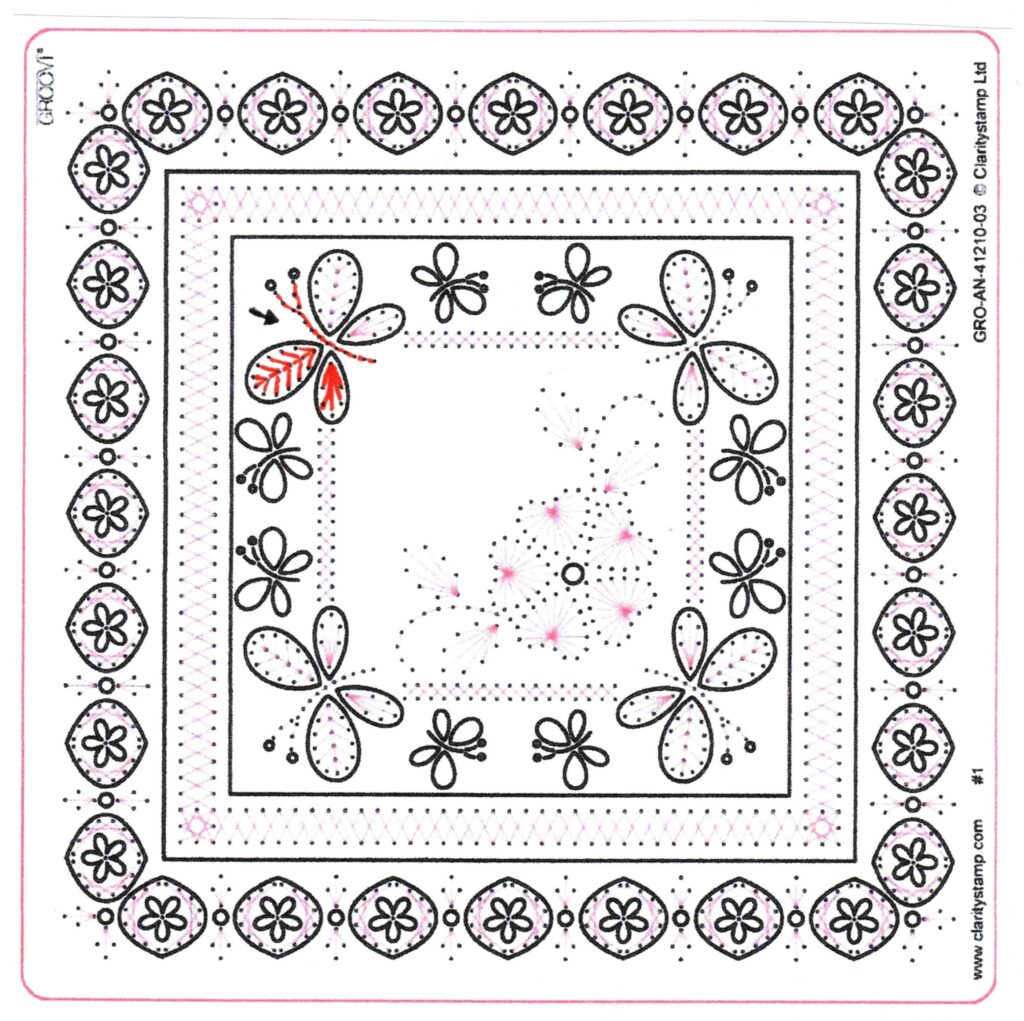
Tina’s Embroidery Butterflies A5 Square – GRO-AN-41210-03
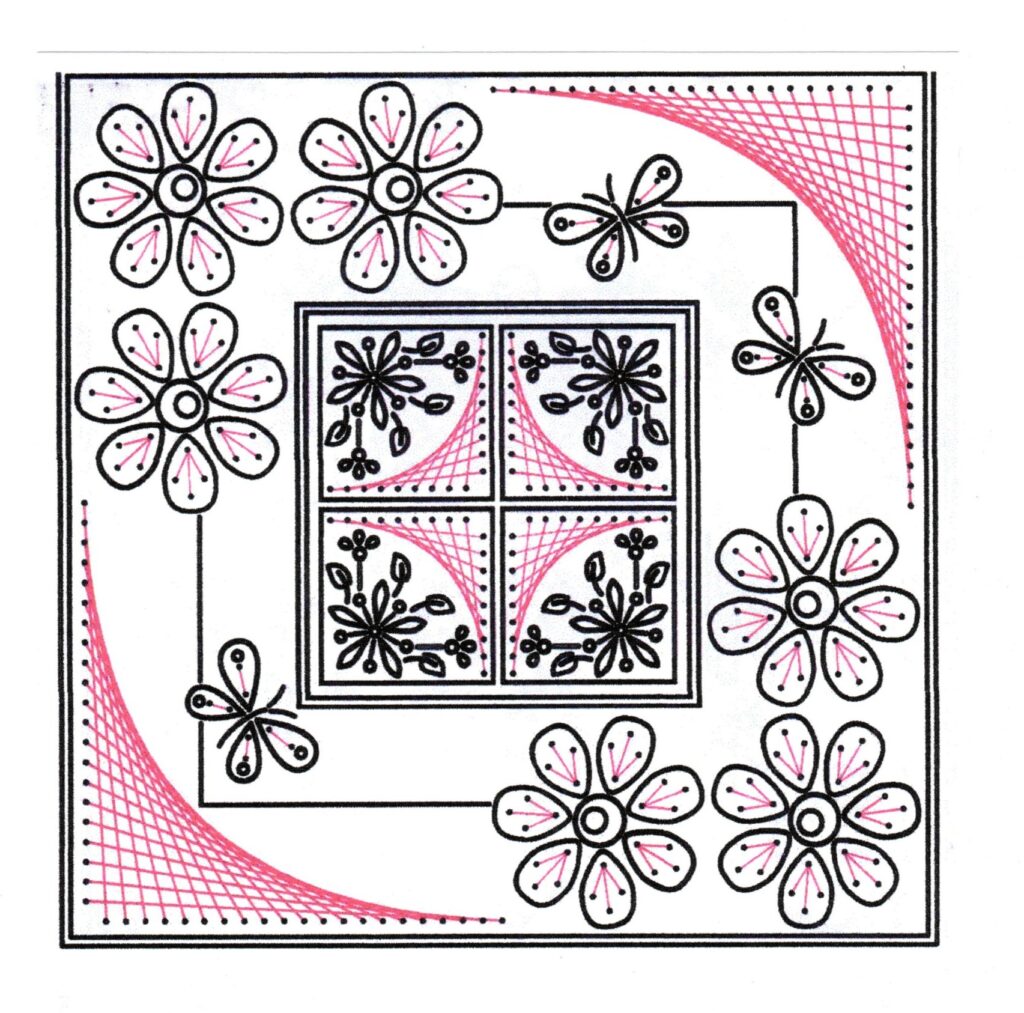
Tina’s Embroider Daisy A5 Square – GRO-FL-41211-03
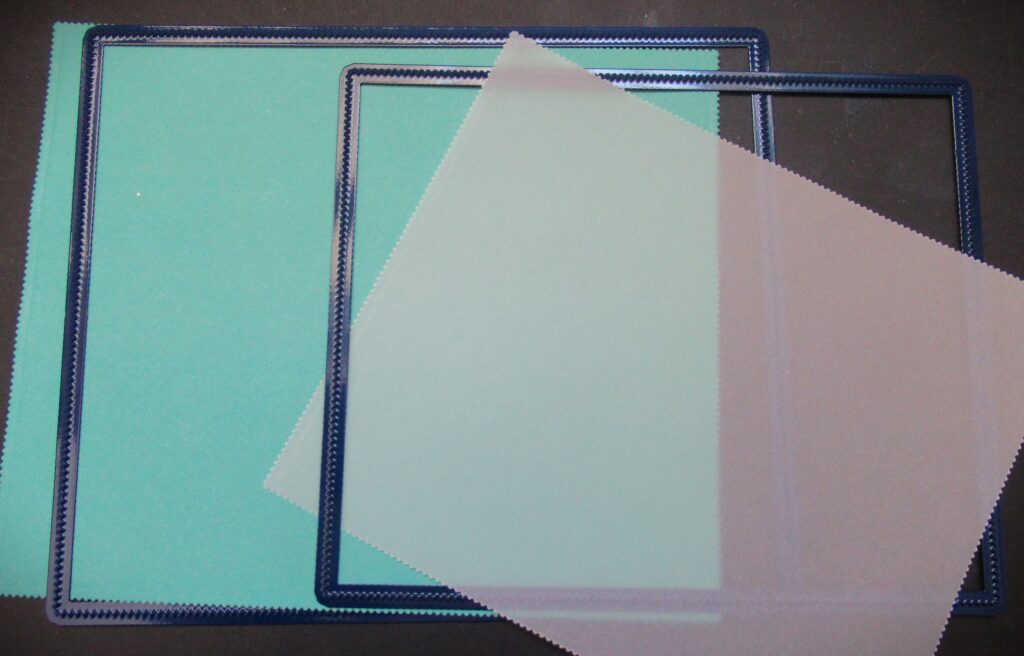
Nested Rectangle Picot Cut A4 Square – GRO-PA-41067-15
Rectangle Picot Cutting Dies – ACC-DI-30682-56
Madeira Metallic Turquoise Embroidery Thread – ACC-MS-30996-XX
Set of size 12 Embroidery Needles – ACC-MS-31399-XX
*There is a full Embroidery Accessories Kit Available on the website too – ACC-MS-31398-XX
Waimea Falls Designer Companion Paper – ACC-CA-31343-88
Gold Pergamano Brads – PER-AC-70274-XX
Pergamano 1 Needle Fine Perforating tool – PER-TO-70035-XX
A4 Black Super Foam – GRO-AC-41957-A4
Double sided tape.
9 sequins.
7 x 7 inch Card Blank – ACC-CA-30619-77
Entwined Sentiments A5 square Stamp Set – STA-WO-10934-A5
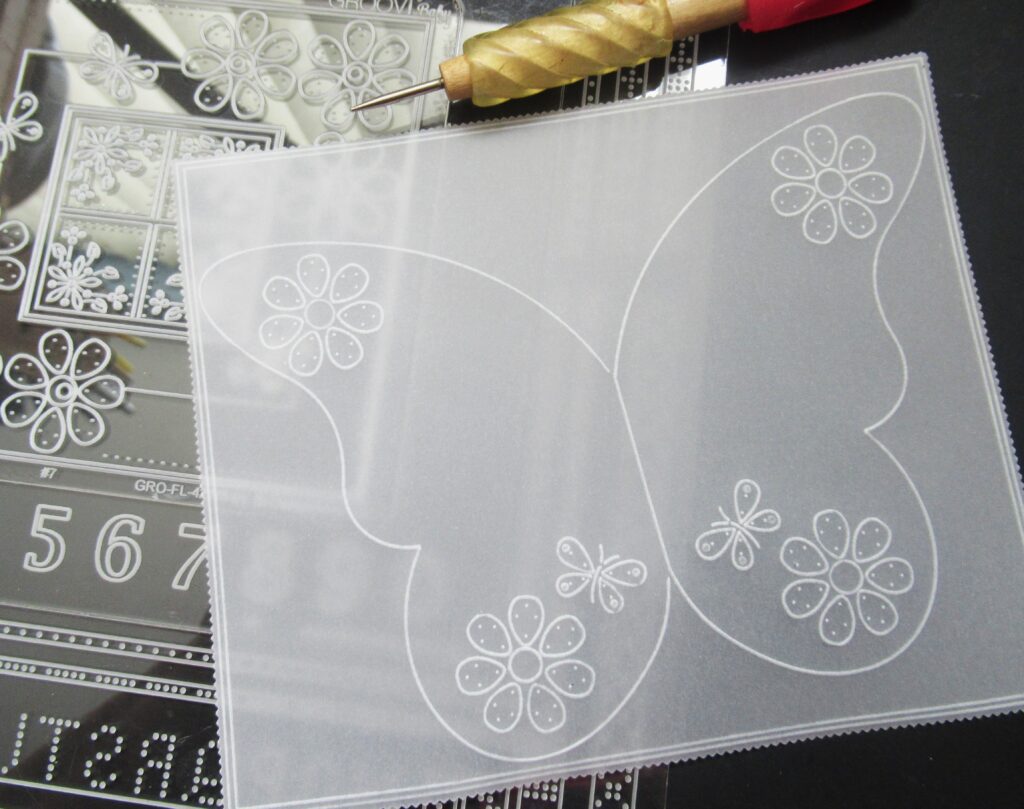
Step 1 – Cut the Waimea Falls Paper using the largest die from the picot cut dies, then the parchment with the 2nd largest die. *I chose a piece of Companion Paper that toned in with the thread I used.
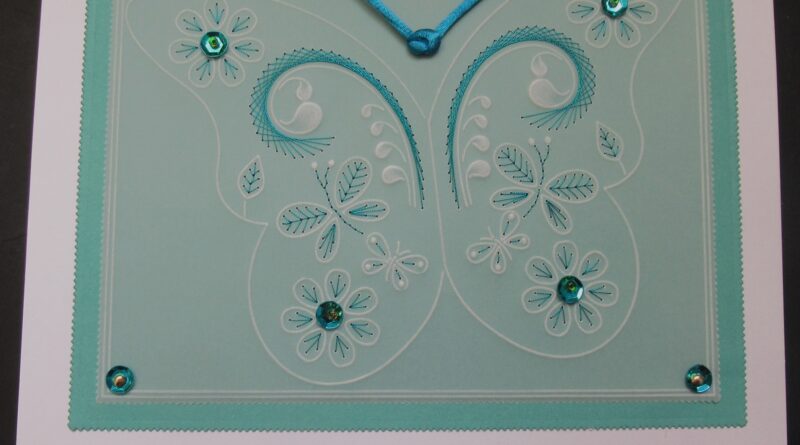
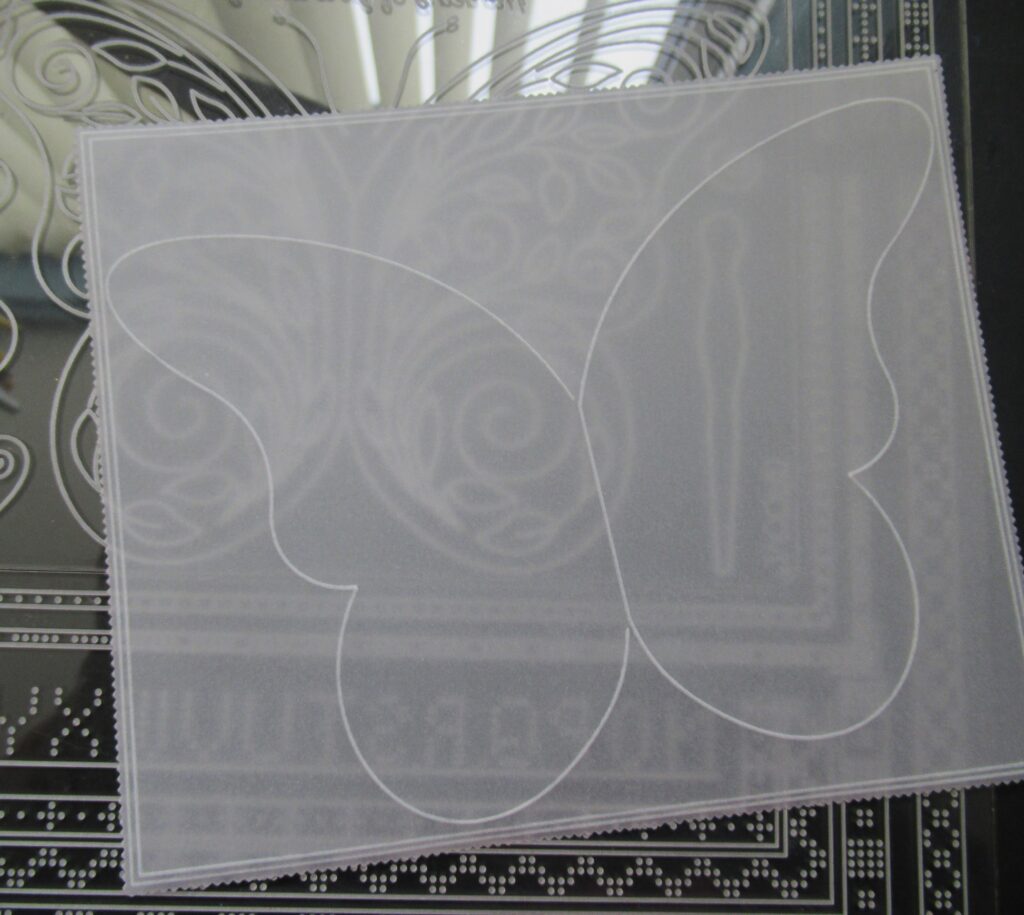
Step 2 – Attach the parchment to the Nested Picot Cut Plate and emboss the 2nd line in, then trace out the outline of the butterfly. *Tilt the butterfly so that it looks like it is flying away and I used the number 1 tool from the Groovi Starter Kit.
Step 3 – Use the Butterflies and Daisies Embroidery Parchlet, and emboss a butterfly in each wing, and a small butterfly just above the daisies. You need to mark all the dots within these designs too, as they will show you where you need to perforate.
Step 4 – Line up the parchment on the Embroidery Daisy Plate, so that one of the curves in the corner make a nice arch at the top of the wings. Add in the curls that are next to it. Emboss this with the number 1 tool. Do a mirror image of it on the other wing. Add a couple of leaves in the top wings just above the ‘v’ shape.
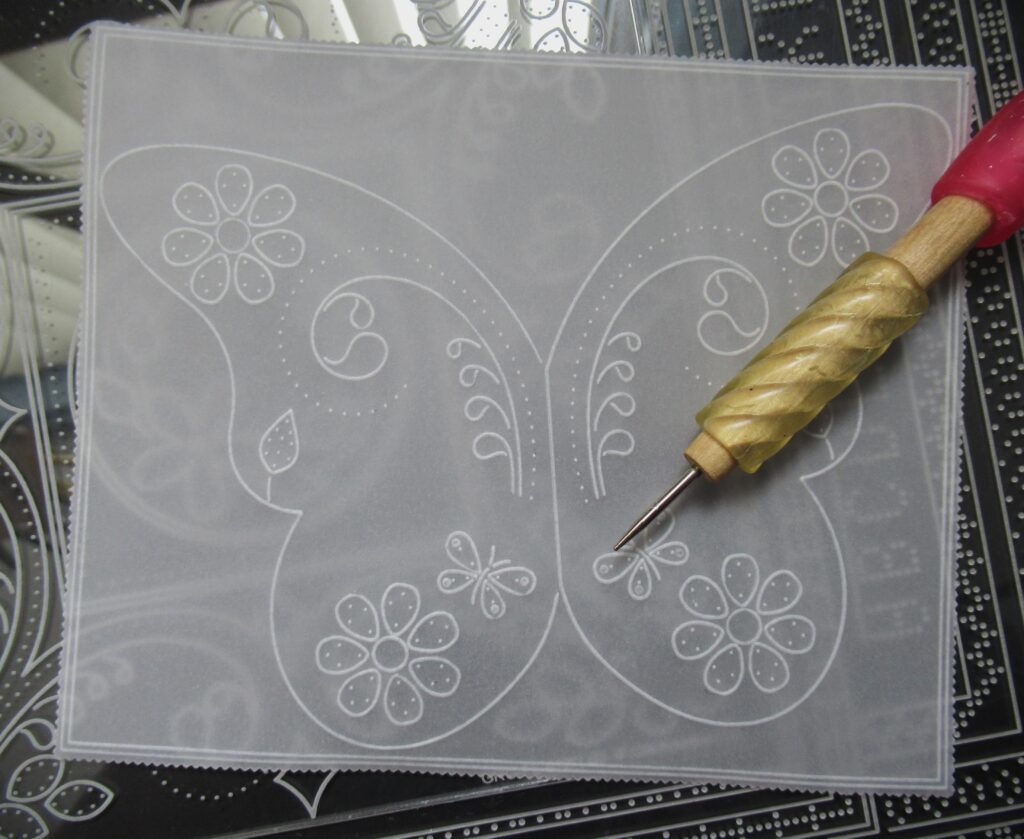
Step 5 – Now use the Embroidery Butterfly plate and put a butterfly into the remaining gap. Again, remember to do all the dots where the embroidery stitches will be.
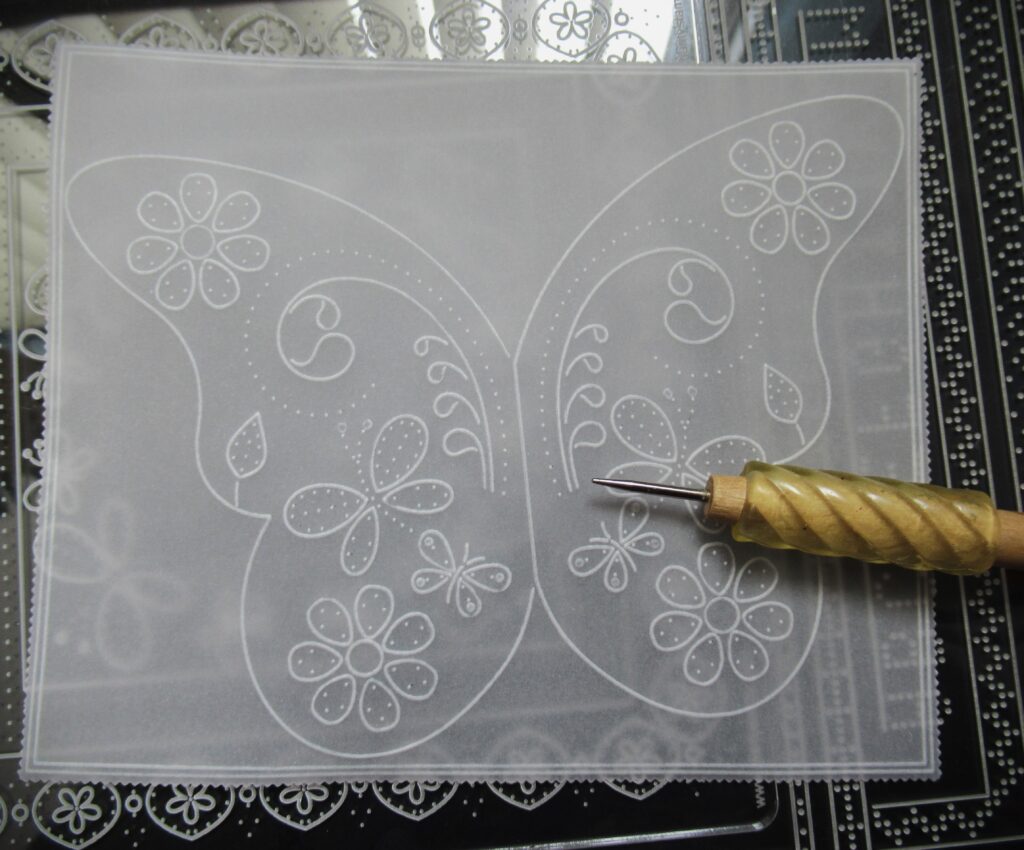
Step 6 – Working on the back, emboss dots and within the swirls. Don’t forget to start with the largest ball tool and let the parchment rest awhile before moving down in size of tool.

Step 7 – Attach the parchment to the backing paper with brads that have been pierced through sequins.
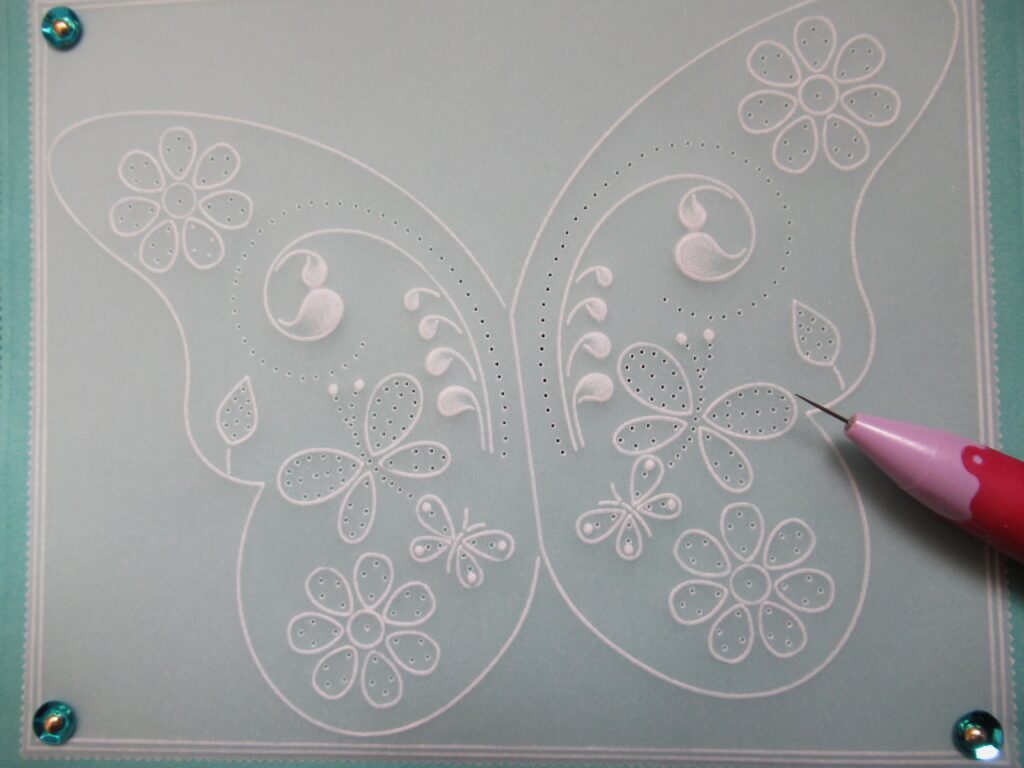
Step 8 – Now it is time to start sewing. When you buy the plates, you will be supplied with a sewing guide in the packaging. *Keep these in a safe place. Attach the thread on the back with tape, but make sure to tape it down where you will not have to sew through it. Follow sewing guide for embroidering the daisies and the small butterflies. Sew a sequin and a bead into the centre of each flower. To do this, go UP through the centre hole, thread the sequin onto the thread, followed by a seed bead, then go back down through the sequin.

Step 9 – Next, embroider the curves at the top of the wings and the leaves from the Daisy plate. Start by going up at hole one, coming down at hole 10 from there, (see the markings I put on the sewing guide) it is a case of advancing one stitch forwards and then backwards until you get to the end of the ‘arch’.
Step 10 – Move to the larger butterflies and follow the diagram in the pic. The body and antenna are done in back stitch.
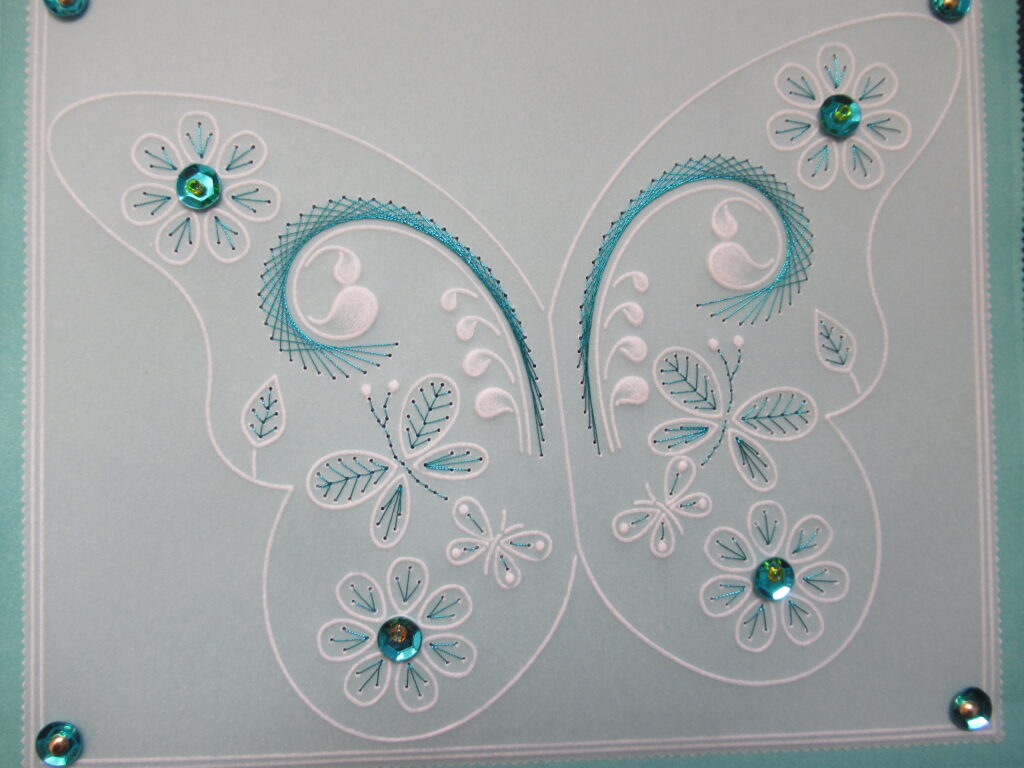
Step 11 – Stamp a sentiment at the bottom of a 7 x 7 white card blank, then mount the parchment piece at the top. Add a tied ribbon or twine to make butterfly antlers.
Another stunner from Glynis – take elements from different design plates and combining them.
Everything that Glynis has used can be found on the Clarity website HERE
Looking at the week ahead:
Monday 22nd January :
In the SHAC with Barbara – 10am Live on Facebook & YouTube
Tuesday 23rd January:
Groovi Tuesday with Paul – 10am Live on Facebook & YouTube
Thursday 25th January:
Get Groovi with Clarity on Create & Craft with Paul – 1pm & 5pm
Friday 26th January:
Crafting with Clarity on Create & Craft with Barbara – 9am & 1pm
Enjoy your week whatever you are up to!
Happy Crafting!
Paul & Glynis xoxo
Clarity – The Home of Art, Craft, and Well-Being.
Beautiful card and lovely clear instructions. Thank you xx
Another lovely project by Glynis & using the embroidery plates in a different design. Just need to find a butterfly outline, I have the other plates but I think I have the Monarch butterfly stamp so will have a play. If not perhaps I can get the SHAC tracing paper out & do it traditionally by drawing the design first then embossing !!
Have a good week everyone, stay safe if Storm Isha comes your way although just looking at the weather reports there are not going to many areas that escape it. Definitely a time to stay indoors & craft.
Lovely project again Glynis. Enbroidery not my strongest point, but will have a go at it. Hope you all survived the storm with minimal damage. Stay safe.
What a clever trick with the sequins! Will have to try that. Thanks Glynis. X
Great step by step, thank you Glynis. x