Clarity Matters Blog Tutorial: How To Create Intricate Lattice Work
Happy Sunday everyone! Paul here.
Time for another step by step project, this week created by Maggie Byford

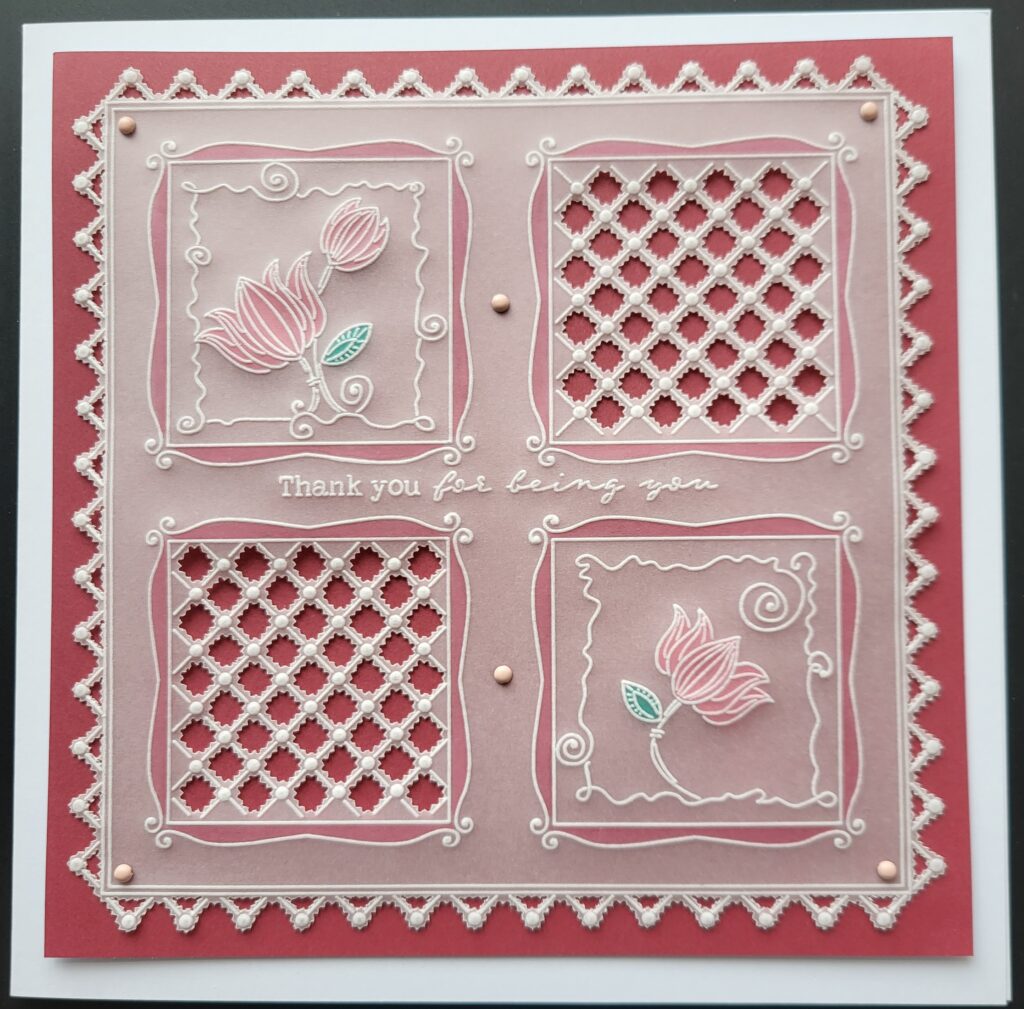
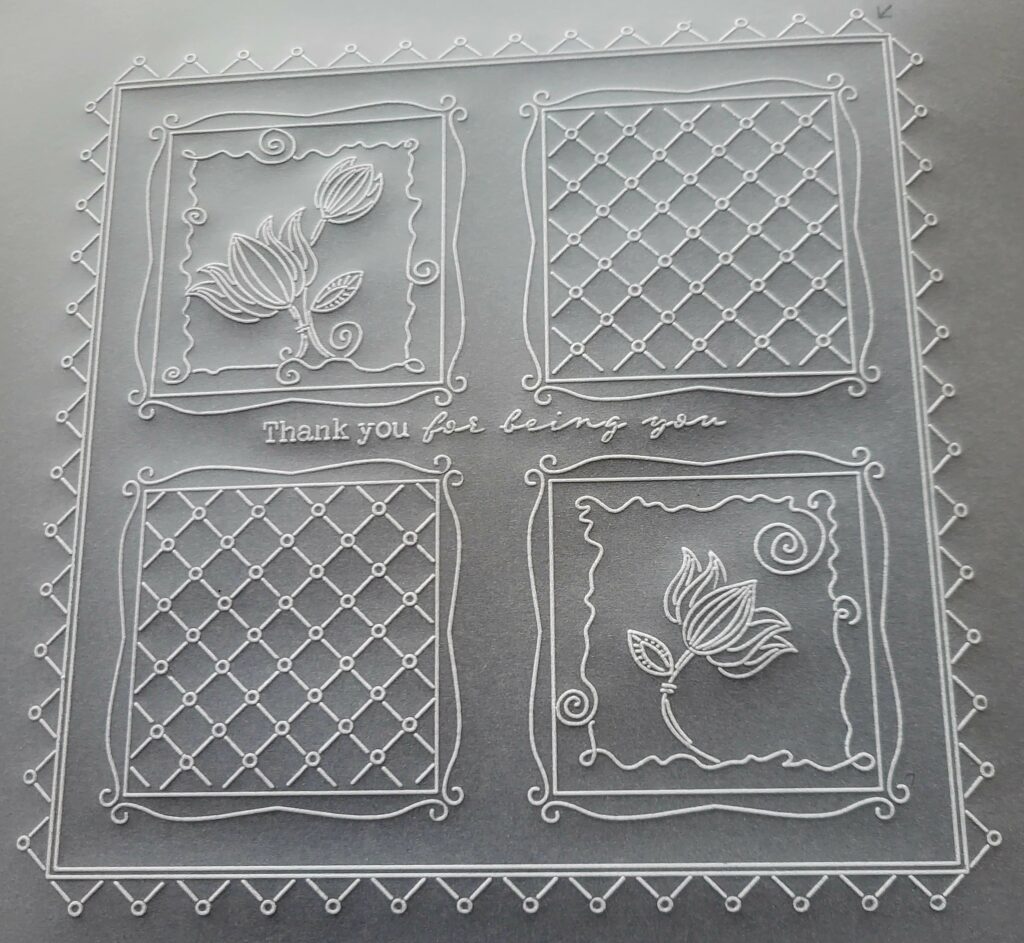
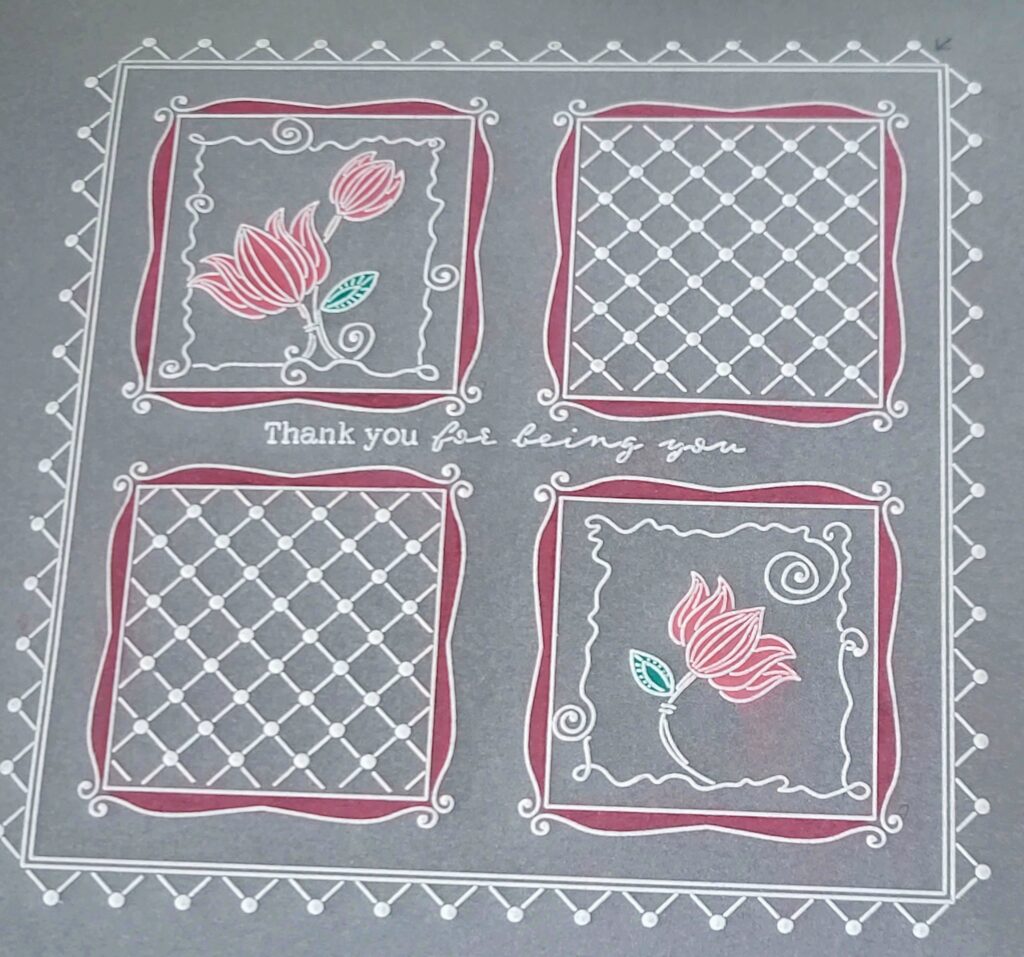
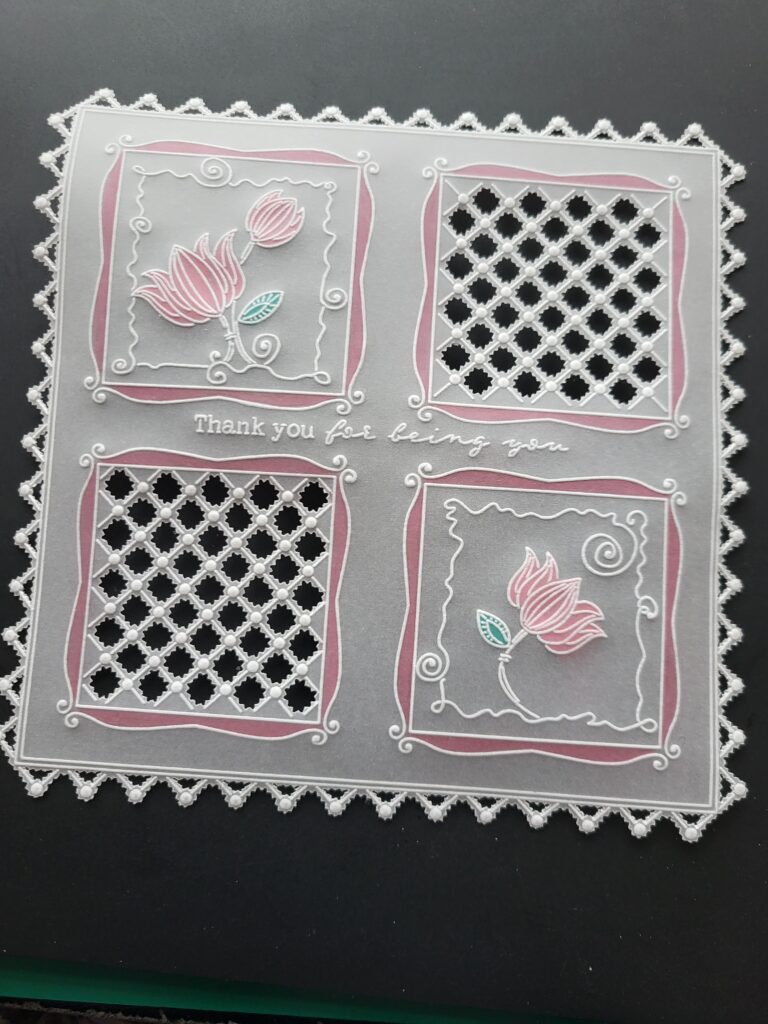
This is where we are heading today and a message from Maggie
Some of you have asked how to pierce and snip latticework using the Lattice Groovi Plate and I hope the Step-by-Step guide I’ve provided for you in this tutorial will help you with the techniques. It is suitable for beginners but you do need a basic knowledge of how to use parchment scissors or snips. You’ll see from my finished card that I’ve only given you two panels of latticework to work on, which I’m sure will be enough to get you started, and this is the finished card that you’ll be aiming for
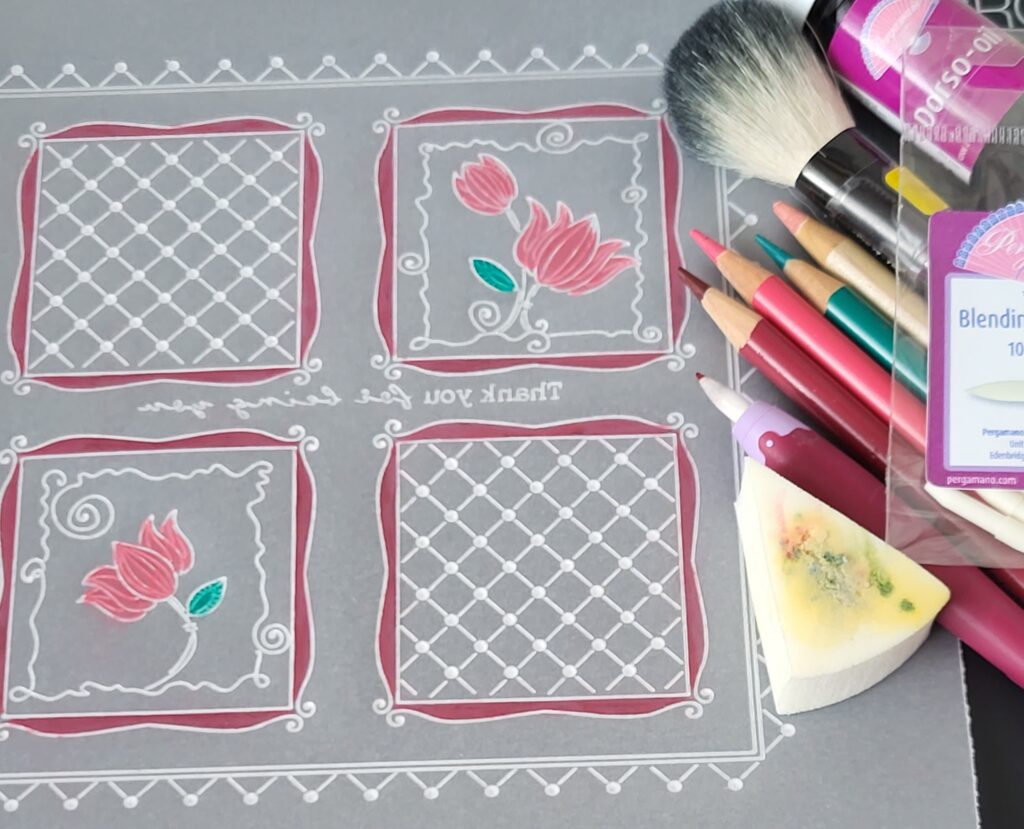
Ingredients:-
Alphabet A5 Square Plate Mate GRO-MA-40002-07
Barbara’s Shac Tulip Floral Panels A5 Square Groovi Plate GRO-FL-41923-03
Lattice A5 Square Groovi Plate GRO-PA-41784-03
Nested Squares Picot Cut A4 Square Groovi Plate GRO-PA-41035-15
Groovi A4 Clear Parchment Paper A4 GRO-AC-40024-A4
2-Needle Bold Perforating Tool (10288) PER-TO-70279-XX
Pergamano Excellent – Embossing Mat PER-AC-70075-XX
Groovi Embossing Tool 1 and 2 GRO-AC-40026-XX
Pergamano 1mm Ball Tool Extra Small (10071) PER-TO-70011-XX
Black Dual-Purpose Groovi Mat A4 GRO-AC-40194-A4
A5 Black Super Foam GRO-AC-41765-XX
Groovi Sticker Tabs x 16 GRO-AC-40437-XX
Groovi Guard GRO-AC-40345-XX
Ringlock Scissors (11315) PER-TO-70041-XX
Pastel Mix Pergamano Brads PER-AC-70270-XX
Dorso Oil (21804) PER-CO-70066-XX
Blending Pen and Refill Nibs PER-AC-70440-XX
Spot On Sponges ACC-MG-30537-XX
Dry Tumble Dryer Sheet
Soft brush (optional)
Polychromos pencils: 193 Burnt Carmine, 124 Rose Carmine, 276 Oxide Green Fiery
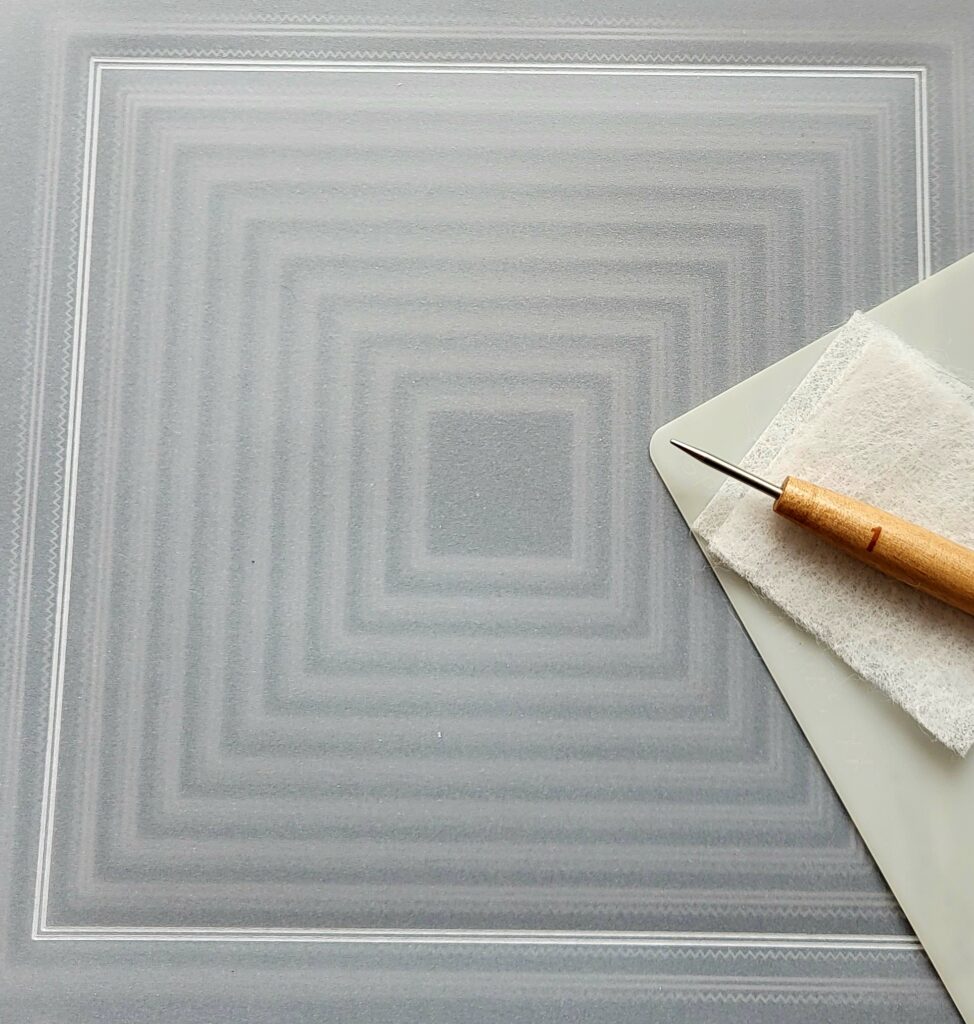
Step 1 – Using Groovi stickers attach clear parchment to the Nested Squares Picot Cut plate and wipe a tumble dryer sheet across the surface to make embossing easier. Use the Groovi No.1 to emboss the double outlines on the 2nd outermost square to form a frame.
Top Tip: Use the Groovi Guard to keep your parchment flat whilst embossing the lines.
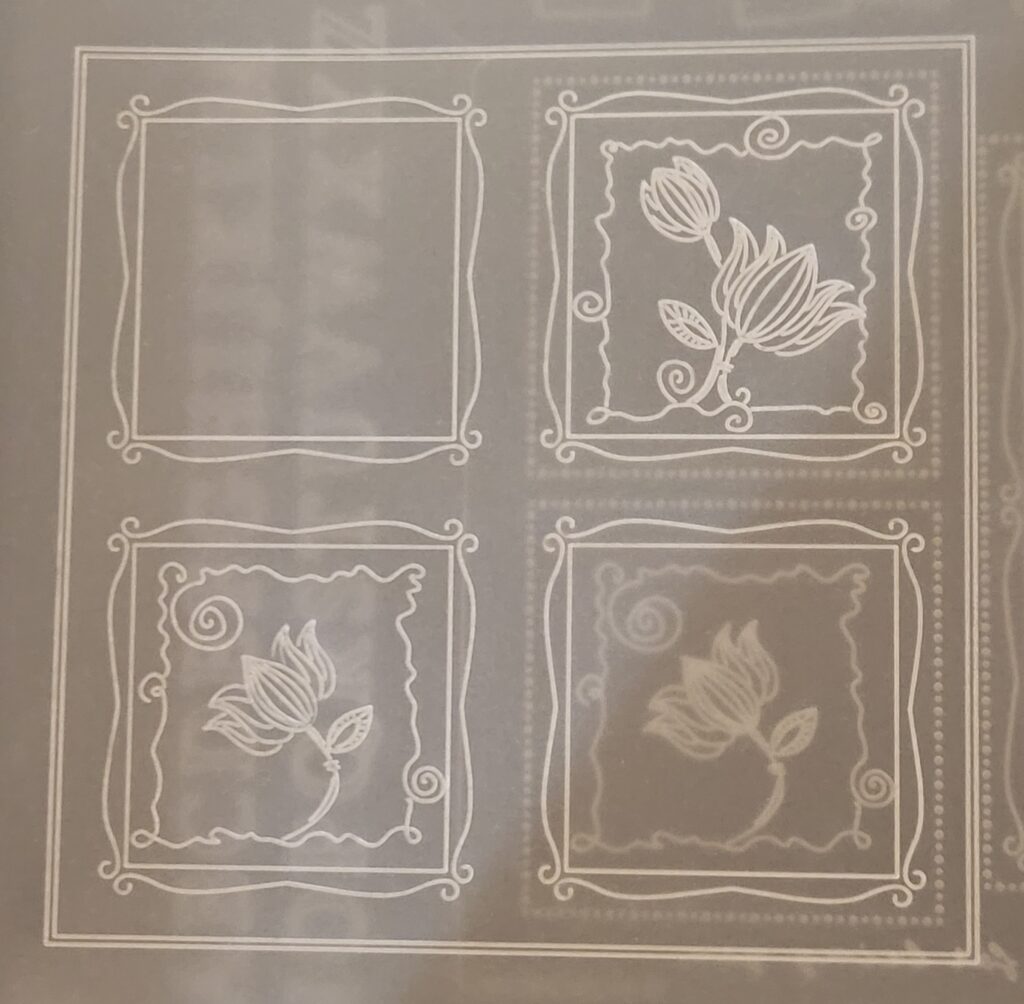
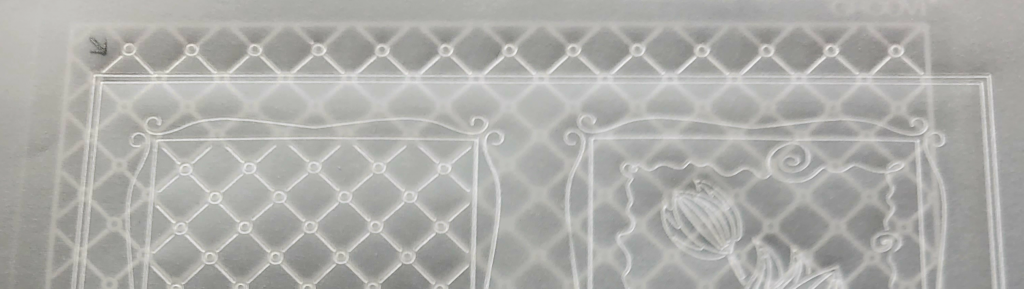
Step 2 – Centralise your embossed frame over the Floral Panels plate and emboss 2 panels down the left side of your parchment using only those outlines as shown on the picture.
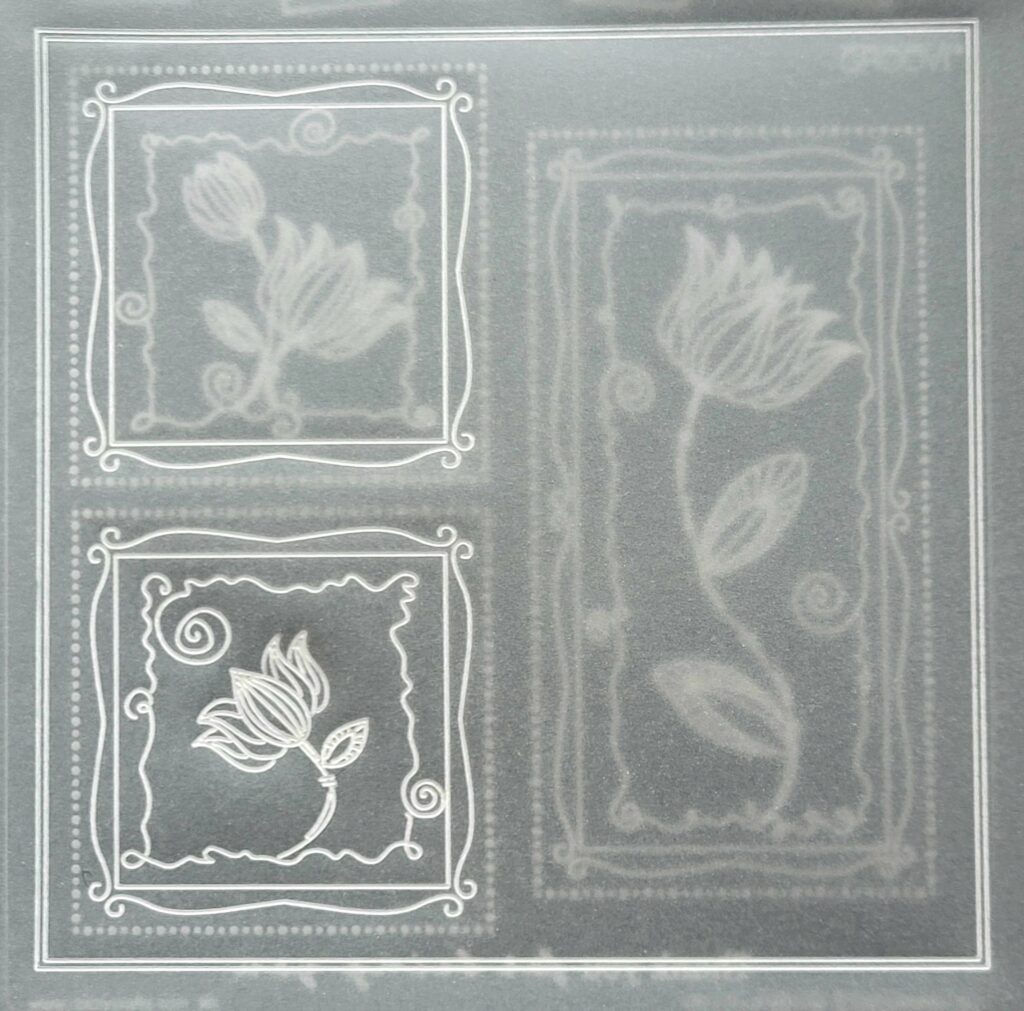
Step 3 – Leave the plate where it is, carefully lift up your parchment and move it slightly to the left, then emboss a further 2 panels down the right side of your parchment, once again using only those outlines shown on the picture. Here’s what it should look like.
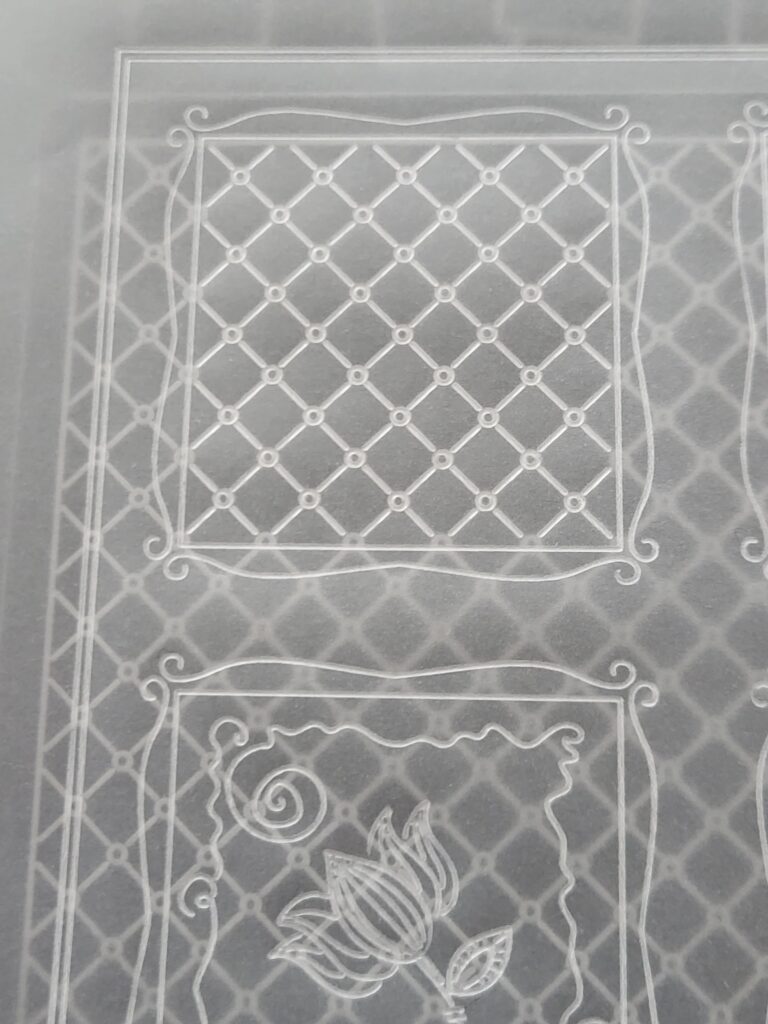
Step 4 – Switching to the Lattice plate, align the top left embossed panel of your parchment over part of the latticework where shown on the picture, and emboss diagonal lines and connecting circles to fit nicely within the panel.
Step 5 – Lift up your parchment and carefully align the bottom right panel on your parchment over part of the latticework where shown on the picture, and again emboss diagonal lines and connecting circles to fit within this panel.
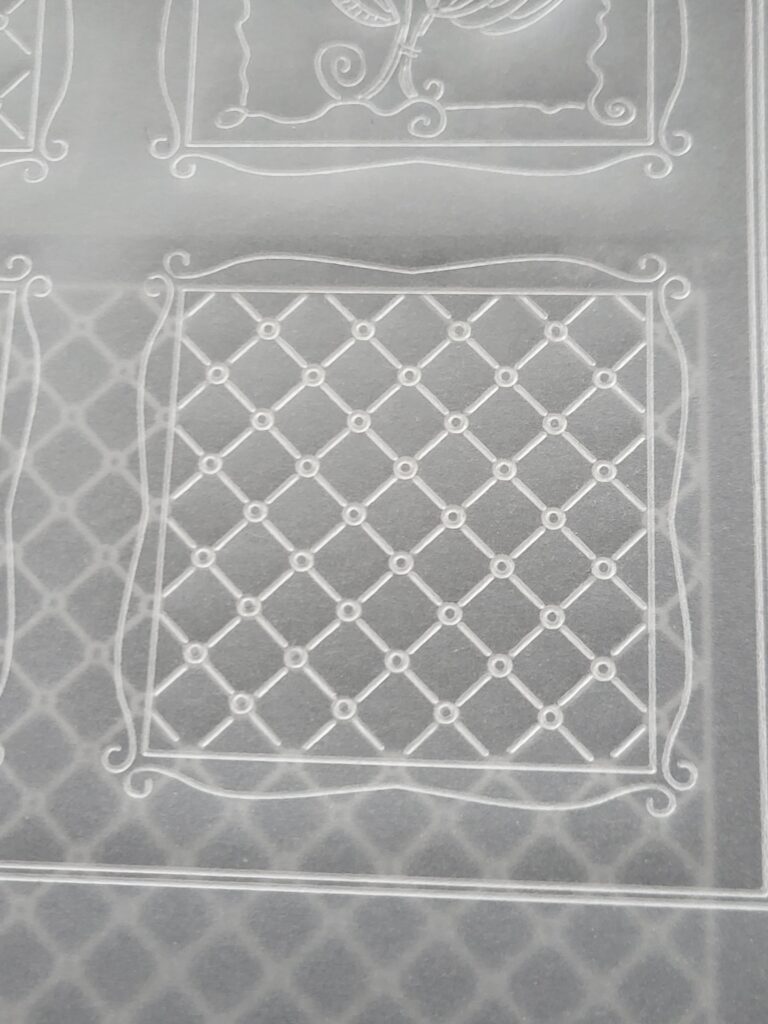
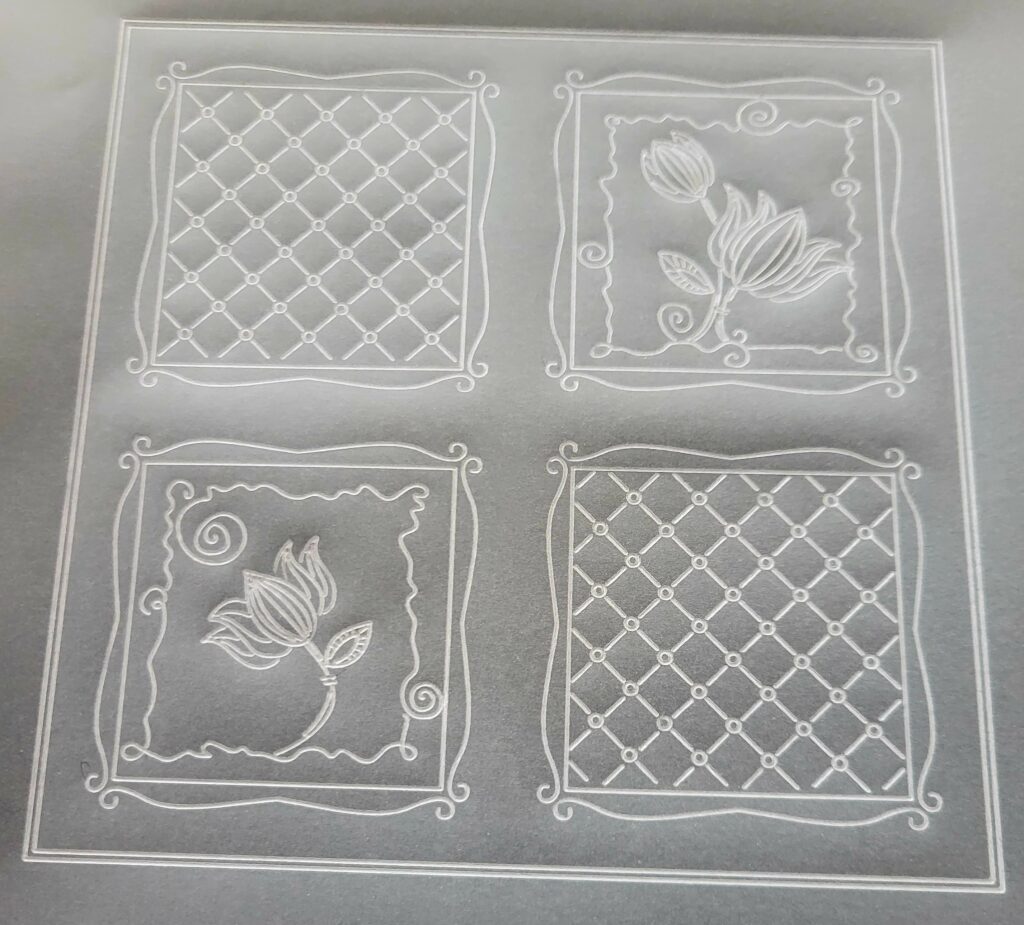
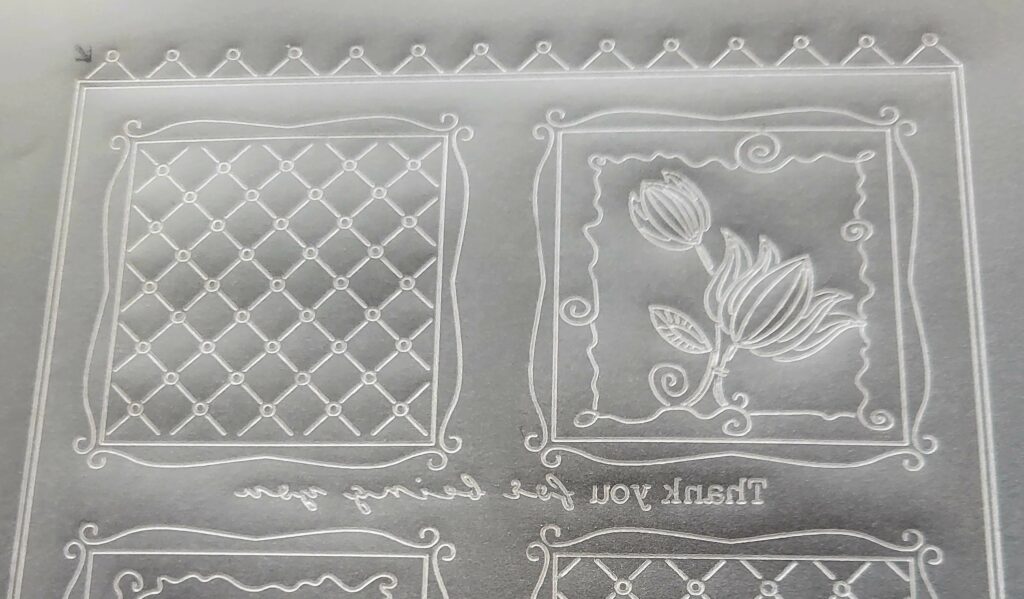
This is what you are aiming for when both panels have been done.
Step 6 – Switching back to the Floral Panels plate, emboss the Thank you for being you sentiment where shown on the picture. Alternatively use a greeting of your own choice.

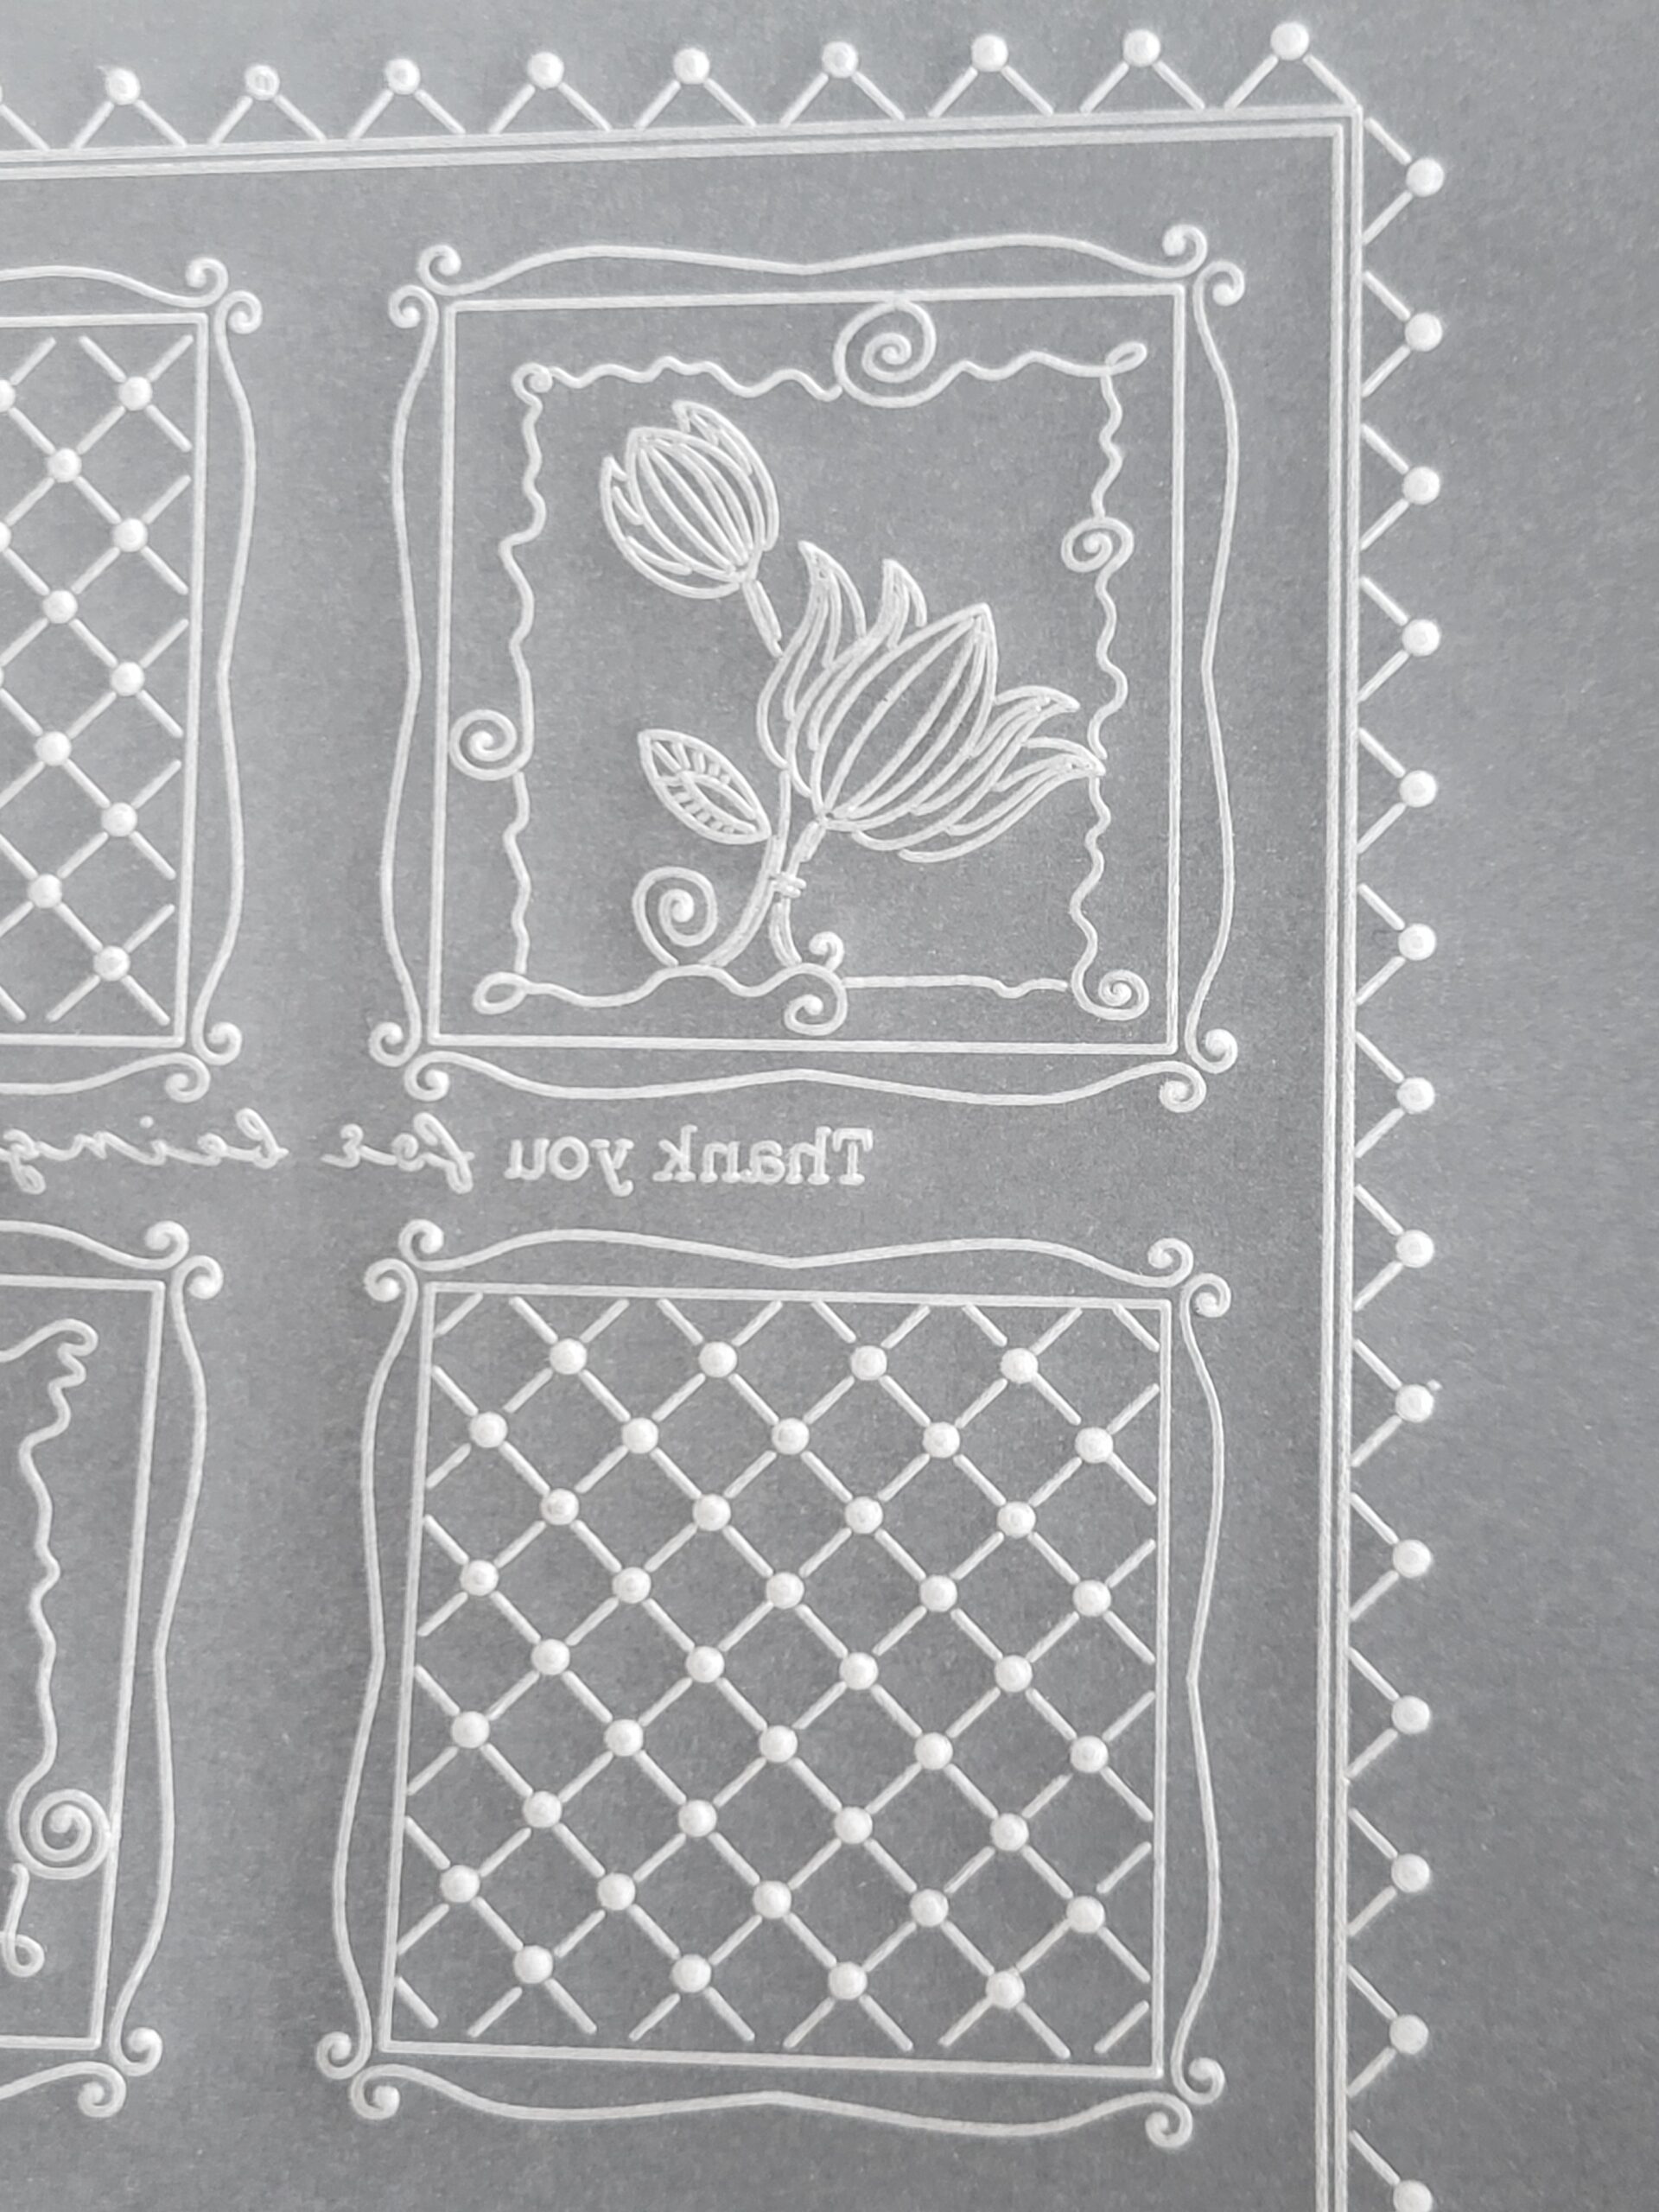
Step 7 – Using the Lattice plate and referring to the arrow at the top left of the picture, emboss the 13 half-diamond shapes along the top row of the outer frame ensuring that you start in a little from the left edge
Add an extra shape at the end to make a total of 14 and this is how the top edge should look.
Step 8 – Repeat Step 7 on the remaining 3 sides of the outer frame so it looks like this.
Step 9 – Use Pergamano 1 embossing tool to emboss all the connecting circles inside the 2 latticework panels and around the outer frame. As an option you can also emboss tiny dots at the ends of the curly frames within 2 of the inner panels as I have done.
Step 10 – Still working on the back of your parchment use Polychromos pencils to add colour as follows: 193 Burnt Carmine inside the double outlines of all 4 fancy frames; 124 Rose Carmine inside the flowers, and 276 Chrome Oxide Green Fiery inside each leaf. Use a soft brush to brush away any pencil residue, then use your blending nibs with a small amount of Dorso oil taken from a Spot On Sponge to blend each of the colours.
This is what it should look like from the front of your parchment.
Step 11 – Place your parchment face up onto a thick perforating mat and using your Groovi Guard and Pergamano Bold 2-Needle tool, pierce as follows:
– inside each of the diamond shapes within each of the 2 latticework panels.
– inside the half-diamond shapes along the outer frame.
– along the outside edges of the half-diamond shapes.
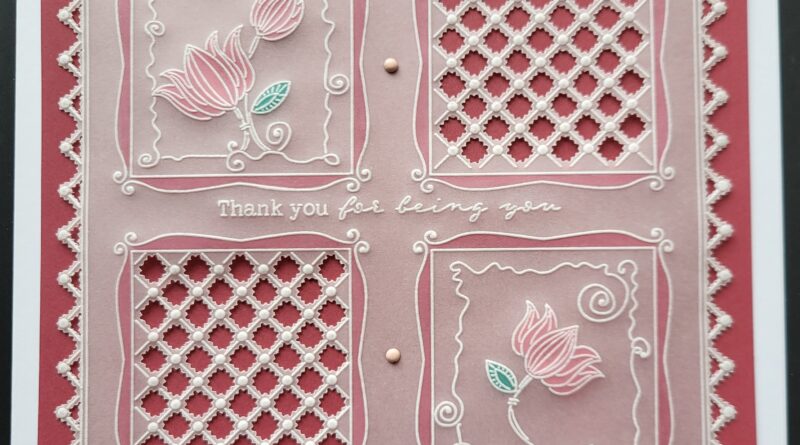
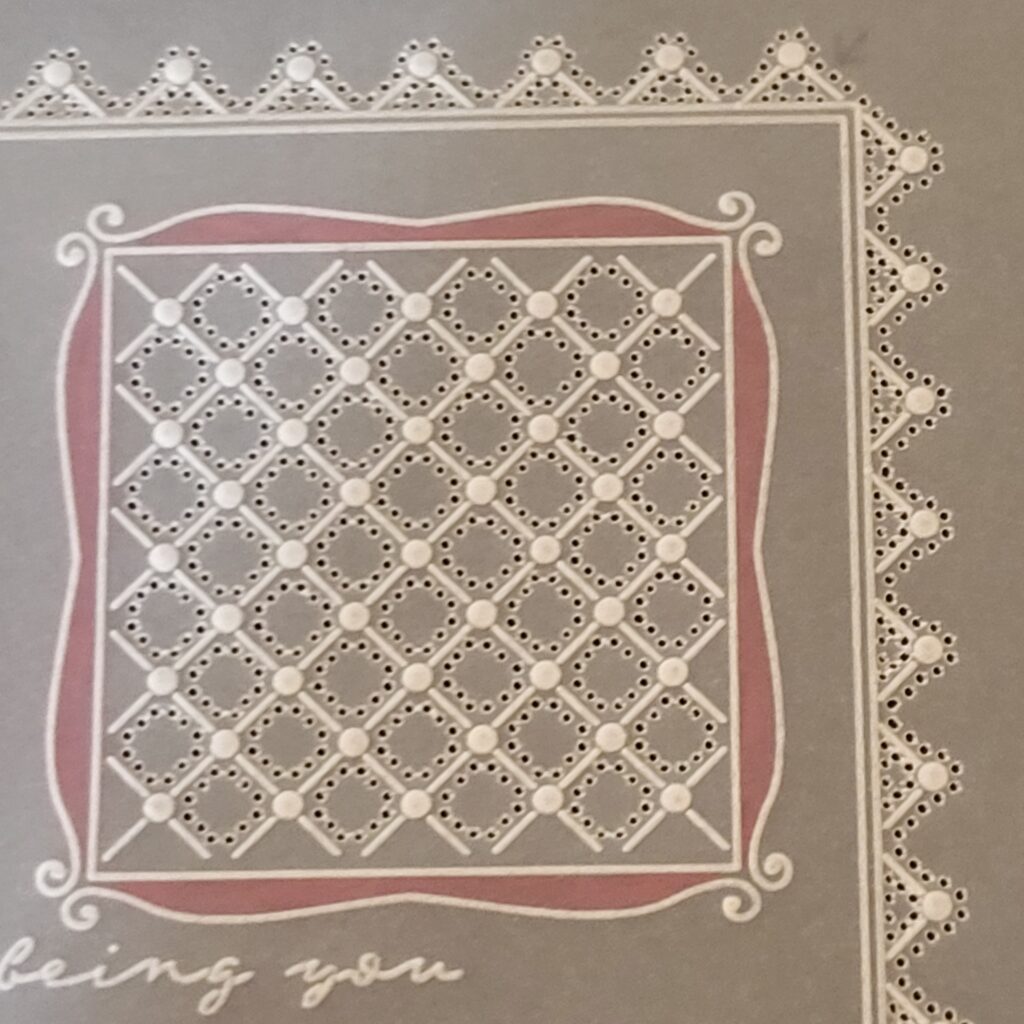
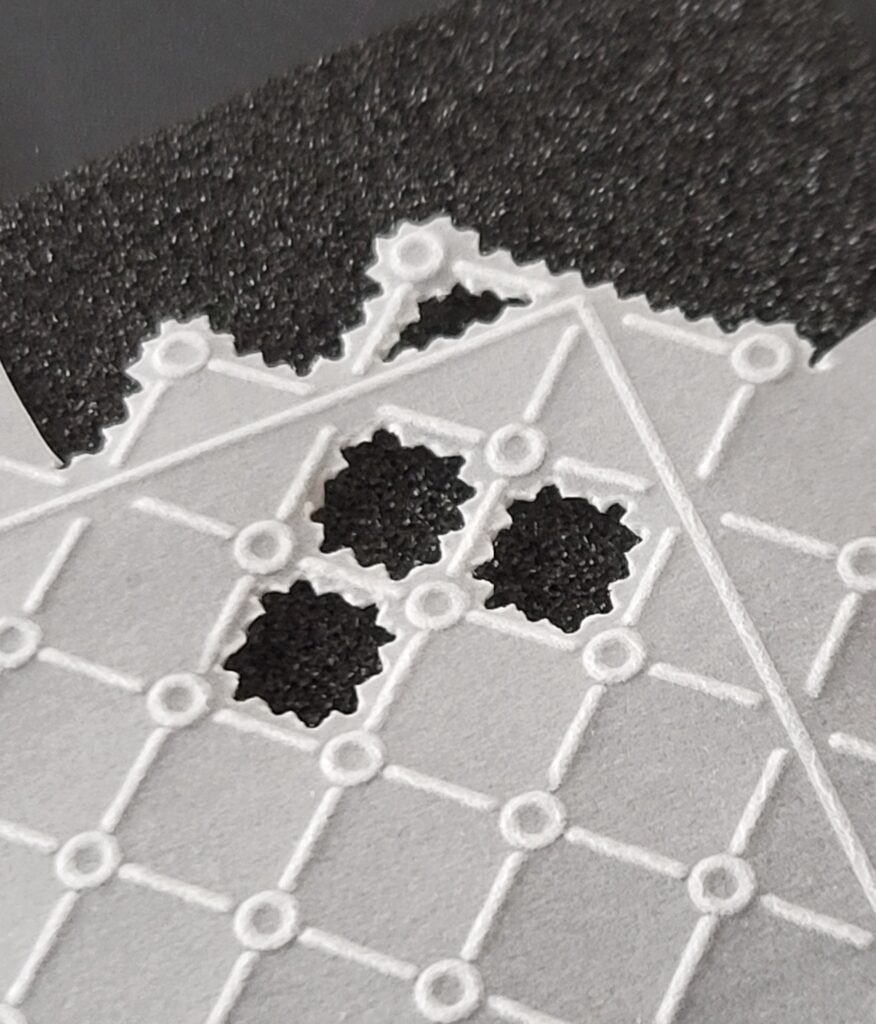
Here is a close-up corner-section showing what you are aiming for.
Top Tips: Using a Groovi Guard when piercing helps keep your parchment flat and stop it from lifting up whilst piercing. Ensure you hold the Bold 2-Needle tool upright and only press down as far as the middle section of the needle, which is the broadest part, as inserting too deeply may cause the parchment to split.
If you are new to piercing latticework then I suggest you use a spare piece of parchment to make yourself a simple practice piece to work on as I have done.
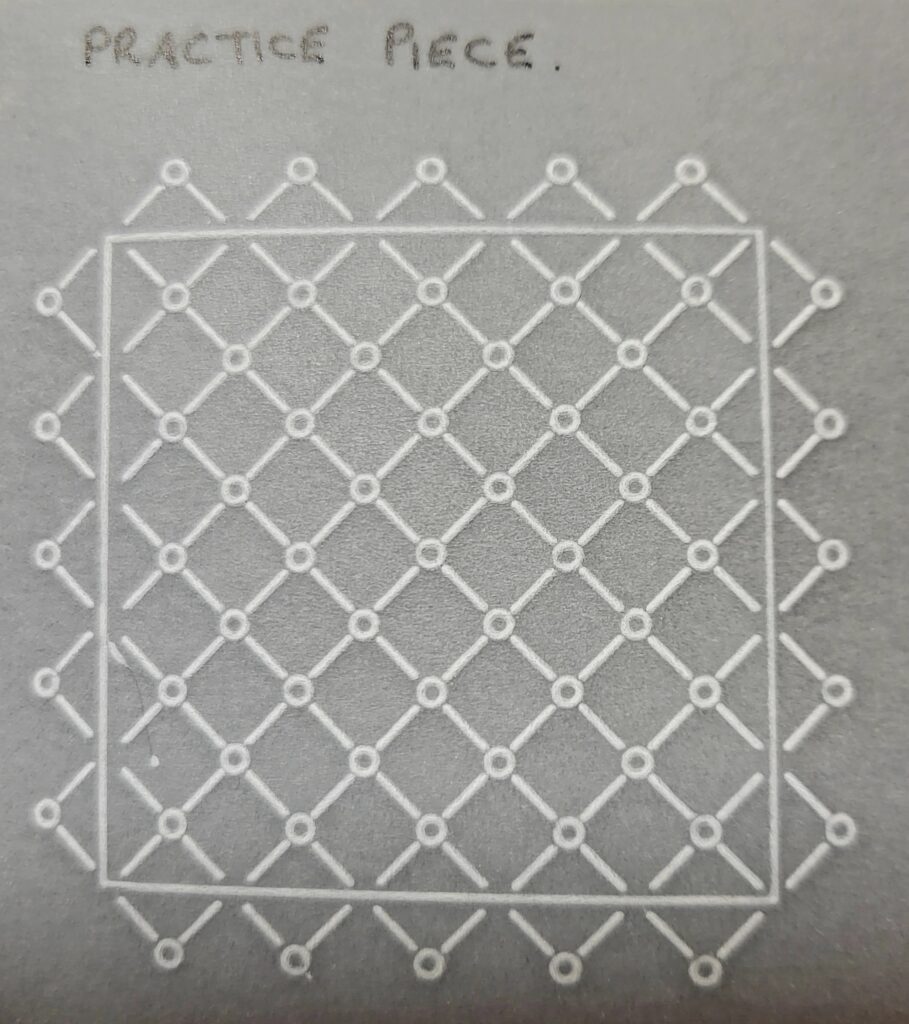
Step 12 – Still working on your practice piece we’ll move on to snipping between the Bold 2-Needle perforations which is done from the front of your work using parchment scissors or snips. On the picture you’ll see I’ve marked 3 of the diamond shapes with a cross as a guide as to which shapes to snip. You can begin by snipping from inside one of the shapes starting with the top 2 perforations, turning the parchment as you work and making sure the downward curve of your scissors or snips is always over the cross whilst snipping. Repeat on the remaining 2 shapes then inside the half-diamond shape on the outer frame.
Note: The cross is on the waste parchment which is meant to fall away when the shape is cut out.
For the perforations along the outside of the half-diamond shapes, snip along the outside of the shapes as indicated by the arrow, again turning the parchment as you work.

This is what it should look like
Step 13 – When you’ve practiced the piercing and snipping you can apply it to your main parchment and this is what it should look like when completed.
Step 14 – To finish, cut a piece of Clarity Companion paper to size (I used a sheet of Shenandoah Companion paper). Attach your work to the front of it using Pergamano Brads, then mount onto the front of folded white card 7×7”. Here is the finished card

Another fantastic step by step from Maggie, thank you x
Everything that Maggie has used can be found on the Clarity website HERE
A busy week ahead at Clarity Towers:
Monday 15th January :
In the SHAC with Barbara – 10am Live on Facebook & YouTube
Tuesday 16th January:
Groovi Tuesday with Paul – 10am Live on Facebook & YouTube
Wednesday 17th January:
Groovi One Day Special on Create & Craft with Paul – 6pm & 9pm
Thursday 18th January:
Groovi One Day Special on Create & Craft with Paul – 10am & 2pm
Thursday 18th January:
In the SHAC with Barbara – 7pm Live on Facebook & YouTube
Enjoy your week whatever you are up to!
Happy Crafting!
Paul & Maggie xoxo
Clarity – The Home of Art, Craft, and Well-Being.
Beautiful project Maggi, love this card xx
Very pretty card and lovely clear instructions! Thank you!
Thank you Maggi , this is beautiful, I have all the products to make this and need a larger house for all my Clarity “STUFF”
Its lovely to have new ideas, thank you again Maggi. xx
Love Janet
Thank you Maggi your instructions and photos are nice and easy to follow. The arrows & crosses on the practice piece are particularly helpful to those just starting out. Brilliant xxx
Thank you Maggie for all the info, will certainly be having a go, Angela.x
I love this project Maggie. Thank you for creating it and doing a wonderful tutorial for us. Xx
Thank you Maggie for such a comprehensive step by step. Great.
Lynn xx
Beautiful project and great instructions 😀😀😀😀😐
Thanks Maggie & Paul, a very pretty project x
Good morning Paul & Maggie, a lovely project & great step by step instructions. I hadn’t thought of using the grid plate to make an edge. I have the stamp set but not the Groovi plates so it will be a project put on my to do list although I can use the lattice grid for borders. Look forward to seeing what others do with this weeks project.