Clarity Matters Blog Tutorial: How To Make Lacy Layers with Grids
Hi everyone, Paul here covering for Grace whilst she is over in New Zealand.
I hope you all had a safe and peaceful Christmas and New Year.
This week we are joined by the lovely Glynis Whitehead who will be showing us how to create lacy layers with grids!

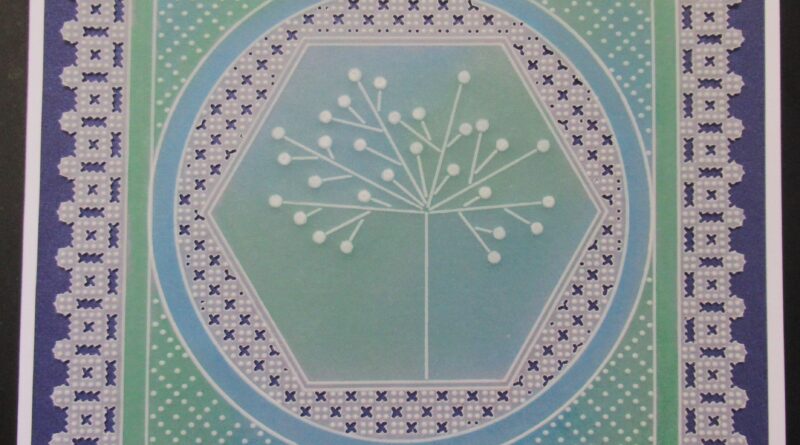
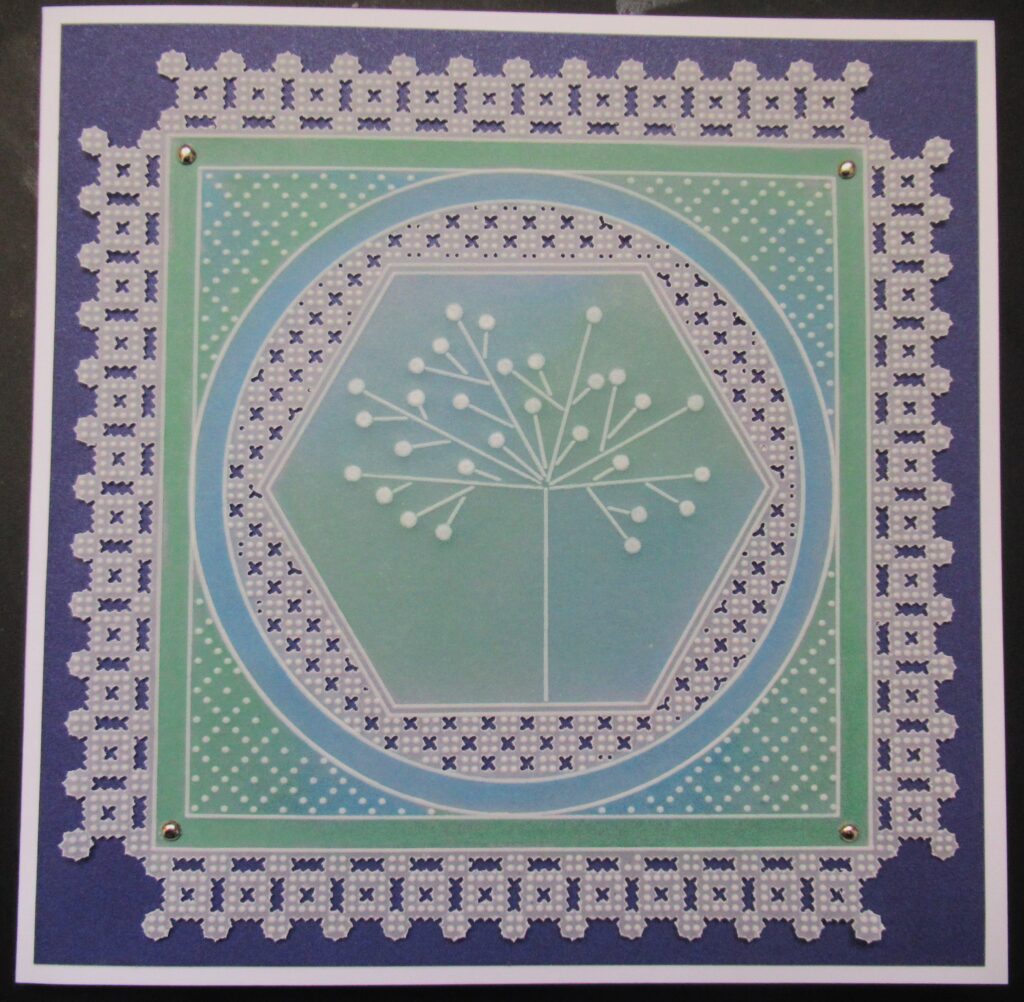
This is where Glynis is going to be taking us
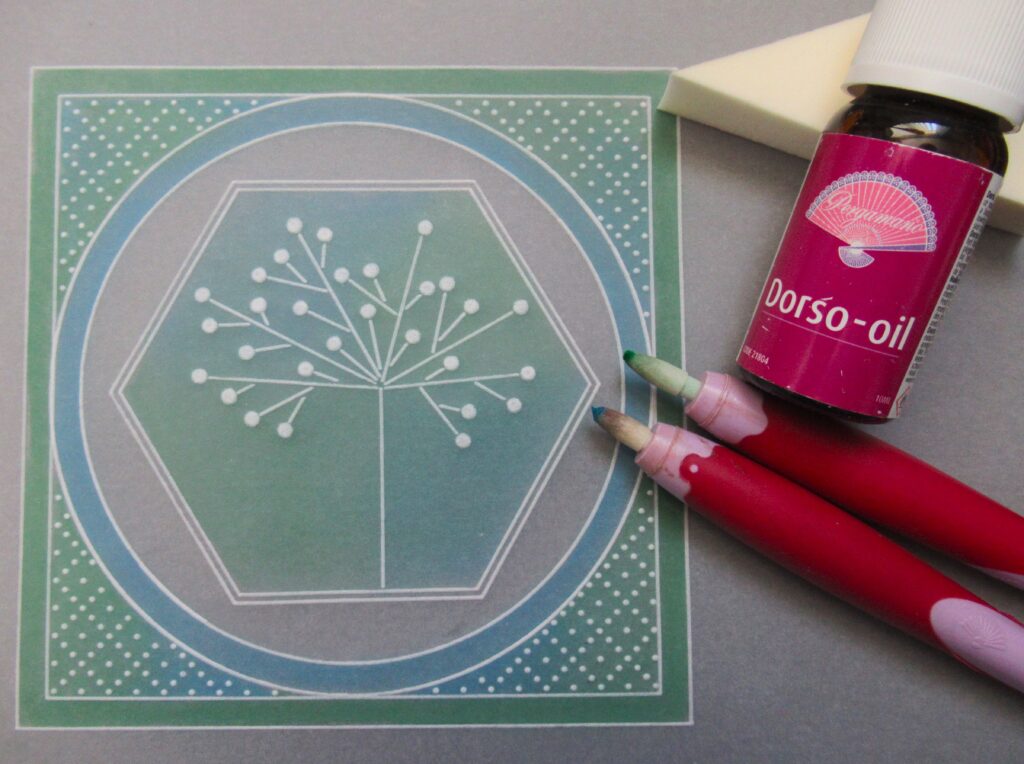
Ingredients:-
Tina’s Funky Bow Tie and Bubble Car Layering Plate – A5sq – GRO-PA-41159-03
Nested Squares A5sq Plate – GRO-PA-40037-03
Nested Circles A5sq Plate – GRO-PA-40051-03
Basic Straight Grid A5sq Plate – GRO-GG-40202-12
Josie’s Straight Embossed Patterns 1 A4sq – GRO-GG-41732-24
Straight Border Grid No 1 – GRO-GG-40350-14
Basic Piercing Grid – Straight – GRO-GG-40384-14
Perga Liner Pencils B – numbers 4 and 6 – PER-CO-70063-XX
Dorso Oil – PER-CO-70066-XX
Spot on Sponge – ACC-MG-30537-XX
Pergamano Blending Pen and Nibs – PER-AC-70440-XX
Plain Parchment – GRO-AC-40024-A4
Shenandoah Companion Paper – ACC-CA-31340-88
6 X 6 White Card Blank – ACC-CA-30618-66
Roll-a-Tape Super Strong Permanent Glue Tape Runner – ACC-MS-31065-XX
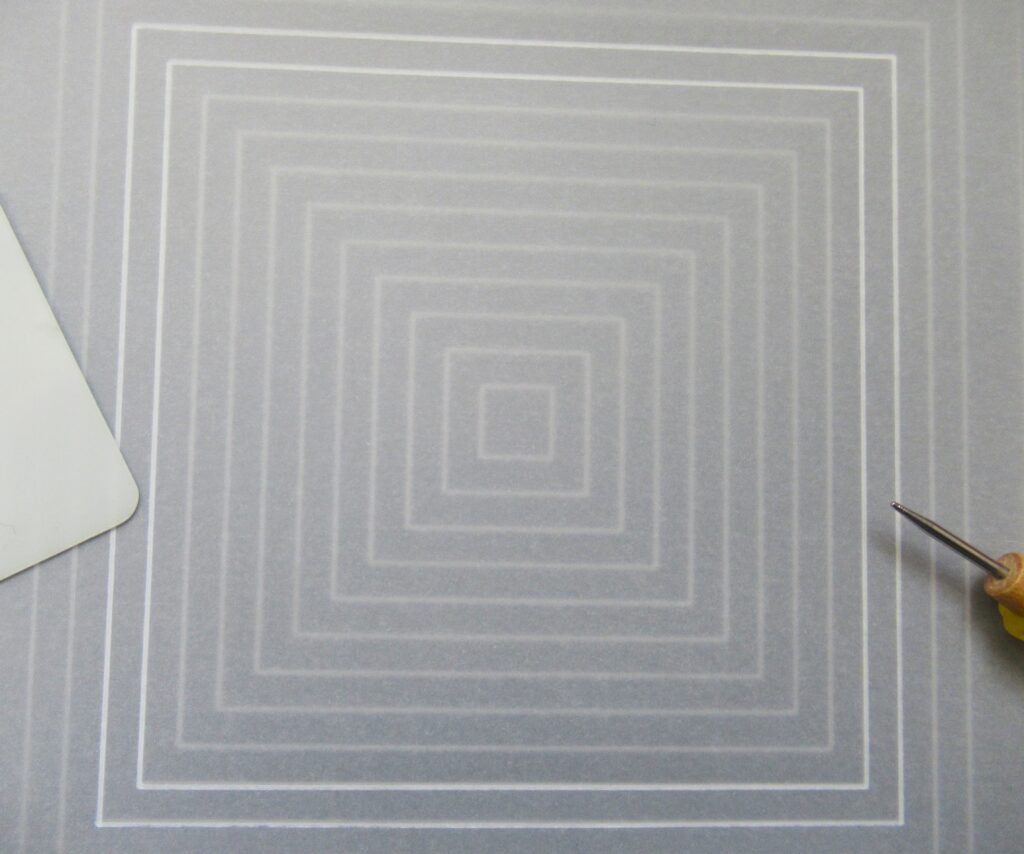
Step 1 – Attach the parchment over the nested squares and emboss the 3rd and 4th lines in from the outer edge.
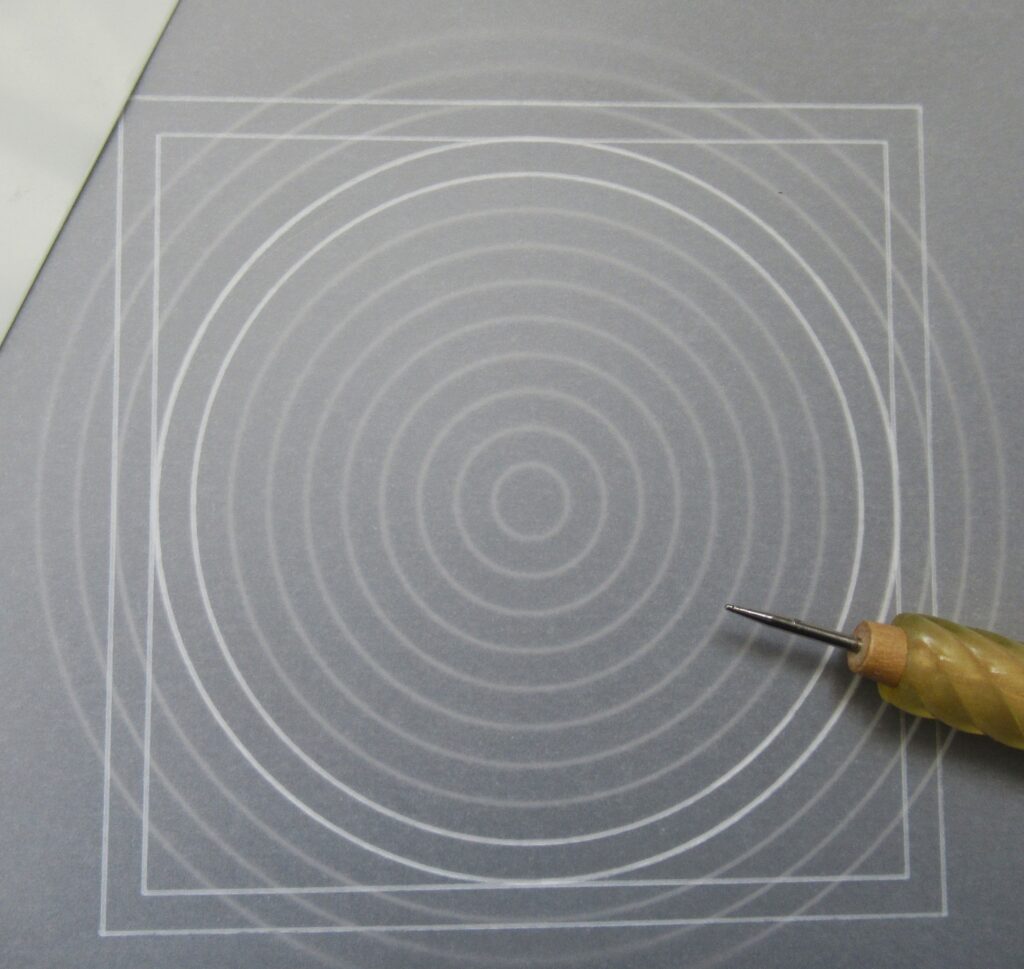
Step 2 – No need to remove the parchment, just lift off the plate mate and slot the nested circle plate in, and it will be in exactly the right place. Emboss the 4th and 5th circles in from the outer edge.
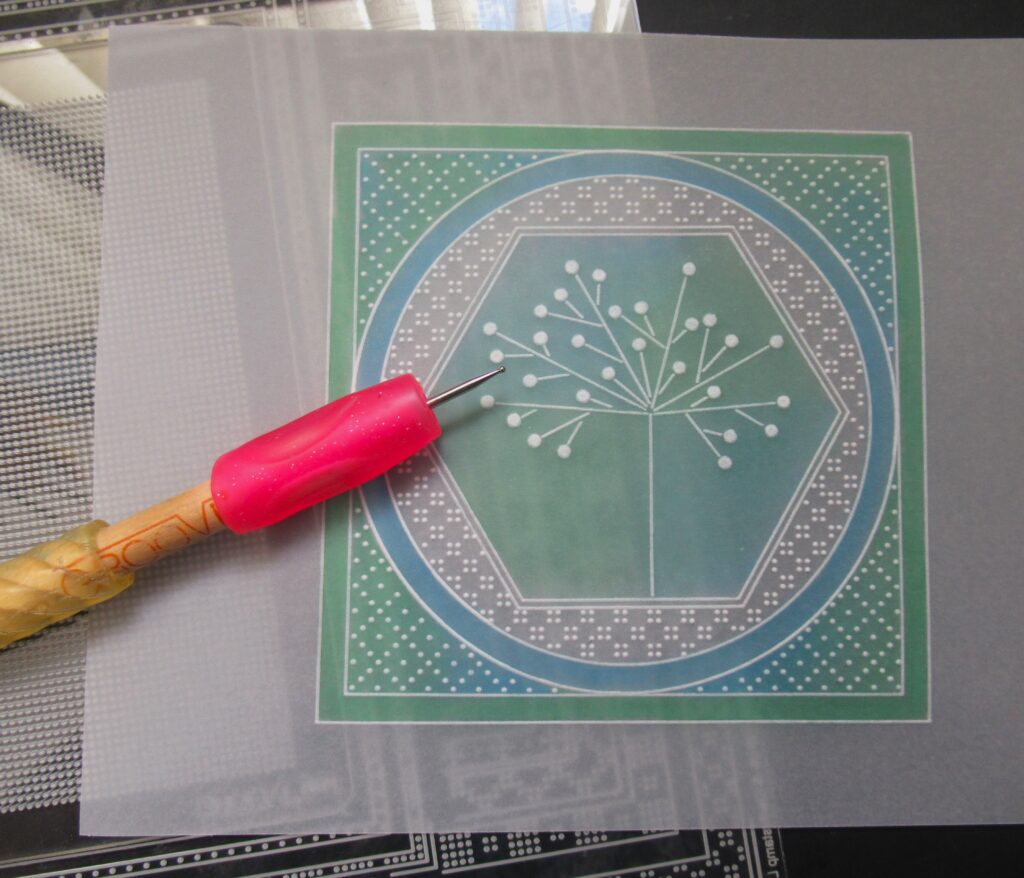
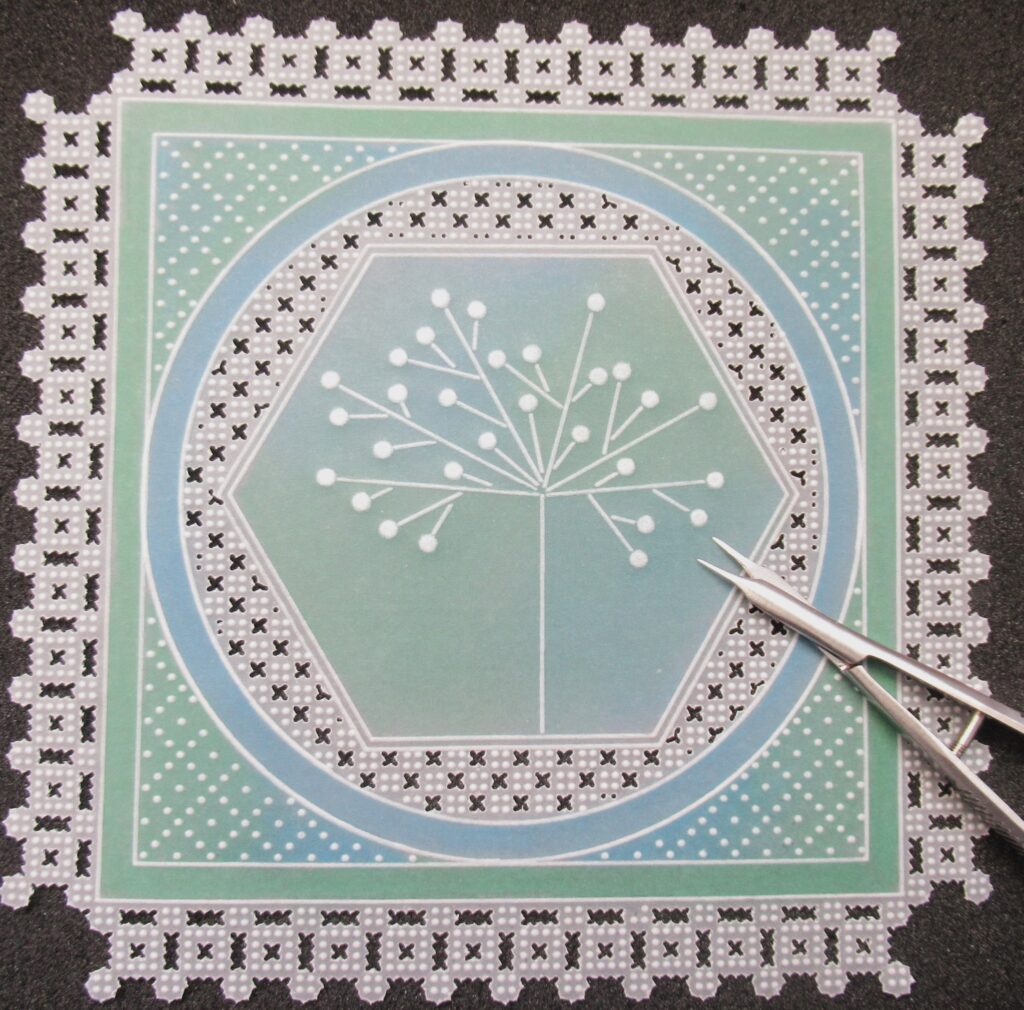
Step 3 – Swap to the Funky Bow Tie plate and centralise the hexagon in the circle. Emboss the outlines and straight lines of the tree in the number 1 tool and the dots with the number 2 tool.
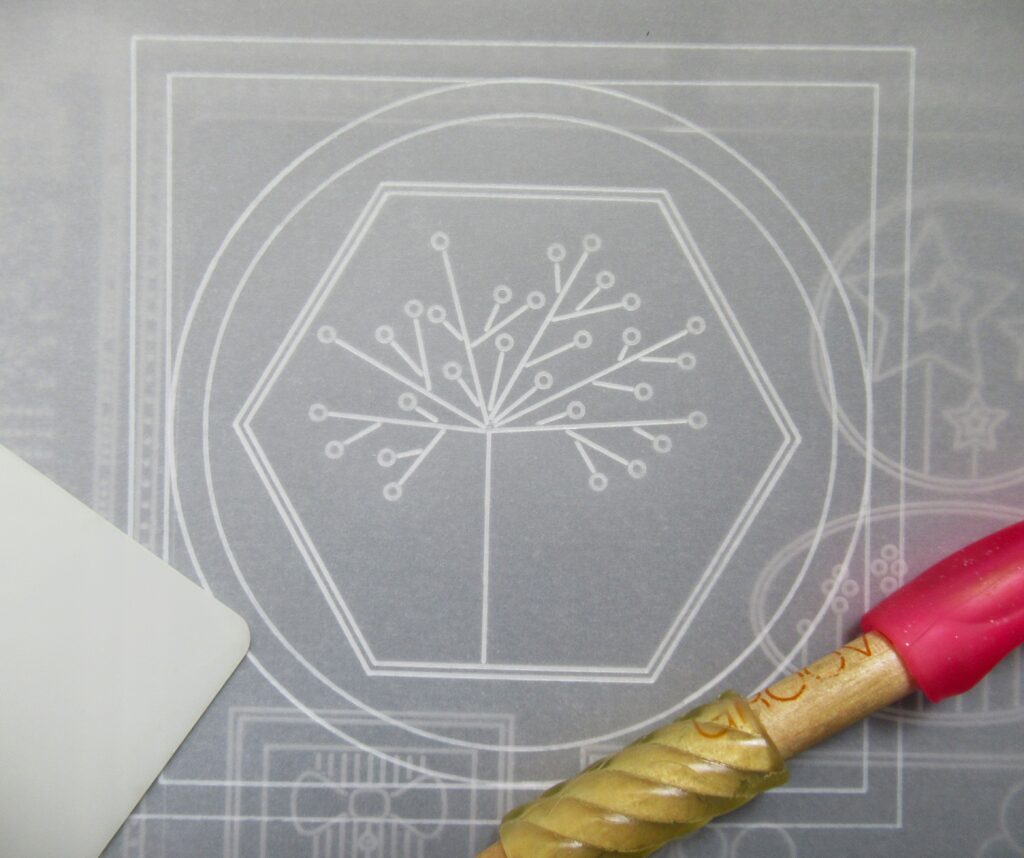
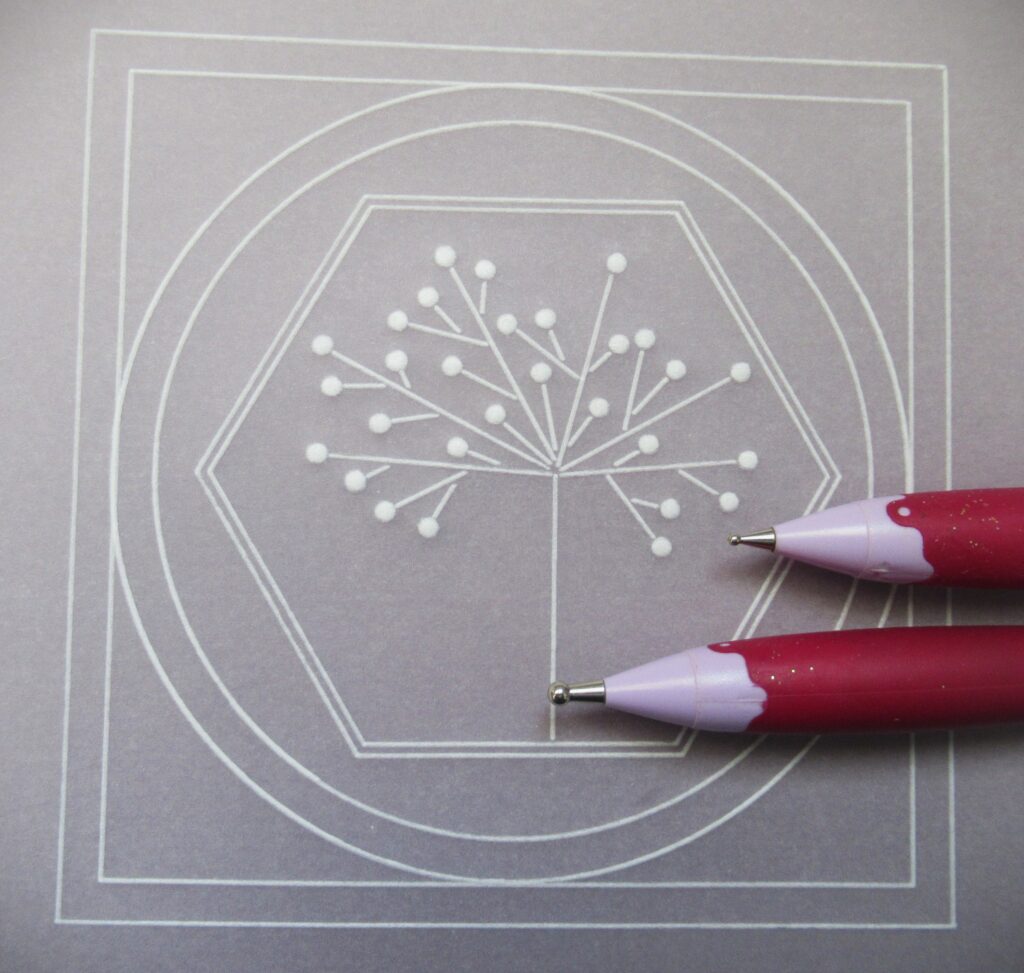
Step 4 – Emboss all the dots on the ends of the branches. Use the number 4 tool or 3mm ball tool first. Go gently round them all, then, by the time you have done them all, they will be rested enough for you to go in with the number 3 tool or 1.5mm ball.
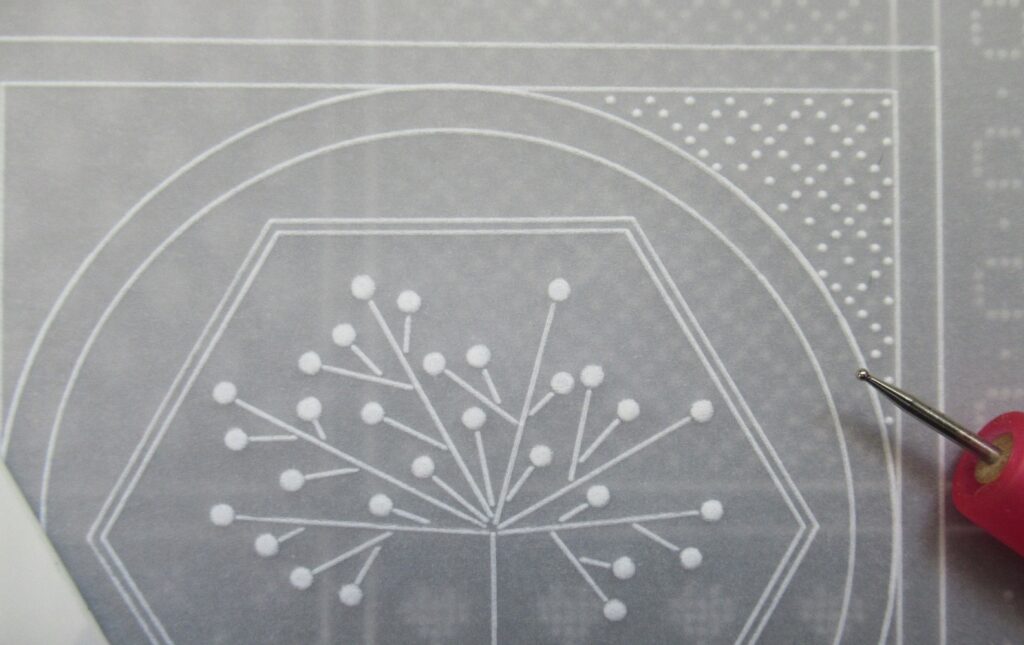
Step 5 – Take Josie’s Straight Embossed Patterns plate and working on the back, line up the corners between the circle and the square frames, and emboss the dot pattern in each corner, one at a time. Use the number 2 tool for this job.
Step 6 – Before we do any more grid work, we need to put the colours into the piece. If we don’t do it now, it will be difficult to do so once we have pierced the parchment. With the blue and green pencils, use the edge to put some pigment down. Mix the colours in patches in the hexagonal motif and in the corners. Then blue in the circle frame and green in the square frame.
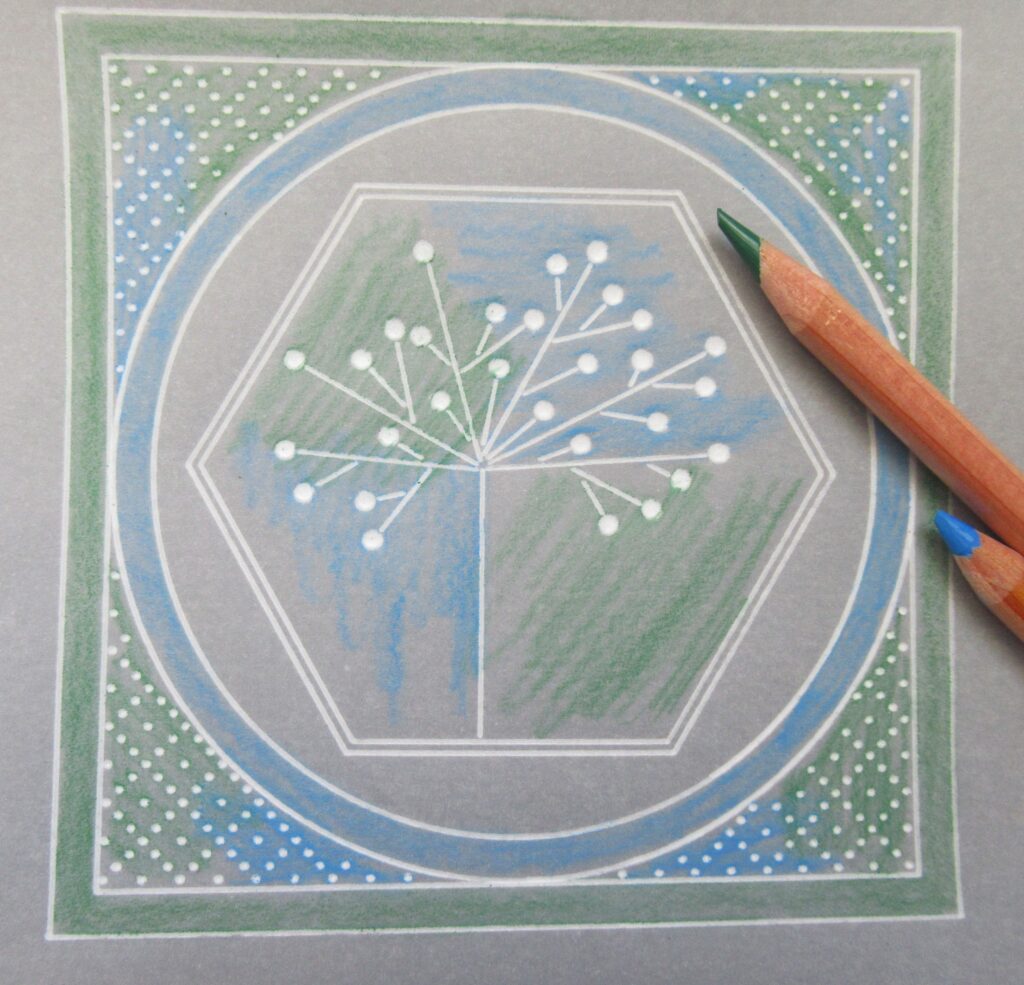
Step 7 – Pop a tiny drop of Dorso oil onto a Spot On Sponge, dip the blending nib into it, but do not too much, as it will remove colour rather than blend it out. Blend the green and blue into each other, and then around the margins.
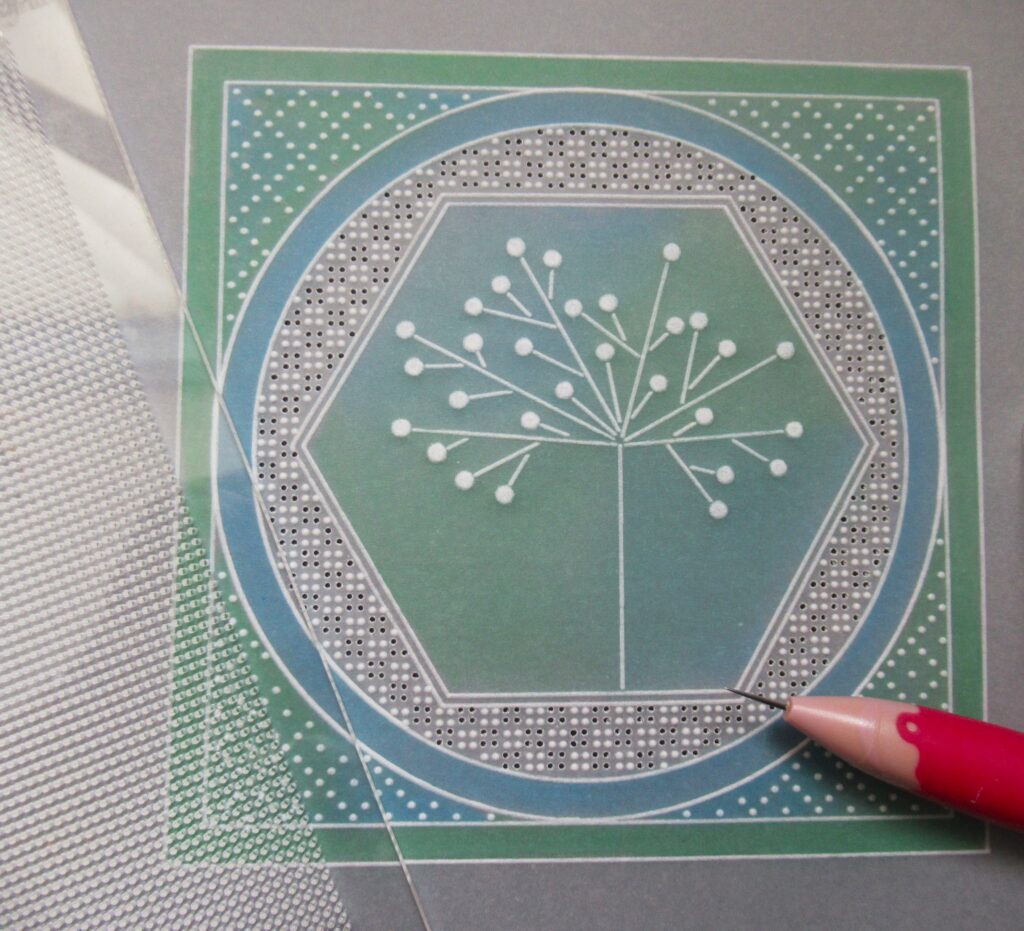
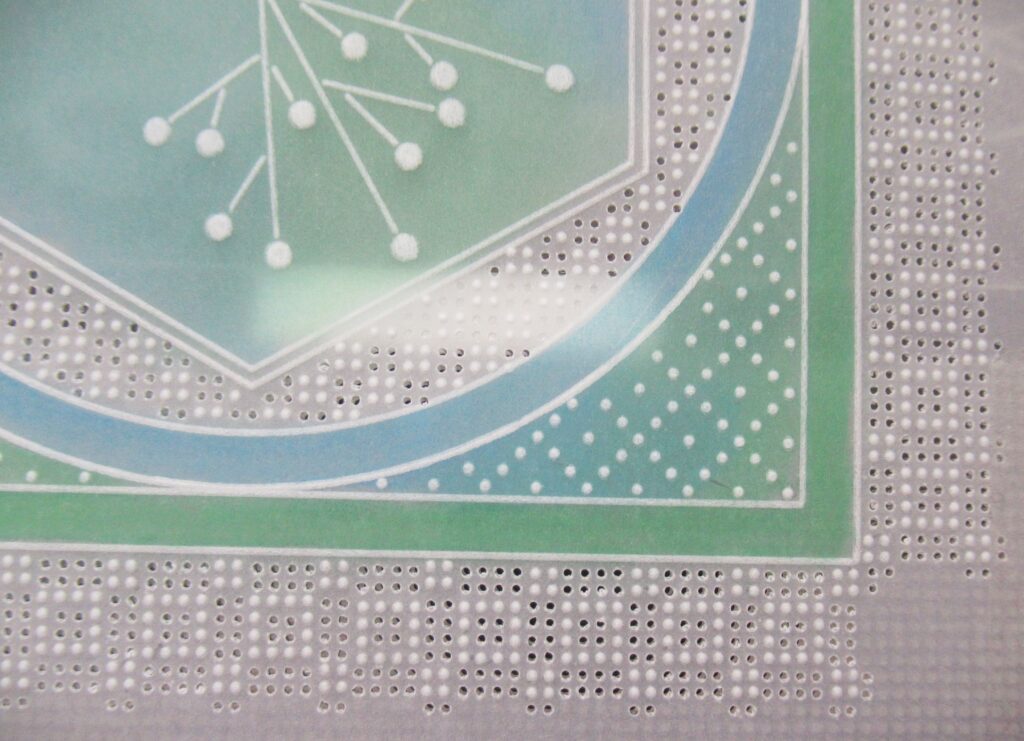
Step 8 – Working on the back, and around the outline of the hexagonal, line the work up on the grid (A5sq) and use the number 2 tool to emboss dots – emboss 4, miss 4 (like a checker board pattern).
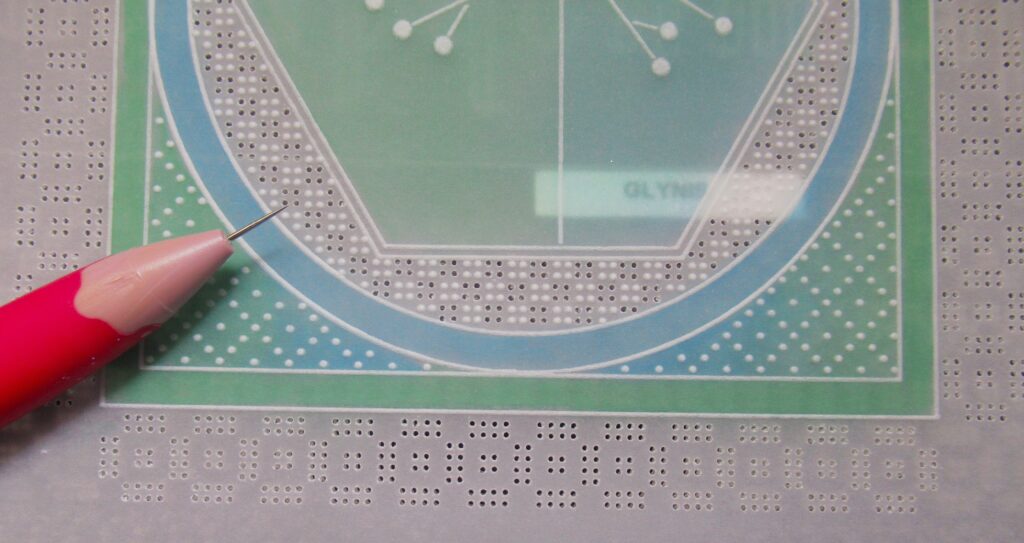
Step 9 – Turn the work over and use a bold single needle tool to perforate the holes of the grid pattern. Pierce 4, skip over the next four dots and pierce the next 4.
Step 10 – Use the Straight Border grid one, and line up the ‘square’ hole pattern up along each side of the border. Line it up so that the pattern is equal at each corner. *Be careful not to go past the corner. Turn the work around to work down each side.
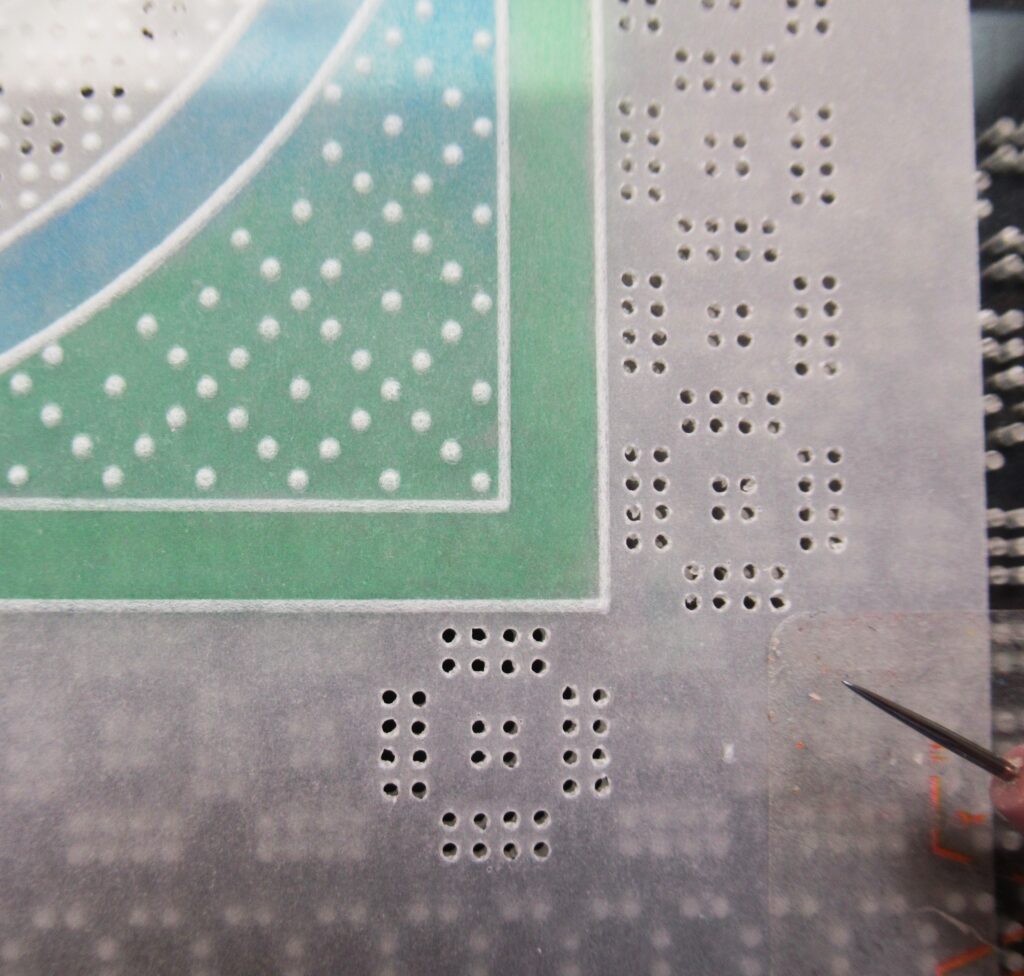
Step 11 – Swap Straight Border grid 1 out for the Basic Piercing Grid. Turn the work over and line up the grid work so that the there are holes between all the perforations. Then use the number 2 tool to emboss dots. Take note of the corners, and emboss 4 extra dots on each one.
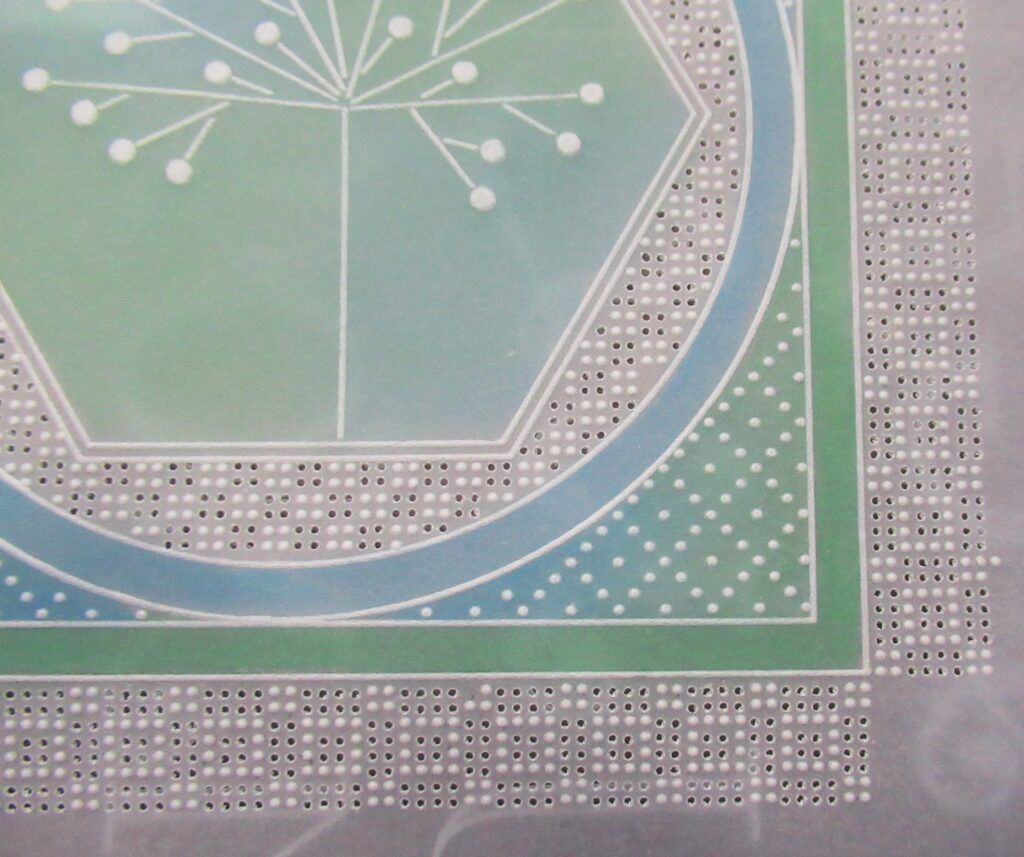
Step 12 – Working again, from the front, line up the border on the grid once more. This is a lot easier now, because all the perforations sort of ‘plug’ into the grid. Perforate under the two dots around each side of the border.
Step 13 – When snipping crosses and slots, you need to always point the scissors or snips towards the bit you are going to keep, which means that the body of the cutters will be over the waste. When it is a four-sided (cross), snip one side at a time, turn the work 90degrees, then snip the next side. Continue until all the crosses are snipped. When you come to a three-sided one, make sure to snip the longest side first, before finishing off.
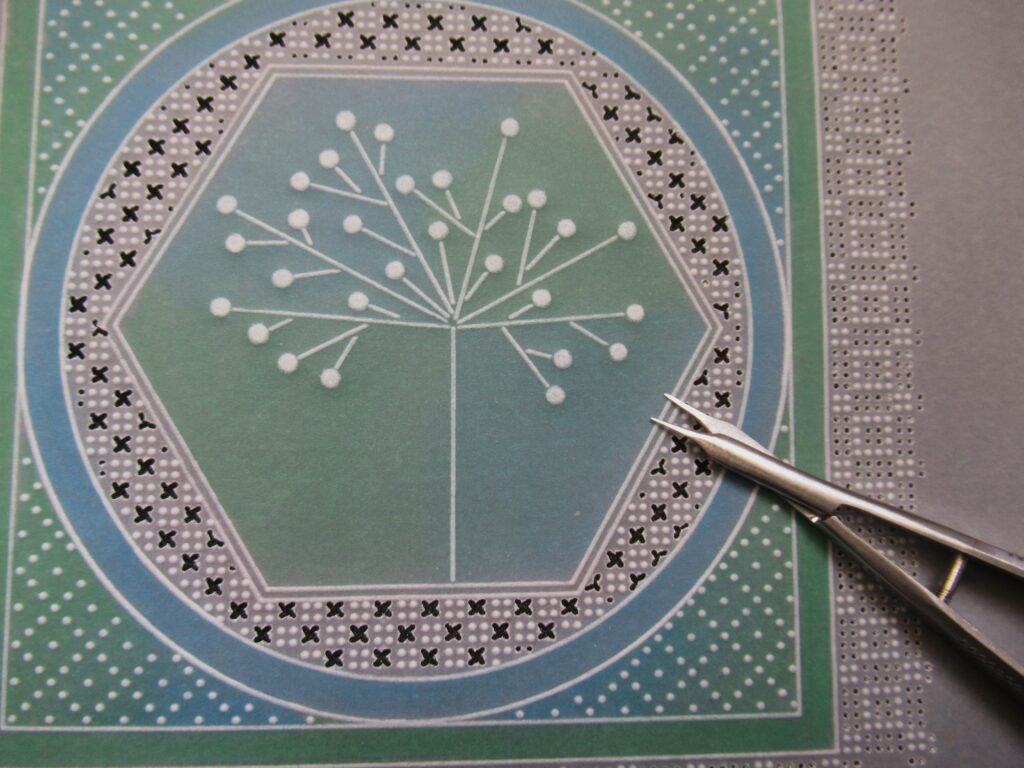
Step 14 – When it comes to the border, there are crosses and slots within the pattern. To snip a slot, first snip all along one side, turn the work, then snip along the opposite side. Then snip the ends. After doing the snipping within the lace work, go around the outside of the work. Do all the diagonal snips first.
Step 15 – Cut a piece of Companion paper to 5 ¾ x 5 ¾ inches square. Then attach the parchment piece with brads at each corner. Use the Roll-A-Tape to stick the work onto a 6 x 6 inch card blank.
As always, an amazing step by step from Glynis. Perfectly explained and so easy to follow. If you are new to lace/grid work, it is always a good idea to practice on a spare piece of parchment first before working on your artwork.
Everything that Glynis has used can be found over on the Clarity website HERE
If you are looking to perfect your picot cutting/snipping, then why not pop along to our Open Days in June and attend the “Snip Clinic”!!!!!! – Tickets available HERE
A busy week ahead at Clarity Towers:
Sunday 7th January :
Crafting with Clarity on Create & Craft with Barbara – 3pm-5pm (2hours)
Monday 8th January :
In the SHAC with Barbara – 10am Live on Facebook & YouTube
Tuesday 9th January:
Groovi Tuesday with Paul – 10am Live on Facebook & YouTube
Thursday 11th January:
The Pergamano Show on Create & Craft with Jane Telford – 11am & 3pm
Thursday 11th January:
In the SHAC with Barbara – 7pm Live on Facebook & YouTube
By the time this blog goes live, I will be heading up to the TV studios with Barb for the first Clarity shows of 2024 on Create & Craft. Did you spot from the above schedule that the lovely Jane Telford will be making her TV debut on Thursday on the Pergamano Show?
Enjoy your week whatever you are up to!
Lotsa love, Paul & Glynis xoxo
Clarity – The Home of Art, Craft, and Well-Being.
A lovely project from Glynis, something different in that we have to work a bit harder to create the pattern but proves it can be done using basic grids & shapes.
A busy week ahead for us, whether watching Barbara and Jane on TV or joining in with the SHAC. It has turned a lot colder so a good excuse to stay in the warm & craft.
Grace, I hope you have arrived safely in New Zealand & thank you Paul for collating this blog.
Take care everyone x
Wow thank you Glynis for another brilliant project , will give this a try , love doing grid work
A beautiful project and the various plates will make it easier to achieve, rather than counting spaces on the old traditional straight or diagonal grid. Thank you for sharing.
Fantastic Glynis. I love cards that sre a bit more challenging. Especially gridwork. Its raining all day here, so good excuse to start and probably finish as well. Thank you for your great step by step details.
I’m really tempted to give this a go as for once I have Tina’s plate and the basic ones to try the pattern. Thank you so much xxx
Great step by step demo, thank you Glynis and Paul. x