Clarity Matters Blog Tutorial: How To Use The Easy Layout Plates
Hello hello! Grace here.
I hope this finds you well, feeling crafty and enjoying your weekend.
On Thursday, Tina Cox showcased a selection of Easy Layout Groovi plates designed by Linda Williams during The Pergamano Show on Create & Craft
We are joined again this week (lucky us!) by the super talented, crafting machine that is… Glynis Whitehead! giving her take on the Easy Layout plates with a selection of plates from Tina Cox.
I’ll hand you right over to our fantastic teacher.

Some have requested cards for men. So here we are! This particular design mostly focuses on composition, watching out for lines so that you don’t go over them, and seeing patterns in the plates that you already have in your stash. Let’s get started…
Ingredients
Tina’s Funky Bow Tie & Bubble Car A5 Sq Plate (GRO-PA-41159-03)
Tina’s Funky Ties & Buttons Layering A5 Sq Plate (GRO-PA-41158-03)
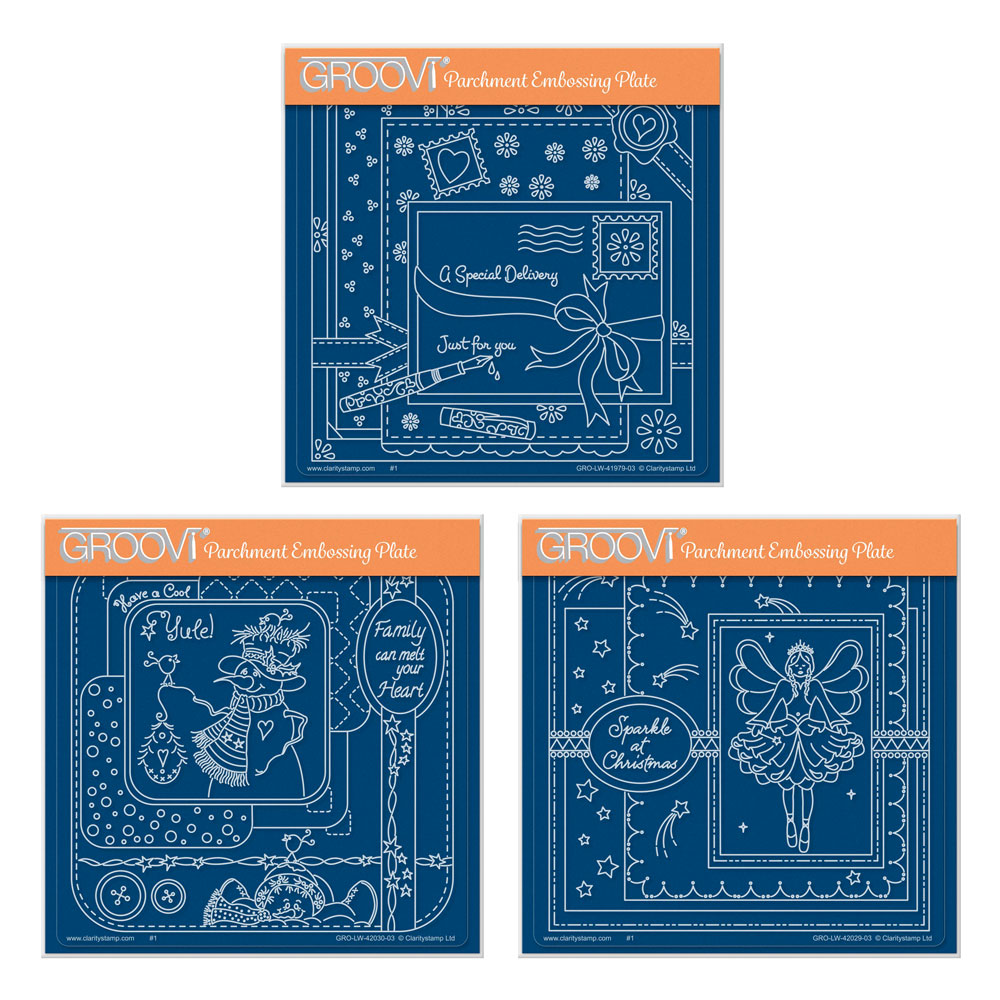
Linda Williams Special Delivery Easy Layout A5 Sq Plate (GRO-LW-41979-03)
Groovi Tools 1 & 2 (GRO-AC-40026-XX)
A5 Piece of Plain Parchment (GRO-AC-40024-A4)
Pergaliner B Pencils (PER-CO-70063-XX)
Pergamano Blending Nibs (PER-AC-70300-XX)
Dorso Oil (PER-CO-70066-XX)
Pergamano Embossing Tool 1.5mm (PER-TO-70004-XX)
Micron Pen (ACC-PE-30778-XX)
Perga Glue (PER-AC-70133-XX)
Method
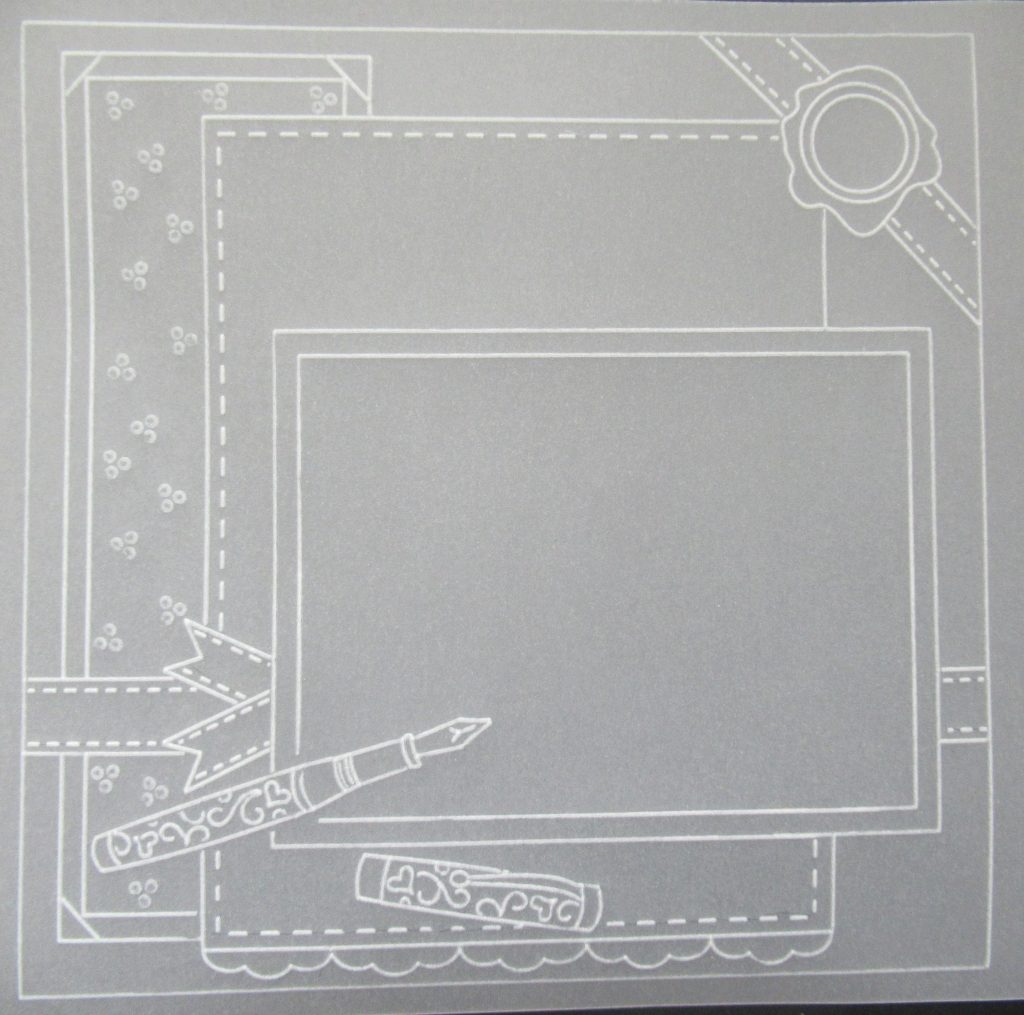
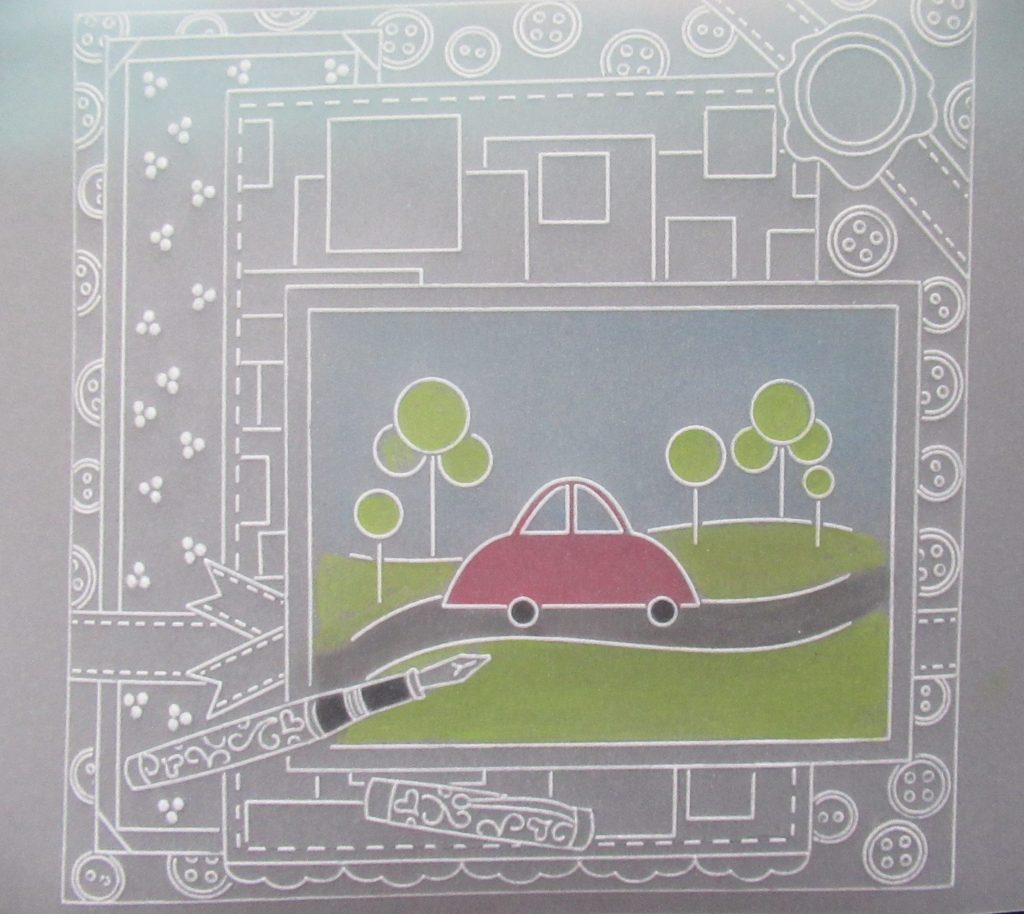
Step 1. Attach your parchment to the Easy Layout plate. Emboss all of the outside lines of the panels. When you get to the largest panel, leave out the bow, emboss the pen, but leave out the bow completely. Keep the straight ribbons that go underneath the large panel. Do this with the number 1 tool. Turn over and use the number 2 tool to just emboss the dots in the long panel. Ignore everything else.
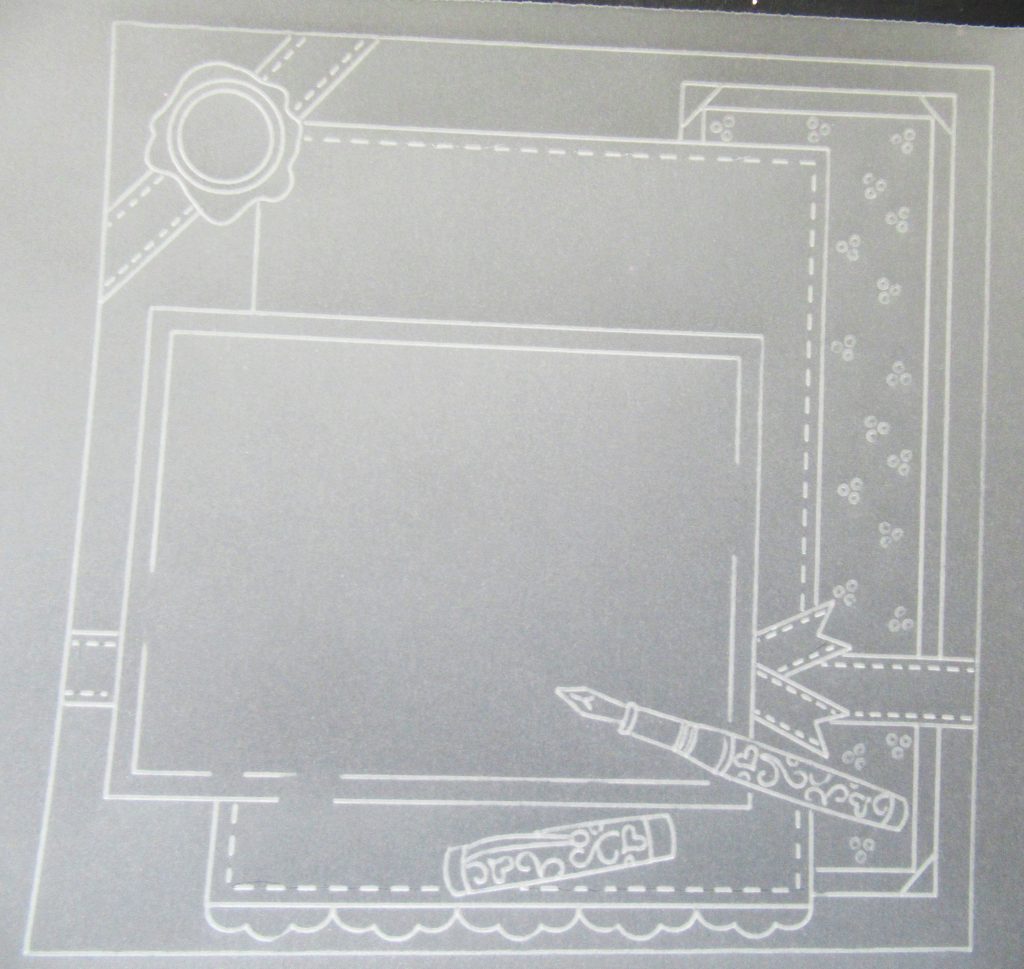
Step 2. We now need to finish the lines of the main large panel. There are plenty of straight lines on this plate, so all you need to do is slot the embossed lines into the groove of one of them and emboss the line to fill each gap.
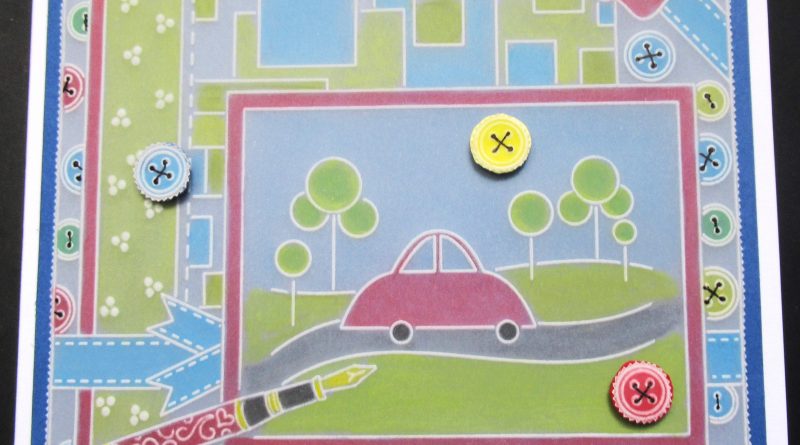
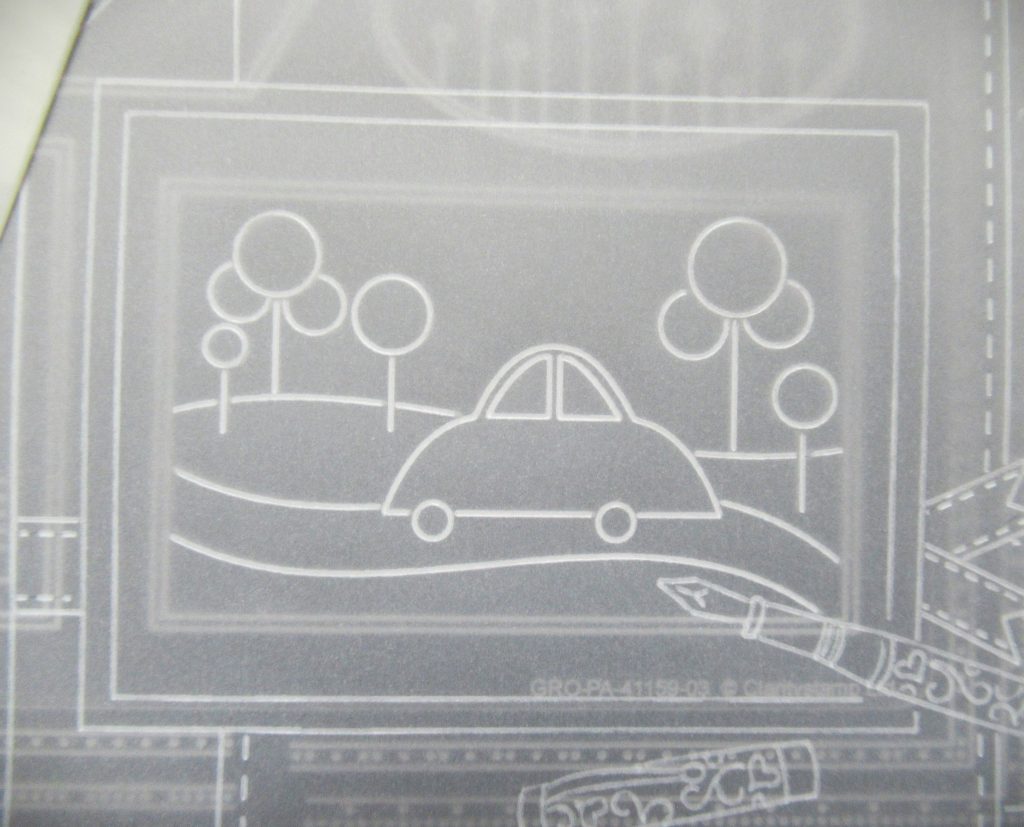
Step 3. Using Tina’s Bubble Car motif, and the number 1 tool, emboss the image into the centre of the large panel, leaving out the double frame around the car.
Step 4. Go to the Funky ties and buttons plate now and randomly emboss buttons into the outer panel. Make some ‘go off the page’ and emboss some so that they look tucked behind other layers. *Keep your eye on the lines as you don’t want to emboss too far and go over those.
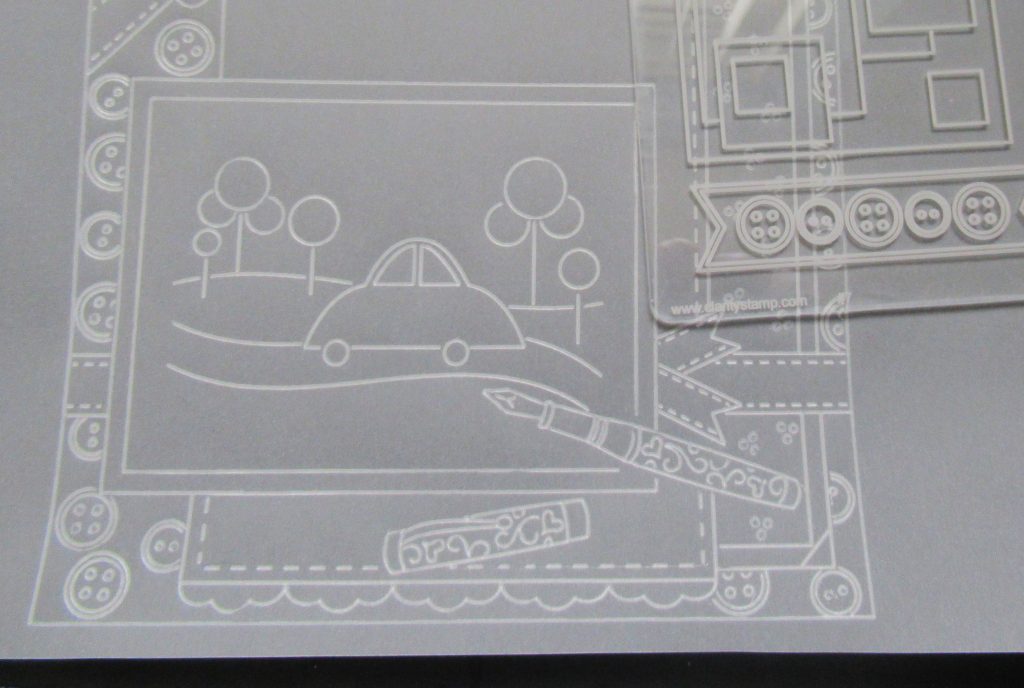
Step 5. Emboss some squares and rectangles (from the large panel in this plate) into the space behind the large one with the car and the pen in it. Move the work around so that they tessellate as much as possible. Emboss 5 (at least 1 yellow one) of the larger buttons onto the spare parchment you have outside the margins. We will make 3D elements later on. That is the design bit sorted.
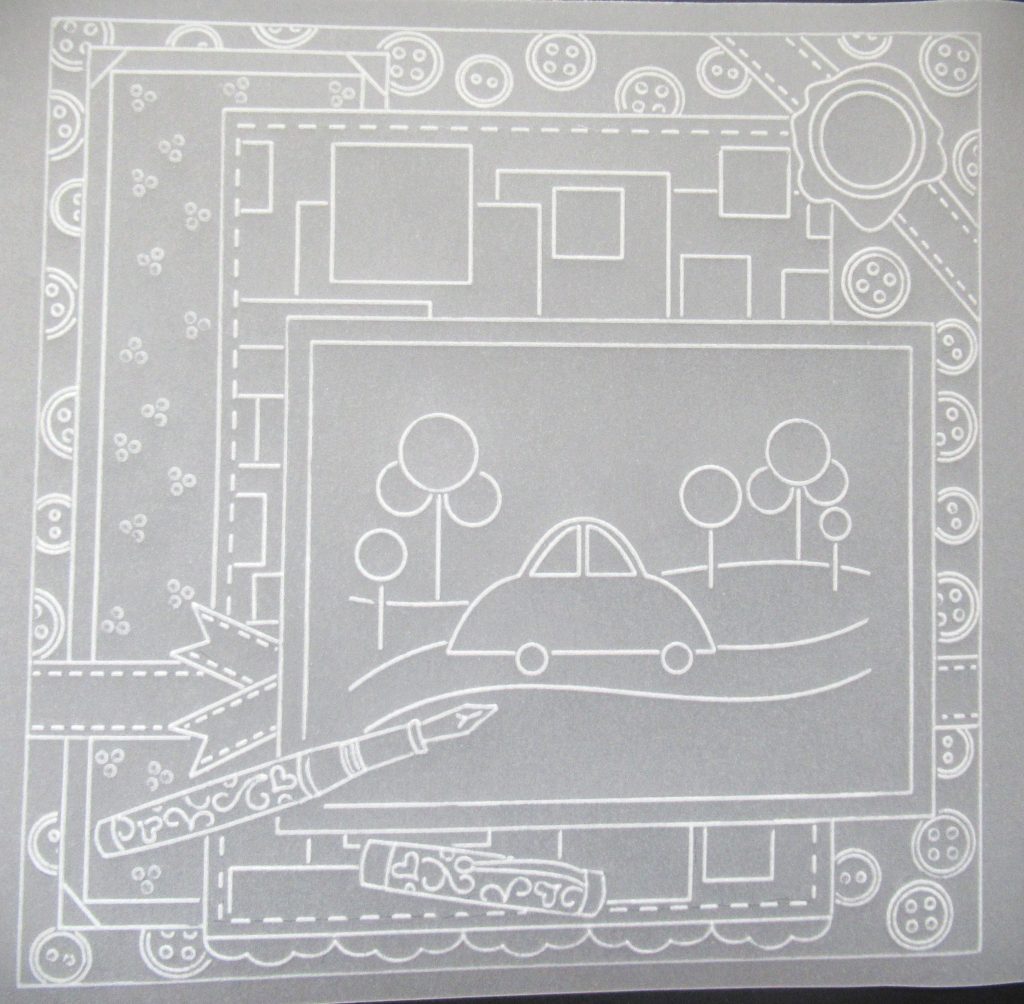
Step 6. Use the 1.5mm ball embossing tool to gently whiten up the small dots in the long panel. Remember to go up and down, side to side before completing the dot by going round and round so that you do not end up with a black dot in the centre. Make them grey rather than white, so by the time you have done the last one, the first ones will be ready to be embossed again.

Step 7. Working on the back, add some colour to the piece, starting with the car and landscape. Blue in the sky, red for the car, green in the hills and black for the road and wheels. Be careful with the black for the road, use it sparingly as it goes a long way. You just need it to be grey rather than black. The ferrule of the pen and wheels need to be very black. Use B pencils and blend the colours out with Dorso oil and blending nibs. Wait until any excess oil on the black has evaporated before moving on.
Step 8. I have used red on the barrel and top of the pen. I have used yellow for the metal parts. I have used blue, green and yellow in the background box pattern and yellow for the long panel with the dots in. I’ve chosen red around the borders of the layers, blue for the ribbon and randomly coloured in the buttons with blue, green, red and yellow.
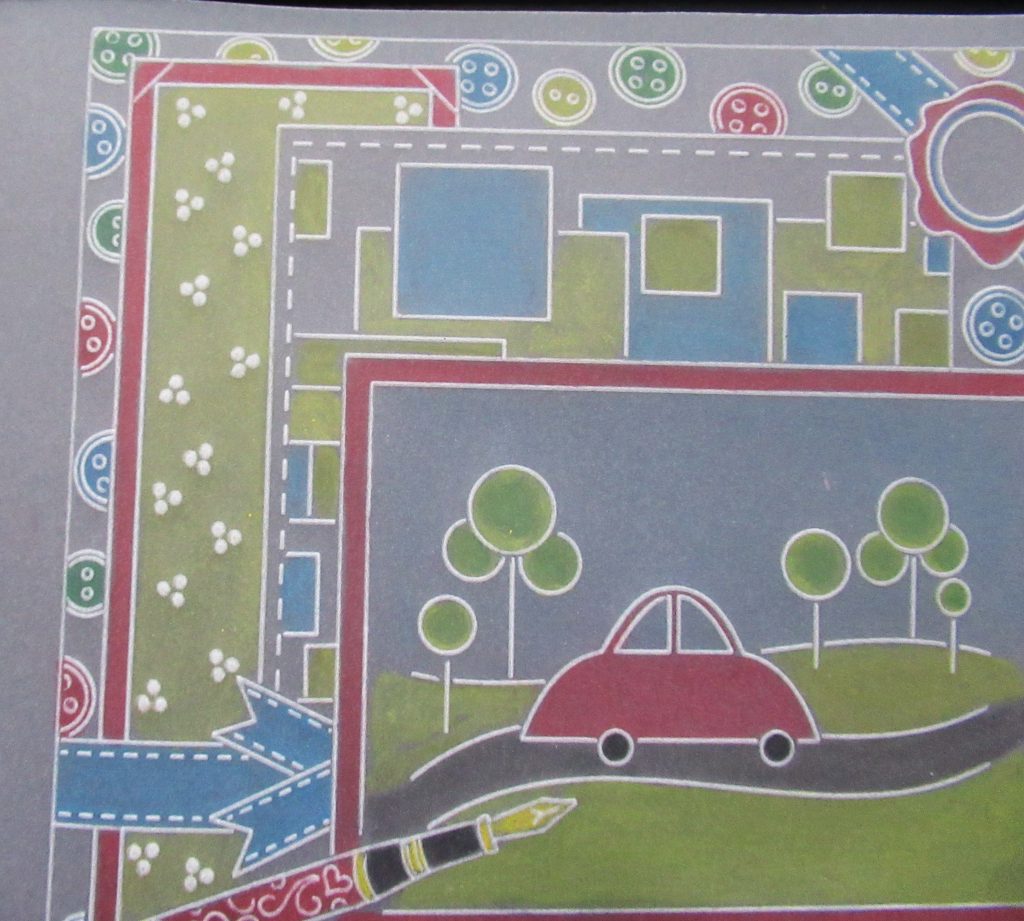
Step 9. Choose a 005 Micron pen and fill in the button holes and add stitches across the buttons.
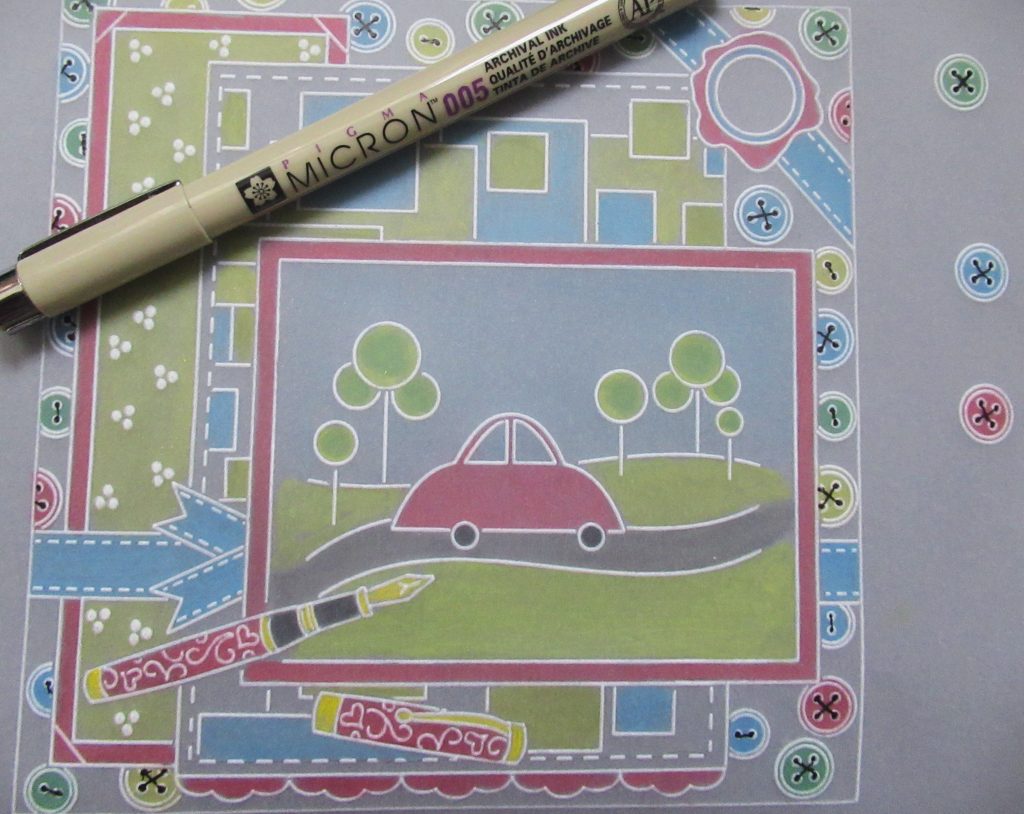
Step 10. Go around the outside of the piece with a 2-Needle tool. Then snip out the work. Also, go around the outside of the spare buttons and picot cut those out. Do not forget to turn your work around as you go. You are pointing the scissors towards the bit you need to keep, which means the body of the scissors will be over the waste.
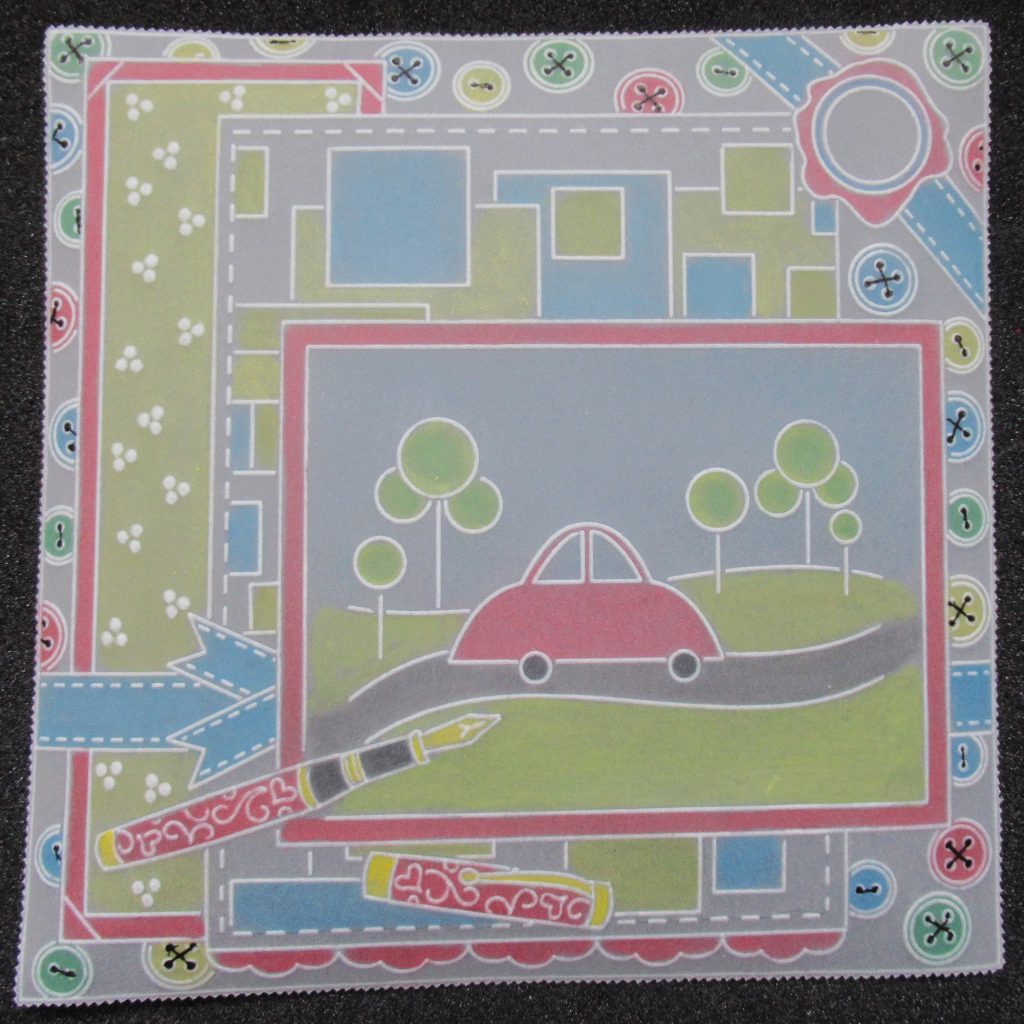
Step 11. Put a little Perga Glue onto a piece of plastic and pick up tiny amounts with a cocktail stick. Apply the glue to the picot edges of the buttons and stick them to the relevant colours of backing paper – I always keep my scraps of card and paper for such a purpose.

Step 12. Cut a piece of backing paper to 5.75 x 5.75 inches and attach the work with brads. Use some 3D sticky pads to attach the buttons. Use the yellow button as the sun in the sky above the car. Stick it to the front of a 6×6 inch card blank. And your card is complete!
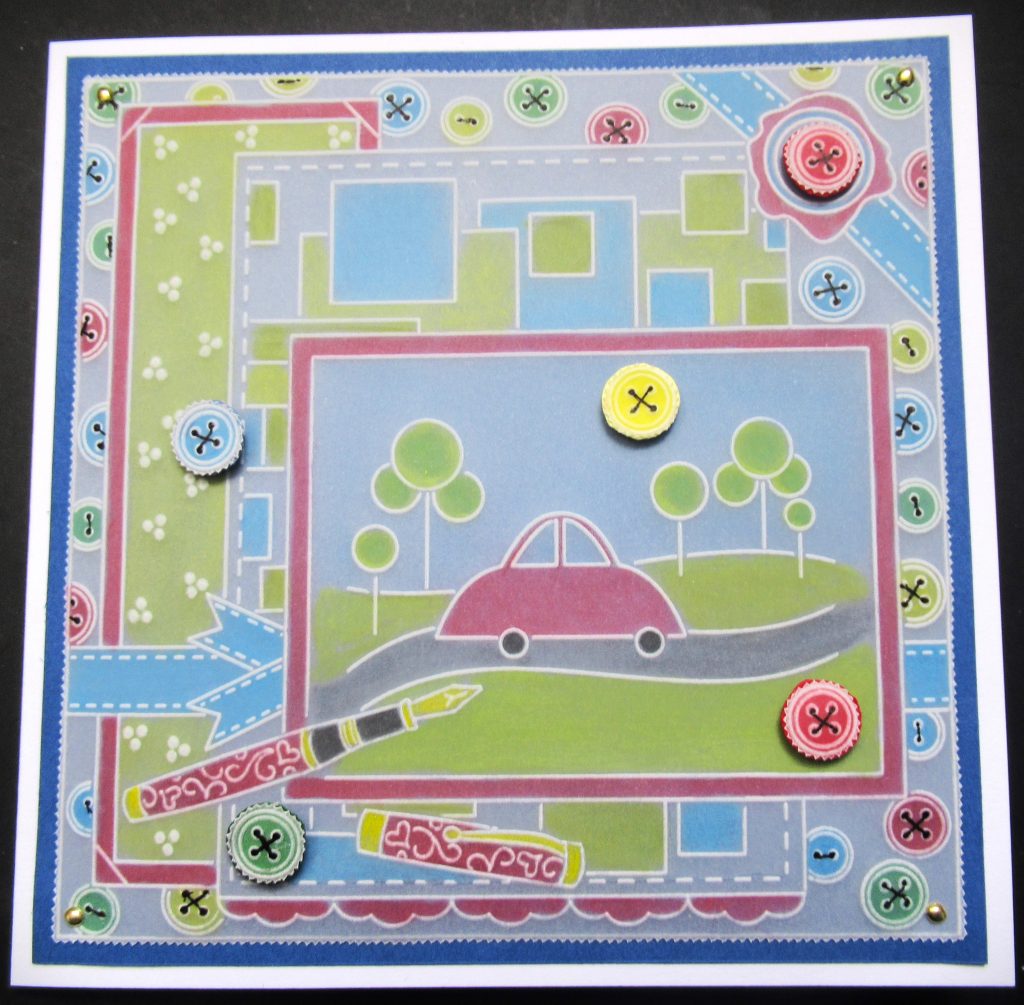
What a fun and funky card! Perfect for a fun fella. Thank you, Glynis, for sharing your tips and tricks with us. We are so grateful for your expertise and amazing projects.
Everything that Glynis has used can be found over on the Clarity website HERE and if you are looking for some more inspiration, then check out Mum’s Blog HERE
Looking at the week ahead
Monday 10th July :
In the SHAC with Barbara – 10am Live on Facebook and YouTube
Tuesday 11th July:
Groovi Tuesday with Paul – 10am Live on Facebook and YouTube
Wednesday 12th July:
One Day Special with Barbara on Create & Craft – 6pm & 9pm (for a sneaky peek make sure you tune into the SHAC on Monday!)
Thursday 13th July:
One Day Special with Barbara on Create & Craft – 10am & 2pm
Friday 14th July:
Craft Along with Barbara – 7pm Live on Facebook and YouTube using the first set of Linda William’s Layering Frames designs
Travel gently, friends. Enjoy the rest of the weekend!
Lotsa love, Grace & Glynis xoxo
Clarity – The Home of Art, Craft, and Well-Being.
Super Glynis, love the primary colour choice it really makes the card pop. I’m sure if I had time even I could achieve this. The Car is a Great one for little people too. Glynis has done it again! Thanks for sharing Grace. Hope your having a lovely weekend.xx
Love this design Glynis a great men’s card.
Thank you.x
Another lovely project that now it has been broken down to a step by step makes it easier to see how achievable it is.
Thank you Glynis & Grace for bringing us another Sunday blog.
Realise that due to appointments I shall miss the live SHAC’s on Monday & Tuesday so will have to watch on catch up but will be there on Friday for the Craft Along x
Oh Thankyou Glynis – I discovered that I have all these plates so can have a go. My biggest problem is colouring in larger areas……
Dear Grace and Glynis a very interesting design. I have a few of the plates. I am busy making lots of cards this month, luckily all ladies but will keep this in mind for future ones. Hope you both have a lovely weekend.
Read your blogs but don’t always answer. Xxx. Enjoyed Friday evening with your Mum ,
Lovely, thank you Grace and Glynis. Enjoyed that.
Thank you Glynis. Might stitch 3 D buttons on instead of using black pen and glue. Great idea for a men,s card.