Clarity Matters Blog Tutorial: How To Celebrate with Numbers
Hello hello! Grace here.
I hope this finds you well, safe and having a restful Sunday morning.
We are joined this weekend by the incredibly talented Clarity Design Team Member, Josie Davidson. Josie has kindly put together a step-by-step project for us.
I’ll hand you right over to our tutor for today. Thanks, Josie!

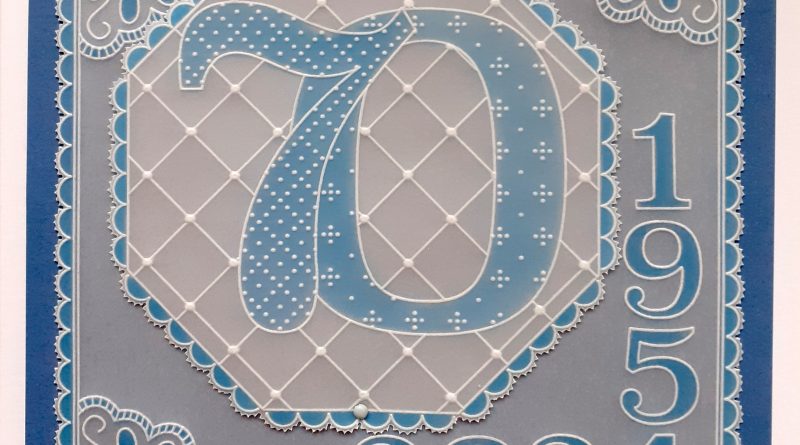
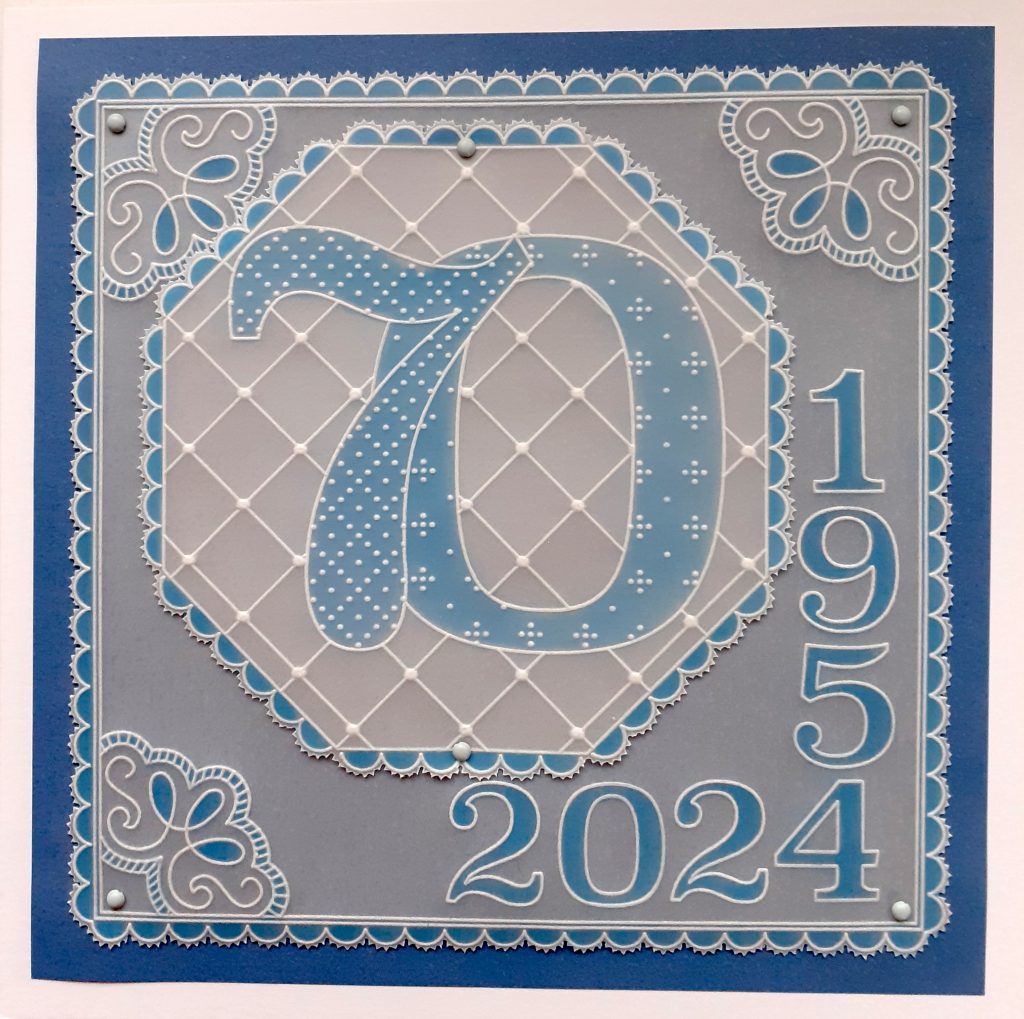
This project uses the Open Number Groovi plates and at first glance, you might think that there’s not a lot that can be done with them but I think they’re great for adding numbers to birthday, anniversary and new baby cards. This project focuses on a birthday that ends in nought as then you can join the year the person was born with the year of their ‘big’ birthday. You could, however, do any birthday number and just split the years up – say one in the top left-hand corner and one in the bottom right corner of your artwork.
Ingredients
A5 Plate Mate – from Starter Kit (GRO-MA-40002-07)
A4 Plate Mate for A4 Sq Grids (GRO-MA-41768-21)
Inset for Baby Plates – included in the Starter kit (GRO-WO-40133-11)
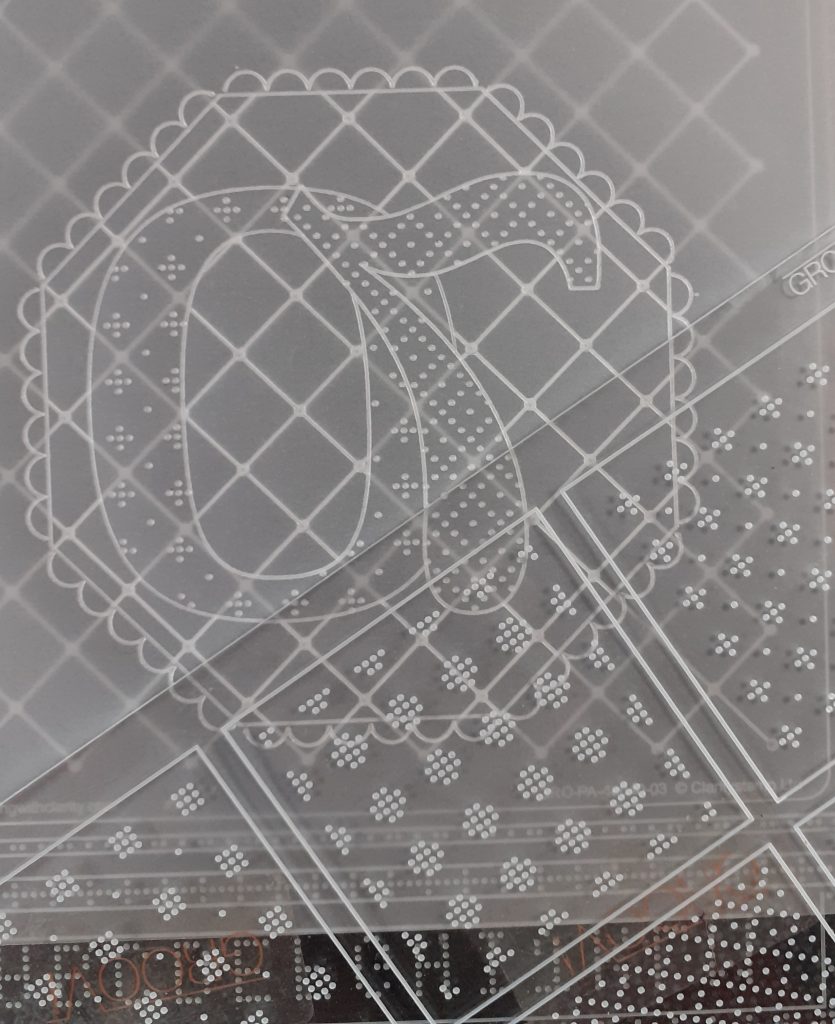
Open Numbers A6 Set (GRO-WO-40496-XX)
Square Extended Nested Scallops (GRO-WO-41168-15)
Josie’s Straight Sampler Plate 1 (GRO-GG-41732-24)
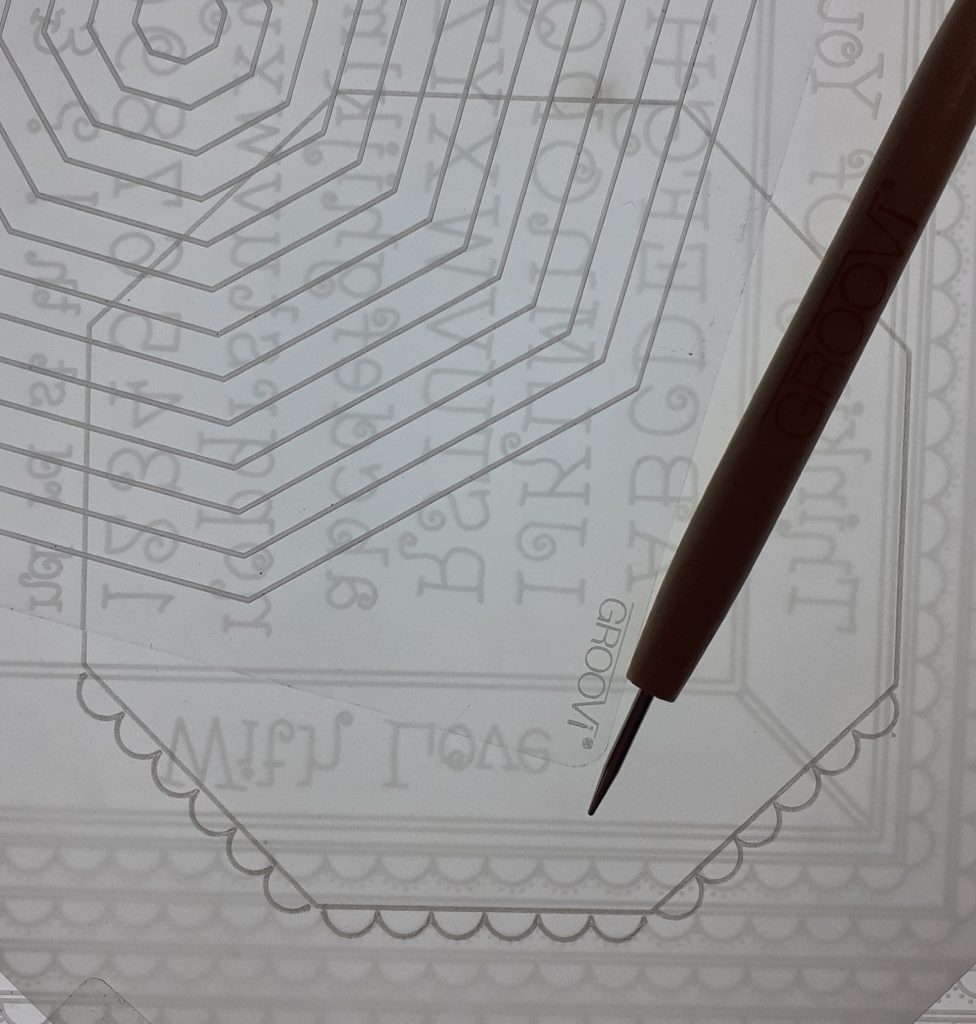
A5 Nested Octagons (GRO-PA-40119-03)
Netting Pattern A5 Plate (GRO-PA-40040-03)
Border Plate Mate for A4 Border Plates, either (GRO-MA-40559-13) or (GRO-MA-40348-13)
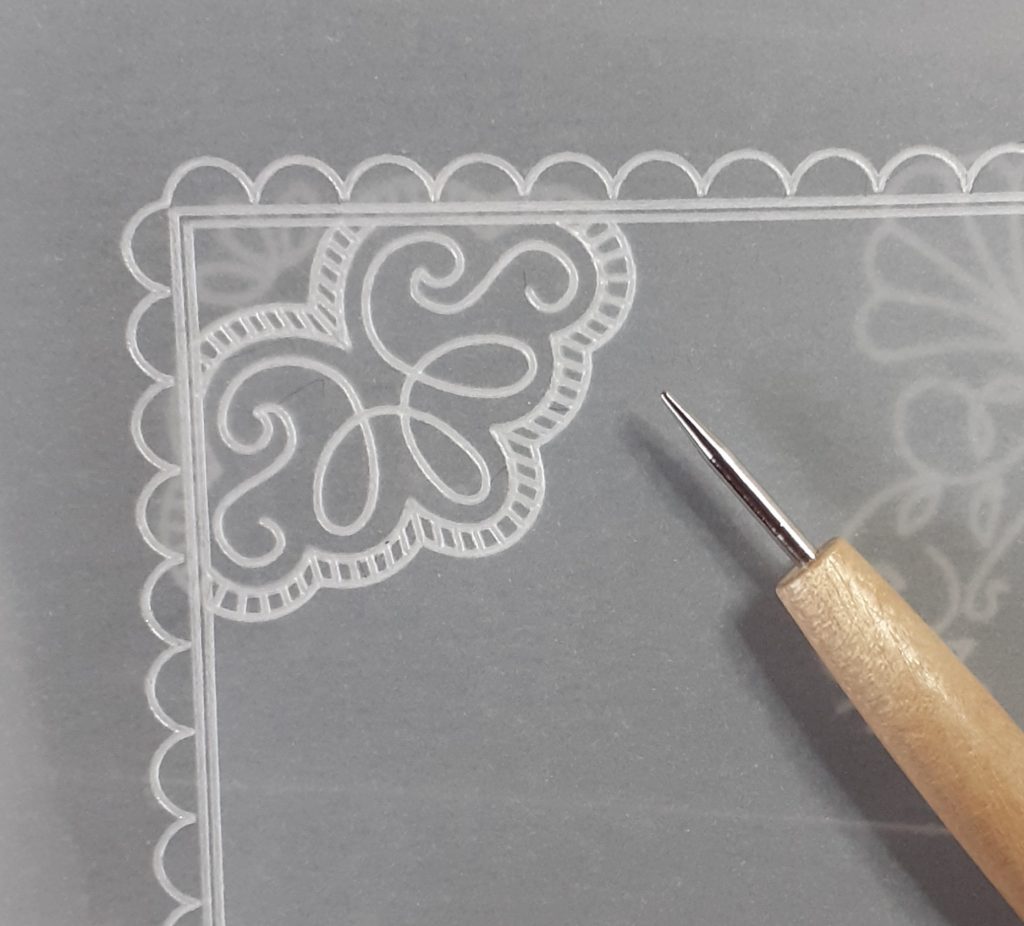
Lace Corners A4 Border Plate (GRO-PA-40126-09)
Groovi 1 and 2 Tool (GRO-AC-40026-XX)
Pergamano 1.5mm Ball Tool (PER-TO-70004-XX)
Pergamano Bold 1-Needle Tool (PER-TO-70028-XX)
Pergamano 2-Needle Tool (PER-TO-70037-XX)
Scissors or Snips
Embossing Mat (GRO-AC-40194-A4)
Thick Perforating Mat (GRO-AC-40603-A4)
Hard Mat (for colouring)
Pergaliners (PER-CO-70063-XX)
Dorso Oil and Blending Nib (PER-AC-70431-XX)
A4 Plain Parchment (GRO-AC-40024-A4)
6 Blue Brads (PER-AC-70270-XX)
7×7 Card Blank (ACC-CA-30619-77)
Indian Summer Companion Paper (ACC-CA-31338-88)
Clarity Tape Roller (ACC-MS-31065-XX)
Groovi Tabs (GRO-AC-40437-XX)
Tumble Dryer Sheet
Method
Step 1. Using the Nested Scalloped Squares Plate, emboss the inner scalloped border using the No 1 tool.

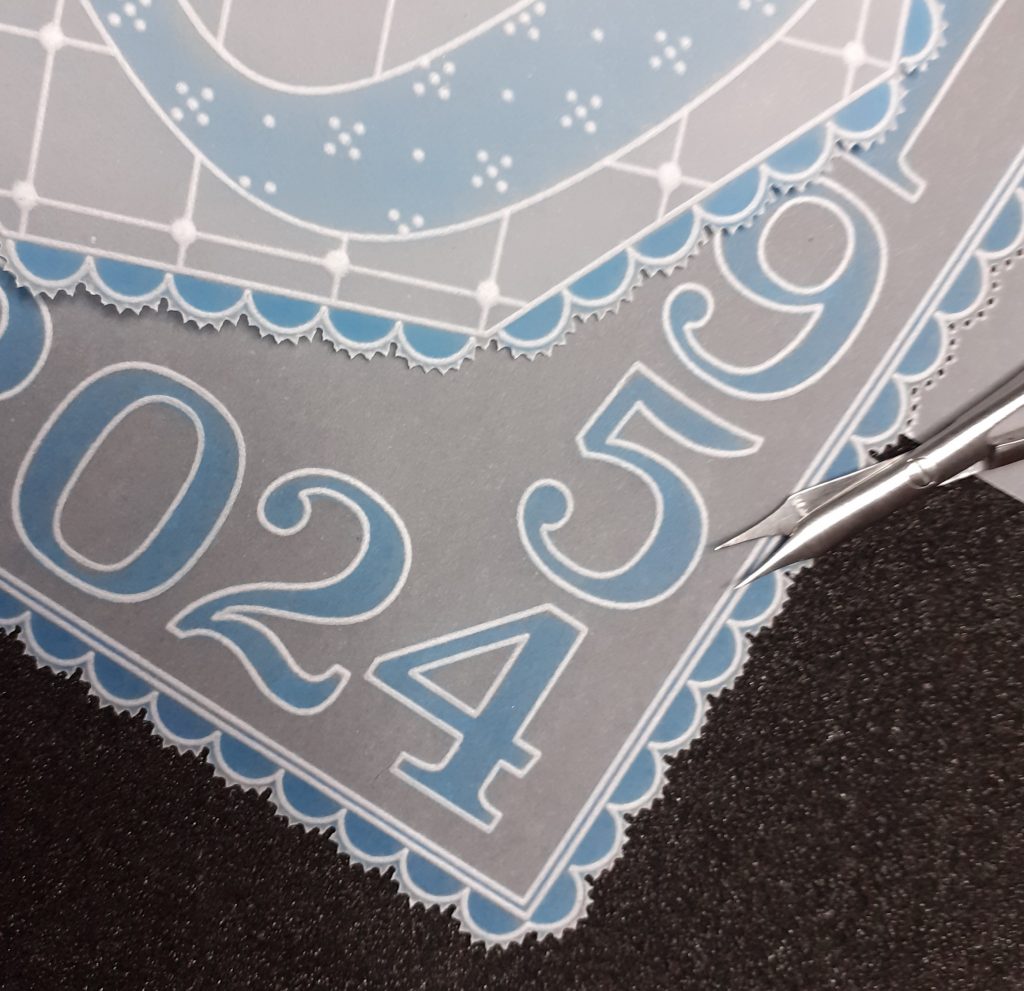
Step 2. Using the Open Numbers plate, emboss the years in the bottom left corner of your square with the No 1 tool (when you turn it over, it will be bottom right). Start with the last number of the year, then the third number, the second number and finally the 1st number along the bottom edge – this is the most recent year. Now you can work up the side of the square again, adding the numbers in reverse. Remember you only need 3 as the 4th one is at the end of the number you have just embossed.
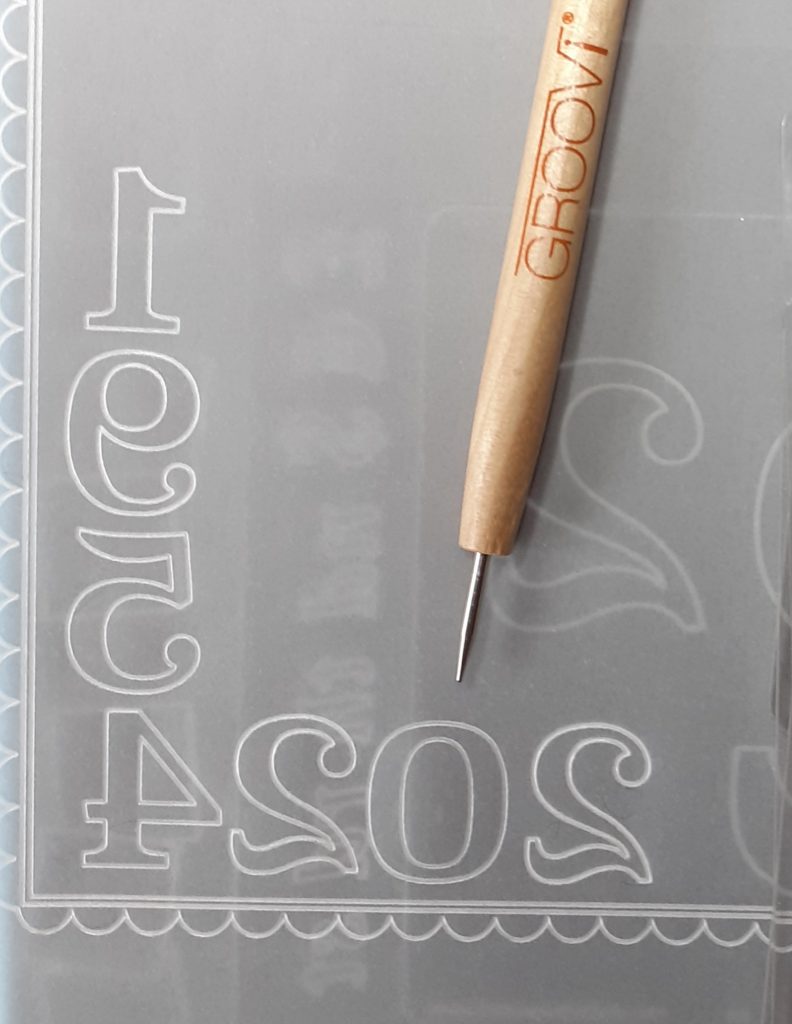
Step 3. TOP TIP: It may help you to write the numbers on a piece of scrap parchment and then turn it over so that you can see them, as you will need to emboss them – one across the bottom and one up the side. Perhaps practice on a piece of parchment before doing it on your artwork; either on another piece of parchment or on the other side of the piece you have been working on.
Using the Nested Octagon plate, emboss the 4th octagon from the outside using the No 1 tool. We now need to add scallops to the outside of the octagon. Line one of the sides of the octagon up onto the line (just inside the scallops of the nested scalloped squares plate) and centralise them – they won’t go right to the end of the line but this will not be obvious once it has been cut out. Emboss with the No 1 tool. Repeat until you have scallops around all of the sides.
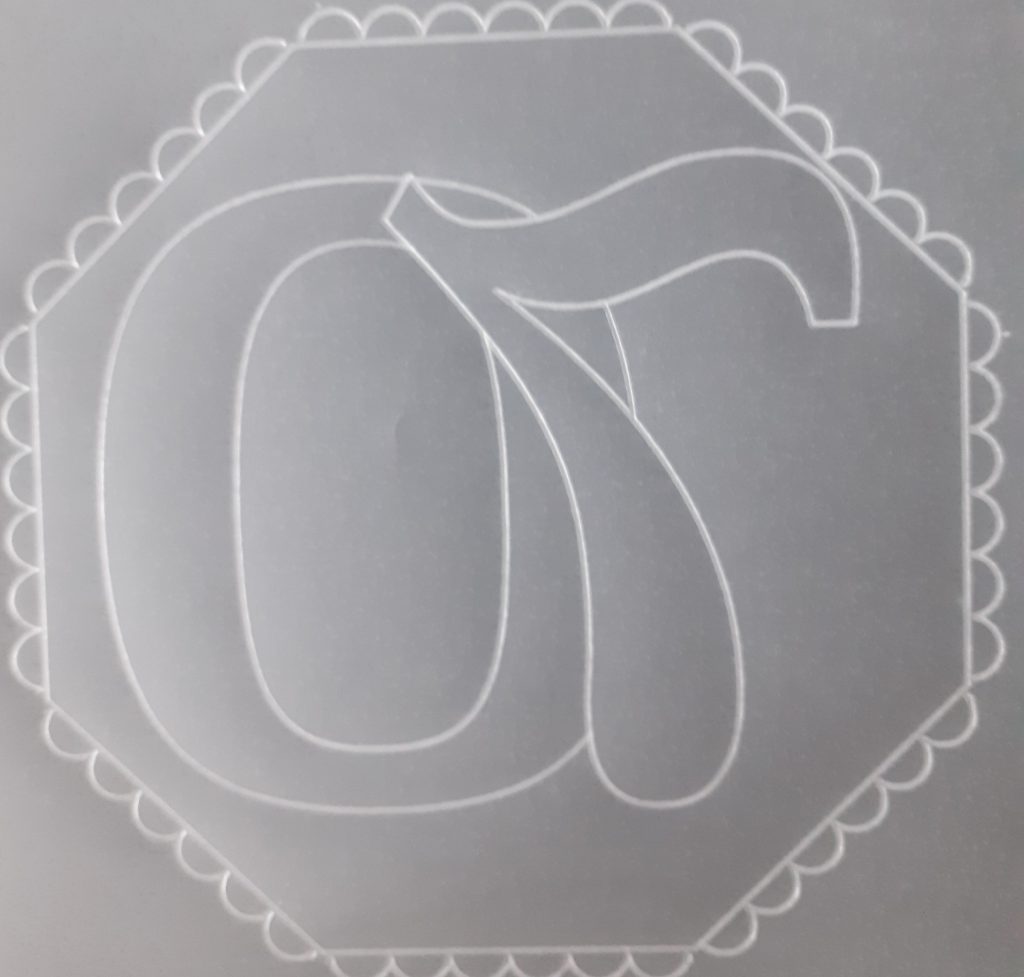
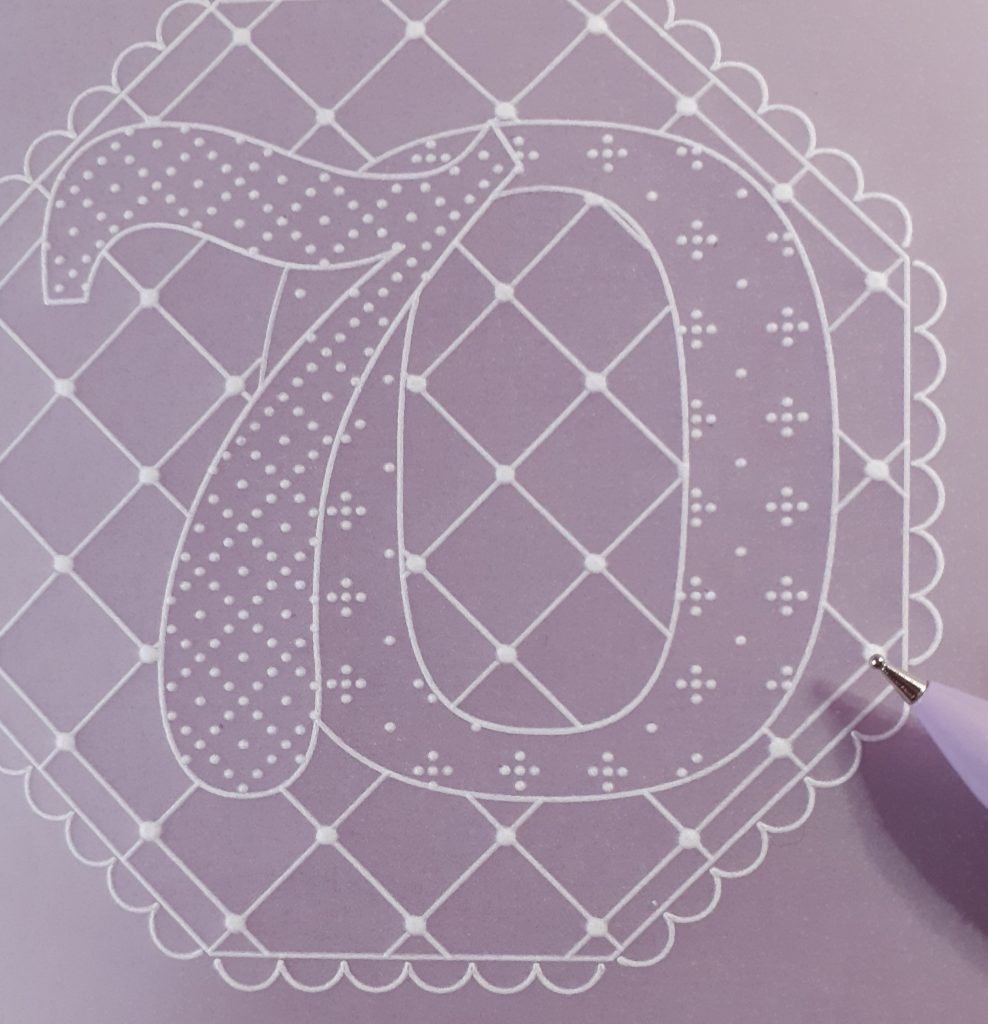
Step 4. The largest numbers on the plates are used to add the special birthday number. Emboss the first number on the right-hand side (inside the octagon) using the No 1 tool, and then add the nought to the left-hand side of this number so that it looks like it is behind it when you turn it over. Avoid embossing the lines of the nought through the centre of the first number.
Step 5. This shows how the embossed numbers will look from the back of the work.
Step 6. Using the No 2 tool, emboss the designs from the embossed patterns plate inside your numbers.
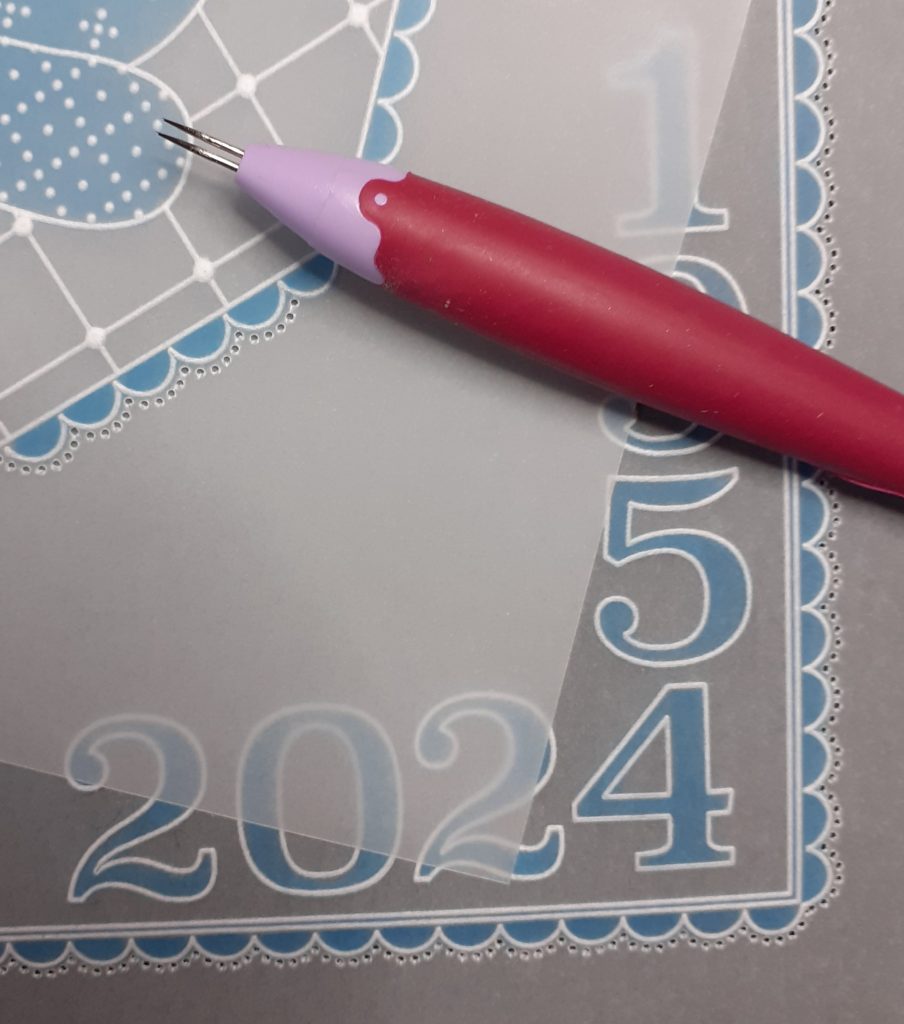
Step 7. Add the netting pattern in the background (behind the numbers) with the No 1 tool for the lines and the No 2 tool for the circles. Emboss the circles into solid white dots with the 1.5mm ball tool.
Step 8. Add part of the 2nd corner, from the top of the border plate, into the three remaining corners with the No 1 tool.
Step 9. Colour the numbers, the scallops and the corner designs with Perga Liner pencil and blend with Dorso Oil – I used the B4 pencil.
Step 10. Perforate around the scallops of both the square and octagonal artwork with the bold two-needle tool, on your thick foam mat.
Step 11. Picot cut the perforations with your scissors or snips.
Step 12. Cut your Indian Summer paper to a 6¼ inch square. Place your square artwork into the centre of the backing paper and attach using the bold single needle tool and brads in each corner. Place the octagonal artwork onto the square artwork, slightly towards the top left and attach with a brad in the centre and bottom sections of the octagon. Use the tape roller to attach your finished work to the backing card.
And you’re all set!
Absolutely epic! Thank you, Josie, for sharing your tips and tricks with us. It is so helpful to see the different ways you can use these plates. Thank you!
Everything that Josie has used can be found over on the Clarity website HERE
Don’t forget, if you want to be kept up to date with all things Clarity, then make sure you sign up to our emails HERE
You may also want to check out our YouTube page HERE It has all episodes of the SHAC and Groovi Tuesday as well as previous Craft Alongs, Moments of Clarity and lots more – and they are all free!
Looking at the week ahead, we have lots to keep you company and entertained……………….
Monday 19th June:
In the SHAC with Barbara – 10am Live on Facebook and YouTube
Tuesday 20th June:
Groovi Tuesday with Paul – 10am Live on Facebook and YouTube
Thursday 22nd June:
Groovi New & Exclusive with Barbara & Paul on Create & Craft – 4pm & 8pm
Friday 23rd June:
Groovi New & Exclusive with Barbara & Paul on Create & Craft – 8am
Saturday 24th June:
Get Groovi with Tina on Create & Craft – 1pm & 5pm
Travel gently, friends.
Lotsa love, Grace & Josie xoxo
Clarity – The Home of Art, Craft, and Well-Being.
Great to see older Groovi plates used so effectively, from simple to superb. We tend to forget how decorative they can be with a little imagination. Thank you for this project.
Hello all,
The best start to a Sunday – Clarity art and a cuppa. Looking forward to new Groovi products
later in the week. Keep cool!
Love this project and it has started my thinking of a golden wedding card I need to make! Enjoy the rest of your weekends xx
Lovely project Josie. Another few items to add to my Groovi list of to buy.
Thank you Josie for a great project that can be adapted for all occasions & ages. It gives a frame/layout that can be added to & taken to whatever level of parchment craft you are at from simple to advanced.
Fathers Day today so we remember the men that have a part of our lives whether they are still with us or not. Today would also have been my Father in laws birthday – so double memories.
Take care everyone & have a good week. There looks like there will plenty going on in the world of Clarity to keep us out of mischief xx
Fantastic easy to follow tutorial which will be very useful.
Thank you. Will definately want to attempt this.
Hello Grace and Josie,
Thank you, Josie, for taking the time to create this fo us, at this difficult time.
Sending love and hugs.
Love
Roz.xxx
Really lovely step by step. Thank you Josie.
I’ve already got the 6 & 0 out as I need to do a 60th, done them before of course but seem to have a blank at the moment ! Thanks for this one ! X