Clarity Matters Blog Tutorial: How To Remove & Add Colour to Designer Parchment – Part 2
Hello hello! Grace here.
I hope this finds you safe, happy and enjoying your Sunday!
We are joined by the super-talented Josie Davidson. Josie is a beloved Clarity Design Team member, and she’s kindly taken the time to put together a step-by-step blog tutorial for us. Thanks, Josie!
I’ll hand you right over to our teacher…

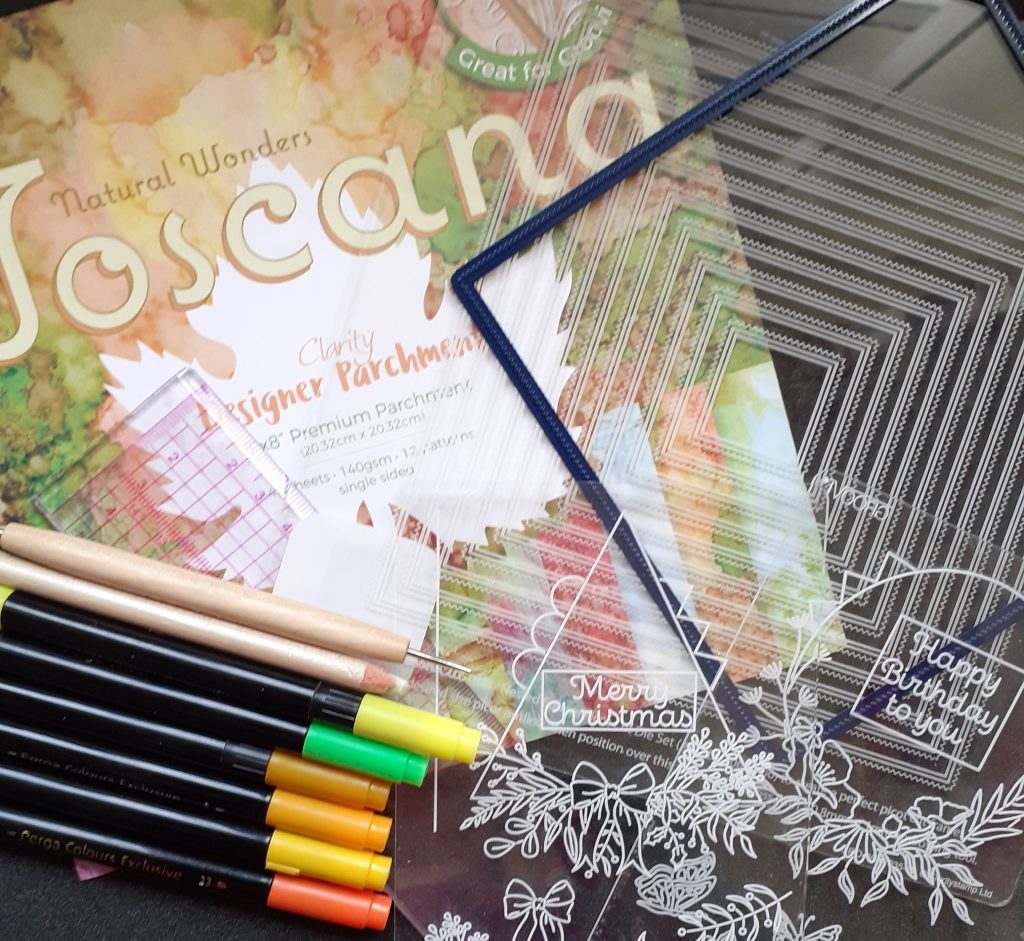
Ingredients
Deluxe Starter Kit (GRO-SK-41709-XX)
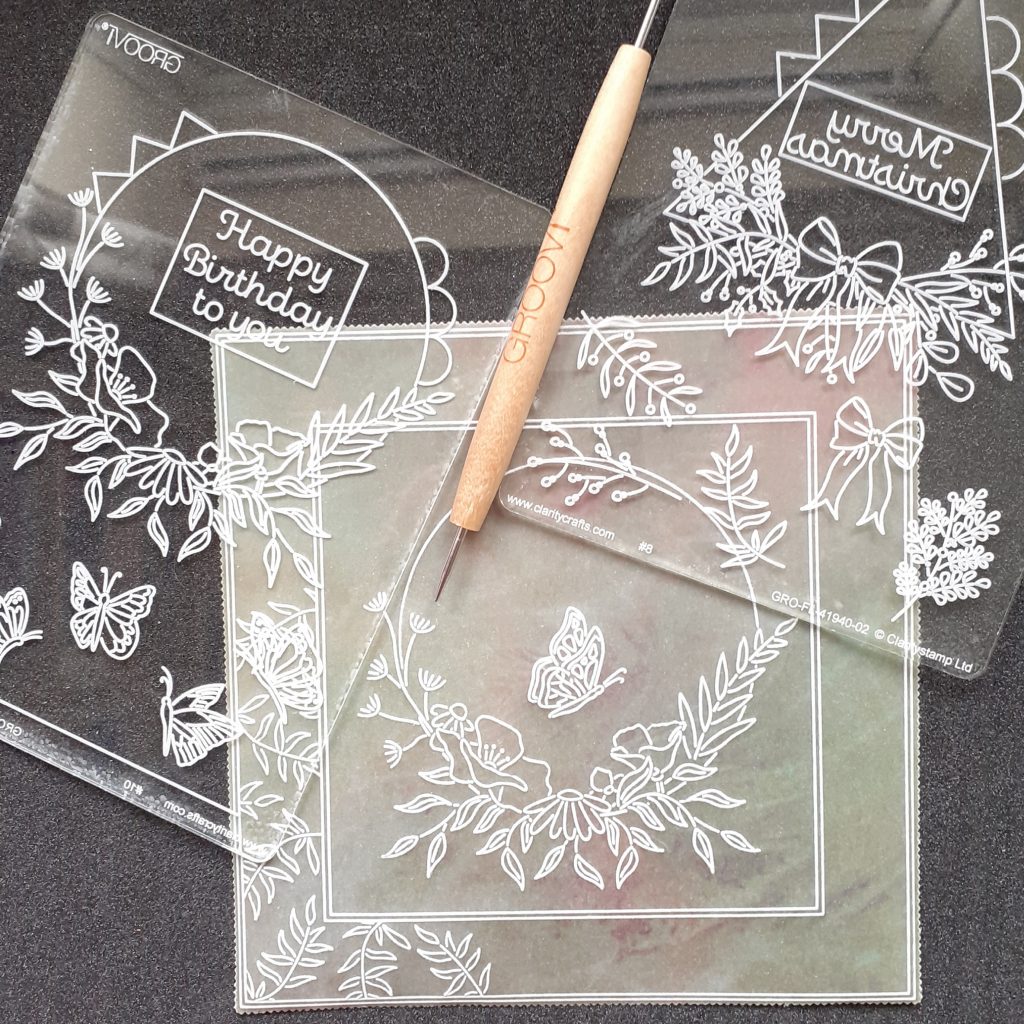
Floral Delights Summer – Happy B-Day A6 Groovi Plate (GRO-FL-41938-02)
Floral Delights Winter – Merry Christmas A6 Groovi Plate (GRO-FL-41940-02)
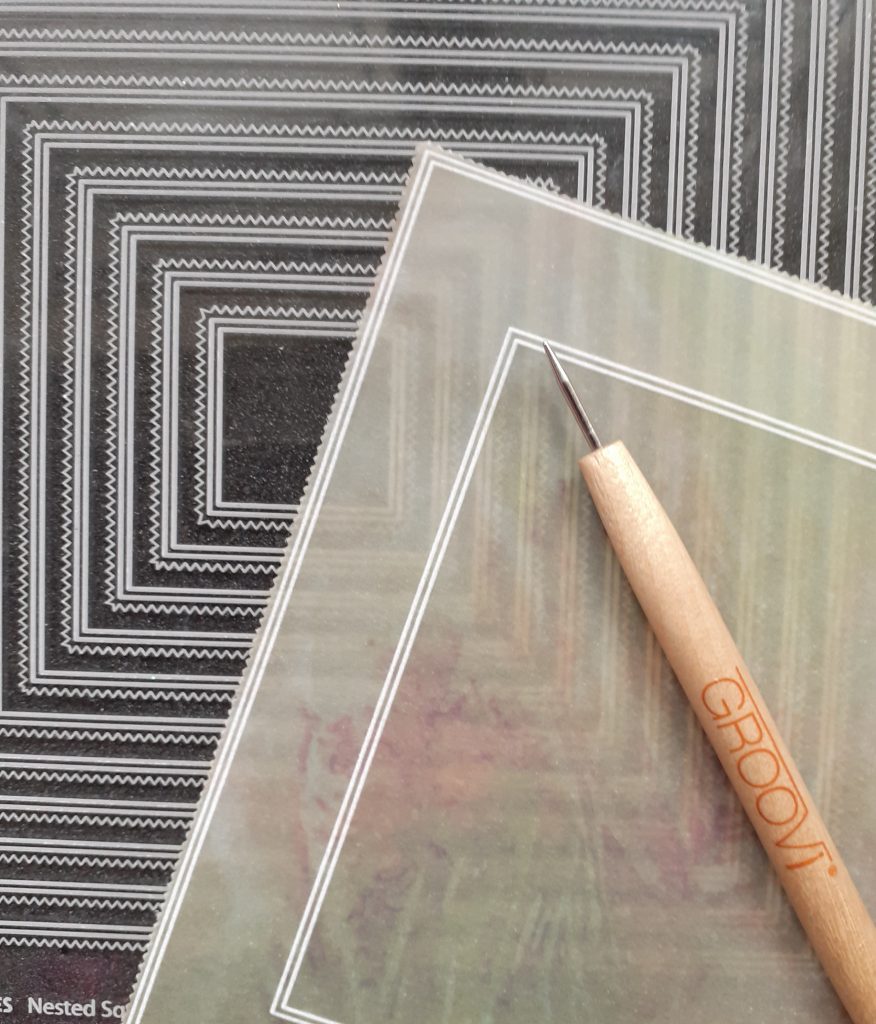
Square Picot Dies (ACC-DI-30666-66)
Nested Square Picot Plate (GRO-PA-41035-15)
Embossing Mat (GRO-AC-41036-A3)
Groovi Tool No 1 (GRO-AC-40026-XX)
Pergamano Bold Single-Needle Tool (PER-TO-70028-XX)
Pergamano Ruler (PER-AC-70278-XX)
Perga Colours 1, 2, 3, 16, 23 & 29 (PER-CO-70063-XX)
Thick Perforating Mat (GRO-AC-40603-A4)
Toscana Parchment and Designer Paper (ACC-CA-30933-88)
Pencil Eraser (ACC-PE-30611-XX)
7×7 White Card Blank (ACC-CA-30619-77)
4 Gold Brads (PER-AC-70274-XX)
Double-Sided Tape (ACC-AD-30375-XX)
Method
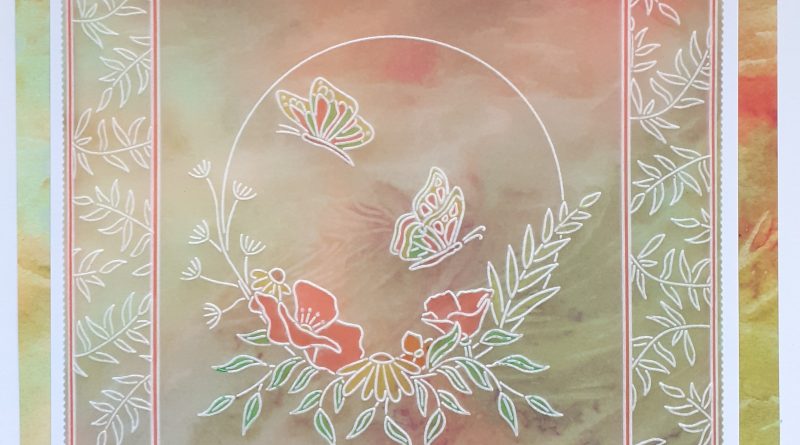
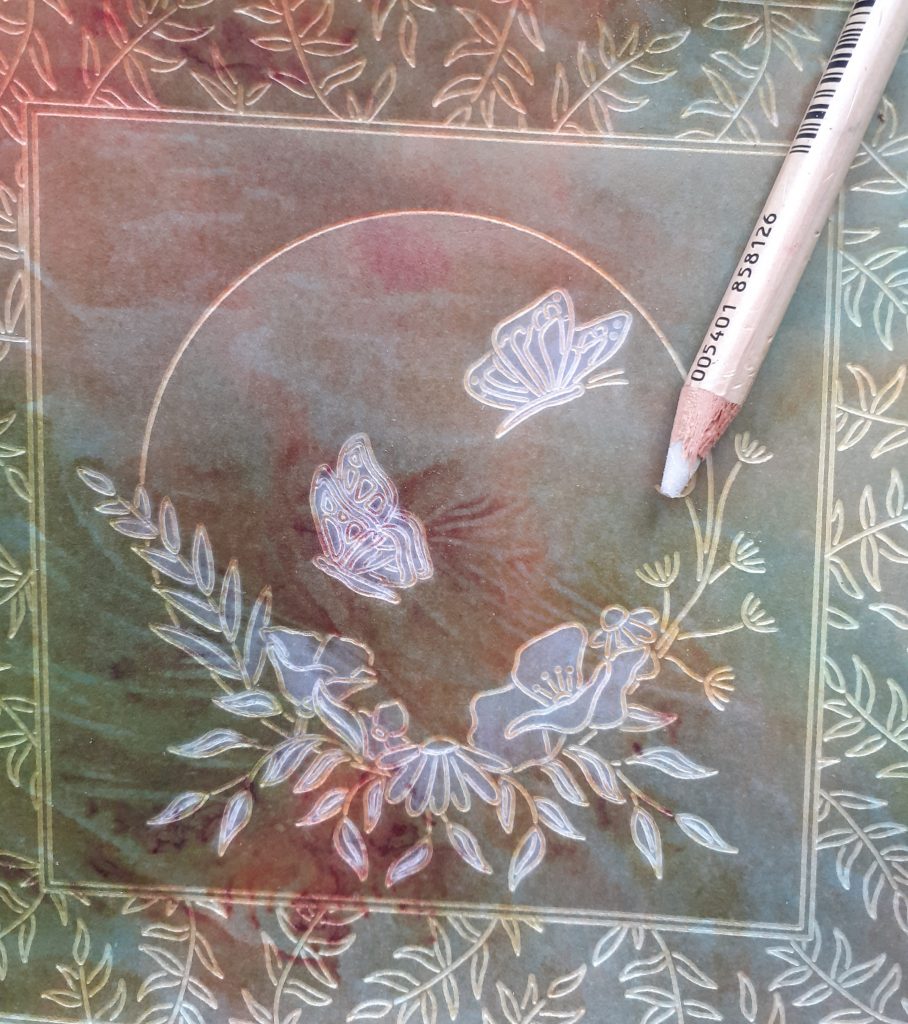
Step 1. Using the Toscana parchment, cut out the 2nd largest picot square. Emboss the 2nd and 5th pair of lines from the picot plate using the Groovi No 1 tool.
Step 2. Emboss the circle flower design from the Happy Birthday plate in the centre square using the No 1 tool. Add two butterflies inside the circle from the same plate. In the space between your two squares, emboss one of the leaf designs from the Merry Christmas plate using the No 1 tool.
Step 3. Erase the colour from the flowers, the butterflies and between the double outlines on the back of your work.
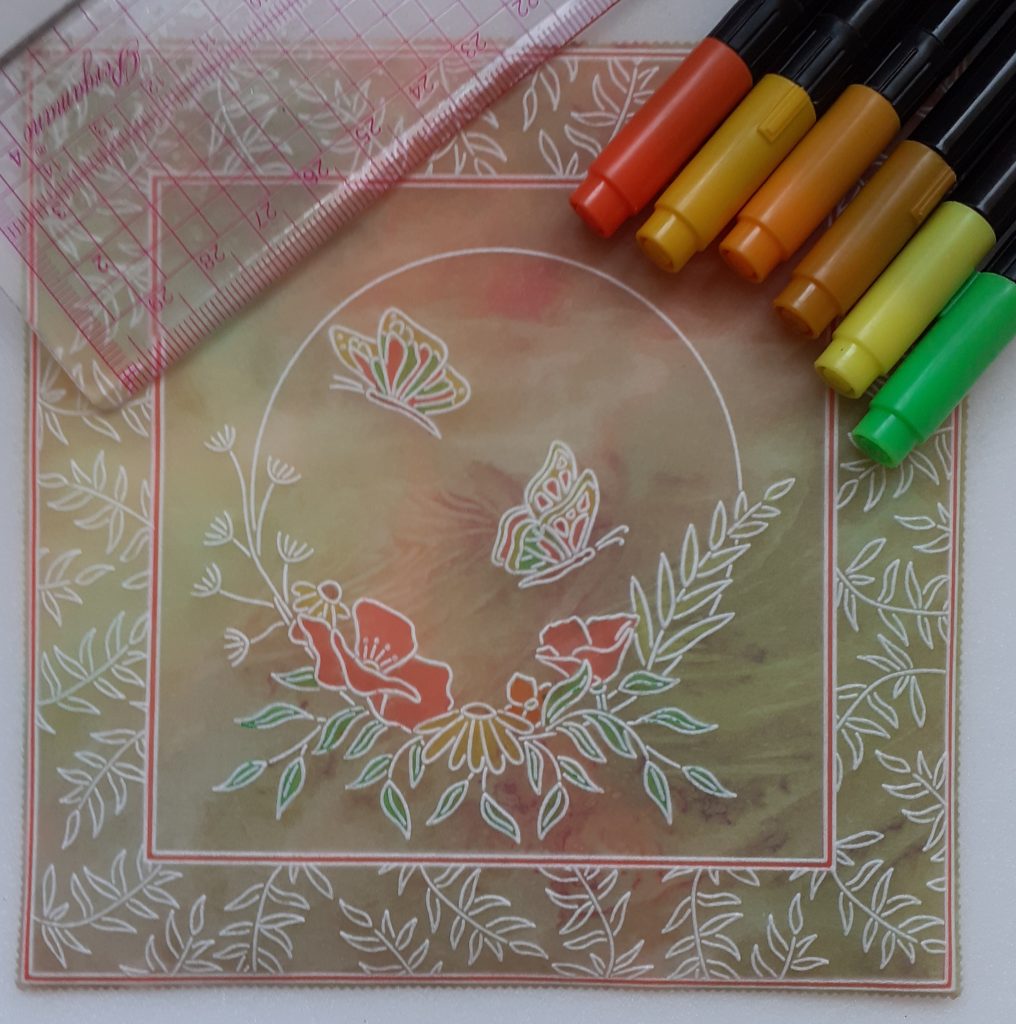
Step 4. Colour directly onto the back of the parchment using Pergcolours
TOP TIP: Use the Pergamano ruler to colour between the double outline by running the Perga Colour pen along the edge of it.

Step 5. The colour on the back will look messy but when you look at your work from the front it will look neatly coloured.
Step 6. Cut a piece of white card to 6×6 and matt your finished work onto it using brads. Use the bold single needle tool to pierce a hole through the parchment and card (on a thick foam mat) and then you can push the brad through the hole. I put all of the brads in place and then turn the whole thing over to bend back the legs of the brads.

Step 7. Cut a piece of Toscana designer paper 6.5×6.5. Attach this to your card blank, the finished piece of work can now be matted onto this. And you’re all done!
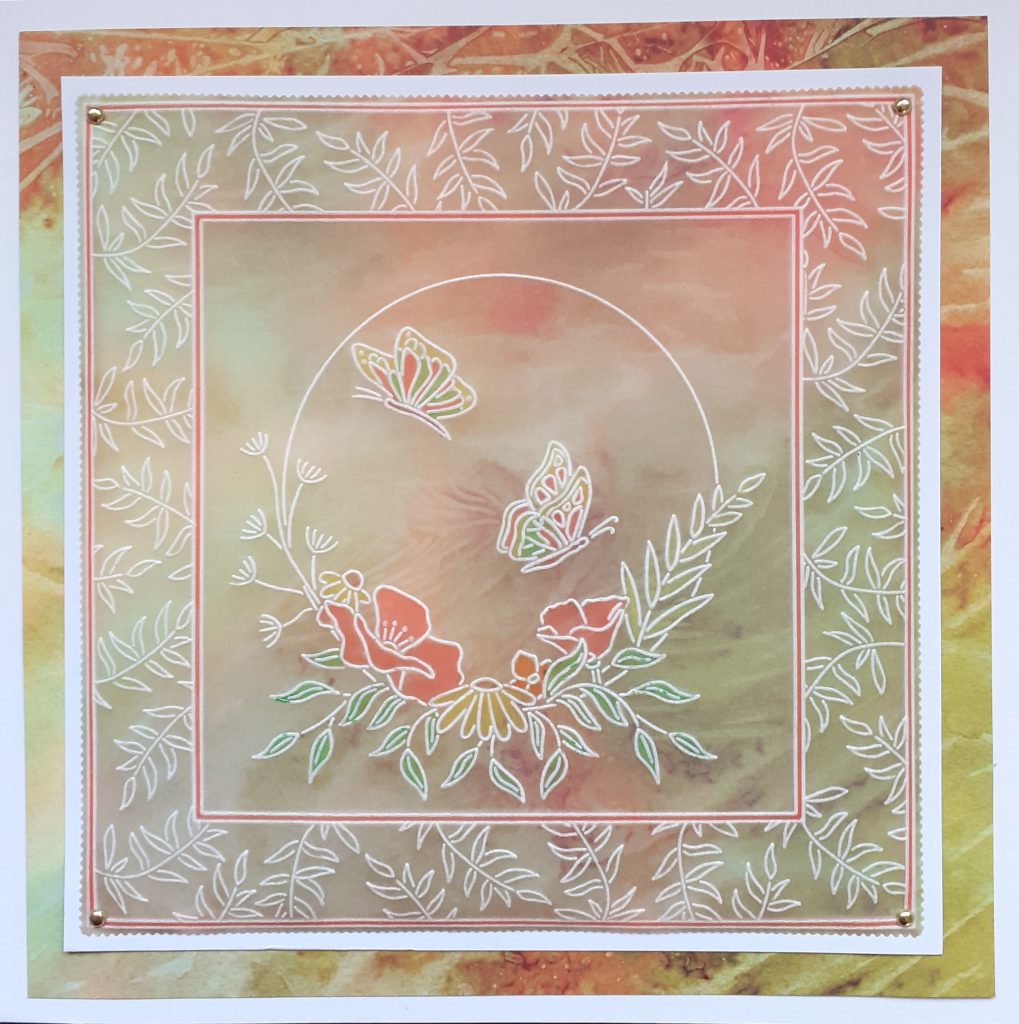
That is such a beautiful card! Thank you, Josie 🙂
Everything that Josie has used can be found HERE on the Clarity website.
If you’d like to give this blog tutorial a go, don’t forget to share your artwork on Groovi Worldwide. And/or email it to me (Grace@claritystamp.com) – We love to see your Clarity artwork!
There are a few Clarity things to look forward to this week, as always.
Here is our schedule for the week ahead:
Monday 17th April:
SHAC Shack with Barbara – 10am Live on Facebook and YouTube
Tuesday 18th April:
Groovi Tuesday with Paul – 10am Live on Facebook and YouTube
Saturday 22nd April:
Get Groovi with Tina Cox on Create & Craft – 1pm & 5pm
See you there!
Travel gently, friends.
Lotsa love, Grace & Josie xo
Clarity – The Home of Art, Craft, and Well-Being.
Another lovely project from Josie with great step by step instructions for everyone to follow. Look forward to seeing everyone’s cards on Groovi Worldwide, these plates are on my wish list as I wasn’t sure I needed them but how wrong was I when I see the cards that are being made using them. Although the process could be used with any plate so I will give that ago over the next few days once I have caught up with the SHAC’s & my PTC.
Thanks Grace & Josie, have a good week & I will catch up with you next weekend xx
I’m glad I got these plates, haven’t used them yet but might give this a try, thank you both. X
Thank you Josie for your clear step by step for creating this very pretty card. I don’t have this particular set but the method plus tips and tricks can be used with any plate (and I have quite a few) in my stash.
I hope you are on the mend. x
Love the idea of colour removing. Have done it now several times. Great design. Thank you Josie and Grace.
Simple, easy and oh so pretty. Thank you for this step by step.
🍒
A brilliant demo for a lovely card. Thank you. x