Clarity’s Blog Tutorial: How To Use the Circular Grid Plates
Hello hello! Grace here.
I hope this finds you safe, happy and well.
First thing’s first… Today is Mum’s birthday. So please join me in wishing her a very HAPPY BIRTHDAY!!!

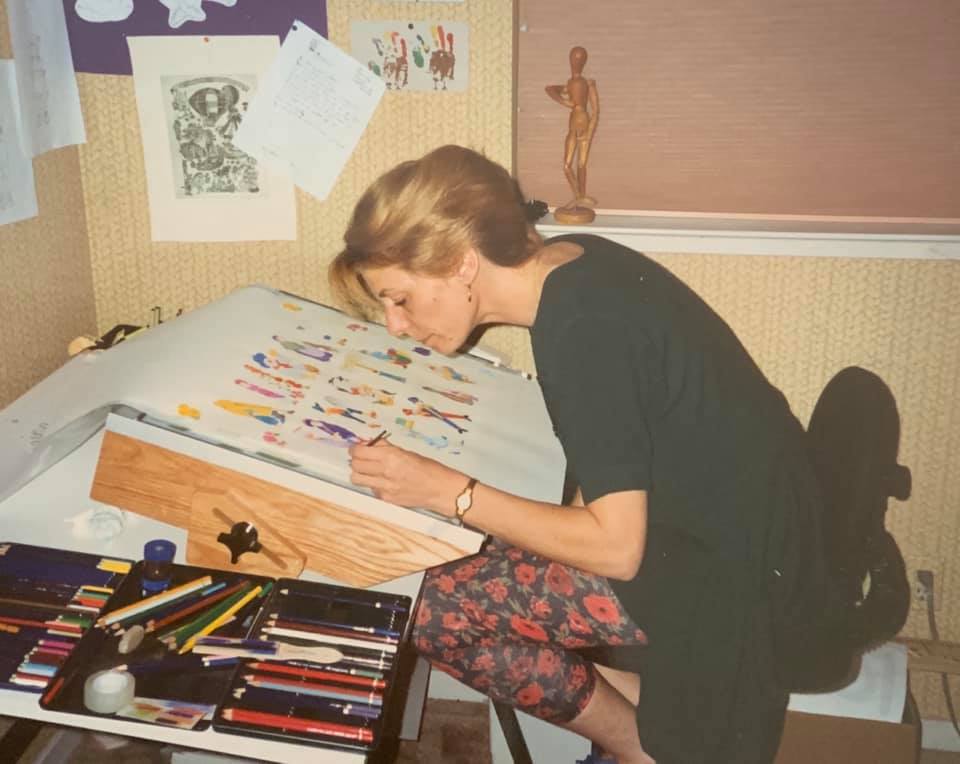
Here’s the lady herself, enjoying some ice cream at The Cheesecake Factory in San Francisco. This was in 2019, for Mum’s 60th, when we all travelled to SF and Hawaii for a week. What a trip that was! Very grateful we made that happen before the world imploded. Here’s to more family trips like that one in the future! She looks happy doesn’t she? 🙂
Please join me in wishing her a huge HAPPY BIRTHDAY! And sending her all the happiness, well wishes & love today! xoxox
This week we’re joined by the fantastic Josie Davidson. She is going to guide us through a step-by-step project using the Faith Circular Grid Groovi Plate. I’ll hand you over!

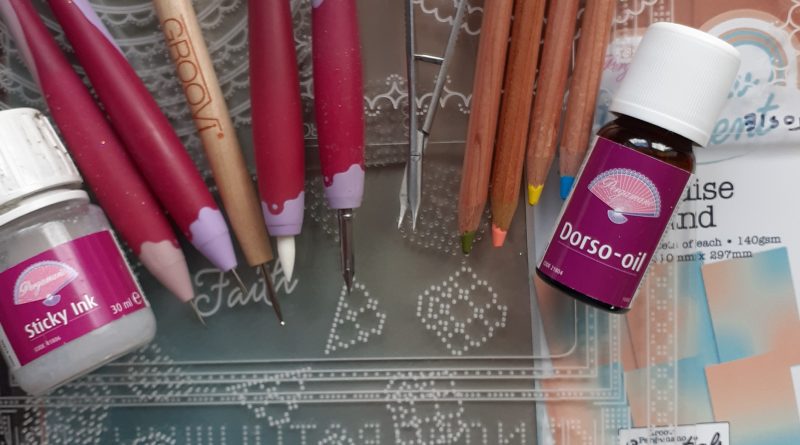
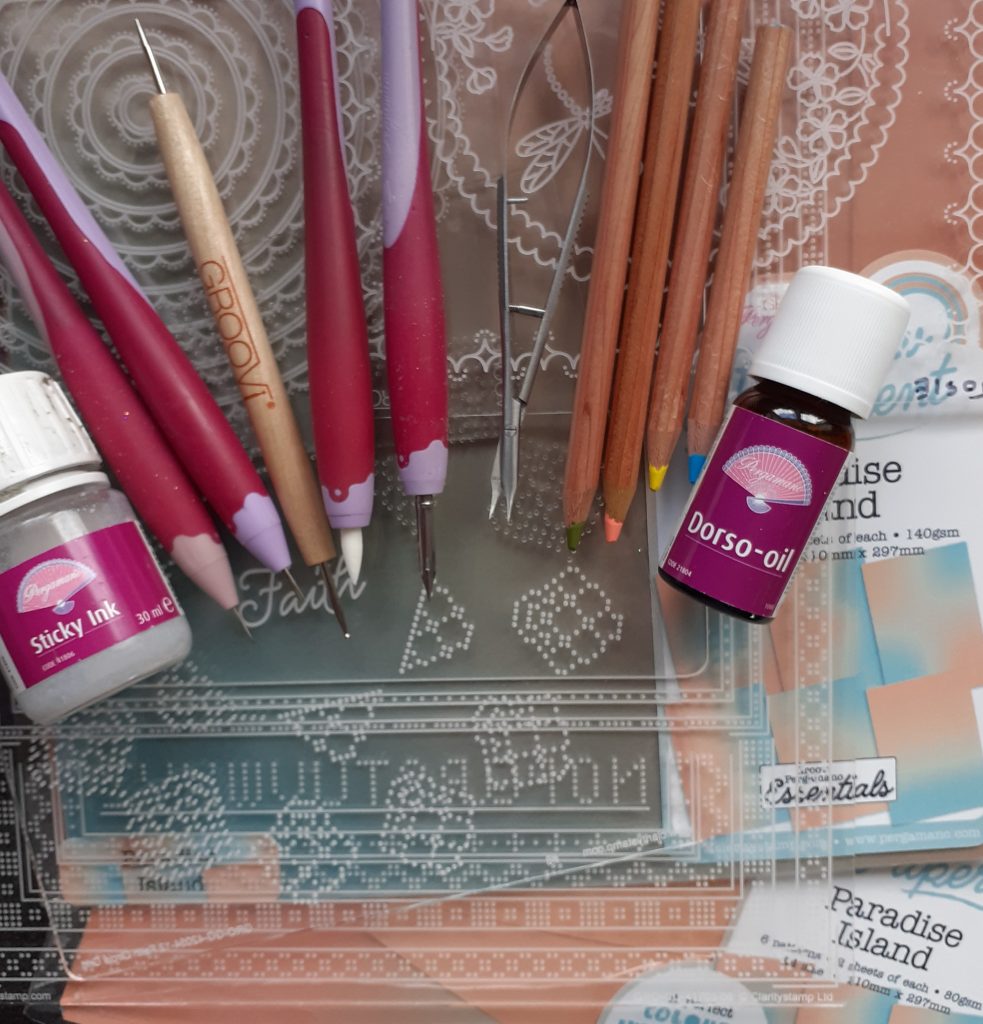
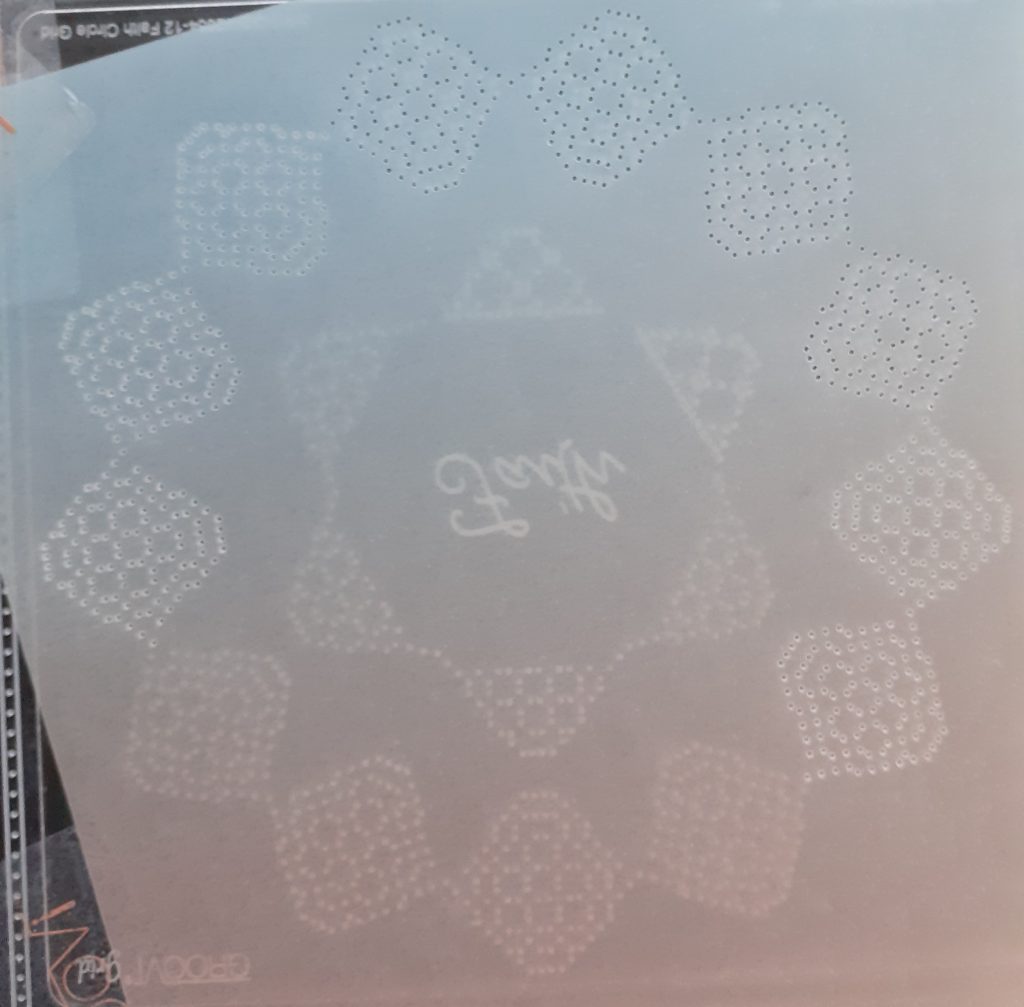
This step-by-step explains how to use the circular grid plates. They are used differently to the duet grid plates because they need to be perforated first and the embossing work is done afterwards. Here is what you’ll need…
Ingredients
Circular Lace Duet A5 Sq Groovi Grid – Faith (GRO-GG-42054-12)
Linda’s Dragonflies A5 Sq Groovi Plate (GRO-AN-40815-03)
Nested Scallops Circles A5 Sq Groovi Plate (GRO-PA-40558-03)
Groovi Plate Mate for A5 Sq Grids (GRO-CO-41706-08)
Paradise Island Rainbow A4 Parchment & Paper (GRO-AC-42023-XX)
Groovi A4 Clear Parchment (GRO-AC-40024-XX)
Scissors or Pergacutters
Groovi 1&2 Tool (GRO-AC-40026-XX)
Pergamano Bold 1-Needle Tool (PER-TO-70028-XX)
Pergamano Bold 2-Needle Tool (PER-TO-70279-XX)
Groovi Guard (GRO-AC-40345-XX)
Pergamano Gold Brads (PER-AC-70274-XX)
Perga Liners #8, 10, 15 & 16
Dorso Oil (PER-CO-70066-XX)
Blending Pen & Nibs (PER-AC-70300-XX)
Sticky Ink & Mapping Pen
Perga Glitter (PER-AC-70252-XX)
7×7 White Card Blank (ACC-CA-30619-77)
Clarity Tape Runner
Tumble Dryer Sheet
Method
Step 1. Rub the back of the Paradise Island Rainbow Parchment with a tumble dryer sheet. Turn the parchment over and attach it to the Faith Circle Grid Plate. Perforate the holes in the plate with the 1 & 2 Needle Tools (you can just use the 1 needle tool if you prefer).
You will have 9 sets of points perforated.
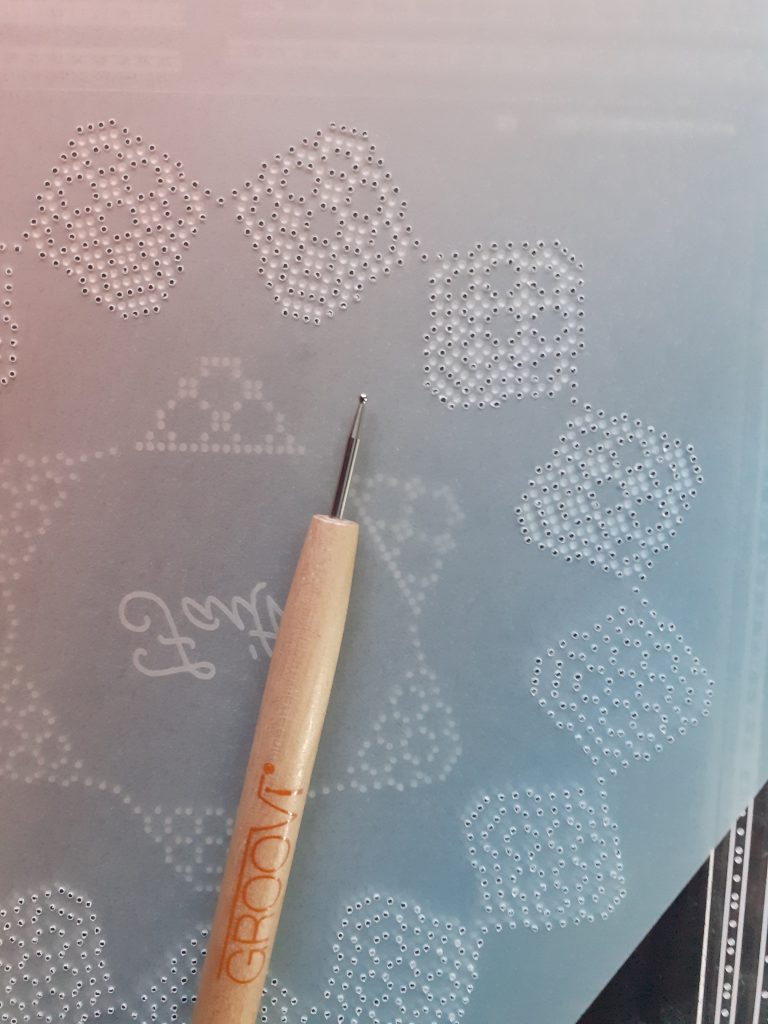
TOP TIP: Make sure to secure your Circle Grid Plate into the Plate Mate with a Groovi Tab to stop it moving whilst you are working.
Step 2. Remove the parchment from the plate and move it around, so that the perforated holes lock into the holes within the plate. You can now perforate the remaining four points to complete the circle.
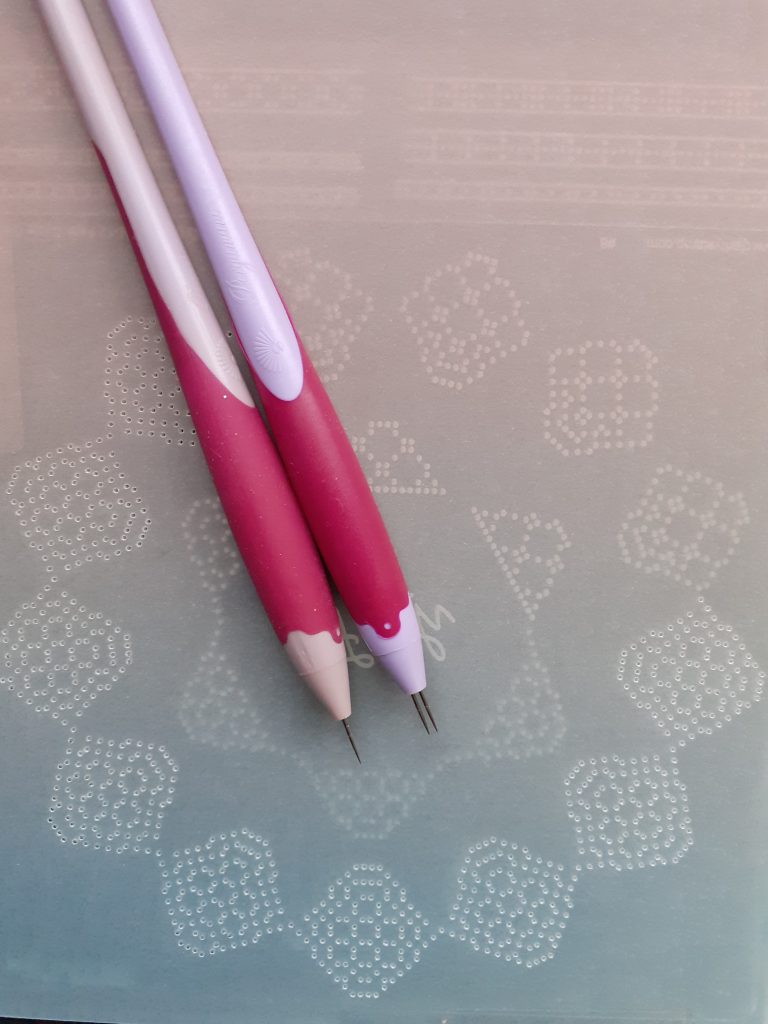
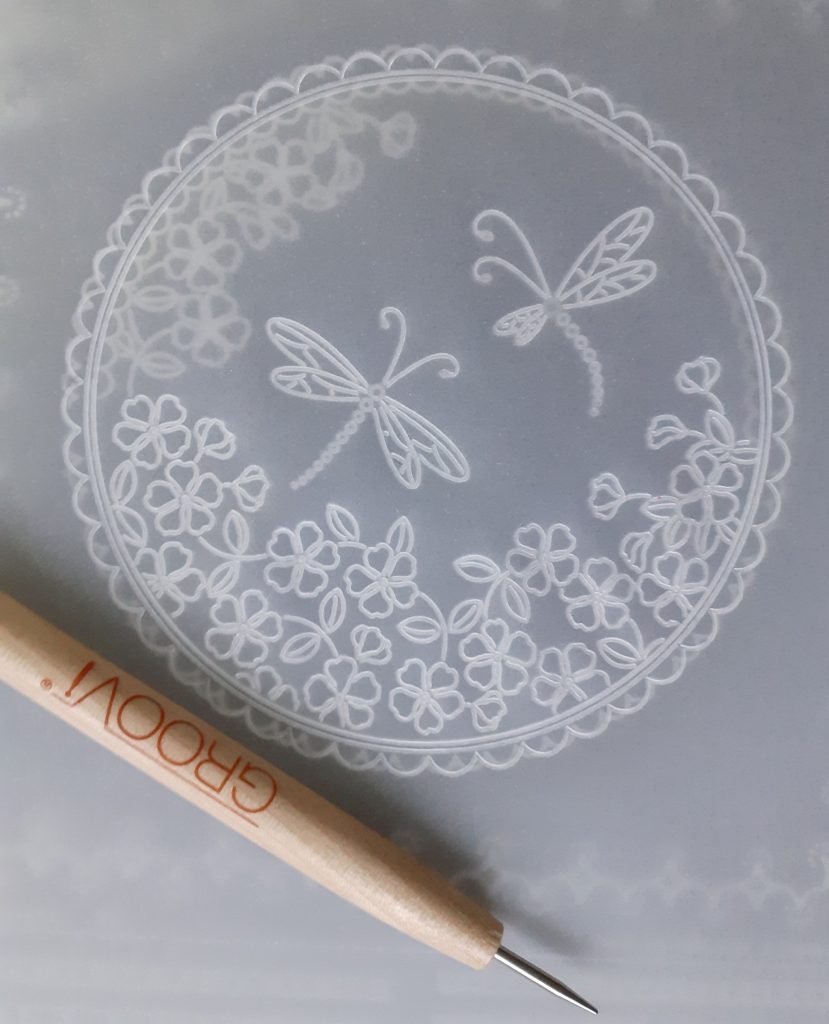
Step 3. Now to do the embossing between the perforations. Make sure you have the embossing side of the plate facing you (you should be able to read GROOVI in the top right corner). Turn your parchment over and align the holes you have perforated around the dots in the plate. Emboss with the Number 2 Groovi Tool by pressing the ball into the dot.
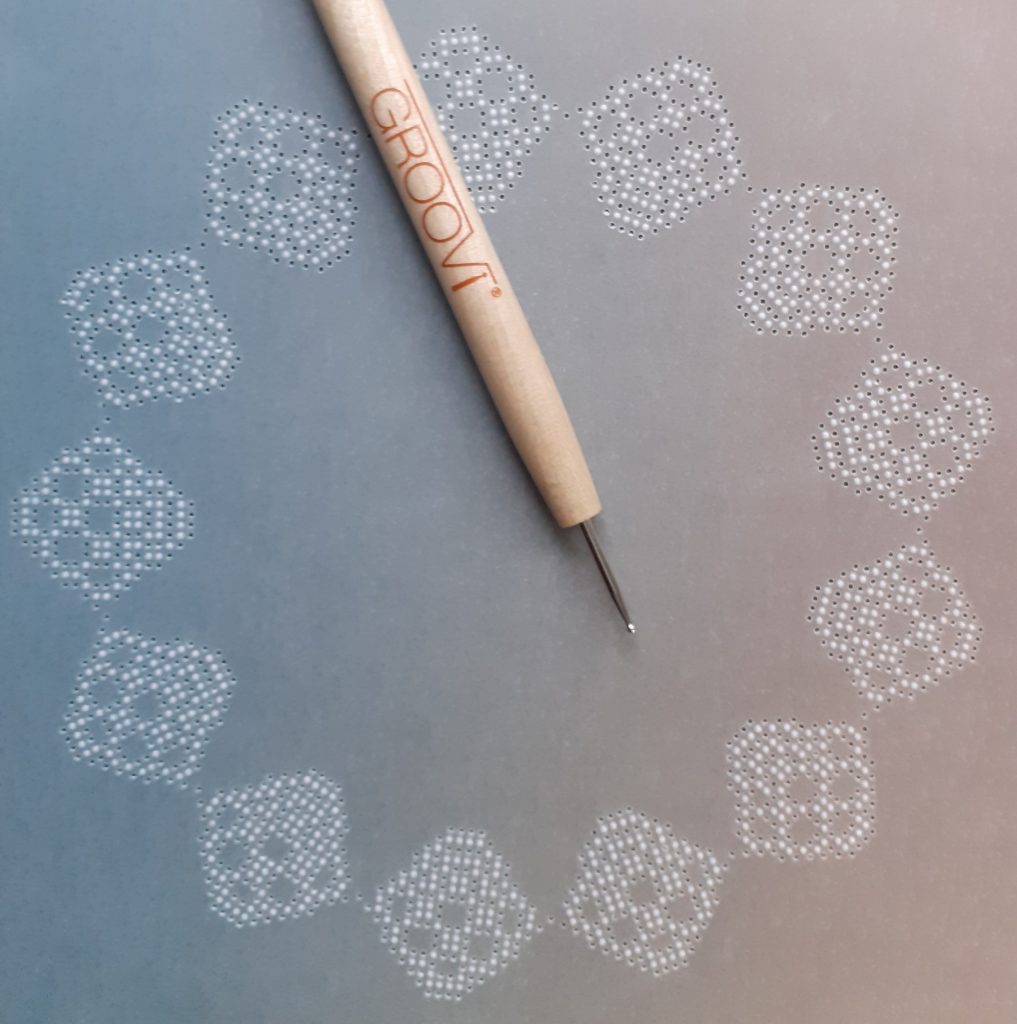
Step 4. You can emboss 4 points each time, so make sure to keep turning your work and realigning each section to do this. Place this to one side whilst you work the centre picture.
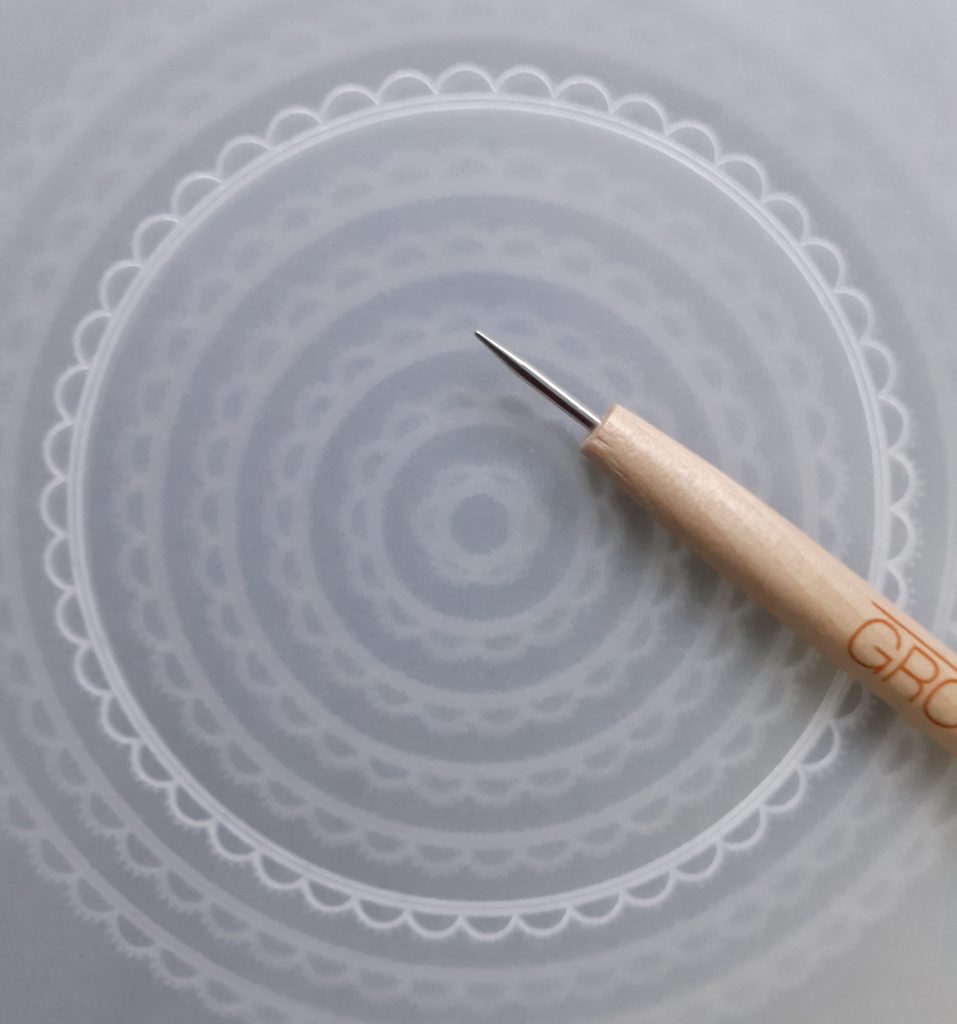
Step 5. Using the Circle Scallop Plate, emboss the third circle from the outer edge of the plate with your Number 1 Groovi Tool.
Step 6. Using the Dragonfly Plate, emboss the flowers and dragonflies using the Number 1 Groovi Tool. You will need to adjust the edge of the circle to fit around the smaller area of flowers.
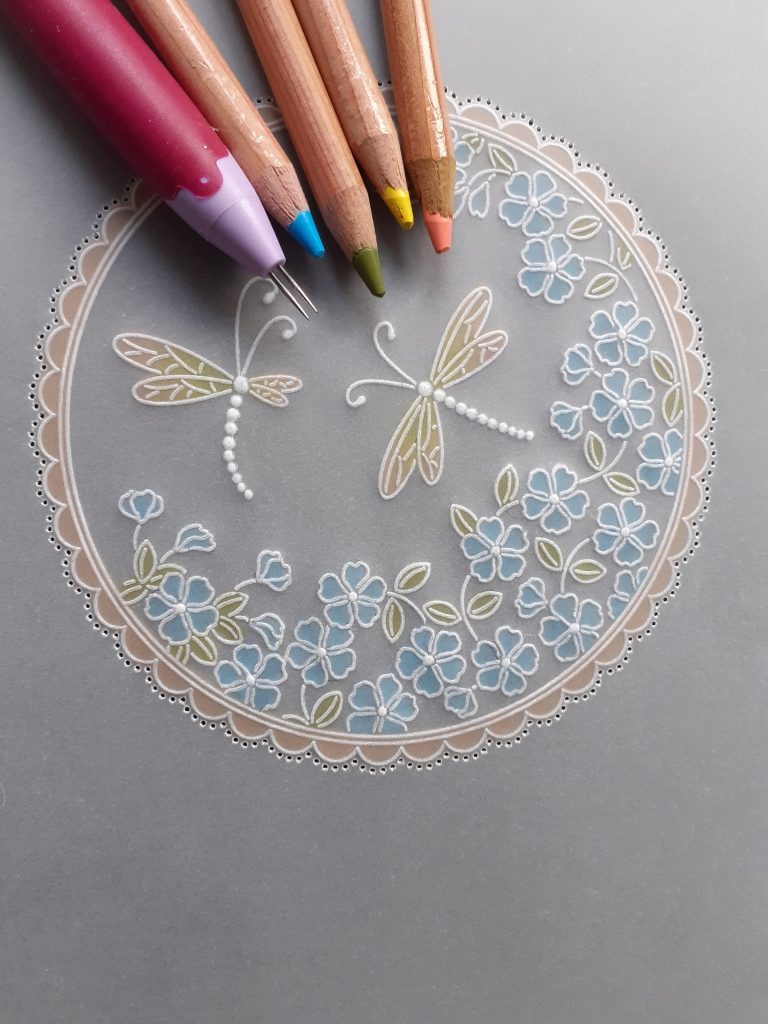
Step 7. Colour the back of your work with Pergaliners. Blend with Dorso Oil and your Blending Pen. Perforate around the scallops outline using the 2 Needle Tool.
Step 8. Picot cut around the scallops and then picot cut the lace circle, following the cutting guide that came with your Groovi Plate.
TOP TIP: When cutting the circle grid design, cut the pattern in each point – where there is a wider gap between the holes, cut these first and then cut the narrower gaps last. This will give a neater finish. Cut the inner picots to form the photo corners and then cut around the outer edge of the circle.
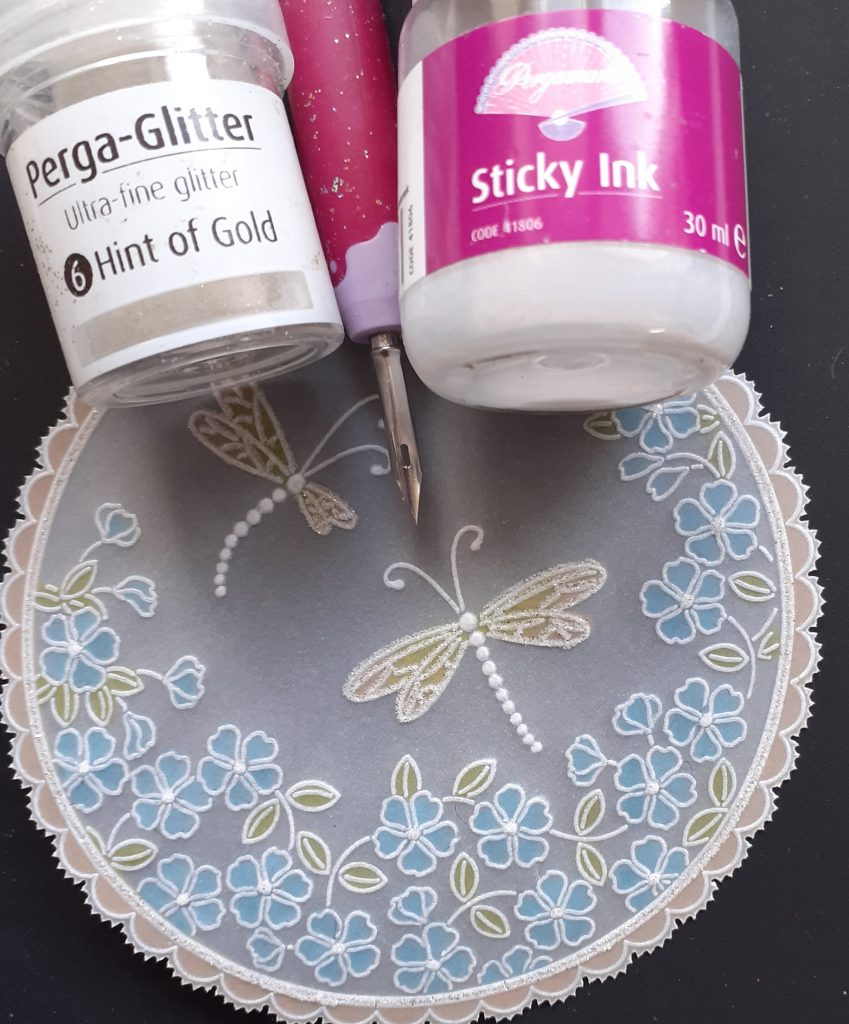
Step 9. Use the Mapping Pen and Sticky Ink to add glitter to your dragonfly topper.
Step 10. Place the topper inside your lacework circle using the photo corners to hold it in place. Cut your rainbow paper to 6×6 square and attach your work to it using brads. Use the glue runner to attach your finished piece to the card blank. And voila!!
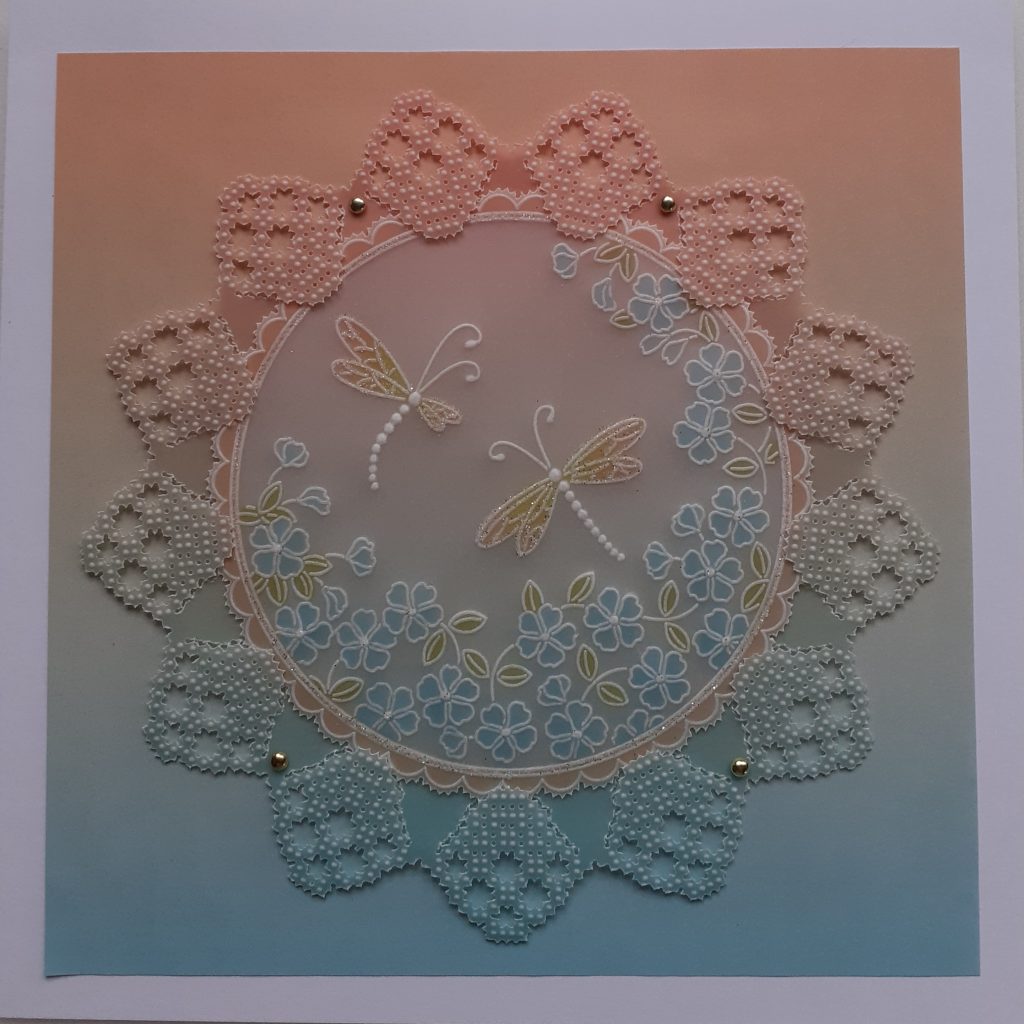
GORGEOUS!!! Thank you Josie, for sharing your skills with us and making the unachievable so achievable for so many of us! 10 steps and bam, there’s a beautiful card.
Everything that Josie has used can be find in one place over on the Clarity website HERE
To celebrate Mum’s Birthday, we are having a celebration over on the Clarity website with 30% off all things Clarity HERE
Looking to the week ahead:
Monday 14th – SHAC Shack with Barb – Live at 10am on Facebook & YouTube
Tuesday 15th – Groovi Tuesday with Paul – Live at 10am on Facebook & YouTube
Thursday 17th – The Pergamano Show with Paul on Create and Craft at 11am & 3pm
Lotsa love, Grace & Josie xo
Clarity – The Home of Art, Craft and Well-Being.
What a fab project – will definitely have a go once I am back in action!
Happy birthday Barbara – hope you have a humongously wonderful birthday and lots of cake 🎂🧁🍰
Lots of love
Katharine xxx💜
Such a beautiful project, thank you, Josie, for showing us how to achieve this!
And HAPPY BIRTHDAY to Barbara for your 30th birthday! May you feel as young as that for many, many years to come!!!
🙂 Doro
Just looked at this weeks sunday blog. Was too sick Covid , to be interested in anything. Feeling much better now and love the design. Great work Josie.
Lovely project. Thank you.
Happy birthday Barbara, enjoy the day, you deserve it.
Thank you, wonderful tutorial. I’ve just got those plates and will try this out soon. Happy birthday Barbara, hope you have a day as wonderful as you are.
Many Happies Barbara – am quite addicted to Groovi – thank you for all your ideas and inspiration. Have a good one!
That’s a great project Josie. Thanks for a fab tutorial.
Happy birthday to Barbara. Hope you’re getting spoilt rotten by Dave!
Lots of love. Xxxx
Great tutorial, thank you.
Many Happy Returns Barbara, may you always be as young at heart as you feel today.
Stay safe
Another great project from Josie.
Hope your Mom has had a wonderful day – love the photos you posted on Facebook Grace
Must finish last weeks project that you set us xx
Hi Grace & Josie – Thank you so much for this lovely tutorial – will be trying to have a go at this !!!
A very Happy Birthday Barbara – Sure you will be spoilt rotten – enjoy your day 🥂🍾
Love Seta Xx