Clarity’s Blog Tutorial: How To Use The Flower Tool – Part 1
Hello hello! Grace here.
I hope you’re well, safe and happy.
This week saw the final Pergamano Multi Needle Volume 1 from the lovely Linda Williams.
The lesson related to the Pergamano Flower Multi Needle and as usual, Glynis has created a beautiful step-by-step project to show how to put what Linda showed us into a finished piece.

How to Use the Flower Tool
Ingredients
Pergamano Handbook for Multi-Needle Tools Volume 1 by Linda Williams (PER-BO-70291-XX)
Nested Arch Tags Groovi Plate A5 (GRO-PA-41465-04)
Linda’s Dance in the Puddles A5 square Groovi Plate (GRO-LW-41556-03)
Flower Perforating tool (PER-TO-70018-XX)
Single Needle Perforating Tool (PER-TO-70035-XX)
1mm Embossing Ball tool (PER-TO-70011-XX)
1.5mm Embossing Ball tool (PER-TO-70004-XX)
6mm Embossing Ball tool (PER-TO-70016-XX)
1 & 2 Tool From Starter Kit (GRO-AC-40026-XX)
3 & 4 Tool From Starter Kit (GRO-AC-40027-XX)
Faber-Castell Polychromos Pencils (ACC-PE-30797-XX) or Perga-Liner Pencil (B) (PER-CO-70063-XX)
Blending nibs (PER-AC-70300-XX)
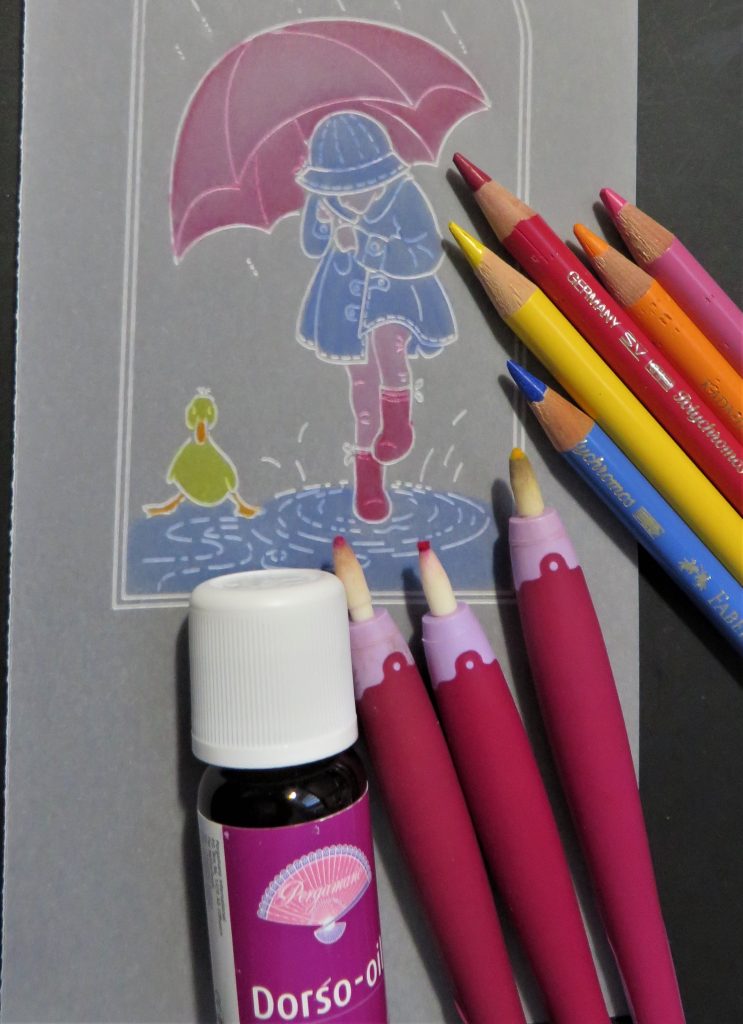
Dorso Oil (PER-CO-70066-XX)
Perga Glue (PER-AC-70133-XX)
Perga Crystals (Starlight) (PER-AC-70402-XX)
Method
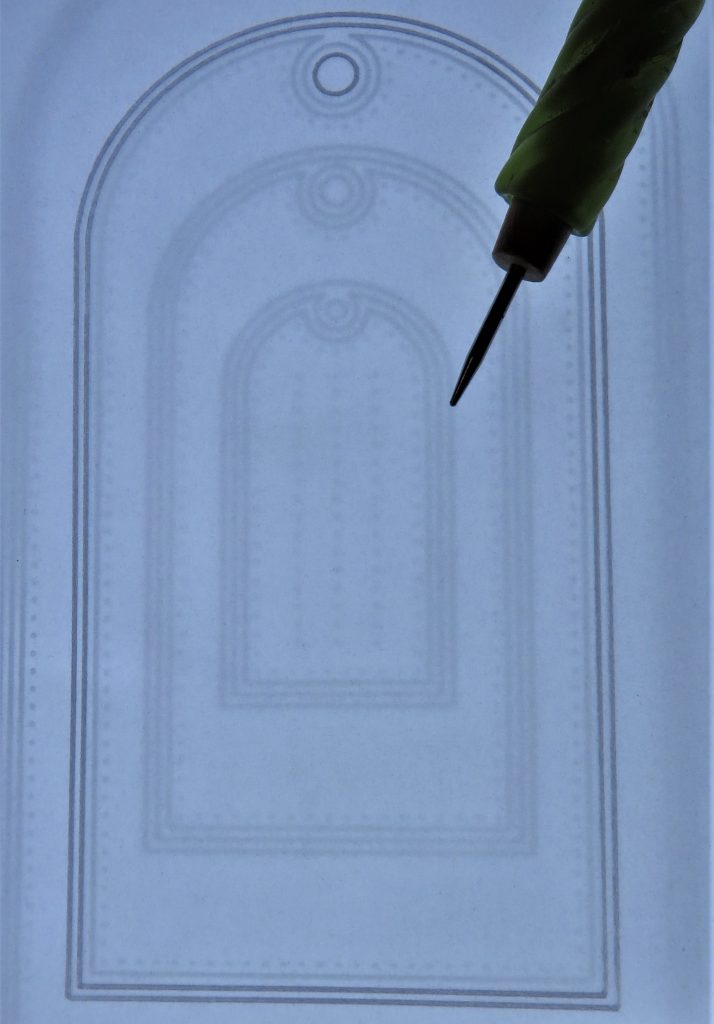
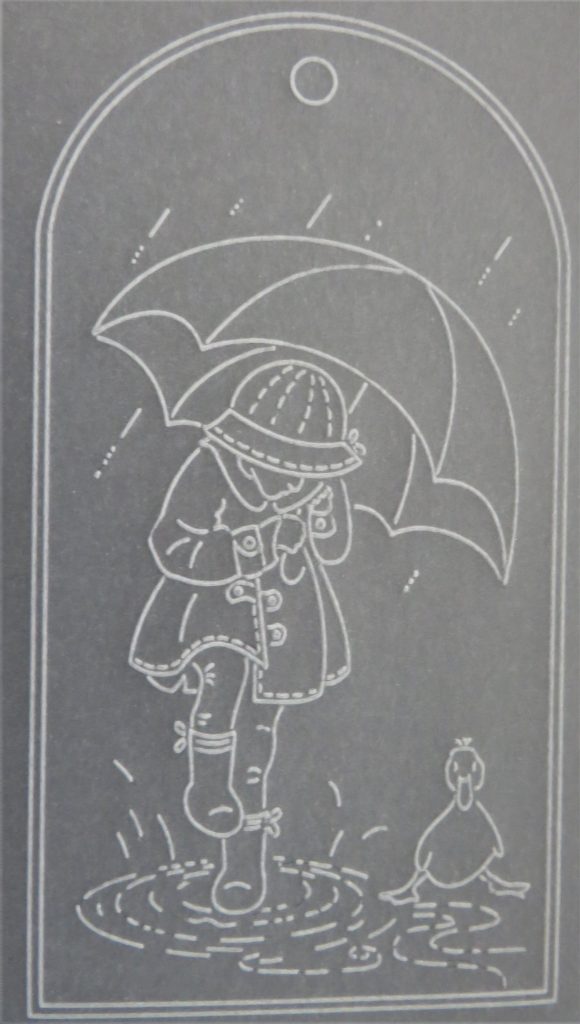
Step 1. Trace the 2nd largest tag from the nested Arch Tags Groovi plate.
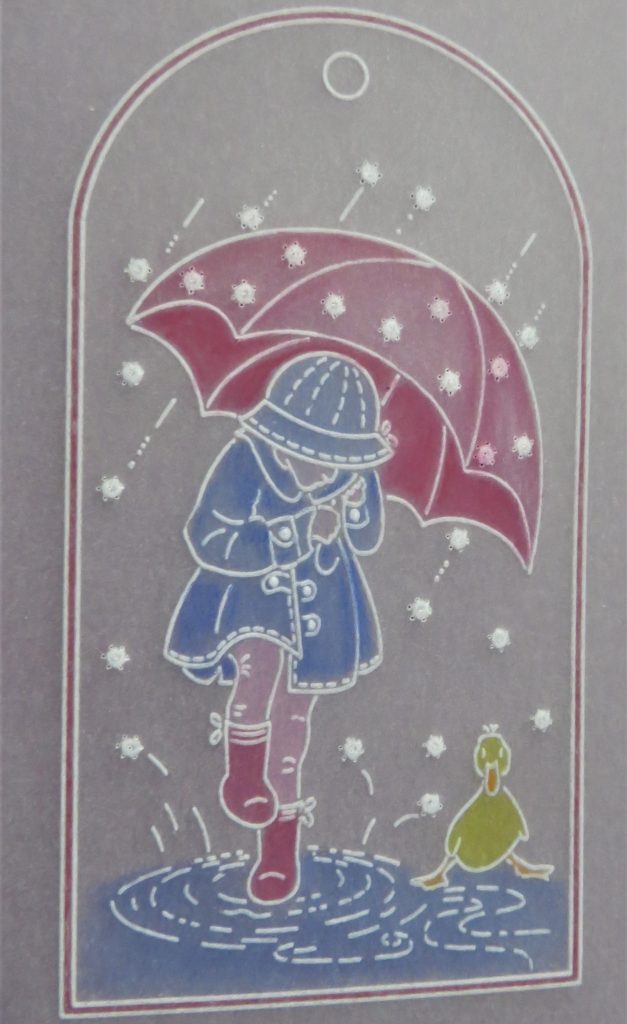
Step 2. Emboss the little girl from Linda’s Dance in the Puddles Groovi plate, leaving out all the dots in the umbrella and raindrops. We will use the Flower tool to substitute those.
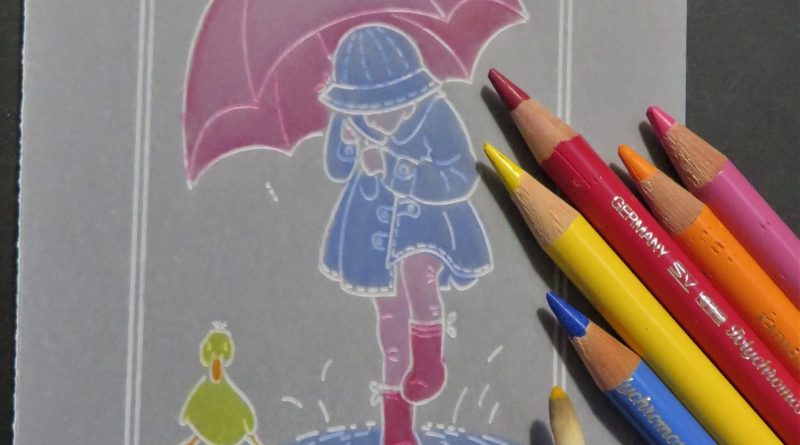
Step 3. Add colour before perforating. Colour on the back of the parchment and blend with Dorso oil and a blending nib. Put a little colour on the front too, to give the image some light and shade.
Step 4. The Flower Tool is illustrated by Linda on pages 38-41 of the Handbook. You need to photocopy the sampler from page 41 if you wish to perforate through the pattern. Use the flower tool to shallow perforate and add random drops on the umbrella and where the raindrops would have been.
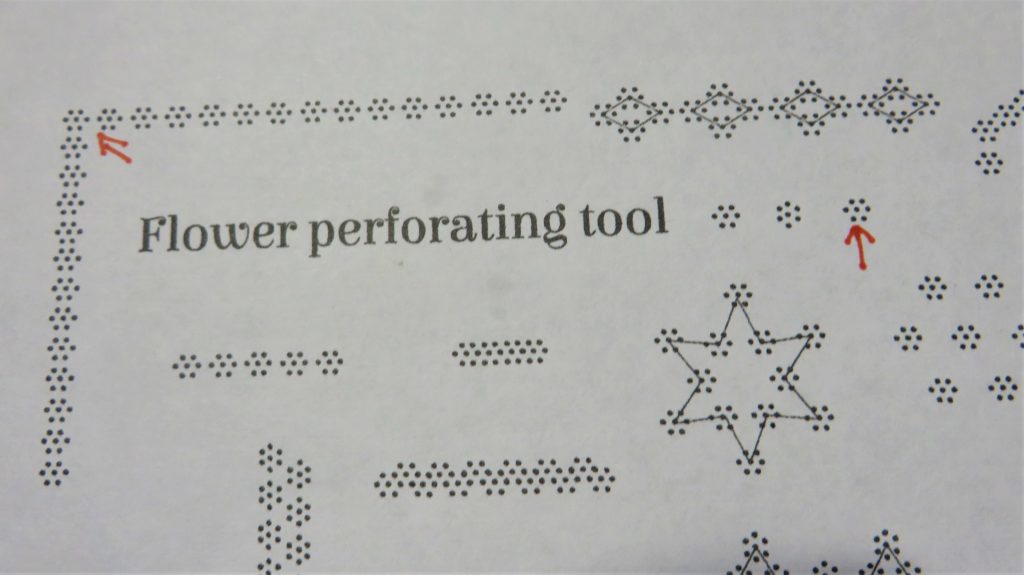
Step 5. Use the 2.5mm ball tool to emboss into the flower perforations around the central hole – fill the whole space within the perforations.
Step 6. Go around the outside with the Flower tool, following the pattern on page 41 of Linda’s handbook. Use the dots on the handle of your tool to help you with lining up. Use a ruler to cover your embossed line to help you prevent impinging on the embossing.
Step 7. Emboss around the centre hole with 1.5mm tool. Try to fill up the space within the perforations. Once all the embossing is done, re-perforate the holes with a fine single-needle tool.
TOP TIP: Go gently – get the whiteness through repetition of the strokes rather than pressing hard, or you will tear the parchment.

Step 8. Follow the guide in Linda’s handbook on page 39. The holes to snip are marked in red. Snip out the tag. Make sure you remember to turn the work rather than your hand. Leave all the snips on the arch of the ‘scallop’ until last so that the parchment is supported as you go.
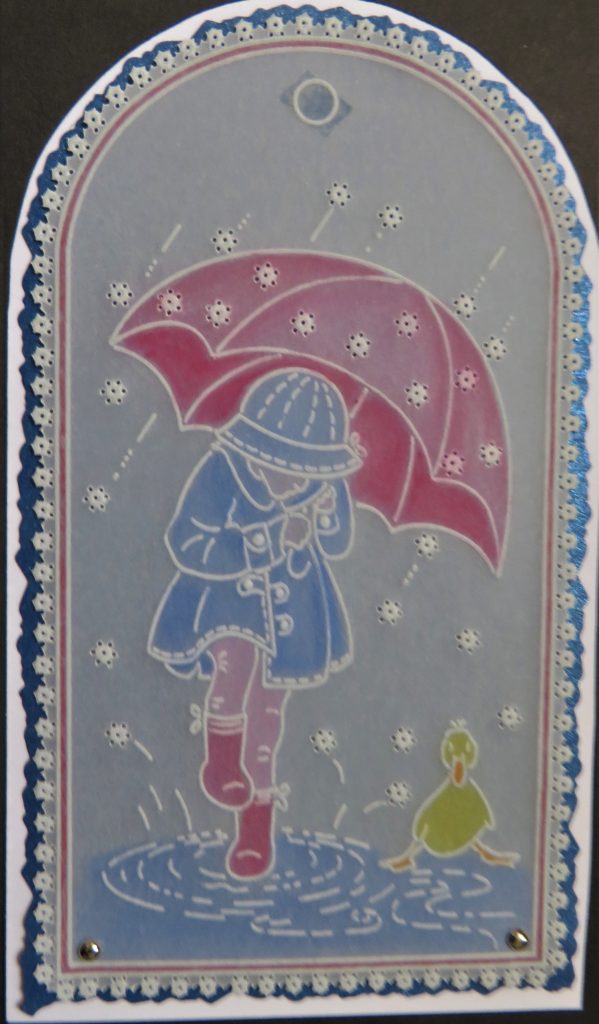
Step 9. Mat and layer the work up onto the backing papers/card of your choice and decorate with some gems. Add a bow at the top. And you’re all done!
Once again, a big thank you to Glynis for guiding us through this step-by-step. That is absolutely gorgeous! And super handy.
All of the previous Pergamano School Lessons from Linda Williams can be found on the Clarity website HERE. All of the products that Glynis has used can be found HERE.
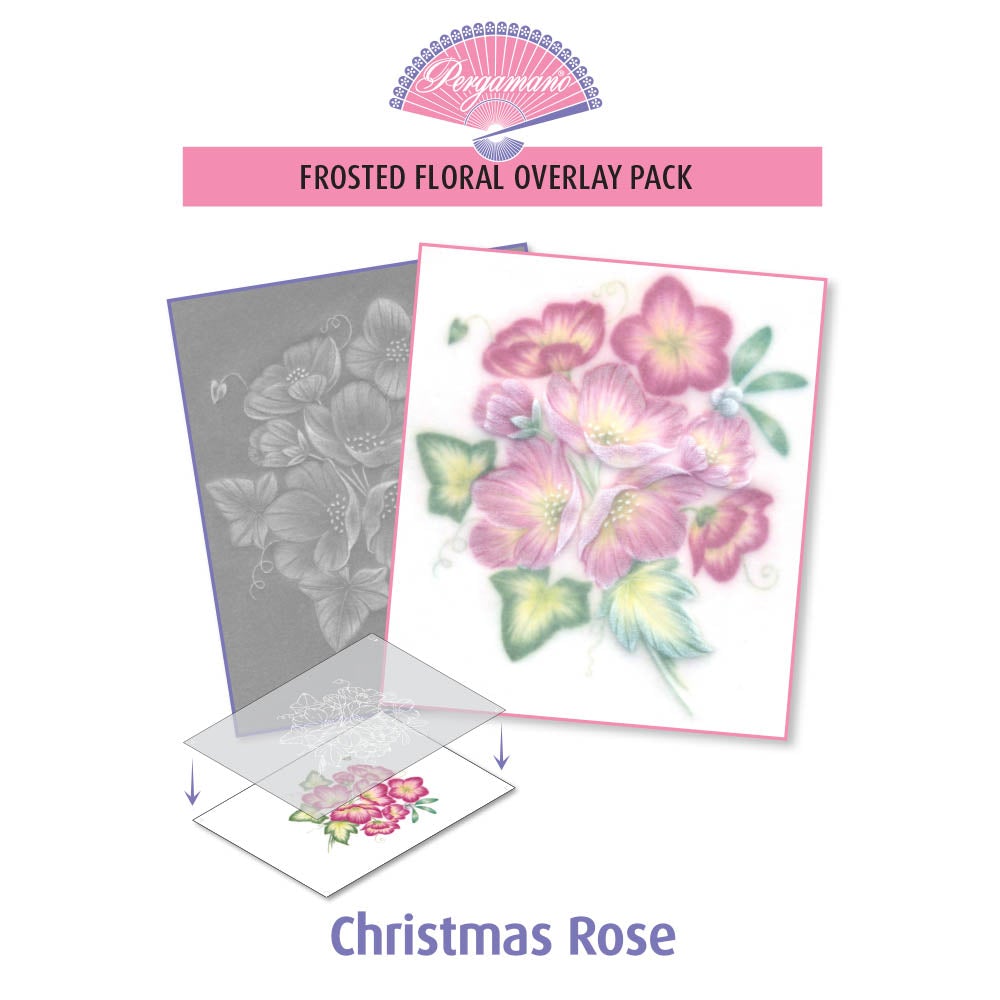
Next Tuesday, in the Pergamano School, Linda will be guiding us through the Frosted Floral Overlay Parchment sets and concentrating on the Christmas Rose.
Don’t forget, the Clarity Craft Club Half Price Members Sale is on – you check out the Clarity website HERE.
If you don’t know what the Clarity Craft Clubs are all about, then click HERE to find out more. If you join now, you can participate in the members half price sale! 🙂
Lotsa love, Grace & Glynis xo
Clarity – The Home of Art, Craft and Well-Being.
Thank you Glynis for another great step by step project. The tags are great toppers for a card.
Looking forward to seeing how the Frosted Florals work – I have my kit ready & waiting for Tuesday.
You are very welcome x
Lovely project as always, Glynis. I am so looking forward to Linda guiding us through the Christmas Rose. I have it on order so will watch on Tuesday and catch up later. Definitely need to watch first anyway and maybe more than once before I try it. Hxx
Love, love, love this. Thank you so much for sharing Glynis xxx
Thank you Glynis for another great design. Really want to get to try some. Xxx
Love all the groovi blog tutorials and the inspiration. Still got a few on my ‘want to have a go’ list. Thanks to all at Clarity
Thanks 2G’s , Grace for the blog and Glynis for the project! X
Thank you both for this lovely project. Step by step is so easy to follow. And it always gives me ideas to use in my classes.