Clarity’s Blog Tutorial: How To Use The 5 Needle Tool (Part 2)
Hello hello! Grace here.
I hope this finds you well and enjoying your day… whatever it is that you are doing!
This week we got back into Summer School. Is it considered Autumn School now though?! Hmmm. Regardless, we enjoyed Lesson #5 this week of The Pergamano School! Super talent Linda Williams showed us more of the 5 Needle Tool (part 2). If you missed the class, then you can either catch up HERE or watch below:
The incredibly talented Glynis Whitehead is in our blog tutorial studio again this weekend too, to share her wisdom and skills with us using the same 5-needle tool we focused on again this week with Linda. Lucky lucky us!
By the way, if you missed the first blog instalment (the 5 Needle Tool Part 1 Blog) or want to remind yourself of it, you can check that out HERE.
I’ll hand you over to the lovely Glynis…

5-Needle Tool (Part 2)
Ingredients
Pergamano Handbook for Multi-Needle Tools Volume 1 by Linda Williams – (PER-BO-70291-XX)
Nested Arch Tags Groovi Plate A5 (GRO-PA-41465-04)
Linda’s Sweet Pea and Lace Groovi plate A5 square (GRO-FL-41229-03)
5-Needle Perforating tool (PER-TO-70019-XX)
1.5mm Embossing Ball tool (PER-TO-70004-XX)
3mm Embossing Ball tool (PER-TO-70005-XX)
Tools from the starter kit (GRO-AC-40026-XX) & (GRO-AC-40027-XX)
Faber-Castell Polychromos Pencils (ACC-PE-30797-XX)
OR Perga-Liner Pencil (B) (PER-CO-70063-XX)
Blending nibs (PER-AC-70300-XX)
A4 Translucent Perforating mat (GRO-AC-40307-A4)
A4 Translucent White Super Foam (GRO-AC-40603-A4)
Pergamano Sticky Ink (PER-AC-70134-XX)
Pergamano Mapping Pen (PER-TO-70039-XX)
Perga-glitters (PER-AC-70252-XX)
(The above 3 items are available in a bundle HERE)
Instructions
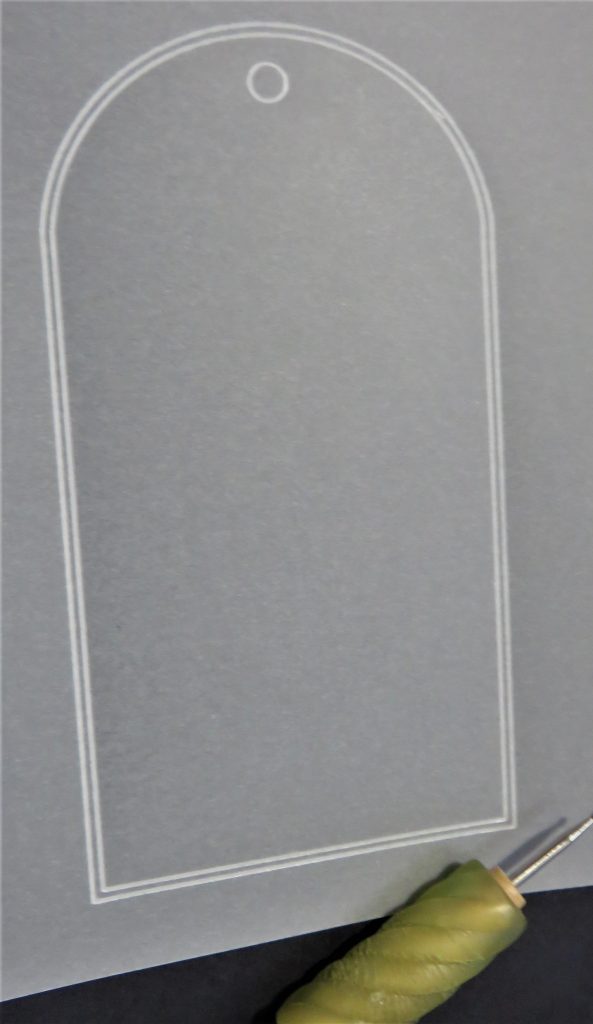
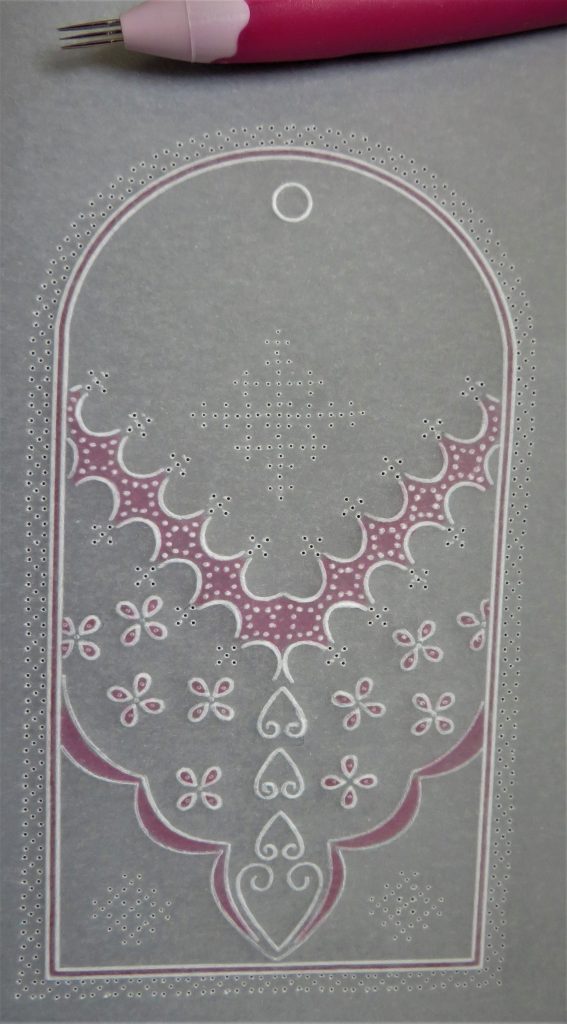
Step 1. Trace out the second largest tag from the Nested Arch Tag plate.
Step 2. Line up the tag onto the Sweet Pea plate so that you make a border across the bottom of the tag. The heart in the centre of the swags should be in the centre. Use the number 1 tool to trace all the dots and elements of the plate within the tag.
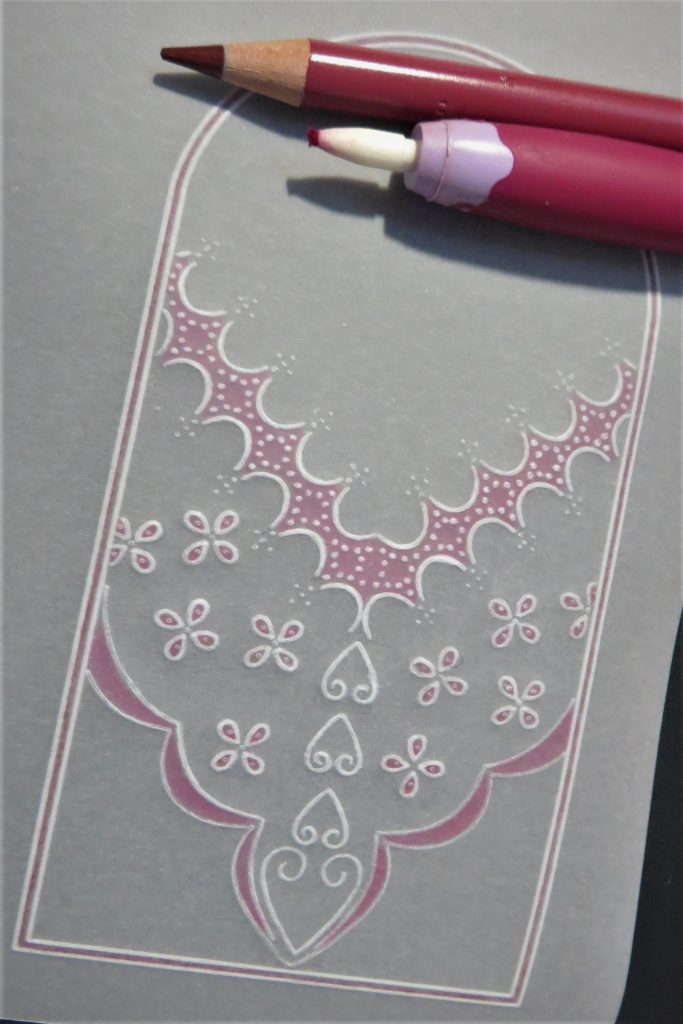
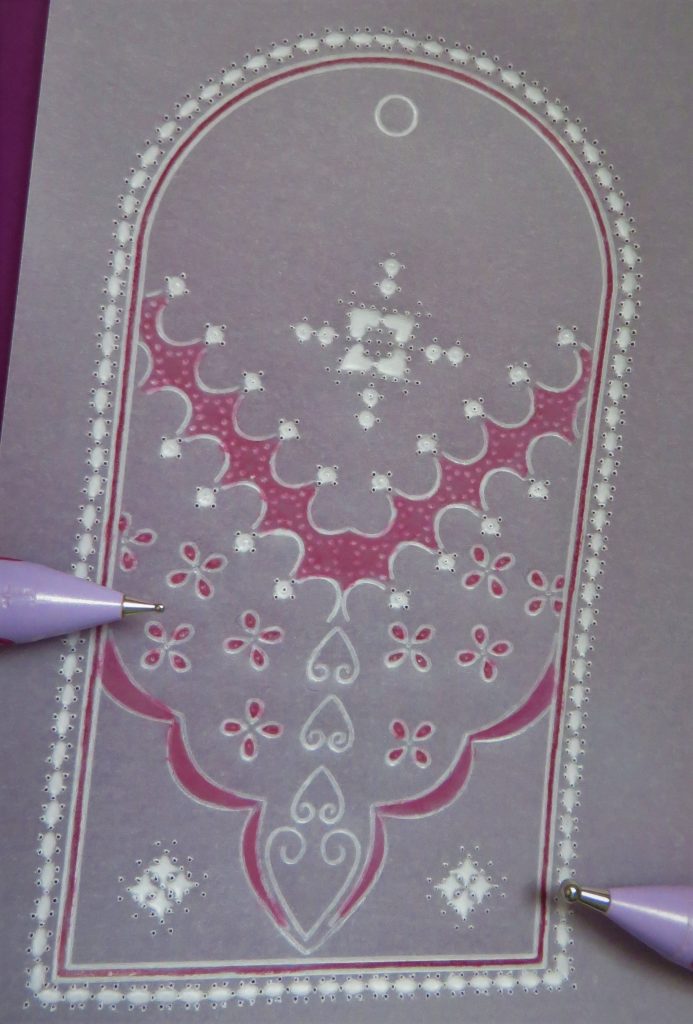
Step 3. Colour in the swags at the bottom of the border, the petals of the little flowers, in between the scallops and the border lines. Blend the pencil out with a little oil on a blending nib. *You don’t need to do this between the border lines.
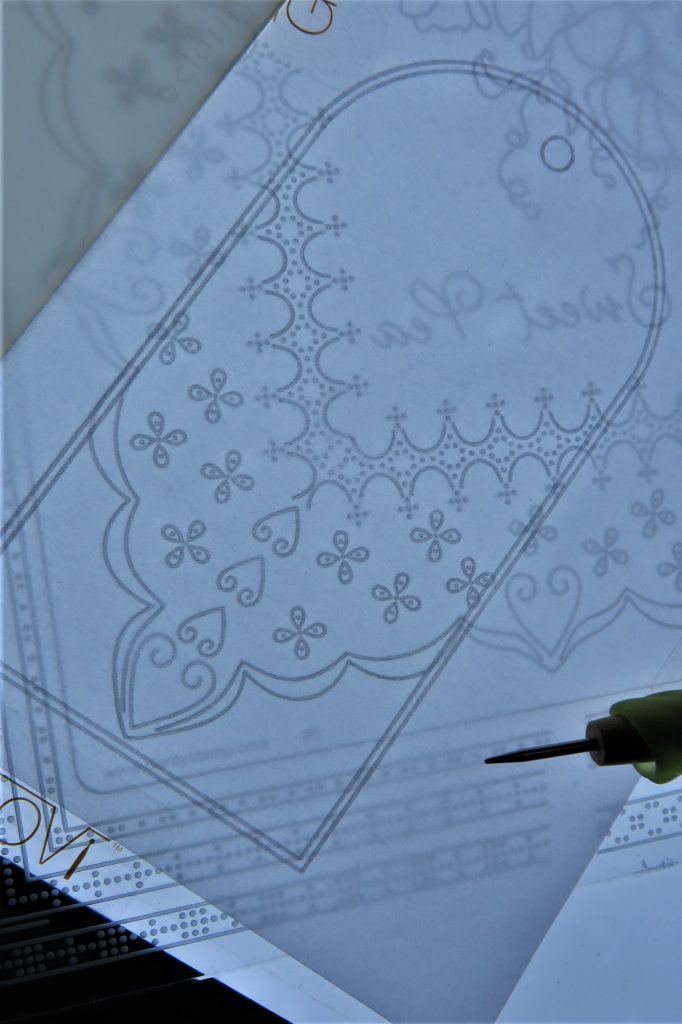
Step 4. The patterns for the 5-needle tool perforations are on pages 22-25 of Linda’s handbook. Make a photocopy of the sampler from page 25 and use the patterns marked with red arrows.
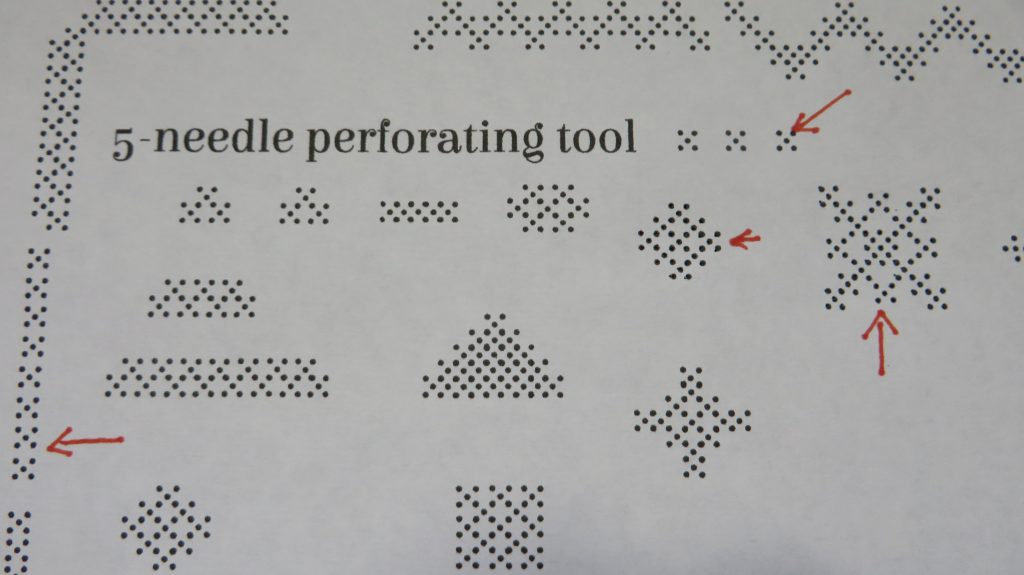
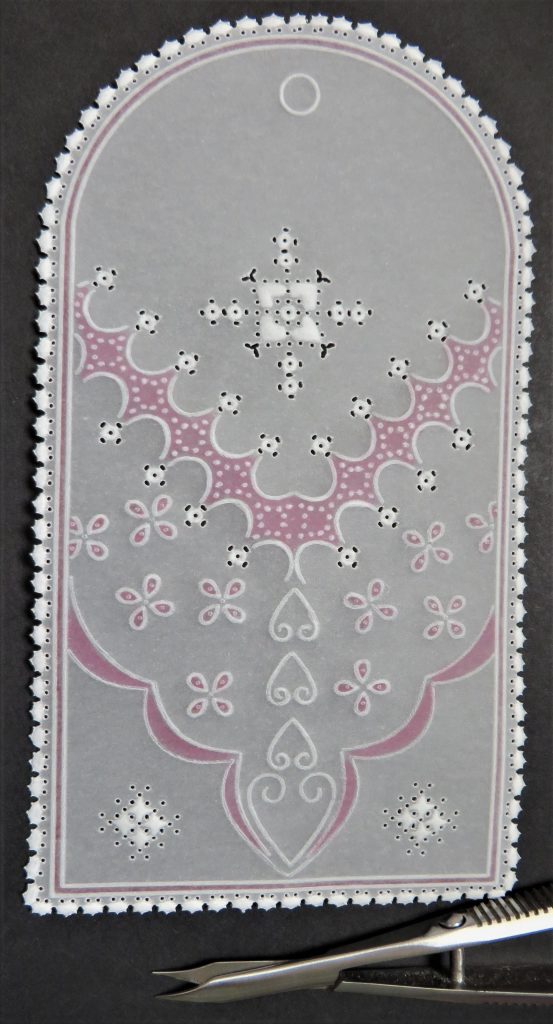
Step 5. Put the shallow translucent mat under the paper and line up the parchment on top of the pattern indicated. Line up the needles with the dots underneath and perforate through the parchment and pattern. You will see that some of the dots on the plate perfectly match the 5-needle tool also (the tips of the “V” border we created with the plate), so perforate through those dots too.
Step 6. Linda’s book (on page 23) shows where we need to perforate, emboss and snip to get the patterns that are illustrated on page 22. So before we re-perorate the 5-needle holes, we need to turn the piece over. Working from the back, emboss between the perforations following Linda’s examples. Use the 3mm ball tool or the number 4 from the starter kit in the larger areas before going in to define the edges with the 1.5mm tool.
Step 7. Turn the piece over again. Working from the front, place your work on Super Foam and re-perforate all the holes. It is easier to do this with a 1 Needle Fine tool. Follow Linda’s book, and when doing the single 5-needle perforations, give the tool a very gentle little twist to elongate the holes. Be very careful not to tear the parchment in between the perforations. If you want to see how this is done, Linda covers this in Lesson 4 HERE
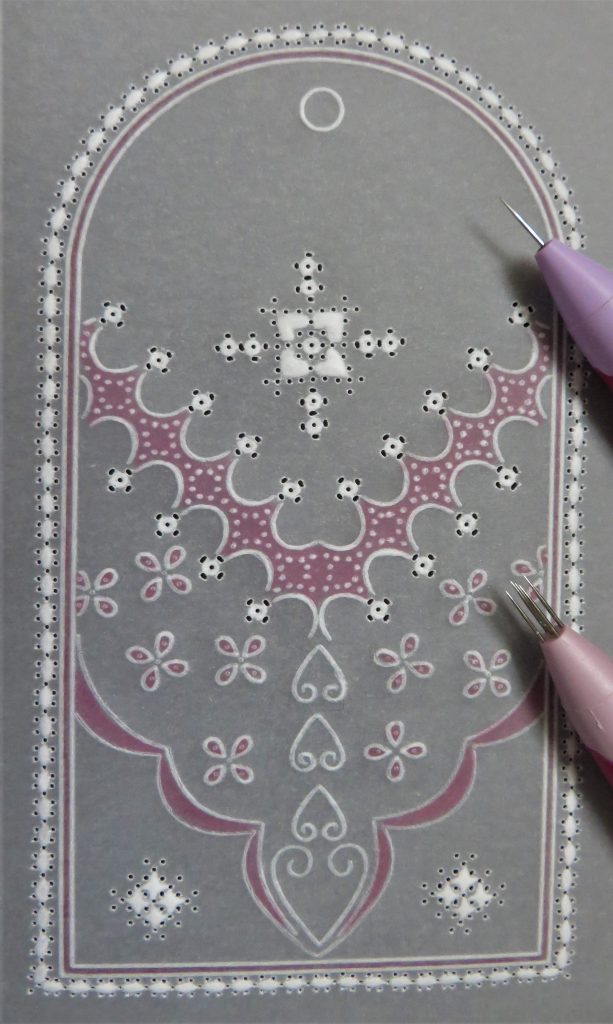
Step 8. Now snip all the perforations, again, following the guide in Linda’s book. It is best to do the widest snips first so that the work is supported. Turn the work as you go, keeping your hand comfortable. Snip all the holes in one direction, turn the work and do the other direction.
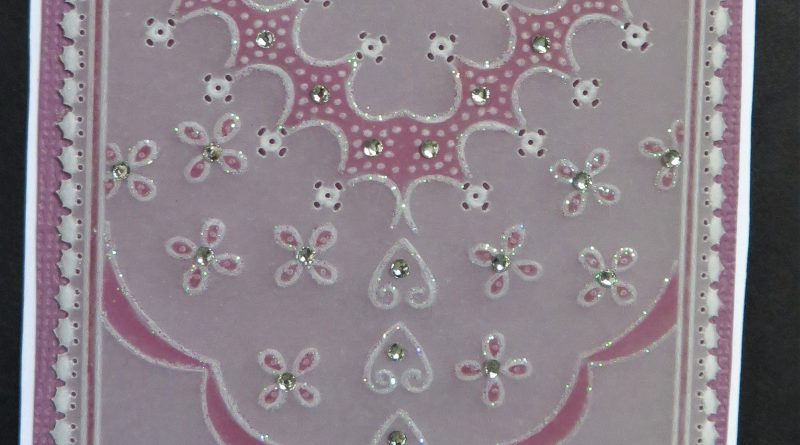
Step 9. Mat and layer the tag onto a coordinating piece of backing card, using brads to attach it at the bottom corners and a little piece of double-sided tape to be hidden by the bow. I’ve mounted mine onto another white piece of card, which I’ve carefully cut around. Add some sticky ink and glitter and a few gems to decorate. And you’re all done!
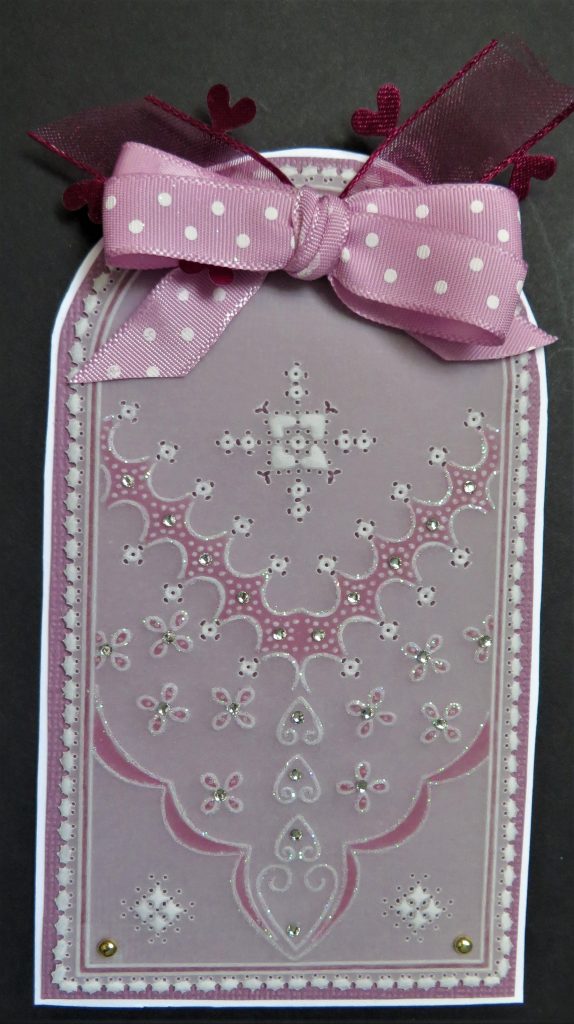
BEAUTIFUL!!!
As usual we have put everything in one place over on the Clarity website HERE
If you have missed any of the previous Summer School Lessons, then we have also created a dedicated space on the Clarity website HERE so it is easy to find all the lessons in one place, together with a downloadable tick list of what you need for school!
Lotsa love, Grace & Glynis xo
Clarity – The Home of Art, Craft and Well-Being.
Gorgeous tag, Glynis. Thank you. Hxx
So pretty. Am a bit behind with these at the moment as had a bad reaction to an insect bite on my hand. Hoping to get going again during the week. Am loving these tags Glynis x
This is beautiful. I have a lot of catching up to do but will get there soon.
Another really pretty tag, I miss the actual Summer School session as Tuesday is my day for going over to mom’s to take her shopping & do any odd jobs that she can’t manage. I need to do some catching up before I get too far behind as I find watching & listening to Linda so helpful in seeing how to get the most out of the tools. Thank you Glynis for giving us another great project to use the patterns learnt in school.
Hi Grace, Hi Glynis, Such a stunning tag, colours are so pretty and the Groovi work is fabulous.
Lots of love from Patricia xx