Clarity’s Blog Tutorial: How to Stamp On Designer Parchment
Hello there! Grace here.
Happy Monday! We’re back with another bloggy tutorial and set of juicy offers!
Next up in our January craft bubble is another true expert (and good friend) Jane Telford!

Jane is beyond talented… and has been kind enough to put together a brilliant step by step tutorial for us on how to turn a stamped creation into a parchment creation! I’ll let Jane take it from here. Let’s have a look…
People often see a design done in ink and say “you could do that in parchment!” but don’t always know how to go about doing that.
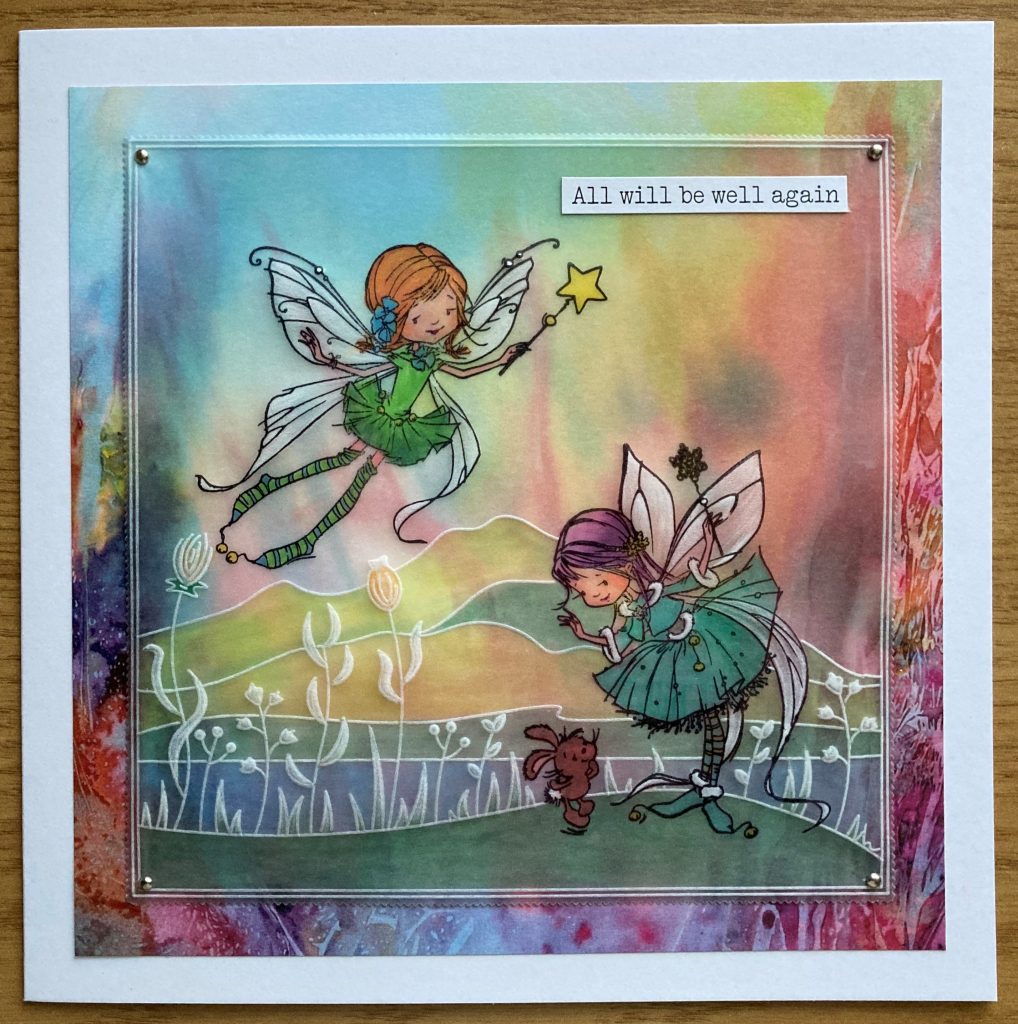
I took one of the samples I had done in ink with the Poppets and used that to make a card in Parchment, using a combination of stamping and Groovi techniques. Let me show you!
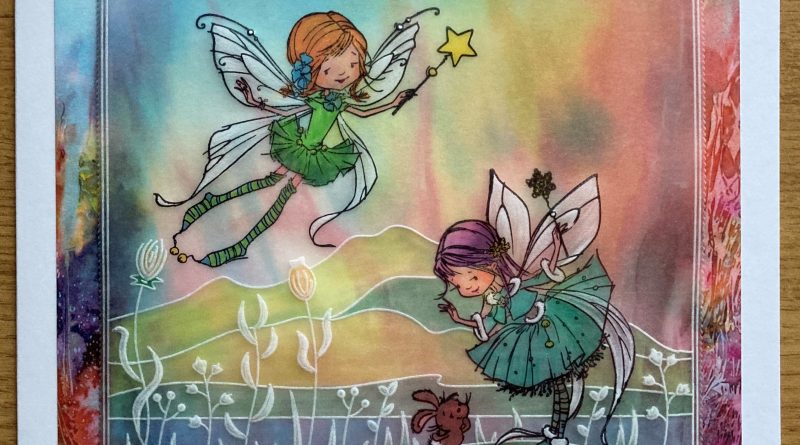
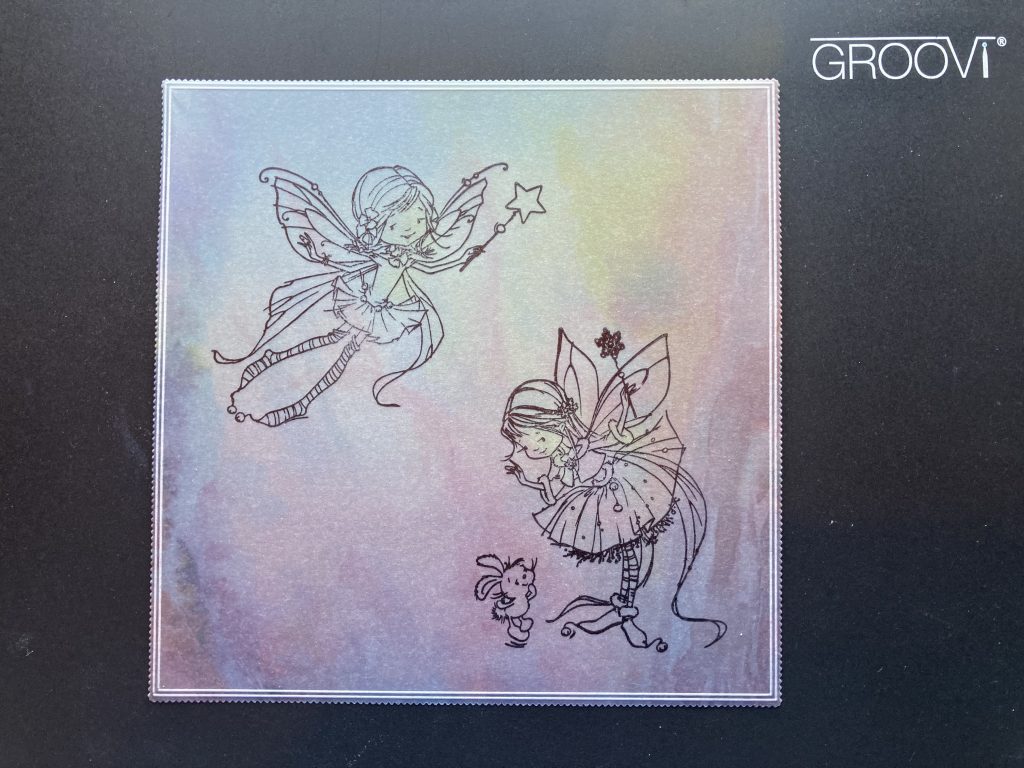
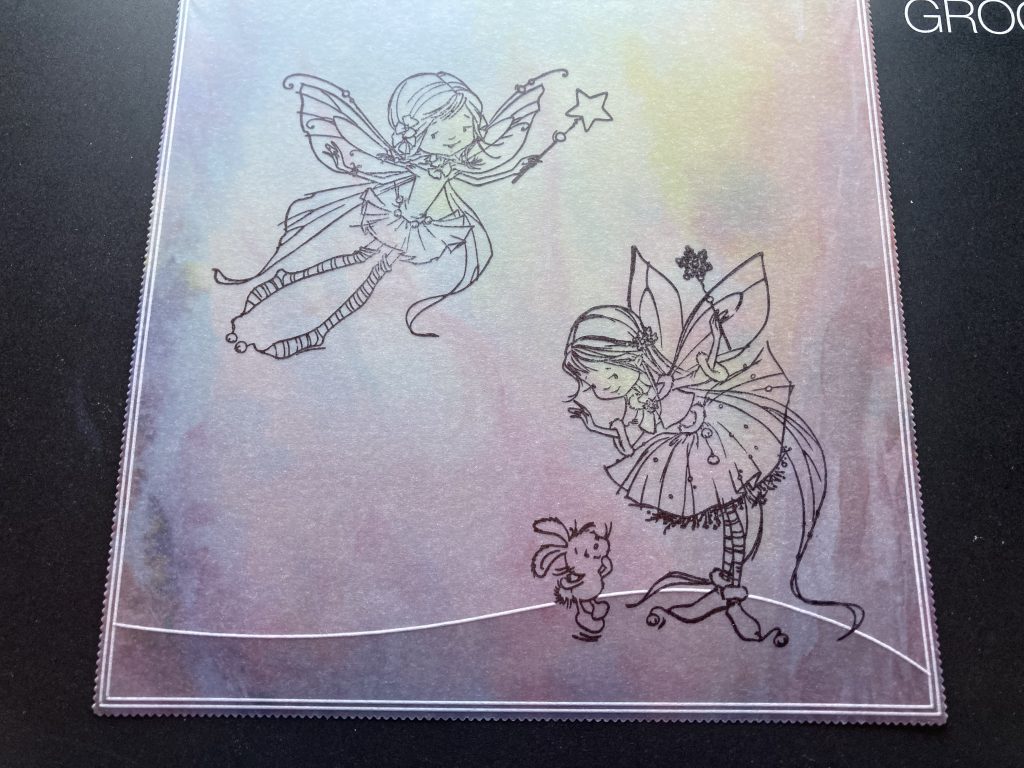
This is the original artwork, using stamps and ink…
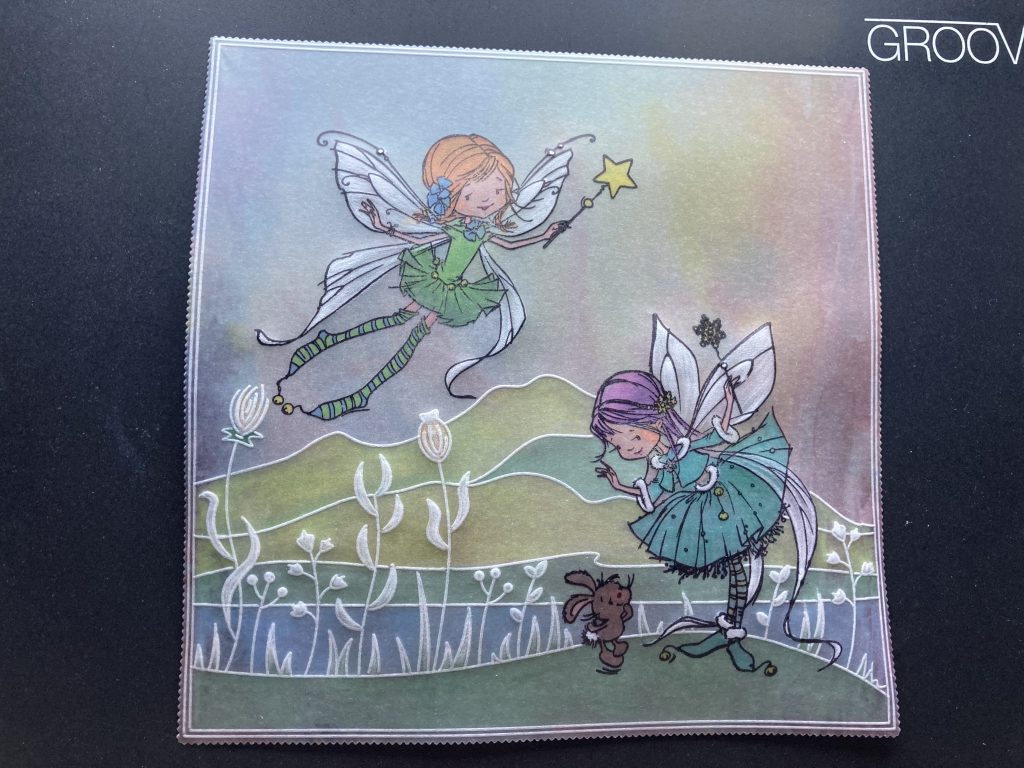
and this is the piece that we are heading towards
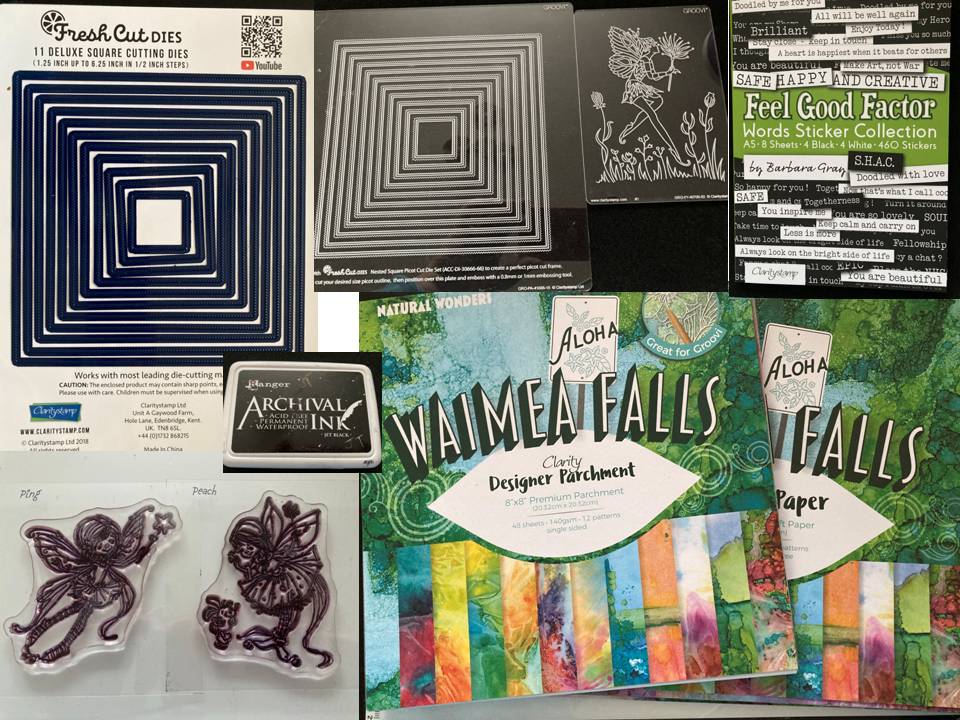
Ingredients
Poppet Stamps: Ping (PER-ST-70384-A6) & Peach (PER-ST-70383-A6)
Black Archival Ink Pad (INK-AR-50030-XX)
Waimea Designer Parchment (ACC-CA-30934-88)
Waimea Designer Paper (ACC-CA-30892-88)
Nested Square Picot Dies & Plate (Back in stock soon!)
Deluxe Starter Kit (GRO-SK-41709-XX)
Fairy 2 A6 Plate (GRO-FY-40709-02)
Feel Good Factor SHAC Stickers (ACC-SC-31048-A5)
White Pencil Eraser (ACC-PE-30670-XX)
Perga Liner Pencils (PER-CO-70063-XX)
Perga Colours Exclusives (PER-CO-70060-XX)
Silver Brads x4 (PER-AC-70275-XX)
8×8 Card Blank (ACC-CA-30620-88)
Dorso Oil (PER-CO-70066-XX)
Tumble dryer Sheet
Method
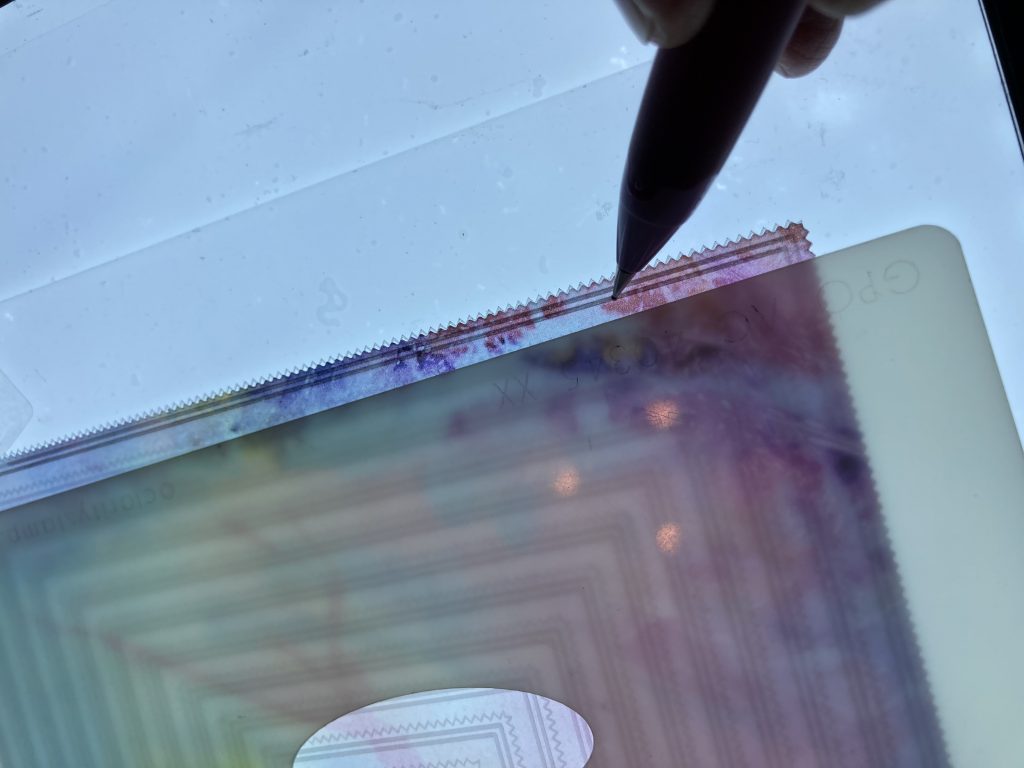
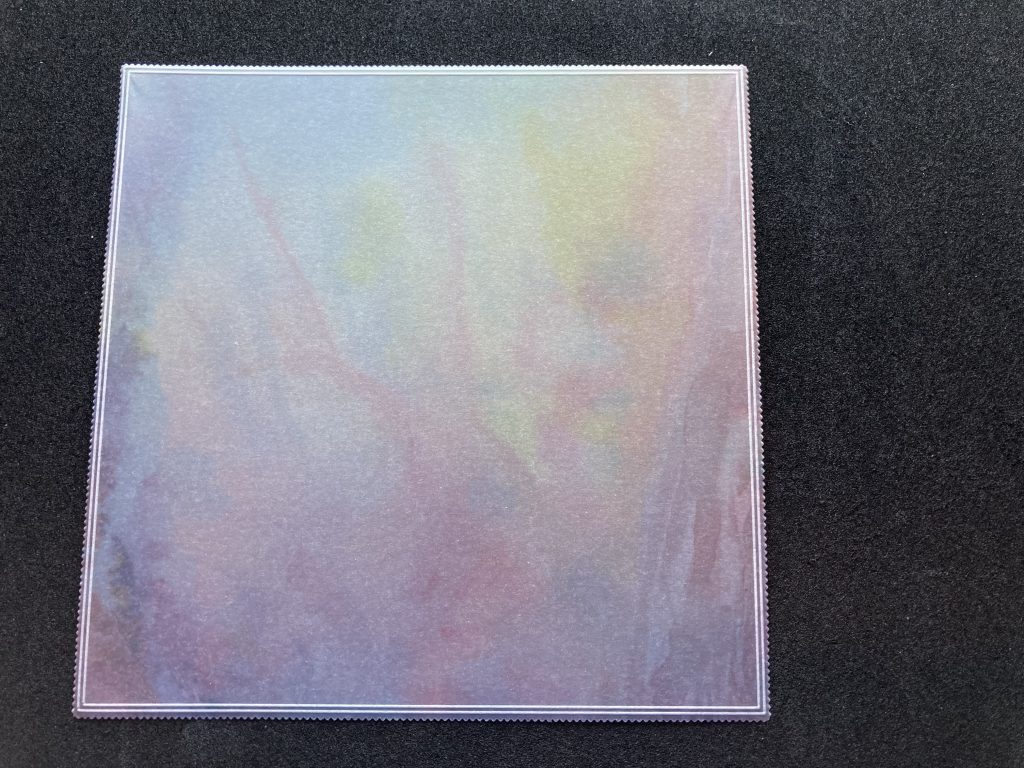
Step 1. Choose the parchment you want. I wanted something to give me a colourful whimsy background and went with Waimea Falls. Wipe it on the back with the tumble dryer sheet. Cut out a square using the largest die in the set.
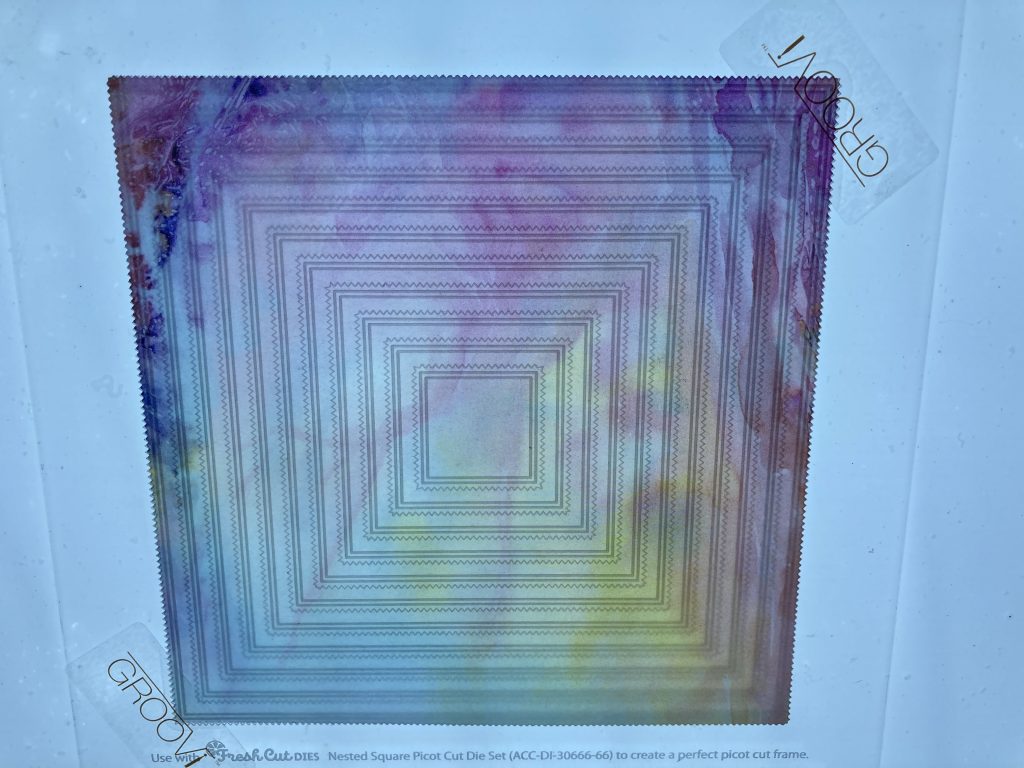
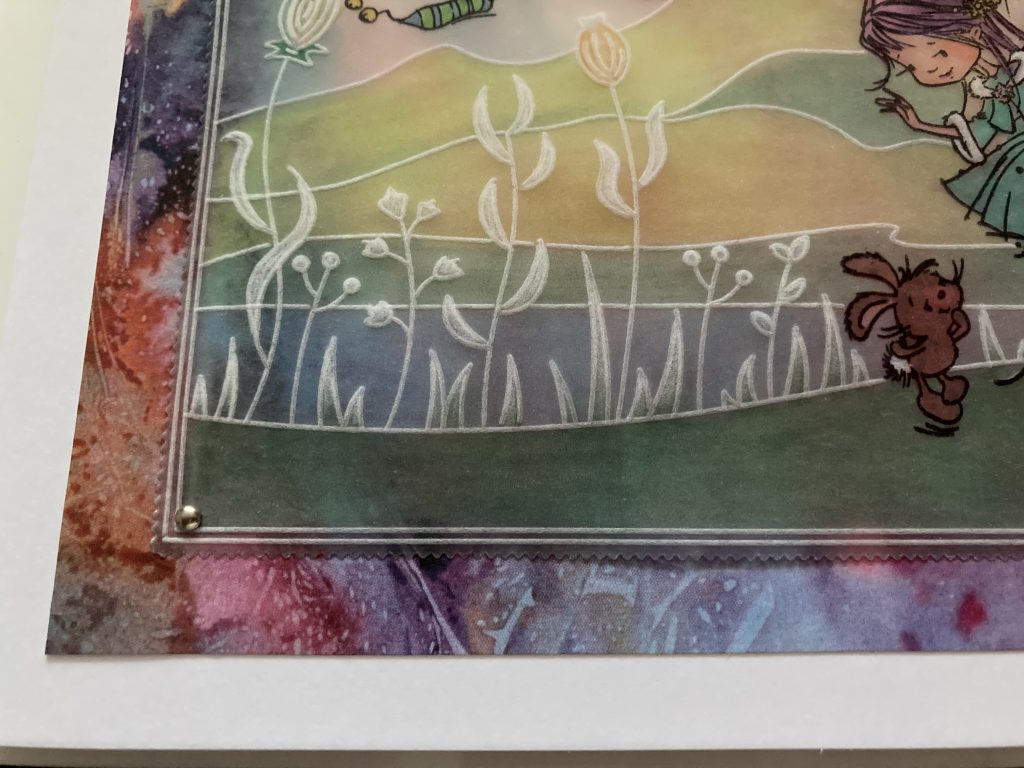
Use the plate and emboss the double white line around the edge.
Step 2. Using a black archival inkpad, stamp the Poppets into place on the front of the parchment. Leave it to dry. Depending on your ink pad, it could take a few minutes or it could take more! You can always place a piece of copy paper over and blot it gently to see if it is dry.
Step 3. Turn over to the back of the parchment and emboss the bottom line of the background using the mountains plate from the deluxe starter kit, avoiding the Poppets. A lightwave panel makes it easier!
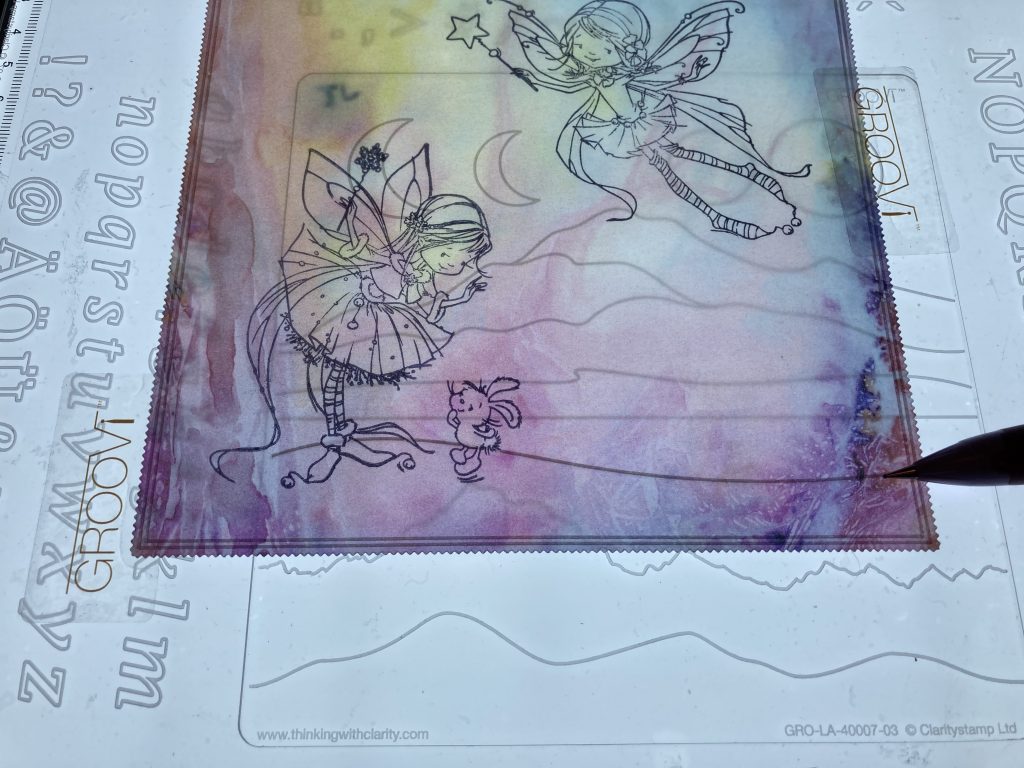
Step 4. Using the fairy plate emboss grass along the embossed line.
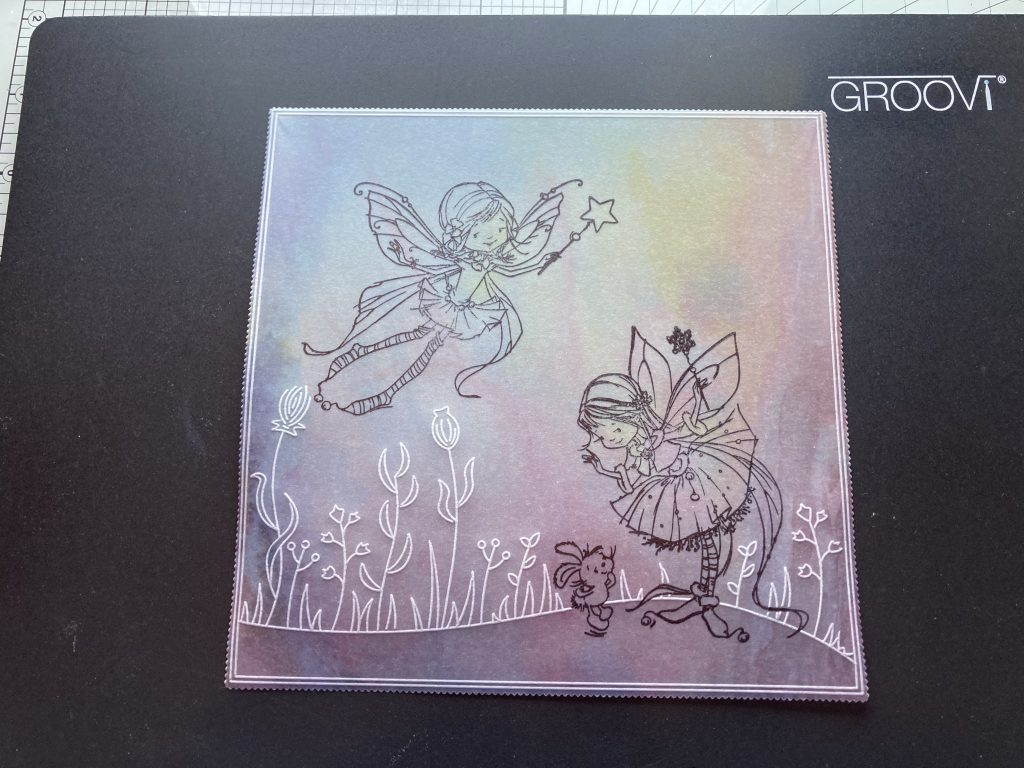
Step 5. Use the mountains plate (from the deluxe starter kit) again to add the rest of the background avoiding the grasses and the fairies.
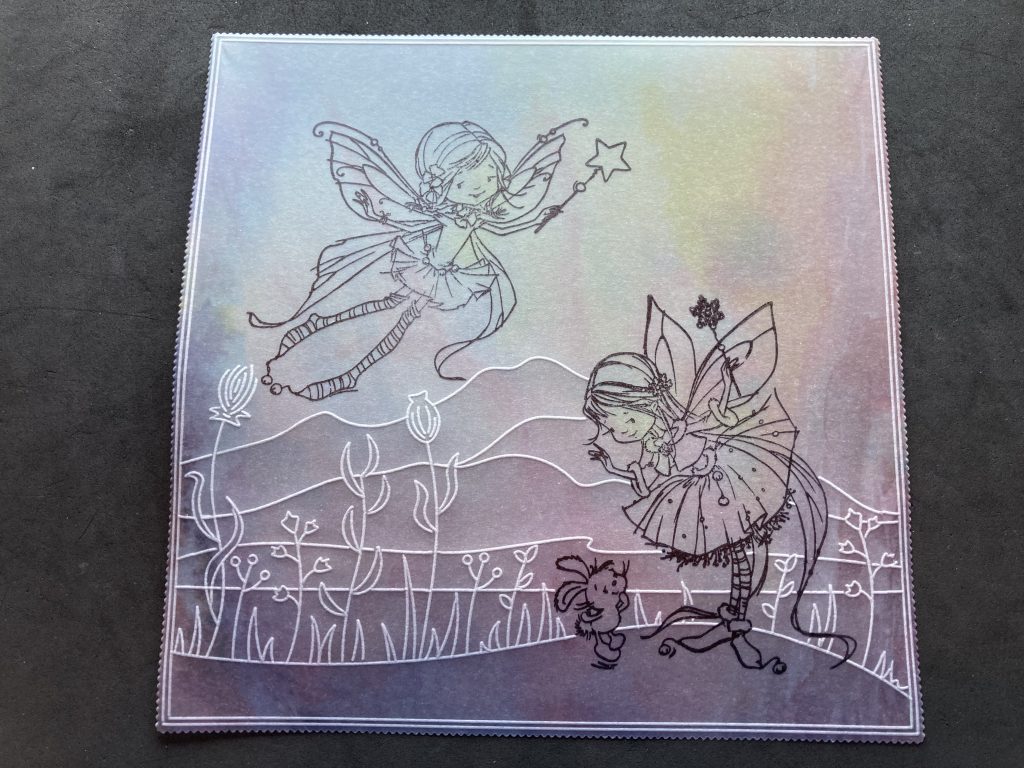
Step 6. Add some white work to the wings of the fairies and also in the grass.

Step 7. Remove the colour from the back of the Poppets and the hills part of the picture using the white ink pencil eraser.
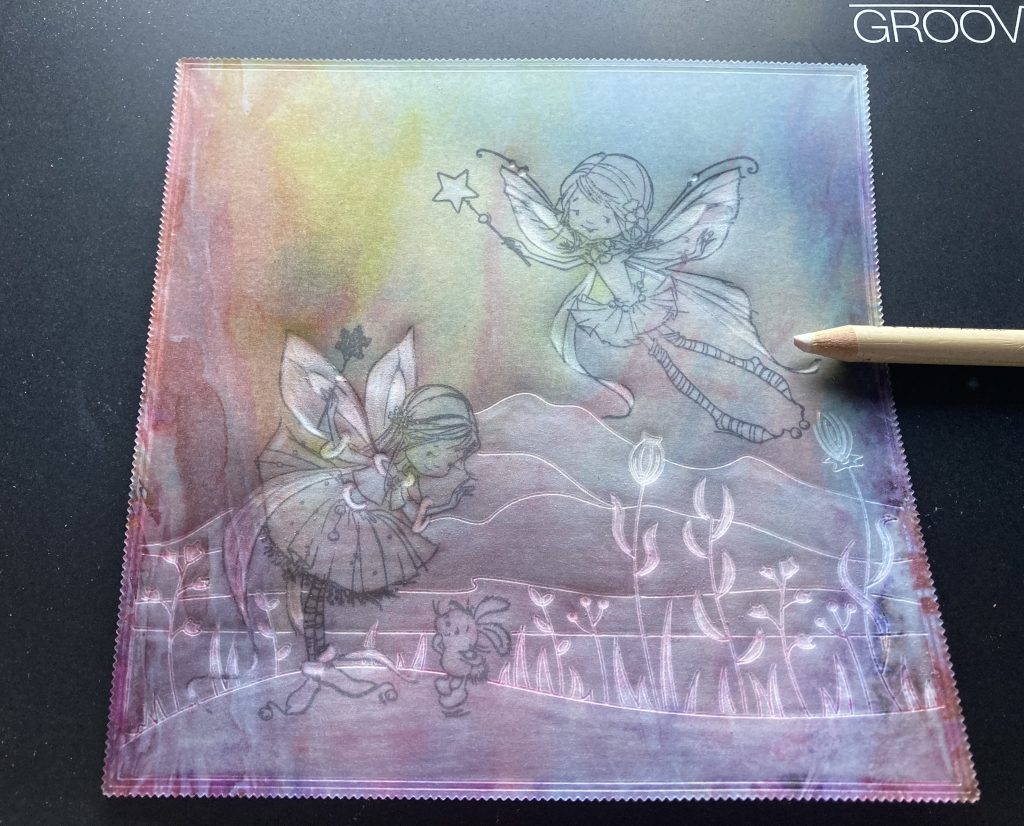
Step 8. Colour the hills using Perga Liner B Pencils, blending with dorso oil or colour the Poppets with the Perga Colour pens to make them stand out more.
Step 9. Cut the designer paper to 7 x 7 inches and attach the parchment to it using brads.
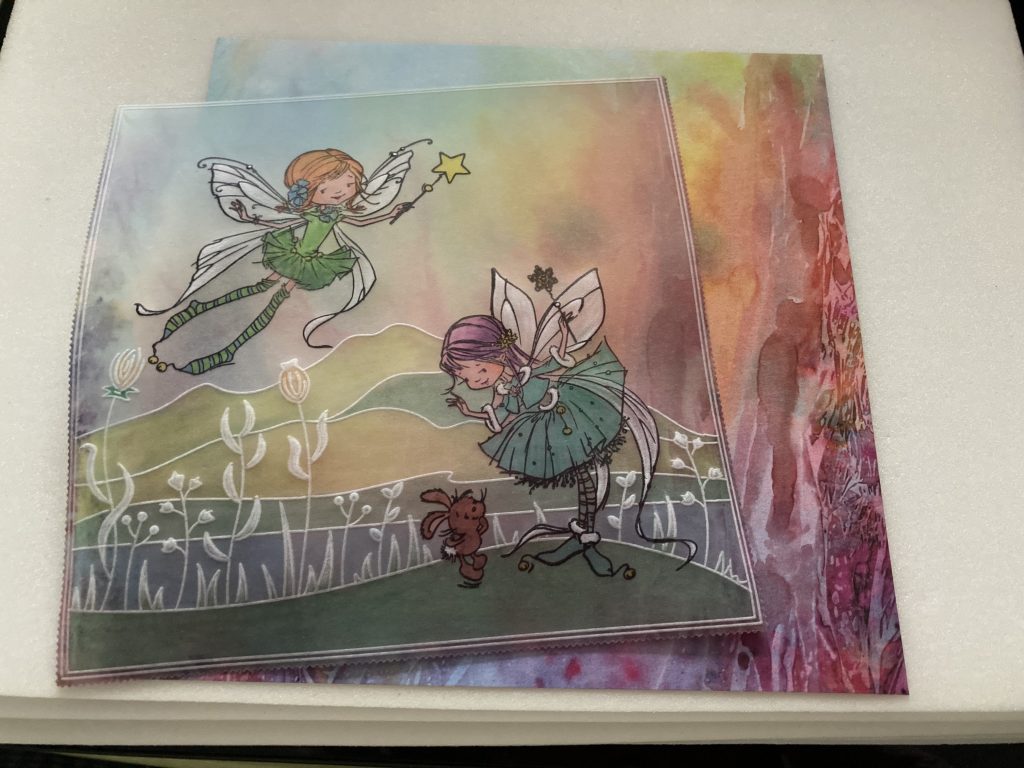
Step 10. Mount on an 8×8 card blank and add a sentiment sticker.
Voila! How stunning is that? I love the colours.
So now we know how to transfer techniques. Very very helpful.
Thank you, dear Jane, for sharing your tricks and tips with us!
Every one of these tutorials and bloggy offers will gather in one place as we add more to the library… whether they’re on claritymattersblog.com or Barbaragrayblog.com you can find them all HERE.
Lotsa love, Grace xo
Clarity – The Home of Art, Craft and Well-being.
Wow these are lovely thank you grace and Jane will definitely have a go xx
Beautiful
Thank you so much, Jane, for your inspiration! I really love the original card. Might need to try that, too. Off to stamp on parchment now!! Only done it once before. That’s my day planned! Lol. Thanks, Grace, for sharing. Hxx
What a lovely make this is the project for me toda!
Absolutely beautiful! Can’t wait to try this with my groovi plates and stamps! Thank you!
Beautiful and thank you so much Jane for sharing your ideas and giving us some inspiration.
Hi Jane. Thanks from me too and I will definitely give it a try as your finished project looks superb. Xxx
Oh WOW this is stunning Jane! Thank you for sharing 🙂
Thanks Grace for showcasing Jane’s work & to Jane for a great step by step. I have the mini versions of the poppets & a couple of the larger ones but feel a few more will finding their way here. These are pieces of art for the wall rather than just cards. Would make a lovely set of pictures for a little girls bedroom.
So many great projects to be done – if only housework, laundry etc didn’t have to be done !! Luckily the cooking is done by OH otherwise we would starve !!
Thank you, Grace and Jane. That’s amazing.
Thank you Jane for the tutorial. I so like the idea of using stamps and Groovi in one project. This has shown me how.
Thanks Grace, for sharing.
xx
Hi Jane
That Is beautiful and you are very talented ,but i don’t stamp but love what you have done .
Congratulations on your blog step by step
Love
Kath
xx
Brilliant card and really great instructions x
Thank you Jane going to give this a try tomorrow.
Thank you Jane for sharing your tips. Your card is beautiful.
Thank you Jane for sharing – wow- both are stunning. Thank you for sharing the step by step.
Thank you both for this step by step sharing. Love these poppets and want some more than I now have.
Will have a go with my poppet stamps!
Take care and stay save!
Lots of love, Trijntje Huppel
Thank-you Jane. That is a very pretty card. It is great to be able to combine all our stash, certainly got plenty of it. X ❤️
Thanks for this Jane. I might give it a go tomorrow though I must work out which side of the parchment is the back and which the front….!
Great stuff Jane. I’ll be giving that a go as I travel the GROOVI path. Thank you.
Thank you Grace and Jane, I’m so pleased you are doing some stamping. I am new to stamping so pleased for any help and tips you give us.
Beautiful pieces Jane, thanks for the ideas. X
Hello Grace and Jane,
Thank you for that very informative blog. It is beautiful.
Love
Roz.xxx
Hi Grace, Wow Jane, this tutorial is fantastic !! I have been wanting to do this technique for a while now, and now you have given me the confidence and inspiration to do it. A truly beautiful project.
Lots of love from Patricia xx
That’s just beautiful. I need to have a go at stamping on parchment (have got some that I bought when I was trying out Groovi). Thanks for the inspiration Jane!
Beautiful, thank you for sharing.
Woowww… niiiiiice and clearly explaining step by step…I think a new hobby for me …again!!!. First drawing with Barbara in 2020 and now this in 2021..I love how you are keeping us busy by learning us new hobbytechnics,…thank you therefor
Hi Jane and Grace
Brilliant blog and a brilliant step by step Jane
I think I have all the ingredients so when I get time I will give it a go
Thank you 🤗🤗
Thank you Jane for inspiring us all, I shall definitely be going to try this right now! The finished result is just fabulous.
Thank you Jane lovely card and great tutorial xxx