
Clarity Matters Blog Tutorial: Fancy Frames
Hello hello! Grace here.
I hope this finds you safe, happy and enjoying your Sunday morning!
We are joined today by the highly talented Julie Campbell. She has generously put together a step-by-step blog tutorial for us. I’ll hand you right over to our teacher…

Hi Everyone! I hope this project finds you safe and well. I have put together what I think is a nice little card using the new Fancy Frames, Bijou Ribbon Words and the spacer that goes with it that Jane launched on The Pergamano Show on 9th May
If you missed the shows, you can watch them over on the Create & Craft website:
I hope you like what I have created and if there are other card projects that you would like to see in a blog, if you could leave a comment below then we can see if we can put one together.
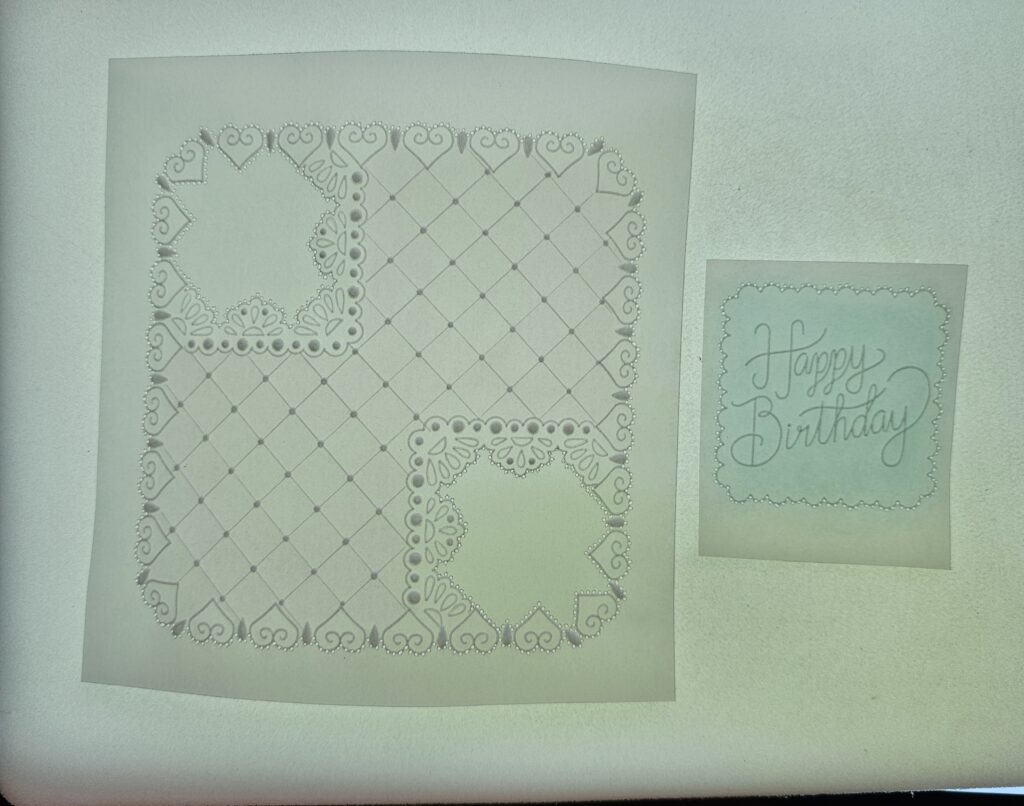
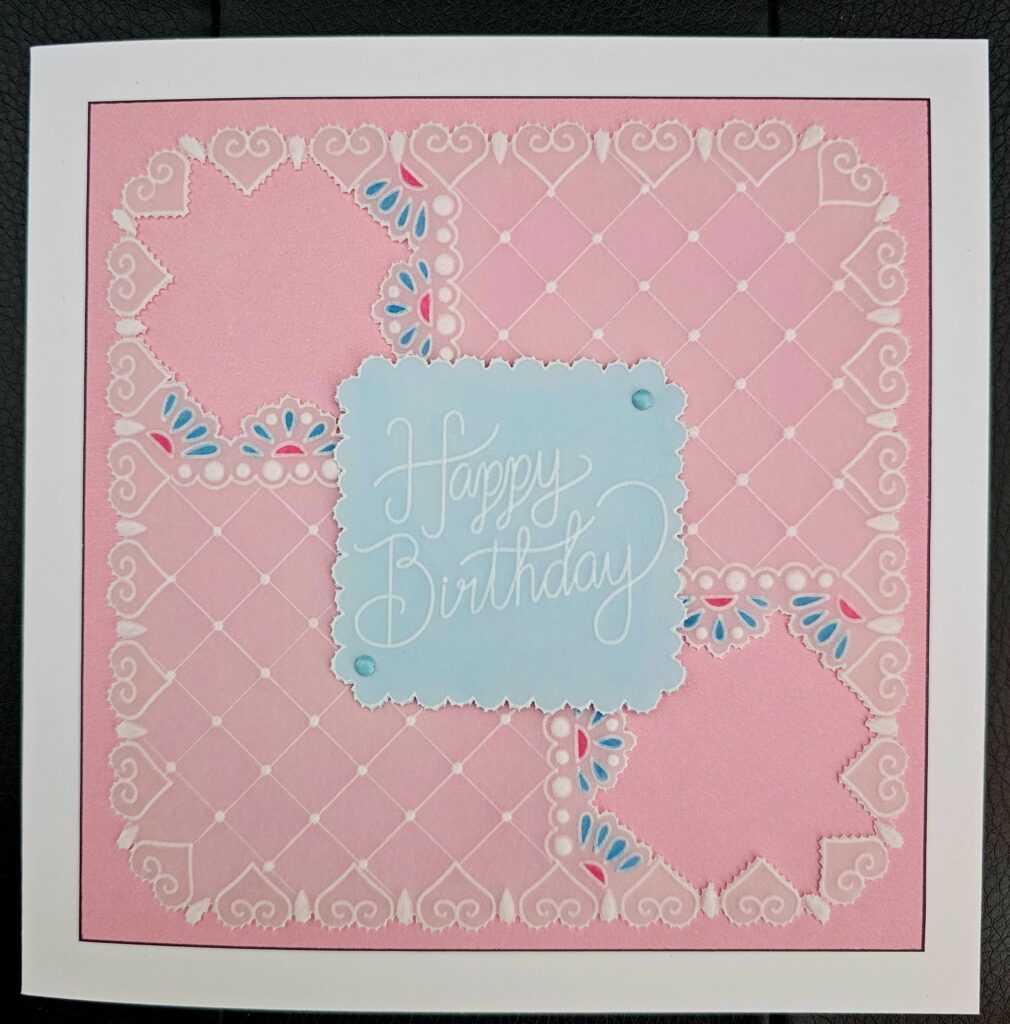
Here we go, this is the card I am going to show you how to make.

Ingredients
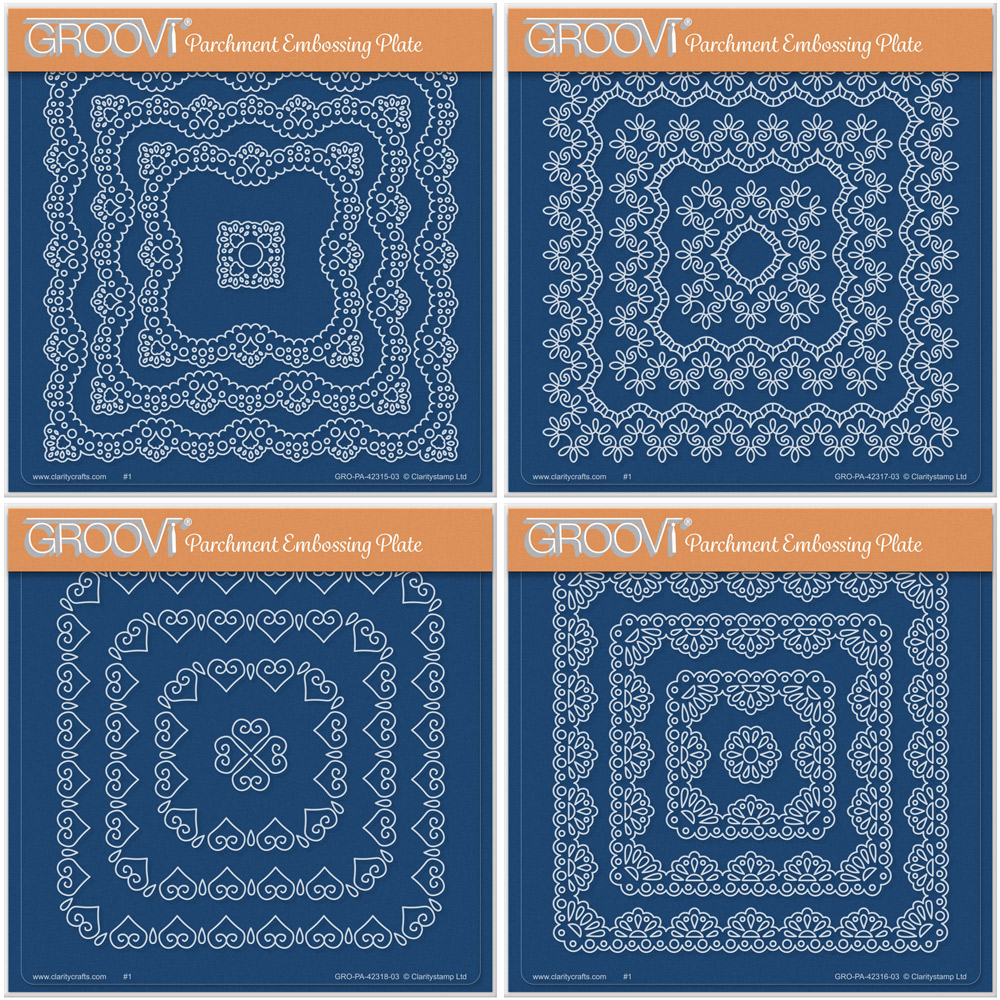
Clear Parchment (GRO-AC-40024-A4)
Nested Squares Lace Heart Frames A5 Sq Groovi Plate (GRO-PA-42318-03)
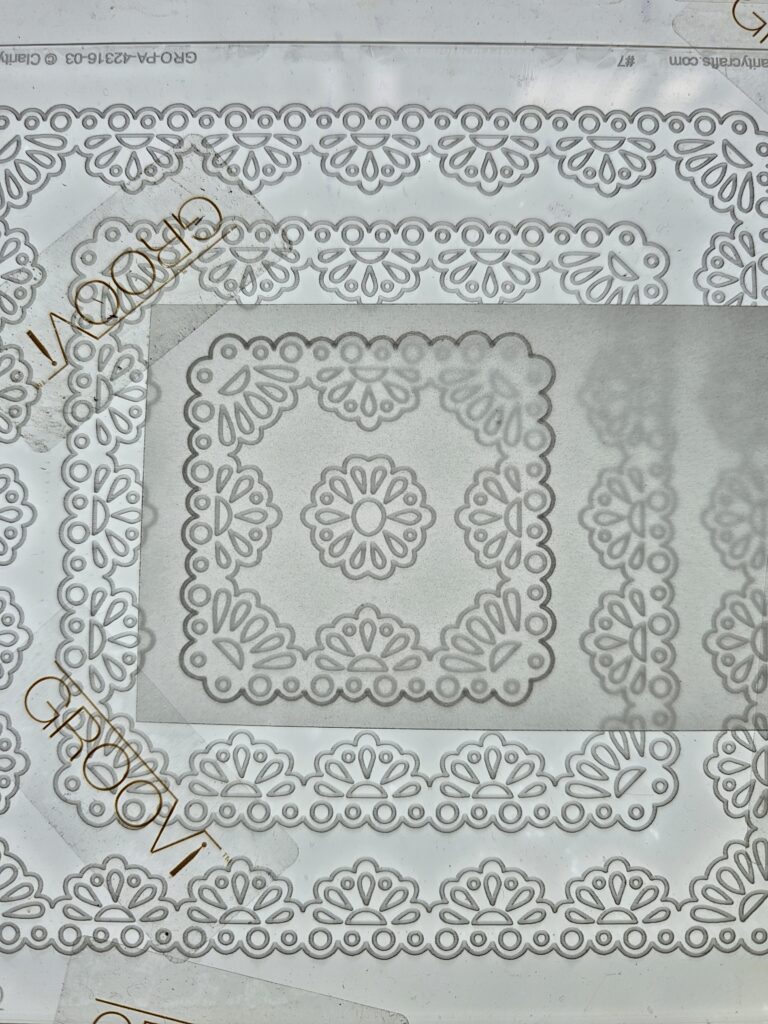
Nested Squares Lace Fan Frames A5 Sq Groovi Plate (GRO-PA-42316-03)
Bijou Ribbon Sentiments A6 Groovi Plate (GRO-WO-42313-02)
Pergamano Ruler (PER-AC-70278-XX)
1mm Pergamano Embossing Tool (PER-TO-70012-XX)
Groovi Number 2 Embossing Tool (GRO-AC-40026-XX)
Pergamano 1-Needle Bold Tool (PER-TO-70028-XX)
Pergamano 2-Needle Bold Tool (PER-TO-70279-XX)
Dorso Crayons Lively Set (the pink & baby blue) (PER-CO-70061-XX)
Perga Colour Exclusives (numbers 6 & 28) (PER-CO-70060-XX)
Dorso Oil (PER-CO-70066-XX)
Low Tack Tape (ACC-AD-31211-XX)
Snips/ Exclusive Scissors / Ring Lock Scissors
Perga Glue (PER-AC-70133-XX)
2 Blue Mini Brads (PER-AC-70270-XX)
Toscana Companion (ACC-CA-31342-88)
Indian Summer Companion (ACC-CA-31345-XX)
Black Sharpie Pen
Tissue
Method
Let’s jump right on in.
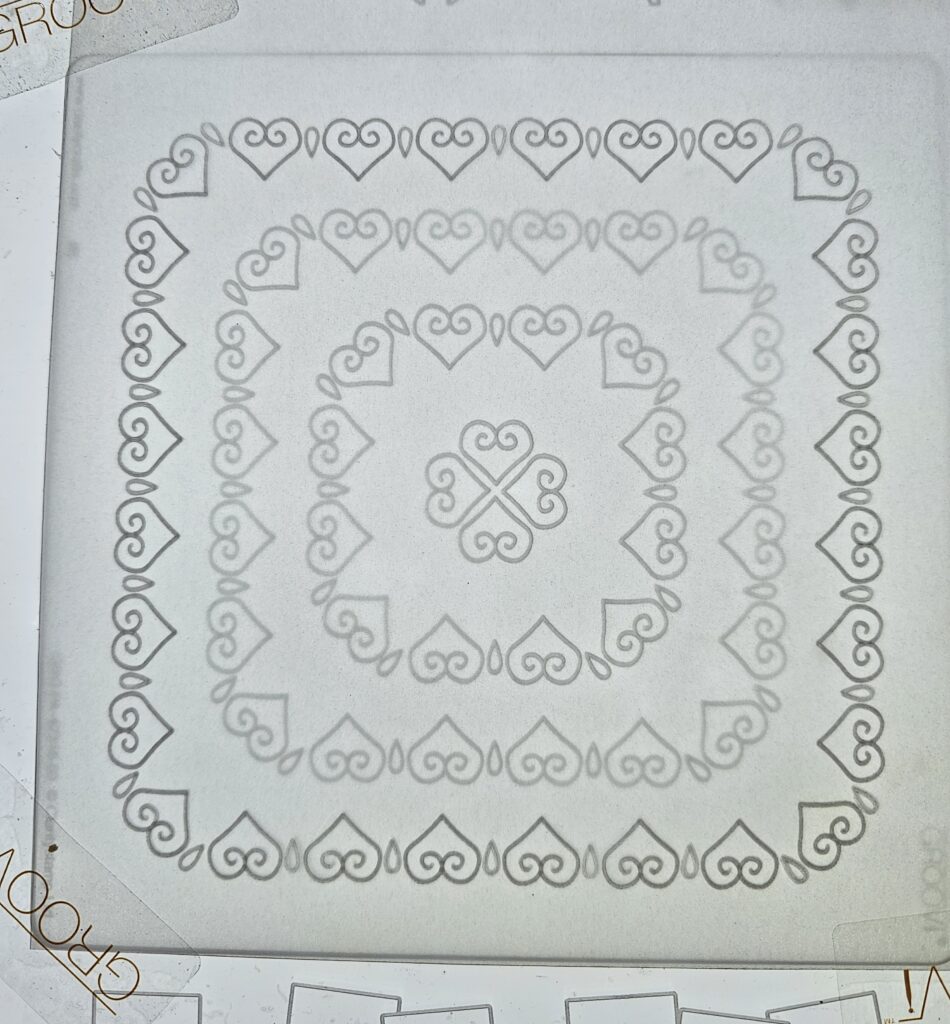
Step 1. Using the Pergamano 1mm embossing tool, the Groovi number 2 embossing tool and the clear parchment, emboss the largest Hearts Border. Use the number 2 Groovi tool for the teardrops and number 1 for the hearts.
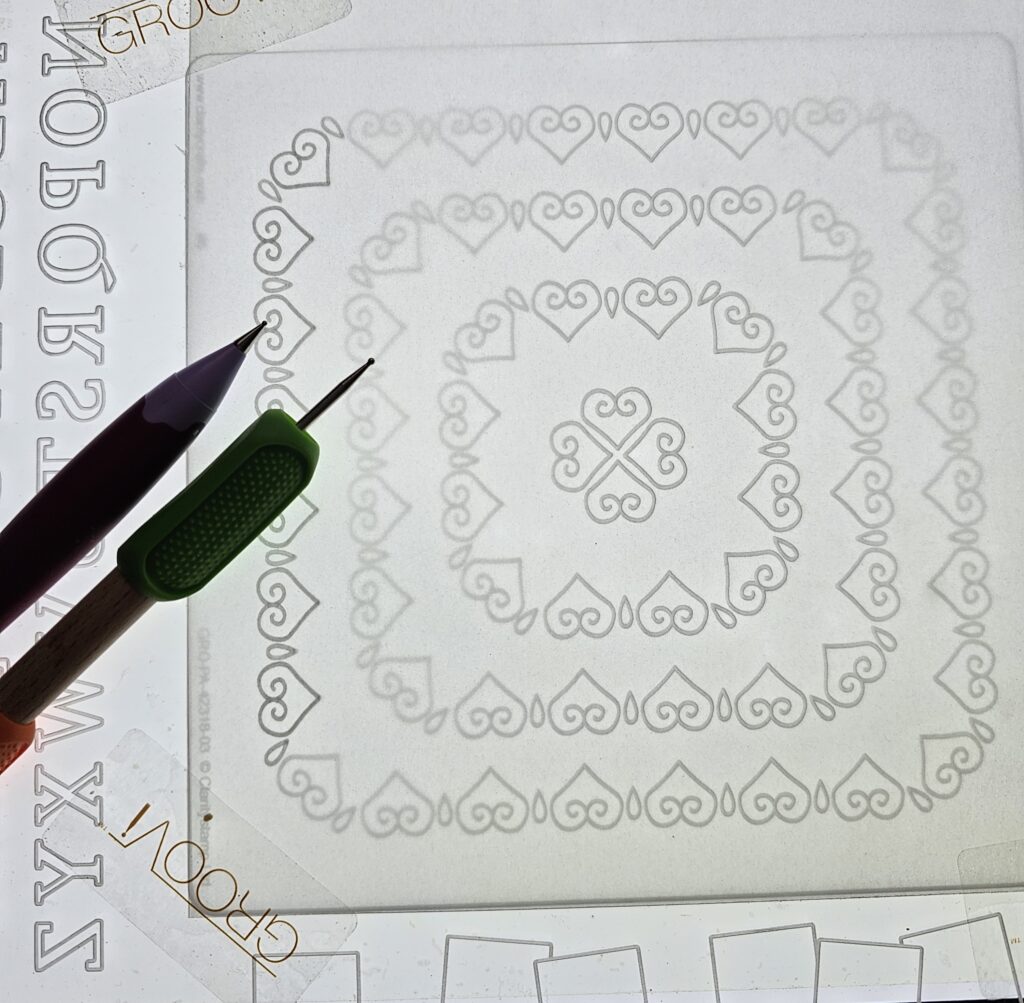
When you have done this it should look like this…
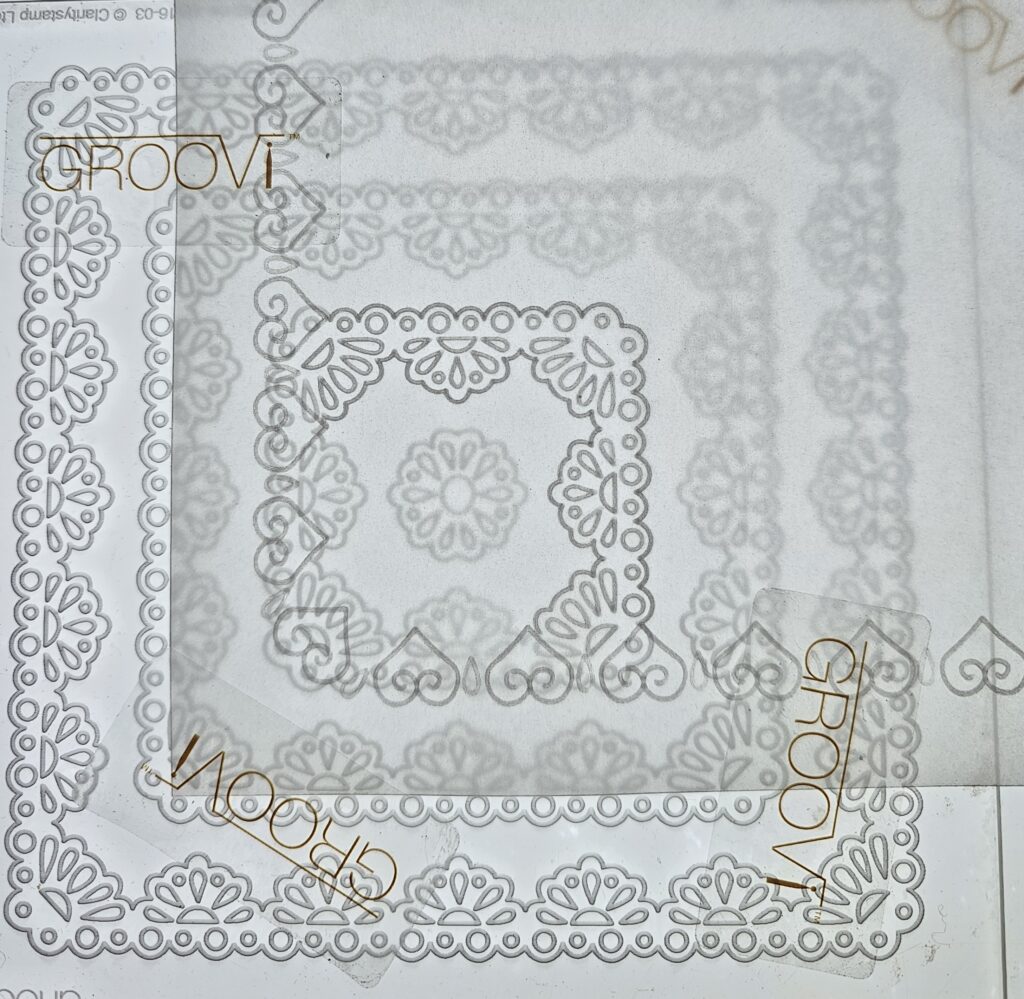
Step 2. In one corner (on the inside of the outer heart border you’ve just embossed), using the smallest border from the Nested Squares Lace Fan Frames plate, place it in the left corner and emboss the pattern using the numbers 1 and 2 tools. This time use the number 2 tool for the circles (these we will emboss to fill in later) and the number 1 for the teardrops and semi circles. Turn to the opposite corner and repeat the process.
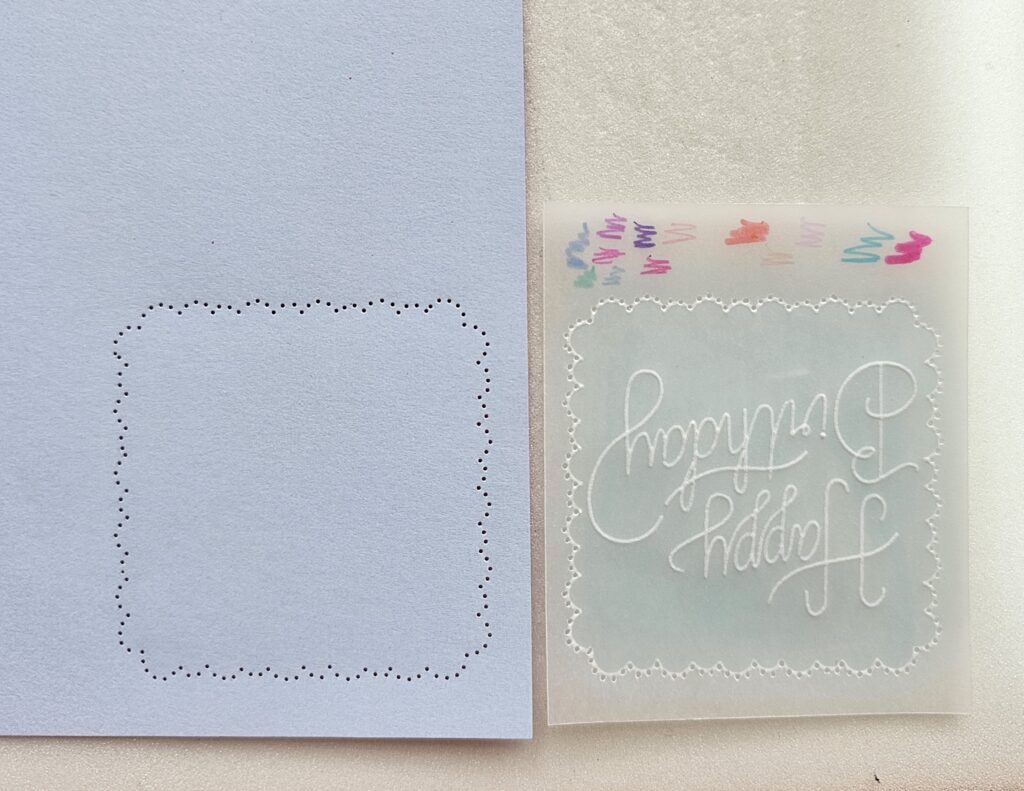
Step 3. On a spare piece of clear parchment, emboss the outer edge only of the smallest border of the Nested Squares Lace Fan Frames plate with the number 1 embossing tool.
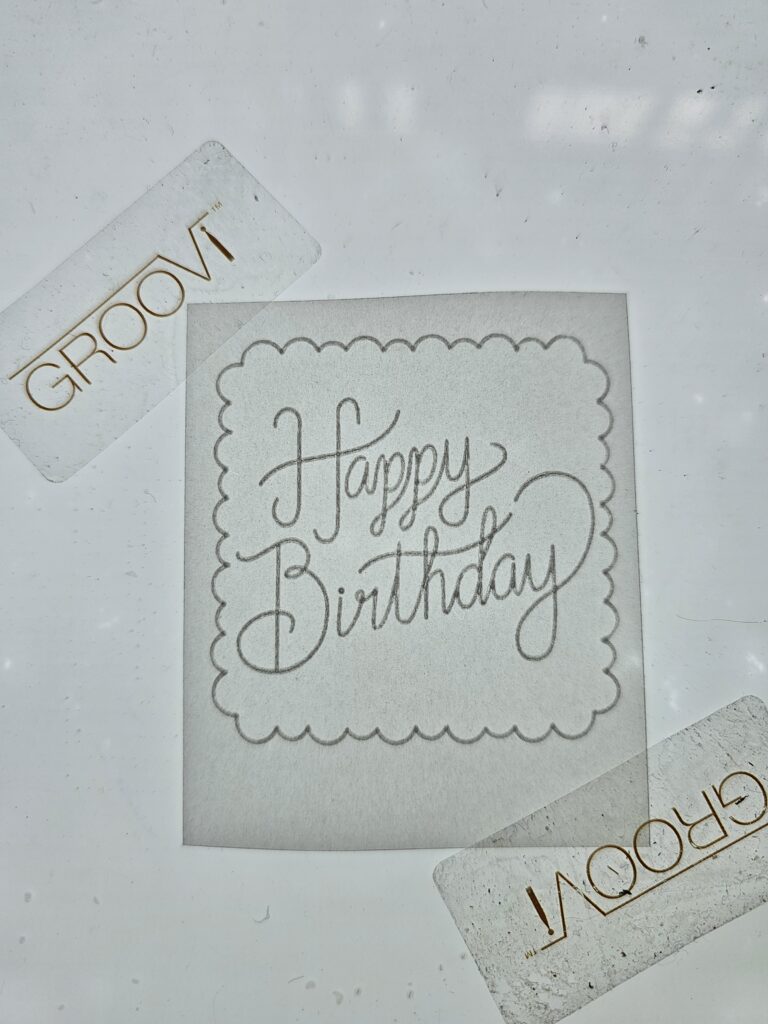
Step 4. Inside this square emboss Happy Birthday from the Bijou Ribbon Sentiments A6 Groovi plate. This is what it should look like from the front.
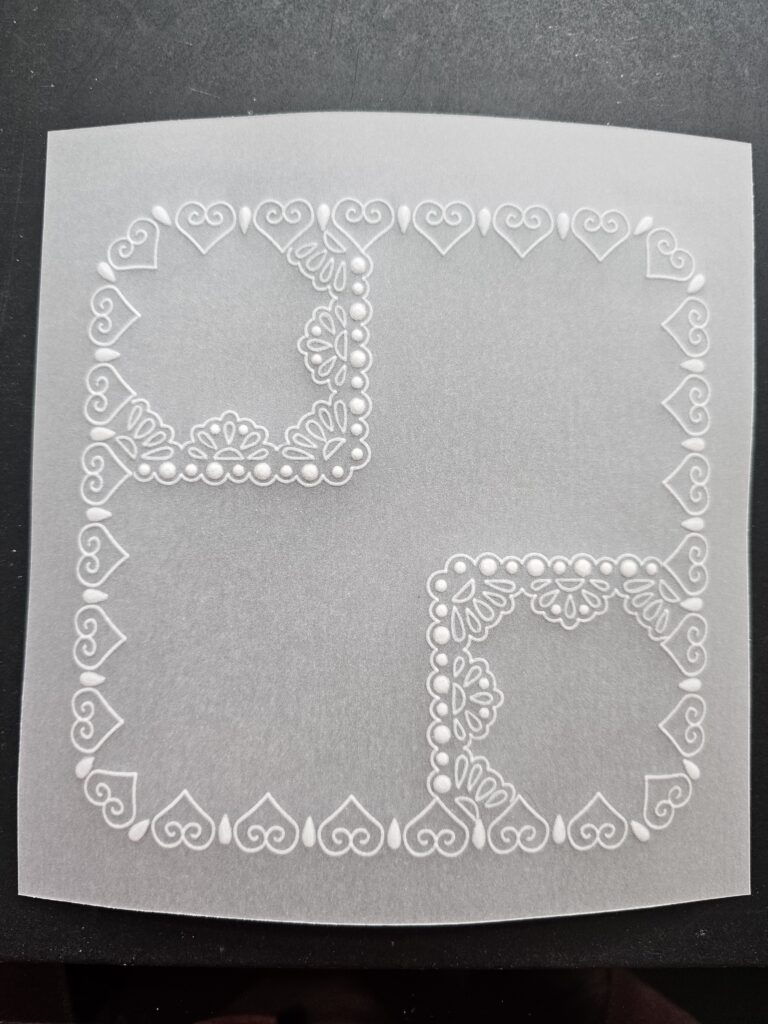
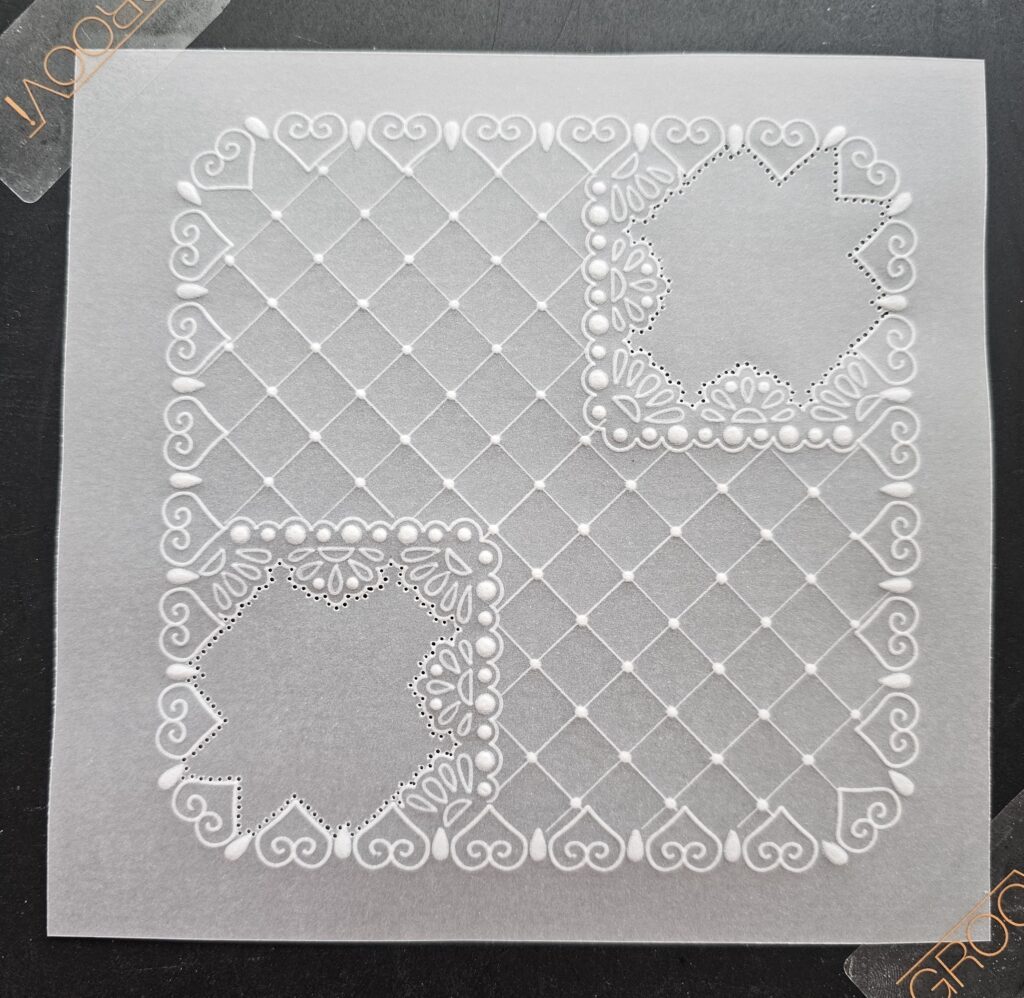
Step 5. On the main piece of parchment with the pattern, working on the back emboss the outer teardrops and circles on the inner borders. Once you are happy with your white work (making sure you rest the parchment between layers of whitework), it should look like this.
Step 6. Working on the back of your parchment and on a soft mat, either the black mat or the Pergamano Embossing Mat Excellent. Place your Pergamano ruler from 1 corner to the other (avoiding the inner corner borders that you have inserted) and draw a line using the number 1 embossing tool as seen in the photo below. Alternatively, you could use either the Lattice A5sq Groovi Plate or the Netting A5sq Groovi Plate
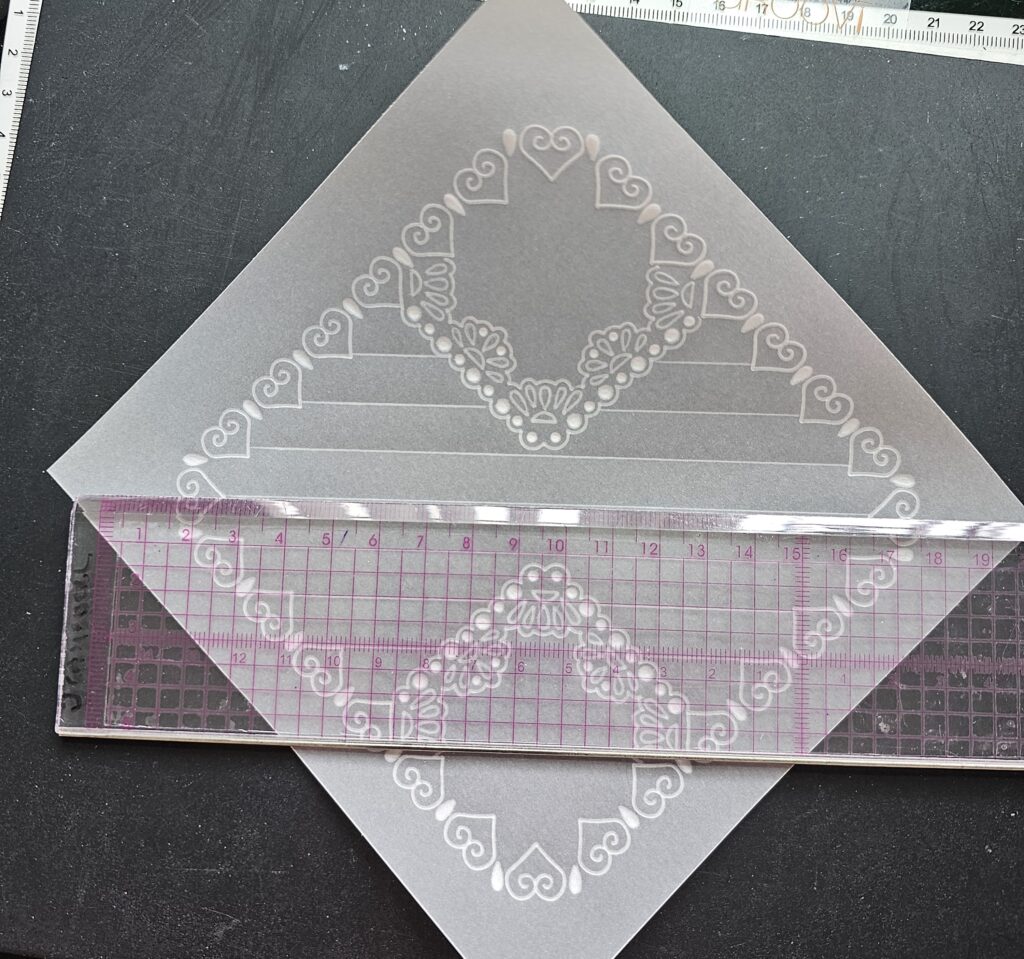
Step 7. At equal levels of 1cm (the first line down on the ruler after the numbers) repeat the lines in the piece of work shown where there are no inner borders. Turn and repeat the other way. Then turn again so that the lines cross at right angles to the first set of lines you have created. It should then look like the photo below.
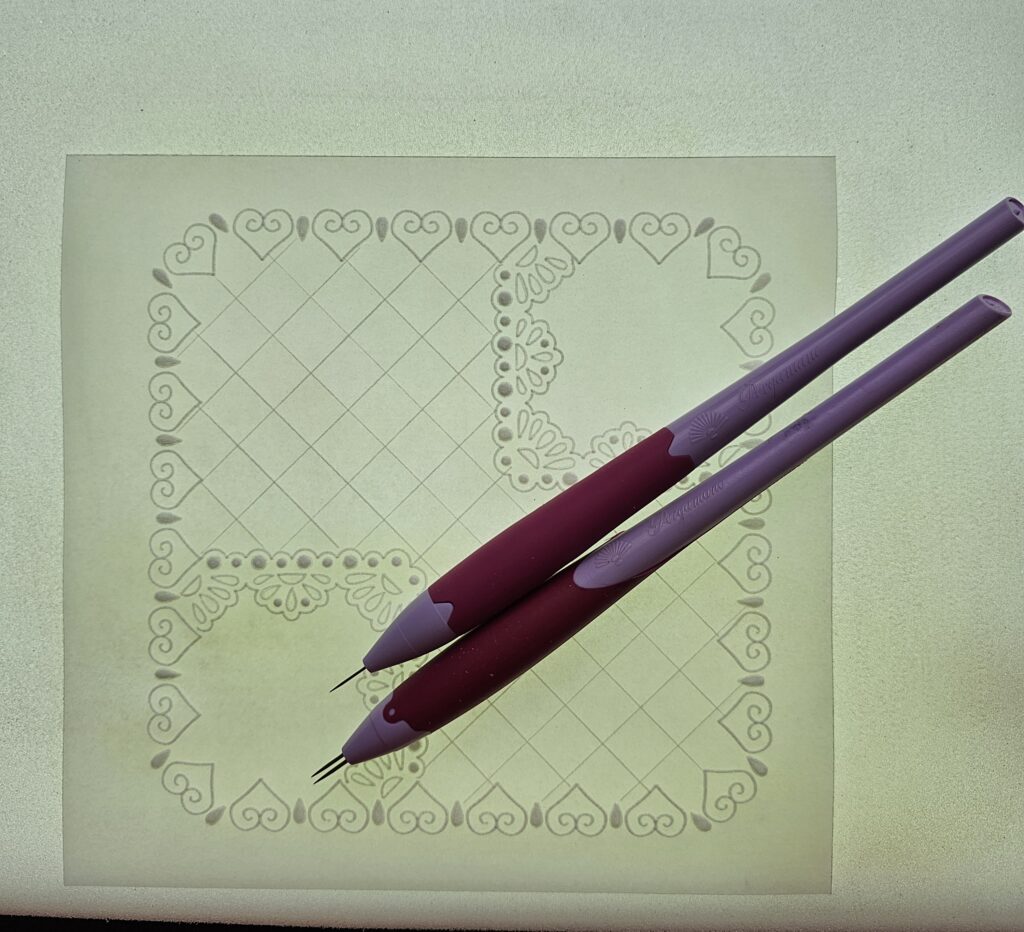
Step 8. Turn your work over to the front use the 1 Needle Bold and 2 Needle Bold Pergamano Tools on your Super Foam to perforate the inner parts of the created corners.

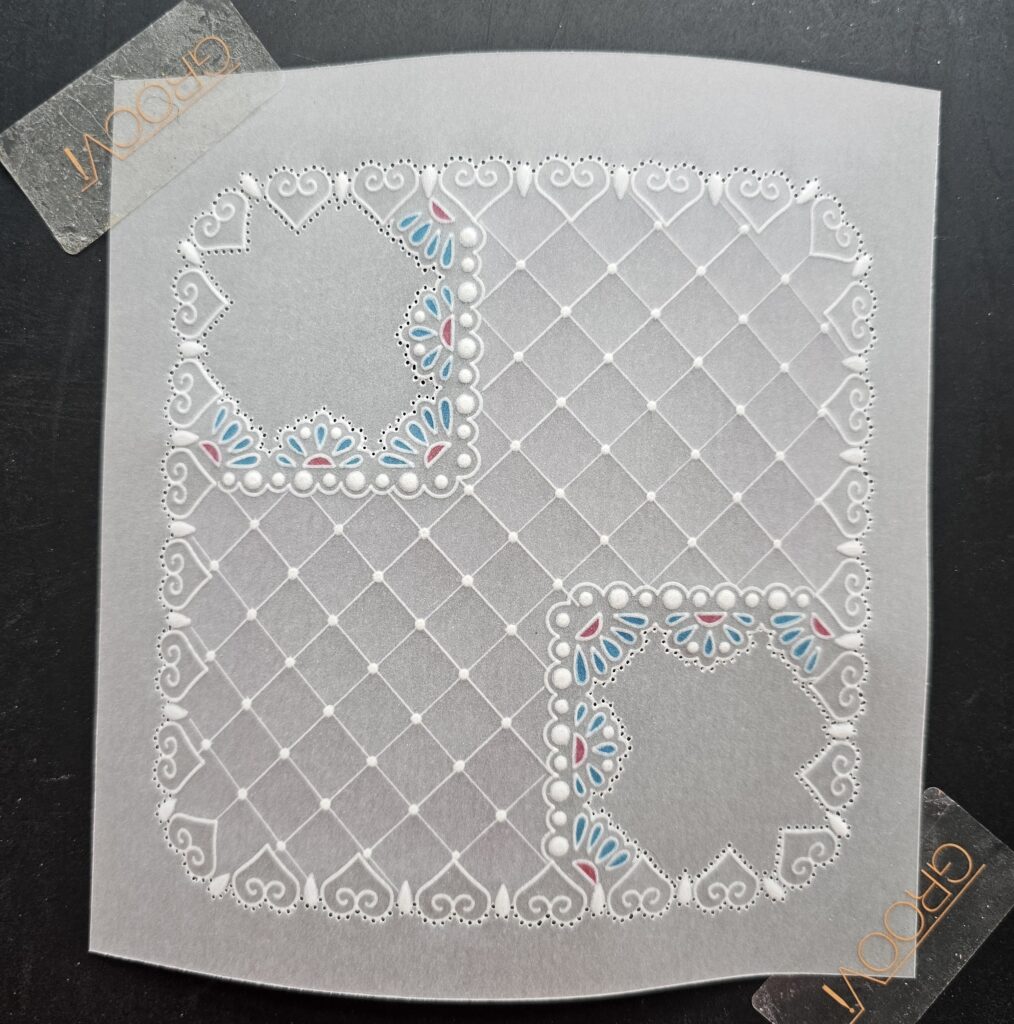
Step 9. With the number 2 Groovi embossing tool, where the lines intersect with each other, create embossed circles.
Once all the dots are done the front of your work should look like this.
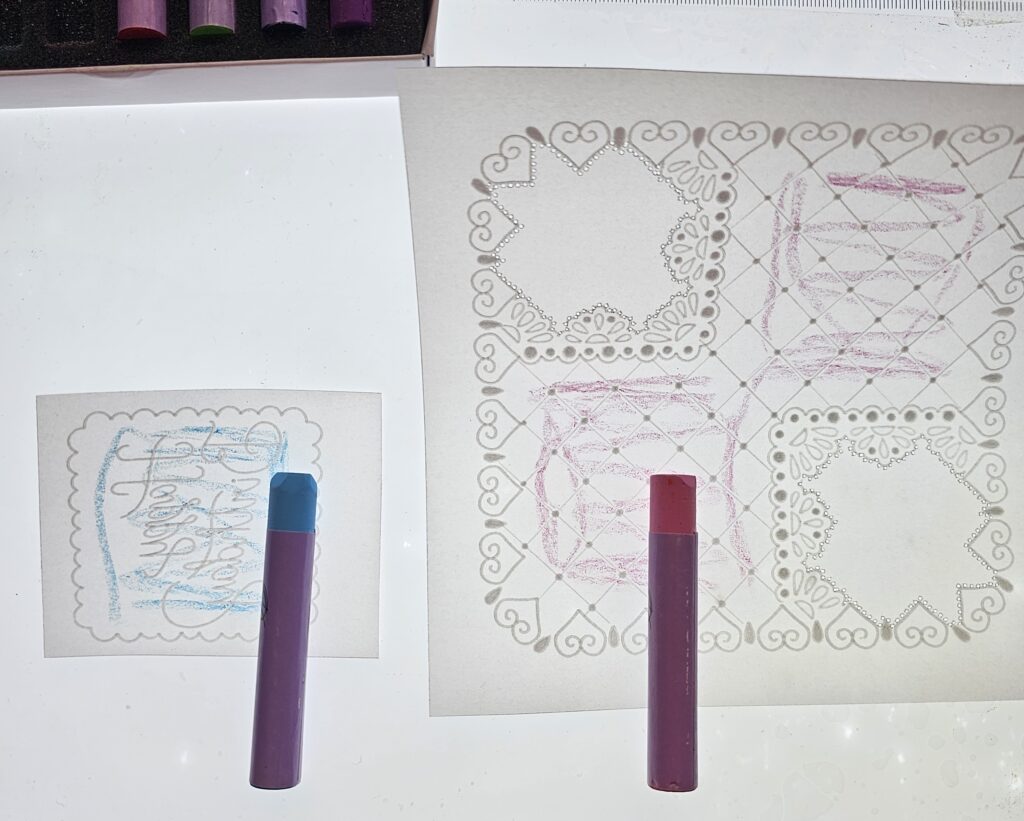
Step 10. On the back of both pieces of your work, you now need to add some colour. I have used Dorso lively colour crayons; baby blue for the Happy Birthday and pink for the main piece of work. Roughly colour as is shown in the photo below then using a tissue folded and twisted into a point, add some Dorso oil and blend your colours using a separate piece of the tissue for each colour.
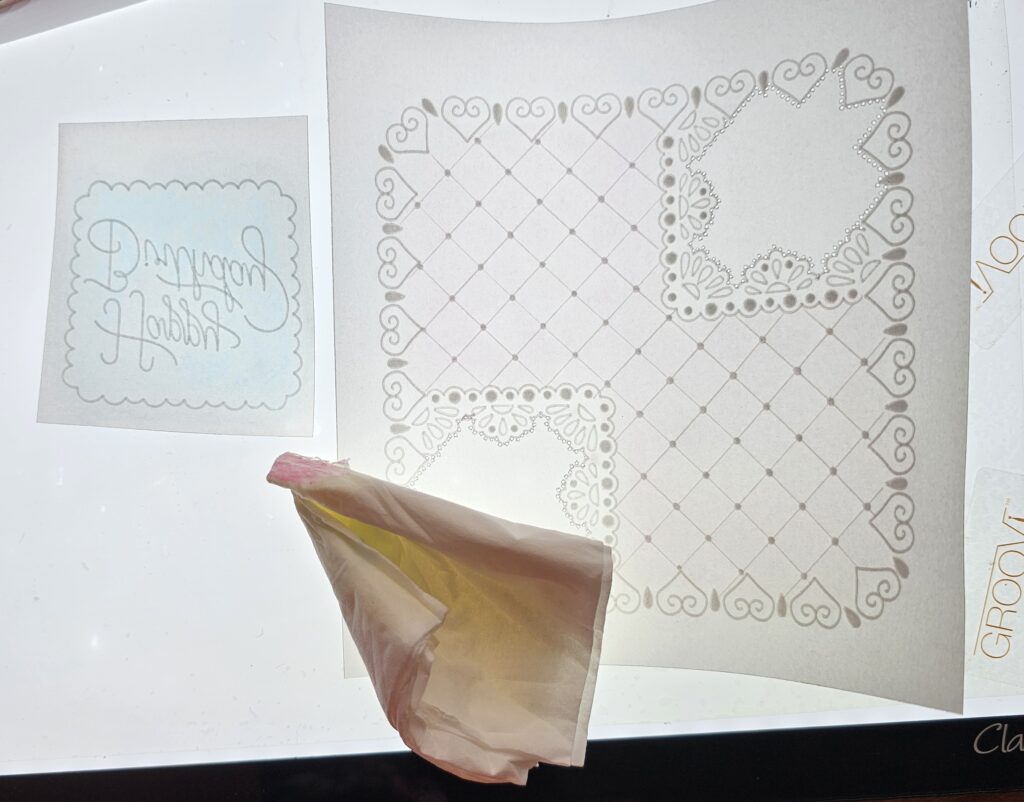
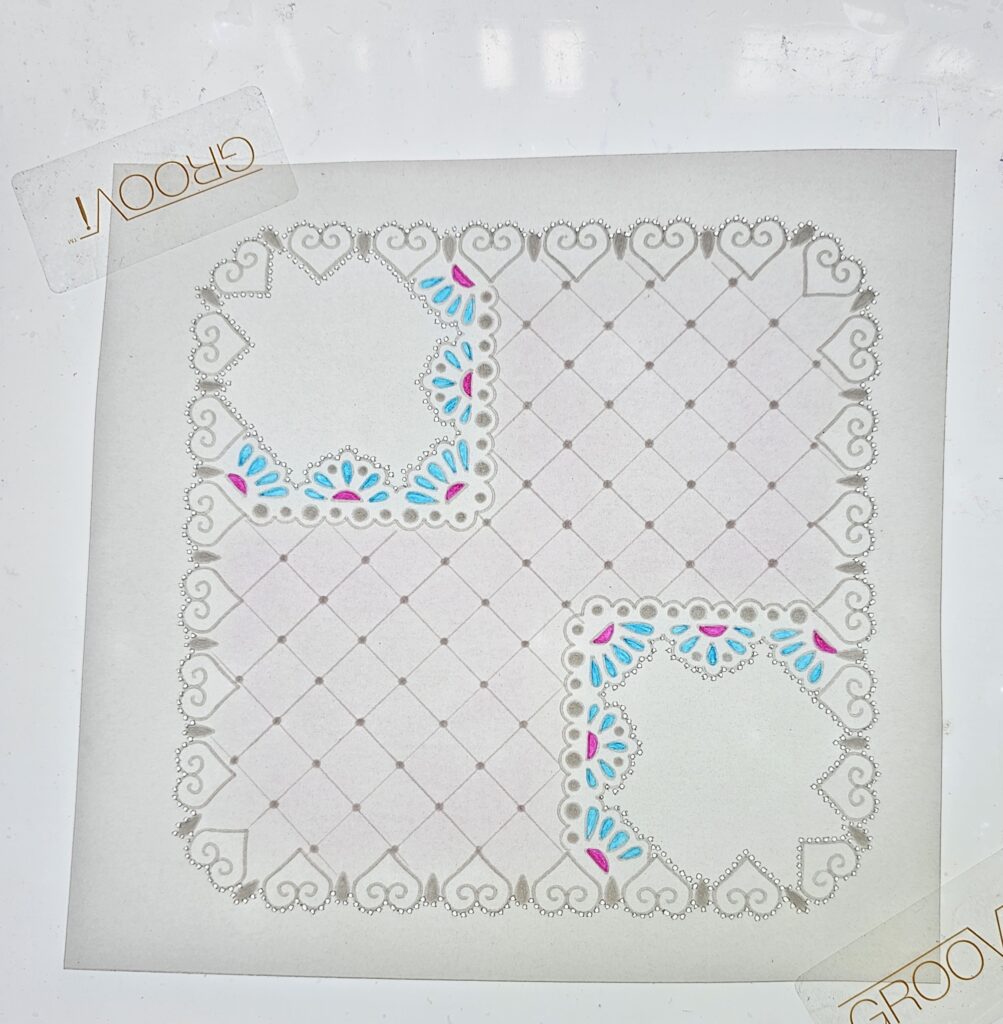
From the front this is what your 2 pieces of parchment should look like.
Step 11. On the back of the main piece of your work, colour the semi circles and inner teardrops using the Perga Colour Exclusive pens. Take care to stay within your embossed lines. I used number 6 and 28.
Working on the front of your work, perforate around the outside of your design using the 2 Needle Bold Pergamano Tool
Step 12. Place the Happy Birthday piece of parchment onto the blue Indian Summer companion paper, using a piece of low tack tape between the layers and also at the edges so that it doesn’t slip. Now pierce through your already perforated piece so that the paper below is also pierced.
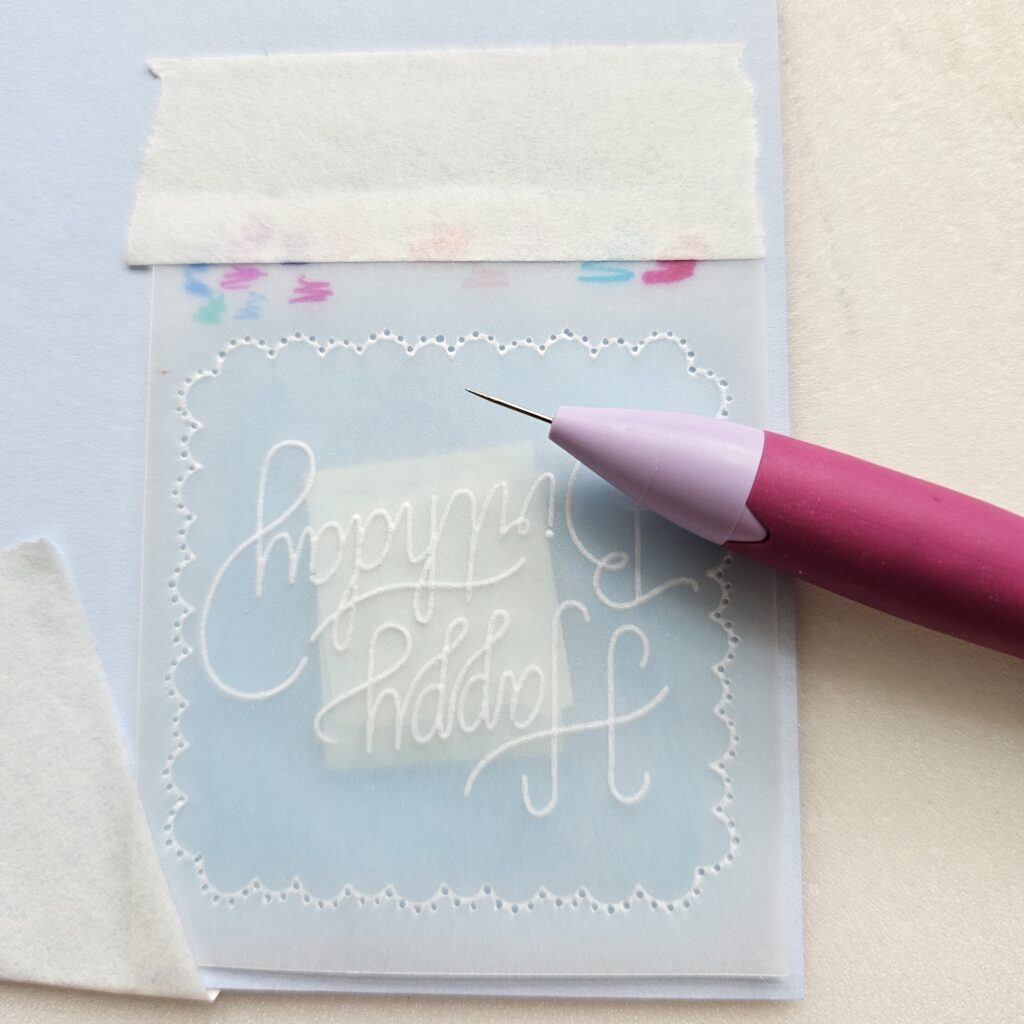
It should look like this when done.
Step 13. Now picot cut out all of your work, including the blue companion paper. Remember to keep your snips pointing towards the portion of work you want to keep, ie over the waste.
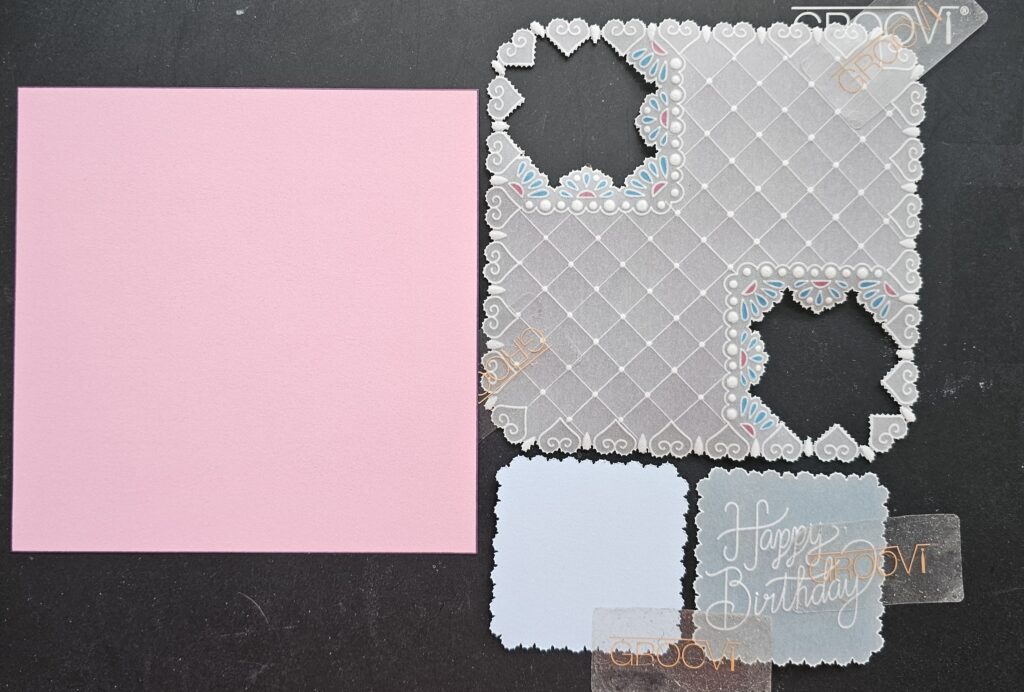
Cut out a piece of Toscana Companion paper to fit the larger portion of your work. Using a black Sharpie pen, draw a thin black line all around the edge. I have used a pink piece of paper. The next photo shows all the parts of your work.
Step 14. Now it’s time to assemble everything. I have attached the Happy Birthday with 2 blue mini brads to the main body of the card going through all 4 layers in the positions shown in the photo. I’ve also added Perga glue to some of the teardrops on the outer edge of the main piece of work.

Step 15. Using double sided sticky tape on the back of the pink Toscana paper, attach your project to your card blank. I have used a 6” x 6” white card blank for this one. Here is your final photo of your now completed work.
I hope that you have enjoyed this project and found the step-by-step instructions useful. If you have any problems or need any clarification, please do contact me.
Apart from that, I hope you enjoy having a play. Enjoy the rest of your weekend and stay safe. Julie xxx
What a lovely and well thought out project!
Thank you, Julie, for sharing this detailed step-by-step project with us. Another beautiful and easy to follow project that we are sure will encourage and inspire you at home!
Everything that Julie has used in this particular project is available in a shopping list, HERE.
Don’t forget about #MadeInMay – share your makes over on our social media. You can read more about it, HERE. and HERE.
Right, what’s going on this upcoming week, busy, busy, busy – lots to keep you entertained…
Monday 20th May:
In the SHAC with Barbara – 10am Live on Facebook & YouTube
Tuesday 21st May:
Groovi Tuesday with Paul – 10am Live on Facebook & YouTube
Thursday 23rd May:
Get Groovi with Clarity with Paul on Create & Craft – 1pm & 5pm
Friday 24th May:
Crafting with Clarity with Barbara on Create & Craft – 9am & 1pm
Clarity Weekender with Barbara on Create & Craft – 4pm
Clarity Weekender with Paul on Create & Craft – 7pm
Saturday 25th May:
Clarity Weekender with Paul on Create & Craft – 8am & 12pm
See you there!
Travel gently, friends.
Lotsa love, Grace & Julie xoxo
Clarity – The Home of Art, Craft, and Well-Being.
Lovely card and great tutorial, especially the trick to produce a matt layer under the happy birthday.
Super tutorial and a very feminine card. Thank you.
Sorry to be a pain Grace but I have a question and hope you can help me. While I have been incapacitated my stash has been moved and muddled by well intentioned “helpers”. It will take me a month to put it all straight again so I must ask, are these lace frames brand new and if not when were they first launched?
Thank you, Cherry.
Hi Cherry, they were new plates that were launched on 9th May of this year, there is a list of the plates above in the ingredients. Hope that helps x
Thanks, this is a great help.
Best wishes, Cherry
Thanks, this is a great help.
Best wishes, Cherry
A lovely project from Julie showing how all the designs can be used together to make something completely different. The plates are on my shopping list for the Open Days so will come back to this one afterwards. Meanwhile I have plenty to keep me occupied – my challenge is to finish all WIP & use some of my paper/card offcuts !!
It looks like another very busy week at Clarity Towers so look forward to seeing what is in store for us.
Need to finish my homework before the SHAC tomorrow so have a good week everyone x