Clarity Matters Blog Tutorial: How To Use The Cross Tool
Hello hello! Grace here.
I hope this finds you well, safe, and enjoying your Sunday morning.
Have you been following Paul and his Groovi Tuesday sessions on Facebook & YouTube? He is currently working his way through the various multi-needle tools that are showcased in the Pergamano Handbook for Multi-Needle Tools – Volume 2. This week he moved on to the next tool in the book – the Cross Tool.
If you missed those last sessions, then you can catch up here:
Picot V Small Perforating Tool – HERE
Picot V Medium Perforating Tool – HERE
Picot V Large Perforating Tool – HERE
Angle Perforating Tool – HERE
During Groovi Tuesday this week, Paul started working with the Cross Tool. You can catch up on that episode, HERE.
Meanwhile, the lovely Glynis Whitehead has made two more projects to go with this most recent tool tutoring. I’ll hand you over to Glynis…

Cross Tool – Project 1
Ingredients
Pergamano Handbook for Multi-Needle Tools Vol 2 by Linda Williams (PER-BO-70355-XX)
Nested Arch Tags Groovi Plate A5 (GRO-PA-41465-04)
Barbara’s Paisley and Leaves Groovi Plate A4 Sq (GRO-TR-41761-15)
Cross Perforating Tool (PER-TO-70023-XX)
Two-Needle Perforating Tool Fine (PER-TO-70037-XX)
Single Needle Perforating Tool (PER-TO-70035-XX)
1mm Embossing ball Tool (PER-TO-70011-XX)
1.5mm Embossing Ball Tool (PER-TO-70004-XX)
3mm Embossing Ball Tool (PER-TO-70005-XX)
Groovi Embossing Tool 1&2 (GRO-AC-40026-XX)
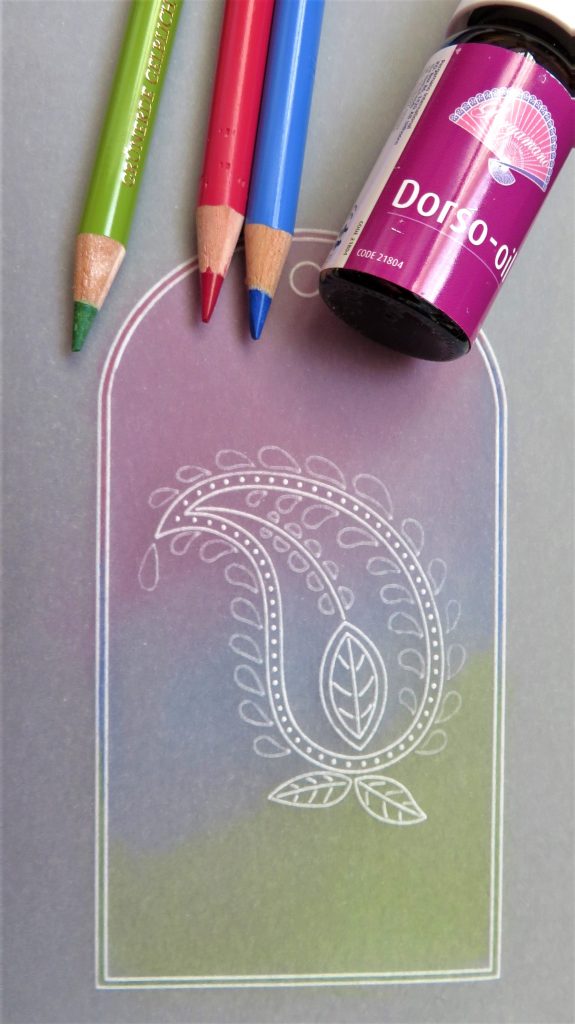
Faber-Castell Polychromos Pencils (ACC-PE-30797-XX)
Or Perga-Liner Pencil (B) (PER-CO-70063-XX)
Blending Nibs (PER-AC-70300-XX)
Dorso Oil (PER-CO-70066-XX)
Perga Glue (PER-AC-70133-XX)
Method
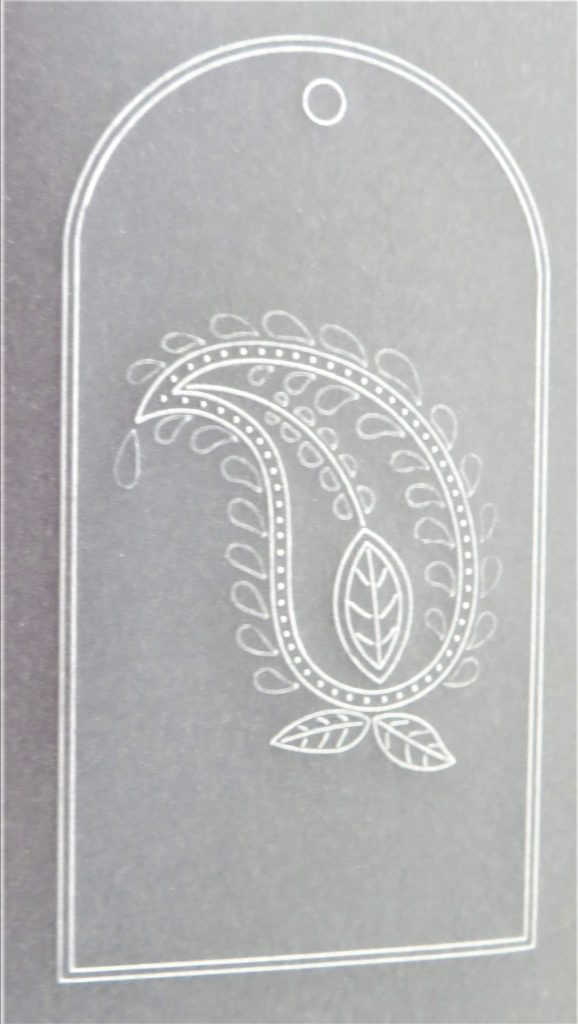
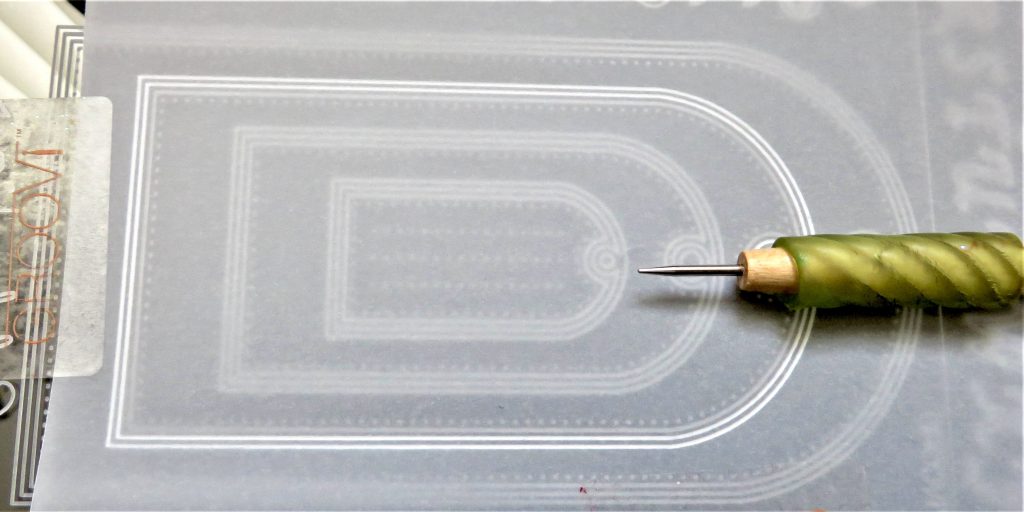
Step 1. Trace out the 2nd largest tag from the Nested Arch Tags Groovi plate.

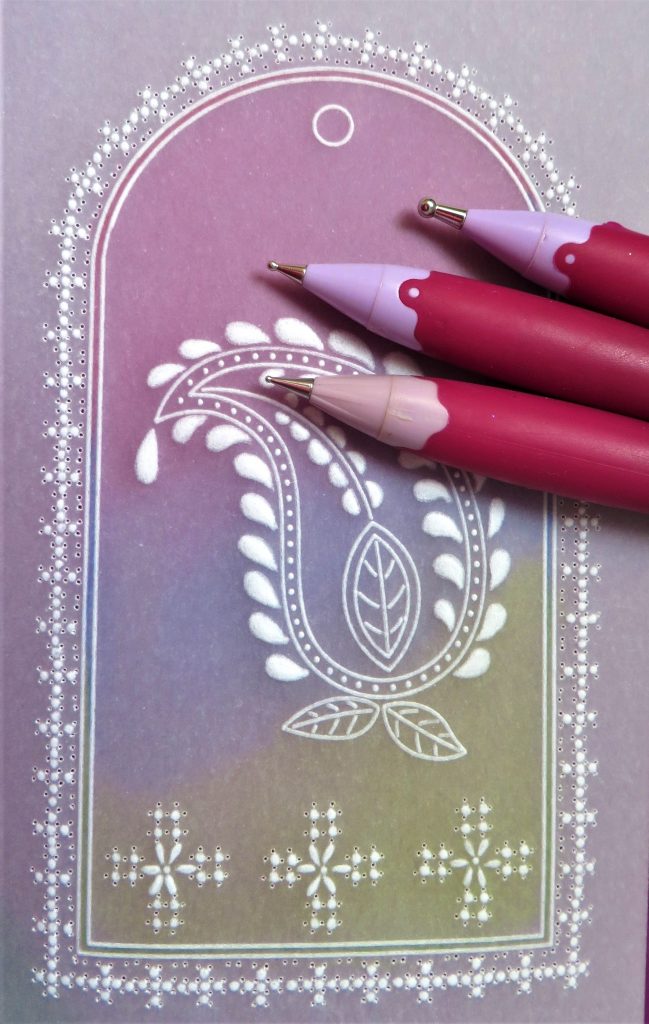
Step 2. Emboss the paisley design from Barbara’s Groovi plate. Remember to use the number 2 tool for tracing the parts you want to do white work with.
Step 3. The Cross perforation tool is illustrated by Linda on pages 30-33 of her Handbook. The sampler you need to photocopy is on page 33. I have marked the designs used with red arrows.

Step 4. Dorso on the back using a blendable pencil, Dorso oil, a folded tissue and a blending nib to get into the edge. Be careful in the choice of colours you put next to each other. For example, if you put a red next to a green, you will end up with brown where it blends together. If you use a pencil rather than Dorso Crayons, make sure to use the side of the pencil rather than the point. If you make solid lines, they are very difficult to blend out.
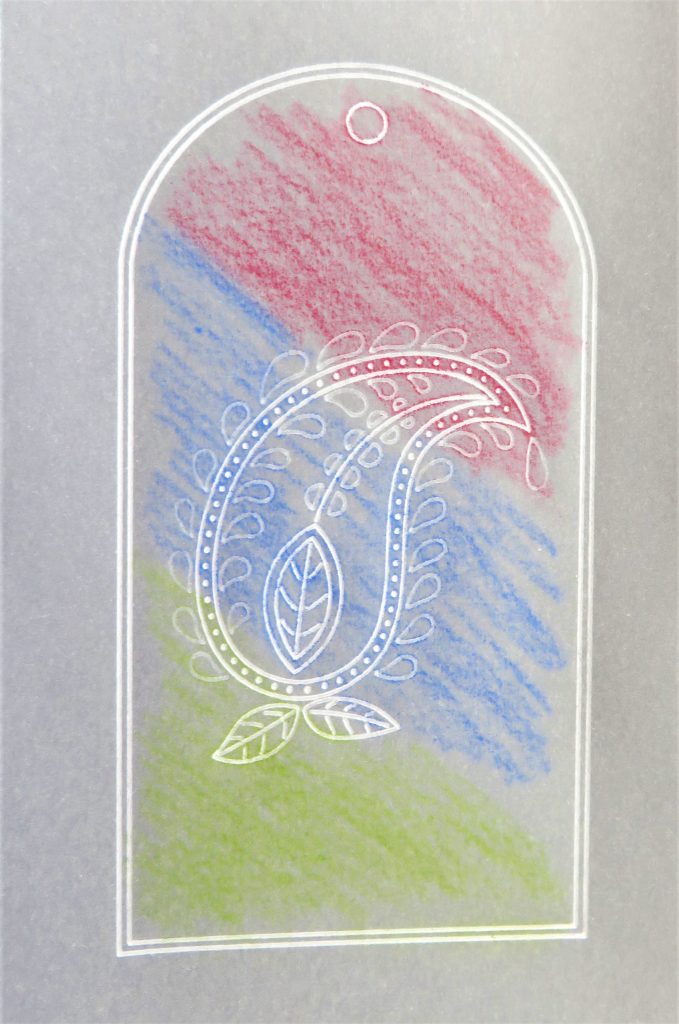
Step 5. Blend each colour separately, changing the nib/place of the tissue as you go. Use a tissue to blend the colours where they join. Go around the margin too, using the colour left on the nibs after blending.
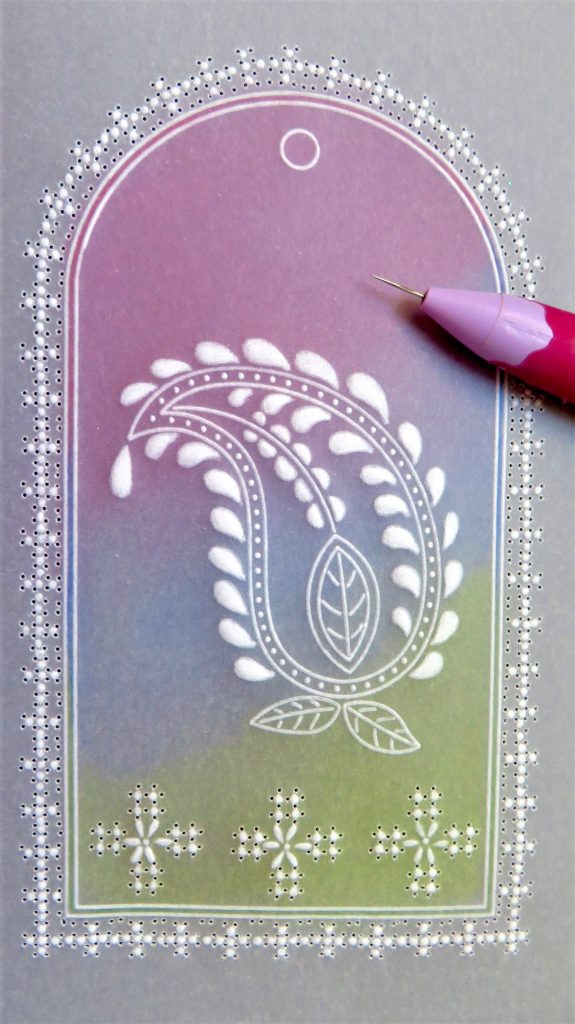
Step 6. Time to add your perforations. Lay the paper pattern onto a shallow perforating mat with the parchment on top and match the needles to the dots underneath. Perforate through both parchment and pattern. Go around the edge of the tag, and by the time you get to the top, you will be used to how to get the tool straight – go around the arch.
Use Linda’s ruler trick to help you keep the perforations straight along the straight sections. If you get a bit ‘wobbly’ at the top of the tag, you know it will be covered by a bow. When you have gone around the tag, fill in along the edge of the tag with the two-needle tool so that you can cut out the little slots. Also, perforate three of the cross designs at the bottom right-hand side of the sampler.

Step 7. Emboss the dots between the perforations with the 1mm ball tool. Do the elements in the paisley design, using the largest tool that will fit into the area you are embossing.
Step 8. With the single needle fine tool, re-perforate all the perforations, ready for snipping out the tag.
Step 9. Snip out the work. Do each side of the slot near the edge of the tag first. Being very careful not to snap off bits at the very edge, snip the waste parchment away. Cut slots into the centre of the ‘cross-shaped designs.

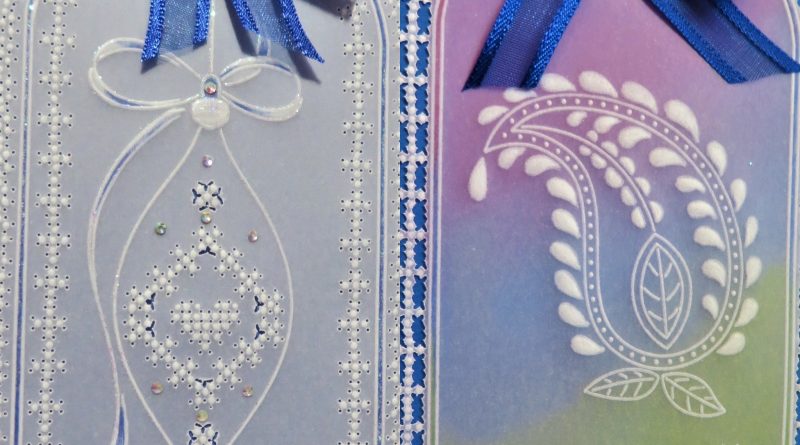
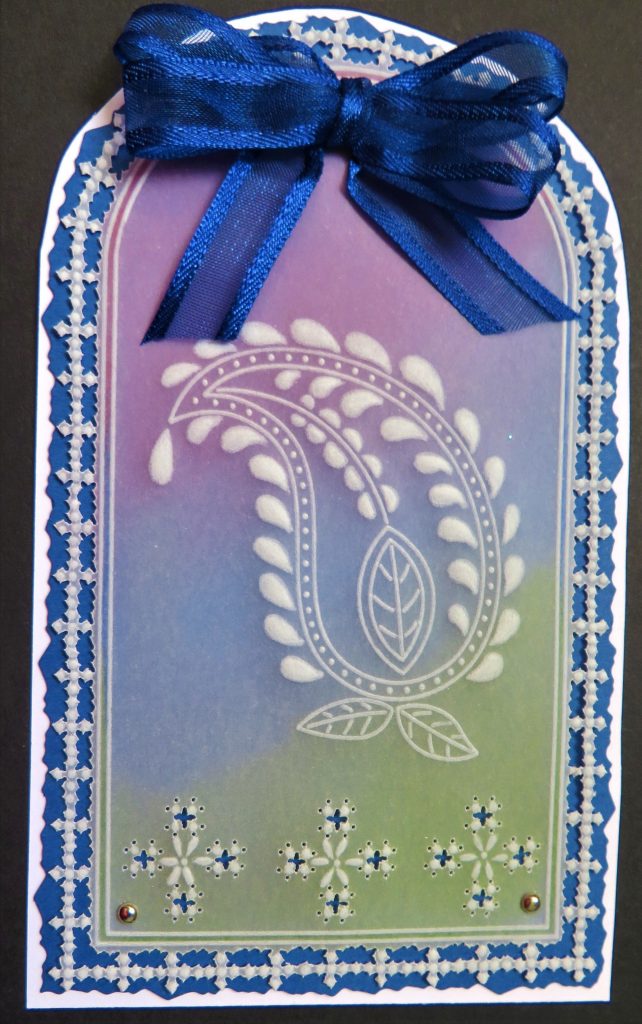
Step 10. Mat and layer the tag onto your choice of backing papers/card and add a bow. And your first project is complete!
Cross Tool – Project 2
Ingredients
Pergamano Handbook for Multi-Needle Tools Vol 2 by Linda Williams (PER-BO-70355-XX)
Nested Arch Tags Groovi Plate A5 (GRO-PA-41465-04)
Tina’s Christmas Baubles A4 Sq Groovi Plate (GRO-CH-41009-15)
Cross Perforating Tool (PER-TO-70023-XX)
Single Needle Perforating Tool (PER-TO-70035-XX)
1mm Embossing Ball Tool (PER-TO-70011-XX)
3mm Embossing Ball Tool (PER-TO-70005-XX)
Groovi Embossing Tool 1&2 (GRO-AC-40026-XX)
Perga Colour Exclusive Pens (PER-CO-70060-XX)
Pergamano Sticky Ink (PER-AC-70134-XX)
Perga-Glitters (PER-AC-70252-XX)
Perga Glue (PER-AC-70133-XX)
Perga Crystals (Starlight Sparkle) (PER-AC-70402-XX)
Method
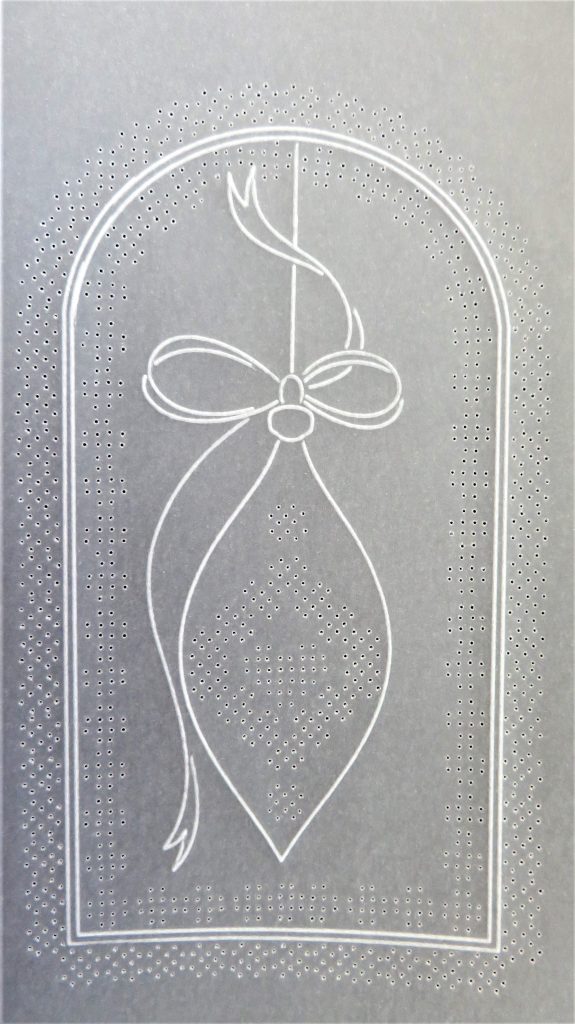
Step 1. Trace out the 2nd largest tag from the Nested Arch Tags Groovi Plate.
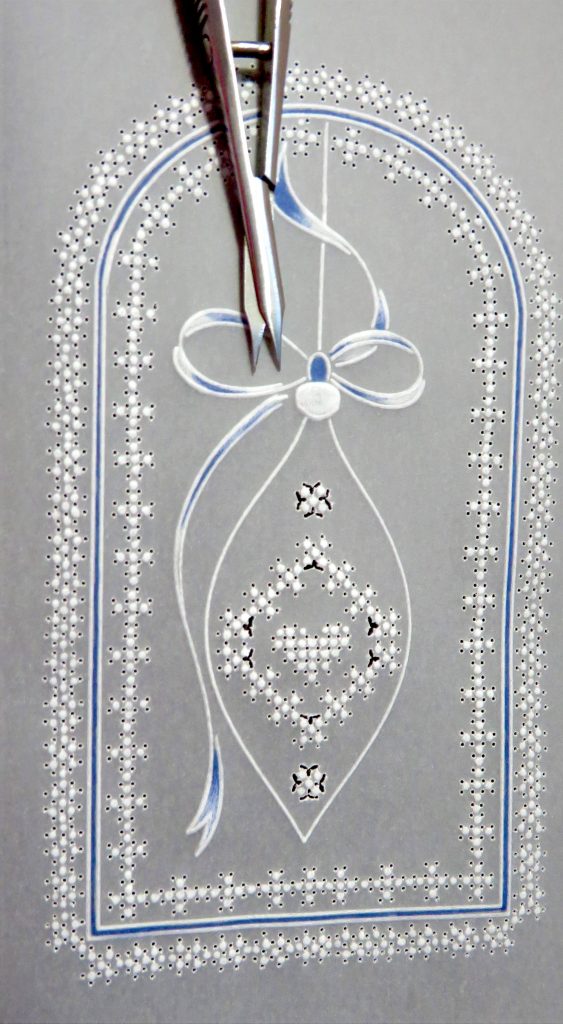
Step 2. Trace the bauble from Tina’s Christmas Bauble plate. Just trace it with the bow and leave out the other flourishes.
Step 3. The Cross Perforating tool is illustrated in Linda’s handbook on pages 30 – 33. The sampler you need to photocopy is on page 33 and I have marked the perforations used with red arrows and numbered them in the order used.
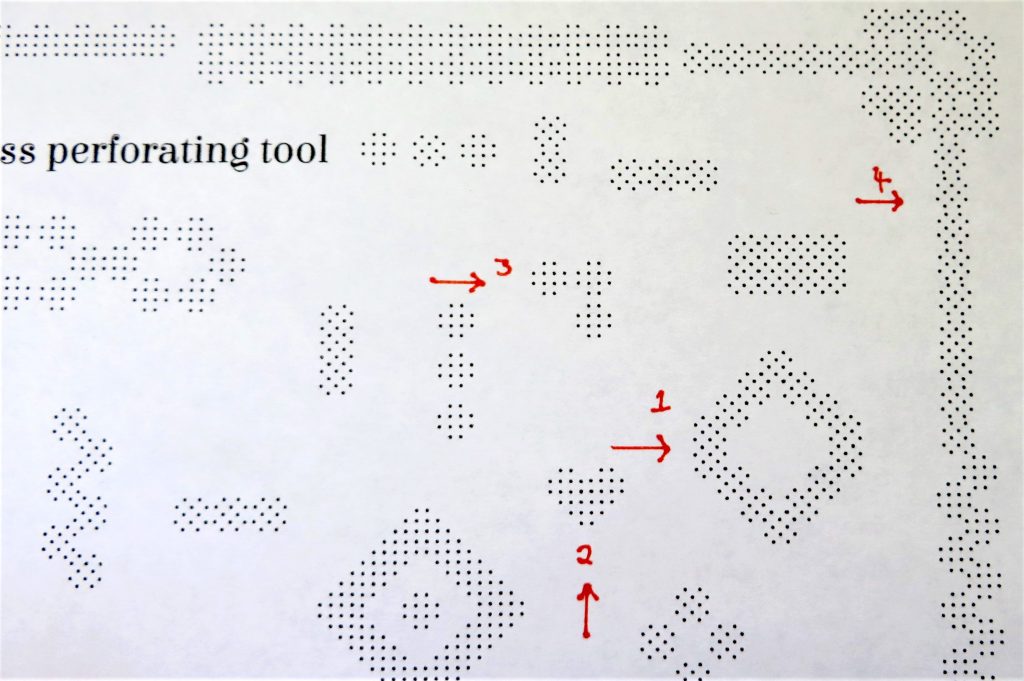
Step 4. Combo 1 fits nicely into the centre of the bauble with another cross perforation at the top and bottom. Combo 2 fits beautifully into the centre of Combo 1. Use combo 3 to go around the inside edge of the tag and 4 around the edge.
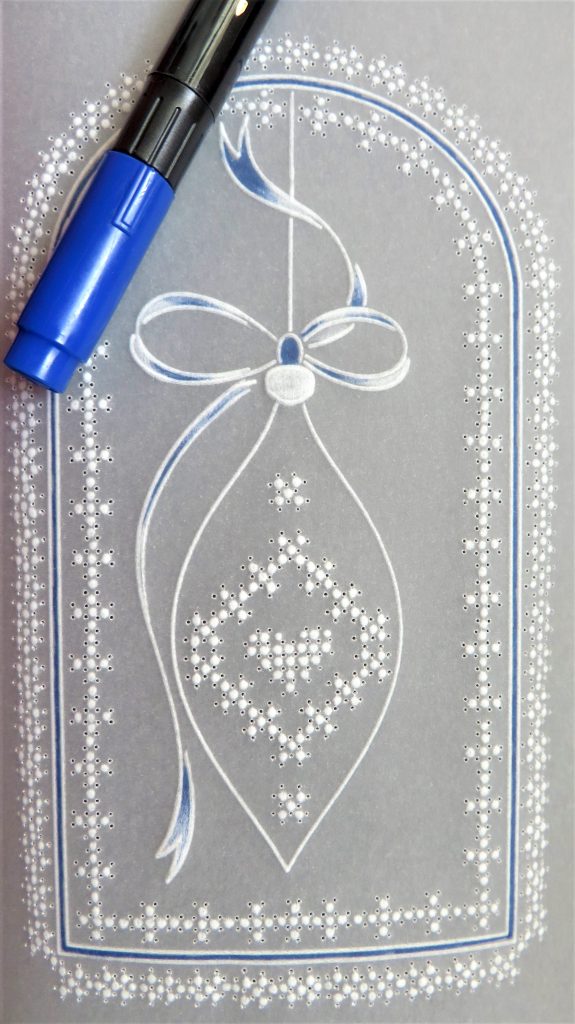
Step 5. Use the 1mm ball tool and emboss all the dots between the perforations. See Linda’s sampler on page 31 for the embossing plan on all the perforation combos. Also, emboss the bow.
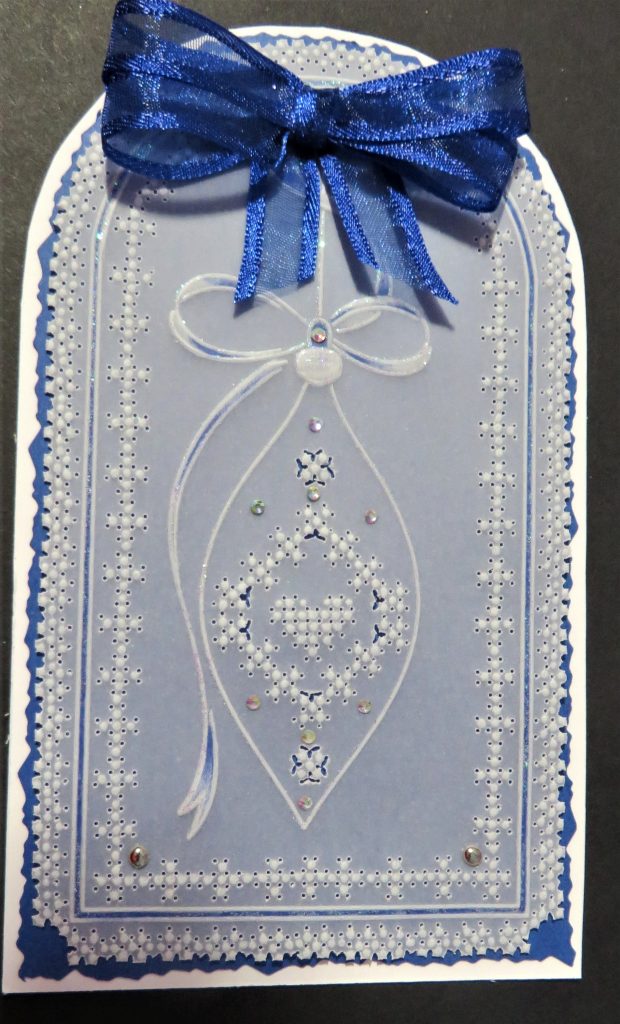
Choose a backing paper/card and colour the margin and bow in a colour to tone in.
Step 6. Re-perforate all the holes, deeply with the fine single-needle tool.
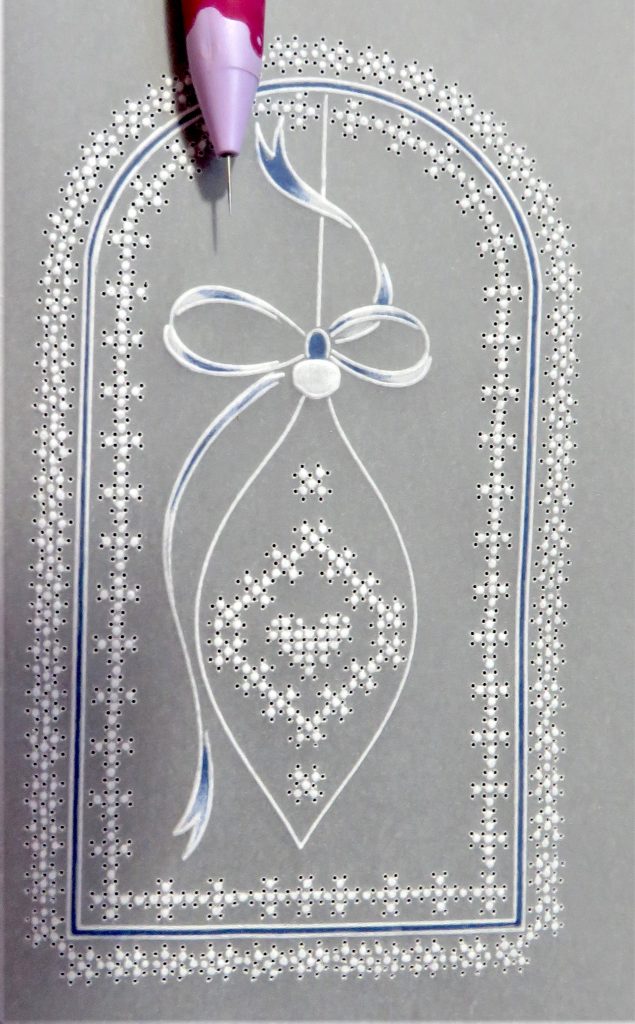
Step 7. Look at Linda’s cutting guide and snip out all the triangles within the bauble decoration. Always snip the diagonals first and take your time as it is quite a wide area to snip. Then snip the sides of the ‘triangles’.
Step 8. Snip around the outside of the tag – see Linda’s cutting guide on page 31 of the handbook.

Step 9. Add some sparkle with some sticky ink, glitter and a few gems. Then mat and layer the tag onto your choice of backing paper/card and add a bow. Your second project is complete!
What beautiful projects! Thank you, Glynis, for sharing your tips and tricks with us, week after week. If you’d like to give these projects a try yourself, don’t forget to share them on Groovi Worldwide.
Everything that Glynis has used in these two projects can be found in a specific shopping list on the Clarity website, HERE.
Now, looking at the week ahead…
Tuesday 19th September:
Groovi Tuesday with Paul – 10am Live on Facebook and YouTube
Thursday 21st September:
New & Exclusive with Dawn Wheeler on Create & Craft, 4pm & 8pm
Friday 22nd September:
New & Exclusive with Dawn Wheeler on Create & Craft, 8am
Saturday 23rd September:
Get Groovi with Tina on Create and Craft, 1pm & 5pm
Hope you’ll join us!
Travel gently, friends.
Lotsa love, Grace & Glynis xoxo
Clarity – The Home of Art, Craft, and Well-Being.
Thank you Glynis, so many different tags you have created for us in the last few weeks They are all great. Thank you.
I’ve found this tool the most challenging, especially where it overlapped. I think I will manage this but it will have to wait, as I’m off to wet Wales shortly to spend the week measuring trees! Not sure which is worse, the forecast this week or the heat we had. Just hope I make it up the hill. It’s been a while since we were there.
Thank you Glynis for the projects each week. X
Thank you Glynis for another 2 pretty tags using this week’s tool from Groovi Tuesday. A bit more challenging as there are 2 ways to pierce the holes but think I have cracked it – we will see how the projects go !!
Grace I hope your ferry trip went well yesterday with your mom & Dave, enjoy the rest of the weekend – its so different here this afternoon compared to last weekend although only 10 degrees cooler it is grey & wet xx
Great tags Glynis, thank you. x