Clarity Matters Blog Tutorial: How To Use the Pergamano Picot V Large Tool
Hello hello! Grace here.
I hope this finds you well, safe and enjoying your Sunday morning.
Have you been following Paul and his Groovi Tuesday sessions on Facebook & YouTube? He is currently working his way through the various multi-needle tools that are showcased in the Pergamano Handbook for Multi-Needle Tools – Volume 2. This week he moved on to the next tool in the book – the Picot V Large Perforating Tool.
If you missed those last sessions, then you can catch up here:
Picot V Small Perforating Tool – HERE
Picot V Medium Perforating Tool – HERE
Earlier this week, Paul started working with the Picot V Large Perforating Tool. You can catch up on that episode, HERE.
Meanwhile, the lovely Glynis Whitehead has made two more projects to go with this most recent tool tutoring. I’ll hand you over to Glynis…

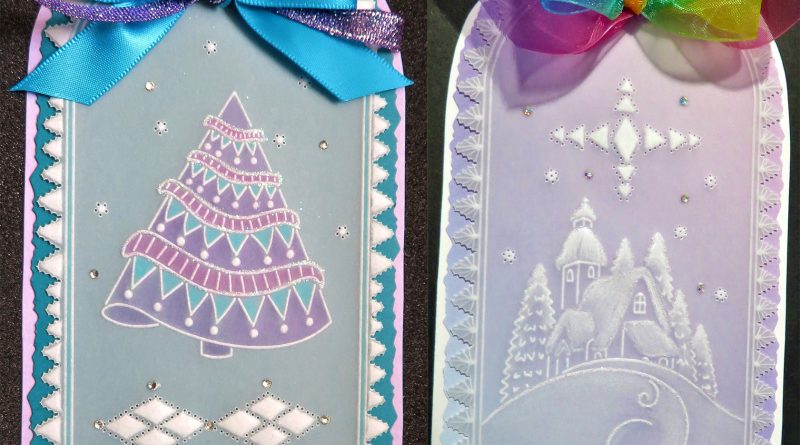
Picot V Large Tool – Project 1
Ingredients
Pergamano Handbook for Multi-Needle Tools Vol 2 by Linda Williams (PER-BO-70355-XX)
Nested Arch Tags Groovi Plate A5 (GRO-PA-41465-04)
Barbara’s Christmas Tree Sampler A4 Sq Groovi Plate (GRO-CH-41378-15)
Picot-V Small Perforating Tool (PER-TO-70281-XX)
Picot-V Medium Perforating Tool (PER-TO-70282-XX)
Picot-V Large Perforating Tool (PER-TO-70283-XX)
5 in a Circle Perforating Tool (PER-TO-70025-XX)
Single Needle Perforating Tool (PER-TO-70035-XX)
1mm Embossing Ball Tool (PER-TO-70011-XX)
1.5mm Embossing Ball Tool (PER-TO-70004-XX)
3mm Embossing Ball Tool (PER-TO-70005-XX)
Tools from the Starter Kit (GRO-AC-40026-XX)
Faber-Castell Polychromos Pencils (ACC-PE-30797-XX)
or Perga-Liner Pencil (B) (PER-CO-70063-XX)
Blending Nibs (PER-AC-70300-XX)
Dorso Oil (PER-CO-70066-XX)
Pergamano Sticky Ink (PER-AC-70134-XX)
Perga Glitters (PER-AC-70252-XX)
Perga Glue (PER-AC-70133-XX)
Perga Crystals (Starlight Sparkle) (PER-CR-70402-XX)
Method
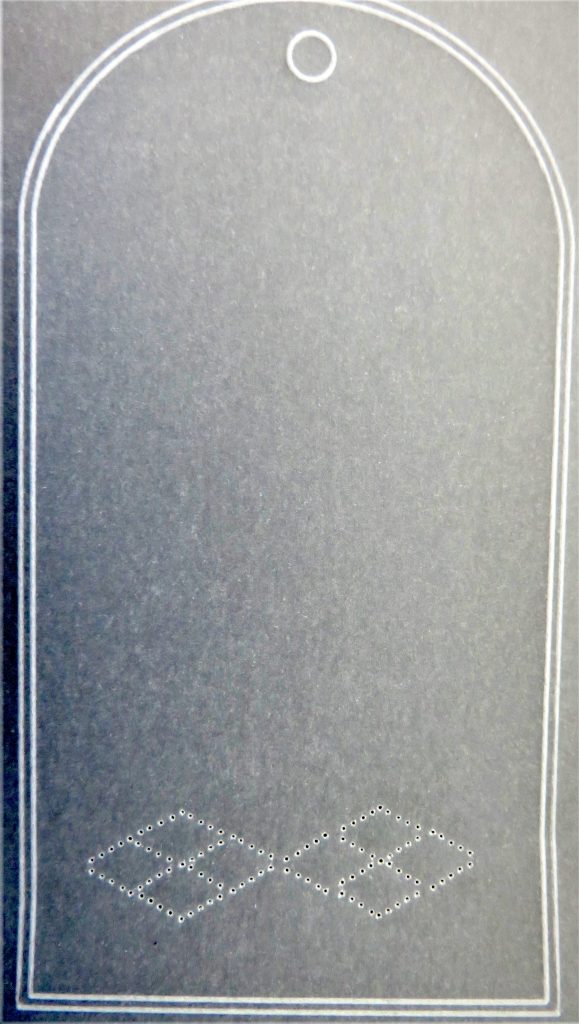
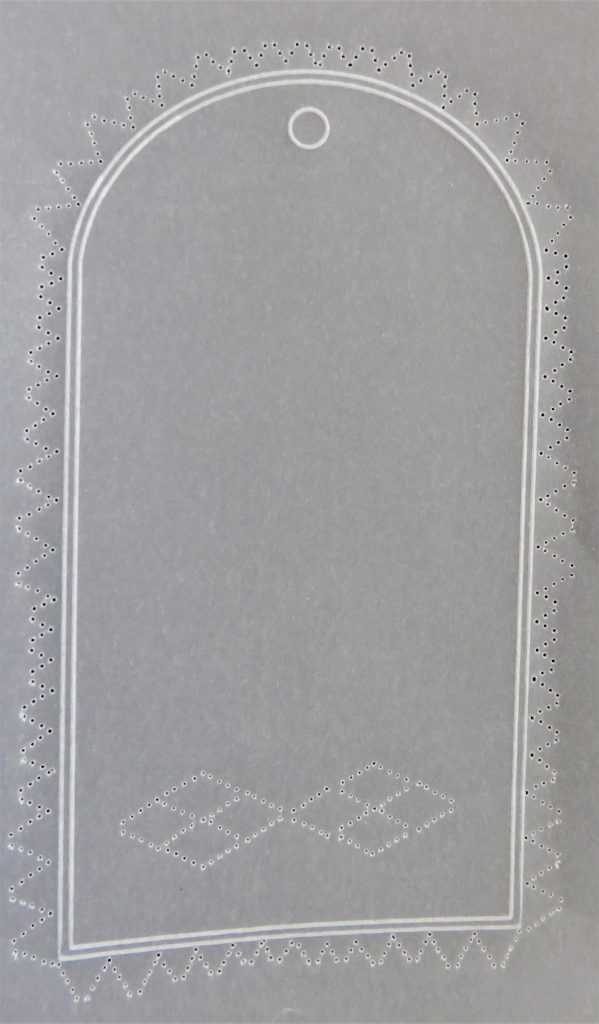
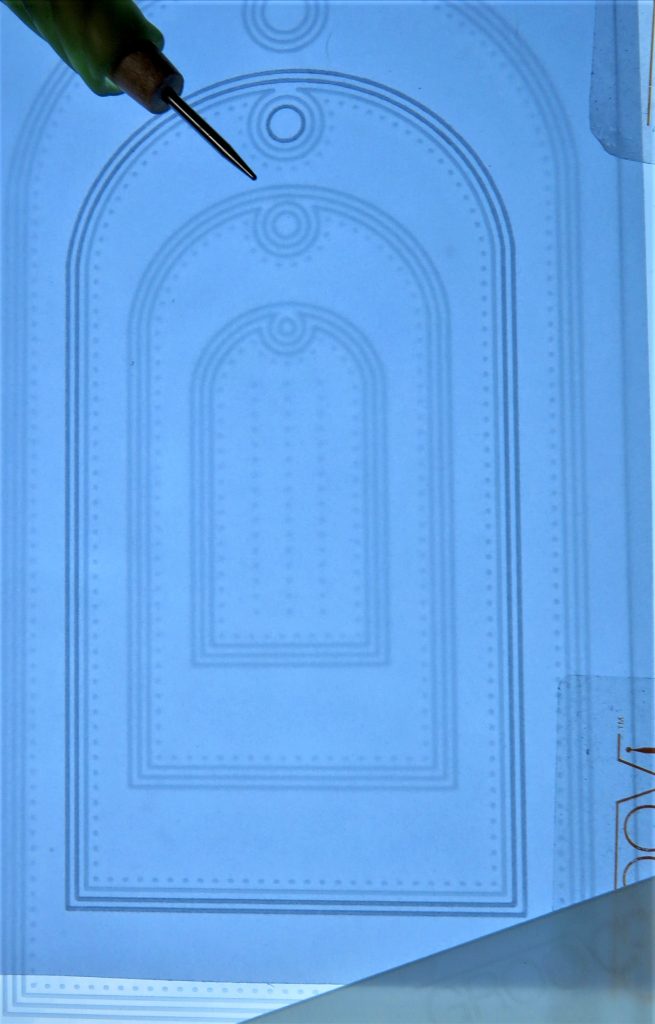
Step 1. Trace out the 2nd largest tag from the Nested Arch Tags Groovi Plate.

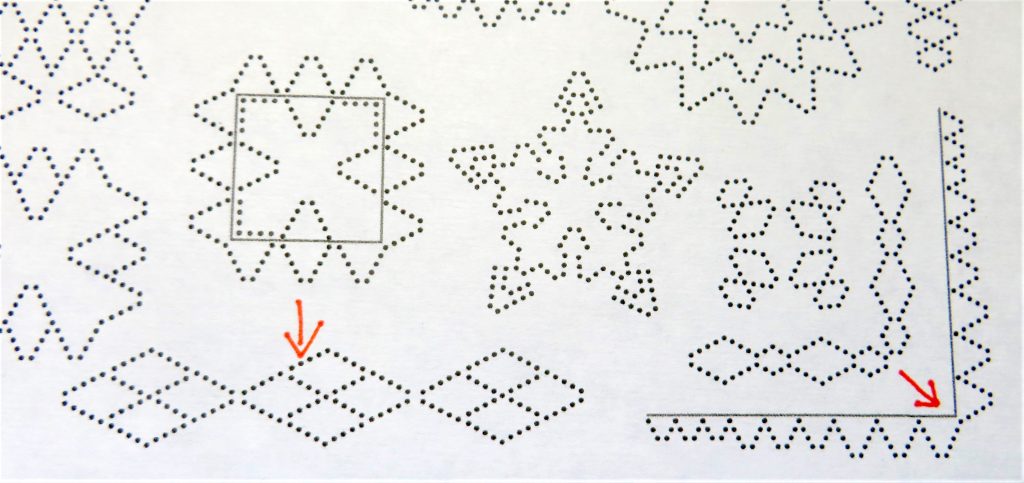
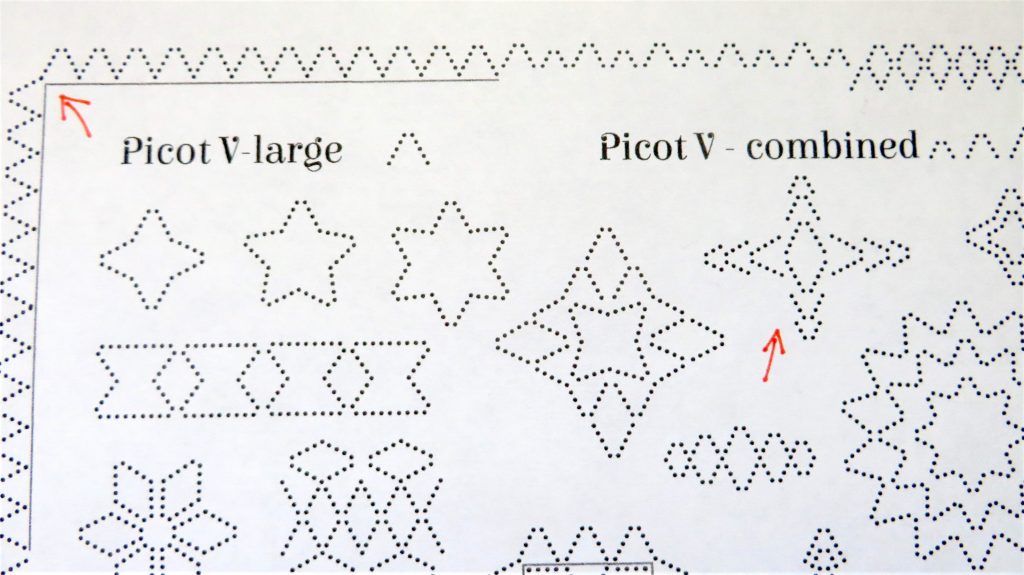
Step 2. The Picot-V large is illustrated in Linda’s Handbook on pages 22-25. The sampler you need to photocopy is on page 25. The perforation combinations used for this project are marked below with red arrows.
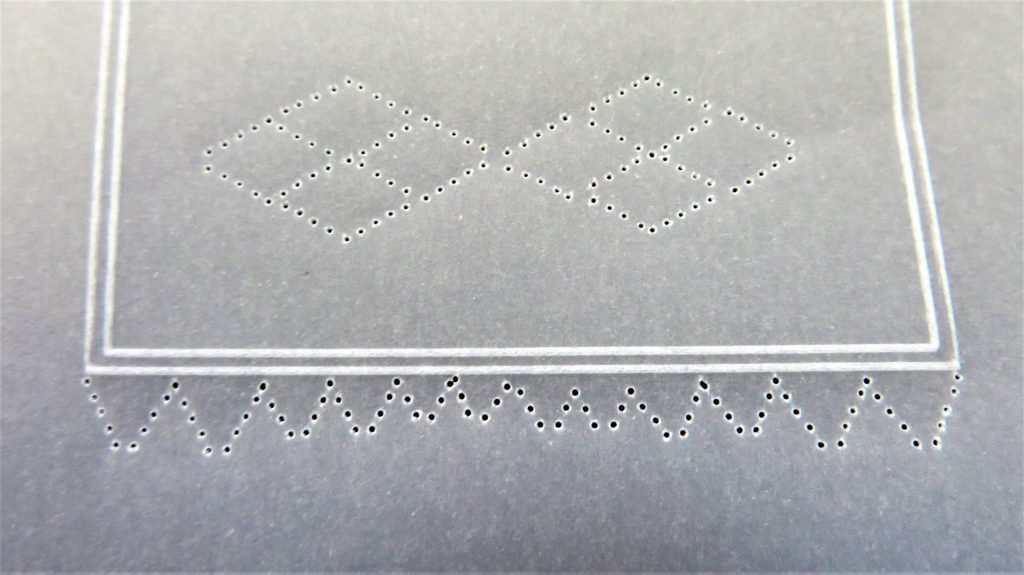
Step 3. Lay the pattern down onto a shallow perforating mat with the parchment on top, lined up to the perforation combo on the bottom, centre of the sampler. Line the needles of the picot V tool up to each dot and shallow perforate through parchment and pattern. Only two of this combo will fit into the space, so it needs to be lined up so that they are centralised.
Step 4. Now go around the outside of the tag, using a combination of all three Picot-V tools. I measured them out across the bottom of the tag and can use two large at each corner, followed by two medium V’s at each end and then 4 small in the centre. Go from corner to corner and meet in the middle so that you can judge how to space them out.
Step 5. Follow the example in Linda’s Handbook around the edges, moving from the right-hand side of the tag to the left alternatively so that you can space the V’s out along the side. This way you can adjust the number of picots you make at the arch of the tag, where the ribbon will be.
Step 6. Choose a tree from Barbara’s Christmas Tree Sampler Groovi Plate and emboss it into the centre of the tag, remembering where your bow will be at the top of the tag. If you want to emboss certain elements within the design, use the number 2 tool or a 1.5mm embossing ball tool.
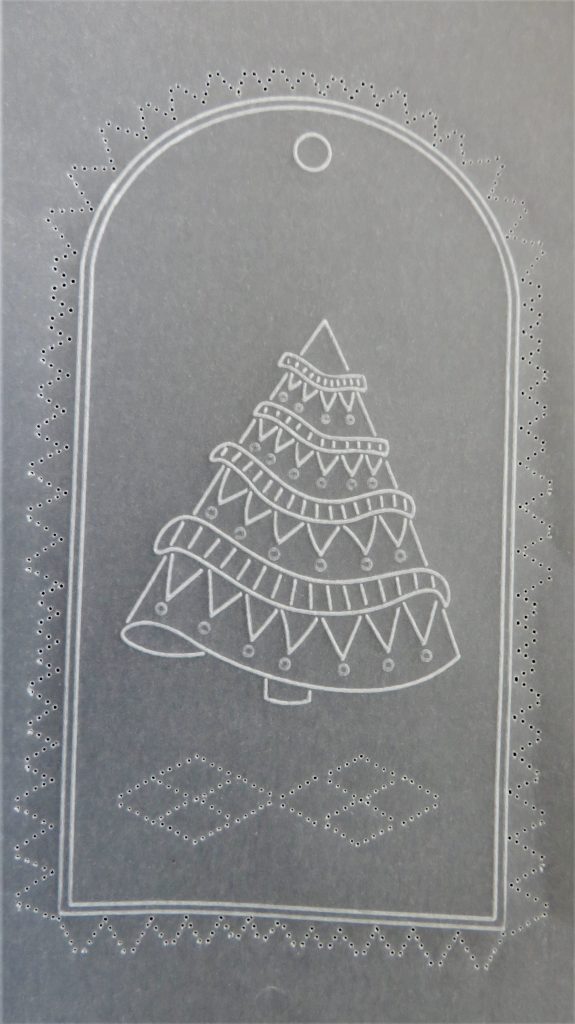
Step 7. Emboss all the Picot V’s using a 4.5mm ball embossing tool, followed by a 3mm ball tool for the large, 3mm ball tool followed by 1.5m for the medium V’s and 1.5 for the small ones. Also, emboss any elements in your chosen Christmas tree.

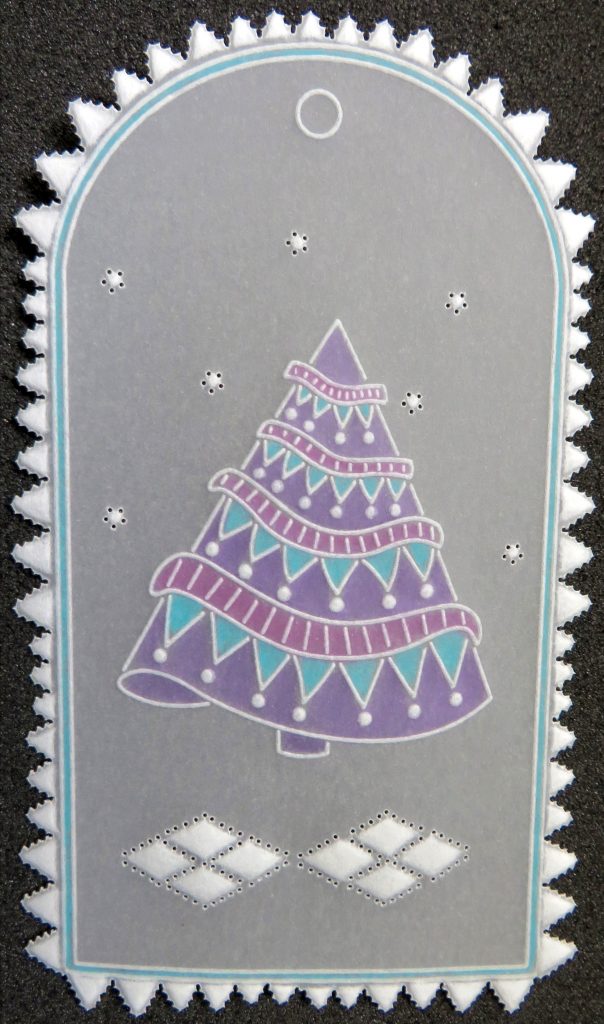
Step 8. Working on the back, add some colour to the Christmas tree and into the tag margin. Put a few 5-in-a-circle perforations around the Christmas tree to represent snowflakes and emboss them with a 1.5mm ball tool.
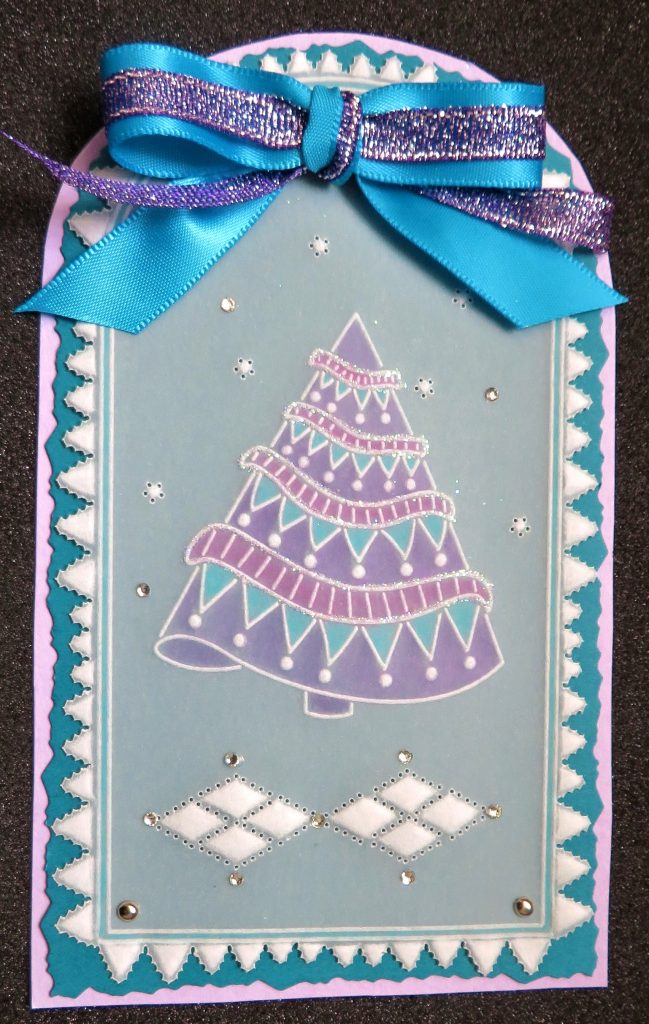
Step 9. Deeply re-perforate the holes with a single needle tool and snip out the tag. Do the diagonals first and then snip the straight perforations, this way the parchment will be supported until the end.
Step 10. Mat and layer the tag onto your chosen backing papers/card. Add a bow and decorate with glitter and gems. And your first project is done!
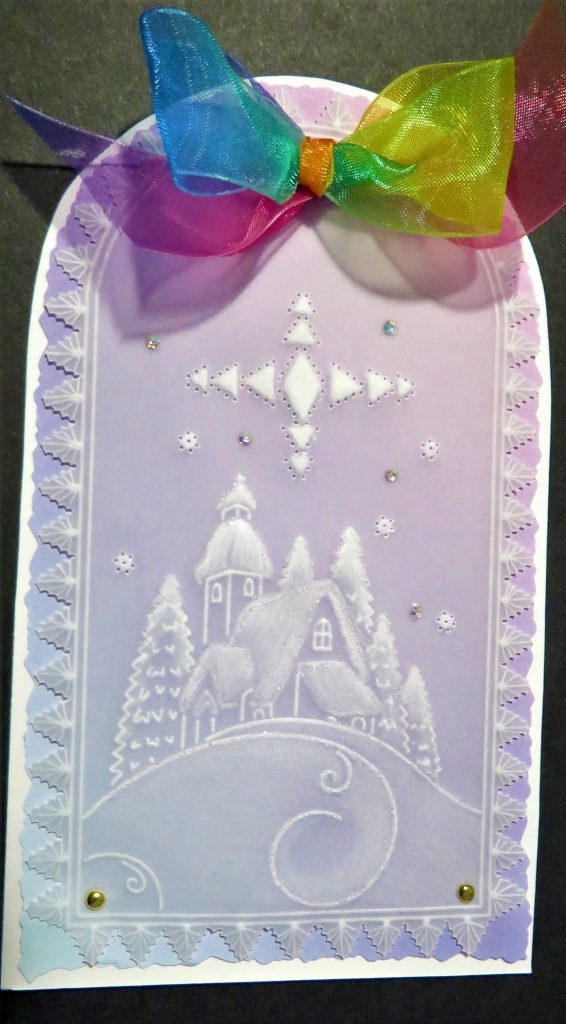
Picot V Large Tool – Project 2
Ingredients
Pergamano Handbook for Multi-Needle Tools Vol 2 by Linda Williams (PER-BO-70355-XX)
Nested Arch Tags A5 Groovi Plate (GRO-PA-41465-04)
Silent Night A5 Sq Groovi Plate (GRO-CH-40739-03)
Picot-V Small Perforating Tool (PER-TO-70281-XX)
Picot-V Medium Perforating Tool (PER-TO-70282-XX)
Picot-V Large Perforating Tool (PER-TO-70283-XX)
Flower Perforating Tool (PER-TO-70018-XX)
Single Needle Perforating Tool (PER-TO-70035-XX)
1mm Embossing Ball Tool (PER-TO-70011-XX)
1.5mm Embossing Ball Tool (PER-TO-70004-XX)
3mm Embossing Ball Tool (PER-TO-70005-XX)
4.5mm Embossing Ball Tool (PER-TO-70015-XX)
6mm Embossing Ball Tool (PER-TO-70016-XX)
Tools from the starter kit (GRO-AC-40026-XX)
Faber-Castell Polychromos Pencils (ACC-PE-30797-XX)
or Perga-Liner Pencil (B) (PER-CO-70063-XX)
Blending Nibs (PER-AC-70300-XX)
Dorso Oil (PER-CO-70066-XX)
Pergamano Sticky Ink (PER-AC-70135-XX)
Perga-Glitters (PER-AC-70252-XX)
Perga Glue (PER-AC-70133-XX)
Perga Crystals (Starlight Sparkle) (PER-CR-70402-XX)
Method
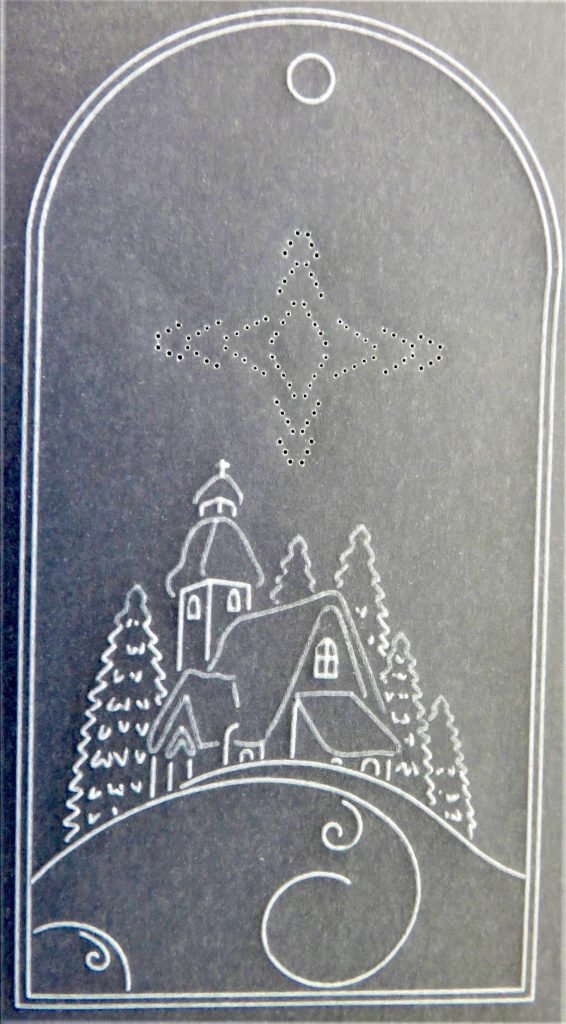
Step 1. Emboss the 2nd largest tag from the Nested Arch Tags Groovi plate.
Step 2. Trace out the church and trees. Use the number 2 tool to emboss the snow on the rooftops.

Step 3. The Picot-V large perforating tool is illustrated in Linda’s Handbook on pages 22-25 and the sampler you need to photocopy is on page 25. I have marked the perforation combinations used in this project with red arrows.
Step 4. Lay the parchment over the pattern, which has been put down onto a shallow perforating mat and line the parchment up over the star shape. This combo uses all the sizes of Picot V tools. Carefully line up all the needles with the dots and perforate through the parchment and pattern.
Step 5. Use the large picot-V tool and go around the edge of the tag. Go alternatively from corner to corner across the bottom of the tag, meeting in the middle. Take them up each side of the tag, spacing them out over the arch at the top. Emboss a dot at the base of the picot and use a single needle tool to emboss lines out from the dot towards the perforations. The needle has to be held at a 45% angle. Lay a cello bag under the parchment to add some resistance and go very gently to avoid cutting the parchment.

Step 6. Put some flower tool perforations above the church scene to represent snowflakes and use a 1.5mm ball tool to emboss within the perforations. Emboss the rooftops, trees and hill, starting with the largest ball tool to fit the space you are embossing. Also, following the instructions in the Handbook, emboss the large star. Start the large V’s with the 4.5mm ball tool, finishing with the 3mm. The medium V’s with the 3mm ball tool, finishing with the 1.5mm, and the small V with the 1.5mm ball tool. Remember to let the parchment rest in between layers.

Step 7. Go around all the perforations using the single needle tool to re-perforate and snip out the tag.
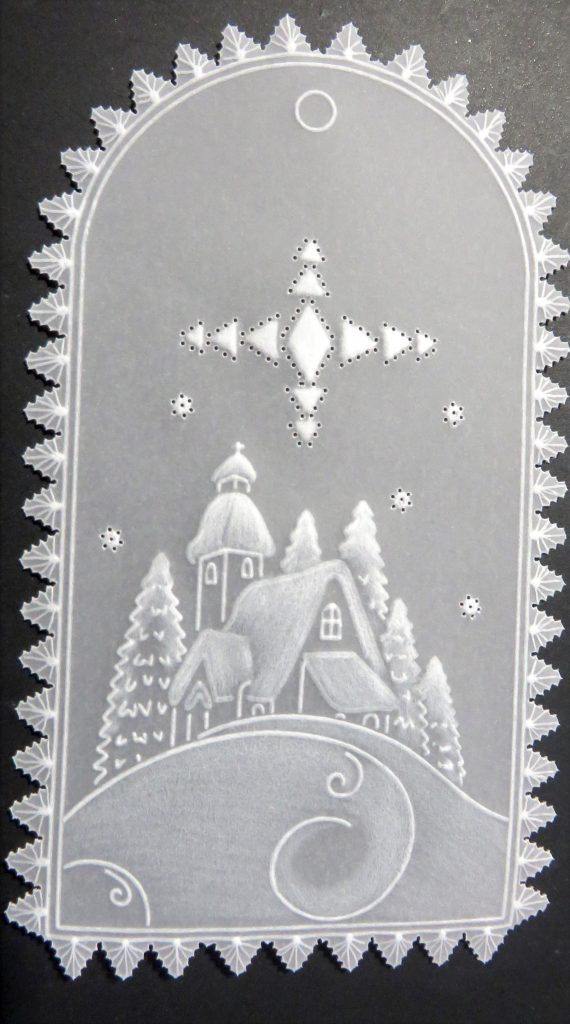
Step 8. Mat and layer the tag onto your choice of backing papers/card.

Step 9. Add a bow and decorate with glitter and gems.
Such fantastic tutorials! Thank you, Glynis, for sharing your tips and tricks with us. Two fabulous projects in one blog!
Everything that Glynis has used in these two projects can be found on the Clarity website, HERE.
I hope you have been enjoying the 30th Birthday Celebrations with Mum and Paul on Create & Craft the past few days. Mum has her last 2 hours today at 3 p.m. You should join her! It will be another fabulous show.
Looking at the week ahead… It’s a little bit quiet this week so that the Clarity team back at base can play catch up. Paul will be around to keep you company in Groovi Tuesday this week as he continues his journey through the Pergamano Multi Needle Handbook Volume 2.
Tuesday 5th September:
Groovi Tuesday with Paul – 10am Live on Facebook and YouTube
And I’ll be here! 🙂 If you need anything don’t hesitate to email me. Grace@claritystamp.com
Travel gently, friends.
Lotsa love, Grace & Glynis xoxo
Clarity – The Home of Art, Craft, and Well-Being.
Hi Grace & Glynis, another great 2 projects & yes I have the necessary stash so will be giving them a go later on.
Things might be quieter for us this coming week with just Groovi Tuesday to look forward to but no doubt the team back at Clarity Towers will be working like the clappers to get all the orders from the weekend out to us shoppers. Going by the number of sell outs & therefore extended, extended extended & I think 3 x extended for the new embedders there were quite a few plus of course the direct to Clarity orders. People better not start moaning again in the next few weeks. They just need to check the order page to see if it has been fulfilled & their emails for notice of dispatch.
Have a good week everyone, look forward to seeing a few more tags on the FB page this week xx
Another lovely project from Glynis. Unfortunately I can’t align the tools to my satisfaction but having seen the doctor this week the new treatment is starting to work so the future looks bright.
I have watched all the tv shows and placed 3 orders and I am willing to wait for however long it takes to be dispatched. The Clarity team will be double timing it coping with the orders – three extended and yesterday and more orders to come this afternoon.
I didn’t read yesterday’s blog until this morning. Such beautiful work, I don’t know how you choose among such delightful projects.
I don’t do Facebook, twitter or any other sites and deliberately avoid anything dodgy. The only company I follow is Clarity on you tube directly from the blog. Hope that rotter gets caught and punished accordingly.
A big thank you to you and all the Clarity team for all you do for us crafters.
Great step by step demo, thank you Grace and Glynis. I’ve not got this tool yet, although I do have the second book, so it is on my wish list to get sometime.
Great Clarity Birthday shows, so enjoyable. I’ve done 2 orders, and don’t mind how long they take to arrive, good things are worth waiting for. Have a great week everyone, safe travels to all. Take care. xx